UI学习
UI分类
安卓的UI分为两大类:一类叫做View视图,一类叫做ViewGroup容器
- View视图:TextView,Button,ImageView都是常见的视图
- ViewGroup容器:内部尅承载、放置、添加View视图的容器
布局方式
安卓布局主要有:线性布局、相对布局、帧布局、约束布局
LinearLayout线性布局
LinearLayout线性布局:横着或者竖着 按顺序排列
其属性主要有:
- orientation:排列方向,主要有
vertical垂直排列、horizontal水平排列 - layout_width/height:宽度,主要有三种类型
- 填充父容器剩余空间:match_parent
- 根据子视图宽度自适应自己的宽高:wrap_content
- 自定义大小,比如50dp
- background:背景颜色
- gravity:重力,决定子控件相对该父容器的位置。主要有三种:
center:居中显示
horizontal_center:水平居中
vertical_center:垂直居中 - layout_gravity:决定该容器相对它的父容器的位置
<?xml version="1.0" encoding="utf-8"?>
<LinearLayout xmlns:android="http://schemas.android.com/apk/res/android"android:layout_width="match_parent"android:layout_height="match_parent"android:orientation="vertical"android:background="#FF2299"android:gravity="center"><Buttonandroid:layout_width="wrap_content"android:layout_height="wrap_content"android:backgroundTint="#FF00FF"/><Buttonandroid:layout_width="wrap_content"android:layout_height="wrap_content"android:backgroundTint="#FFFF00"/><Buttonandroid:layout_width="wrap_content"android:layout_height="wrap_content"android:backgroundTint="#00FF00"/></LinearLayout>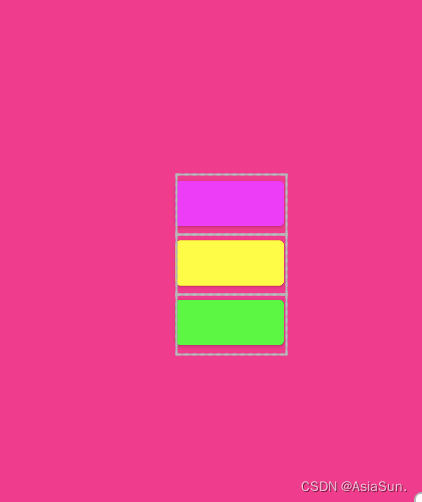
RelativeLayout相对布局
在摆放子视图位置时,按照指定的参考系摆放子视图的位置,默认以屏幕左上角(0, 0)位置作为参考系摆放位置
主要有三大类:
- 相对父元素
- 相对兄弟元素
- 相对兄弟元素对齐方式
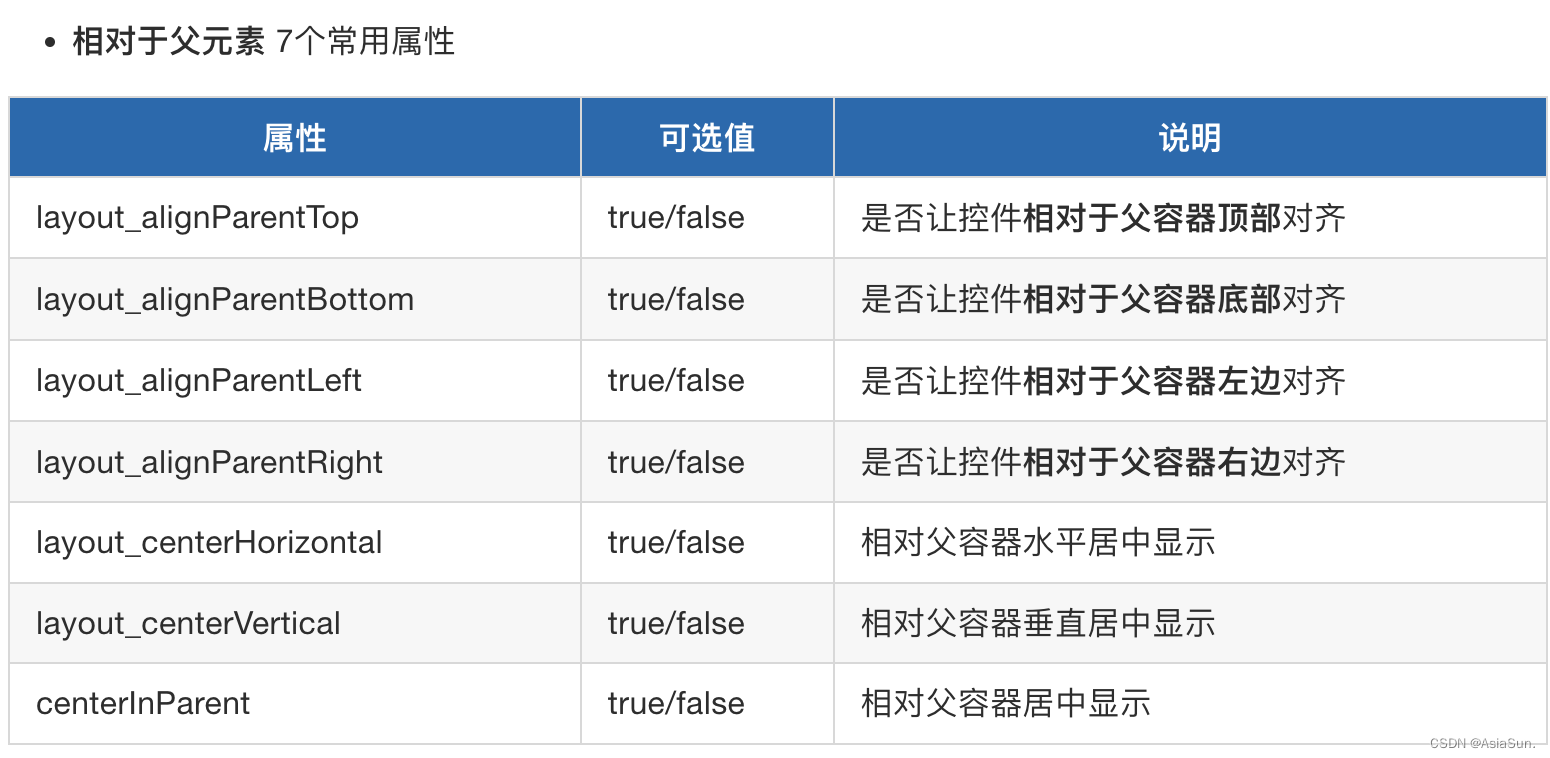
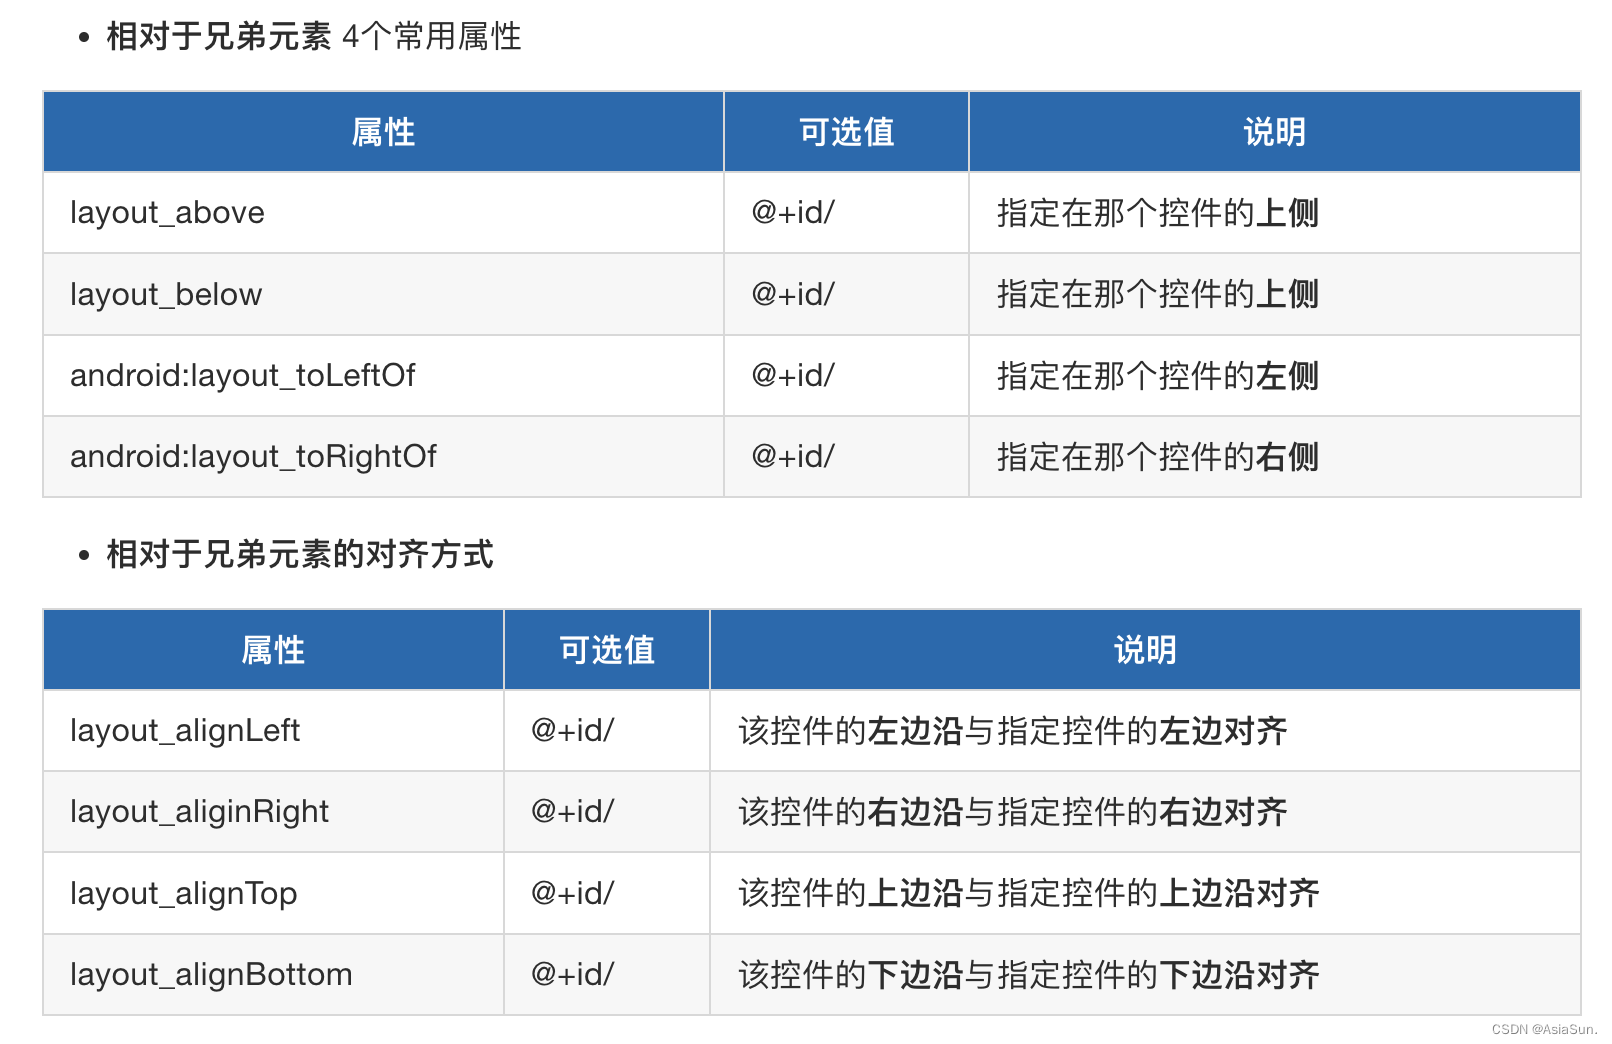
<?xml version="1.0" encoding="utf-8"?>
<RelativeLayout xmlns:android="http://schemas.android.com/apk/res/android"android:layout_width="match_parent"android:layout_height="match_parent"><Buttonandroid:id="@+id/btn1"android:layout_width="wrap_content"android:layout_height="wrap_content"android:insetTop="0dp"android:insetBottom="0dp"android:text="按钮1"/><Buttonandroid:id="@+id/btn2"android:layout_width="wrap_content"android:layout_height="wrap_content"android:insetTop="0dp"android:insetBottom="0dp"android:text="按钮2"android:layout_toRightOf="@id/btn1"android:layout_below="@id/btn1"/><Buttonandroid:id="@+id/btn3"android:layout_width="wrap_content"android:layout_height="wrap_content"android:insetTop="0dp"android:insetBottom="0dp"android:text="按钮3"android:layout_toRightOf="@id/btn2"android:layout_below="@id/btn2"/><Buttonandroid:id="@+id/btn4"android:layout_width="wrap_content"android:layout_height="wrap_content"android:insetTop="dp"android:insetBottom="0dp"android:text="按钮4"android:layout_toRightOf="@id/btn3"android:layout_below="@id/btn3"/>
</RelativeLayout>
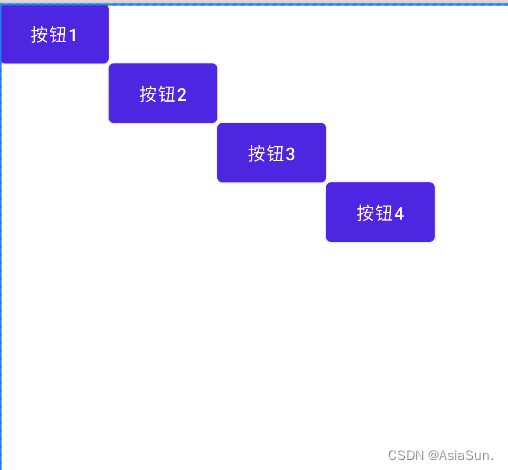
FrameLayout帧布局
组件的默认位置都是左上角,组件之间可以重叠
设置方式与线性布局相似
具体UI
Button之MaterialButton
Material: 重要的
MaterialButton是Google推出的新控件,比较好用
使用步骤:
-
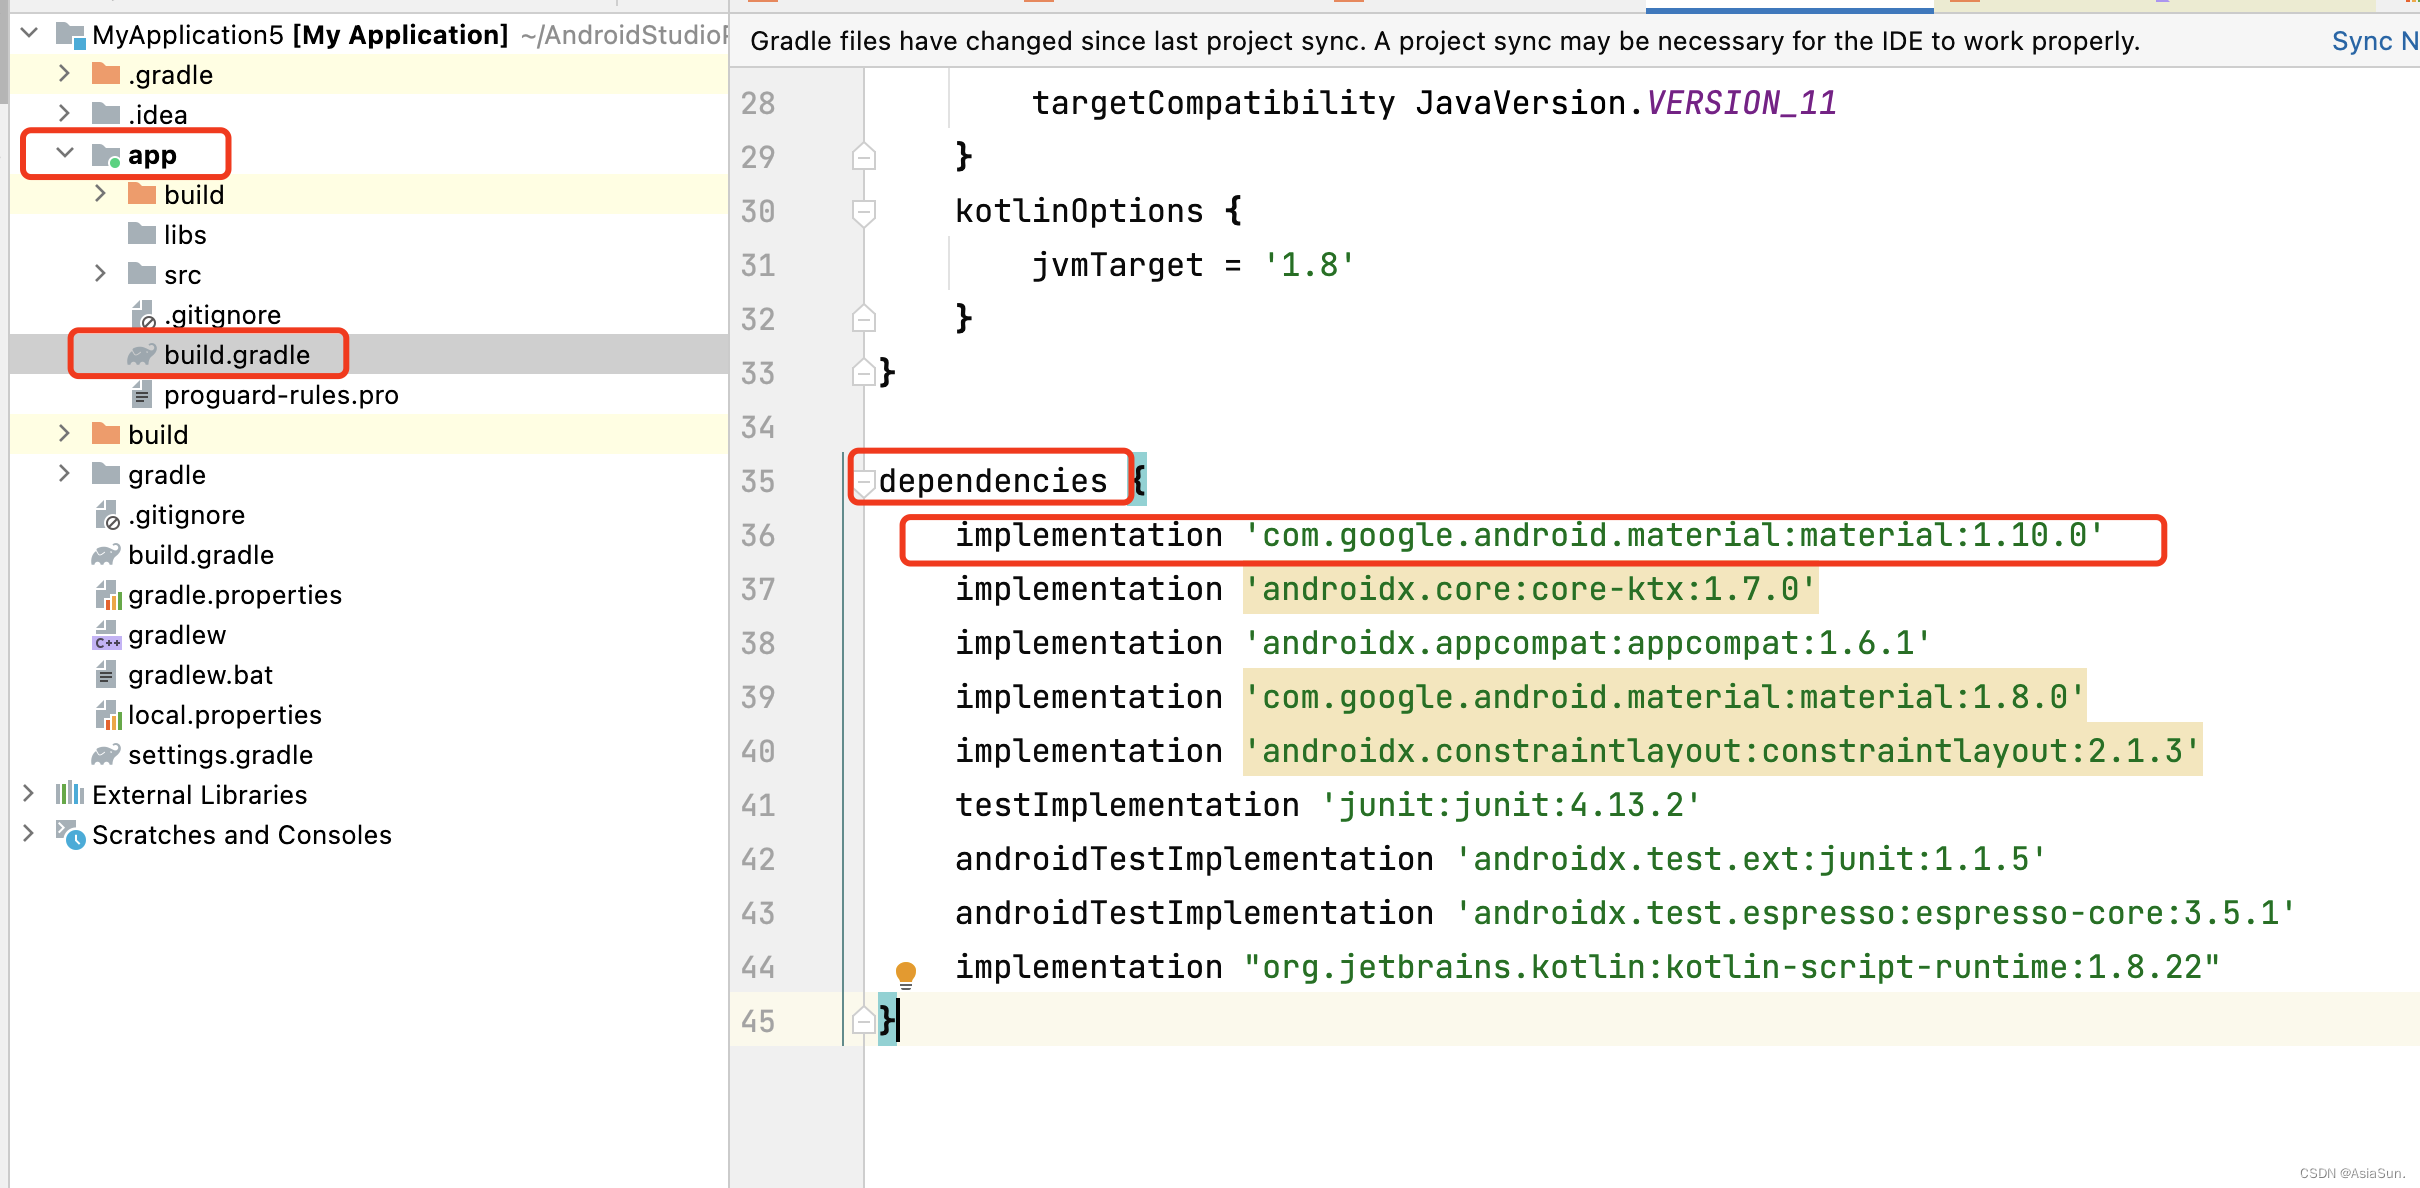
1.添加依赖
在app下的build.gradle文件下,dependencies里,添加依赖:implementation 'com.google.android.material:material:1.10.0'
然后执行:Sync Now
-
2.修改app的theme主题
修改地方:
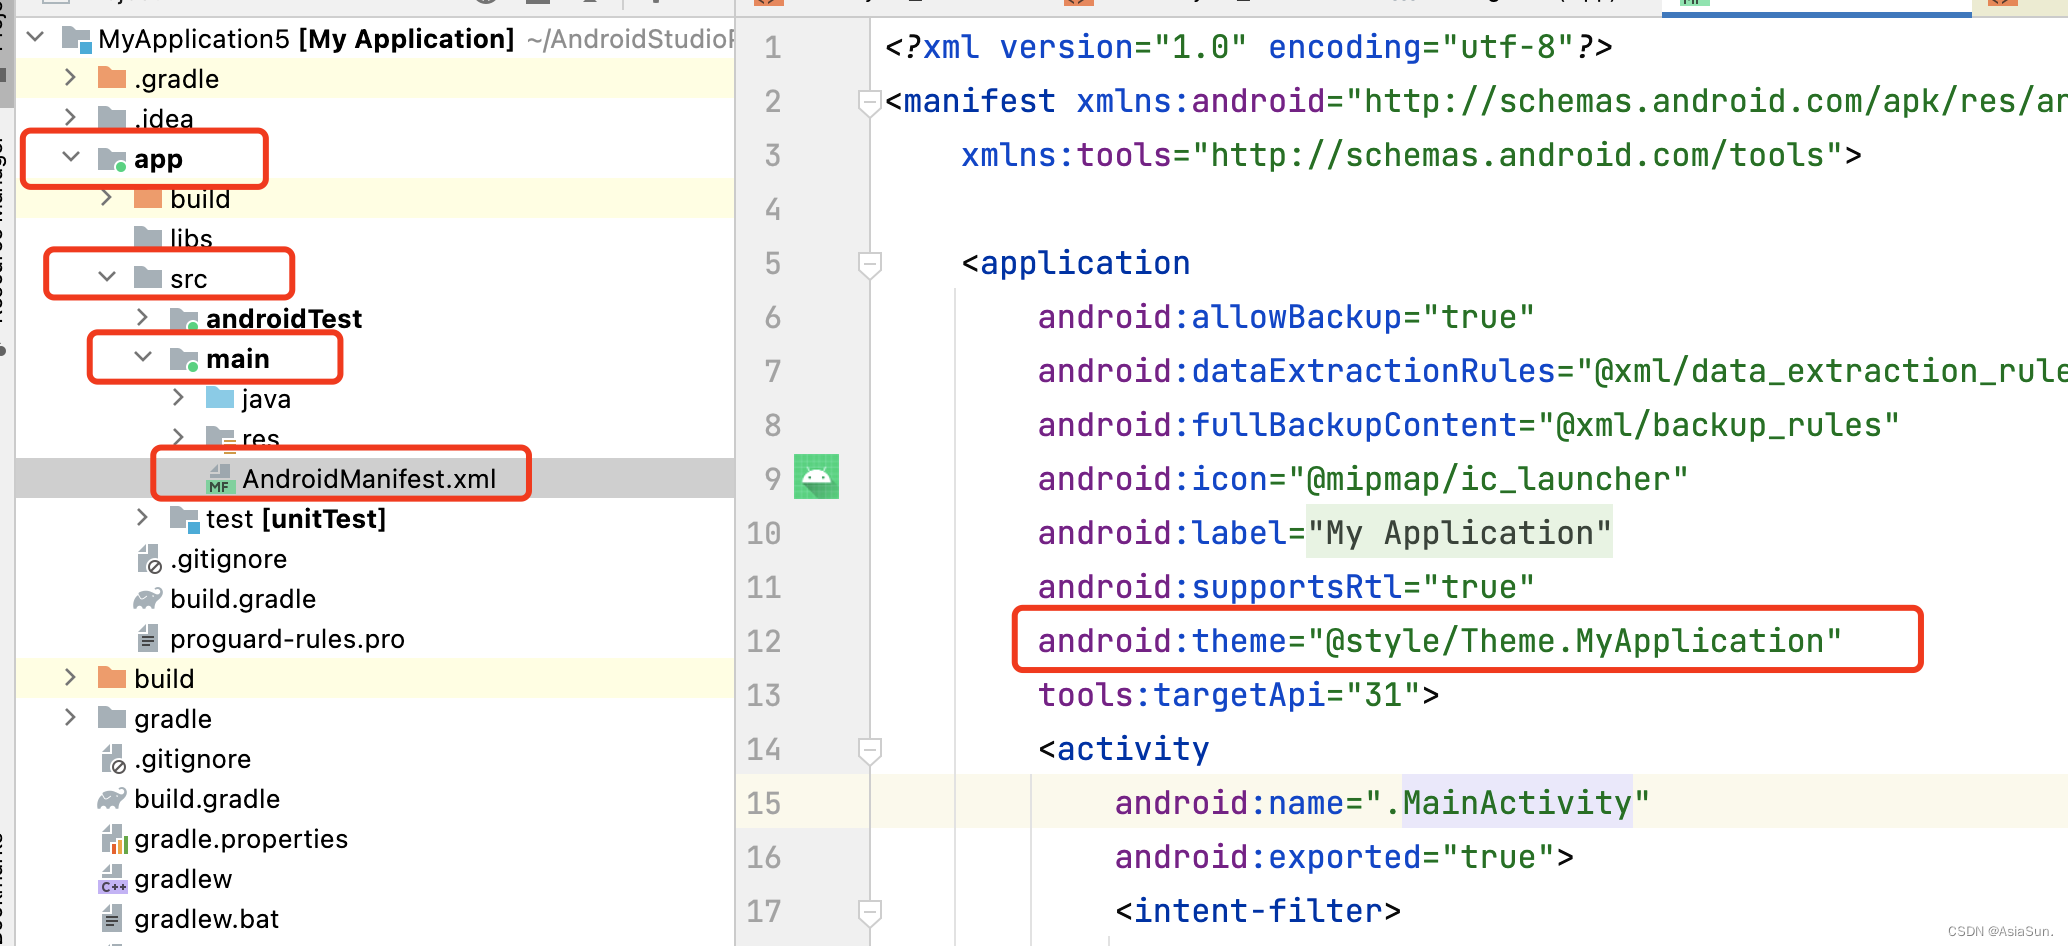
将其parenter修改为:Theme.MaterialComponents.Light.NoActionBar
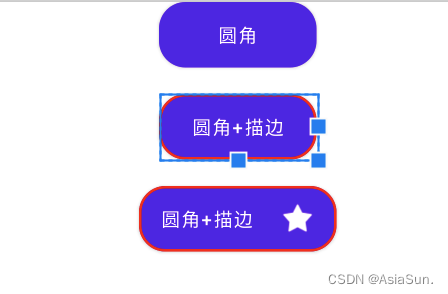
一些常见属性:

写的一些效果:
MaterialButtonToggleGroup
类似于iOS的segment

<com.google.android.material.button.MaterialButtonToggleGroupandroid:id="@+id/material_group"android:layout_width="match_parent"android:layout_height="60dp"android:layout_marginLeft="10dp"android:layout_marginRight="10dp"android:gravity="center"app:checkedButton="@id/btn2"><com.google.android.material.button.MaterialButtonandroid:id="@+id/btn1"android:layout_width="0dp"android:layout_height="50dp"android:layout_weight="1"android:text="TAB1"app:cornerRadius="15dp"android:insetTop="0dp"android:insetBottom="0dp"android:gravity="center"/><com.google.android.material.button.MaterialButtonandroid:id="@+id/btn2"android:layout_width="0dp"android:layout_height="50dp"android:layout_weight="1"android:text="TAB2"app:cornerRadius="20dp"android:insetTop="0dp"android:insetBottom="0dp"android:gravity="center"/><com.google.android.material.button.MaterialButtonandroid:id="@+id/btn3"android:layout_width="0dp"android:layout_height="50dp"android:layout_weight="1"android:text="TAB3"app:cornerRadius="20dp"android:insetTop="0dp"android:insetBottom="0dp"android:gravity="center"/></com.google.android.material.button.MaterialButtonToggleGroup>
监听的时候:
//通过id,找到对象val toggleGroup = findViewById<MaterialButtonToggleGroup>(R.id.material_group)//对象添加监听//参数是一个接口,前面需要加上object: 关键字toggleGroup.addOnButtonCheckedListener(object: MaterialButtonToggleGroup.OnButtonCheckedListener{//里面是实现接口的方法override fun onButtonChecked(group: MaterialButtonToggleGroup?,checkedId: Int,isChecked: Boolean) {Log.e("MaterialButton", "${checkedId}, ${isChecked.toString()}");}})
TextView
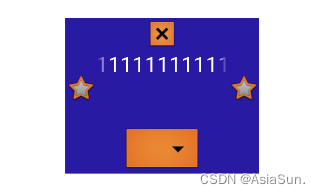
<LinearLayout xmlns:android="http://schemas.android.com/apk/res/android"android:layout_width="match_parent"android:layout_height="match_parent"android:gravity="center_horizontal"><TextViewandroid:id="@+id/textView2"android:layout_width="200dp"android:layout_height="160dp"android:text="111111111111111111111111111111"android:textSize="22dp"android:textColor="#ffffff"//使用这个,跑马灯才管用android:singleLine="true"android:background="@color/purple_700"android:layout_marginTop="30dp"android:ellipsize="marquee"android:marqueeRepeatLimit="-1"android:focusable="true"android:focusableInTouchMode="true"android:drawableLeft="@android:drawable/btn_star"android:drawableRight="@android:drawable/btn_star"android:drawableTop="@android:drawable/btn_dialog"android:drawableBottom="@android:drawable/btn_dropdown"/></LinearLayout>在activity里面调用:val tv = findViewById<TextView>(R.id.textView2)
tv.requestFocus()
ImageView
图片名不能以数字开头
center:保持原图的大小,显示在ImageView的中心。当原图的长(宽)大于ImageView的长(宽),超过部分裁剪处理。centerCrop:以填满整个ImageView为目的,将原图的中心对准ImageView的中心,等比例放大原图,直到填满ImageView为止(指的是ImageView的宽和高都要填满),原图超过ImageView的部分作裁剪处理。centerInside:以原图完全显示为目的,将图片的内容完整居中显示,通过按比例缩小原图的长(宽)等于或小于ImageView的长(宽)。如果原图的长宽本身就小于ImageView的长宽,则原图不作任何处理,居中显示在ImageView。fitCenter:把原图按比例扩大或缩小到ImageView的ImageView的高度,居中显示fitEnd:把原图按比例扩大(缩小)到ImageView的高度,显示在ImageView的下部分位置fitStart:把原图按比例扩大(缩小)到ImageView的高度,显示在ImageView的上部分位置fitXY:把原图按照指定的大小在View中显示,拉伸显示图片,不保持原比例,填满ImageView.matrix:不改变原图的大小,从ImageView的左上角开始绘制原图,原图超过ImageView的部 分作裁剪处理。
RecyclerView
类似:tableView+collectionView
adapter:数据源
来一个简单的List
private val data = listOf("Apple", "Banana", "Orange", "Watermelon", "Pear", "Grape", "Pineapple", "Strawberry", "Cherry", "Mango", "Apple", "Banana", "Orange", "Watermelon", "Pear", "Grape", "Pineapple", "Strawberry", "Cherry", "Mango")override fun onCreate(savedInstanceState: Bundle?) {super.onCreate(savedInstanceState)setContentView(R.layout.activity_main)//注意:android.R.layout.simple_list_item_1val adapter = ArrayAdapter<String>(this, android.R.layout.simple_list_item_1, data)val recyclerView = findViewById<ListView>(R.id.listView)recyclerView.adapter = adapter}在xml上,写上ListView<ListViewandroid:id="@+id/listView"android:layout_width="match_parent"android:layout_height="match_parent"/>

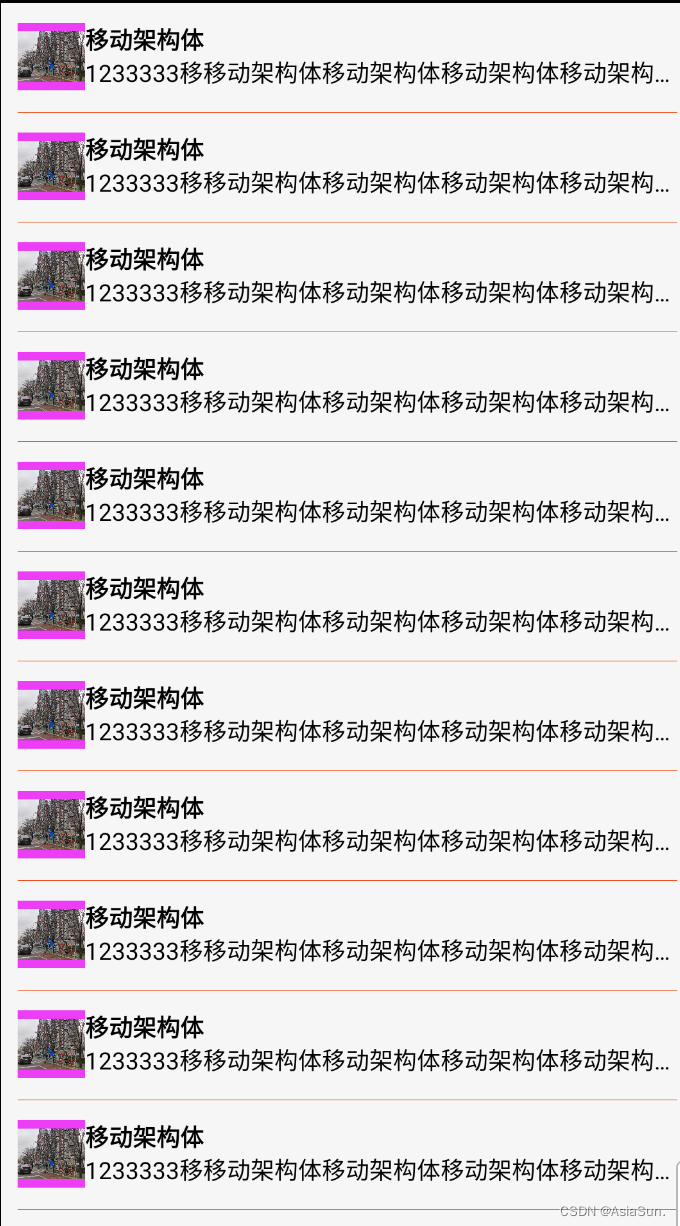
自定义列表
使用:recyclerView
class MainActivity : AppCompatActivity() {override fun onCreate(savedInstanceState: Bundle?) {super.onCreate(savedInstanceState)setContentView(R.layout.activity_main)//找到recyclerViewval recyclerView = findViewById<RecyclerView>(R.id.recyclerView)//管理者,负责列表的布局recyclerView.layoutManager = LinearLayoutManager(this, LinearLayoutManager.VERTICAL, false)recyclerView.adapter = MyAdapter1()}//创建一个adapter,负责数据的适配class MyAdapter1: RecyclerView.Adapter<MyViewHolder>() {override fun onCreateViewHolder(parent: ViewGroup, viewType: Int): MyViewHolder {//找到itemval cellView = LayoutInflater.from(parent.context).inflate(R.layout.textview_test, parent, false)return MyViewHolder(cellView)}//个数override fun getItemCount(): Int {return 20}override fun onBindViewHolder(holder: MyViewHolder, position: Int) {}}//负责列表的复用class  MyViewHolder(view: View): RecyclerView.ViewHolder(view){}
}
跳转
显示跳转:
val btn = findViewById<MaterialButton>(R.id.jump_button)btn.setOnClickListener {val intent = Intent(this, secondActivity::class.java)//传值intent.putExtra("key", "22222")startActivity(intent)}//接收值val dataString = intent.getStringExtra("key")
例子:
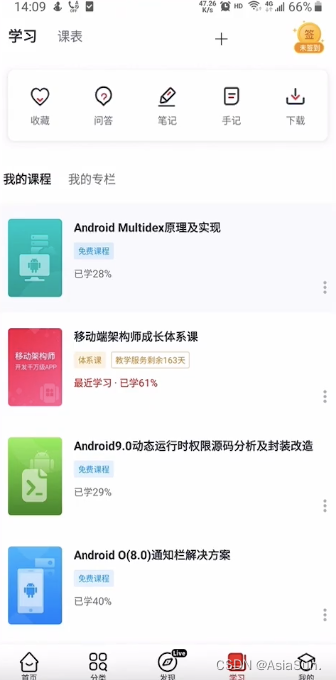
作业结果:


)


