基于YOLOv5的S弯识别
目录
- 基于YOLOv5的S弯识别
- 技术背景
- 算法介绍
- 具体实现
- 1、下载仓库
- 2、配置环境
- 3、数据处理
- 4、转成engine文件
- 5、使用代码实现识别
- 技术总结
技术背景
S弯识别是一个在自动驾驶和机器人领域中很常见的任务,它需要识别道路上的弯道,特别是S形弯道,以便车辆或机器人能够相应地控制速度和方向。为了实现航天智慧物流比赛中的难点:识别S弯,在本文中,我们将介绍如何使用YOLOv5,一种基于深度学习的目标检测算法,来实现S弯识别。
算法介绍
YOLOv5是一种基于深度学习的目标检测算法,它是YOLO(You Only Look Once)系列算法的最新版本。与之前的版本相比,YOLOv5采用了一些新的技术来提高检测精度和速度。
YOLOv5算法的核心思想是将目标检测问题转化为一个回归问题。具体来说,它将输入图像划分为一个固定大小的网格,并在每个网格中预测多个目标的位置和类别。每个目标由一个边界框(bounding box)和一个置信度分数(confidence score)表示。边界框是一个矩形,它框住了目标的位置,而置信度分数则表示目标在该边界框内的概率。
YOLOv5采用了一种基于锚框(anchor box)的方法来处理不同大小和比例的目标。锚框是一些预定义的矩形框,它们具有不同的宽度和高度,并与输入图像中的每个网格相关联。YOLOv5使用这些锚框来预测目标的位置和大小,从而提高了检测精度。
为了进一步提高检测精度,YOLOv5还采用了一种新的训练策略,称为AutoML。AutoML是一种自动化机器学习技术,它可以自动地优化模型的超参数,从而提高模型的性能。在YOLOv5中,AutoML用于优化模型的网络结构、损失函数和数据增强等方面。
除了精度之外,速度也是YOLOv5的一个关键优势。YOLOv5采用了一种新的网络结构,称为CSPNet(Cross Stage Partial Network),它可以提高网络的计算效率。此外,YOLOv5还采用了一些优化技术,例如混合精度训练和模型剪枝,以进一步提高速度和效率。
具体实现
1、下载仓库
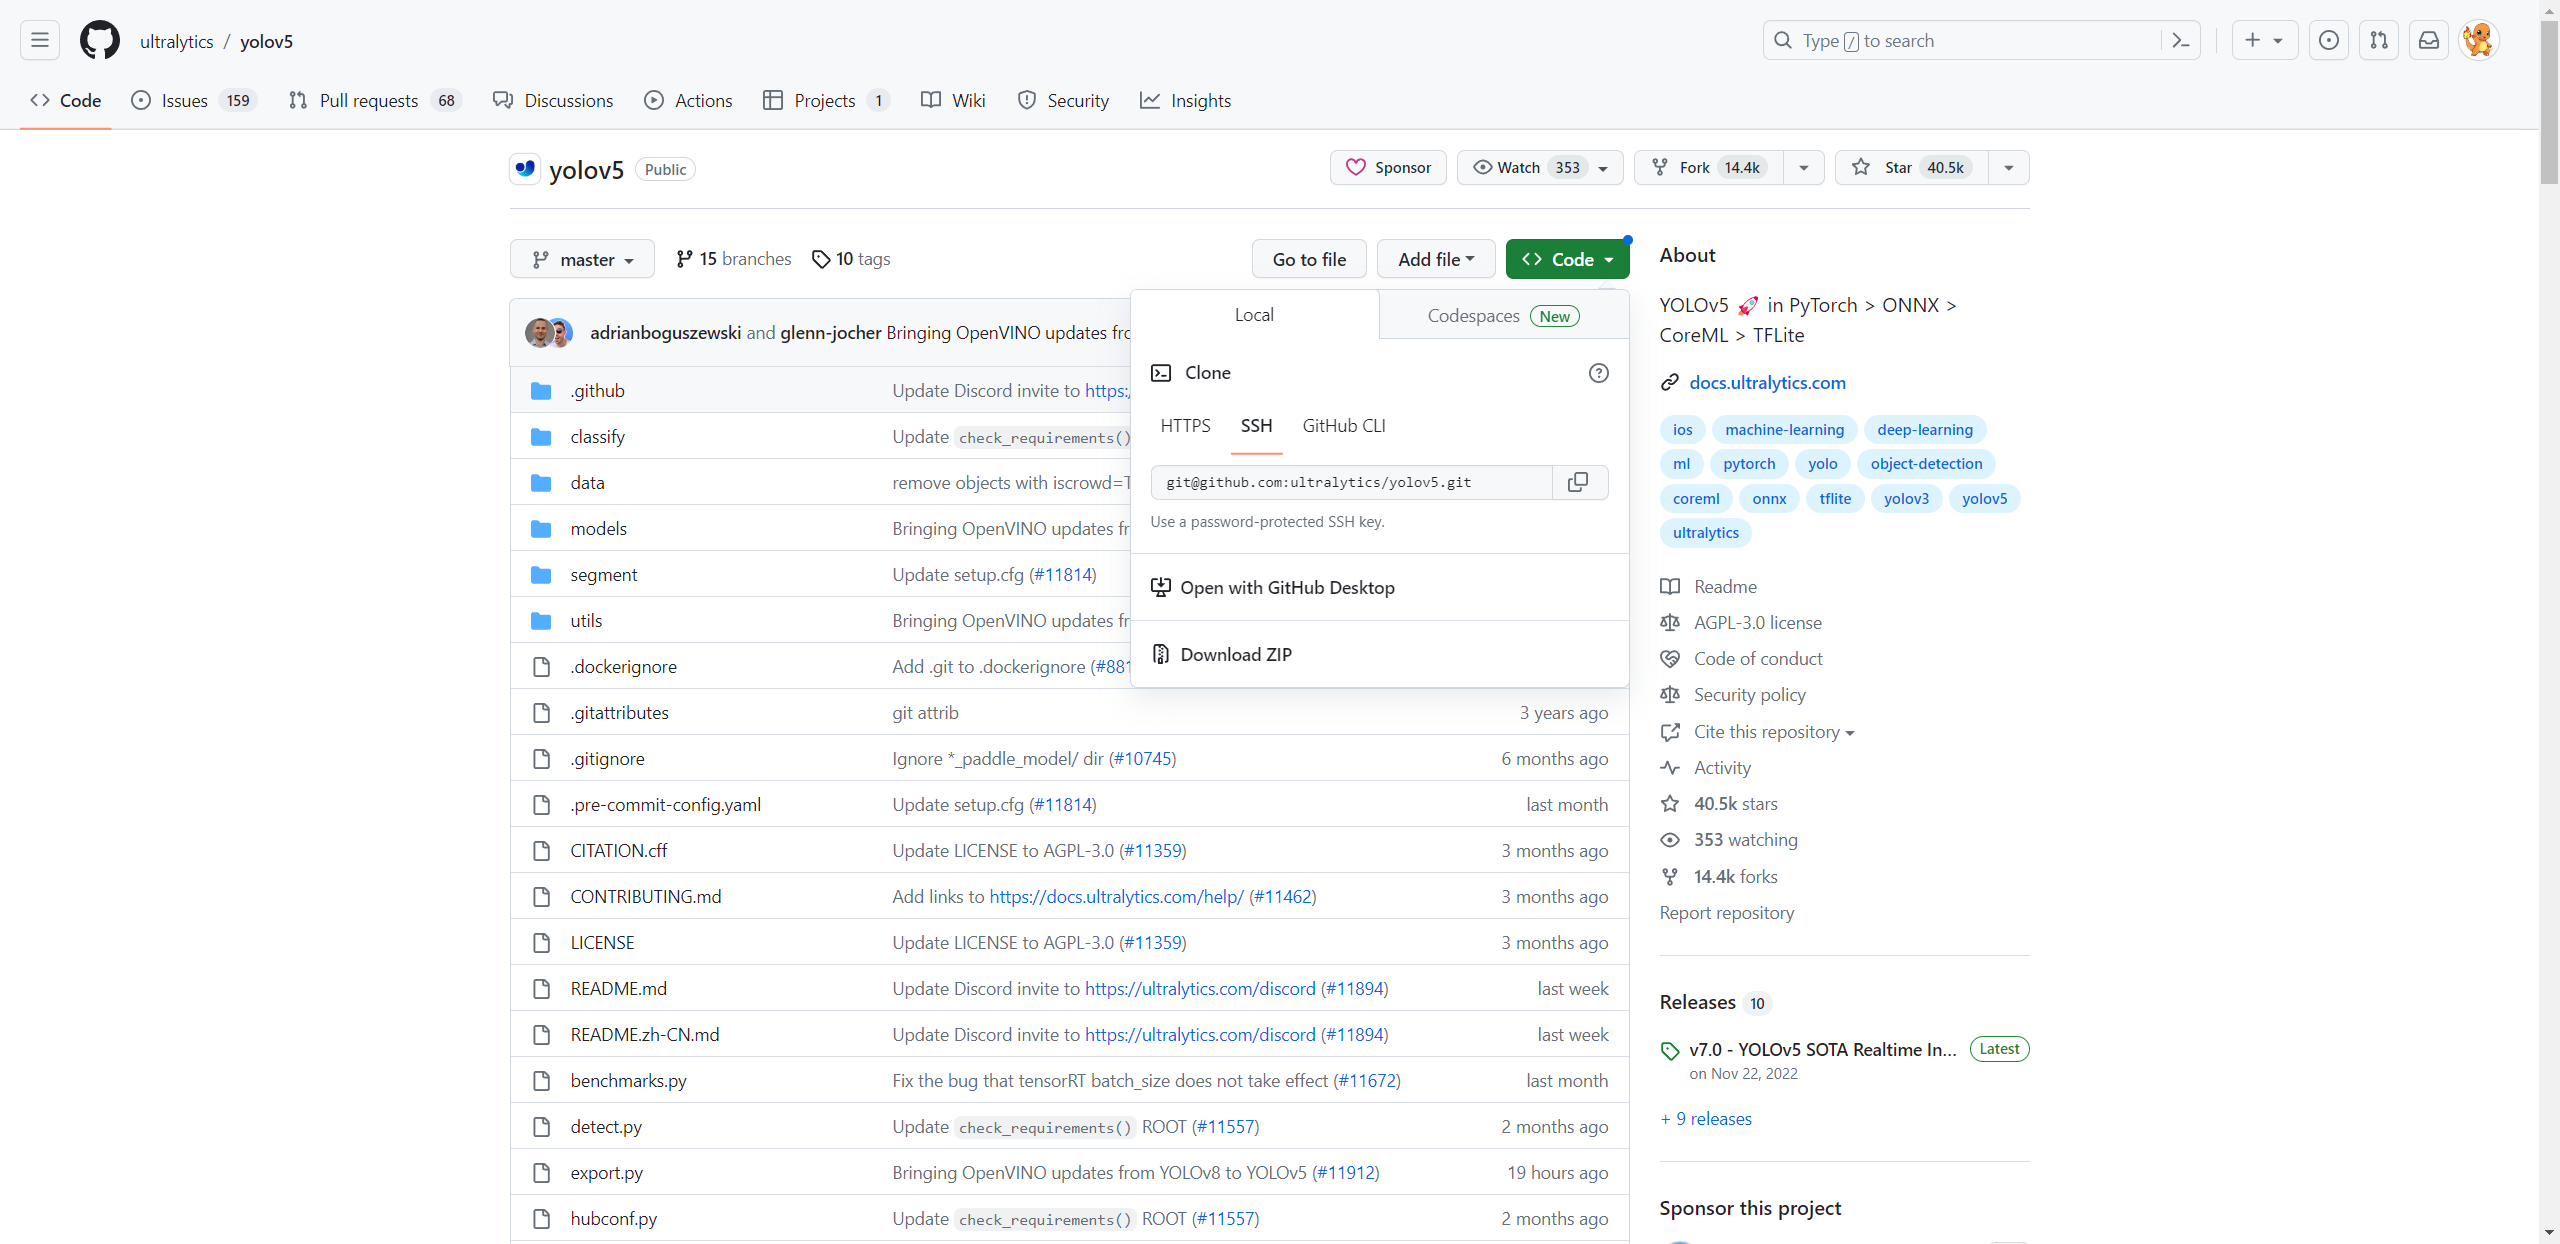
官网地址:https://github.com/ultralytics/yolov5
点击download zip下载压缩包到本地

2、配置环境
使⽤ anaconda 创建虚拟环境,安装仓库中 requirements.txt ⽂件中的第三⽅库,或者
直接使⽤命令 pip install -r requirements.txt
注意:如果下载依赖较慢,可以考虑更换镜像源,搜索python镜像源即可,这里提供一些常见的。
常见国内镜像源
http://pypi.douban.com/simple/  豆瓣
http://mirrors.aliyun.com/pypi/simple/ 阿里
http://pypi.hustunique.com/simple/ 华中理工大学
http://pypi.sdutlinux.org/simple/ 山东理工大学
http://pypi.mirrors.ustc.edu.cn/simple/  中国科学技术大学
3、数据处理
使用 labelimg 工具,对图片进行标注,S弯车道线标注为s
将对应的图片以及标注后的txt文件放入数据集中:images存放原图,labels存放标注后的文件

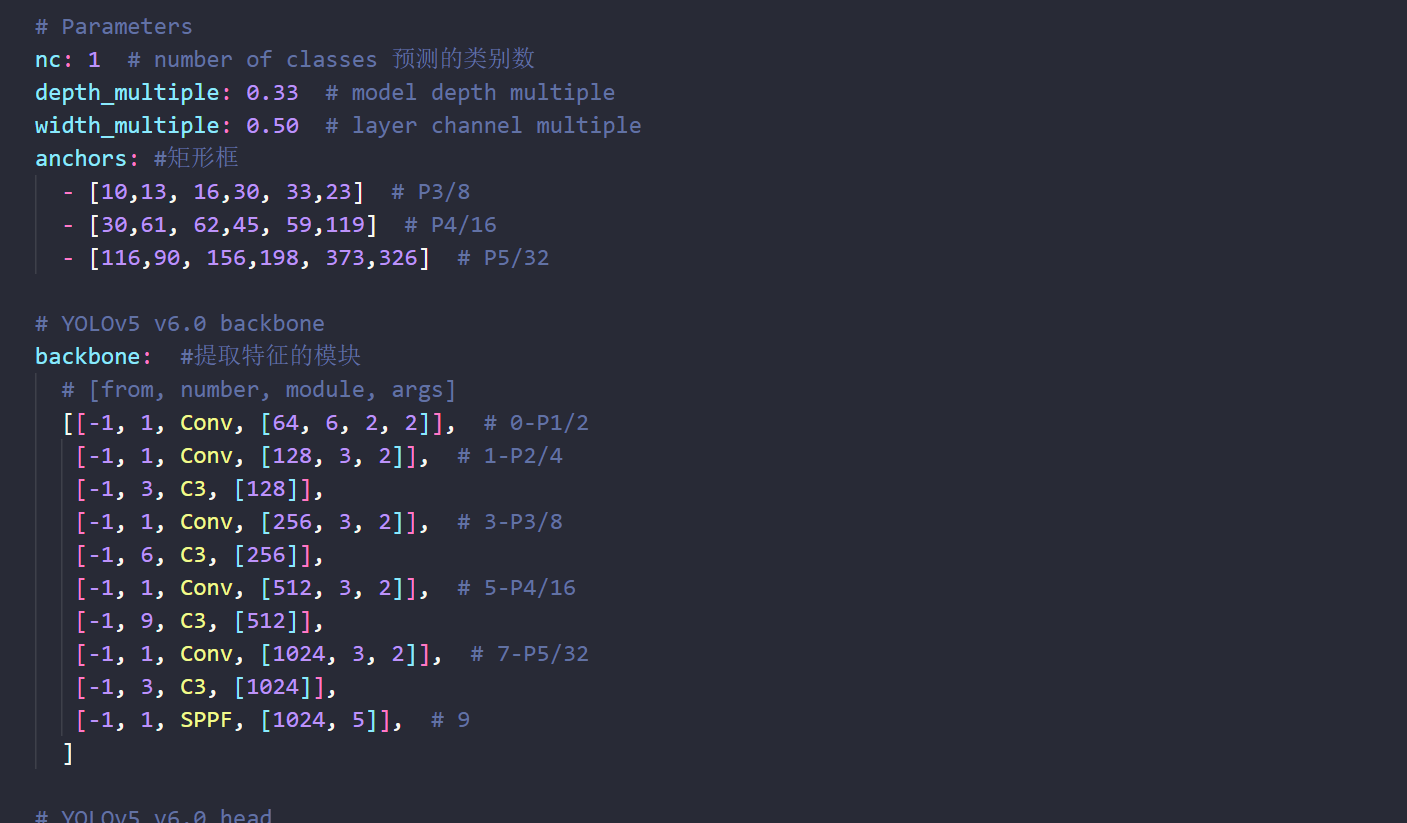
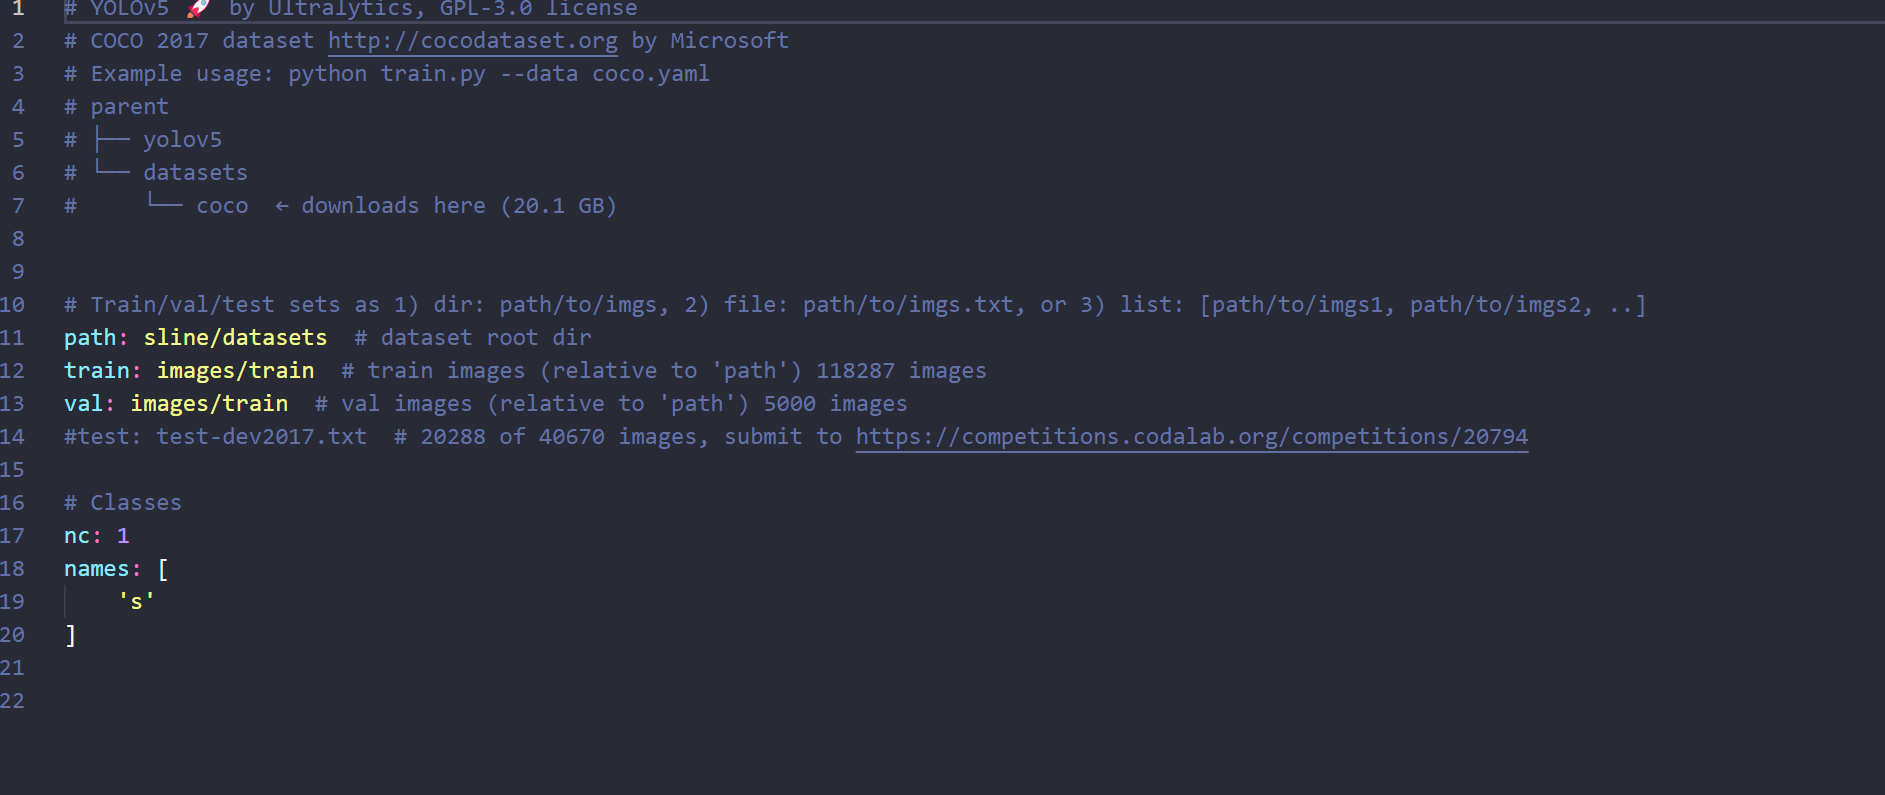
修改两个yaml文件关于模型类别的参数配置


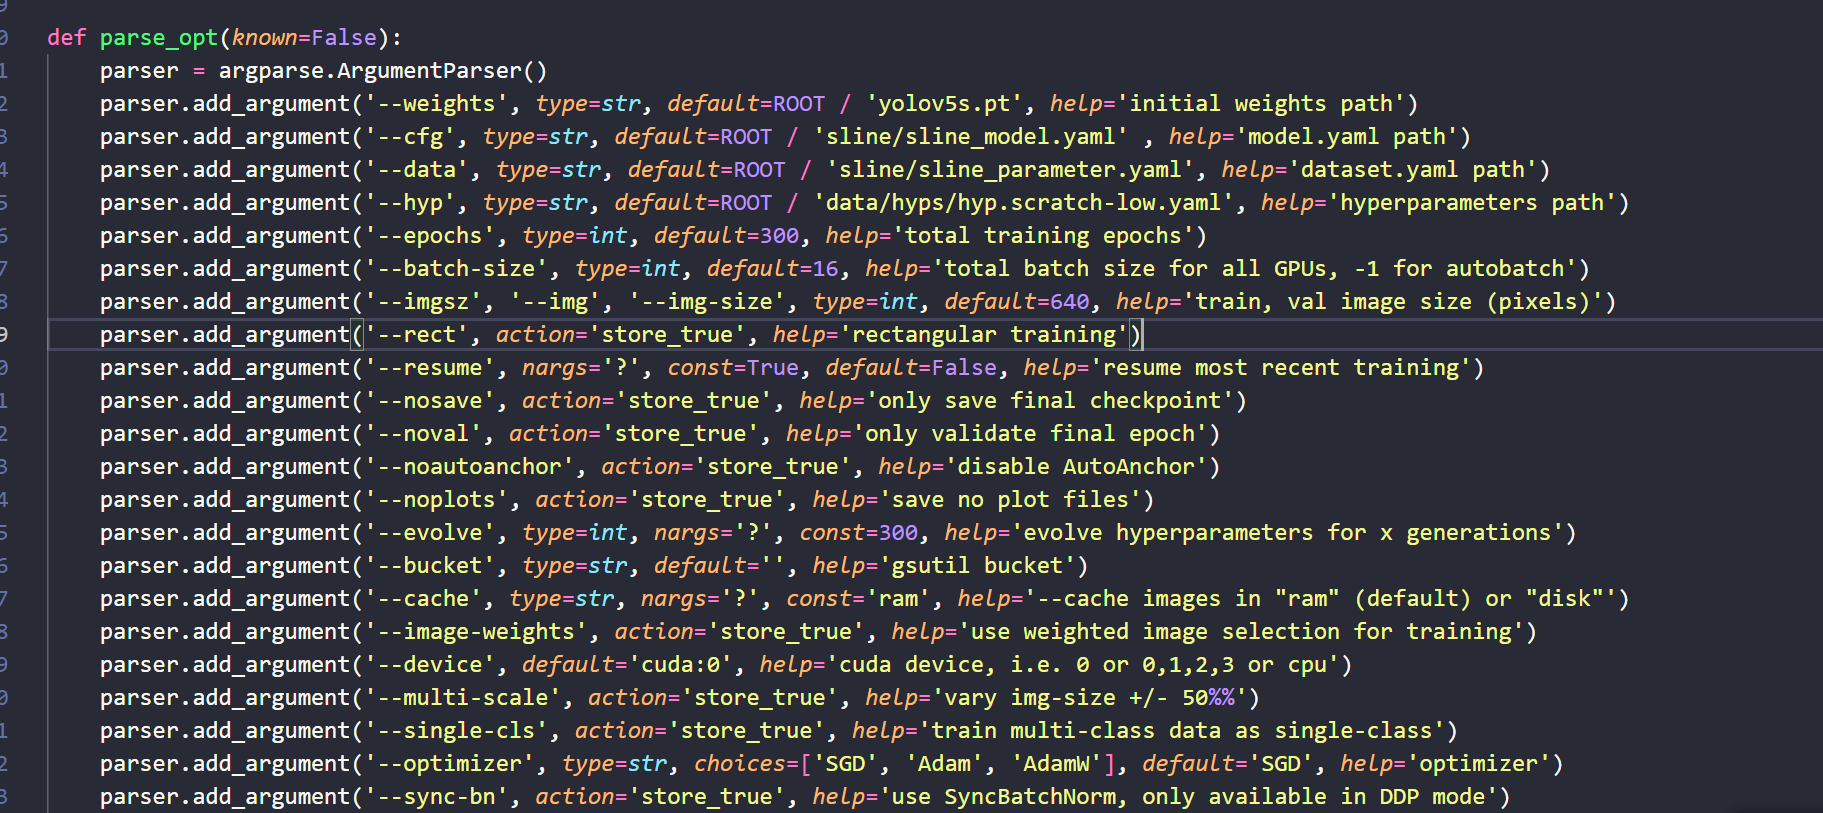
将train.py中的参数改成数据集的路径,如图所示,运行训练即可。
这里的轮次以及输入图片的大小都可以更具自己的需求更改参数,按照实际情况与电脑GPU算法能力微调即可。

4、转成engine文件
为了提高模型的性能和效率,我们可以将训练引擎文件转换为TensorRT格式,并将其应用于小车的硬件加速中。TensorRT是一种高性能的推理引擎,它可以优化深度学习模型的推理速度和内存使用,并将其部署到GPU和其他硬件设备上。
官网地址:tensorrtx/yolov5 at yolov5-v6.2 · wang-xinyu/tensorrtx (github.com)
将pt文件通过ftp协议远程传输到小车上,再使用以下命令完成模型的转化。
- generate .wts from pytorch with .pt, or download .wts from model zoo
// clone code according to above #Different versions of yolov5
// download https://github.com/ultralytics/yolov5/releases/download/v6.2/yolov5s.pt
cp {tensorrtx}/yolov5/gen_wts.py {ultralytics}/yolov5
cd {ultralytics}/yolov5
python gen_wts.py -w yolov5s.pt -o yolov5s.wts
// a file 'yolov5s.wts' will be generated.
- build tensorrtx/yolov5 and run
cd {tensorrtx}/yolov5/
// update CLASS_NUM in yololayer.h if your model is trained on custom dataset
mkdir build
cd build
cp {ultralytics}/yolov5/yolov5s.wts {tensorrtx}/yolov5/build
cmake ..
make
sudo ./yolov5 -s [.wts] [.engine] [n/s/m/l/x/n6/s6/m6/l6/x6 or c/c6 gd gw]  // serialize model to plan file
sudo ./yolov5 -d [.engine] [image folder]  // deserialize and run inference, the images in [image folder] will be processed.
// For example yolov5s
sudo ./yolov5 -s yolov5s.wts yolov5s.engine s
sudo ./yolov5 -d yolov5s.engine ../samples
// For example Custom model with depth_multiple=0.17, width_multiple=0.25 in yolov5.yaml
sudo ./yolov5 -s yolov5_custom.wts yolov5.engine c 0.17 0.25
sudo ./yolov5 -d yolov5.engine ../samples
5、使用代码实现识别
使用官方的python_trt代码即可识别
"""
An example that uses TensorRT's Python api to make inferences.
"""
import ctypes
import os
import shutil
import random
import sys
import threading
import time
import cv2
import numpy as np
import pycuda.autoinit
import pycuda.driver as cuda
import tensorrt as trtcuda.Context.pop()CONF_THRESH = 0.5
IOU_THRESHOLD = 0.4def gstreamer_pipeline(capture_width=1280,capture_height=720,display_width=1280,display_height=720,framerate=120,flip_method=0,
):return ("nvarguscamerasrc ! ""video/x-raw(memory:NVMM), width=(int)%d, height=(int)%d, format=(string)NV12, framerate=(fraction)%d/1! ""nvvidconv flip-method=%d ! ""video/x-raw, width=(int)%d, height=(int)%d, format=(string)BGRx ! ""videoconvert ! ""video/x-raw, format=(string)BGR ! ""appsink"% (capture_width,capture_height,framerate,flip_method,display_width,display_height,))
def get_img_path_batches(batch_size, img_dir):ret = []batch = []for root, dirs, files in os.walk(img_dir):for name in files:if len(batch) == batch_size:ret.append(batch)batch = []batch.append(os.path.join(root, name))if len(batch) > 0:ret.append(batch)return retdef plot_one_box(x, img, color=None, label=None, line_thickness=None):"""description: Plots one bounding box on image img,this function comes from YoLov5 project.param: x:      a box likes [x1,y1,x2,y2]img:    a opencv image objectcolor:  color to draw rectangle, such as (0,255,0)label:  strline_thickness: intreturn:no return"""tl = (line_thickness or round(0.002 * (img.shape[0] + img.shape[1]) / 2) + 1)  # line/font thicknesscolor = color or [random.randint(0, 255) for _ in range(3)]c1, c2 = (int(x[0]), int(x[1])), (int(x[2]), int(x[3]))cv2.rectangle(img, c1, c2, color, thickness=tl, lineType=cv2.LINE_AA)if label:tf = max(tl - 1, 1)  # font thicknesst_size = cv2.getTextSize(label, 0, fontScale=tl / 3, thickness=tf)[0]c2 = c1[0] + t_size[0], c1[1] - t_size[1] - 3cv2.rectangle(img, c1, c2, color, -1, cv2.LINE_AA)  # filledcv2.putText(img,label,(c1[0], c1[1] - 2),0,tl / 3,[225, 255, 255],thickness=tf,lineType=cv2.LINE_AA,)class YoLov5TRT(object):"""description: A YOLOv5 class that warps TensorRT ops, preprocess and postprocess ops."""def __init__(self, engine_file_path):# Create a Context on this device,self.ctx = cuda.Device(0).make_context()stream = cuda.Stream()TRT_LOGGER = trt.Logger(trt.Logger.INFO)runtime = trt.Runtime(TRT_LOGGER)# Deserialize the engine from filewith open(engine_file_path, "rb") as f:engine = runtime.deserialize_cuda_engine(f.read())context = engine.create_execution_context()host_inputs = []cuda_inputs = []host_outputs = []cuda_outputs = []bindings = []for binding in engine:print('bingding:', binding, engine.get_binding_shape(binding))size = trt.volume(engine.get_binding_shape(binding)) * engine.max_batch_sizedtype = trt.nptype(engine.get_binding_dtype(binding))# Allocate host and device buffershost_mem = cuda.pagelocked_empty(size, dtype)cuda_mem = cuda.mem_alloc(host_mem.nbytes)# Append the device buffer to device bindings.bindings.append(int(cuda_mem))# Append to the appropriate list.if engine.binding_is_input(binding):self.input_w = engine.get_binding_shape(binding)[-1]self.input_h = engine.get_binding_shape(binding)[-2]host_inputs.append(host_mem)cuda_inputs.append(cuda_mem)else:host_outputs.append(host_mem)cuda_outputs.append(cuda_mem)# Storeself.stream = streamself.context = contextself.engine = engineself.host_inputs = host_inputsself.cuda_inputs = cuda_inputsself.host_outputs = host_outputsself.cuda_outputs = cuda_outputsself.bindings = bindingsself.batch_size = engine.max_batch_sizedef infer(self, raw_image_generator):threading.Thread.__init__(self)# Make self the active context, pushing it on top of the context stack.self.ctx.push()# Restorestream = self.streamcontext = self.contextengine = self.enginehost_inputs = self.host_inputscuda_inputs = self.cuda_inputshost_outputs = self.host_outputscuda_outputs = self.cuda_outputsbindings = self.bindings# Do image preprocessbatch_image_raw = []batch_origin_h = []batch_origin_w = []batch_input_image = np.empty(shape=[self.batch_size, 3, self.input_h, self.input_w])for i, image_raw in enumerate(raw_image_generator):input_image, image_raw, origin_h, origin_w = self.preprocess_image(image_raw)batch_image_raw.append(image_raw)batch_origin_h.append(origin_h)batch_origin_w.append(origin_w)np.copyto(batch_input_image[i], input_image)batch_input_image = np.ascontiguousarray(batch_input_image)# Copy input image to host buffernp.copyto(host_inputs[0], batch_input_image.ravel())start = time.time()# Transfer input data  to the GPU.cuda.memcpy_htod_async(cuda_inputs[0], host_inputs[0], stream)# Run inference.context.execute_async(batch_size=self.batch_size, bindings=bindings, stream_handle=stream.handle)# Transfer predictions back from the GPU.cuda.memcpy_dtoh_async(host_outputs[0], cuda_outputs[0], stream)# Synchronize the streamstream.synchronize()end = time.time()# Remove any context from the top of the context stack, deactivating it.self.ctx.pop()# Here we use the first row of output in that batch_size = 1output = host_outputs[0]# Do postprocessfor i in range(self.batch_size):result_boxes, result_scores, result_classid = self.post_process(output[i * 6001: (i + 1) * 6001], batch_origin_h[i], batch_origin_w[i])# Draw rectangles and labels on the original imagefor j in range(len(result_boxes)):box = result_boxes[j]plot_one_box(box,batch_image_raw[i],label="{}:{:.2f}".format(categories[int(result_classid[j])], result_scores[j]),)return batch_image_raw, end - startdef destroy(self):# Remove any context from the top of the context stack, deactivating it.self.ctx.pop()def get_raw_image(self, image_path_batch):"""description: Read an image from image path"""for img_path in image_path_batch:yield cv2.imread(img_path)def get_raw_image_zeros(self, image_path_batch=None):"""description: Ready data for warmup"""for _ in range(self.batch_size):yield np.zeros([self.input_h, self.input_w, 3], dtype=np.uint8)def preprocess_image(self, raw_bgr_image):"""description: Convert BGR image to RGB,resize and pad it to target size, normalize to [0,1],transform to NCHW format.param:input_image_path: str, image pathreturn:image:  the processed imageimage_raw: the original imageh: original heightw: original width"""image_raw = raw_bgr_imageh, w, c = image_raw.shapeimage = cv2.cvtColor(image_raw, cv2.COLOR_BGR2RGB)# Calculate widht and height and paddingsr_w = self.input_w / wr_h = self.input_h / hif r_h > r_w:tw = self.input_wth = int(r_w * h)tx1 = tx2 = 0ty1 = int((self.input_h - th) / 2)ty2 = self.input_h - th - ty1else:tw = int(r_h * w)th = self.input_htx1 = int((self.input_w - tw) / 2)tx2 = self.input_w - tw - tx1ty1 = ty2 = 0# Resize the image with long side while maintaining ratioimage = cv2.resize(image, (tw, th))# Pad the short side with (128,128,128)image = cv2.copyMakeBorder(image, ty1, ty2, tx1, tx2, cv2.BORDER_CONSTANT, None, (128, 128, 128))image = image.astype(np.float32)# Normalize to [0,1]image /= 255.0# HWC to CHW format:image = np.transpose(image, [2, 0, 1])# CHW to NCHW formatimage = np.expand_dims(image, axis=0)# Convert the image to row-major order, also known as "C order":image = np.ascontiguousarray(image)return image, image_raw, h, wdef xywh2xyxy(self, origin_h, origin_w, x):"""description:    Convert nx4 boxes from [x, y, w, h] to [x1, y1, x2, y2] where xy1=top-left, xy2=bottom-rightparam:origin_h:   height of original imageorigin_w:   width of original imagex:          A boxes numpy, each row is a box [center_x, center_y, w, h]return:y:          A boxes numpy, each row is a box [x1, y1, x2, y2]"""y = np.zeros_like(x)r_w = self.input_w / origin_wr_h = self.input_h / origin_hif r_h > r_w:y[:, 0] = x[:, 0] - x[:, 2] / 2y[:, 2] = x[:, 0] + x[:, 2] / 2y[:, 1] = x[:, 1] - x[:, 3] / 2 - (self.input_h - r_w * origin_h) / 2y[:, 3] = x[:, 1] + x[:, 3] / 2 - (self.input_h - r_w * origin_h) / 2y /= r_welse:y[:, 0] = x[:, 0] - x[:, 2] / 2 - (self.input_w - r_h * origin_w) / 2y[:, 2] = x[:, 0] + x[:, 2] / 2 - (self.input_w - r_h * origin_w) / 2y[:, 1] = x[:, 1] - x[:, 3] / 2y[:, 3] = x[:, 1] + x[:, 3] / 2y /= r_hreturn ydef post_process(self, output, origin_h, origin_w):"""description: postprocess the predictionparam:output:     A numpy likes [num_boxes,cx,cy,w,h,conf,cls_id, cx,cy,w,h,conf,cls_id, ...] origin_h:   height of original imageorigin_w:   width of original imagereturn:result_boxes: finally boxes, a boxes numpy, each row is a box [x1, y1, x2, y2]result_scores: finally scores, a numpy, each element is the score correspoing to boxresult_classid: finally classid, a numpy, each element is the classid correspoing to box"""# Get the num of boxes detectednum = int(output[0])# Reshape to a two dimentional ndarraypred = np.reshape(output[1:], (-1, 6))[:num, :]# Do nmsboxes = self.non_max_suppression(pred, origin_h, origin_w, conf_thres=CONF_THRESH, nms_thres=IOU_THRESHOLD)result_boxes = boxes[:, :4] if len(boxes) else np.array([])result_scores = boxes[:, 4] if len(boxes) else np.array([])result_classid = boxes[:, 5] if len(boxes) else np.array([])return result_boxes, result_scores, result_classiddef bbox_iou(self, box1, box2, x1y1x2y2=True):"""description: compute the IoU of two bounding boxesparam:box1: A box coordinate (can be (x1, y1, x2, y2) or (x, y, w, h))box2: A box coordinate (can be (x1, y1, x2, y2) or (x, y, w, h))            x1y1x2y2: select the coordinate formatreturn:iou: computed iou"""if not x1y1x2y2:# Transform from center and width to exact coordinatesb1_x1, b1_x2 = box1[:, 0] - box1[:, 2] / 2, box1[:, 0] + box1[:, 2] / 2b1_y1, b1_y2 = box1[:, 1] - box1[:, 3] / 2, box1[:, 1] + box1[:, 3] / 2b2_x1, b2_x2 = box2[:, 0] - box2[:, 2] / 2, box2[:, 0] + box2[:, 2] / 2b2_y1, b2_y2 = box2[:, 1] - box2[:, 3] / 2, box2[:, 1] + box2[:, 3] / 2else:# Get the coordinates of bounding boxesb1_x1, b1_y1, b1_x2, b1_y2 = box1[:, 0], box1[:, 1], box1[:, 2], box1[:, 3]b2_x1, b2_y1, b2_x2, b2_y2 = box2[:, 0], box2[:, 1], box2[:, 2], box2[:, 3]# Get the coordinates of the intersection rectangleinter_rect_x1 = np.maximum(b1_x1, b2_x1)inter_rect_y1 = np.maximum(b1_y1, b2_y1)inter_rect_x2 = np.minimum(b1_x2, b2_x2)inter_rect_y2 = np.minimum(b1_y2, b2_y2)# Intersection areainter_area = np.clip(inter_rect_x2 - inter_rect_x1 + 1, 0, None) * \np.clip(inter_rect_y2 - inter_rect_y1 + 1, 0, None)# Union Areab1_area = (b1_x2 - b1_x1 + 1) * (b1_y2 - b1_y1 + 1)b2_area = (b2_x2 - b2_x1 + 1) * (b2_y2 - b2_y1 + 1)iou = inter_area / (b1_area + b2_area - inter_area + 1e-16)return ioudef non_max_suppression(self, prediction, origin_h, origin_w, conf_thres=0.5, nms_thres=0.4):"""description: Removes detections with lower object confidence score than 'conf_thres' and performsNon-Maximum Suppression to further filter detections.param:prediction: detections, (x1, y1, x2, y2, conf, cls_id)origin_h: original image heightorigin_w: original image widthconf_thres: a confidence threshold to filter detectionsnms_thres: a iou threshold to filter detectionsreturn:boxes: output after nms with the shape (x1, y1, x2, y2, conf, cls_id)"""# Get the boxes that score > CONF_THRESHboxes = prediction[prediction[:, 4] >= conf_thres]# Trandform bbox from [center_x, center_y, w, h] to [x1, y1, x2, y2]boxes[:, :4] = self.xywh2xyxy(origin_h, origin_w, boxes[:, :4])# clip the coordinatesboxes[:, 0] = np.clip(boxes[:, 0], 0, origin_w -1)boxes[:, 2] = np.clip(boxes[:, 2], 0, origin_w -1)boxes[:, 1] = np.clip(boxes[:, 1], 0, origin_h -1)boxes[:, 3] = np.clip(boxes[:, 3], 0, origin_h -1)# Object confidenceconfs = boxes[:, 4]# Sort by the confsboxes = boxes[np.argsort(-confs)]# Perform non-maximum suppressionkeep_boxes = []while boxes.shape[0]:large_overlap = self.bbox_iou(np.expand_dims(boxes[0, :4], 0), boxes[:, :4]) > nms_threslabel_match = boxes[0, -1] == boxes[:, -1]# Indices of boxes with lower confidence scores, large IOUs and matching labelsinvalid = large_overlap & label_matchkeep_boxes += [boxes[0]]boxes = boxes[~invalid]boxes = np.stack(keep_boxes, 0) if len(keep_boxes) else np.array([])return boxesclass inferThread(threading.Thread):def __init__(self, yolov5_wrapper, image_path_batch):threading.Thread.__init__(self)self.yolov5_wrapper = yolov5_wrapperself.image_path_batch = image_path_batchdef run(self):batch_image_raw, use_time = self.yolov5_wrapper.infer(self.yolov5_wrapper.get_raw_image(self.image_path_batch))for i, img_path in enumerate(self.image_path_batch):parent, filename = os.path.split(img_path)save_name = os.path.join('output', filename)# Save imagecv2.imwrite(save_name, batch_image_raw[i])print('input->{}, time->{:.2f}ms, saving into output/'.format(self.image_path_batch, use_time * 1000))class warmUpThread(threading.Thread):def __init__(self, yolov5_wrapper):threading.Thread.__init__(self)self.yolov5_wrapper = yolov5_wrapperdef run(self):batch_image_raw, use_time = self.yolov5_wrapper.infer(self.yolov5_wrapper.get_raw_image_zeros())print('warm_up->{}, time->{:.2f}ms'.format(batch_image_raw[0].shape, use_time * 1000))if __name__ == "__main__":# load custom plugin and enginePLUGIN_LIBRARY = "build/libmyplugins.so"engine_file_path = "build/lv.engine"if len(sys.argv) > 1:engine_file_path = sys.argv[1]if len(sys.argv) > 2:PLUGIN_LIBRARY = sys.argv[2]ctypes.CDLL(PLUGIN_LIBRARY)# load coco labelscategories = ["r","g","s","1","2","3","4"]if os.path.exists('output/'):shutil.rmtree('output/')os.makedirs('output/')# a YoLov5TRT instanceyolov5_wrapper = YoLov5TRT(engine_file_path)try:print('batch size is', yolov5_wrapper.batch_size)image_dir = "images/"image_path_batches = get_img_path_batches(yolov5_wrapper.batch_size, image_dir)for i in range(10):# create a new thread to do warm_upthread1 = warmUpThread(yolov5_wrapper)thread1.start()thread1.join()for batch in image_path_batches:# create a new thread to do inferencethread1 = inferThread(yolov5_wrapper, batch)thread1.start()thread1.join()finally:# destroy the instanceyolov5_wrapper.destroy()
技术总结
使用YOLOv5算法识别S弯,并将模型转换为TensorRT格式以实现硬件加速,可以显著提高模型的性能和效率,从而更好地适应实际场景中的应用需求。这种方法可以应用于各种机器人和智能小车等应用场景中,帮助开发者快速构建高性能和高效率的智能车辆系统。同时,这种方法也可以为深度学习在嵌入式系统中的应用提供参考和思路。


)


)


