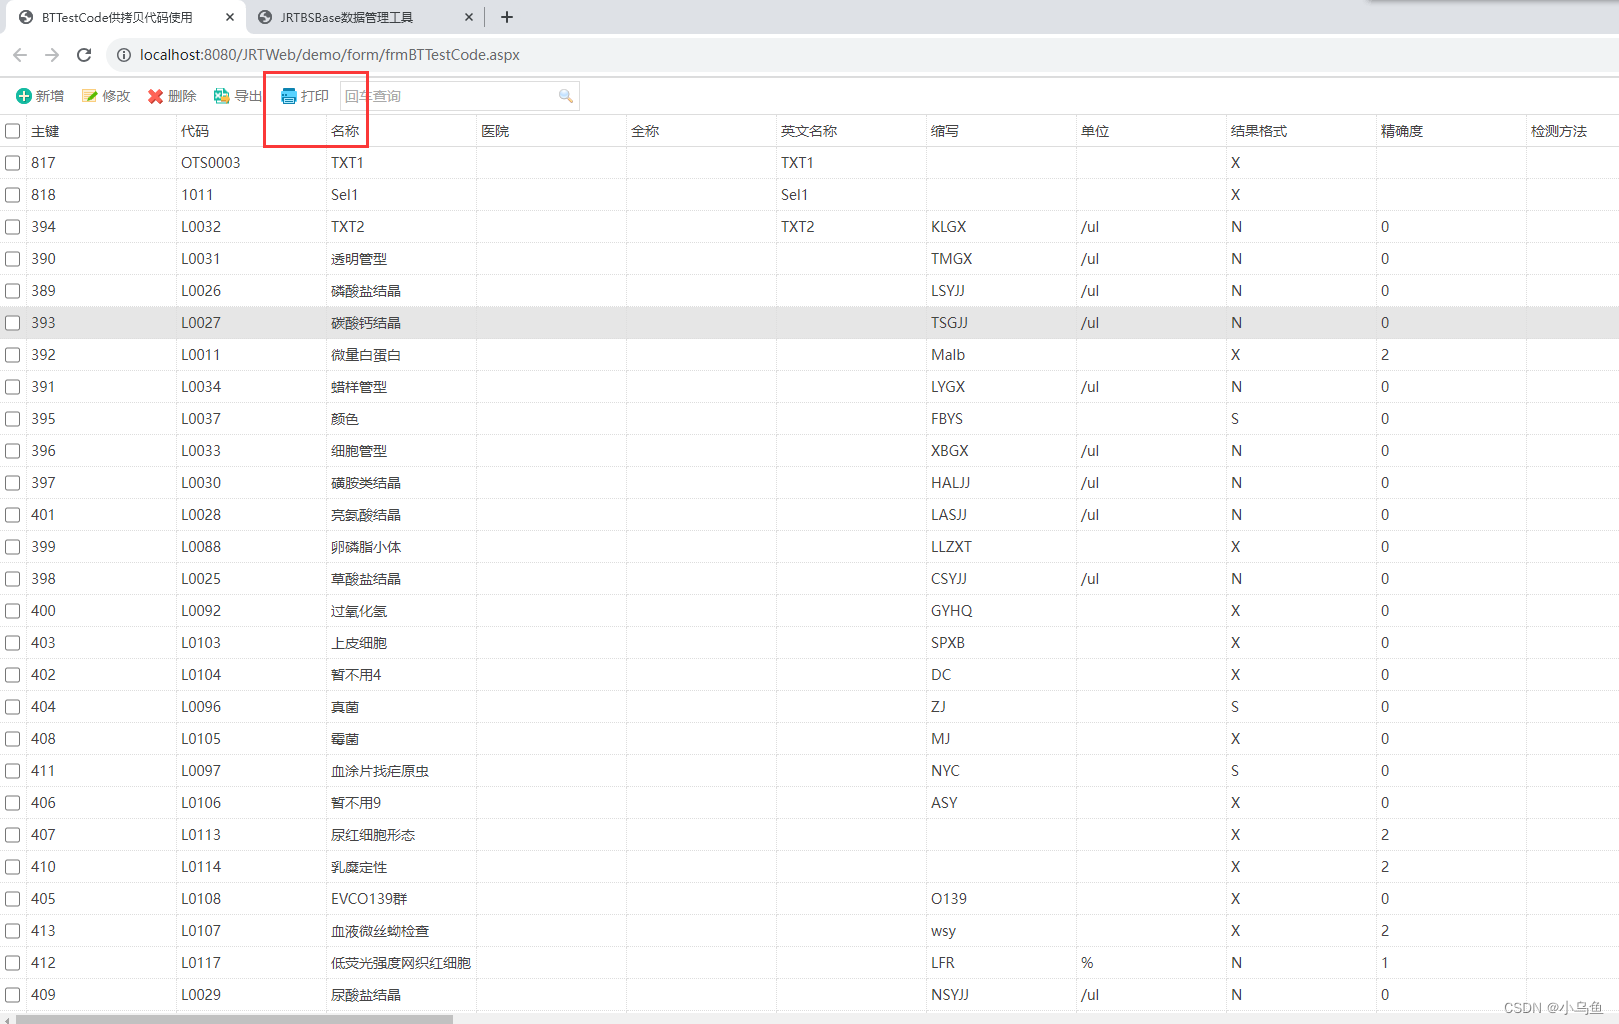
之前对接的打印和导出是C#实现的,如果要完全Java化就需要用Java把打印元素绘制协议用Java实现,这次介绍实现主体搭建,最终使JRT达到完全信创和跨平台目标。到这篇后,所有的Java难题都解决完毕,几天到几周之内就可以把打印元素绘制协议完全实现,实现看着很快。至此可以一马平川的用Java了,没有M,一样可以领先,哈哈哈哈,框架完全体快出来了。
首先抽取消息处理接口
package Monitor.Msg;import org.java_websocket.WebSocket;/*** 抽取的处理前端传来的消息接口,不同类型的消息处理实现此接口从而实现不同的功能*/
public interface IMessageDeal {/*** 处理消息* @param socket 套接字,可以获得id,发送消息给socket* @param message 约定#分割的第一位描述消息类型,收到的消息内容* @return 是否继续往后传递消息,true是,false否*/public boolean DealMessage(WebSocket socket, String message);
}
然后实现打印消息处理
package Monitor.Msg;
import Monitor.Util.LogUtils;
import javafx.scene.control.Alert;
import org.java_websocket.WebSocket;/*** 处理打印消息*/
public class MessagePrintDeal implements Monitor.Msg.IMessageDeal {/*** 处理消息* @param socket 套接字,可以获得id,发送消息给socket* @param message 约定#分割的第一位描述消息类型,收到的消息内容* @return 是否继续往后传递消息,true是,false否*/public boolean DealMessage(WebSocket socket, String message){LogUtils.WriteDebugLog("识别以print#开头的消息");//识别打印消息if (message.split("#")[0].equals("print")){LogUtils.WriteDebugLog("确定为打印消息,准备处理");int index = message.indexOf('#');String msg = message.substring(index + 1);String[] arrMsg = msg.split("@");//报告打印消息直接处理,不驱动exe,提高速度if (arrMsg.length > 5 && (!arrMsg[4].contains("PDF#")) && (arrMsg[0].equals("iMedicalLIS://0") || arrMsg[0].equals("iMedicalLIS://1")) && (!arrMsg[4].equals("ReportView"))){String cmdLine = msg.substring(14);String[] tmpStrings = cmdLine.split((char)64+"");String printFlag = tmpStrings[0];String connectString = tmpStrings[1].replace("&", "&");String rowids = tmpStrings[2];String userCode = tmpStrings[3];//PrintOut:打印 PrintPreview打印预览String printType = tmpStrings[4];//参数模块名称(LIS工作站,DOC医生,SELF自助,OTH其它)String paramList = tmpStrings[5];String clsName = "";String funName = "";if (tmpStrings.length >= 8){clsName = tmpStrings[6];funName = tmpStrings[7];}//没传报告主键退出if (rowids == "" && printType != "ReportView"){javafx.application.Platform.runLater(()->{Alert alert = new Alert(Alert.AlertType.INFORMATION);alert.setTitle("提示");alert.setHeaderText("打印参数异常");alert.setContentText("未传入报告主键");alert.showAndWait();});return true;};String ip = "";String hostName = "";String mac = "";paramList = paramList + "^HN" + hostName + "^IP" + ip + "^MAC" + mac;//printFlag 0:打印所有报告 1:循环打印每一份报告if (printFlag.substring(0, 1).equals("0")){Monitor.Print.PrintProtocol reportPrint = new Monitor.Print.PrintProtocol(rowids, userCode, paramList, connectString, printType, clsName, funName);}else{String[] tmpRowids = rowids.split((char)94+"");for (int i = 0; i < tmpRowids.length; i++){rowids = tmpRowids[i];if (rowids != ""){Monitor.Print.PrintProtocol reportPrint = new Monitor.Print.PrintProtocol(rowids, userCode, paramList, connectString, printType, clsName, funName);}}}}return false;}LogUtils.WriteDebugLog("不是打印消息,传递消息链");return true;}
}然后实现Websockt对接消息、
package Monitor.Websocket;import Monitor.Util.LogUtils;
import org.java_websocket.WebSocket;
import org.java_websocket.handshake.ClientHandshake;
import org.java_websocket.server.WebSocketServer;
import Monitor.Msg.IMessageDeal;import java.net.InetSocketAddress;
import java.util.ArrayList;
import java.util.List;public class WebsocketServer extends WebSocketServer {/*** 存所有套接字*/private static List<WebSocket> allSockets = new ArrayList<>();/*** 处理消息链对象*/public List<IMessageDeal> LinkList=new ArrayList<>();/*** 构造函数* @param port*/public WebsocketServer(int port) {super(new InetSocketAddress(port));Monitor.Util.LogUtils.WriteDebugLog("启动Websockt在"+port);}/*** 打开链接* @param conn 连接* @param handshake 握手*/@Overridepublic void onOpen(WebSocket conn, ClientHandshake handshake) {LogUtils.WriteDebugLog("新客户端接入:" + conn.getRemoteSocketAddress());allSockets.add(conn);}/*** 断开连接* @param conn 连接* @param code 代码* @param reason 原因* @param remote 是否远程*/@Overridepublic void onClose(WebSocket conn, int code, String reason, boolean remote) {LogUtils.WriteDebugLog("客户端断开:" + conn.getRemoteSocketAddress());allSockets.remove(conn);}/*** 收到消息* @param conn 连接* @param message 消息*/@Overridepublic void onMessage(WebSocket conn, String message) {System.out.println("收到消息:" + conn.getRemoteSocketAddress() + ": " + message);LogUtils.WriteDebugLog("#WS消息服务准备调用消息链...");try{if (LinkList.size() > 0){for(IMessageDeal deal:LinkList){LogUtils.WriteDebugLog("#WS调用:" + deal.getClass().getName() + "...");boolean ret = deal.DealMessage(conn, message);LogUtils.WriteDebugLog("#WS调用:" + deal.getClass().getName() + "结束...");//返回false不传递消息了if (ret == false){LogUtils.WriteDebugLog("#WS消息链不继续传递消息...");break;}}}LogUtils.WriteDebugLog("#WS消息服务调用消息链结束...");}catch (Exception ex){LogUtils.WriteExceptionLog("#WS消息服务调用消息链异常", ex);}}/*** 发生错误* @param conn 连接* @param ex 异常*/@Overridepublic void onError(WebSocket conn, Exception ex) {LogUtils.WriteExceptionLog("发生错误:" + conn.getRemoteSocketAddress(),ex);}/*** 启动事件*/@Overridepublic void onStart() {}}
包装log4j
package Monitor.Util;import org.slf4j.Logger;
import org.slf4j.LoggerFactory;public class LogUtils {//调试日志static final Logger loggerDebug = LoggerFactory.getLogger("Debug");/*** 书写调试日志* @param message 日志内容*/public static void WriteDebugLog(String message){loggerDebug.error(message);}/*** 书写异常日志* @param message 描述* @param exception 异常*/public static void WriteExceptionLog(String message, Exception exception){loggerDebug.error(message, exception);}}
实现exe程序
package Monitor;import javafx.application.Application;
import javafx.fxml.FXMLLoader;
import javafx.geometry.Insets;
import javafx.geometry.Orientation;
import javafx.scene.Parent;
import javafx.scene.Scene;
import javafx.scene.control.Button;
import javafx.scene.control.Label;
import javafx.scene.control.SplitPane;
import javafx.scene.control.TextArea;
import javafx.scene.layout.HBox;
import javafx.scene.layout.VBox;
import javafx.stage.Stage;
import Monitor.Websocket.WebsocketServer;
import Monitor.Msg.MessagePrintDeal;import java.net.URL;
import java.nio.file.Paths;public class Main extends Application {// 创建一个TextArea控件TextArea textInfo = new TextArea();//日志路径String logPath="";@Overridepublic void start(Stage primaryStage) throws Exception{String projectPath = System.getProperty("user.dir");Monitor.Util.LogUtils.WriteDebugLog("项目路径:" + projectPath);URL url = Main.class.getResource("");String bashPath = url.getPath();Monitor.Util.LogUtils.WriteDebugLog("程序路径:"+bashPath);//日志路径logPath= Paths.get(projectPath,"logs","Debug.log").toString();// 设置文本自动换行textInfo.setWrapText(true);Monitor.Util.LogUtils.WriteDebugLog("启动Websockt");WebsocketServer server=new WebsocketServer(8082);MessagePrintDeal printDeal=new MessagePrintDeal();server.LinkList.add(printDeal);server.start();SplitPane splitPane = new SplitPane();splitPane.setOrientation(Orientation.VERTICAL);// 刷新日志按钮Button btnRefresh = new Button("刷新日志");btnRefresh.setOnMouseClicked(e -> {RefreshLogs();});btnRefresh.setPrefHeight(30);// 清空日志按钮Button btnDelete = new Button("清空日志");btnDelete.setOnMouseClicked(e -> {DeleteLogs();});btnDelete.setPrefHeight(30);HBox top  = new HBox(20,btnRefresh,btnDelete);top.setPadding(new Insets(5,5,5,5));top.setPrefHeight(40);top.setMaxHeight(40);HBox bottom = new HBox(textInfo);textInfo.prefWidthProperty().bind(bottom.widthProperty());RefreshLogs();//VBox left = new VBox(new Label("left"));//VBox center = new VBox(new Label("center"));//VBox right = new VBox(new Label("right"));//SplitPane splitPane1 = new SplitPane();//splitPane1.getItems().setAll(left,center,right);splitPane.getItems().addAll(top, bottom);Scene scene = new Scene(splitPane);//primaryStage.setScene(scene);//Parent root = FXMLLoader.load(getClass().getResource("Main.fxml"));//primaryStage.setTitle("JRTClient");primaryStage.setOnCloseRequest(event -> {try {server.stop();}catch (Exception ex){}});primaryStage.setScene(scene);primaryStage.setMaximized(true);primaryStage.show();}/*** 刷新日志*/public void RefreshLogs(){try {textInfo.setText(Monitor.Util.TxtUtil.ReadTextStr(logPath));}catch (Exception ex){}}/*** 清空日志*/public void DeleteLogs(){try {Monitor.Util.TxtUtil.WriteText2File(logPath,"");textInfo.setText("");}catch (Exception ex){}}public static void main(String[] args) {launch(args);}
}
实现打印画图类
package Monitor.Print;import java.awt.*;
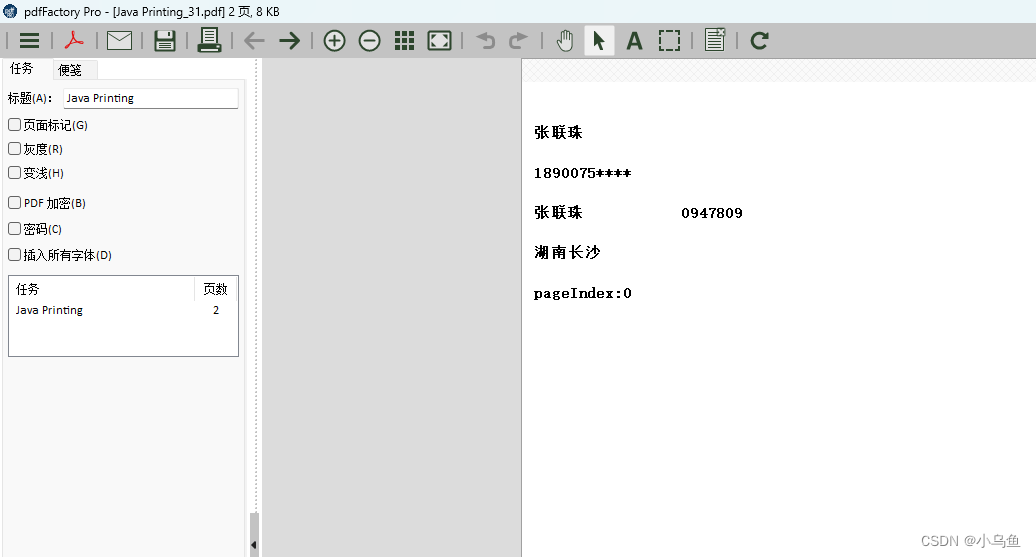
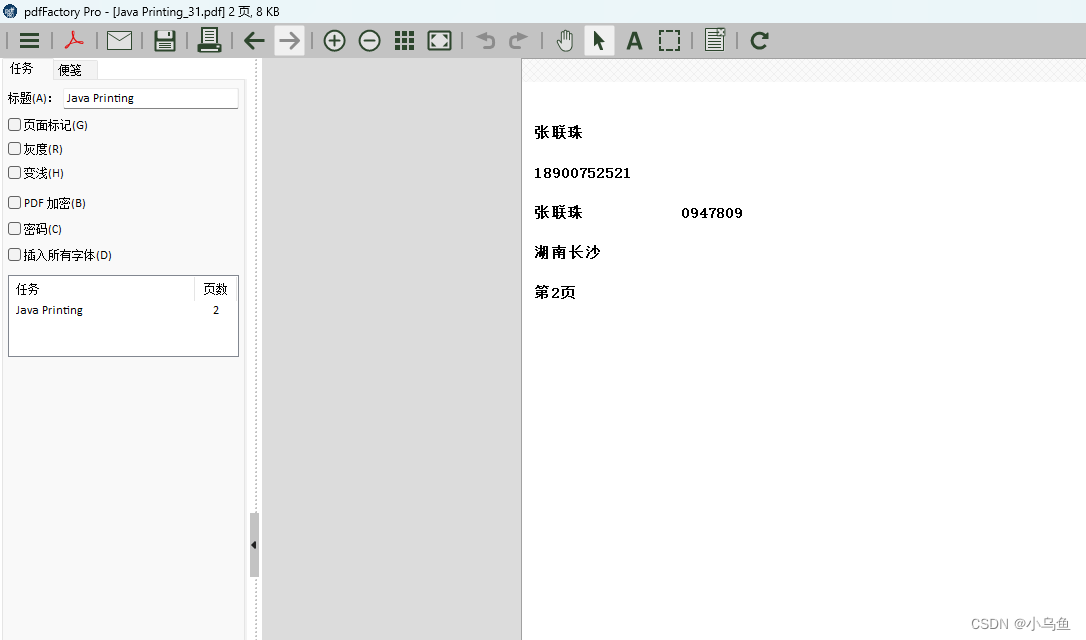
import java.awt.print.*;public class PrintProtocol implements Printable {/*** 按打印元素绘制协议实现打印* @param rowids 数据主键* @param userCode 用户* @param paramList 参数* @param connectString 连接串* @param printFlag 打印标识* @param className 调用类名* @param funcName 方法名称*/public PrintProtocol(String rowids, String userCode, String paramList, String connectString, String printFlag, String className, String funcName){try {// 通俗理解就是书、文档Book book = new Book();// 设置成竖打PageFormat pf = new PageFormat();pf.setOrientation(PageFormat.PORTRAIT);// 通过Paper设置页面的空白边距和可打印区域。必须与实际打印纸张大小相符。Paper paper = new Paper();// 设置纸张大小为 A4 大小(210 mm × 297 mm)double width = 827;double height = 1169;double margin = 10.0;paper.setSize(width, height);paper.setImageableArea(margin, margin, width - 2 * margin, height - 2 * margin);pf.setPaper(paper);book.append(this, pf,2);// 获取打印服务对象PrinterJob job = PrinterJob.getPrinterJob();// 设置打印类job.setPageable(book);job.print();} catch (PrinterException e) {e.printStackTrace();}}/*** 安逸画图* @param graphics* @param pageFormat* @param pageIndex* @return* @throws PrinterException*/@Overridepublic int print(Graphics graphics, PageFormat pageFormat, int pageIndex) throws PrinterException {// 转换成Graphics2D 拿到画笔Graphics2D g2 = (Graphics2D) graphics;// 设置打印颜色为黑色g2.setColor(Color.black);//打印起点坐标double x = pageFormat.getImageableX();double y = pageFormat.getImageableY();if(pageIndex==0) {//设置打印字体(字体名称、样式和点大小)(字体名称可以是物理或者逻辑名称)Font font = new Font("宋体", Font.BOLD, 14);// 设置字体g2.setFont(font);//字体高度float heigth = font.getSize2D();g2.drawString("Java打印测试", (float) 10, 10);font = new Font("宋体", Font.BOLD, 12);// 设置字体g2.setFont(font);// 字体高度heigth = font.getSize2D();g2.drawString("张联珠", (float) 10, 60);g2.drawString("1890075****", (float) 10, 90);g2.drawString("张联珠", 10, 120);g2.drawString("0947809", 120, 120);font = new Font("宋体", Font.BOLD, 12);g2.setFont(font);heigth = font.getSize2D();g2.drawString("湖南长沙", 10, 150);g2.drawString("pageIndex:" + pageIndex, 10, 180);return PAGE_EXISTS;}else if(pageIndex==1) {//设置打印字体(字体名称、样式和点大小)(字体名称可以是物理或者逻辑名称)Font font = new Font("宋体", Font.BOLD, 14);// 设置字体g2.setFont(font);//字体高度float heigth = font.getSize2D();g2.drawString("Java打印测试", (float) 10, 10);font = new Font("宋体", Font.BOLD, 12);// 设置字体g2.setFont(font);// 字体高度heigth = font.getSize2D();g2.drawString("张联珠", (float) 10, 60);g2.drawString("18900752521", (float) 10, 90);g2.drawString("张联珠", 10, 120);g2.drawString("0947809", 120, 120);font = new Font("宋体", Font.BOLD, 12);g2.setFont(font);heigth = font.getSize2D();g2.drawString("湖南长沙", 10, 150);g2.drawString("第2页" , 10, 180);return PAGE_EXISTS;}else{return NO_SUCH_PAGE;}}
}
测试


的进制转换)


)
十二 基于小波变换的图像降噪)


及R实现)

