Java后端开发——MVC商品管理程序
本篇文章内容主要有下面几个部分:
- MVC架构介绍
- 项目环境搭建
- 商品管理模块
- Servlet代码重构BaseServlet
- 文件上传
MVC 是模型-视图-控制器(Model-View-Controller),它是一种设计模式,也是一种软件架构模式,用于构建用户界面(UI)应用程序。
1.模型(Model):
模型代表应用程序的数据结构和业务逻辑。它负责处理应用程序的数据逻辑部分,包括数据的获取、修改、验证等。
在一个应用程序中,模型可以是一个简单的数据对象,也可以是包含大量业务规则和处理逻辑的复杂对象。
2.视图(View):
视图负责将数据渲染成用户可以看到的界面。它展示了模型的数据给用户,并允许用户与数据进行交互。
在 Web 应用程序中,视图通常是 HTML、CSS 和用户界面组件。
3.控制器(Controller):
控制器是模型和视图之间的中介,它接收用户的输入并处理用户请求。控制器根据用户的请求选择合适的模型进行处理,并将处理结果传递给视图进行显示。
在 Web 应用程序中,控制器通常是处理 HTTP 请求、调度逻辑以及返回 HTTP 响应的代码。
MVC 框架的工作流程:
1.用户交互:
用户与应用程序交互,发送请求给控制器。
2.控制器处理请求:
控制器接收到用户的请求,根据请求的类型(GET、POST 等)和参数来决定调用哪个模型处理数据。
控制器可能还需要处理一些逻辑,例如验证用户的输入、选择合适的模型进行处理等。
3.模型处理数据:
模型接收控制器传递过来的数据请求,并进行相应的数据处理,包括数据的获取、更新、存储等操作。
.4.控制器获取处理结果:
模型处理完数据后,将结果返回给控制器。
5.控制器选择视图:
控制器根据模型返回的数据结果,选择合适的视图进行渲染。
6.视图渲染结果:
视图将模型返回的数据渲染成用户可以看到的界面。
7.用户界面更新:
更新后的用户界面展示给用户,用户可以进行下一步操作。
这种分离有利于代码的组织和维护。每个组件都专注于特定的功能,降低了耦合性,使得代码更易于理解、测试和扩展。MVC 模式在各种软件开发中都有广泛的应用,特别是在 Web 开发中,诸如Spring MVC(Java)、Django(Python)、Ruby on Rails(Ruby)等框架中都采用了 MVC 架构。
MVC商品管理程序
项目环境搭建
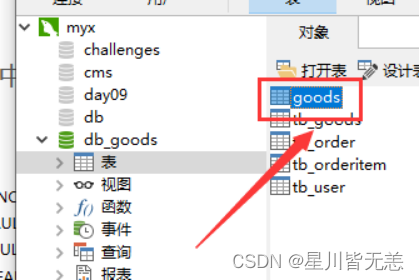
1.创建数据库db_goods,表goods
在MySQL数据库中创建一个名称为db_goods的数据库,并根据表结构在数据库中创建相应的表。
CREATE TABLE `goods` (`id` INT NOT NULL AUTO_INCREMENT,`name` VARCHAR(45) DEFAULT NULL,`cover` VARCHAR(45) DEFAULT NULL,`image1` VARCHAR(45) DEFAULT NULL,`image2` VARCHAR(45) DEFAULT NULL,`price` FLOAT DEFAULT NULL,`intro` VARCHAR(300) DEFAULT NULL,`stock` INT DEFAULT NULL,`type_id` INT DEFAULT NULL,PRIMARY KEY (`id`)
);
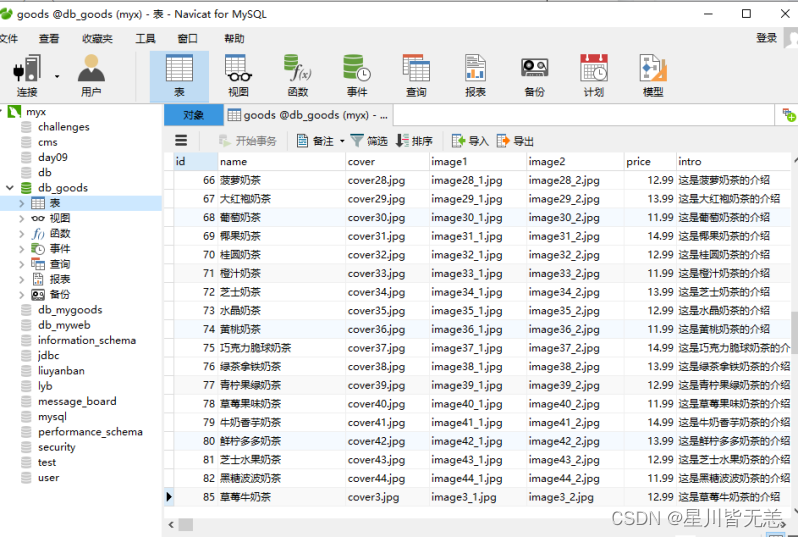
在goods表中插入一些商品数据:
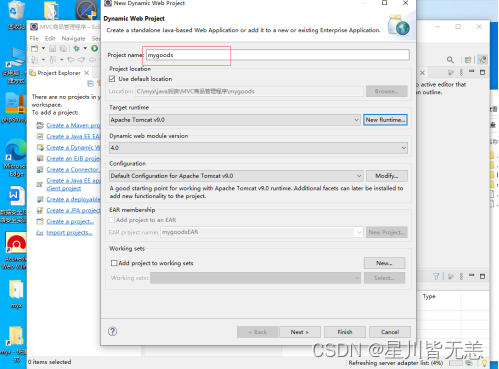
2.创建项目mygoods,引入JAR包
新建Dynamic web project
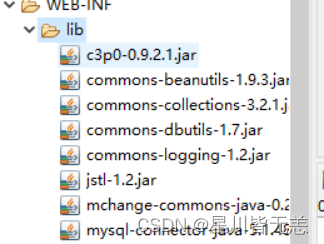
将项目所需JAR包导入到项目的WEB-INF/lib文件夹下。
3.配置c3p0-config.xml文件
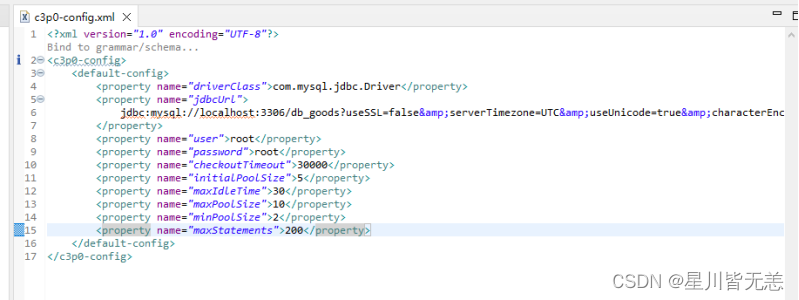
将JAR包导入到项目中并发布到类路径后,在src根目录下新建c3p0-config.xml文件,用于配置数据库连接参数。我的mysql数据库账号和密码都是root.
<?xml version="1.0" encoding="UTF-8"?>
<c3p0-config>
<default-config>
<property name="driverClass">com.mysql.jdbc.Driver</property>
<property name="jdbcUrl">
jdbc:mysql://localhost:3306/db_goods?useSSL=false&serverTimezone=UTC&useUnicode=true&characterEncoding=utf-8
</property>
<property name="user">root</property>
<property name="password">root</property>
<property name="checkoutTimeout">30000</property>
<property name="initialPoolSize">5</property>
<property name="maxIdleTime">30</property>
<property name="maxPoolSize">10</property>
<property name="minPoolSize">2</property>
<property name="maxStatements">200</property>
</default-config>
</c3p0-config>
4.编写DBUtils工具类
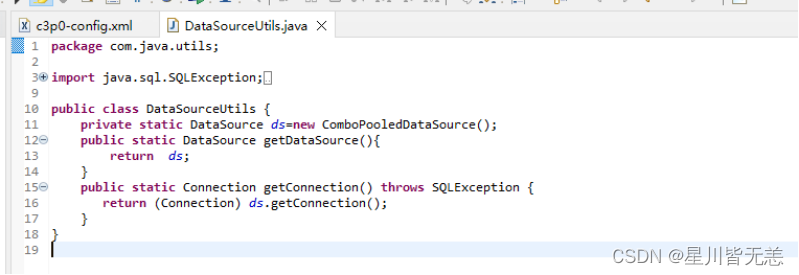
在src下创建一个名称为utils的包,在该包下新建DataSourceUtils类,用于获取数据源和数据库连接。
package com.java.utils;import java.sql.SQLException;import javax.sql.DataSource;import com.mchange.v2.c3p0.ComboPooledDataSource;
import com.mysql.jdbc.Connection;public class DataSourceUtils {private static DataSource ds=new ComboPooledDataSource();public static DataSource getDataSource(){return  ds;}public static Connection getConnection() throws SQLException {return (Connection) ds.getConnection();}
}
商品管理模块
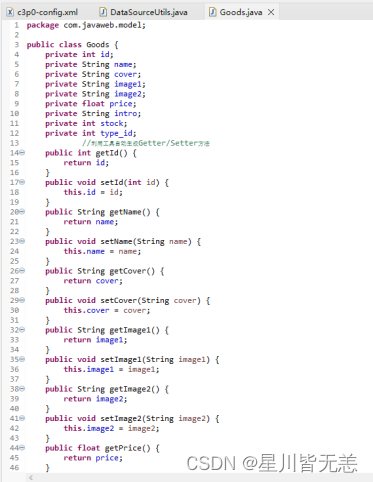
1.创建Goods.java的JavaBean类
//创建Goods.java的JavaBean类
package com.javaweb.model;public class Goods {
private int id;
private String name;
private String cover;
private String image1;
private String image2;
private float price;
private String intro;
private int stock;
private int type_id;
//利用工具自动生成Getter/Setter方法
public int getId() {
return id;
}
public void setId(int id) {
this.id = id;
}
public String getName() {
return name;
}
public void setName(String name) {
this.name = name;
}
public String getCover() {
return cover;
}
public void setCover(String cover) {
this.cover = cover;
}
public String getImage1() {
return image1;
}
public void setImage1(String image1) {
this.image1 = image1;
}
public String getImage2() {
return image2;
}
public void setImage2(String image2) {
this.image2 = image2;
}
public float getPrice() {
return price;
}
public void setPrice(float price) {
this.price = price;
}
public String getIntro() {
return intro;
}
public void setIntro(String intro) {
this.intro = intro;
}
public int getStock() {
return stock;
}
public void setStock(int stock) {
this.stock = stock;
}
public int getType_id() {
return type_id;
}
public void setType_id(int type_id) {
this.type_id = type_id;
}
}
2.创建GoodsDao.java类
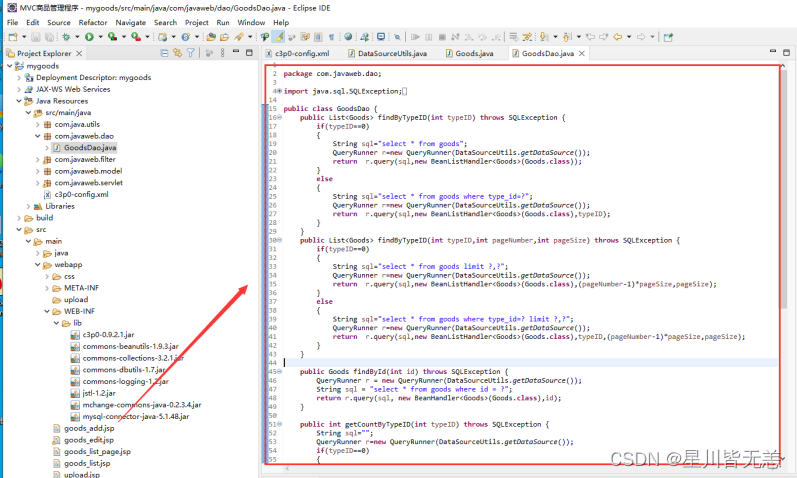
package com.javaweb.dao;
import java.sql.SQLException;
import java.util.List;
import org.apache.commons.dbutils.QueryRunner;
import org.apache.commons.dbutils.handlers.BeanHandler;
import org.apache.commons.dbutils.handlers.BeanListHandler;
import org.apache.commons.dbutils.handlers.ScalarHandler;
import com.java.utils.DataSourceUtils;
import com.javaweb.model.Goods;
public class GoodsDao {public List<Goods> findByTypeID(int typeID) throws SQLException {if(typeID==0){String sql="select * from goods";QueryRunner r=new QueryRunner(DataSourceUtils.getDataSource());return  r.query(sql,new BeanListHandler<Goods>(Goods.class));}else{String sql="select * from goods where type_id=?";QueryRunner r=new QueryRunner(DataSourceUtils.getDataSource());return  r.query(sql,new BeanListHandler<Goods>(Goods.class),typeID);}}    public List<Goods> findByTypeID(int typeID,int pageNumber,int pageSize) throws SQLException {if(typeID==0){String sql="select * from goods limit ?,?";QueryRunner r=new QueryRunner(DataSourceUtils.getDataSource());return  r.query(sql,new BeanListHandler<Goods>(Goods.class),(pageNumber-1)*pageSize,pageSize);}else{String sql="select * from goods where type_id=? limit ?,?";QueryRunner r=new QueryRunner(DataSourceUtils.getDataSource());return  r.query(sql,new BeanListHandler<Goods>(Goods.class),typeID,(pageNumber-1)*pageSize,pageSize);}}   public Goods findById(int id) throws SQLException {QueryRunner r = new QueryRunner(DataSourceUtils.getDataSource());String sql = "select * from goods where id = ?";return r.query(sql, new BeanHandler<Goods>(Goods.class),id);}public int getCountByTypeID(int typeID) throws SQLException {String sql="";QueryRunner r=new QueryRunner(DataSourceUtils.getDataSource());if(typeID==0){sql="select count(*) from goods";return r.query(sql,new ScalarHandler<Long>()).intValue();}else{sql="select count(*) from goods where type_id=?";return r.query(sql,new ScalarHandler<Long>(),typeID).intValue();}}public void insert(Goods g) throws SQLException {QueryRunner r = new QueryRunner(DataSourceUtils.getDataSource());String sql = "insert into goods(name,cover,image1,image2,price,intro,stock,type_id) values(?,?,?,?,?,?,?,?)";r.update(sql,g.getName(),g.getCover(),g.getImage1(),g.getImage2(),g.getPrice(),g.getIntro(),g.getStock(),g.getType_id());}public void update(Goods g) throws SQLException {QueryRunner r = new QueryRunner(DataSourceUtils.getDataSource());String sql = "update goods set name=?,cover=?,image1=?,image2=?,price=?,intro=?,stock=?,type_id=? where id=?";r.update(sql,g.getName(),g.getCover(),g.getImage1(),g.getImage2(),g.getPrice(),g.getIntro(),g.getStock(),g.getType_id(),g.getId());}public void delete(int id) throws SQLException {QueryRunner r = new QueryRunner(DataSourceUtils.getDataSource());String sql = "delete from goods where id = ?";r.update(sql,id);}}
3.创建goods_add.jsp表单页
<%@ page language="java" contentType="text/html; charset=UTF-8"
pageEncoding="UTF-8"%>
<!DOCTYPE html>
<html>
<head>
<meta charset="UTF-8">
<title>Insert title here</title>
<link rel="stylesheet" href="css/bootstrap.css" />
</head>
<body>
<div class="container-fluid">
<h3>添加商品页面</h3>
<br><br>
<form class="form-horizontal" action="${pageContext.request.contextPath}/GoodsServlet?m=add" method="post">
<div class="form-group">
<label for="input_name" class="col-sm-1 control-label">名称</label>
<div class="col-sm-6">
<input type="text" class="form-control" id="input_name" name="name" required="required">
</div>
</div>
<div class="form-group">
<label for="input_name" class="col-sm-1 control-label">价格</label>
<div class="col-sm-6">
<input type="text" class="form-control" id="input_name" name="price" >
</div>
</div>
<div class="form-group">
<label for="input_name" class="col-sm-1 control-label">介绍</label>
<div class="col-sm-6">
<input type="text" class="form-control" id="input_name" name="intro" >
</div>
</div>
<div class="form-group">
<label for="input_name" class="col-sm-1 control-label">库存</label>
<div class="col-sm-6">
<input type="text" class="form-control" id="input_name" name="stock" >
</div>
</div>
<div class="form-group">
<label for="input_file" class="col-sm-1 control-label">封面图片</label>
<div class="col-sm-6">
<input type="text" name="cover" id="input_file" required="required">推荐尺寸: 500 * 500
</div>
</div>
<div class="form-group">
<label for="input_file" class="col-sm-1 control-label">详情图片1</label>
<div class="col-sm-6">
<input type="text" name="image1" id="input_file" required="required">推荐尺寸: 500 * 500
</div>
</div>
<div class="form-group">
<label for="input_file" class="col-sm-1 control-label">详情图片2</label>
<div class="col-sm-6">
<input type="text" name="image2" id="input_file" required="required">推荐尺寸: 500 * 500
</div>
</div>
<div class="form-group">
<label for="select_topic" class="col-sm-1 control-label">类目</label>
<div class="col-sm-6">
<select class="form-control" id="select_topic" name="type_id">
<option value="1">食品</option>
<option value="2">生活用品</option>
<option value="3">学习用品</option>
</select>
</div>
</div>
<div class="form-group">
<div class="col-sm-offset-1 col-sm-10">
<button type="submit" class="btn btn-success">提交保存</button>
</div>
</div>
</form>
</div>
</body>
</html>
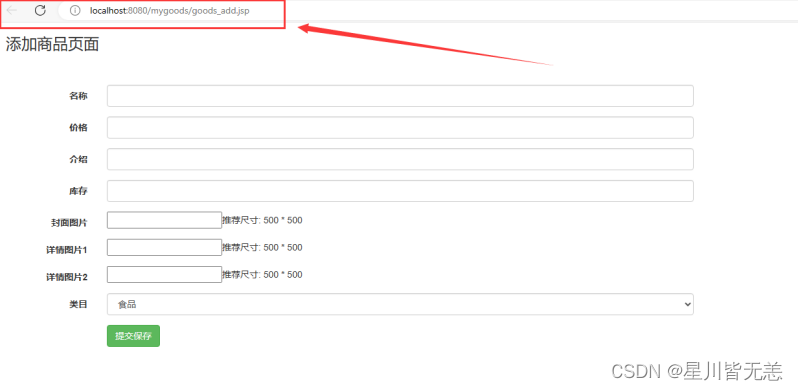
4.创建GoodServlet.java,根据请求参数m的值调用增删改查方法
@WebServlet("/GoodsServlet")
public class GoodsServlet extends HttpServlet {GoodsDao goodsDao=new GoodsDao();protected void service(HttpServletRequest request, HttpServletResponse response) throws ServletException, IOException {String m=request.getParameter("m");if(m.equals("add")) {add(request,response);}else if(m.equals("find")) {find(request,response);}else if(m.equals("update")) {update(request,response);}else if(m.equals("delete")) {delete(request,response);}else if(m.equals("findById")) {findById(request,response);}}
}
5.完善GoodServlet的商品增加add方法
private void add(HttpServletRequest request, HttpServletResponse response) {
Goods goods = new Goods();
try {
BeanUtils.populate(goods,request.getParameterMap());
goodsDao.insert(goods);
response.sendRedirect("GoodsServlet?m=find");
} catch (Exception e) {
e.printStackTrace();
}

6.测试商品保存
运行tomact服务器,添加一条商品信息:
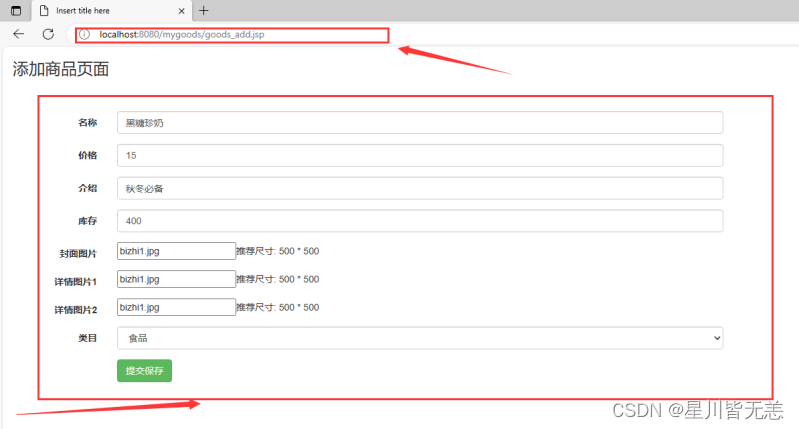
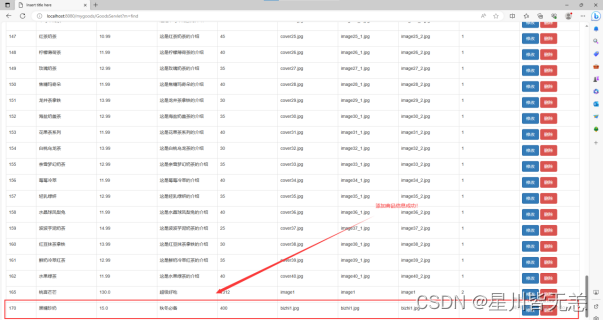
提交保存,再查看所有商品信息页,发现添加商品测试成功!
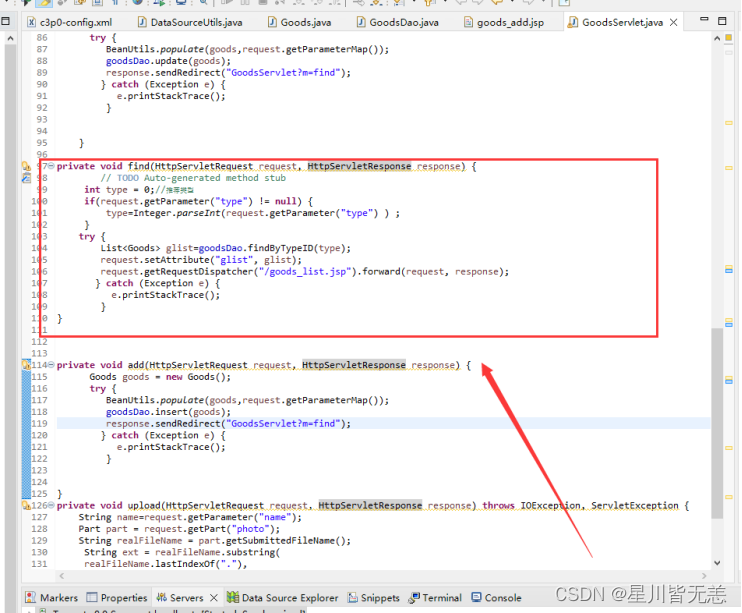
7.完善GoodServlet的商品查询find方法。
private void find(HttpServletRequest request, HttpServletResponse response) {
// TODO Auto-generated method stub
int type = 0;//推荐类型
if(request.getParameter("type") != null) {
type=Integer.parseInt(request.getParameter("type") ) ;
}
try {
List<Goods> glist=goodsDao.findByTypeID(type);
request.setAttribute("glist", glist);
request.getRequestDispatcher("/goods_list.jsp").forward(request, response);
} catch (Exception e) {
e.printStackTrace();
}
}
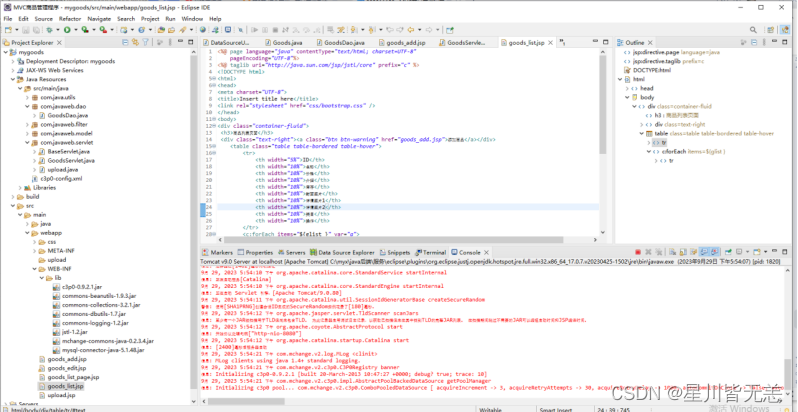
8.创建商品列表页面goods_list.jsp
<%@ page language="java" contentType="text/html; charset=UTF-8"
pageEncoding="UTF-8"%>
<%@ taglib uri="http://java.sun.com/jsp/jstl/core" prefix="c" %>
<!DOCTYPE html>
<html>
<head>
<meta charset="UTF-8">
<title>Insert title here</title>
<link rel="stylesheet" href="css/bootstrap.css" />
</head>
<body>
<div class="container-fluid">
<h3>商品列表页面</h3>
<div class="text-right"><a class="btn btn-warning" href="goods_add.jsp">添加商品</a></div>
<table class="table table-bordered table-hover">
<tr>
<th width="5%">ID</th>
<th width="10%">名称</th>
<th width="10%">价格</th>
<th width="10%">介绍</th>
<th width="10%">库存</th>
<th width="10%">封面图片</th>
<th width="10%">详情图片1</th>
<th width="10%">详情图片2</th>
<th width="10%">类目</th>
<th width="10%">操作</th>
</tr>
<c:forEach items="${glist }" var="g">
<tr>
<td><p>${g.id }</p></td>
<td><p>${g.name }</p></td>
<td><p>${g.price }</p></td>
<td><p>${g.intro }</p></td>
<td><p>${g.stock }</p></td>
<td><p>${g.cover }</p></td>
<td><p>${g.image1 }</p></td>
<td><p>${g.image2}</p></td>
<td><p>${g.type_id }</p></td>
<td>
<a class="btn btn-primary" href="${pageContext.request.contextPath}/GoodsServlet?m=findById&id=${g.id}">修改</a>
<a class="btn btn-danger" href="${pageContext.request.contextPath}/GoodsServlet?m=delete&id=${g.id}">删除</a>
</td>
</tr>
</c:forEach>
</table>
</div>
</body>
</html>
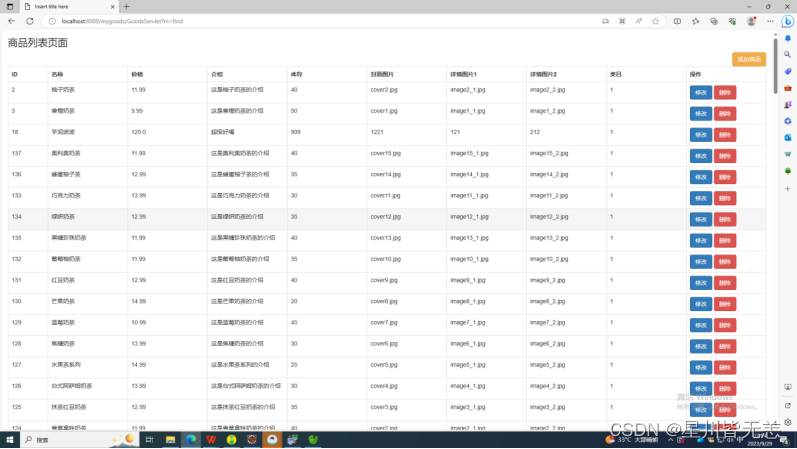
9.测试商品查询全部
运行tomact服务,运行goods_list.jsp文件然后在网页find路由
http://localhost:8080/mygoods/GoodsServlet?m=find
查询商品全部信息。
10.完善GoodServlet的商品按ID查询findById方法
private void findById(HttpServletRequest request, HttpServletResponse response) {
int id=Integer.parseInt(request.getParameter("id"));
try {
Goods g= goodsDao.findById(id);
request.setAttribute("g", g);
request.getRequestDispatcher("/goods_edit.jsp").forward(request, response);
} catch (Exception e) {
e.printStackTrace();
}
}


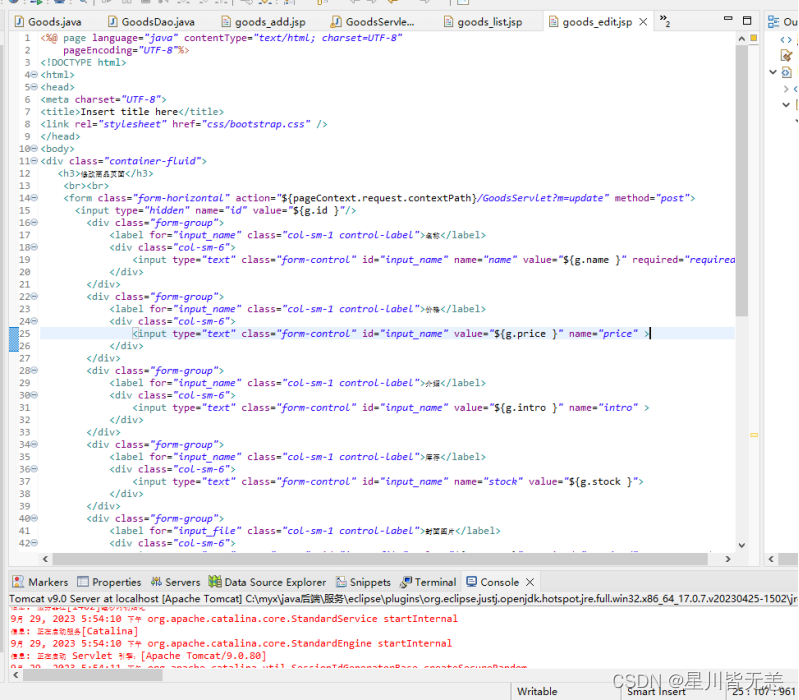
11.创建商品列表页面goods_edit.jsp
<%@ page language="java" contentType="text/html; charset=UTF-8"
pageEncoding="UTF-8"%>
<!DOCTYPE html>
<html>
<head>
<meta charset="UTF-8">
<title>Insert title here</title>
<link rel="stylesheet" href="css/bootstrap.css" />
</head>
<body>
<div class="container-fluid">
<h3>修改商品页面</h3>
<br><br>
<form class="form-horizontal" action="${pageContext.request.contextPath}/GoodsServlet?m=update" method="post">
<input type="hidden" name="id" value="${g.id }"/>
<div class="form-group">
<label for="input_name" class="col-sm-1 control-label">名称</label>
<div class="col-sm-6">
<input type="text" class="form-control" id="input_name" name="name" value="${g.name }" required="required">
</div>
</div>
<div class="form-group">
<label for="input_name" class="col-sm-1 control-label">价格</label>
<div class="col-sm-6">
<input type="text" class="form-control" id="input_name" value="${g.price }" name="price" >
</div>
</div>
<div class="form-group">
<label for="input_name" class="col-sm-1 control-label">介绍</label>
<div class="col-sm-6">
<input type="text" class="form-control" id="input_name" value="${g.intro }" name="intro" >
</div>
</div>
<div class="form-group">
<label for="input_name" class="col-sm-1 control-label">库存</label>
<div class="col-sm-6">
<input type="text" class="form-control" id="input_name" name="stock" value="${g.stock }">
</div>
</div>
<div class="form-group">
<label for="input_file" class="col-sm-1 control-label">封面图片</label>
<div class="col-sm-6">
<input type="text" name="cover" id="input_file" value="${g.cover }" required="required">推荐尺寸: 500 * 500
</div>
</div>
<div class="form-group">
<label for="input_file" class="col-sm-1 control-label">详情图片1</label>
<div class="col-sm-6">
<input type="text" name="image1" id="input_file" value="${g.image1 }" required="required">推荐尺寸: 500 * 500
</div>
</div>
<div class="form-group">
<label for="input_file" class="col-sm-1 control-label">详情图片2</label>
<div class="col-sm-6">
<input type="text" name="image2" id="input_file" value="${g.image2 }" required="required">推荐尺寸: 500 * 500
</div>
</div>
<div class="form-group">
<label for="select_topic" class="col-sm-1 control-label">类目</label>
<div class="col-sm-6">
<select class="form-control" id="select_topic" value="${g.type_id }" name="type_id">
<option value="1" ${g.type_id==1?'selected="selected"':''}>食品</option>
<option value="2" ${g.type_id==2?'selected="selected"':''}>生活用品</option>
<option value="3" ${g.type_id==3?'selected="selected"':''}>学习用品</option>
</select>
</div>
</div>
<div class="form-group">
<div class="col-sm-offset-1 col-sm-10">
<button type="submit" class="btn btn-success">提交保存</button>
</div>
</div>
</form>
</div>
</body>
</html>
12.测试商品更新
启动tomact服务器,
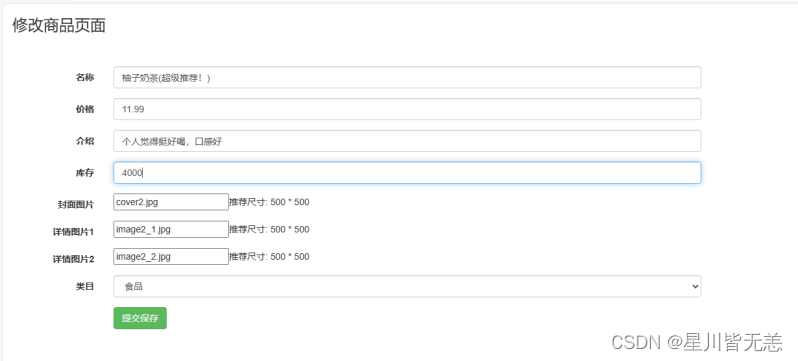
http://localhost:8080/mygoods/GoodsServlet?m=findById&id=2
对id为2的商品进行修改。
修改之前的数据:

进行修改:
修改之后的数据:

13.完善GoodServlet的商品删除delete方法
private void delete(HttpServletRequest request, HttpServletResponse response) {
// TODO Auto-generated method stub
int id=Integer.parseInt(request.getParameter("id"));
try {
goodsDao.delete(id);
response.sendRedirect("GoodsServlet?m=find");
} catch (Exception e) {
e.printStackTrace();
}
}

14.测试商品删除
我们在所有商品页面把id为168和169的商品删除:
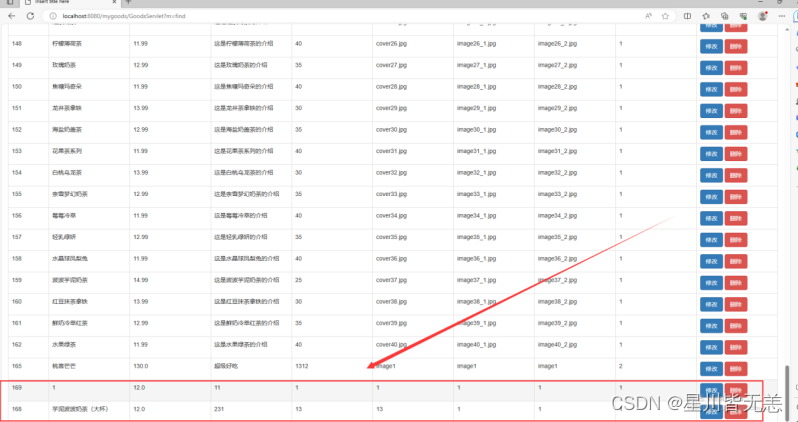
点击删除,成功调用delete方法删除两条记录:
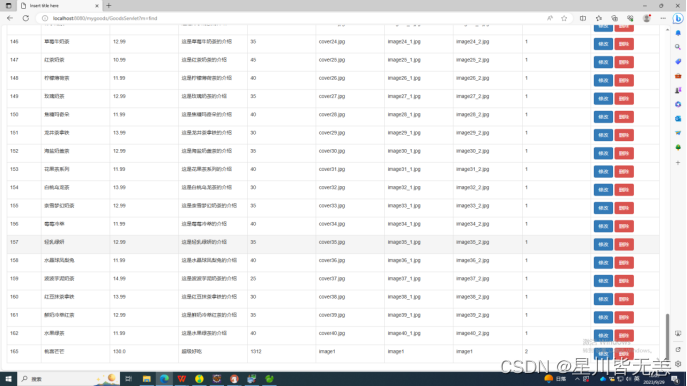
15.创建编码过滤器,解决表单中文乱码
为防止项目中请求和响应出现乱码情况,在src下创建一个名称为filter的包,在该包下新建一个过滤器EncodeFilter类来统一全站的编码,防止出现乱码的情况。
package com.javaweb.filter;import java.io.IOException;
import javax.servlet.Filter;
import javax.servlet.FilterChain;
import javax.servlet.FilterConfig;
import javax.servlet.ServletException;
import javax.servlet.ServletRequest;
import javax.servlet.ServletResponse;
import javax.servlet.annotation.WebFilter;
import javax.servlet.http.HttpFilter;/*** Servlet Filter implementation class EncodeFilter*/
@WebFilter("/*")
public class EncodeFilter extends HttpFilter implements Filter {/*** @see Filter#destroy()*/public void destroy() {// TODO Auto-generated method stub}/*** @see Filter#doFilter(ServletRequest, ServletResponse, FilterChain)*/public void doFilter(ServletRequest request, ServletResponse response, FilterChain chain) throws IOException, ServletException {request.setCharacterEncoding("utf-8");chain.doFilter(request, response);}/*** @see Filter#init(FilterConfig)*/public void init(FilterConfig fConfig) throws ServletException {// TODO Auto-generated method stub}}

Servlet代码重构BaseServlet
1.编写BaseServlet,实现Java动态方法调用
package com.javaweb.servlet;import java.io.IOException;
import java.lang.reflect.Method;import javax.servlet.ServletException;
import javax.servlet.http.HttpServlet;
import javax.servlet.http.HttpServletRequest;
import javax.servlet.http.HttpServletResponse;public class BaseServlet extends HttpServlet {@Overrideprotected void service(HttpServletRequest req, HttpServletResponse resp) throws ServletException, IOException {String m = req.getParameter("m");Class  clazz = this.getClass();try {Method method = clazz.getDeclaredMethod(m, HttpServletRequest.class, HttpServletResponse.class);method.setAccessible(true);method.invoke(this,req,resp);} catch (Exception e) {e.printStackTrace();} }}
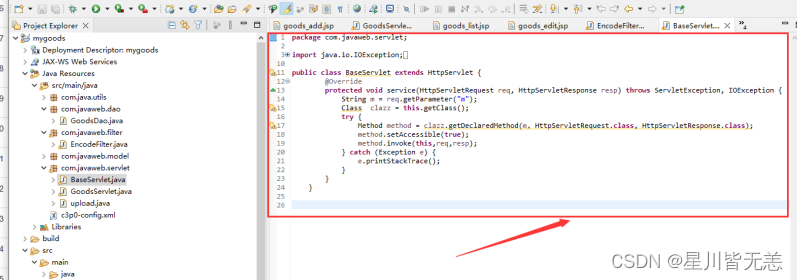
2.修改GoodServlet继承BaseServlet
将之前的HttpServlet修改为BaseServlet
public class GoodsServlet extends BaseServlet {
private static final long serialVersionUID = 1L;
GoodsDao goodsDao=new GoodsDao();

3.测试功能是否正常
服务器启动正常,测试正常可以正常增删改查
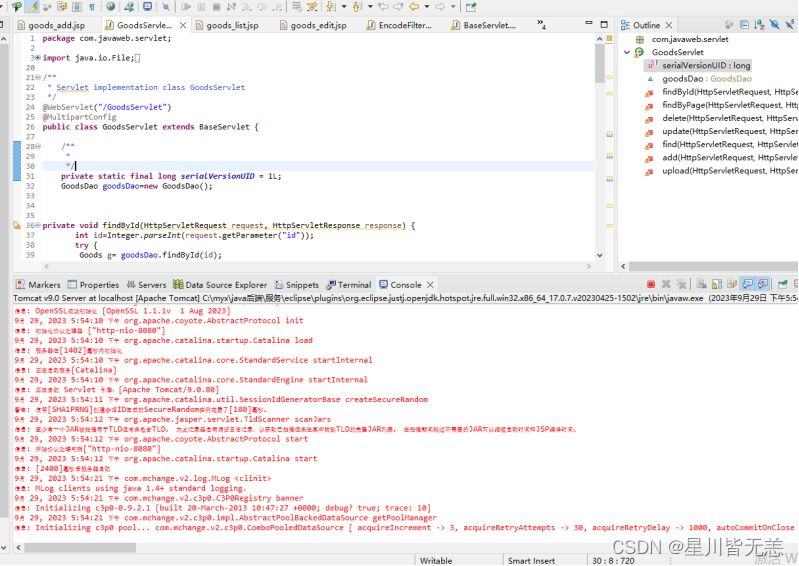
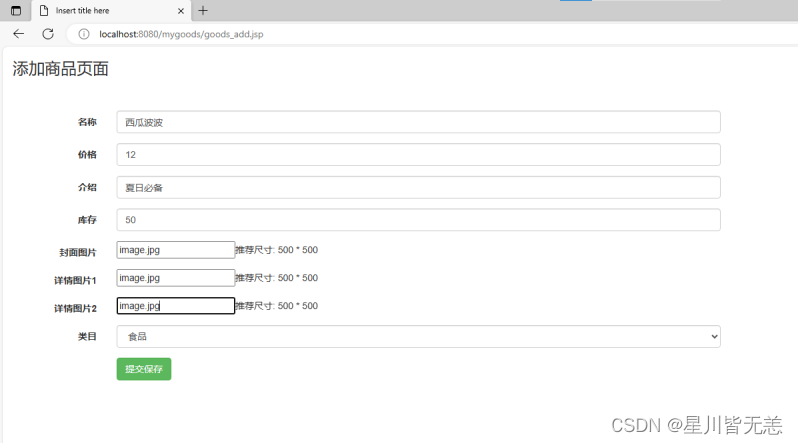
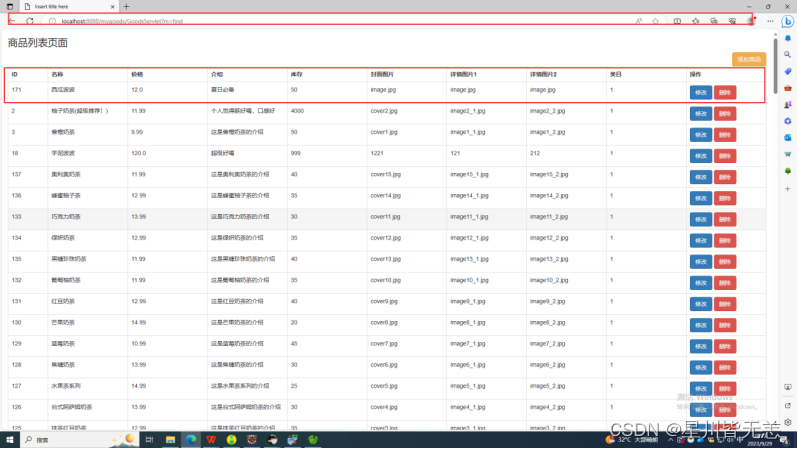
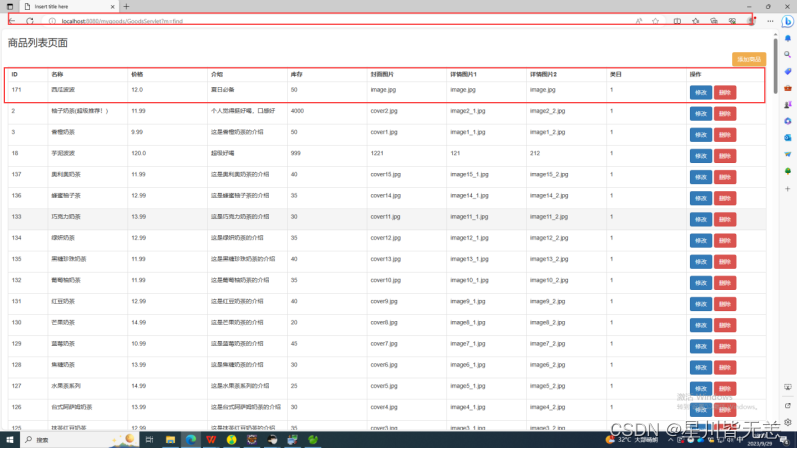
增加一条“西瓜波波”商品信息:
我们修改西瓜波波价格从12改成15:
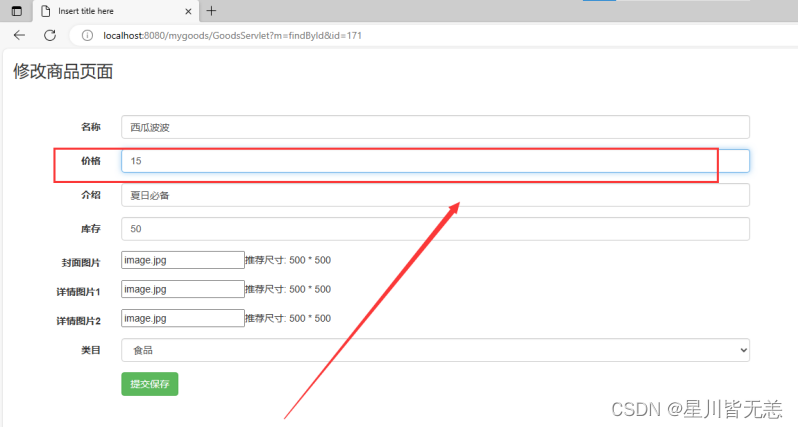
修改成功!

删除西瓜波波这条商品信息,删除成功,在所有商品信息页查找不到此商品!
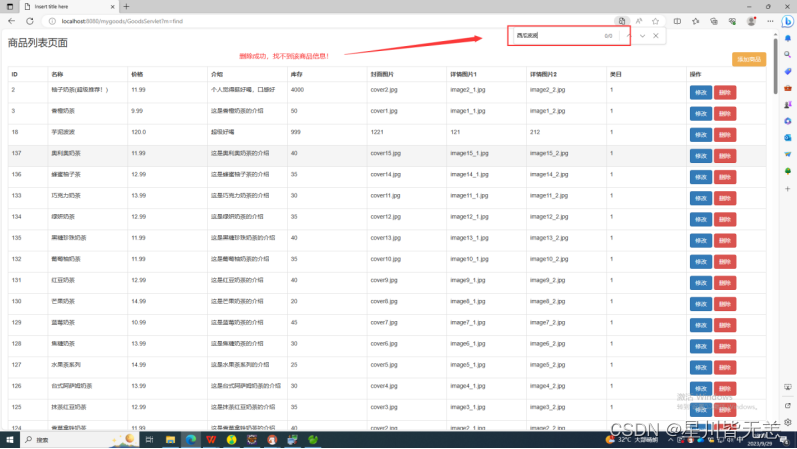
通过测试,所有功能均正常!
文件上传
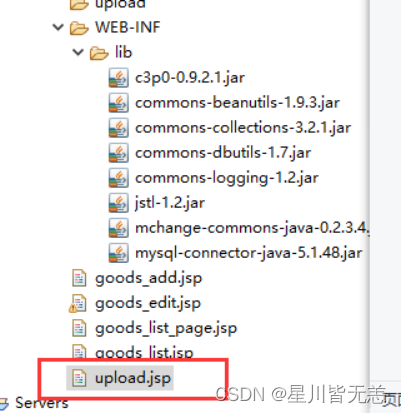
1.创建上传表单页
新建upload.jsp上传表单页
2.编写上传upload方法
<%@ page language="java" contentType="text/html; charset=UTF-8"
pageEncoding="UTF-8"%>
<!DOCTYPE html>
<html>
<head>
<meta charset="UTF-8">
<title>Insert title here</title>
</head>
<body>
<form action="${pageContext.request.contextPath}/GoodsServlet?m=upload" method="post" enctype="multipart/form-data">
商品名称:<input type="text" name="name">
商品图片:<input type="file" name="photo">
<input type="submit" value="上传">
</form></body>
</html>

3.测试
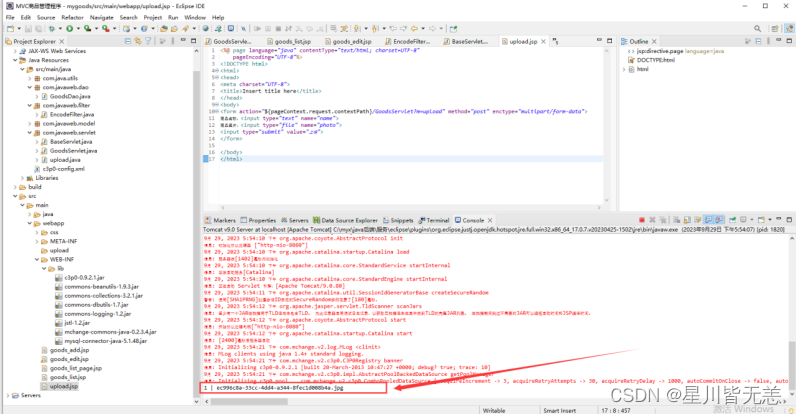
启动tomact服务器,运行upload.jsp文件开始进行文件上传

上传商品名称为1 ,上传图片名称为“图片.jpg”


点击上传,控制台信息显示:
1 | ec996c8a-33cc-4dd4-a344-8fec1d008b4a.jpg
文件上传成功!
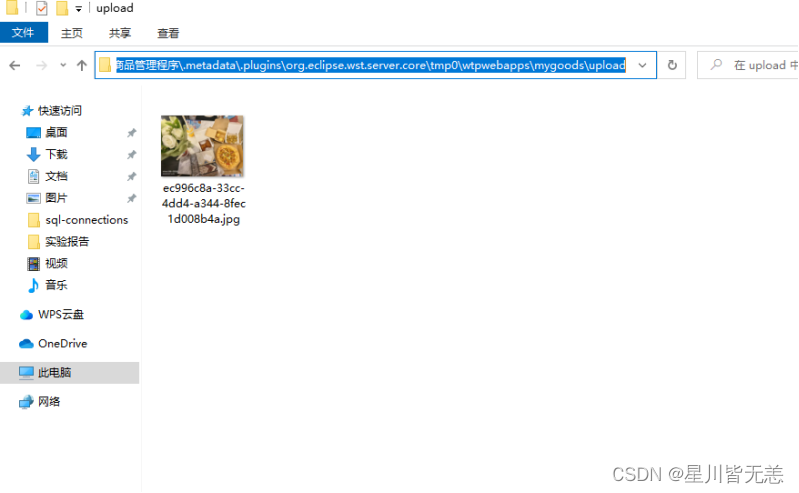
然后打开本地目录:
C:\myx\java后端\MVC商品管理程序.metadata.plugins\org.eclipse.wst.server.core\tmp0\wtpwebapps\mygoods\upload
成功发现我们在upload,jsp页面上传的文件:
希望各位能通过MVC商品管理程序认识MVC框架的重要性,它可以有效地分离业务逻辑和视图层,使得代码更加清晰易懂。


-支持向量机(SVM)的分类预测算法)
)


![[传智杯 #3 决赛] 课程](http://pic.xiahunao.cn/[传智杯 #3 决赛] 课程)


