原理图:
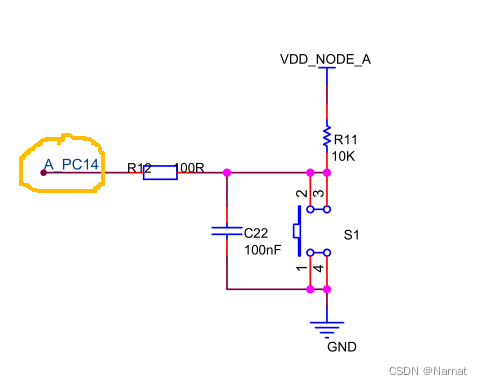
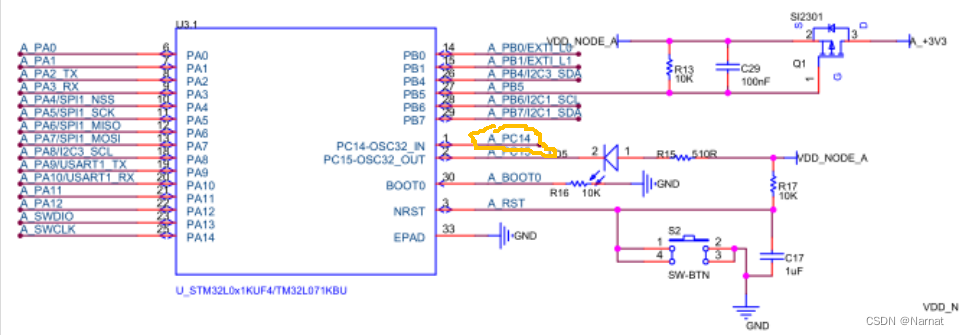
当按键S1按下PC14接GND,为低电平
CubMX配置:
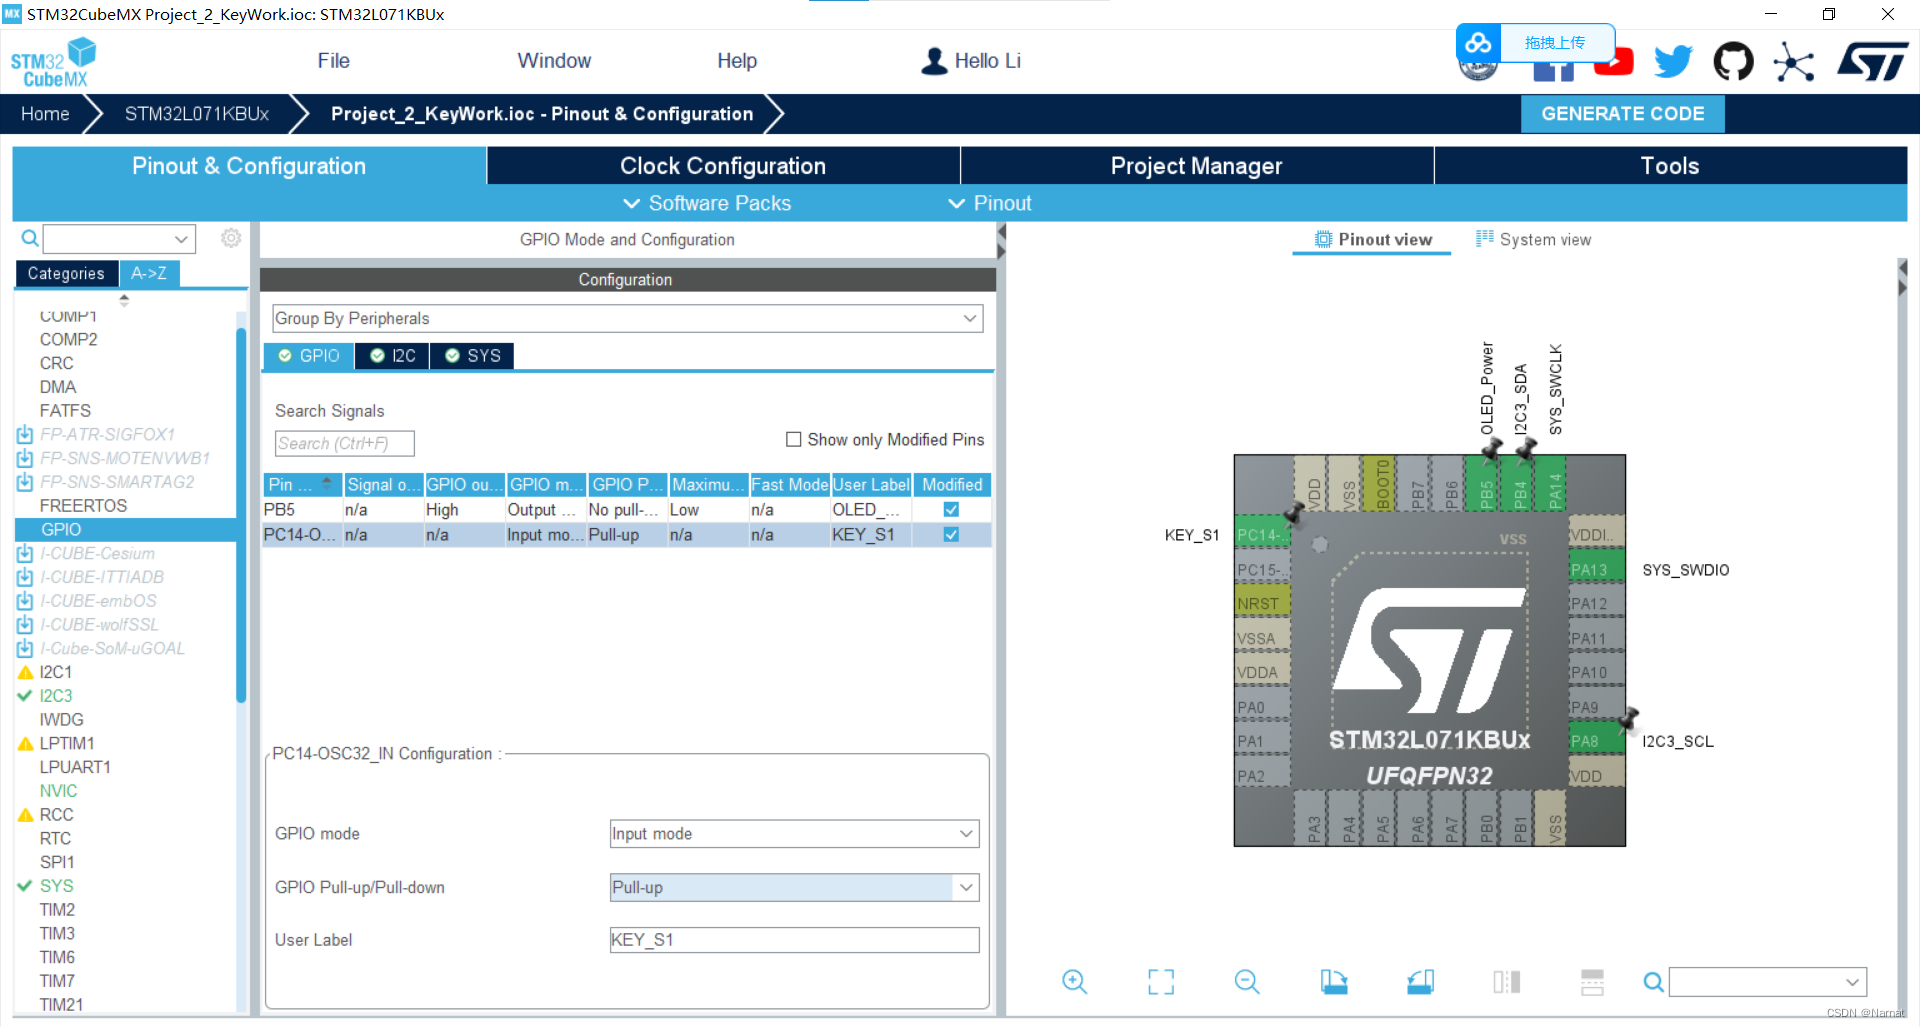
Keil配置:
main函数:
while (1){/* USER CODE END WHILE */OLED_ShowString(32, 0, "hello", 16);if(Function_KEY_S1Check() == 1){ OLED_ShowString(16, 2, "key:", 16);OLED_ShowString(48, 2, "1", 16);}else{OLED_ShowString(16, 2, "key:", 16);OLED_ShowString(48, 2, "0", 16);}/* USER CODE BEGIN 3 */}
Function.c和.h函数:
#include "Function.h"
#include "i2c.h"
#include "oled.h"void OLED_Write(unsigned char type, unsigned char data){unsigned char Write_Data[2];Write_Data[0] = type;Write_Data[1] = data;HAL_I2C_Master_Transmit(&hi2c3, 0x78, Write_Data, 2, 0xff);
}void Function_OledEnable(unsigned char ms){HAL_GPIO_WritePin(OLED_Power_GPIO_Port, OLED_Power_Pin, GPIO_PIN_RESET);HAL_Delay(ms);OLED_Init();
}uint8_t Function_KEY_S1Check(void){if(HAL_GPIO_ReadPin(KEY_S1_GPIO_Port, KEY_S1_Pin) == GPIO_PIN_RESET) return (uint8_t) 1;else return (uint8_t) 0;
}#ifndef __FUNCTION__
#define __FUNCTION__
#include <stdint.h>void OLED_Write(unsigned char type, unsigned char data);
void Function_OledEnable(unsigned char ms);
uint8_t Function_KEY_S1Check(void);
#endif
效果:
待更新…
拓展:
1.实验板GPIO引脚无论是上拉还是下拉都可以检测出外界输入的高电平还是低电平,这和模拟电路不一样模拟电路是1&0或1&1来判断,当模拟电路引脚默认电平为低即0,那么外界输入为1或者0它都不能判断,而实验板是通过输入电平是否能改变本引脚的电平大小来判断,外界输入电平导致本引脚电平变高,所以外界为高电平,外界输入导致本引脚变低外界为低电平
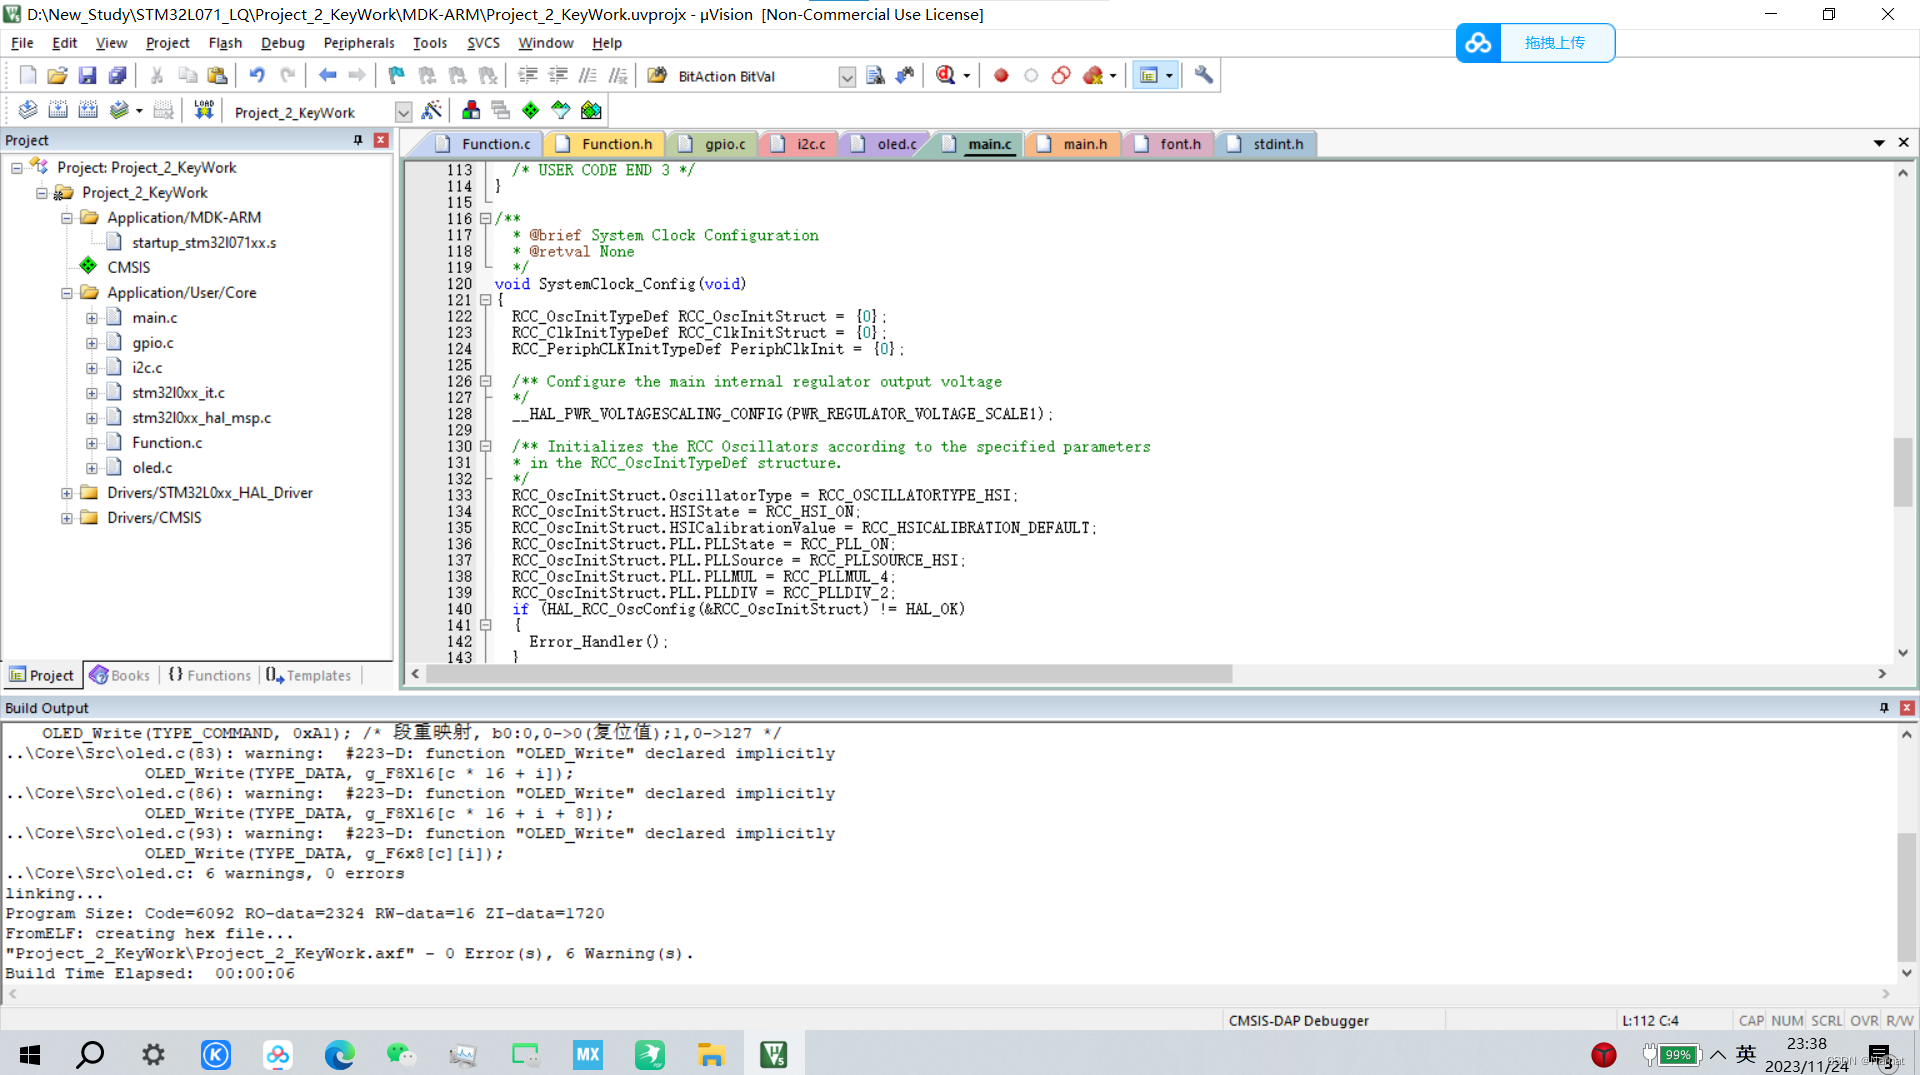
2.代码引用的头文件比较有意思,理论上通过头文件能将零散代码连在一起,个别报错还是能运行例如:
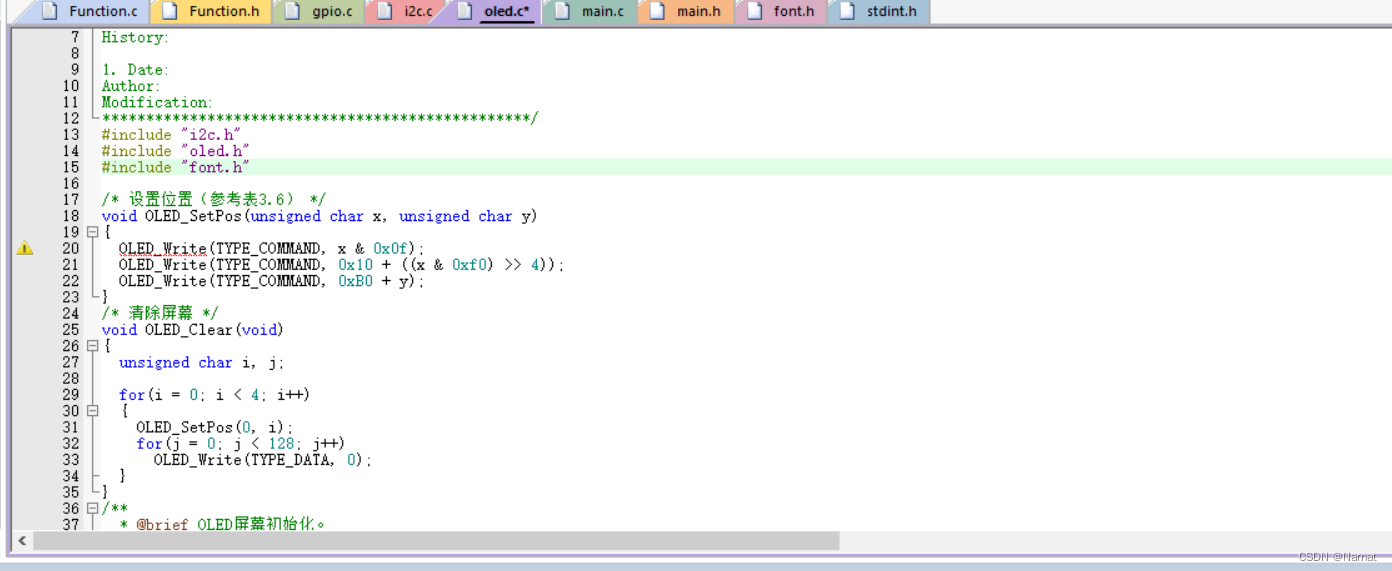
这里oled.c没有引用Function.h文件所以有个函数没有定义,报了红线
但是在main函数中这些代码通过头文件组合在一起了,能运行:
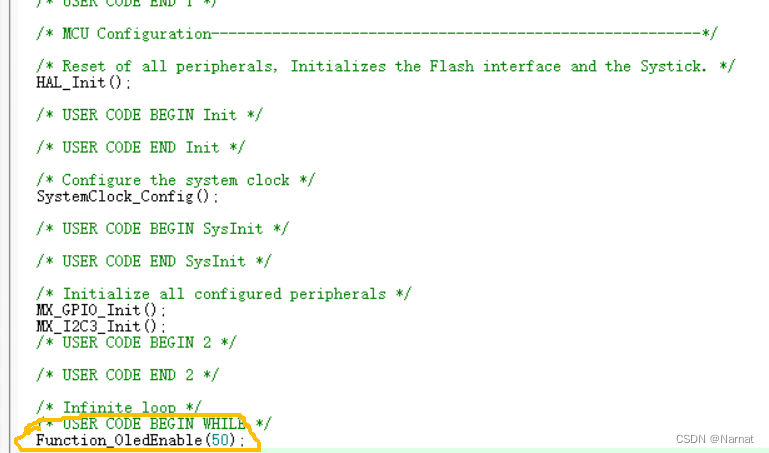
3.oled使能函数一定要放在i2c初始化函数后面,因为先将i2c初始化了才能传递信息,才能被oled接收,才能被显示:


定长掩码和变长掩码)


