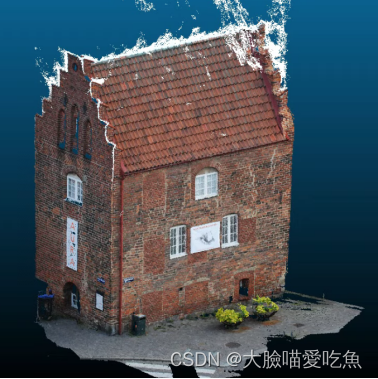
安装vcpkg过程需要翻墙!!!
github下载代码
git clone https://github.com/microsoft/vcpkg
git clone https://github.com/cdcseacave/VCG.git
git clone https://github.com/cdcseacave/openMVS.git src
安装vcpkg包
cd .\vcpkg
.\bootstrap-vcpkg.bat
vcpkg integrate install
vcpkg install zlib:x64-windows boost:x64-windows eigen3:x64-windows ceres:x64-windows opencv:x64-windows cgal:x64-windows glew:x64-windows glfw3:x64-windows
编译OpenMVS
mkdir .\build-mvs
cd .\build-mvs
cmake . ..\openMVS -G "Visual Studio 15 2017 Win64" -DCMAKE_TOOLCHAIN_FILE=..\vcpkg\scripts\buildsystems\vcpkg.cmake -DVCPKG_TARGET_TRIPLET=x64-windows -DVCG_ROOT="..\VCG" -DCMAKE_CUDA_ARCHITECTURES=75 -DCMAKE_CUDA_STANDARD=14
用cmake-gui编译OpenMVG
打开vs编译release版本
下载图片数据到文件夹images
防止CPU跑满系统崩溃,以下命令行增加了
start /WAIT /affinity 0x7f运行OpenMVG
mkdir .\mvgstart /WAIT /affinity 0x7f D:\OpenMVS\build-mvg\Windows-AMD64-Release\Release\openMVG_main_SfMInit_ImageListing.exe -i .\images\ -d D:\OpenMVS\openMVG\src\openMVG\exif\sensor_width_database\sensor_width_camera_database.txt -o .\mvg\matches -f 10160start /WAIT /affinity 0x7f D:\OpenMVS\build-mvg\Windows-AMD64-Release\Release\openMVG_main_ComputeFeatures.exe -i .\mvg\matches\sfm_data.json -o .\mvg\matchesstart /WAIT /affinity 0x7f D:\OpenMVS\build-mvg\Windows-AMD64-Release\Release\openMVG_main_PairGenerator.exe -i .\mvg\matches\sfm_data.json -o .\mvg\matches\pairs.binstart /WAIT /affinity 0x7f D:\OpenMVS\build-mvg\Windows-AMD64-Release\Release\openMVG_main_ComputeMatches.exe -i .\mvg\matches\sfm_data.json -p .\mvg\matches\pairs.bin -o .\mvg\matches\matches.putative.binstart /WAIT /affinity 0x7f D:\OpenMVS\build-mvg\Windows-AMD64-Release\Release\openMVG_main_GeometricFilter.exe -i .\mvg\matches\sfm_data.json -m .\mvg\matches\matches.putative.bin -g f -o .\mvg\matches\matches.f.binstart /WAIT /affinity 0x7f D:\OpenMVS\build-mvg\Windows-AMD64-Release\Release\openMVG_main_SfM.exe -s INCREMENTAL -i .\mvg\matches\sfm_data.json -M .\mvg\matches\matches.f.bin -o .\mvg\outputstart /WAIT /affinity 0x7f D:\OpenMVS\build-mvg\Windows-AMD64-Release\Release\openMVG_main_ComputeSfM_DataColor.exe -i .\mvg\output\sfm_data.bin -o .\mvg\output\sfm_data_colorized.plymkdir .\mvs
start /WAIT /affinity 0x7f D:\OpenMVS\build-mvg\Windows-AMD64-Release\Release\openMVG_main_openMVG2openMVS.exe -i .\mvg\output\sfm_data.bin -d .\mvs\undistortedImages -o .\mvs\scene.mvs
如果运行自己图片,第一行添加 -f 10000,计算方式见下面公式
start /WAIT /affinity 0x7f D:\OpenMVS\build-mvg\Windows-AMD64-Release\Release\openMVG_main_SfMInit_ImageListing.exe -i .\images\ -d D:\OpenMVS\openMVG\src\openMVG\exif\sensor_width_database\sensor_width_camera_database.txt -o .\mvg\matches -f 10160
openMVG documentation! — openMVG library
运行OpenMVS
start /WAIT /affinity 0x7f D:\OpenMVS\build-mvs\bin\vc15\x64\Release\DensifyPointCloud.exe -i ..\mvs\scene.mvs -w .\mvsstart /WAIT /affinity 0x7f D:\OpenMVS\build-mvs\bin\vc15\x64\Release\ReconstructMesh.exe -i ..\mvs\scene_dense.mvs -w .\mvsstart /WAIT /affinity 0x7f D:\OpenMVS\build-mvs\bin\vc15\x64\Release\RefineMesh.exe -i ..\mvs\scene_dense_mesh.mvs -w .\mvsstart /WAIT /affinity 0x7f D:\OpenMVS\build-mvs\bin\vc15\x64\Release\TextureMesh.exe -i ..\mvs\scene_dense_mesh.mvs -w .\mvs查看结果,也可以用cloudcompare
D:\OpenMVS\build-mvs\bin\vc15\x64\Release\Viewer.exe -i .\mvs\scene_dense_mesh_texture.mvs


)


))


)
————创建、使用、备份、相关资料)

)