1. pip 安装

2. django 指令
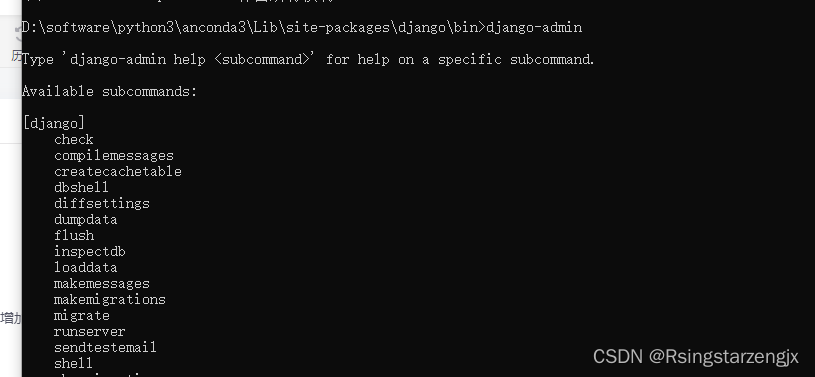
D:\software\python3\anconda3\Lib\site-packages\django\bin>django-adminType 'django-admin help <subcommand>' for help on a specific subcommand.Available subcommands:[django]checkcompilemessagescreatecachetabledbshelldiffsettingsdumpdataflushinspectdbloaddatamakemessagesmakemigrationsmigraterunserversendtestemailshellshowmigrationssqlflushsqlmigratesqlsequenceresetsquashmigrationsstartappstartprojecttesttestserver
Note that only Django core commands are listed as settings are not properly configured (error: Requested setting INSTALLED_APPS, but settings are not configured. You must either define the environment variable DJANGO_SETTINGS_MODULE or call settings.configure() before accessing settings.).
3.创建项目
D:\software\python3\anconda3\Lib\site-packages\django\bin>django-admin  startproject guest
CommandError: [WinError 5] 拒绝访问。: 'D:\\software\\python3\\anconda3\\Lib\\site-packages\\django\\bin\\guest
python - Django creating new project - access is denied - Stack Overflow
问题解决 ;
选择其他路径创建,不要再 'D:\\software\\python3\\anconda3\\Lib\\site-packages\\django\\bin下执行命令

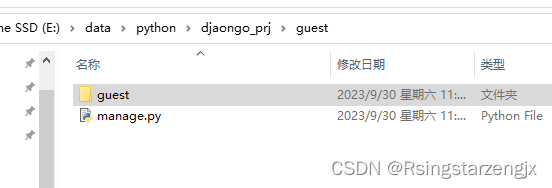

4 目录结构 :
 查看 manange 提供的命令
E:\data\python\djaongo_prj>cd guestE:\data\python\djaongo_prj\guest> python manage.pyType 'manage.py help <subcommand>' for help on a specific subcommand.Available subcommands:[auth]changepasswordcreatesuperuser[contenttypes]remove_stale_contenttypes[django]checkcompilemessagescreatecachetabledbshelldiffsettingsdumpdataflushinspectdbloaddatamakemessagesmakemigrationsmigratesendtestemailshellshowmigrationssqlflushsqlmigratesqlsequenceresetsquashmigrationsstartappstartprojecttesttestserver[sessions]clearsessions[staticfiles]collectstaticfindstaticrunserverE:\data\python\djaongo_prj\guest>官方命令文档 : django-admin and manage.py | Django documentation | Django
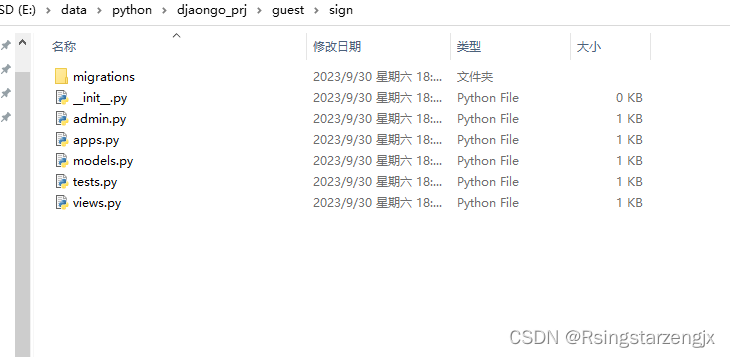
5.创建应用 sign
E:\data\python\djaongo_prj\guest>python manage.py startapp sign

运行 :
python manager.py runserver
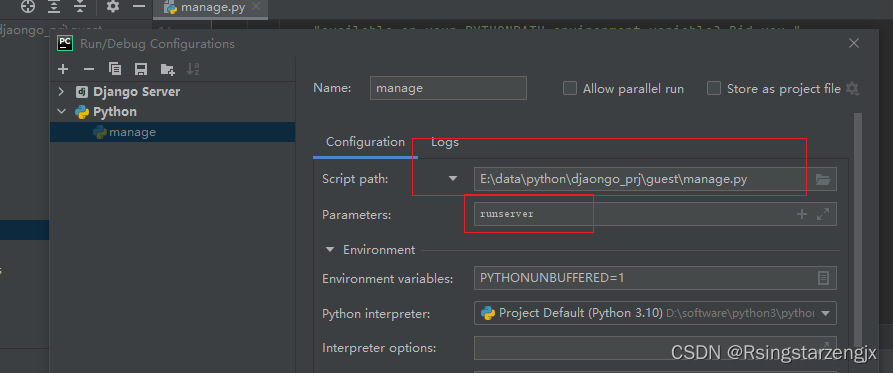

http://127.0.0.1:8000/
如果运行失败可能出现端口占用 : python manager.py runserver 127.0.0.1:8001 运行
127.0.0.1 表示本机的IP地址 8001: 是端口
guest/settings.py 添加项目 sign
INSTALLED_APPS = ['django.contrib.admin','django.contrib.auth','django.contrib.contenttypes','django.contrib.sessions','django.contrib.messages','django.contrib.staticfiles','sign'
]
6显示 Hello Django!
guest/urls.py
url(r'^index/$', views.index), # 添加 index 、路径配置
"""guest URL ConfigurationThe `urlpatterns` list routes URLs to views. For more information please see:https://docs.djangoproject.com/en/2.2/topics/http/urls/
Examples:
Function views1. Add an import:  from my_app import views2. Add a URL to urlpatterns:  path('', views.home, name='home')
Class-based views1. Add an import:  from other_app.views import Home2. Add a URL to urlpatterns:  path('', Home.as_view(), name='home')
Including another URLconf1. Import the include() function: from django.urls import include, path2. Add a URL to urlpatterns:  path('blog/', include('blog.urls'))
"""
from django.conf.urls import url
from django.contrib import admin
from django.urls import path
from sign import viewsurlpatterns = [url(r'^admin/', admin.site.urls),url(r'^index/$', views.index),  # 添加 index 、路径配置
]
sign/views.py
from django.shortcuts import render# Create your views here.
from django.http  import  HttpResponse# 定义inex 函数,通过HttpResponse 类向客户端返回字符创
def index(request):return HttpResponse("Hello Django!")
7.使用模版
创建 templates (文件名称不要随便改django 默认从这个路径下找html)
sign/templates/index.html
<!DOCTYPE html>
<html lang="en">
<head><meta charset="UTF-8"><title>Title</title><h1> Hello Django!<h1>
</head>
<body></body>
</html>
8.修改 sign/views.py
return render(request,"index.html") 使用 render函数
from django.shortcuts import render# Create your views here.
from django.http  import  HttpResponse# 定义inex 函数,通过HttpResponse 类向客户端返回字符创
def index(request):#return HttpResponse("Hello Django!")  # 使用Django 的render函数return  render(request,"index.html")
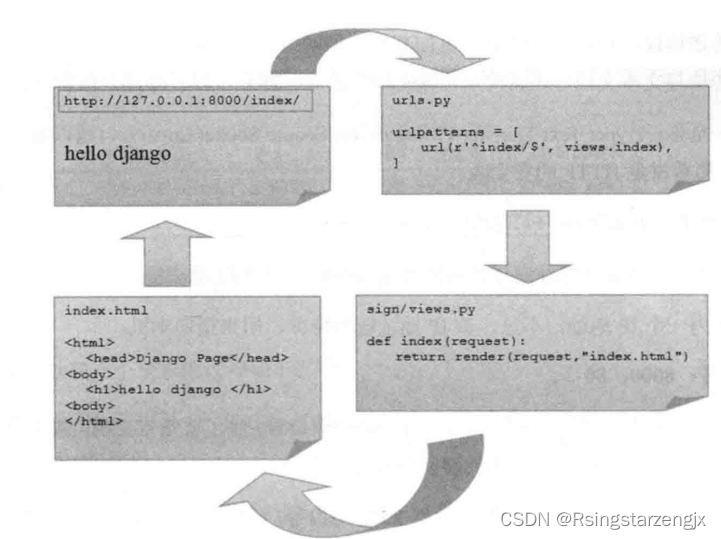
Django 工作流



——脉冲雷达(四))


