文章目录
- 前言
- 素材
- 人物
- 瓦片
- 其他
- 一、建造系统
- 1. 定义物品类
- 2. 绘制地图
- 3. 实现瓦片选中效果
- 4. 限制瓦片选择
- 5. 放置物品功能
- 6. 清除物品
- 7. 生成和拾取物品功能
- 二、库存系统
- 1. 简单绘制UI
- 2. 零代码控制背包的开启关闭
- 3. 实现物品的拖拽
- 拖拽功能
- 拖拽恢复问题
- 4. 拖拽放置物品
- 5. 定义物品属性
- 6. 在库存中寻找空闲位置
- 7. 满库存判断
- 8. 物品数量显示
- 9. 物品堆叠
- 10. 快捷栏物品选择
- 11. 选中工具功能
- 12. 使用物品 删除物品
- 三、建造系统和库存系统结合
- 最终效果
- 源码
- 完结
前言
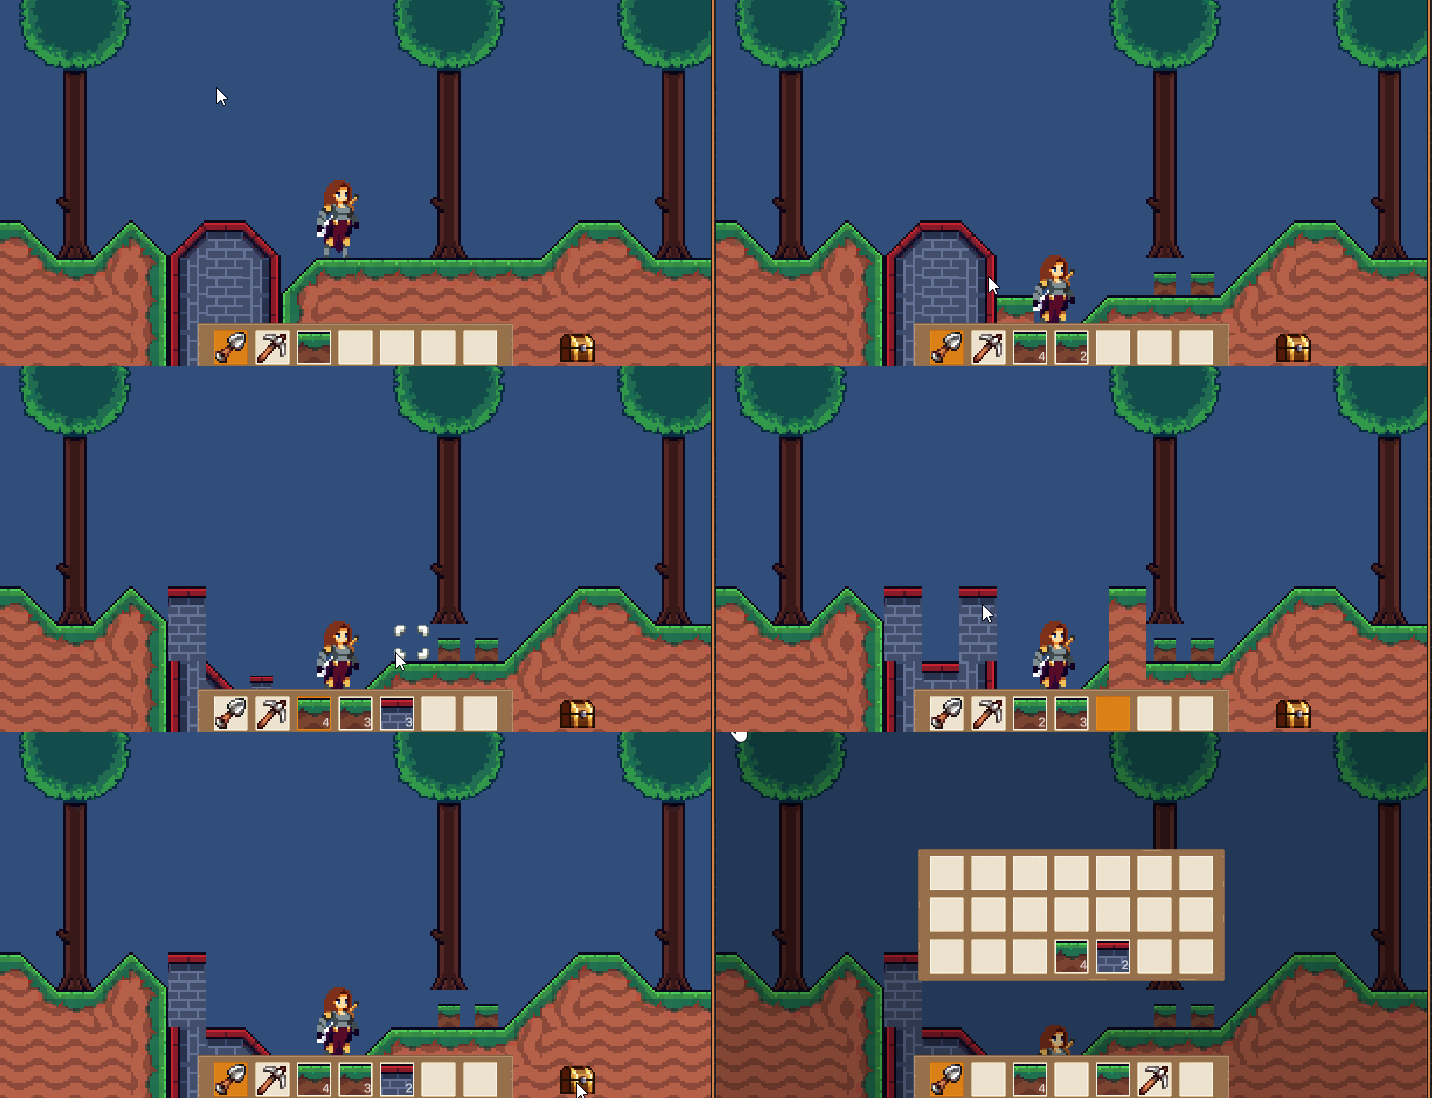
本文来实现一个类泰瑞利亚游戏的demo,其中主要包括经典的库存系统和建造系统
注意:文章主要分为建造系统、库存系统和建造系统和库存系统结合三大部分,其中建造系统和库存系统相互独立实现,都可以单独提取出来使用
先来看看最终效果
素材
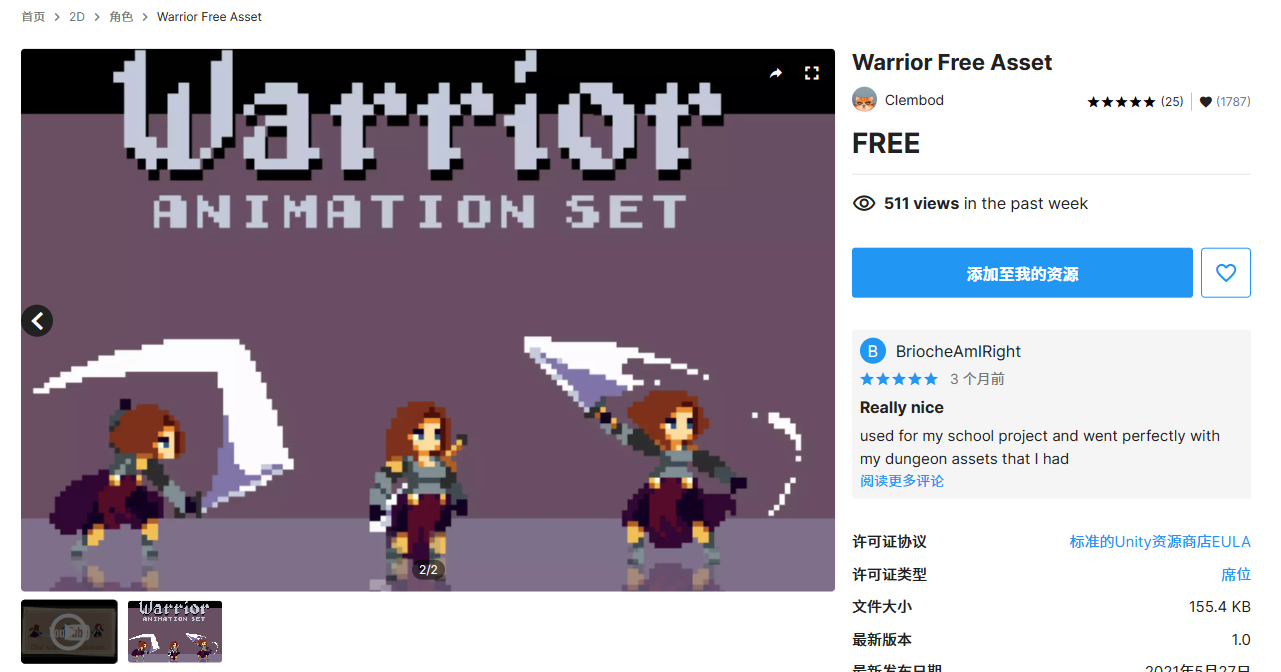
人物
https://assetstore.unity.com/packages/2d/characters/warrior-free-asset-195707
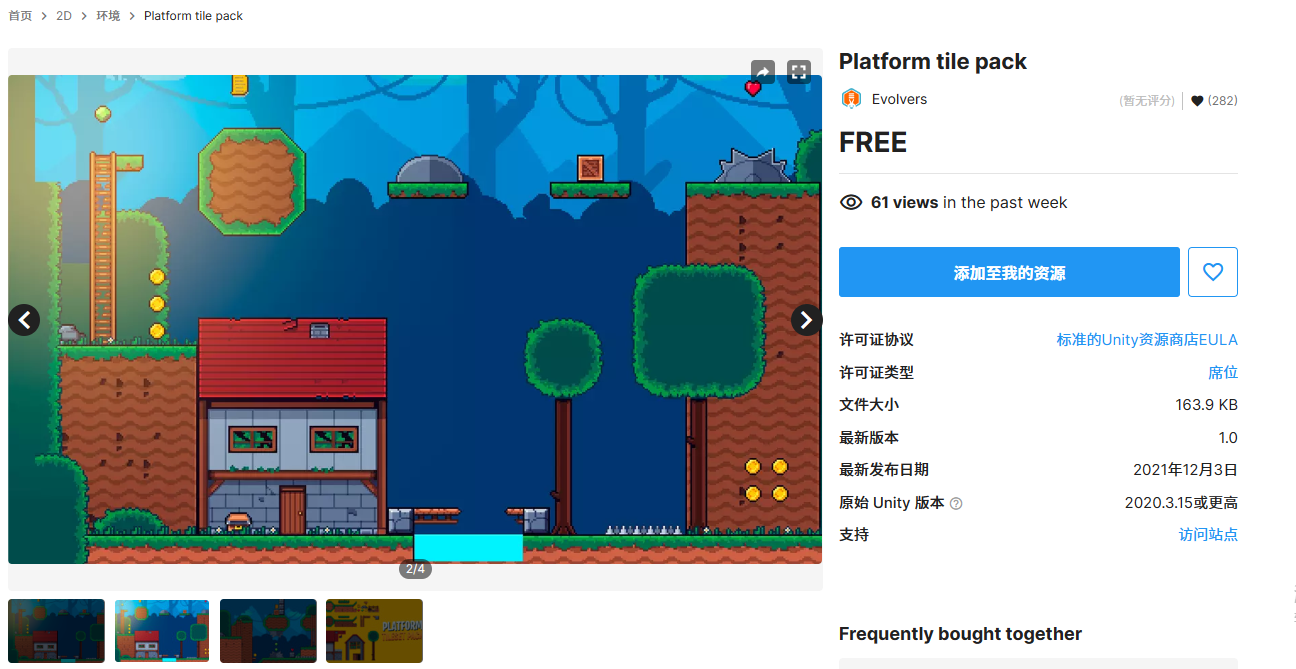
瓦片
https://assetstore.unity.com/packages/2d/environments/platform-tile-pack-204101
其他


一、建造系统
1. 定义物品类
游戏物品基类
using UnityEngine;
using UnityEngine.Tilemaps;// 创建一个 ScriptableObject,用于表示游戏物品
[CreateAssetMenu(menuName = "GameObject/Item")]
public class Item : ScriptableObject
{public TileBase tile;   // 物品对应的瓦片public Sprite image;    // 物品的图像public ItemType type;   // 物品的类型public ActionType actionType;   // 物品的动作类型public Vector2Int range = new Vector2Int(5, 4);   // 物品的范围,默认为 5x4
}// 定义枚举类型 ItemType,表示物品的类型
public enum ItemType
{BuildingBlock,   // 建筑块物品类型Tool   // 工具物品类型
}// 定义枚举类型 ActionType,表示动作的类型
public enum ActionType
{Dig,   // 挖掘动作类型Mine   // 开采动作类型
}
using UnityEngine;// 创建一个继承自 RuleTile 的自定义规则瓦片
[CreateAssetMenu(menuName = "Tiles/Custom Rule Tile")]
public class RuleTileWithData : RuleTile
{public Item item;   // 规则瓦片对应的物品数据
}
ps:RuleTileWithData 的意义在于扩展了 Unity 自带的 RuleTile 类,允许我们在规则瓦片中关联额外的物品数据(Item)。这样做的好处是,我们可以在使用规则瓦片的地图中,直接获取与特定瓦片关联的物品信息,而不需要额外的查找或维护数据结构。
添加游戏物品和RuleTileWithData

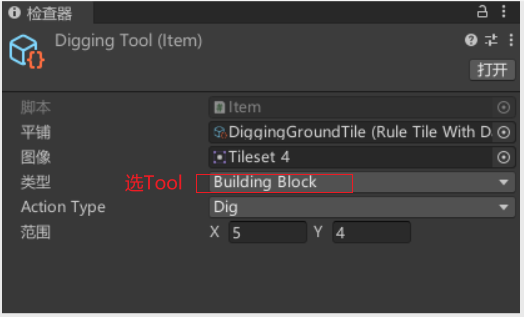
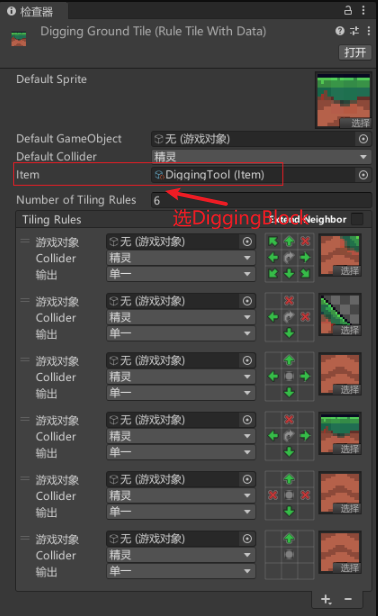
Mining同理
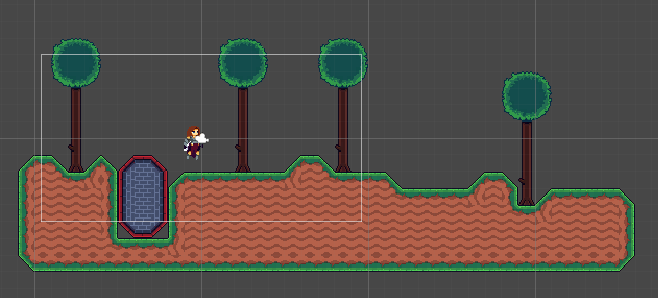
2. 绘制地图
简单绘制一个地图
3. 实现瓦片选中效果
using System.Collections;
using System.Collections.Generic;
using UnityEngine;
using UnityEngine.Tilemaps;public class BuildingSystem : MonoBehaviour
{[SerializeField] private Item item;             // 当前选中的物品[SerializeField] private TileBase highlightTile; // 高亮显示瓦片所使用的 TileBase[SerializeField] private Tilemap mainTilemap;   // 主要的地图瓦片对象[SerializeField] private Tilemap tempTilemap;   // 临时地图瓦片对象,用于显示高亮瓦片private Vector3Int highlightedTilePos;          // 高亮显示的瓦片在网格中的位置private bool highlighted;                       // 是否在高亮显示private void Update(){// 如果当前有选中的物品,则在 Update 方法中更新高亮显示if (item != null){HighlightTile(item);}}private Vector3Int GetMouseOnGridPos(){// 获取鼠标在当前网格中的位置Vector3 mousePos = Camera.main.ScreenToWorldPoint(Input.mousePosition);Vector3Int mouseCellPos = mainTilemap.WorldToCell(mousePos);mouseCellPos.z = 0;return mouseCellPos;}private void HighlightTile(Item currentItem){// 获取鼠标在当前网格中的位置Vector3Int mouseGridPos = GetMouseOnGridPos();// 如果当前高亮显示的瓦片位置不等于鼠标位置,则更新高亮显示if (highlightedTilePos != mouseGridPos){// 清除之前高亮显示的瓦片tempTilemap.SetTile(highlightedTilePos, null);// 获取当前位置的瓦片,并在临时地图瓦片对象上高亮显示TileBase tile = mainTilemap.GetTile(mouseGridPos);if (tile){tempTilemap.SetTile(mouseGridPos, highlightTile);highlightedTilePos = mouseGridPos;highlighted = true;}else{highlighted = false;}}}
}
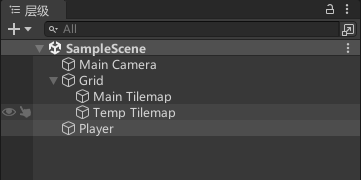
Main Tilemap绘制地图,Temp Tilemap用于显示选中框
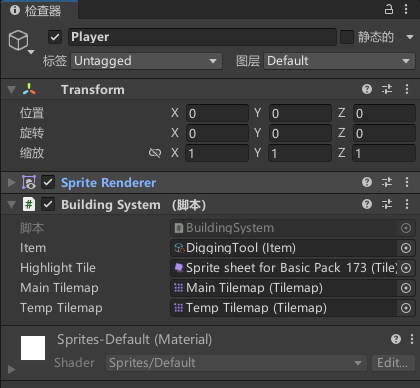
挂载脚本,配置参数
效果
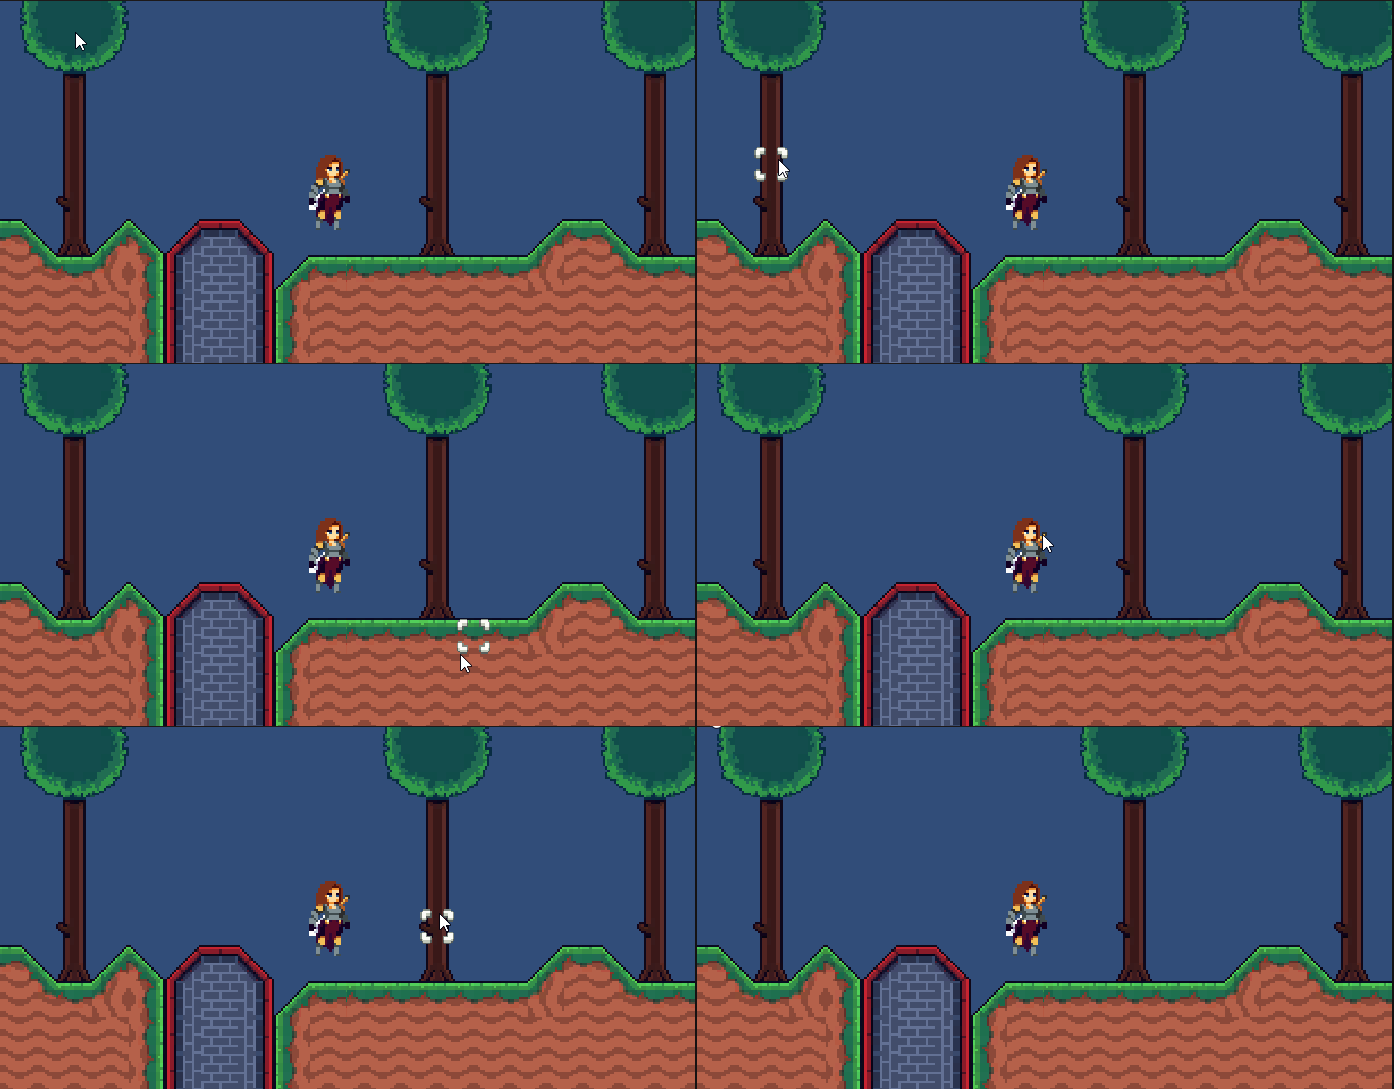
4. 限制瓦片选择
按Item里的range,控制瓦片只能在人物一定区域可选中
修改BuildingSystem
private Vector3Int playerPos;   //玩家位置//。。。private void Update()
{playerPos = mainTilemap.WorldToCell(transform.position);// 如果当前有选中的物品,则在 Update 方法中更新高亮显示if (item != null){HighlightTile(item);}
}
private void HighlightTile(Item currentItem)
{// 获取鼠标在当前网格中的位置Vector3Int mouseGridPos = GetMouseOnGridPos();// 如果当前高亮显示的瓦片位置不等于鼠标位置,则更新高亮显示if (highlightedTilePos != mouseGridPos){// 清除之前高亮显示的瓦片tempTilemap.SetTile(highlightedTilePos, null);// 检查鼠标位置与玩家位置是否在范围内if (InRange(playerPos, mouseGridPos, (Vector3Int)currentItem.range)){// 获取鼠标位置上的瓦片,并检查条件 GetTile获取指定坐标格子瓦片if (CheckCondition(mainTilemap.GetTile<RuleTileWithData>(mouseGridPos), currentItem)){// 在临时地图瓦片对象上高亮显示瓦片tempTilemap.SetTile(mouseGridPos, highlightTile);highlightedTilePos = mouseGridPos;highlighted = true;}else{highlighted = false;}}else{highlighted = false;}}
}
//判断鼠标位置与玩家位置是否在范围内
private bool InRange(Vector3Int positionA, Vector3Int positionB, Vector3Int range)
{// 判断两个位置之间的距离是否在范围内Vector3Int distance = positionA - positionB;if (Math.Abs(distance.x) >= range.x || Math.Abs(distance.y) >= range.y){return false;}return true;
}//检查瓦片与当前物品的条件是否匹配
private bool CheckCondition(RuleTileWithData tile, Item currentItem)
{// 检查瓦片与当前物品的条件是否匹配if (currentItem.type == ItemType.BuildingBlock){if (!tile){return true;}}else if (currentItem.type == ItemType.Tool){if (tile){if (tile.item.actionType == currentItem.actionType){return true;}}}return false;
}
效果
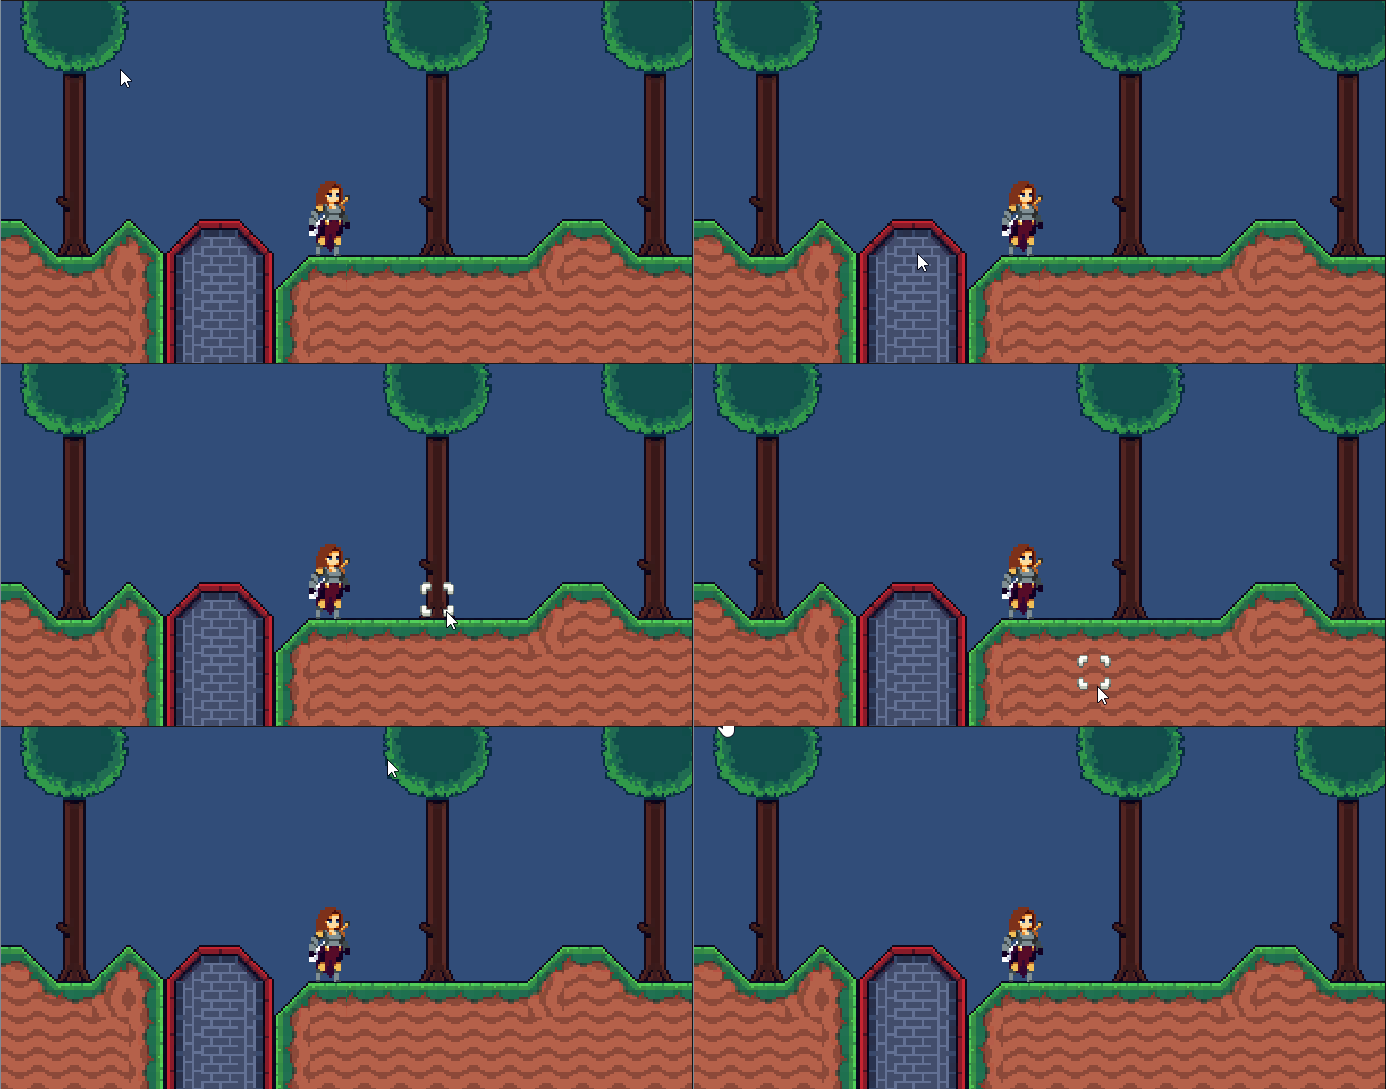
5. 放置物品功能
BuildingSystem新增功能
private void Update()
{if (Input.GetMouseButtonDown(0))// 当玩家按下左键时{if (highlighted){if (item.type == ItemType.BuildingBlock)// 如果当前选中的物品是建筑方块{Build(highlightedTilePos, item);// 放置方块}}}}
// 放置方块
private void Build(Vector3Int position, Item itemToBuild)
{tempTilemap.SetTile(position, null);// 清除临时 Tilemap 上的方块highlighted = false;// 取消高亮状态mainTilemap.SetTile(position, itemToBuild.tile);// 在主 Tilemap 上放置方块
}
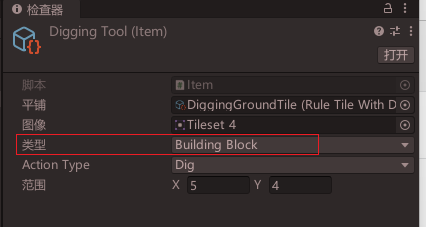
为了测试,先修改item类型为BuildingBlock
效果
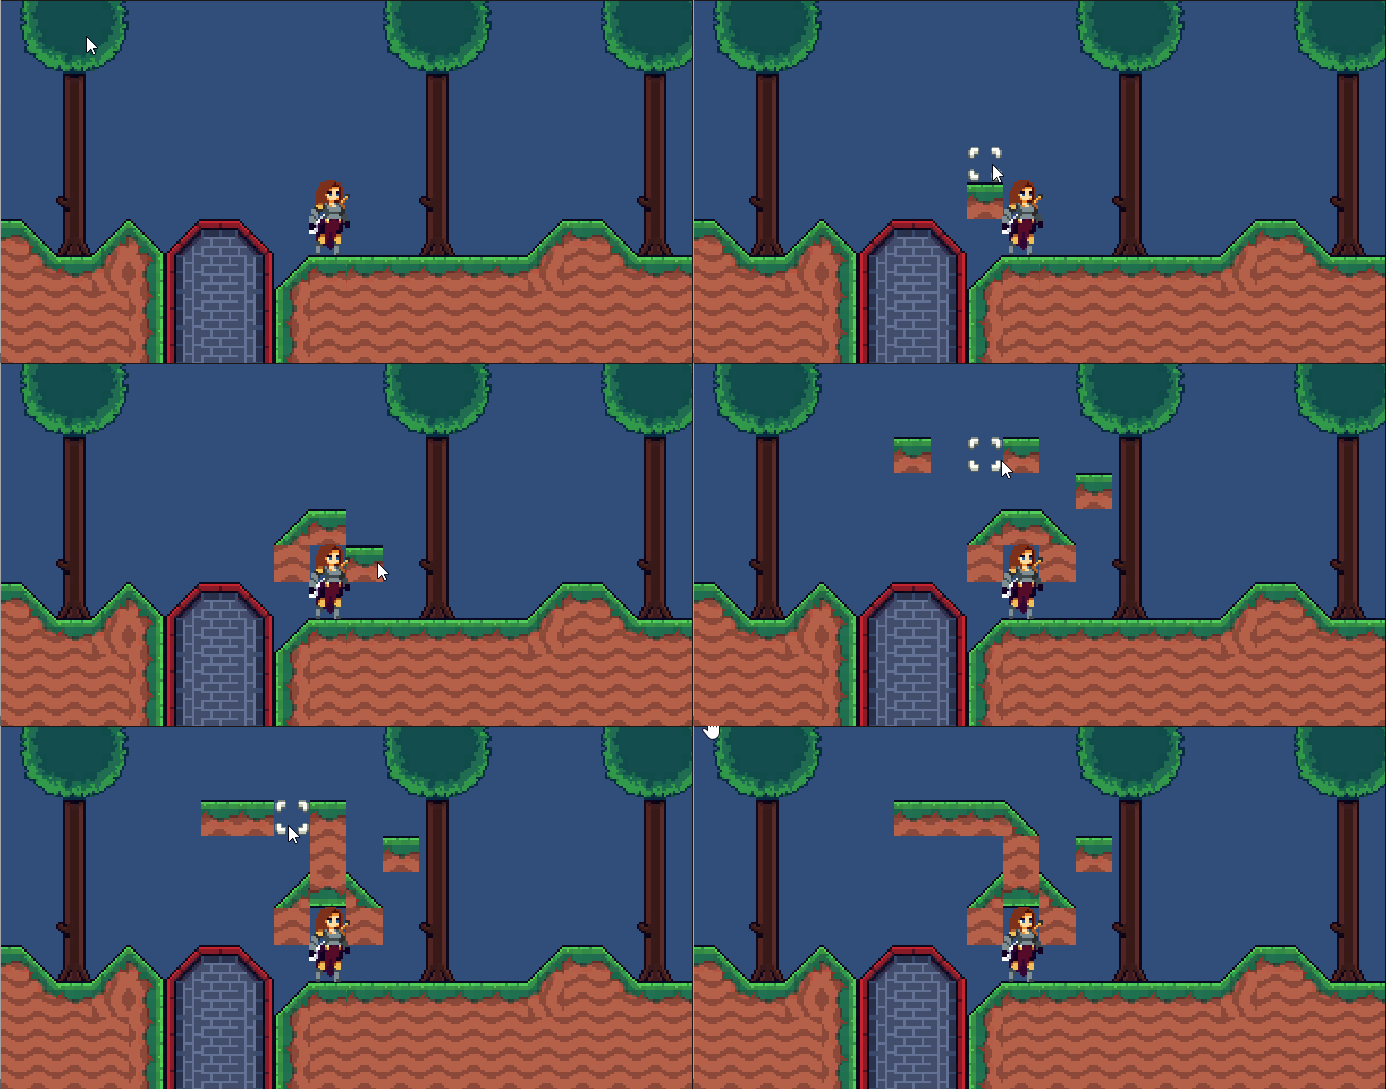
6. 清除物品
private void Update()
{if (Input.GetMouseButtonDown(0))// 当玩家按下左键时{if (highlighted){if (item.type == ItemType.BuildingBlock)// 如果当前选中的物品是建筑方块{Build(highlightedTilePos, item);// 放置方块}else if (item.type == ItemType.Tool)// 如果当前选中的物品是工具{Destroy(highlightedTilePos);// 移除方块}}}
}
// 移除方块以及生成相应物品
private void Destroy(Vector3Int position)
{tempTilemap.SetTile(position, null);// 清除临时 Tilemap 上的方块highlighted = false;// 取消高亮状态RuleTileWithData tile = mainTilemap.GetTile<RuleTileWithData>(position);// 获取当前位置上的方块数据mainTilemap.SetTile(position, null);// 在主 Tilemap 上移除方块
}
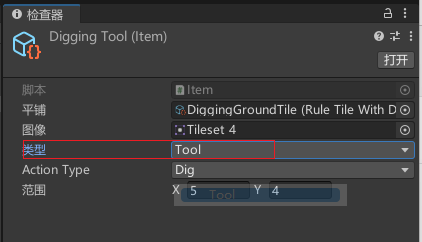
为了测试,先修改item类型为Tool
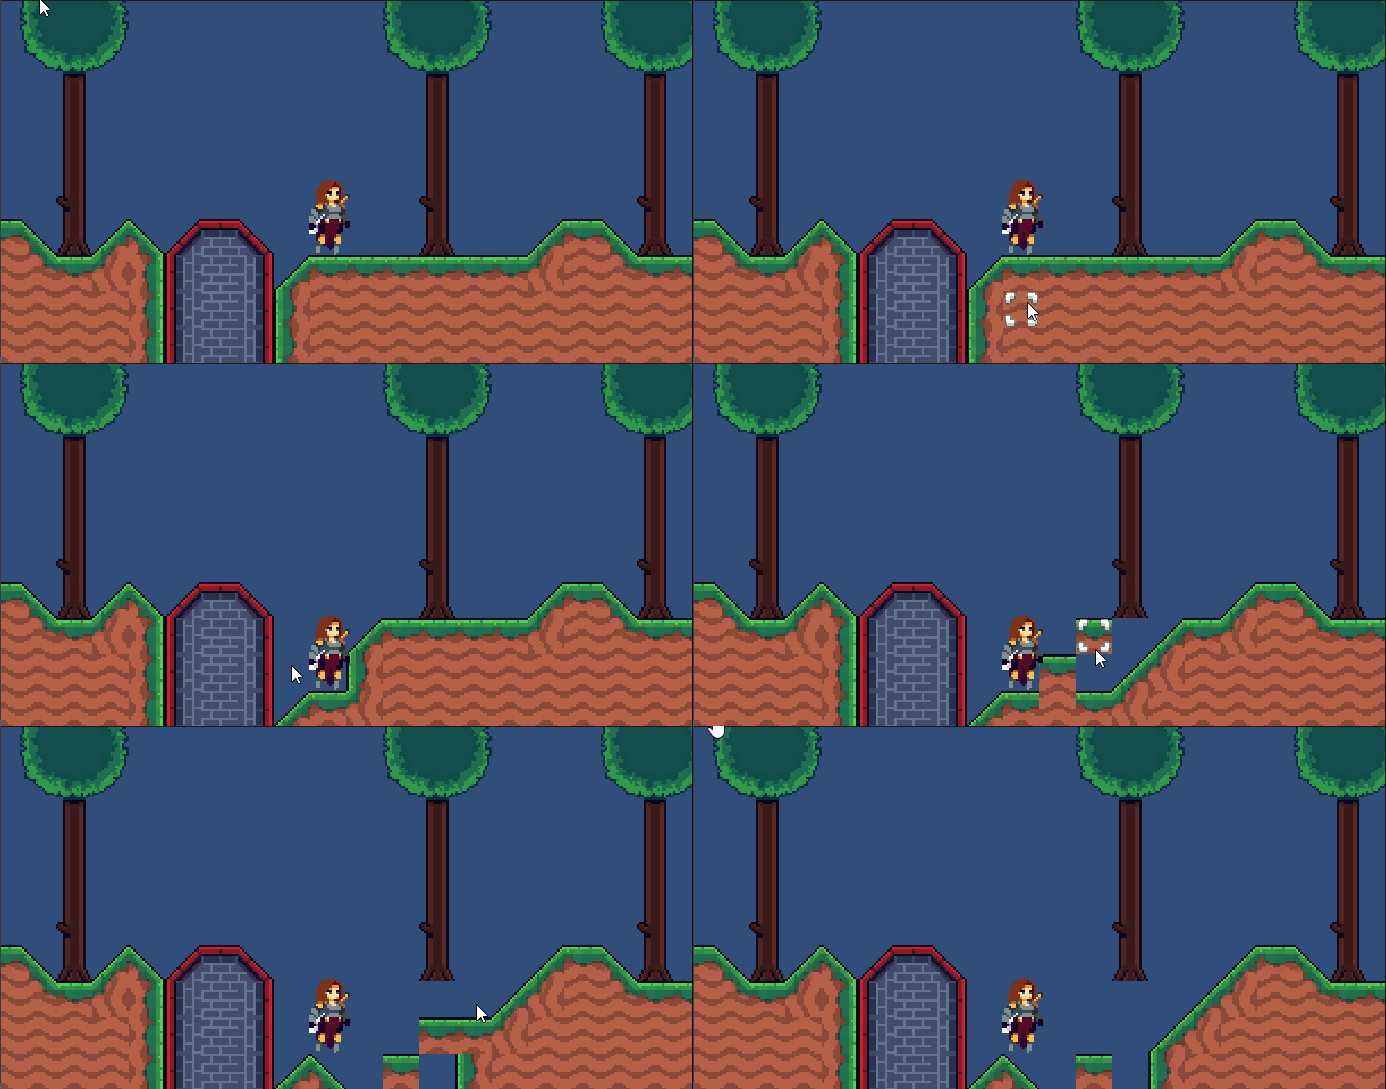
效果
7. 生成和拾取物品功能
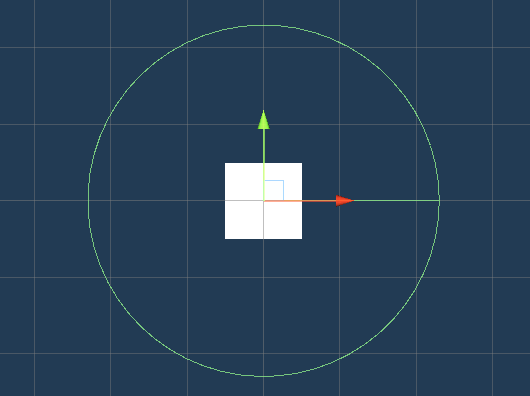
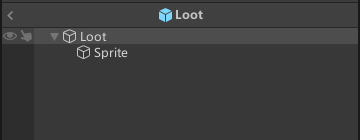
新增Loot预制体,用于显示物品
新增脚本Loot
using System.Collections;
using UnityEngine;public class Loot : MonoBehaviour
{[SerializeField] private SpriteRenderer sr; // 用于显示物品图像的组件[SerializeField] private new BoxCollider2D collider; // 触发器组件[SerializeField] private float moveSpeed; // 拾取时的移动速度private Item item; // 表示此物品的数据模型// 初始化物品public void Initialize(Item item){this.item = item;sr.sprite = item.image; // 显示物品图像}// 当进入触发器时执行的逻辑private void OnTriggerEnter2D(Collider2D other){if (other.CompareTag("Player")){StartCoroutine(MoveAndCollect(other.transform)); // 开始移动并拾取物品}}// 移动并拾取物品的逻辑private IEnumerator MoveAndCollect(Transform target){Destroy(collider); // 拾取后销毁触发器while (transform.position != target.position){transform.position = Vector3.MoveTowards(transform.position, target.position, moveSpeed * Time.deltaTime); // 向目标移动yield return 0;}Destroy(gameObject); // 拾取完成后销毁物品对象}
}
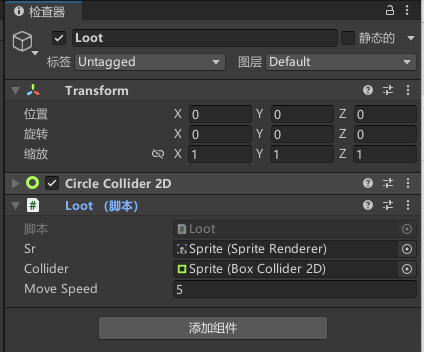
挂载脚本,并配置参数
修改BuildingSystem生成物品
[SerializeField] private GameObject lootPrefab;// 拾取物品时生成的对象// 移除方块以及生成相应物品
private void Destroy(Vector3Int position)
{//。。。Vector3 pos = mainTilemap.GetCellCenterWorld(position);// 获取方块中心的世界坐标GameObject loot = Instantiate(lootPrefab, pos, Quaternion.identity);// 创建拾取物品loot.GetComponent<Loot>().Initialize(tile.item);// 初始化拾取物品数据
}
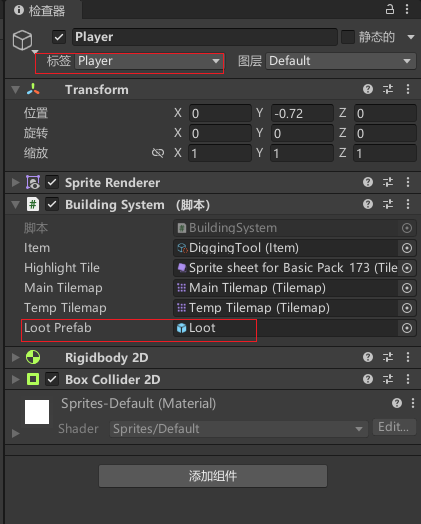
记得挂载预制体,修改Player标签
运行效果
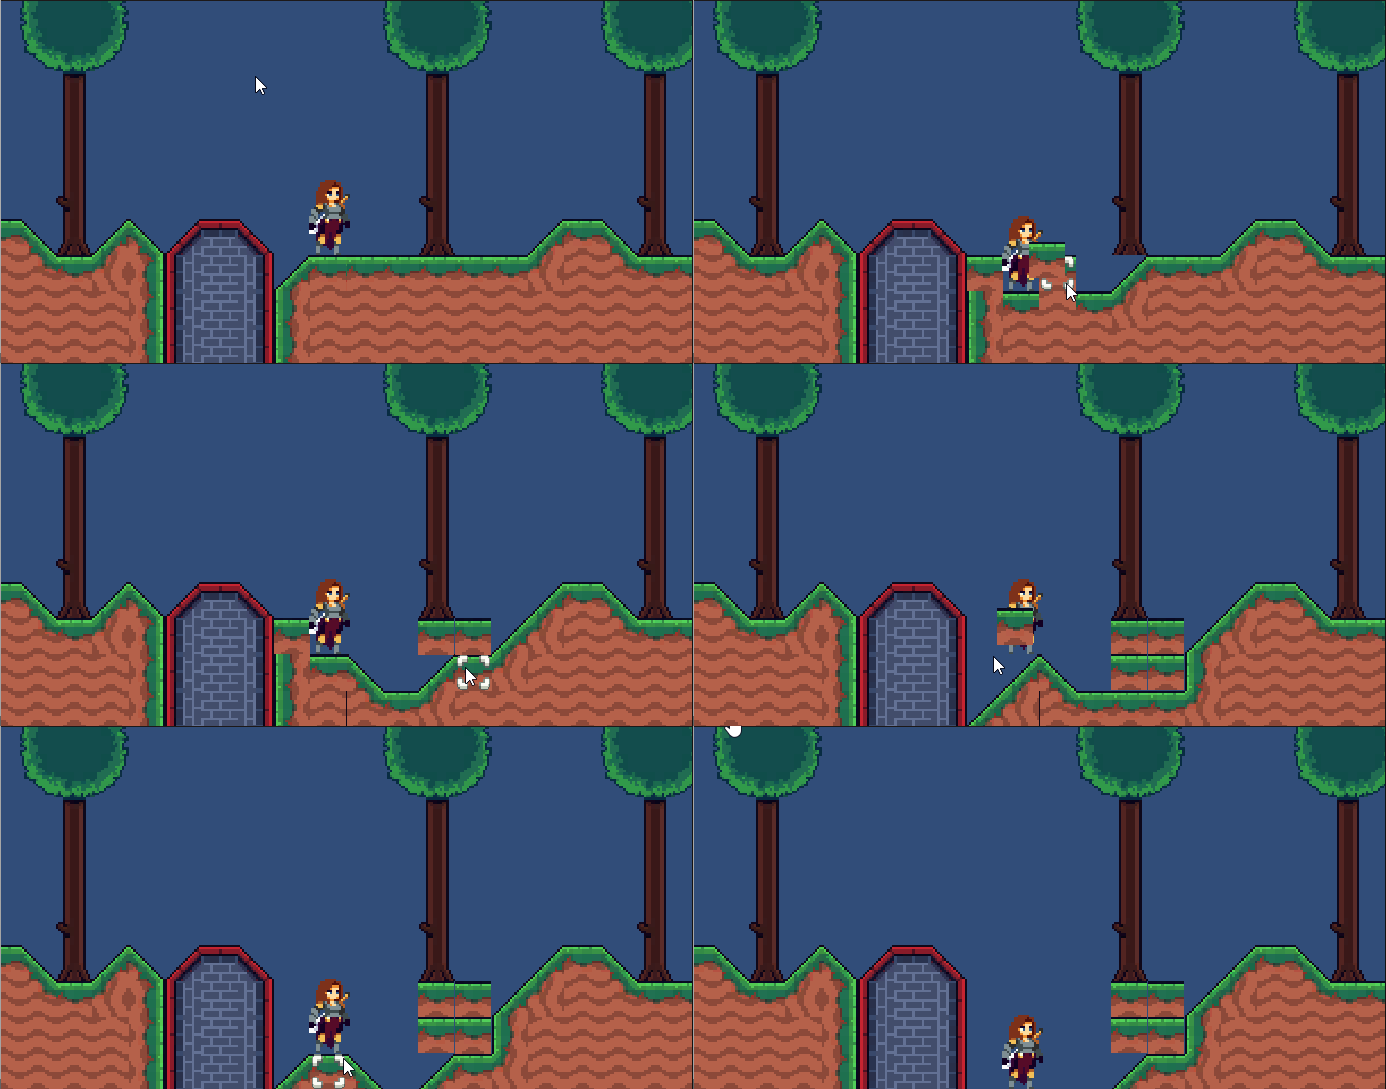
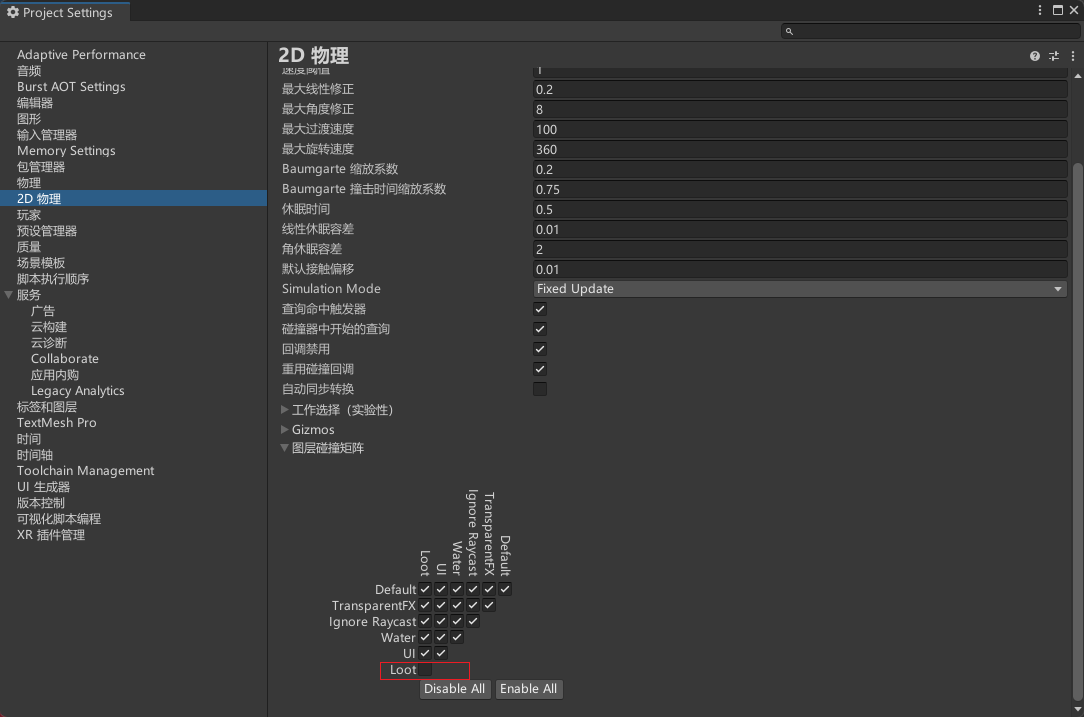
为了效果更好,可以去除物品直接的碰撞,并减小生成物的大小
效果
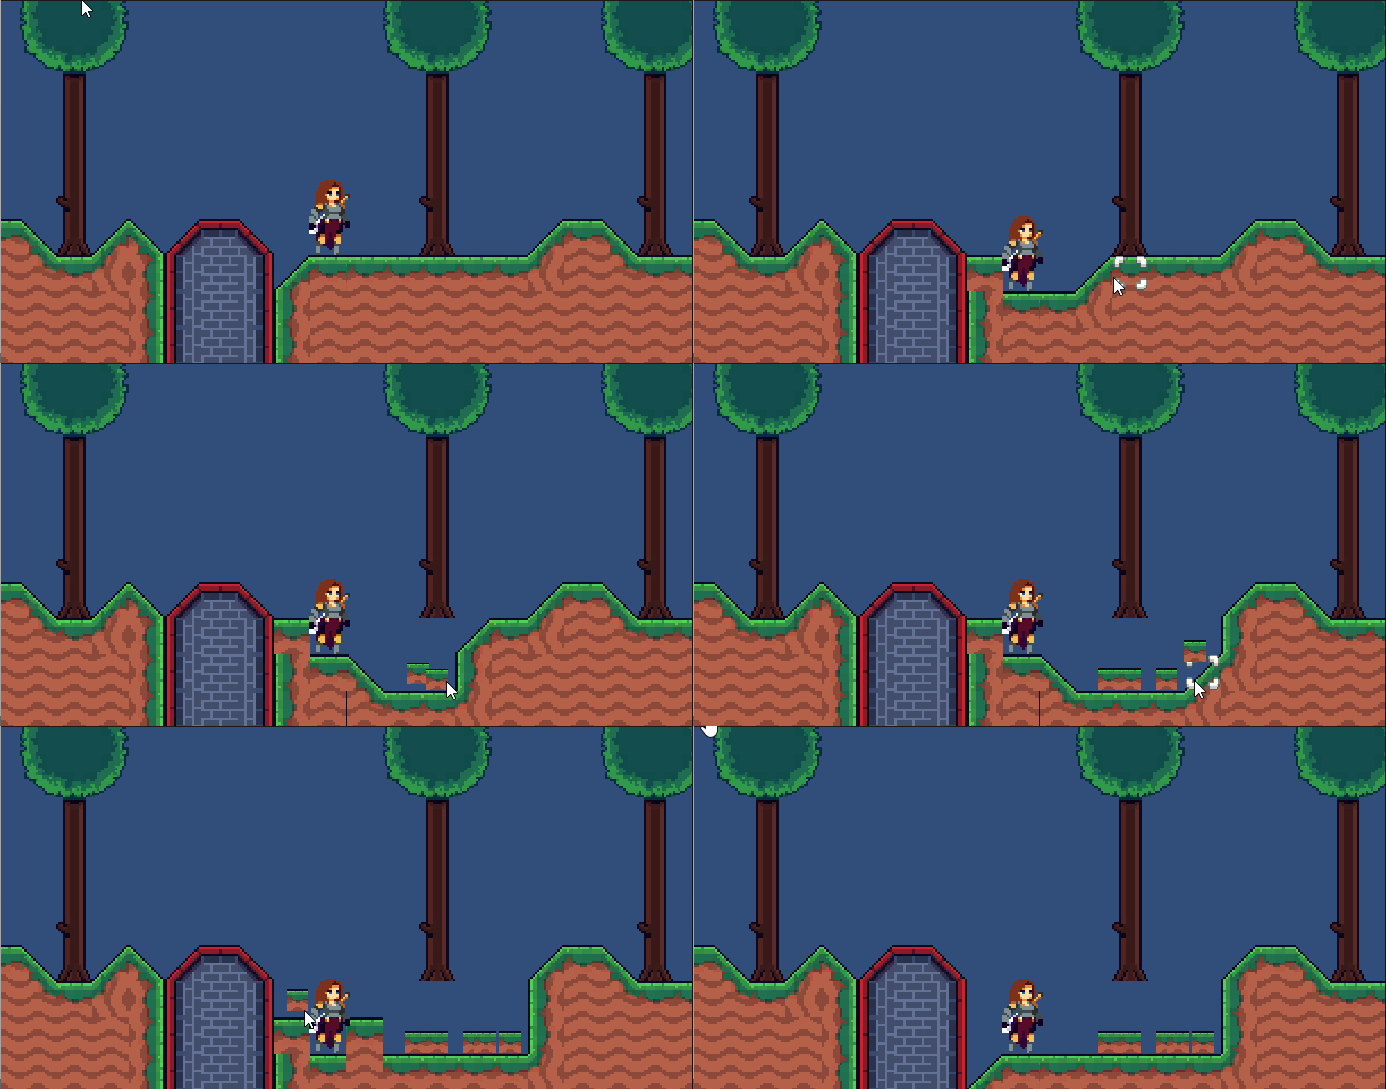
二、库存系统
1. 简单绘制UI
UI绘制这里就不多说了,节省大家时间,之前文章已经说了很多次了,不懂得可以去看我往期的文章
层级
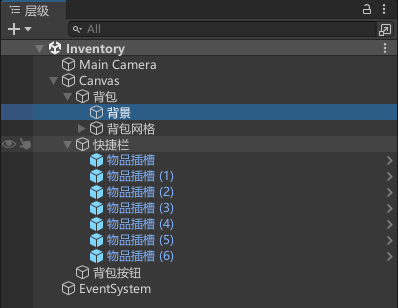
效果
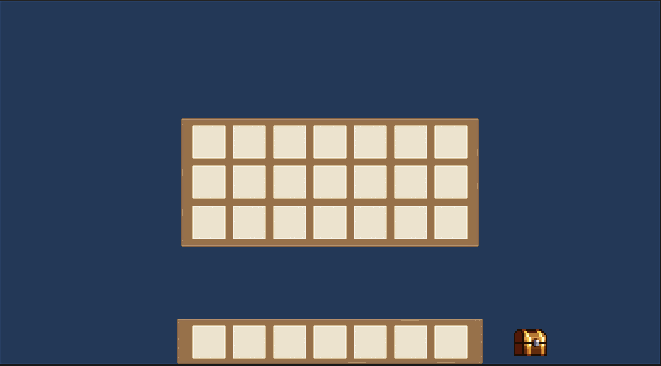
2. 零代码控制背包的开启关闭
点击背包显示背包,隐藏按钮
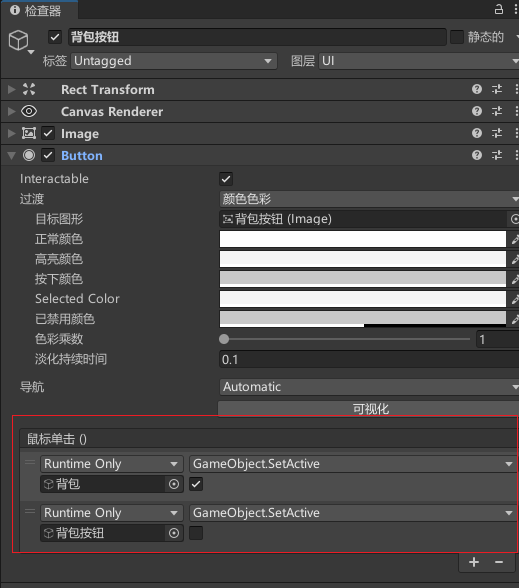
点击背景隐藏背包,开启按钮
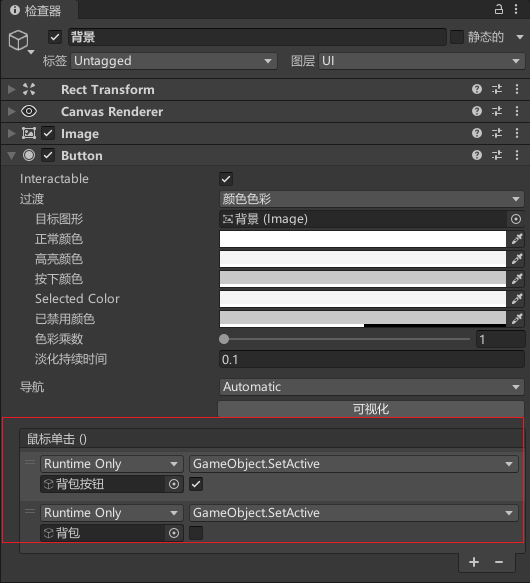
效果
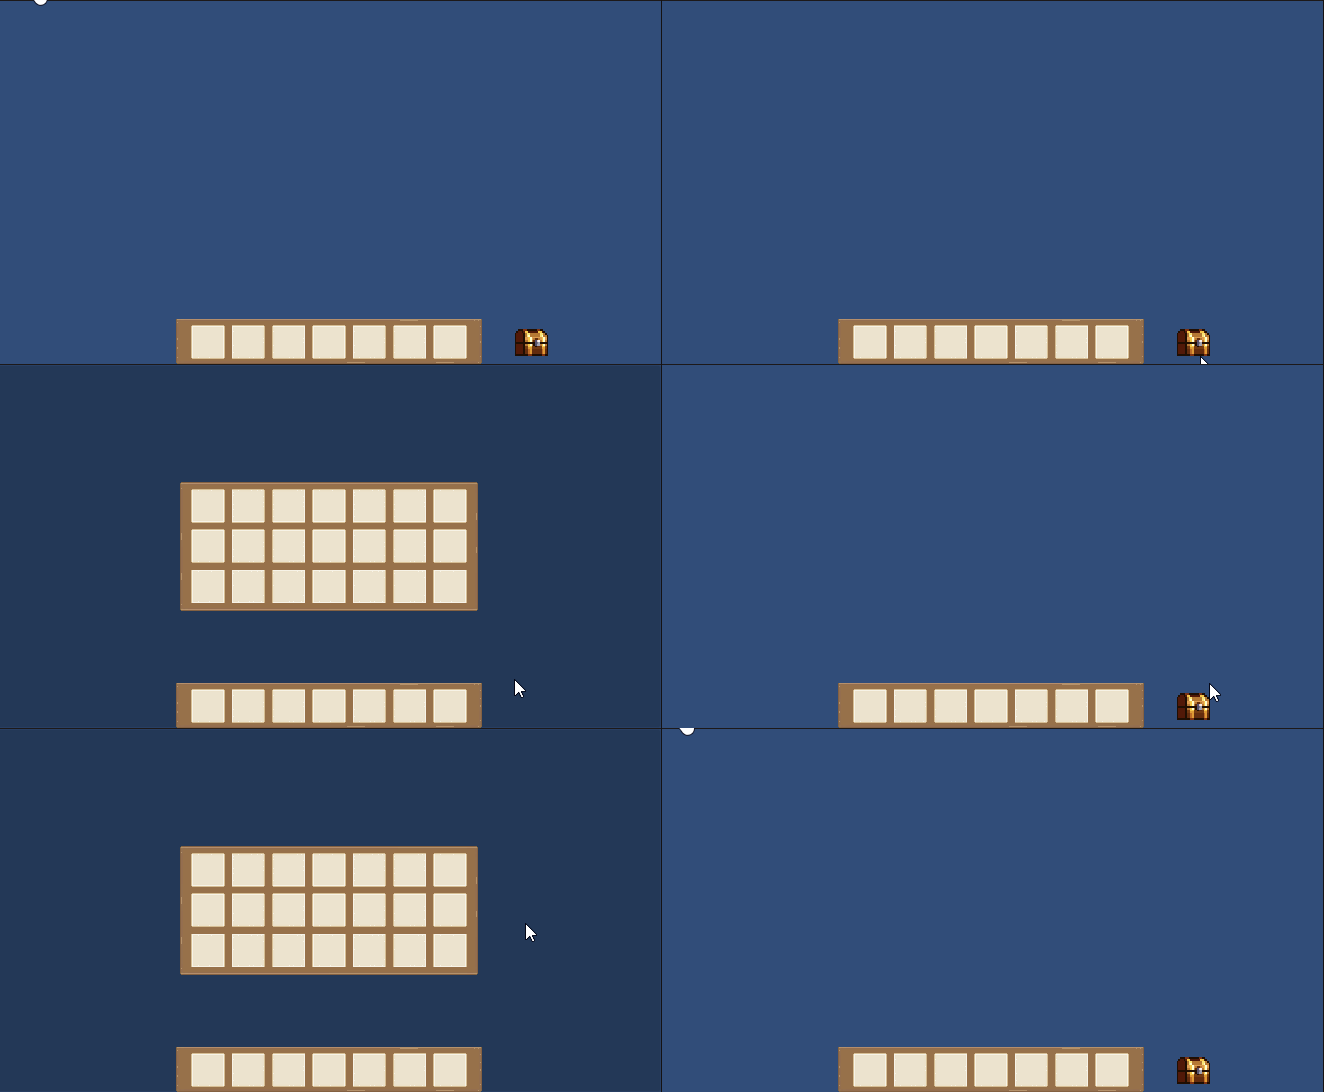
3. 实现物品的拖拽
拖拽功能
在物品插槽子集新增一个物品预制体,并挂载新增脚本InventoryItem

InventoryItem 脚本
using UnityEngine;
using UnityEngine.UI;
using UnityEngine.EventSystems;public class InventoryItem : MonoBehaviour, IBeginDragHandler, IDragHandler, IEndDragHandler
{[Header("UI")][HideInInspector] public Image image; // 物品的图像组件[HideInInspector] public Transform parentAfterDrag; // 记录拖拽前的父级位置//开始拖拽时调用public void OnBeginDrag(PointerEventData eventData){image = transform.GetComponent<Image>();image.raycastTarget = false; // 禁用射线检测,防止拖拽物体遮挡其他UI元素的交互parentAfterDrag = transform.parent; // 记录拖拽前的父级位置//transform.root 是用来获取当前对象的根物体,这里及是Canvastransform.SetParent(transform.root); // 设置拖拽物体的父级为Canvas,以保证拖拽物体在最上层显示}//拖拽过程中调用public void OnDrag(PointerEventData eventData){transform.position = Input.mousePosition; // 将拖拽物体的位置设置为鼠标的当前位置}//拖拽结束时调用public void OnEndDrag(PointerEventData eventData){image.raycastTarget = true; // 启用射线检测transform.SetParent(parentAfterDrag); // 恢复拖拽结束后物品的父级位置}
}
效果
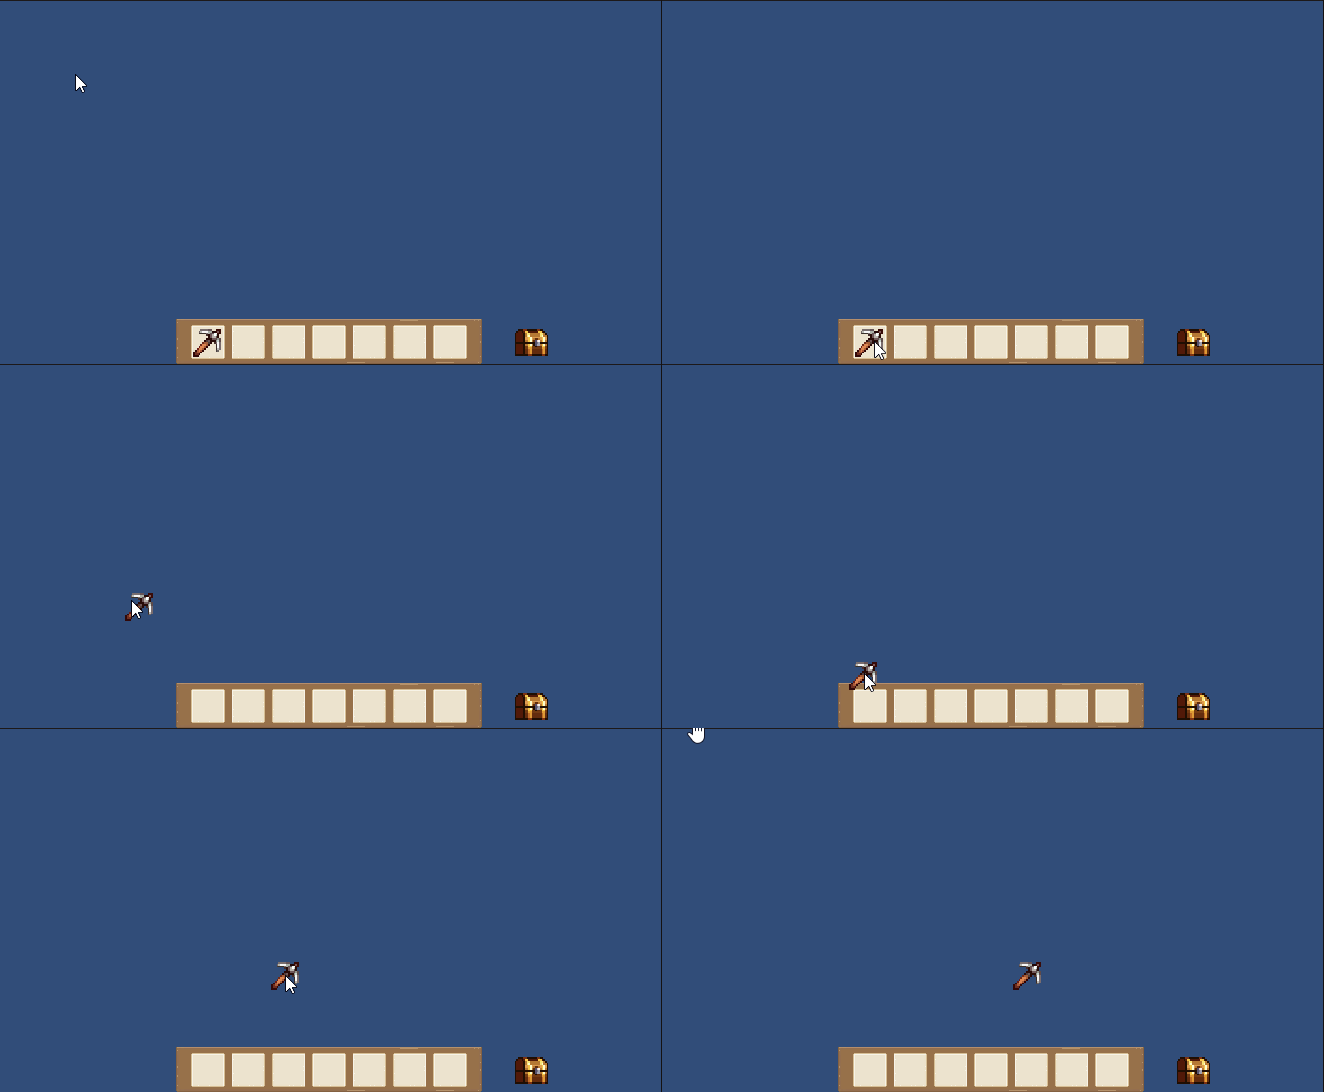
拖拽恢复问题
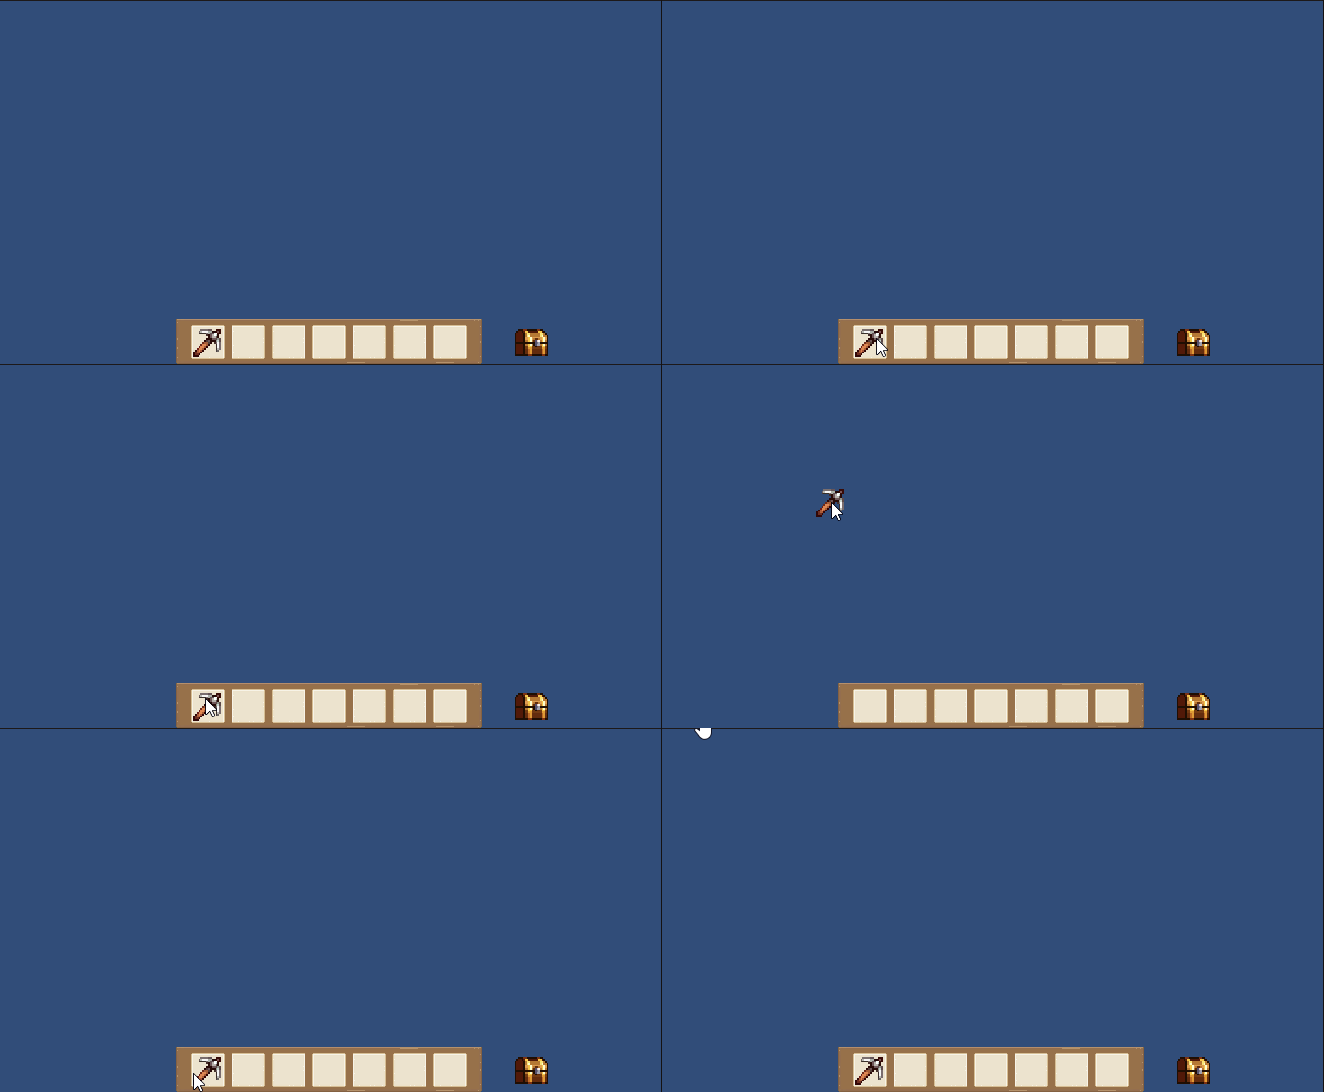
你会发现,拖拽结束物品并没有回到原来的位置,即使我们已经恢复了拖拽结束后物品的父级位置
这是因为物品的位置我们并没有恢复,这里我们可以给在物品父级,也就是物品插槽中新增Grid Layout Group组件,强制定义子物体的布局位置
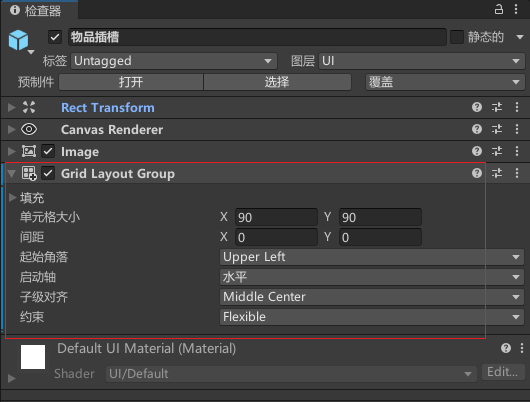
运行效果
4. 拖拽放置物品
新增InventorySlot 脚本,挂载在物品插槽
using UnityEngine;
using UnityEngine.EventSystems;public class InventorySlot : MonoBehaviour, IDropHandler
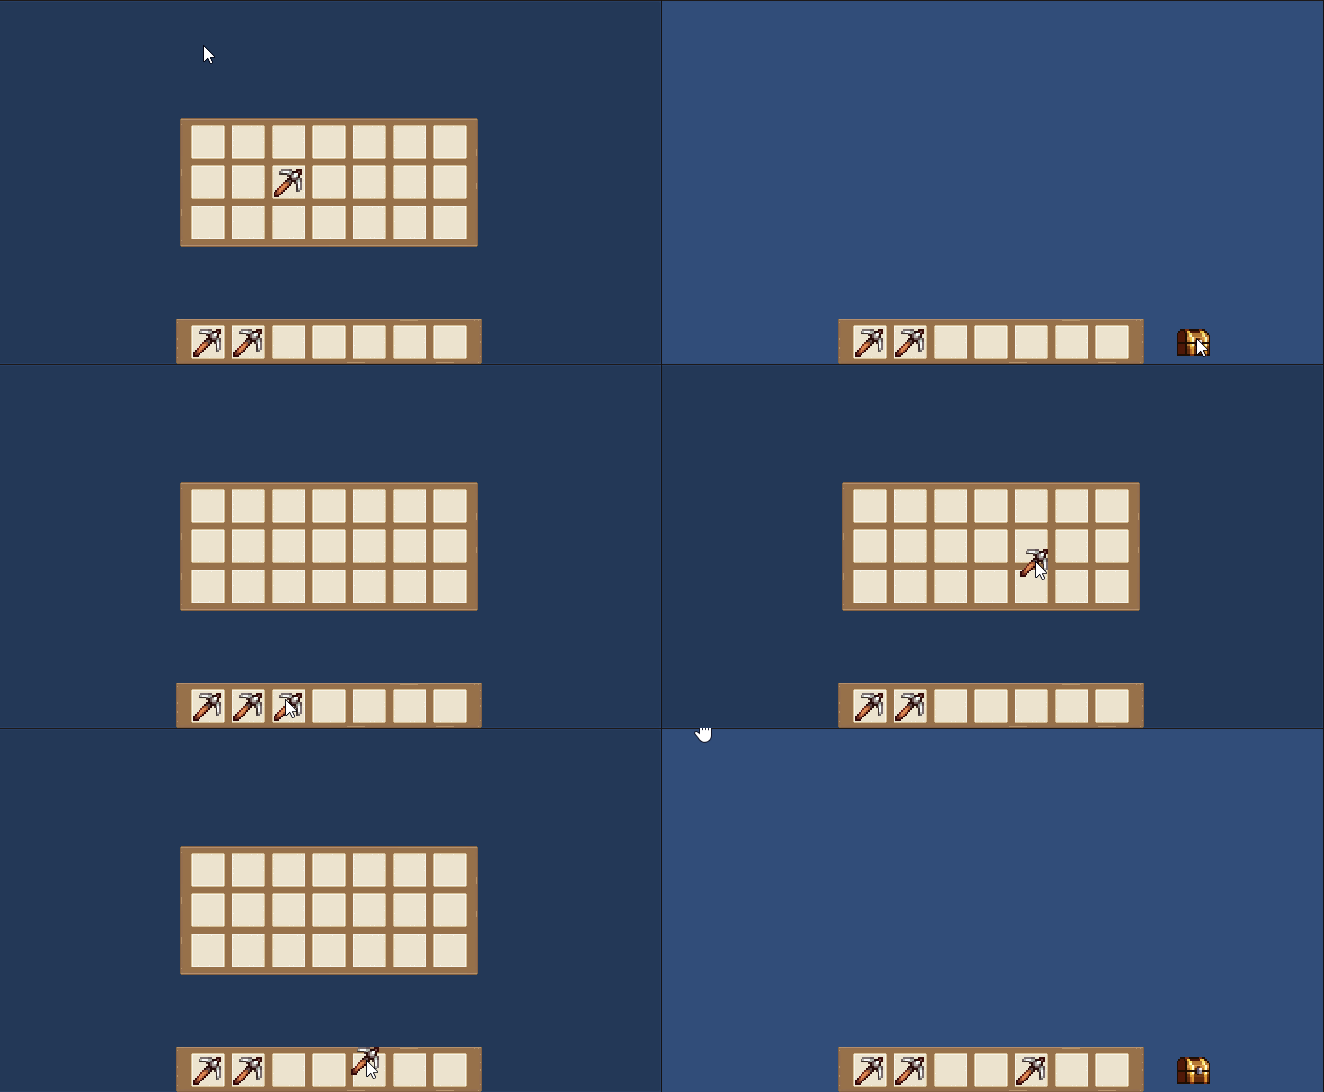
{// 在拖拽物体放置在目标对象上时被调用public void OnDrop(PointerEventData eventData){//检查背包槽是否没有子物体(即没有物品),只有背包槽为空才能放置物品。if (transform.childCount == 0){//从拖拽事件的 pointerDrag 对象中获取拖拽的物品InventoryItem inventoryItem = eventData.pointerDrag.GetComponent<InventoryItem>();inventoryItem.parentAfterDrag = transform;}}
}
效果
5. 定义物品属性
using UnityEngine;
using UnityEngine.Tilemaps;// 创建一个 ScriptableObject,用于表示游戏物品
[CreateAssetMenu(menuName = "GameObject/Item")]
public class Item : ScriptableObject
{[Header("游戏内")]public TileBase tile;   // 物品对应的瓦片public ItemType type;   // 物品的类型public ActionType actionType;   // 物品的动作类型public Vector2Int range = new Vector2Int(5, 4);   // 物品的范围,默认为 5x4[Header("UI内")]public bool stackable = true;//是否可叠起堆放的,默认是[Header("两者")]public Sprite image;    // 物品的图像
}// 定义枚举类型 ItemType,表示物品的类型
public enum ItemType
{BuildingBlock,   // 建筑块物品类型Tool   // 工具物品类型
}// 定义枚举类型 ActionType,表示动作的类型
public enum ActionType
{Dig,   // 挖掘动作类型Mine   // 开采动作类型
}
创建几种不同的物品

修改InventoryItem,初始化不同的道具
public Item item;private void Start()
{image = transform.GetComponent<Image>();InitialiseItem(item);
}public void InitialiseItem(Item newItem)
{image.sprite = newItem.image;
}
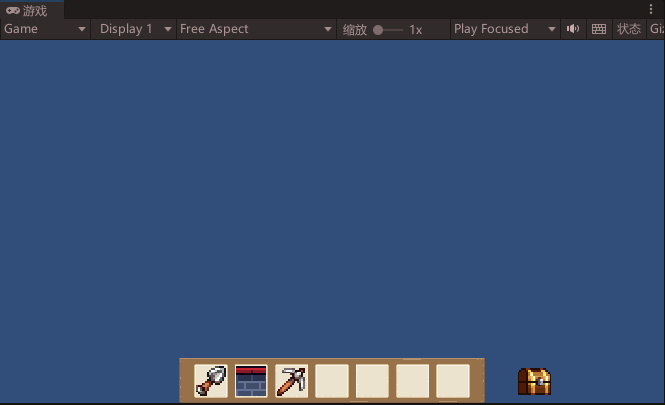
为了测试,我们配置几种不同的物品
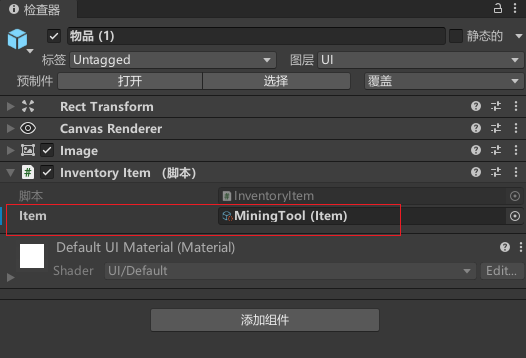
效果
6. 在库存中寻找空闲位置
实际使用,我们肯定不可能通过挂载配置不同物品,所以进行修改,等待后续使用,隐藏item
[HideInInspector] public Image image; // 物品的图像组件
[HideInInspector] public Item item;
[HideInInspector] public Transform parentAfterDrag; // 记录拖拽前的父级位置private void Start()
{image = transform.GetComponent<Image>();
}public void InitialiseItem(Item newItem)
{   item = newItem;image.sprite = newItem.image;
}
新增InventoryManager代码,在库存中寻找空闲位置,添加物品
using UnityEngine;public class InventoryManager : MonoBehaviour
{public InventorySlot[] inventorySlots; // 背包槽数组public GameObject inventoryItemPrefab; // 物品预制体private void Start(){//判断inventorySlots是否为空if (inventorySlots.Length <= 0){Debug.Log("背包槽数组没有配置,请先配置好!");return;}}// 添加物品到背包public void AddItem(Item item){for (int i = 0; i < inventorySlots.Length; i++){InventorySlot slot = inventorySlots[i]; // 获取当前遍历的背包槽InventoryItem itemInSlot = slot.GetComponentInChildren<InventoryItem>(); // 在背包槽中查找是否已经存在物品if (itemInSlot == null) // 如果背包槽内没有物品{SpawnNewItem(item, slot); // 生成新的物品到这个背包槽中return;}}}// 生成新的物品到背包槽中void SpawnNewItem(Item item, InventorySlot slot){GameObject newItemGo = Instantiate(inventoryItemPrefab, slot.transform); // 实例化物品预制体并设置父级为当前的背包槽InventoryItem inventoryItem = newItemGo.GetComponent<InventoryItem>(); // 获取生成物品的 InventoryItem 组件inventoryItem.InitialiseItem(item); // 初始化物品信息}
}
新增InventoryManager空节点,挂载脚本,绑定挂载所有的物品插槽
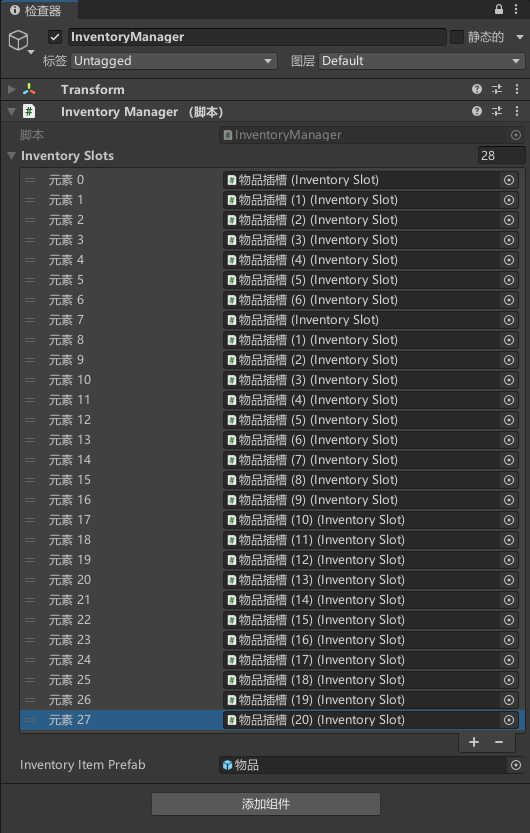
新增Test测试脚本,用于测试添加物品功能
using UnityEngine;public class Test : MonoBehaviour
{public InventoryManager inventoryManager;public Item[] itemsToPickup;public void PickupItem(int id){inventoryManager.AddItem(itemsToPickup[id]);}
}
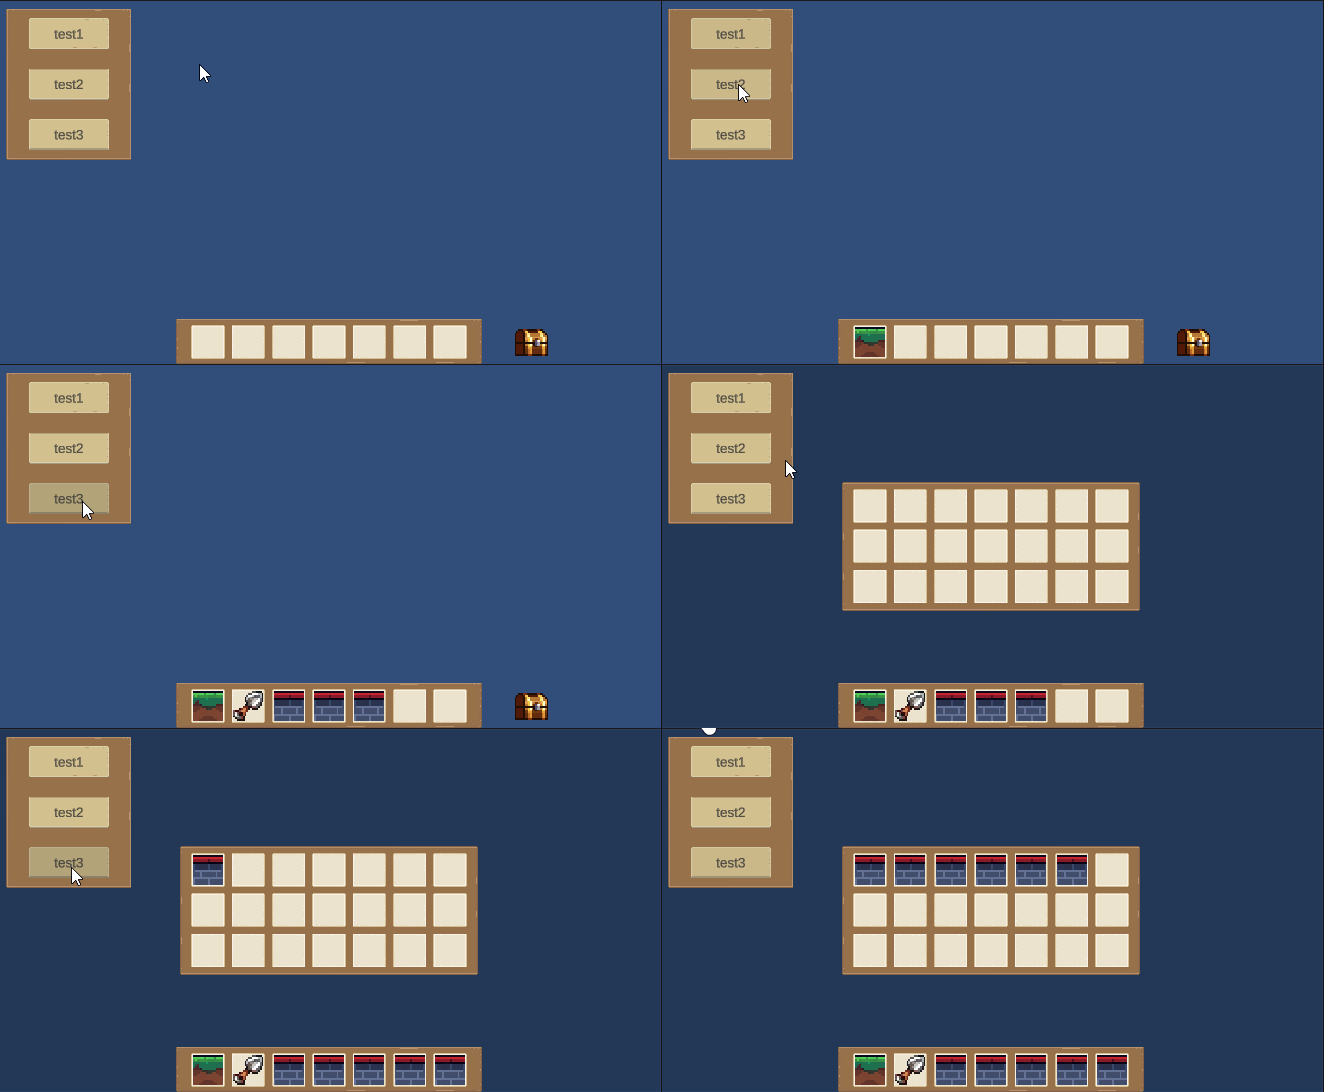
新增测试面板挂载test脚本,并新增几个按钮测试
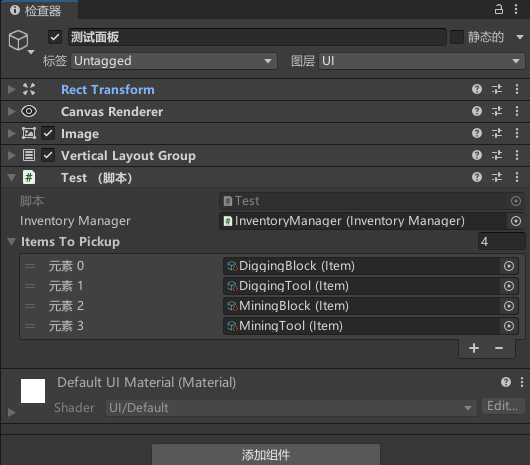
效果
7. 满库存判断
前面有点问题,如果我们库存已经满了,拾取的物品就消失了,这时候就需要修改InventoryManager的AddItem方法,返回添加物品的状态
// 添加物品到背包
public bool AddItem(Item item)
{for (int i = 0; i < inventorySlots.Length; i++){InventorySlot slot = inventorySlots[i]; // 获取当前遍历的背包槽InventoryItem itemInSlot = slot.GetComponentInChildren<InventoryItem>(); // 在背包槽中查找是否已经存在物品if (itemInSlot == null) // 如果背包槽内没有物品{SpawnNewItem(item, slot); // 生成新的物品到这个背包槽中return true;}}return false;
}
同步修改Test代码,根据返回值判断物品是否添加成功
public void PickupItem(int id)
{bool result = inventoryManager.AddItem(itemsToPickup[id]);if (result == true){Debug.Log("添加物品");}else{Debug.Log("添加物品失败,库存已满");}
}
效果
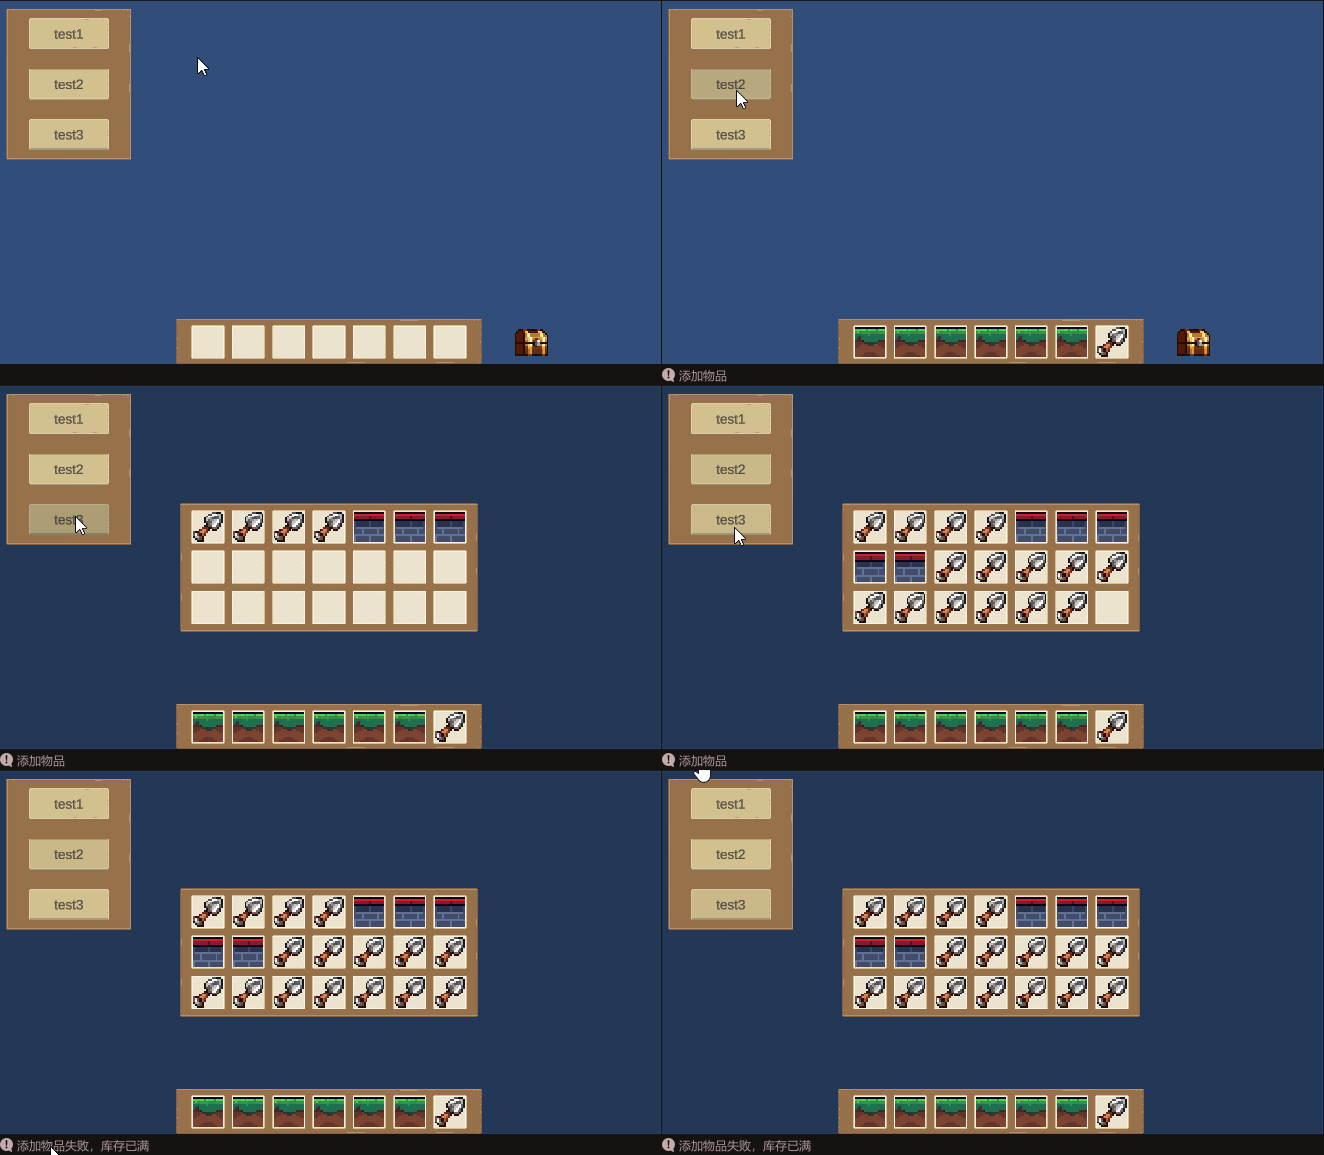
8. 物品数量显示
在物品的子集新增一个Text文本,用于显示物品数量,并添加Canvas Group组件,将这个组件的blocksRaycasts属性设置为false,表示在我们刚开始拖拽的整个过程当中,鼠标不会再去把这个UI物品当作一个阻挡物来看待,包括他的子物体的所有的UI对象
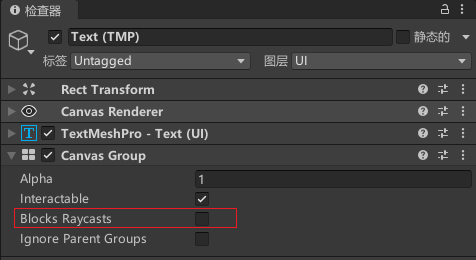
并修改InventoryItem物品脚本
[HideInInspector] public GameObject countText; // 数量文本
[HideInInspector] public int count = 1; //默认数量public void InitialiseItem(Item newItem)
{countText = transform.GetChild(0).gameObject;item = newItem;image.sprite = newItem.image;RefreshCount();
}public void RefreshCount()
{countText.GetComponent<TextMeshProUGUI>().text = count.ToString();}
效果
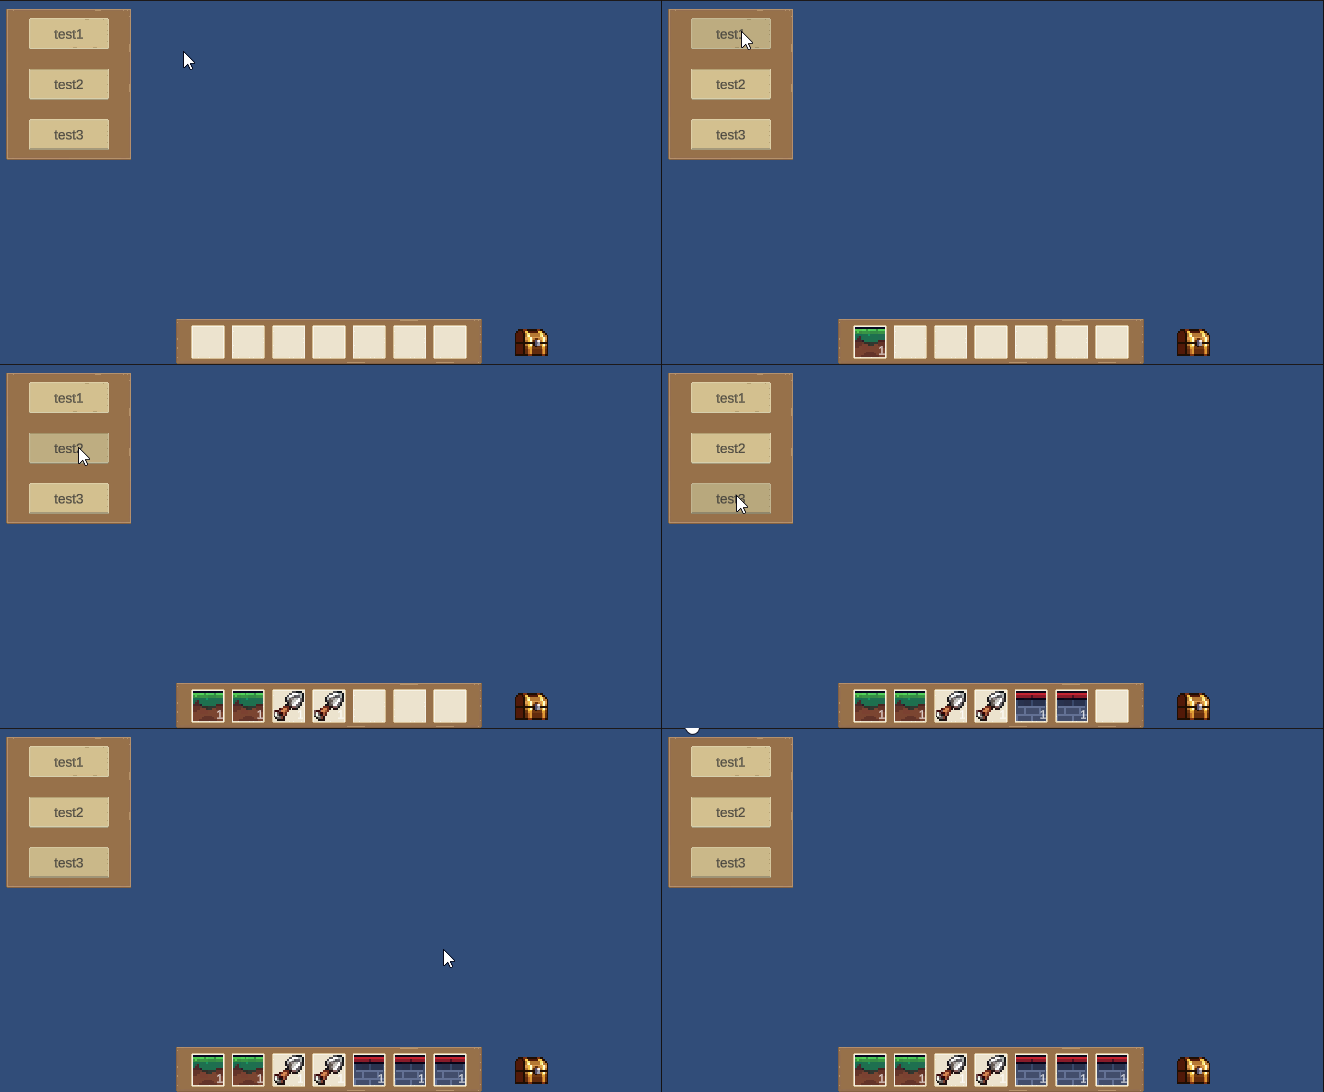
如果计算是1我们可以选择隐藏数量显示,这样效果会更好
public void RefreshCount()
{countText.GetComponent<TextMeshProUGUI>().text = count.ToString();//控制数量显示隐藏 大于1才显示bool textActive  = count > 1;countText.gameObject.SetActive(textActive);}
效果
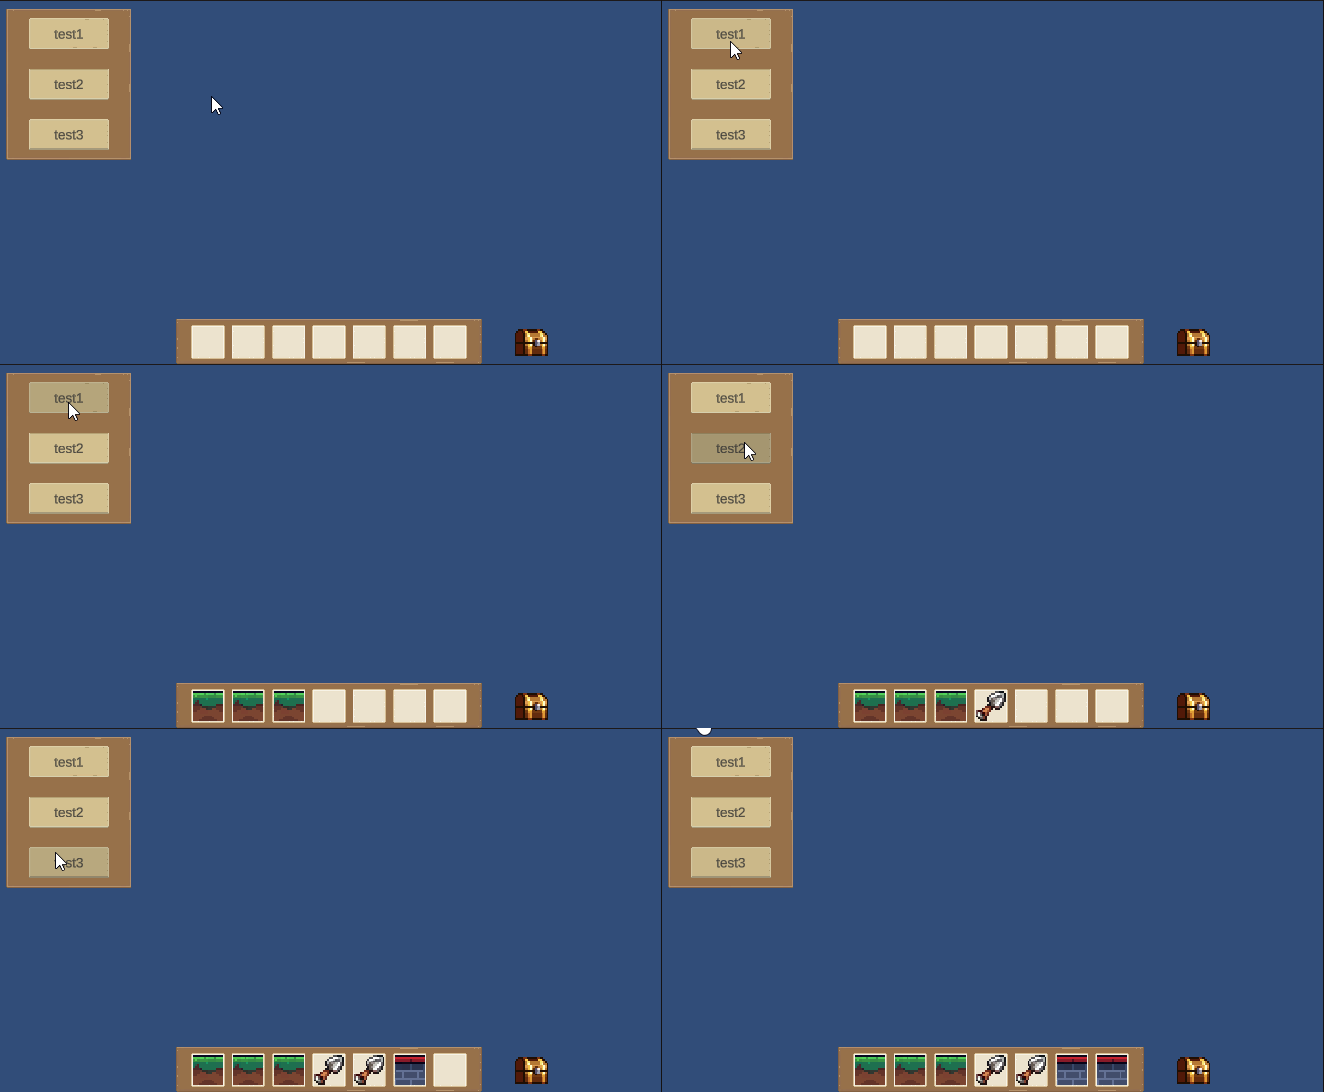
随机添加数量,测试
public void InitialiseItem(Item newItem)
{countText = transform.GetChild(0).gameObject;item = newItem;image.sprite = newItem.image;count = Random.Range(1, 4);//随机添加物品数量测试RefreshCount();}
效果
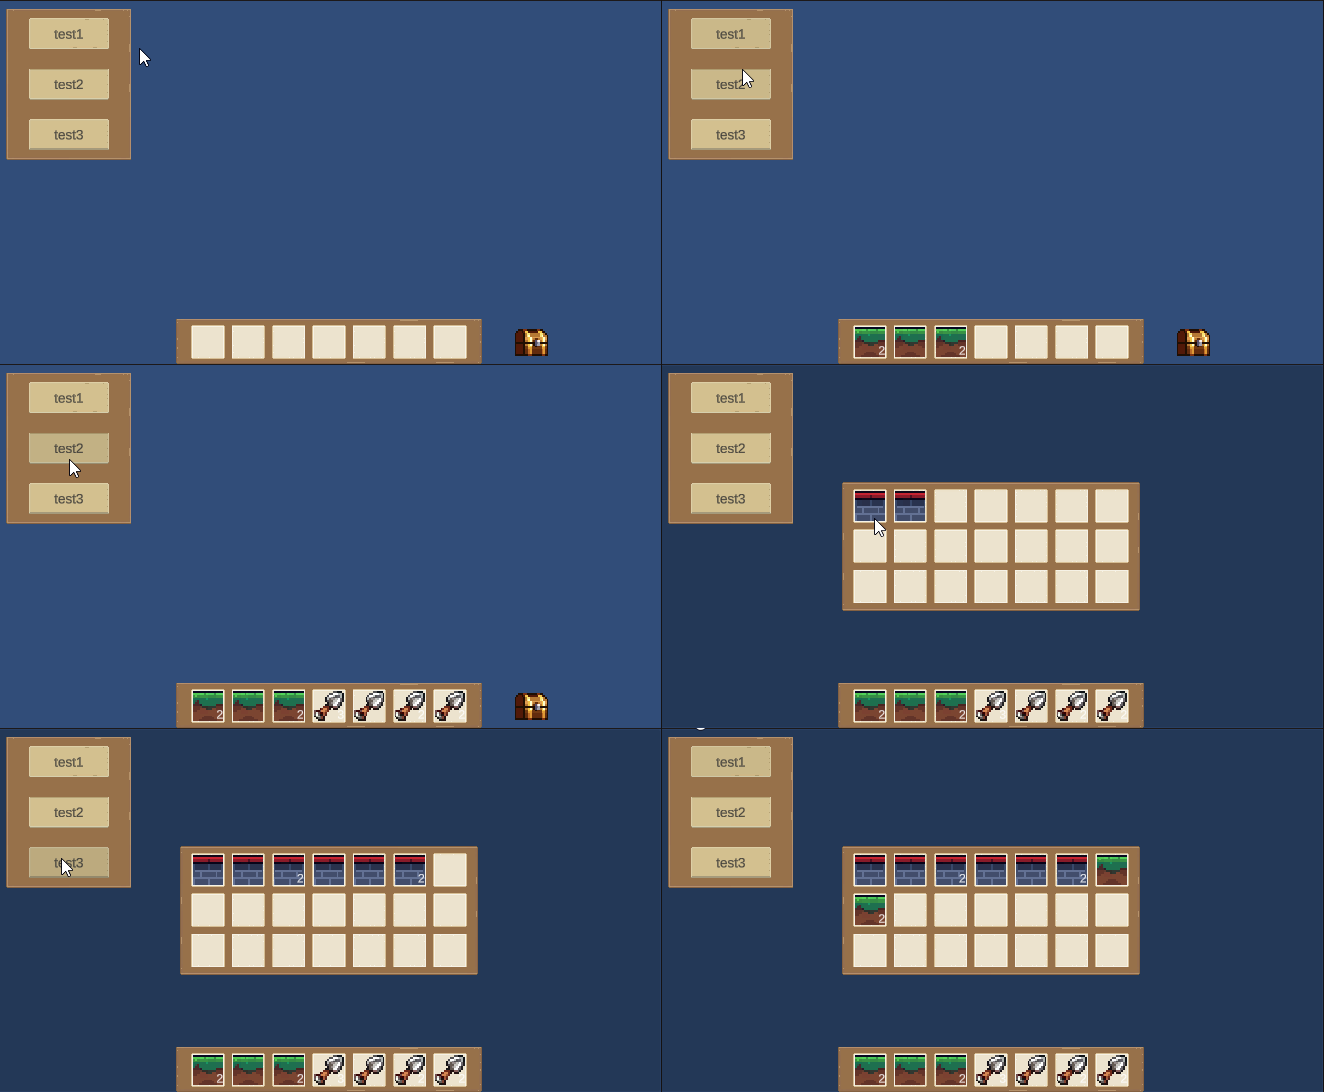
9. 物品堆叠
修改InventoryManager
public int maxStackedItems = 4; //最大堆叠数量,默认4// 添加物品到背包
public bool AddItem(Item item)
{for (int i = 0; i < inventorySlots.Length; i++){InventorySlot slot = inventorySlots[i]; // 获取当前遍历的背包槽InventoryItem itemInSlot = slot.GetComponentInChildren<InventoryItem>(); // 在背包槽中查找是否已经存在物品if (itemInSlot == null) // 如果背包槽内没有物品{SpawnNewItem(item, slot); // 生成新的物品到这个背包槽中return true;}else if (itemInSlot.item == item && itemInSlot.count < maxStackedItems && itemInSlot.item.stackable == true){itemInSlot.count++;//添加数量itemInSlot.RefreshCount();return true;}}return false;
}
效果
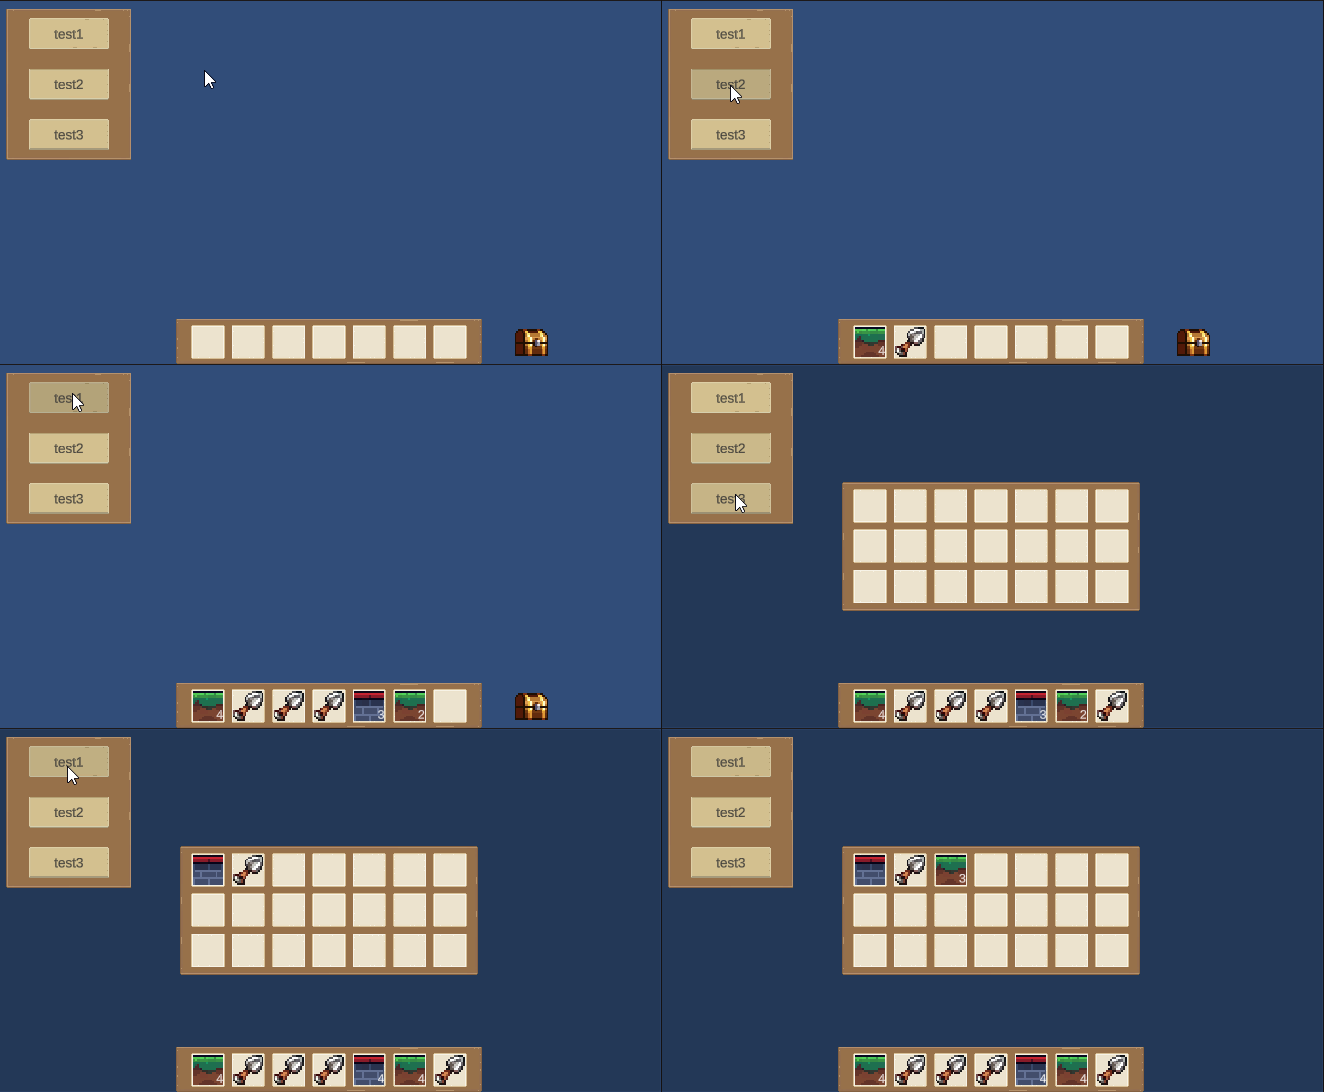
10. 快捷栏物品选择
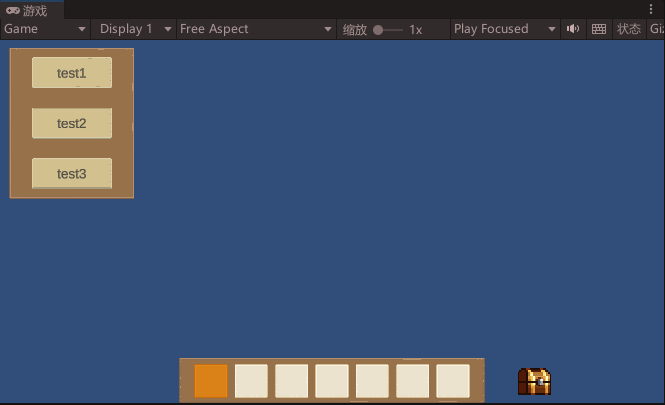
我们通过修改选中物品的背景颜色,提供选中的视觉效果
修改InventorySlot代码
private Image image;
public Color selectedColor, notSelectedColor;private void Awake()
{image = GetComponent<Image>();Deselect();// 初始化时取消选中
}
//选择该槽位颜色修改
public void Select()
{image.color = selectedColor;
}
//取消选择该槽位颜色修改
public void Deselect()
{image.color = notSelectedColor;
}
修改InventoryManager
int selectedSlot = -1;private void Start()
{ChangeSelectedSlot(0);//默认选中第一个槽
}void ChangeSelectedSlot(int newValue)
{if (selectedSlot >= 0){inventorySlots[selectedSlot].Deselect();// 取消之前选中的槽位}inventorySlots[newValue].Select();// 选择新的槽位selectedSlot = newValue;// 更新选中的槽位索引
}
效果
1-6键盘数字实现切换
修改InventoryManager代码
private void Update(){if (Input.GetKeyDown (KeyCode.Alpha1))ChangeSelectedSlot(0);else if (Input.GetKeyDown(KeyCode.Alpha2))ChangeSelectedSlot(1);else if (Input.GetKeyDown(KeyCode.Alpha3))ChangeSelectedSlot(2);else if (Input.GetKeyDown(KeyCode.Alpha4))ChangeSelectedSlot(3);else if (Input.GetKeyDown(KeyCode.Alpha5))ChangeSelectedSlot(4);else if (Input.GetKeyDown(KeyCode.Alpha6))ChangeSelectedSlot(5);else if (Input.GetKeyDown(KeyCode.Alpha7))ChangeSelectedSlot(6);
}
优化代码
private void Update()
{if (Input.inputString != null){bool isNumber = int.TryParse(Input.inputString, out int number);if (isNumber & number > 0 & number < 8) ChangeSelectedSlot(number - 1);}
}
效果
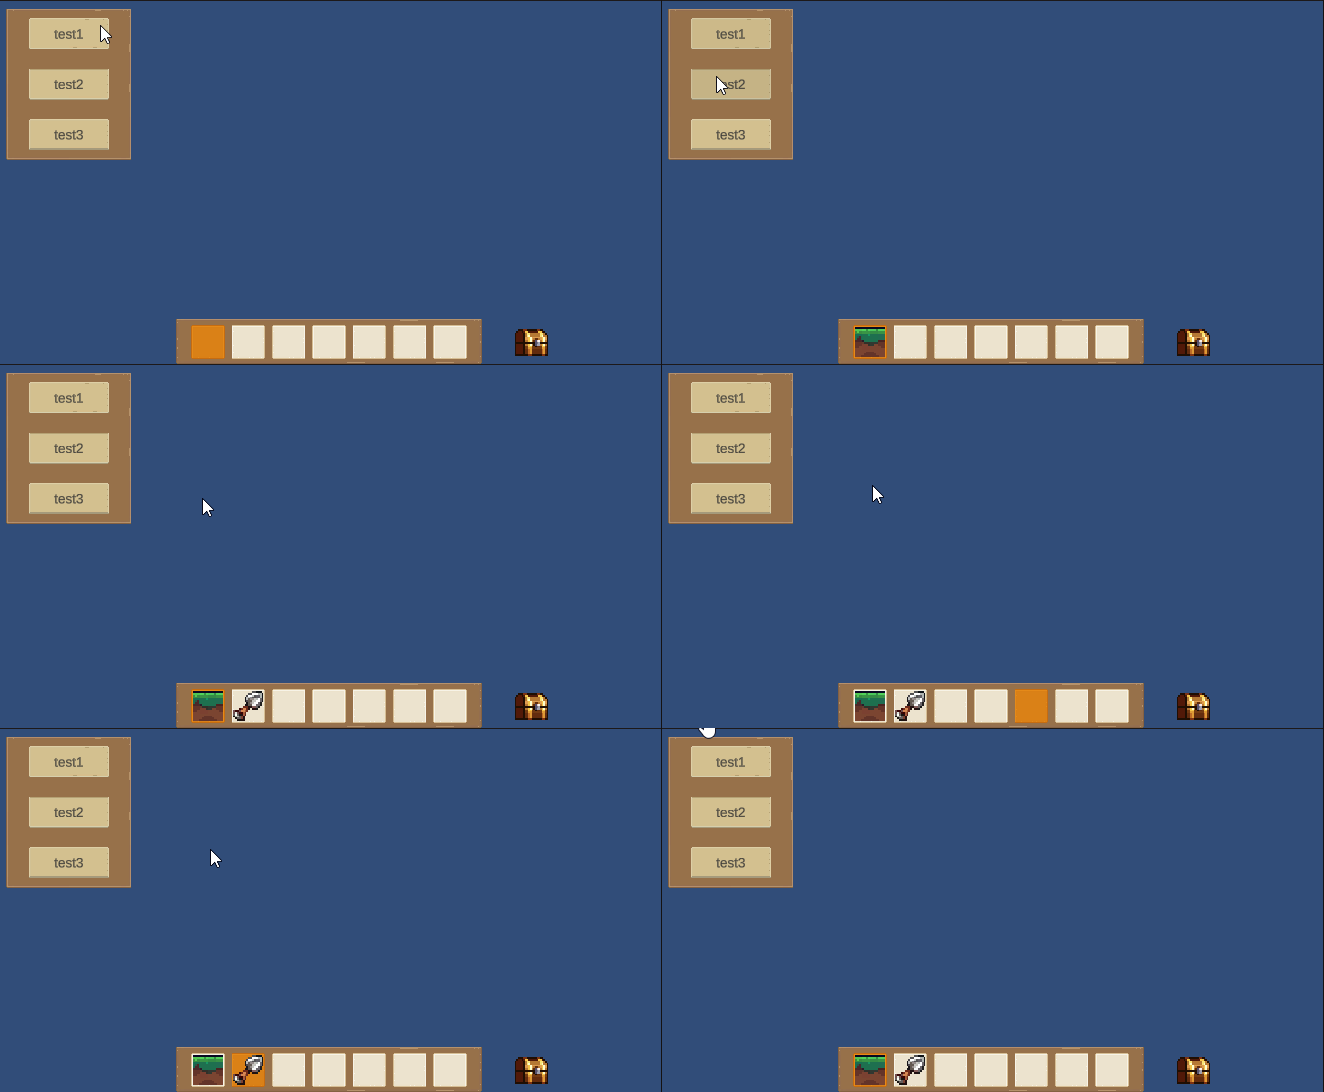
11. 选中工具功能
InventoryManager新增选中物品方法
// 获取当前选中物品
public Item GetSelectedItem(){if (inventorySlots.Length > 0){InventorySlot slot = inventorySlots[selectedSlot];// 获取当前选中槽位InventoryItem itemInSlot = slot.GetComponentInChildren<InventoryItem>();// 获取槽位上的物品if (itemInSlot != null) return itemInSlot.item;// 如果有物品,则返回物品}return null;//如果没有选中物品则返回null
}
在Test脚本中测试打印
//获取当前选中物品并打印输出
public void GetSelectedItem()
{Item receivedItem = inventoryManager.GetSelectedItem();//获取当前选中物品if (receivedItem != null){Debug.Log("选中物品:" + receivedItem);}else{Debug.Log("没有选中物品!");}
}
新增按钮测试
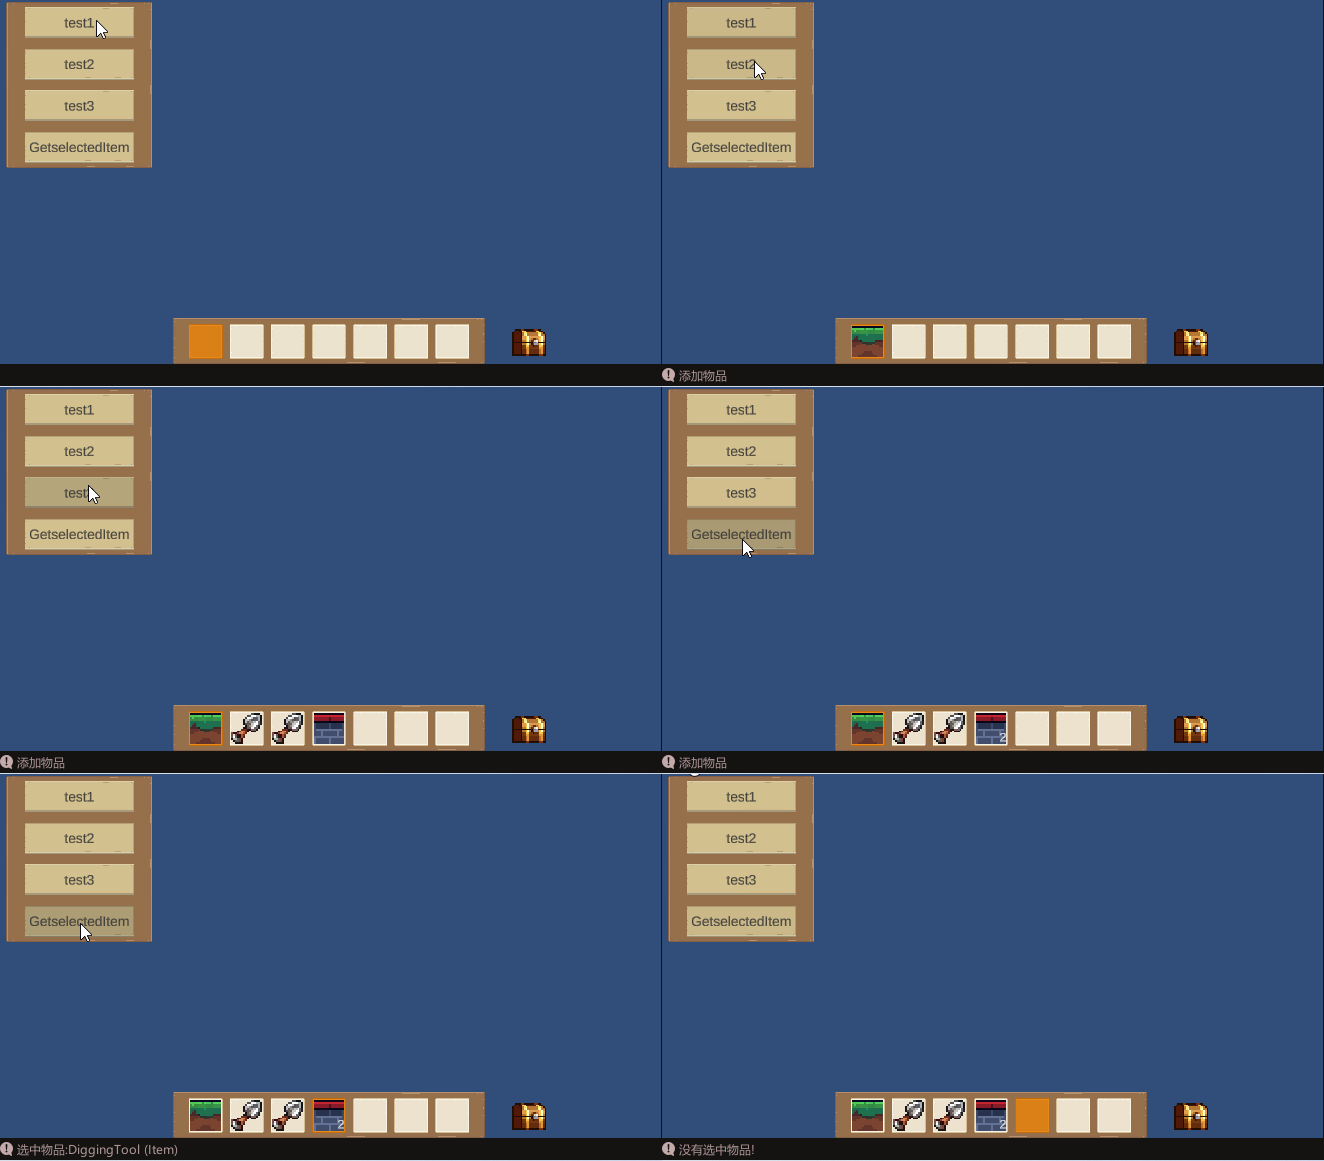
12. 使用物品 删除物品
修改InventoryManagerGetselectedItem方法
// 获取当前选中物品
public Item GetSelectedItem(bool use)
{if (inventorySlots.Length > 0){InventorySlot slot = inventorySlots[selectedSlot];// 获取当前选中槽位InventoryItem itemInSlot = slot.GetComponentInChildren<InventoryItem>();// 获取槽位上的物品if (itemInSlot != null){Item item = itemInSlot.item;//是否使用物品if (use == true){itemInSlot.count--;//减少库存if (itemInSlot.count <= 0){Destroy(itemInSlot.gameObject);//删除物品}else{itemInSlot.RefreshCount();//更新数量文本显示}}return item;}}return null;//如果没有选中物品则返回null
}
Test新增方法测试
//使用物品测试
public void UseSelectedItem()
{Item receivedItem = inventoryManager.GetSelectedItem(true);//获取当前使用的物品if (receivedItem != null){Debug.Log("使用物品:" + receivedItem);}else{Debug.Log("没有可使用的物品!");}
}
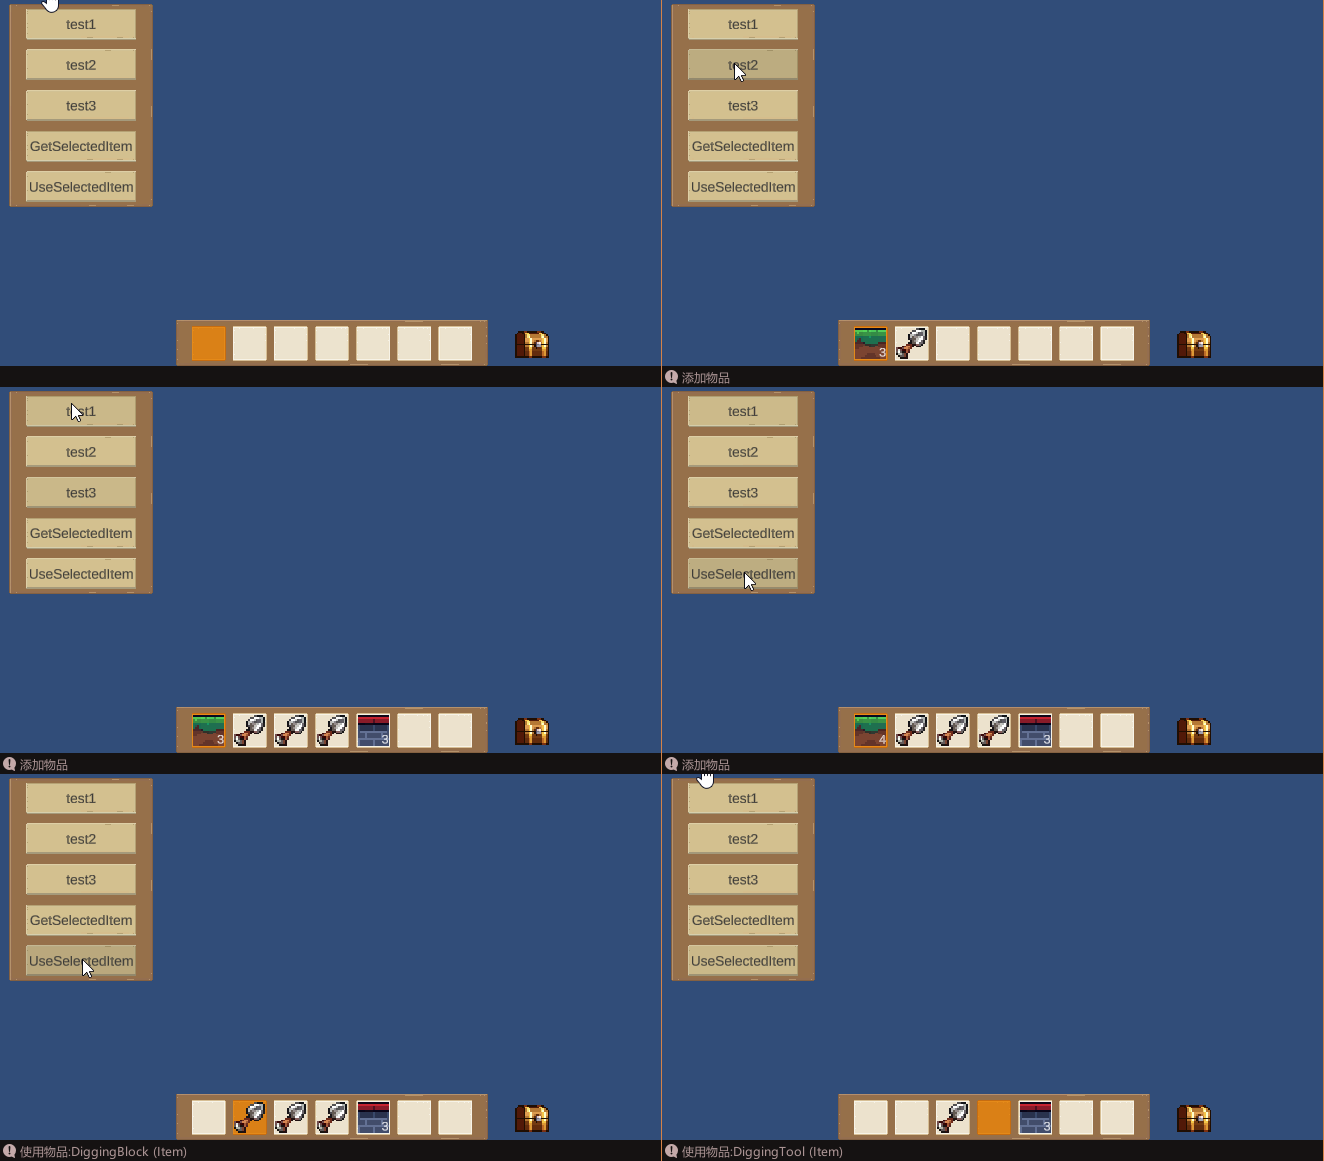
效果
三、建造系统和库存系统结合
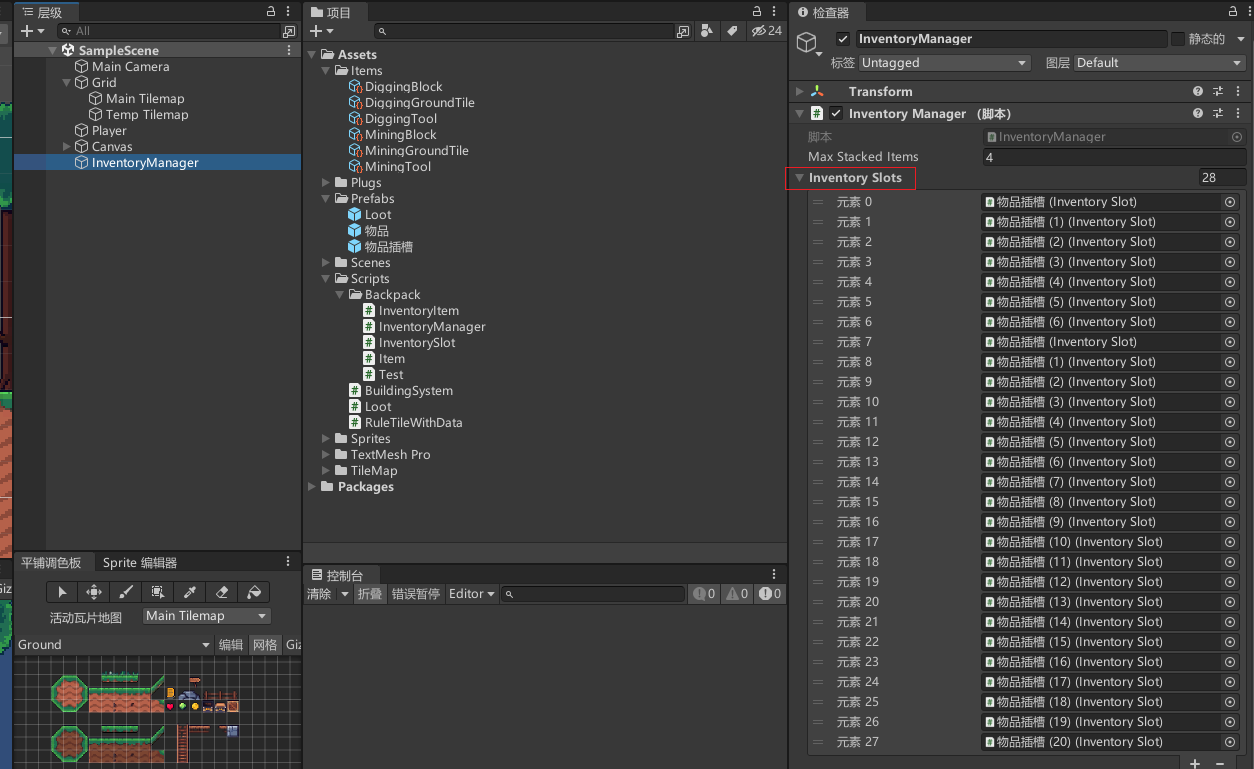
把库存系统的UI全部到建造系统里,并重新物品插槽信息
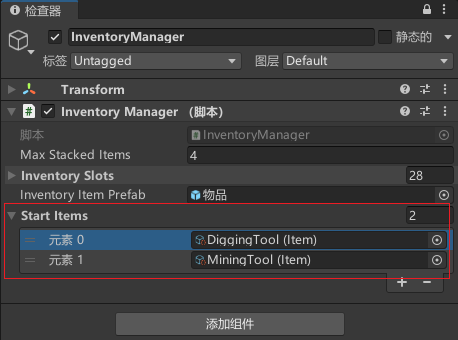
修改InventoryManager,配置开始时,默认显示物品的物品信息
public Item[] startItems; //默认物品列表private void Start()
{ChangeSelectedSlot(0);//默认选中第一个槽foreach (var item in startItems){AddItem(item);}}
这里我默认配置两个工具
修改InventoryManager为单例,方便其他地方调用
public static InventoryManager instance;void Awake(){instance = this;
}
修改BuildingSystem,获取当前选中物品
// [SerializeField] private Item item;             // 当前选中的物品private void Update()
{Item item = InventoryManager.instance.GetSelectedItem(false);
}
收集物品,修改Loot代码
// 当进入触发器时执行的逻辑
private void OnTriggerEnter2D(Collider2D other)
{if (other.CompareTag("Player")){bool canAdd = InventoryManager.instance.AddItem(item);if (canAdd){StartCoroutine(MoveAndCollect(other.transform));// 开始移动并拾取物品}}
}
使用减少物品,修改BuildingSystem代码
// 放置方块
private void Build(Vector3Int position, Item itemToBuild)
{InventoryManager.instance.GetSelectedItem(true);tempTilemap.SetTile(position, null);// 清除临时 Tilemap 上的方块highlighted = false;// 取消高亮状态mainTilemap.SetTile(position, itemToBuild.tile);// 在主 Tilemap 上放置方块
}
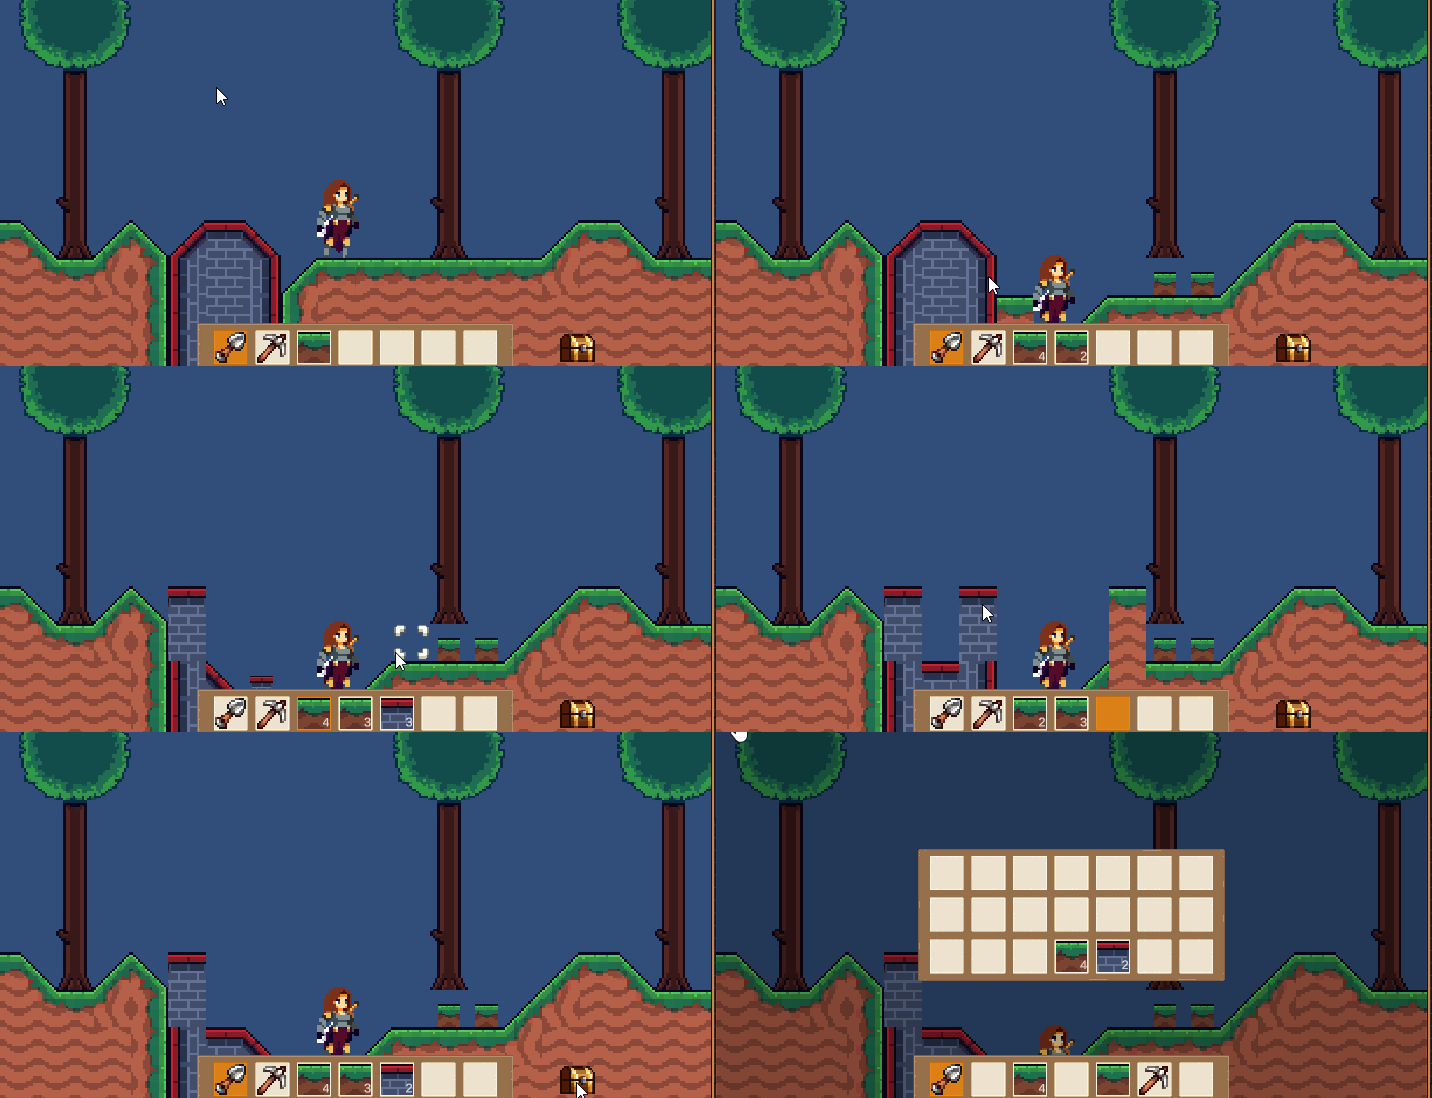
最终效果
源码
整理好后我会放上来
完结
赠人玫瑰,手有余香!如果文章内容对你有所帮助,请不要吝啬你的点赞评论和关注,以便我第一时间收到反馈,你的每一次支持都是我不断创作的最大动力。点赞越多,更新越快哦!当然,如果你发现了文章中存在错误或者有更好的解决方法,也欢迎评论私信告诉我哦!
好了,我是向宇,https://xiangyu.blog.csdn.net
一位在小公司默默奋斗的开发者,出于兴趣爱好,于是最近才开始自习unity。如果你遇到任何问题,也欢迎你评论私信找我, 虽然有些问题我可能也不一定会,但是我会查阅各方资料,争取给出最好的建议,希望可以帮助更多想学编程的人,共勉~



)


清单和特点总结)


)


