wsl配置ubuntu22.04,并配置docker
文章目录
- wsl配置ubuntu22.04,并配置docker
- 一、在Windows上安装Linux子系统
- 前提条件
- 安装步骤
- 二、wsl安装系统到其他盘
- ①查看wsl运行状态,将其保持在关闭状态
- ②导出当前Linux的镜像
- ③注销之前的系统并检查
- ④导入镜像
- ⑤配置先前设置的默认登录用户
- 三、配置docker和docker-compose
- Wsl2中的Ubuntu22.04安装Docker
- docker指令必须用sudo执行
- 配置Docker镜像源
- 四、docker pull 报错Get "https://registry-1.docker.io/v2/": net/http: request canceled while waiting for connection (Client.Timeout exceeded while awaiting headers)解决方法
- 五、Docker关闭不掉进程,Stopping docker.service, but it can still be activated by: docker.socket
一、在Windows上安装Linux子系统
前提条件
-
windows机器需要支持虚拟化,并且需要在BIOS中开启虚拟化技术,因为WSL2基于hyper-V。
查看是否开启虚拟化
按住Windows+R输入cmd打开命令行,输入systeminfo可以看到如下字样,代表电脑已经支持虚拟化,可继续安装
Hyper-V 要求: 虚拟机监视器模式扩展: 是固件中已启用虚拟化: 是二级地址转换: 是数据执行保护可用: 是 -
无论是Windows10还是Windows11,所使用的Windows是最新版的,如果不是最新版,请在
设置-Windows更新中将系统更新到最新版本
安装步骤
-
开启开发者模式
-
开启“适用于Linux的Windows子系统”:
找到 控制面板
-程序和功能-启用或关闭Windows功能,选中“适用于Linux的Windows子系统”和“虚拟机平台”,然后点击确定。需要重启电脑。 -
安装Linux分发版:
-
没有wsl的:下载Linux内核更新包,适用于 x64 计算机的 WSL2 Linux 内核更新包,安装。
-
有wsl的:直接终端输入
wsl --update
-
-
启用虚拟机功能
安装 WSL 2 之前,必须启用“虚拟机平台”可选功能。 计算机需要虚拟化功能才能使用此功能。
以管理员身份打开PowerShell并运行:dism.exe /online /enable-feature /featurename:VirtualMachinePlatform /all /norestart这时需要重启电脑,等待电脑重新启动完成即可。
-
将 WSL 2 设置为默认版本
打开 PowerShell,然后在安装新的 Linux 发行版时运行以下命令,将 WSL 2 设置为默认版本:
wsl --set-default-version 2
-
安装ubuntu22.04版本
直接在微软商店搜索ubuntu22.04,下载完成就行
-
运行
在开始菜单可以看到刚刚下载好的ubuntu22.04版本,直接双击运行,会提示输账户和密码,输入后就i能进去。(不输入就是默认root用户,需要自己添加账户)
此时可以在
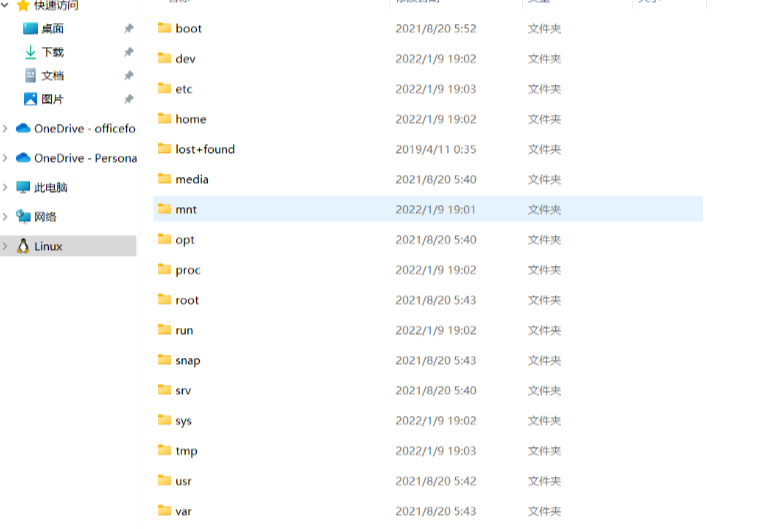
此电脑中看到Linux,打开它可以看到Ubuntu的文件,后续与Ubuntu之间的文件操作可以从此处进行。
安装步骤就完成了。
二、wsl安装系统到其他盘
因为默认是安装ubuntu在C盘,那我一般不喜欢在C盘装软件,所以把ubuntu该到了D盘。
①查看wsl运行状态,将其保持在关闭状态
在powershell中输入代码:
wsl -l -v

图中STATE显示Running,就需要使用
wsl --shutdown
将其关闭,再次使用"wsl -l -v"确认状态

发现已经不在运行了
②导出当前Linux的镜像
在D盘根目录创建了新文件夹“Ubuntu2204”作为之后ubuntu的安装位置
在Powershell中输入代码:
wsl --export Ubuntu-22.04 H:\ubuntu22.04.tar
其中,"Ubuntu-22.04"是使用"wsl -l -v"查看到的linux系统的名字和版本,“D:\ubuntu22.04.tar ”是在H盘的根目录下创建名为“ubuntu22.04.tar”的镜像

③注销之前的系统并检查
Powershell中输入:
wsl --unregister Ubuntu-22.04
再通过“wsl -l -v”,发现子系统已删除

④导入镜像
wsl --import Ubuntu-22.04 D:\Ubuntu2004 D:\ubuntu20.04.tar
Ubuntu-22.04 Linux系统名称和版本
D:\Ubuntu2204 安装路径
D:\ubuntu22.04.tar 镜像所在位置
等待系统处理,在文件夹中看到vhdx文件即为导入成功
⑤配置先前设置的默认登录用户
ubuntu2204.exe config --default-user username
username替换成你先前输入的账户名,可以替换为root
至此ubuntu22.04迁移完成~!
三、配置docker和docker-compose
Wsl2中的Ubuntu22.04安装Docker
友情提示:确定为wsl2+ubuntu22.04,否则可能按照以下步骤会失败。若失败,请完全卸载后重装docker,并检查wsl版本
安装依赖包
sudo apt install apt-transport-https ca-certificates curl gnupg lsb-release
添加阿里云镜像源和密钥
curl -fsSL https://mirrors.aliyun.com/docker-ce/linux/ubuntu/gpg | sudo gpg --dearmor -o /usr/share/keyrings/docker-archive-keyring.gpg
添加阿里云镜像源和密钥
curl -fsSL https://mirrors.aliyun.com/docker-ce/linux/ubuntu/gpg | sudo gpg --dearmor -o /usr/share/keyrings/docker-archive-keyring.gpg
添加阿里云镜像源
echo "deb [arch=amd64 signed-by=/usr/share/keyrings/docker-archive-keyring.gpg] https://mirrors.aliyun.com/docker-ce/linux/ubuntu $(lsb_release -cs) stable" | sudo tee /etc/apt/sources.list.d/docker.list > /dev/null
从软件源中更新安装工具包
sudo apt update
sudo apt uograde
安装Docker套件
sudo apt install docker-ce docker-ce-cli containerd.io
安装docker-compose
sudo apt install docker-compose
验证安装是否成功
docker --version

docker-compose --version
启动docker
sudo service docker start
docker指令必须用sudo执行
默认情况下, Unix 套接字 (Unix socket)由用户 root 拥有,其他用户只能使用 sudo 访问它。 Docker 守护进程始终以 root 用户身份运行。
为了避免每次都加sudo,需要给现在的账户添加docker权限
创建Docker用户组
通常在安装 Docker 时会自动创建一个名为 docker 的用户组,但可以手动确保其存在:
sudo groupadd docker
将当前用户添加到docker 组
sudo usermod -aG docker $USER
配置Docker镜像源
1.创建Docker文件夹
sudo mkdir -p /etc/docker
2.写入个人镜像源
sudo tee /etc/docker/daemon.json <<-'EOF'
{"registry-mirrors": ["https://要写入的镜像源.cn"]
}
EOF
3.重启守护进程和docker引擎
sudo systemctl daemon-reload
sudo systemctl restart docker
测试镜像源配置成功
sudo docker pull hello-world

其他镜像源加速地址:
Docker 中国官方镜像 https://registry.docker-cn.com
DaoCloud 镜像站 http://f1361db2.m.daocloud.io
Azure 中国镜像 https://dockerhub.azk8s.cn
科大镜像站 https://docker.mirrors.ustc.edu.cn
阿里云 https://ud6340vz.mirror.aliyuncs.com
七牛云 https://reg-mirror.qiniu.com
网易云(常用) https://hub-mirror.c.163.com
腾讯云 https://mirror.ccs.tencentyun.com
四、docker pull 报错Get “https://registry-1.docker.io/v2/”: net/http: request canceled while waiting for connection (Client.Timeout exceeded while awaiting headers)解决方法
配置加速地址
vim /etc/docker/daemon.json
添加以下内容
{"registry-mirrors": ["https://docker.1panel.live"]
}
或者
{"registry-mirrors": ["https://docker.211678.top","https://docker.1panel.live","https://hub.rat.dev","https://docker.m.daocloud.io","https://do.nark.eu.org","https://dockerpull.com","https://dockerproxy.cn","https://docker.awsl9527.cn"]
}
或
{"registry-mirrors": ["https://docker.m.daocloud.io"]
}
保存
:wq
重启docker
systemctl daemon-reload
systemctl restart  docker
五、Docker关闭不掉进程,Stopping docker.service, but it can still be activated by: docker.socket
解决方法:
sudo service docker stopsystemctl stop docker.socket


)


)


)


)

