Java后端代码
maven 仓库:
<!--openAI 请求工具-->
<dependency><groupId>com.unfbx</groupId><artifactId>chatgpt-java</artifactId><version>1.1.5</version>
</dependency>
maven 仓库官方 tts 使用案例:
@SneakyThrows
@Test
public void textToSpeed() {TextToSpeech textToSpeech = TextToSpeech.builder().model(TextToSpeech.Model.TTS_1.getName()).input("OpenAI官方Api的Java SDK,可以快速接入项目使用。目前支持OpenAI官方全部接口,同时支持Tokens计算。官方github地址:https://github.com/Grt1228/chatgpt-java。欢迎star。").voice(TtsVoice.NOVA.getName()).responseFormat(TtsFormat.MP3.getName()).build();java.io.File file = new java.io.File("G:\\test.mp3");ResponseBody responseBody = client.textToSpeech(textToSpeech);InputStream inputStream = responseBody.byteStream();//创建文件if (!file.exists()) {if (!file.getParentFile().exists())file.getParentFile().mkdir();try {file.createNewFile();} catch (IOException e) {e.printStackTrace();log.error("createNewFile IOException");}}OutputStream os = null;try {os = new BufferedOutputStream(new FileOutputStream(file));byte data[] = new byte[8192];int len;while ((len = inputStream.read(data, 0, 8192)) != -1) {os.write(data, 0, len);}} catch (IOException e) {e.printStackTrace();} finally {try {inputStream.close();} catch (IOException e) {e.printStackTrace();}try {if (os != null) {os.close();}} catch (IOException e) {e.printStackTrace();}}
}
控制器 controller
@ApiOperation("文本转语音")
@GetMapping("/textToVoice")
public ResponseEntity<InputStreamResource> textToVoice(String text, HttpServletResponse response) {response.setContentType("application/octet-stream");return translationHistoryService.textToVoice(text);
}
业务 service
@Override
public ResponseEntity<InputStreamResource> textToVoice(String text) {String audioDownloadUrl = ObjectUtils.filterObjectNull(this.lambdaQuery().select(TranslationHistory::getAudioDownloadUrl).eq(TranslationHistory::getOriginalText, text).last(SqlConstants.LIMIT_1).one(), TranslationHistory.class).getAudioDownloadUrl();InputStream inputStream = chatGptService.textToSpeed(text,audioDownloadUrl);InputStreamResource resource = new InputStreamResource(inputStream);return ResponseEntity.ok().contentType(MediaType.APPLICATION_OCTET_STREAM).body(resource);
}
public InputStream textToSpeed(String text,String audioDownloadUrl) {// 1、查询缓存String redisKey = RedisKeyUtils.getTextToSpeed(text);byte[] audioData = RedisUtils.getByte(redisKey);if (audioData != null) {log.info("从缓存中返回音频流数据");return new ByteArrayInputStream(audioData);}// 2、调用 api 响应// 将生成的音频数据读取为字节数组InputStream inputStream = null;try {log.info("从 API 中返回音频流数据");inputStream = textToSpeedIs(text);audioData = inputStreamToByteArray(inputStream);// 将音频缓存到 Redis 中RedisUtils.setValue(redisKey, audioData,7L, TimeUnit.DAYS);byte[] finalAudioData = audioData;// 开辟线程存入 redispoolSend.send(()->{// 标记首次String cacheKey = RedisKeyUtils.getFirstTextToSpeed(text);RedisUtils.setValue(cacheKey, finalAudioData,2L, TimeUnit.DAYS);});} catch (IOException e) {log.error("openAI音频调用异常:",e  );throw new RuntimeException(e);} finally {// 平常的关闭流代码太难看了,写了工具类简洁多了,自己封装一个CloseableUtils.close(inputStream);}// 将文本和对应的音频数据缓存到 Redis 中RedisUtils.setValue(redisKey, audioData, 7L, TimeUnit.DAYS);inputStream = new ByteArrayInputStream(audioData);return inputStream;
}
private InputStream textToSpeedIs(String text) throws IOException {TextToSpeech textToSpeech = TextToSpeech.builder().model(TextToSpeech.Model.TTS_1.getName()).input(text).voice(TtsVoice.NOVA.getName()).responseFormat(TtsFormat.MP3.getName()).build();// (重点,这里的方法细节就不展示了,看官方案例就知道,在哪个基础上复制粘贴封装一下方法即可)ResponseBody responseBody = chatGptStreamRequest.textToSpeech(textToSpeech,openaiKeyService.getApiKeyStrList());InputStream inputStream = responseBody.byteStream();return inputStream;
}
将 inputStream 流转换成 byte[] 数组
public static byte[] inputStreamToByteArray(InputStream inputStream) throws IOException {ByteArrayOutputStream byteBuffer = new ByteArrayOutputStream();int bufferSize = 1024;byte[] buffer = new byte[bufferSize];int len;while ((len = inputStream.read(buffer)) != -1) {byteBuffer.write(buffer, 0, len);}byte[] bytes = byteBuffer.toByteArray();byteBuffer.close();inputStream.close(); // 关闭流以释放资源return bytes;
}
后端代码就是这样,哦对了,还有 redisTemplate 的配置也分享一下,因为要将音频 byte[] 存入缓存,所以单独给 byte[] 类型配置 redisTemplate 注入:
@Bean
public RedisTemplate<String, byte[]> byteRedisTemplate(RedisConnectionFactory connectionFactory) {RedisTemplate<String, byte[]> template = new RedisTemplate<>();template.setConnectionFactory(connectionFactory);template.setKeySerializer(new StringRedisSerializer());// 使用 ByteArrayRedisSerializer 来处理字节数据template.setValueSerializer(RedisSerializer.byteArray());template.afterPropertiesSet();return template;
}
public static void setValue(String key, byte[] value, Long expireTime, TimeUnit timeUnit) {redisByteTemplate.opsForValue().set(key, value, expireTime, timeUnit);
}
public static byte[] getByte(String key) {return redisByteTemplate.opsForValue().get(key);
}
前端代码
<!DOCTYPE html>
<html lang="zh">
<head><meta charset="UTF-8"><title>音频流测试</title>
</head>
<body><h2>音频流播放测试</h2><!-- 音频播放组件,初始时不显示 --><audio id="audioPlayer" controls style="display: none;"></audio><button id="playAudio">播放音频</button><script>document.getElementById('playAudio').addEventListener('click', function() {// 音频流接口的 URLvar audioUrl = 'http://localhost:8822/client/translation/textToVoice?text=今天很开心1';// 使用 Fetch API 请求音频流fetch(audioUrl, {method: 'GET',headers: {// 添加请求头'token': 'v0Dbf55iGiH8uSfxwrlkvlt12qb57cnj'}}).then(function(response) {// 检查响应是否成功if (response.ok) {return response.blob();}throw new Error('网络响应错误');}).then(function(blob) {// 将 Blob 转换为 URL 并设置给 <audio> 元素var url = URL.createObjectURL(blob);var audioPlayer = document.getElementById('audioPlayer');audioPlayer.src = url;audioPlayer.style.display = 'block';audioPlayer.play();}).catch(function(error) {console.error('请求音频流失败:', error);});});</script>
</body>
</html>
过程中出现的后端异常
User
No converter for [class cn.hutool.core.io.resource.InputStreamResource] with preset Content-Type 'application/octet-stream'
将 class cn.hutool.core.io.resource.InputStreamResource 切换成 org.springframework.core.io.InputStreamResource 即可
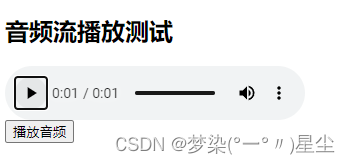
启动调试

嗯,完美运行,下班收工


)
:玩转二叉树--建树+层序遍历)


