Stable-Diffusion-WebUI简介
通过Gradio库,实现Stable Diffusion web 管理接口

Windows 11 安装Stable-Diffusion-WebUI
个人认为Stable-Diffusion-WebUI 官网提供的代码安装手册/自动安装不适合新手安装,我这边将一步步讲述我是如何搭建Python Conda虚拟环境来运行Stable-Diffusion-WebUI项目。在此文当中还会穿插一些AI知识点。
Stable-Diffusion-WebUI 源码下载
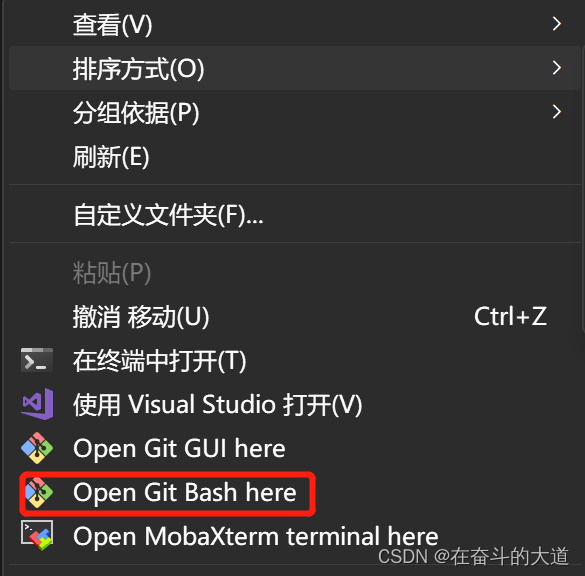
打开Git 命令窗口,右击选择->Open Git Base Here

执行如下指令,下载Stable-Diffusion-WebUI 源码。
git clone https://github.com/AUTOMATIC1111/stable-diffusion-webui.git构建Stable-Diffusion-WebUI 运行虚拟环境(stable-diffusion-webui),并安装项目依赖
创建stable-diffusion-webui虚拟环境执行如下指令:
-- 创建pyotrch 虚拟环境,并指定Python版本
conda create -n stable-diffusion-webui python=3.10
-- 激活pytorch 环境
activate stable-diffusion-webui
解答:个人为什么不推荐各位新手安装Stable-Diffusion-WebUI 官网提供的文档进行项目部署调试(手动/自动安装),我先将官网对于提供的安装文档拷贝出来,以及大致梳理其中的关键点步骤。
Installation on Windows 10/11 with NVidia-GPUs using release package 手动安装
Download sd.webui.zip from v1.0.0-pre and extract its contents.
Run update.bat.
Run run.bat.
For more details see Install-and-Run-on-NVidia-GPUsAutomatic Installation on Windows 自动安装
Install Python 3.10.6 (Newer version of Python does not support torch), checking "Add Python to PATH".
Install git.
Download the stable-diffusion-webui repository, for example by running git clone https://github.com/AUTOMATIC1111/stable-diffusion-webui.git.
Run webui-user.bat from Windows Explorer as normal, non-administrator, user.我这里主要梳理的是自动安装流程说明
1、前置Python版本下载及其安装和Git 下载stable-diffusion-webui 源码就不做过多的讲述,我们重点从自动安装的入口webui-user.bat 文件开始说明。
第一:启动webui-user.bat
主要进行python 版本指定、git源码地址、Python 项目venv 虚拟环境地址和stable-diffusion-webui 项目运行参数配置,最终调用webui.bat
第二: webui.bat
主要进行检查Python 版本\Git 配置\Venv 虚拟环境目录地址。
核心功能函数:
check_pip: 检查Python 是否安装包管理工具,存在调用创建虚拟环境方法start_venv, 否则输出错误信息。
start_venv: 主要是虚拟路径是否存在,存在调用虚拟环境激活方法activate_venv,否则调用skip_venv方法。
skip_venv:判断ACCELERATE配置是否开启,开启执行accelerate方法,否则执行launch方法
launch 和 accelerate_launch 方法异同点
相同点:都是调用stable-diffusion-webui 源码中launch.py
不同点: accelerate_launch 指定运行中进程CPU 核数= --num_cpu_threads_per_process=6
launch 无
第三: stable-diffusion-webui.launch.py
launch.py 主要进行stable-diffusion-webui 依赖环境的初始化和stable-diffusion-webui 的启动。
核心功能片段:

stable-diffusion-webui 初始化环境关联的Python 功能代码。
prepare_environment()方法由stable-diffusion-webui.modules.launch_utils.py 提供。主要功能为:
1、根据系统版本生成pip 安装torch 指令。
2、下载stable-diffusion-webui 依赖文件
3、下载stable-diffusion-webui 依赖包
4、下载stable-diffusion-webui 依赖源码
等等相关下载和检查依赖。
stable-diffusion-webui 启动关联的Python 功能代码。
start() 方法由stable-diffusion-webui.modules.launch_utils.py 提供。主要功能为:
依据传递的参数(sys.argv)调用stable-diffusion-webui.webui.py 的不同方法。
def start():print(f"Launching {'API server' if '--nowebui' in sys.argv else 'Web UI'} with arguments: {' '.join(sys.argv[1:])}")import webuiif '--nowebui' in sys.argv:webui.api_only()else:webui.webui()温馨提示:stable-diffusion-webui.webui.py 是项目的程序入口。
Stable-Diffusion-WebUI 安装项目依赖包模块
执行如下指令:
pip install -r requirements.txtStable-Diffusion-WebUI 安装项目依赖包模块存在的问题
问题一:安装torch 模块失败
产生问题原因:指定的torch 下载地址为国外服务器,如果我们本机没有设置科学上网很容易报错。
解决办法:通过阿里云的Simple Index 下载torch 的离线文件,进行本地安装。

并执行如下指令:
pip install E:\\whl\\torch-2.2.1-cp310-cp310-win_amd64.whl问题二:Stable-Diffusion-WebUI.repositories 目录项目下载失败
如果本机没有配置科学上网会导致Stable-Diffusion-WebUI.repositories 源码项目很容易失败。
解决办法:使用浏览器科学上网工具:穹顶穿越,访问Git项目并下载至Stable-Diffusion-WebUI.repositories目录即可。
Stable-Diffusion-WebUI 项目启动遇到的问题
问题一:A matching Triton is not available, some optimizations will not be enabled.
Error caught was: No module named ‘triton’
解决过程:
第一步:执行pip install triton后,得到的结果
> pip install triton
ERROR: Could not find a version that satisfies the requirement triton (from versions: none)
ERROR: No matching distribution found for triton
第二步:查询Simple Index 是否二进制文件

果然哪里都没有提供Windows的二进制下载,难道要自己编译?
第三步:百度/Google 检索是否存在已经编译好的二进制文件。
温馨提示:相关资源等下统一由百度云盘提供出来。
问题二:File "E:\python_ai\stable-diffusion-webui\modules\sd_models_types.py", line 1, in <module>
from ldm.models.diffusion.ddpm import LatentDiffusion
File "e:\python_ai\stable-diffusion-webui\repositories\stable-diffusion-stability-ai\ldm\models\diffusion\ddpm.py", line 20, in <module>
from pytorch_lightning.utilities.distributed import rank_zero_only
ModuleNotFoundError: No module named 'pytorch_lightning.utilities.distributed'
解决办法:
将下面几个文件中:
/stable-diffusion-webui/repositories/stable-diffusion-stability-ai/ldm/models/diffusion/ddpm.py (Line: 20)
/stable-diffusion-webui/extensions-builtin/LDSR/sd_hijack_ddpm_v1.py (Line: 17)
/stable-diffusion-webui\modules\models\diffusion\ddpm_edit.py(Line:22)
中
pytorch_lightning.utilities.distributed 修改为 pytorch_lightning.utilities.rank_zero


问题三: File "E:\python_ai\stable-diffusion-webui\modules\shared.py", line 66, in <module>
gradio_theme = gr.themes.Base()
AttributeError: module 'gradio' has no attribute 'themes'
解决办法:虚拟环境stable-diffusion-webui 协助gradio 模块,下载最新gradio 模块
指令如下:
pip uninstall gradiopip install gradio问题四:
Use --skip-version-check commandline argument to disable this check.
==============================================================================
Downloading: "https://huggingface.co/runwayml/stable-diffusion-v1-5/resolve/main/v1-5-pruned-emaonly.safetensors" to E:\python_ai\stable-diffusion-webui\models\Stable-diffusion\v1-5-pruned-emaonly.safetensors
----- None
loading stable diffusion model: FileNotFoundError
Traceback (most recent call last):
File "D:\anaconda3\envs\stable-diffusion-webui\lib\threading.py", line 973, in _bootstrap
self._bootstrap_inner()
File "D:\anaconda3\envs\stable-diffusion-webui\lib\threading.py", line 1016, in _bootstrap_inner
self.run()
File "D:\anaconda3\envs\stable-diffusion-webui\lib\threading.py", line 953, in run
self._target(*self._args, **self._kwargs)
File "E:\python_ai\stable-diffusion-webui\modules\initialize.py", line 148, in load_model
shared.sd_model # noqa: B018
File "E:\python_ai\stable-diffusion-webui\modules\shared_items.py", line 133, in sd_model
return modules.sd_models.model_data.get_sd_model()
File "E:\python_ai\stable-diffusion-webui\modules\sd_models.py", line 622, in get_sd_model
load_model()
File "E:\python_ai\stable-diffusion-webui\modules\sd_models.py", line 693, in load_model
checkpoint_info = checkpoint_info or select_checkpoint()
File "E:\python_ai\stable-diffusion-webui\modules\sd_models.py", line 226, in select_checkpoint
raise FileNotFoundError(error_message)
FileNotFoundError: No checkpoints found. When searching for checkpoints, looked at:
- file E:\python_ai\stable-diffusion-webui\model.ckpt
- directory E:\python_ai\stable-diffusion-webui\models\Stable-diffusionCan't run without a checkpoint. Find and place a .ckpt or .safetensors file into any of those locations.
问题原因:stable-diffusion-webui 项目启动依赖stable-diffusion-webui\models\Stable-diffusion\v1-5-pruned-emaonly.safetensors\v1-5-pruned-emaonly.ckpt 模型
解决办法:访问脸蛋网

检索:v1-5-pruned-emaonly

直接点击下载,下载完成后拷贝至 stable-diffusion-webui\models\Stable-diffusion 目录中即可。

问题五:
File "E:\python_ai\stable-diffusion-webui\modules\api\models.py", line 96, in generate_model
DynamicModel.__config__.allow_population_by_field_name = True
File "D:\anaconda3\envs\stable-diffusion-webui\lib\site-packages\pydantic\_internal\_model_construction.py", line 221, in __getattr__
raise AttributeError(item)
AttributeError: __config__
问题原因:
pydatic 版本冲突
解决办法:
移除虚拟环境stable-diffusion-webui中pydatic 默认版本,安装pydatic 指定版本
pip install pydantic==1.10.11
问题六:
File "e:\python_ai\stable-diffusion-webui\repositories\stable-diffusion-stability-ai\ldm\modules\encoders\modules.py", line 103, in __init__
self.tokenizer = CLIPTokenizer.from_pretrained(version)
File "D:\anaconda3\envs\stable-diffusion-webui\lib\site-packages\transformers\tokenization_utils_base.py", line 1768, in from_pretrained
raise EnvironmentError(
OSError: Can't load tokenizer for 'openai/clip-vit-large-patch14'. If you were trying to load it from 'https://huggingface.co/models', make sure you don't have a local directory with the same name. Otherwise, make sure 'openai/clip-vit-large-patch14' is the correct path to a directory containing all relevant files for a CLIPTokenizer tokenizer.
解决办法:
1、打开网站https://huggingface.co/models
2、检索并下载openai/clip-vit-large-patch1 模型
3、在stable-diffusion-webui\models 文件目录下新建openai文件夹,将下载的clip-vit-large-patch1
模型拷贝进去。

温馨提示:相关资源等下统一由百度云盘提供出来。
问题七: File "e:\python_ai\stable-diffusion-webui\repositories\stable-diffusion-stability-ai\ldm\modules\encoders\modules.py", line 105, in __init__ **
疑惑:相同的问题六已经讲述,为什么还要再说一遍。
解答:问题六回答的问题是模型下载,问题七是模型已经存放自定目录,还是包模型无法找到这个是涉及Python 代码问题。
原因在于:stable-diffusion-webui运行时它需要访问huggingface.co去下载一些模型需要的文件,而大陆用户连接不上huggingface.co,导致报错。
解决办法:openai/clip-vit-large-patch14 默认URL请求地址修改为本地绝对路径地址
self.tokenizer = CLIPTokenizer.from_pretrained("E:\python_ai\stable-diffusion-webui\models\openai\clip-vit-large-patch14")
self.transformer = CLIPTextModel.from_pretrained("E:\python_ai\stable-diffusion-webui\models\openai\clip-vit-large-patch14")
问题八:
File "D:\anaconda3\envs\stable-diffusion-webui\lib\site-packages\torch\cuda\__init__.py", line 239, in _lazy_init
raise AssertionError("Torch not compiled with CUDA enabled")
AssertionError: Torch not compiled with CUDA enabled
问题原因:我本机是windows 系统独显为Inter,不是英伟达,导致不能使用GPU。
解决办法:stable-diffusion-webui 项目的启动,禁用GPU使用CPU
执行如下指令:
python webui.py --no-half --use-cpu allstable-diffusion-webui 简单文字生成图片AI 功能演示
在虚拟环境stable-diffusion-webui 中启动stable-diffusion-webui 项目,执行如下指令:
C:\Users\zzg>cd E:\python_ai\stable-diffusion-webuiC:\Users\zzg>e:E:\python_ai\stable-diffusion-webui>
E:\python_ai\stable-diffusion-webui>conda env  list
# conda environments:
#
base                     D:\anaconda3
animated_drawings        D:\anaconda3\envs\animated_drawings
backgroundremover        D:\anaconda3\envs\backgroundremover
ldm                      D:\anaconda3\envs\ldm
python310                D:\anaconda3\envs\python310
pytorch                  D:\anaconda3\envs\pytorch
stable-diffusion-webui     D:\anaconda3\envs\stable-diffusion-webuiE:\python_ai\stable-diffusion-webui>
E:\python_ai\stable-diffusion-webui>activate stable-diffusion-webuiE:\python_ai\stable-diffusion-webui>conda.bat activate stable-diffusion-webui(stable-diffusion-webui) E:\python_ai\stable-diffusion-webui>python webui.py --no-half --use-cpu all
WARNING[XFORMERS]: xFormers can't load C++/CUDA extensions. xFormers was built for:PyTorch 2.0.1+cu118 with CUDA 1108 (you have 2.0.1+cpu)Python  3.10.11 (you have 3.10.13)Please reinstall xformers (see https://github.com/facebookresearch/xformers#installing-xformers)Memory-efficient attention, SwiGLU, sparse and more won't be available.Set XFORMERS_MORE_DETAILS=1 for more details
No module 'xformers'. Proceeding without it.
Warning: caught exception 'Torch not compiled with CUDA enabled', memory monitor disabled
==============================================================================
You are running torch 2.0.1+cpu.
The program is tested to work with torch 2.1.2.
To reinstall the desired version, run with commandline flag --reinstall-torch.
Beware that this will cause a lot of large files to be downloaded, as well as
there are reports of issues with training tab on the latest version.Use --skip-version-check commandline argument to disable this check.
==============================================================================
----- None
Loading weights [cc6cb27103] from E:\python_ai\stable-diffusion-webui\models\Stable-diffusion\v1-5-pruned-emaonly.ckpt
Running on local URL:  http://127.0.0.1:7860To create a public link, set `share=True` in `launch()`.
Startup time: 21.3s (import torch: 7.3s, import gradio: 3.8s, setup paths: 5.3s, other imports: 2.3s, load scripts: 1.3s, create ui: 0.5s, gradio launch: 0.5s).
Creating model from config: E:\python_ai\stable-diffusion-webui\configs\v1-inference.yaml
当前路径地址 E:\python_ai\stable-diffusion-webui
Applying attention optimization: InvokeAI... done.
Model loaded in 8.2s (load weights from disk: 5.0s, create model: 0.8s, apply weights to model: 2.2s, calculate empty prompt: 0.1s).
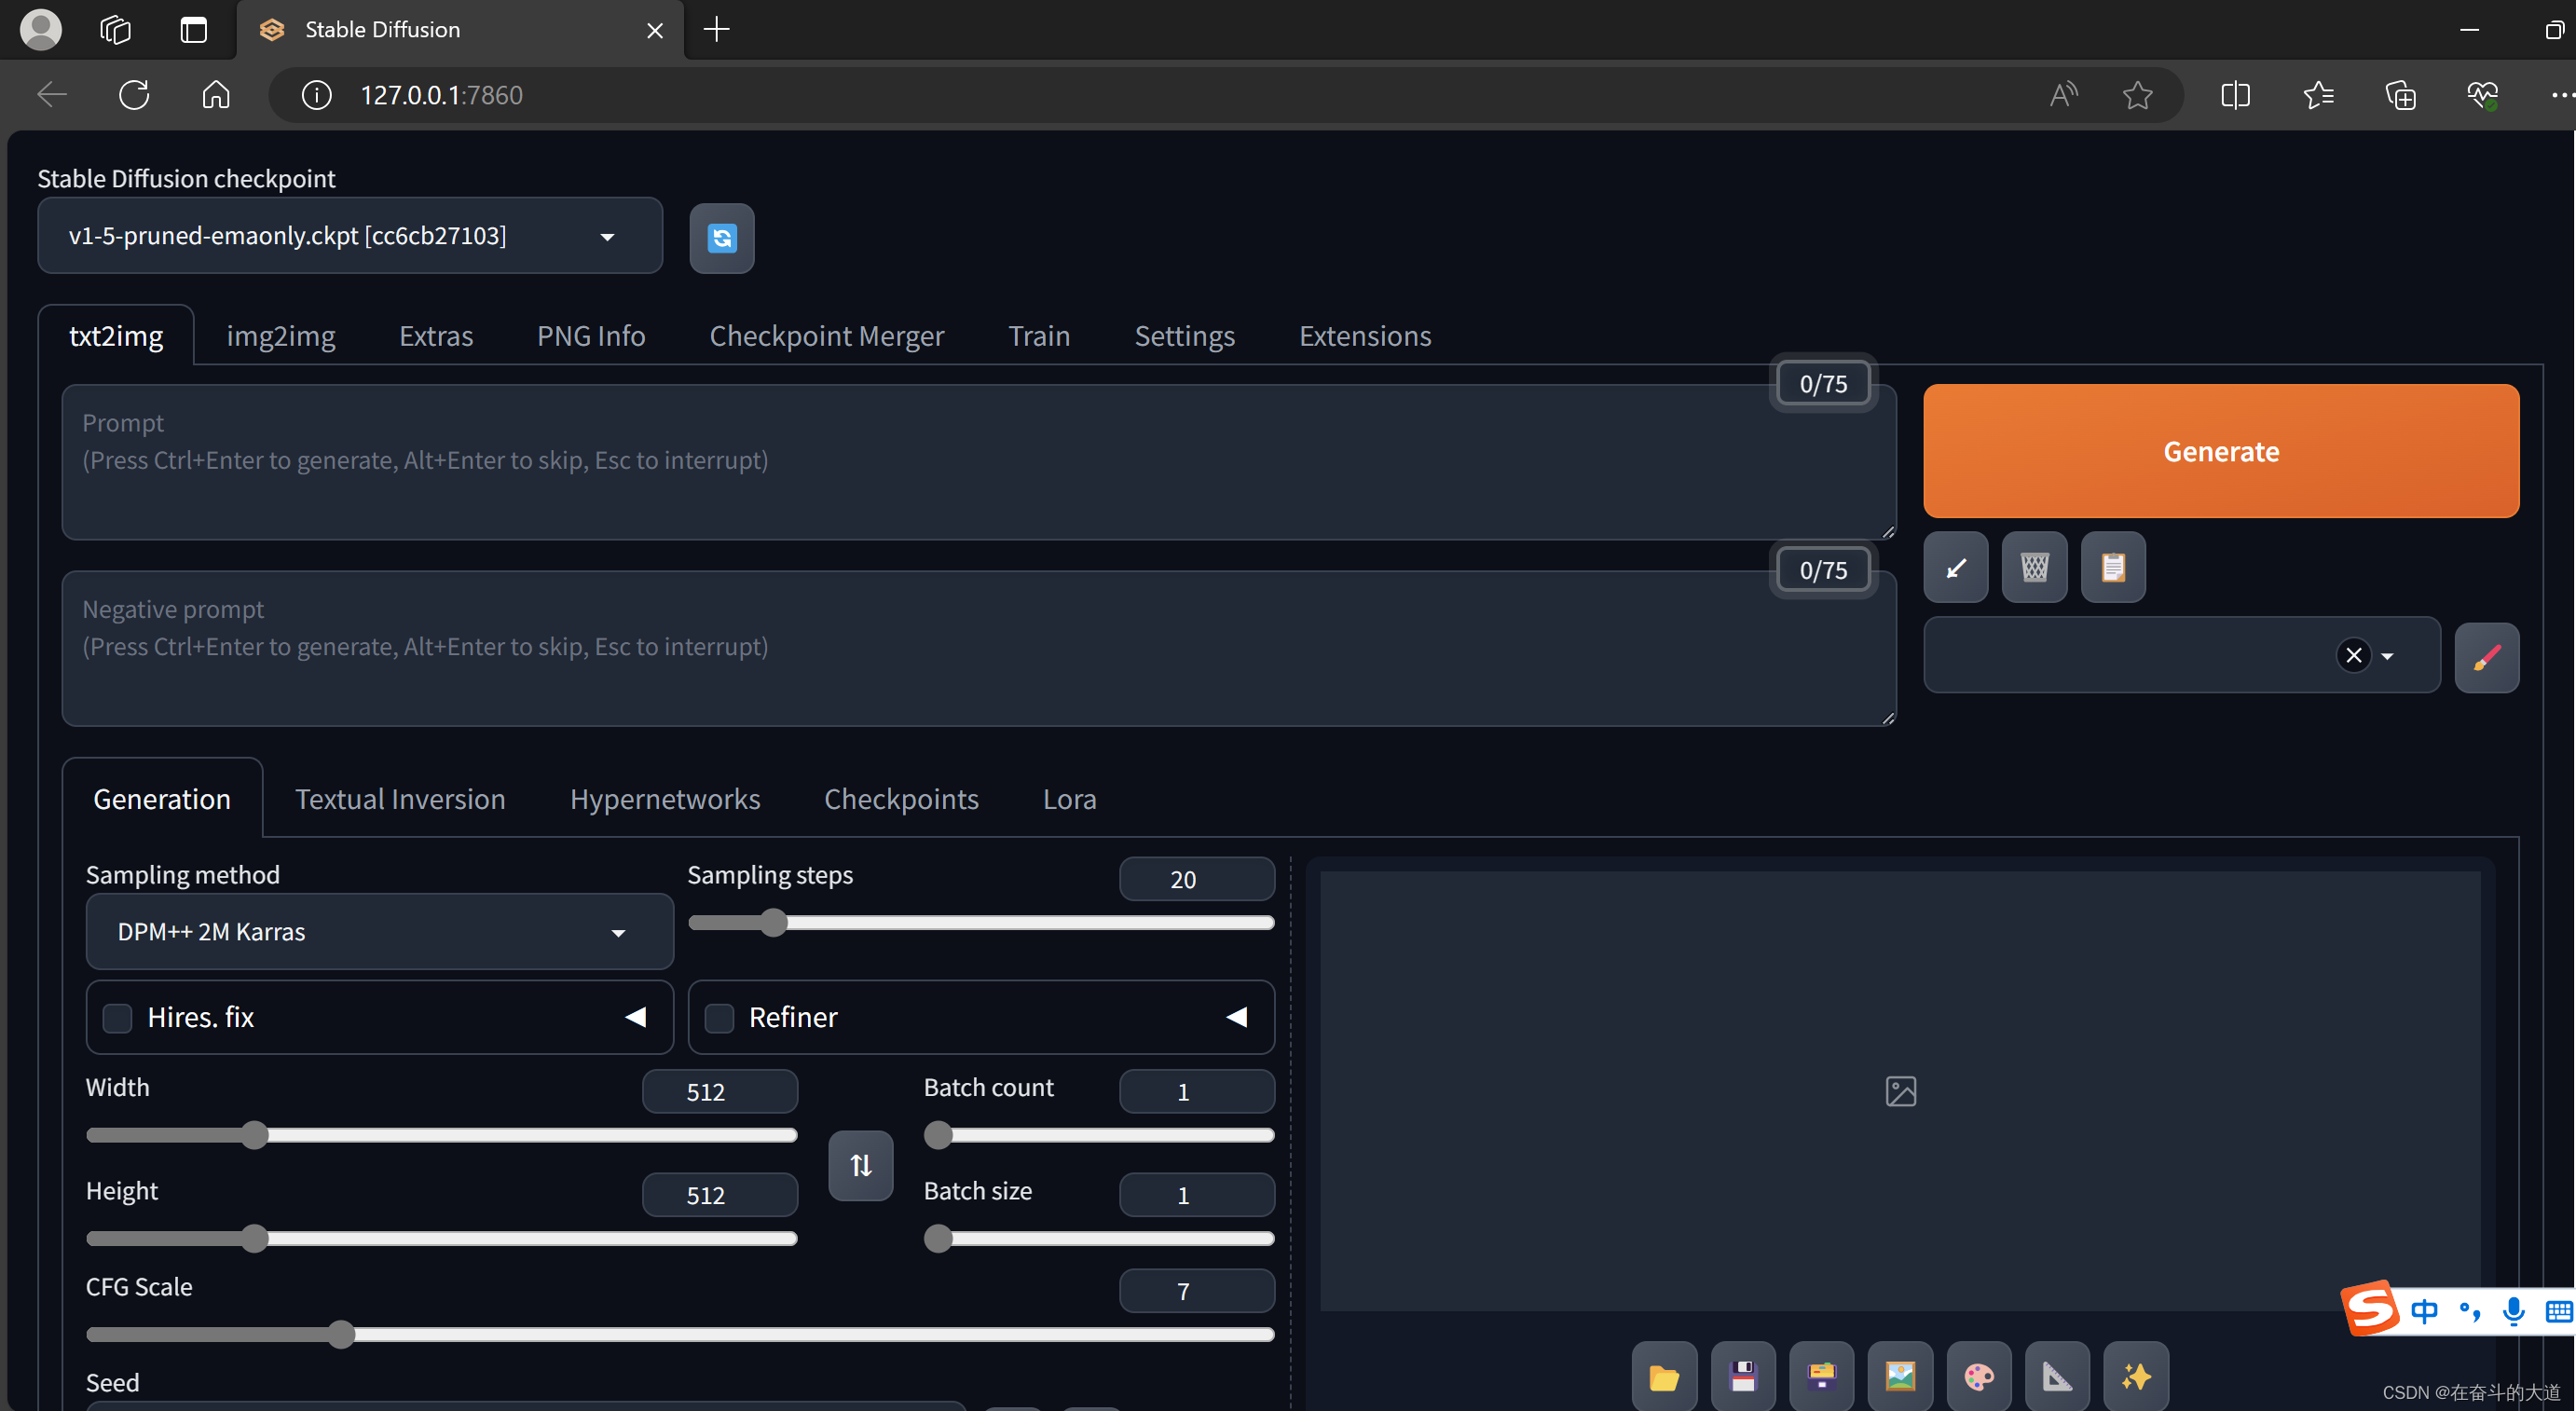
项目启动后,浏览器会自动打开http://127.0.0.1:7860/

在Prompt 输入文本框中录入: An astronaut riding a horse/一个宇航员骑马照
温馨提示:我现在仅仅下载了stable-diffusion 中文字生成图像模型,其他模型请按需下载。
百度云盘模型和包模块
链接:https://pan.baidu.com/s/1emfU3kra3AenEoSd4T9WQw
提取码:500a
--来自百度网盘超级会员V7的分享


)


块和内联)

)


)

)


)