集群分发脚本xsync
- 一、简介
- 二、环境准备
- 三、添加到机器的 hosts 文件
- 四、ping 命令测试
- 五、SSH 配置
- 5.1.本地先生成公钥和私钥
- 5.2.将公钥拷贝到其他机器
- 六、xsync 脚本编写
- 6.1.安装 rsync
- 6.2.新建 xsync.sh
- 6.3.xsync.sh脚本
- 6.4.赋予脚本执行权限
- 6.5.测试
- endl
一、简介
配置集群时需要将文件拷贝到各个机器,使用 xsync 工具同时进行多台机器同步数据,省去了麻烦。
二、环境准备
准备三台虚拟机,IP 分别为 192.168.147.128、192.168.147.129、192.168.147.130,修改三台机器主机名:
# 192.168.147.128
echo > host128 /etc/hostname# 192.168.147.129
echo > host129 /etc/hostname# 192.168.147.130
echo > host130 /etc/hostname
三、添加到机器的 hosts 文件
vim /etc/hosts# 添加以下内容
192.168.147.128 host128
192.168.147.129 host129
192.168.147.130 host130
四、ping 命令测试
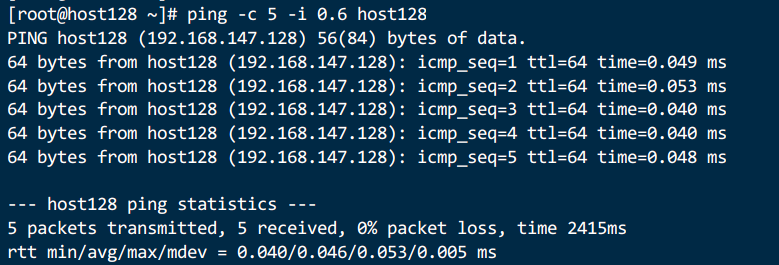
# 每隔0.6秒ping一次,一共ping 5次
ping -c 5 -i 0.6 host128

五、SSH 配置
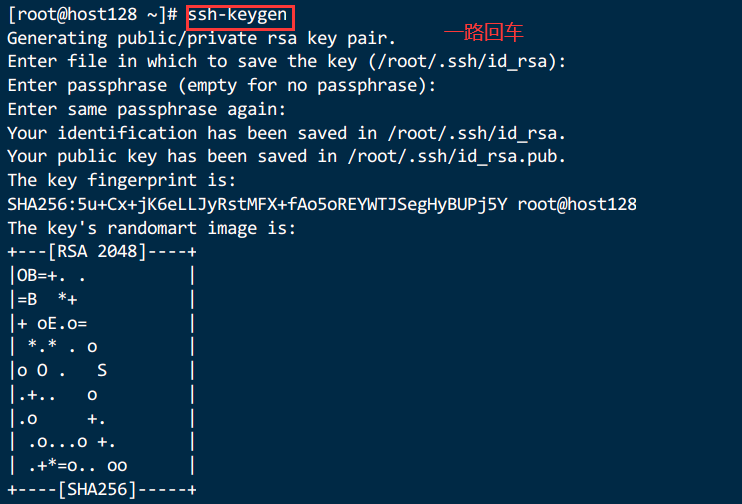
5.1.本地先生成公钥和私钥
ssh-keygen


5.2.将公钥拷贝到其他机器
# 命令格式
ssh-copy-id -i ~/.ssh/id_rsa.pub remote_ip # remote_ip 为远程主机的 IP 地址,我们需要同时输入其它机器
ssh-copy-id -i ~/.ssh/id_rsa.pub 192.168.147.128
ssh-copy-id -i ~/.ssh/id_rsa.pub 192.168.147.129
ssh-copy-id -i ~/.ssh/id_rsa.pub 192.168.147.130


六、xsync 脚本编写
6.1.安装 rsync
xsync 是对 rsync 的再封装,需要安装 rsyncyum -y install rsync
6.2.新建 xsync.sh
vim /usr/bin/xsync.sh
6.3.xsync.sh脚本
#!/bin/bash#1. 判断参数个数
if [ $# -lt 1 ]
thenecho Not Enough Arguement!exit;
fi#2. 遍历集群所有机器
for host in host128 host129 host130
doecho ====================  $host  ====================#3. 遍历所有目录,挨个发送for file in $@do#4. 判断文件是否存在if [ -e $file ]then#5. 获取父目录pdir=$(cd -P $(dirname $file); pwd)#6. 获取当前文件的名称fname=$(basename $file)ssh $host "mkdir -p $pdir"rsync -av $pdir/$fname $host:$pdirelseecho $file does not exists!fidone
done
6.4.赋予脚本执行权限
chmod 777 /usr/bin/xsync.sh
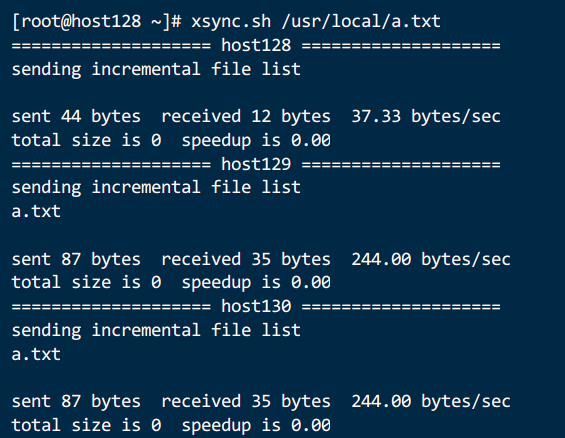
6.5.测试
touch /usr/local/a.txtxsync.sh /usr/local/a.txt


 | @Observed装饰器和@ObjectLink装饰器)


)

