个人主页:兜里有颗棉花糖
欢迎 点赞👍 收藏✨ 留言✉ 加关注💓本文由 兜里有颗棉花糖 原创
收录于专栏【Spring MVC】
本专栏旨在分享学习Spring MVC的一点学习心得,欢迎大家在评论区交流讨论💌
目录
- 一、加法计算器
- 二、登录页面
- login.html
- index.html
- 三、留言板
一、加法计算器
前端代码:
<!DOCTYPE html>
<html lang="en">
<head><meta charset="UTF-8"><meta name="viewport" content="width=device-width, initial-scale=1.0"><title>Document</title>
</head>
<body><form action="/calc/sum" method="post"><h1>计算器</h1>数字1:<input name="num1" type="text"><br>数字2:<input name="num2" type="text"><br><input type="submit" value=" 点击相加 "></form>
</body></html>
后端代码:
package org.example.demo1.demos.web.controller;import org.springframework.web.bind.annotation.RequestMapping;
import org.springframework.web.bind.annotation.RestController;@RequestMapping("/calc")
@RestController
public class CalcController {@RequestMapping("/sum")public String sum(Integer num1,Integer num2) {Integer sum = num1 + num2;return "计算结果为:" + sum;}
}
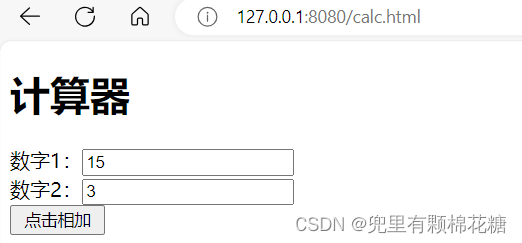
运行结果:
二、登录页面
前端两个文件(login.html、index.html),后端一个文件(UserController.java)。
后端代码如下:
package org.example.demo1.demos.web.controller;import org.springframework.util.StringUtils;
import org.springframework.web.bind.annotation.RequestMapping;
import org.springframework.web.bind.annotation.RestController;import javax.servlet.http.HttpSession;@RequestMapping("/user")
@RestController
public class UserController {@RequestMapping("/login")public Boolean login(String userName, String password, HttpSession session) {// 校验参数的合法性if(!StringUtils.hasLength(userName) || !StringUtils.hasLength(password))return false;// 进行用户名和密码的校验if("admin".equals(userName) && "admin".equals(password)) {session.setAttribute("username","admin");return true;}return false;}@RequestMapping("/getUserInfo")public String getUserInfo(HttpSession session) {// 从session中获取session用户String userName = (String) session.getAttribute("username");return userName;}
}
login.html
<!DOCTYPE html>
<html lang="en">
<head><meta charset="UTF-8"><title>登录页面</title>
</head>
<body>
<h1>用户登录</h1>
用户名:<input name="userName" type="text" id="userName"><br>
密码:<input name="password" type="password" id="password"><br>
<input type="button" value="登录" onclick="login()"><script src="https://cdn.bootcdn.net/ajax/libs/jquery/3.6.4/jquery.min.js"></script>
<script>function login() {// console.log("登录...")$.ajax({url: "/user/login",type: "post",data:{"userName": $("#userName").val(),"password": $("#password").val()},success:function(result) {if(result) {location.href = "/index.html"; // 方式一// location.assign(); 方式二}else {alert("密码错误");}}})}
</script>
</body></html>
index.html
<!doctype html>
<html lang="en"><head><meta charset="UTF-8"><meta name="viewport"content="width=device-width, user-scalable=no, initial-scale=1.0, maximum-scale=1.0, minimum-scale=1.0"><meta http-equiv="X-UA-Compatible" content="ie=edge"><title>用户登录首页</title>
</head><body>
登录人: <span id="loginUser"></span><script src="https://cdn.bootcdn.net/ajax/libs/jquery/3.6.4/jquery.min.js"></script>
<script>// 页面加载时,就去调用后端请求$.ajax({url: "/user/getUserInfo",type: "get",success:function(username) {$("#loginUser").text(username);}})
</script>
</body>
</html>
三、留言板
后端接口定义:
1.提交留言(/message/publish):
参数:MessageInfo(from,to,message)
返回结果:true/false
2.查看所有留言(/message/getMessageList):
参数:无
返回结果:List<MessageInfo>
前端代码:
<!DOCTYPE html>
<html lang="en"><head><meta charset="UTF-8"><meta name="viewport" content="width=device-width, initial-scale=1.0"><title>留言板</title><style>.container {width: 350px;height: 300px;margin: 0 auto;/* border: 1px black solid; */text-align: center;}.grey {color: grey;}.container .row {width: 350px;height: 40px;display: flex;justify-content: space-between;align-items: center;}.container .row input {width: 260px;height: 30px;}#submit {width: 350px;height: 40px;background-color: orange;color: white;border: none;margin: 10px;border-radius: 5px;font-size: 20px;}</style>
</head><body>
<div class="container"><h1>留言板</h1><p class="grey">输入后点击提交, 会将信息显示下方空白处</p><div class="row"><span>谁:</span> <input type="text" name="" id="from"></div><div class="row"><span>对谁:</span> <input type="text" name="" id="to"></div><div class="row"><span>说什么:</span> <input type="text" name="" id="say"></div><input type="button" value="提交" id="submit" onclick="submit()"><!-- <div>A 对 B 说: hello</div> -->
</div><script src="https://cdn.bootcdn.net/ajax/libs/jquery/3.6.4/jquery.min.js"></script>
<script>// 页面加载时请求后端获取留言列表$.ajax({url: "/message/getMessageInfo",type: "get",success: function(messages){for(var m of messages){//2. 构造节点(拼接节点的html)var divE = "<div>"+m.from +"对" + m.to + "说:" + m.message+"</div>";//3. 把节点添加到页面上$(".container").append(divE);}}});function submit(){//1. 获取留言的内容var from = $('#from').val();var to = $('#to').val();var say = $('#say').val();if (from== '' || to == '' || say == '') {return;}// 提交留言$.ajax({url: "/message/publish",type: "post",data: {"from":from,"to":to,"message":say},success:function (result){if(result) {// 留言成功//2. 构造节点var divE = "<div>"+from +"对" + to + "说:" + say+"</div>";//3. 把节点添加到页面上$(".container").append(divE);//4. 清空输入框的值$('#from').val("");$('#to').val("");$('#say').val("");}else {// 留言失败alert("留言发布失败")}}});}
</script>
</body>
</html>
后端代码:
package org.example.demo1.demos.web.controller;import org.springframework.util.StringUtils;
import org.springframework.web.bind.annotation.RequestMapping;
import org.springframework.web.bind.annotation.RestController;import java.util.ArrayList;
import java.util.List;@RequestMapping("/message")
@RestController
public class MessageController {private List<MessageInfo> messageInfos = new ArrayList<>();@RequestMapping("/publish")public Boolean publicMessage(MessageInfo messageInfo){if(!StringUtils.hasLength(messageInfo.getMessage())|| !StringUtils.hasLength(messageInfo.getFrom())|| !StringUtils.hasLength((messageInfo.getTo()))) {return false;}messageInfos.add(messageInfo);return true;}@RequestMapping("/getMessageInfo")public List<MessageInfo> getMessageInfo(){return messageInfos;}
}
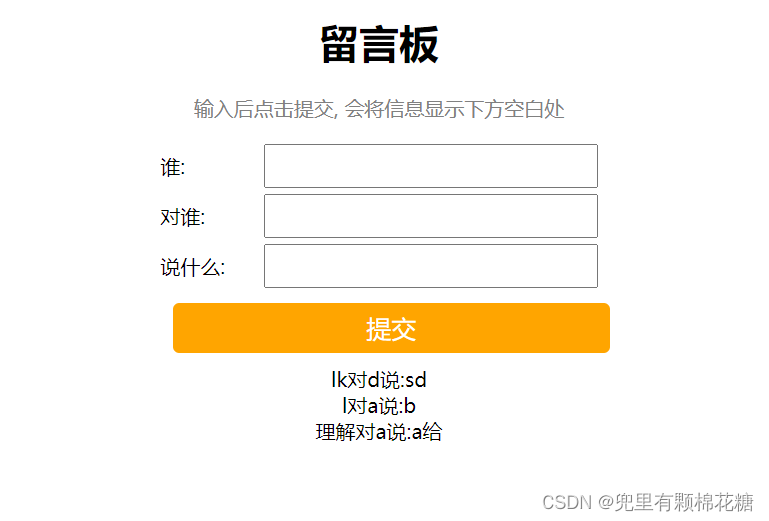
效果演示:

好了,以上就是本文的全部内容了。希望各位友友可以一键三连哈!!!


-----独立按键进一步控制LED灯)

)


)

持有... 30秒)


![torch报错:[winerror 126] 找不到指定的模块torch_python.dll“ or one of its dependencies.](http://pic.xiahunao.cn/torch报错:[winerror 126] 找不到指定的模块torch_python.dll“ or one of its dependencies.)


)

