一、源码下载
下面是hadoop官方源码下载地址,我下载的是hadoop-3.2.4,那就一起来看下吧
Index of /dist/hadoop/core
二、上下文
在上一篇<Hadoop-MapReduce-MRAppMaster启动篇>中已经将到:MRAppMaster的启动,那么运行MapTask、ReduceTask的容器(YarnChild)是怎么启动的呢?接下来我们一起来看看
三、结论
MRJobConfig是一个MRJob的配置,里面包含了Map、Reduce、Combine类以及Job名称、用户名称、队列名称、MapTask数量、ReduceTask数量、工作目录,jar在本地的路径、任务超时时间、任务id、输入输出目录,每个任务的内存大小和cpu核数等等。
此外它里面还有一个属性,如下:
package org.apache.hadoop.mapreduce;
public interface MRJobConfig {//......省略......public static final String APPLICATION_MASTER_CLASS ="org.apache.hadoop.mapreduce.v2.app.MRAppMaster";public static final String MAPREDUCE_V2_CHILD_CLASS = "org.apache.hadoop.mapred.YarnChild";//......省略......
}
MRAppMaster是MapReduce的ApplicationMaster实现,负责整个MapReduce作业的过程调度和状态协调
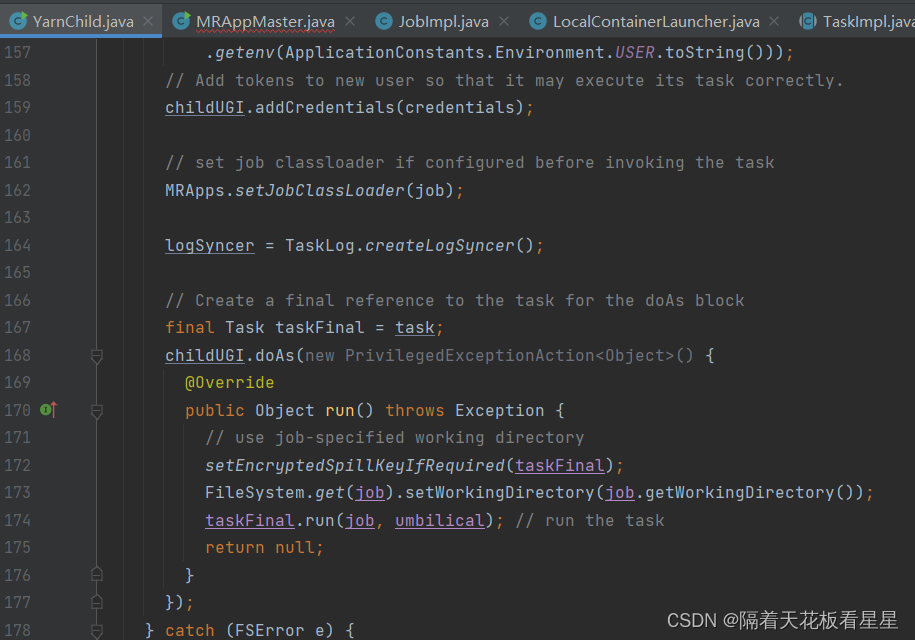
YarnChid是运行在每个容器中的进程,负责运行某一个MapTask或者ReduceTask,
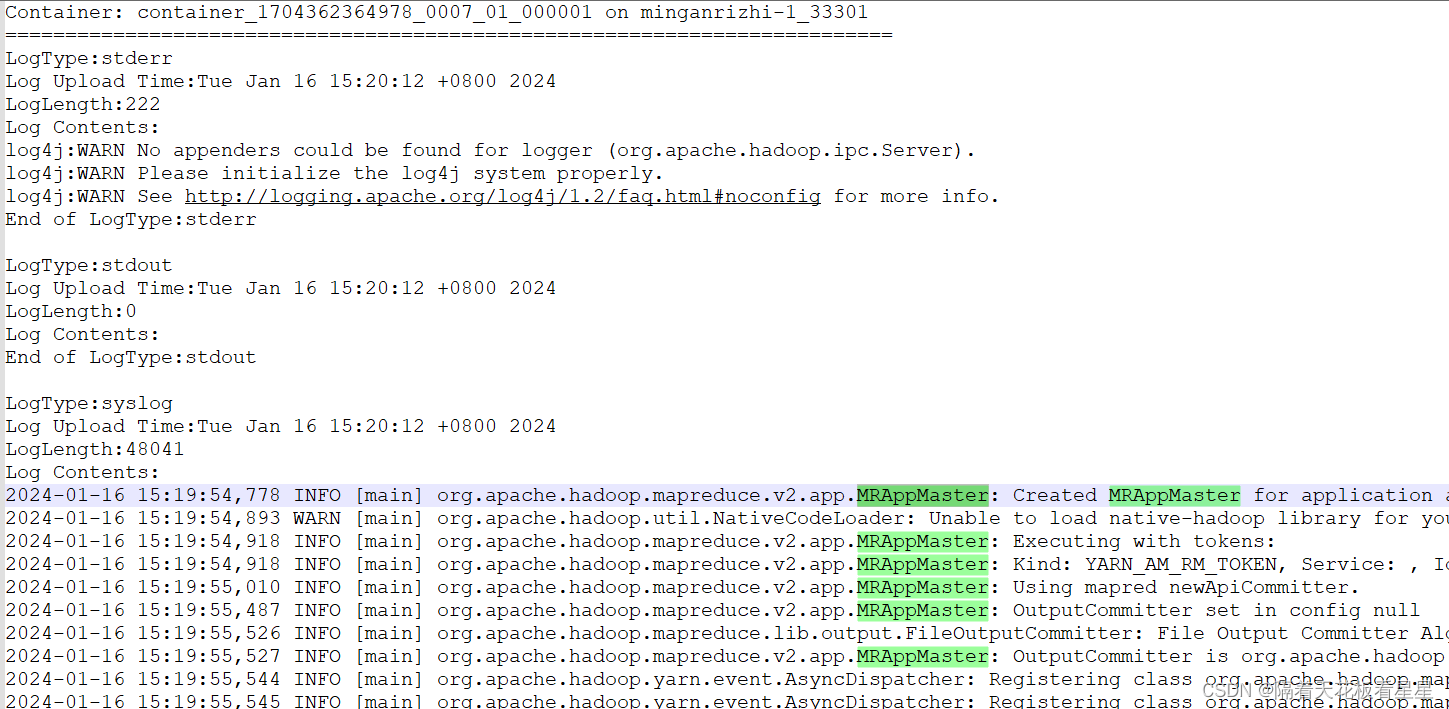
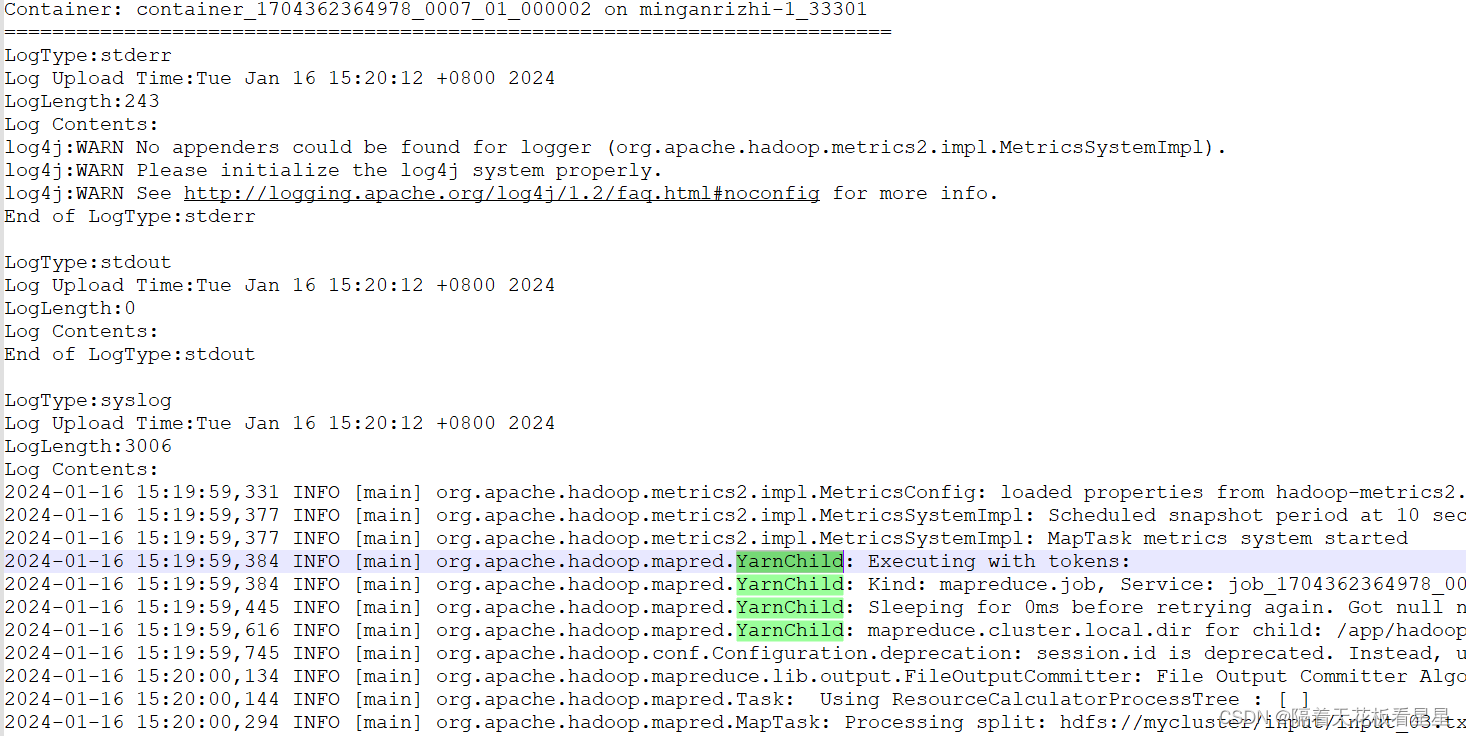
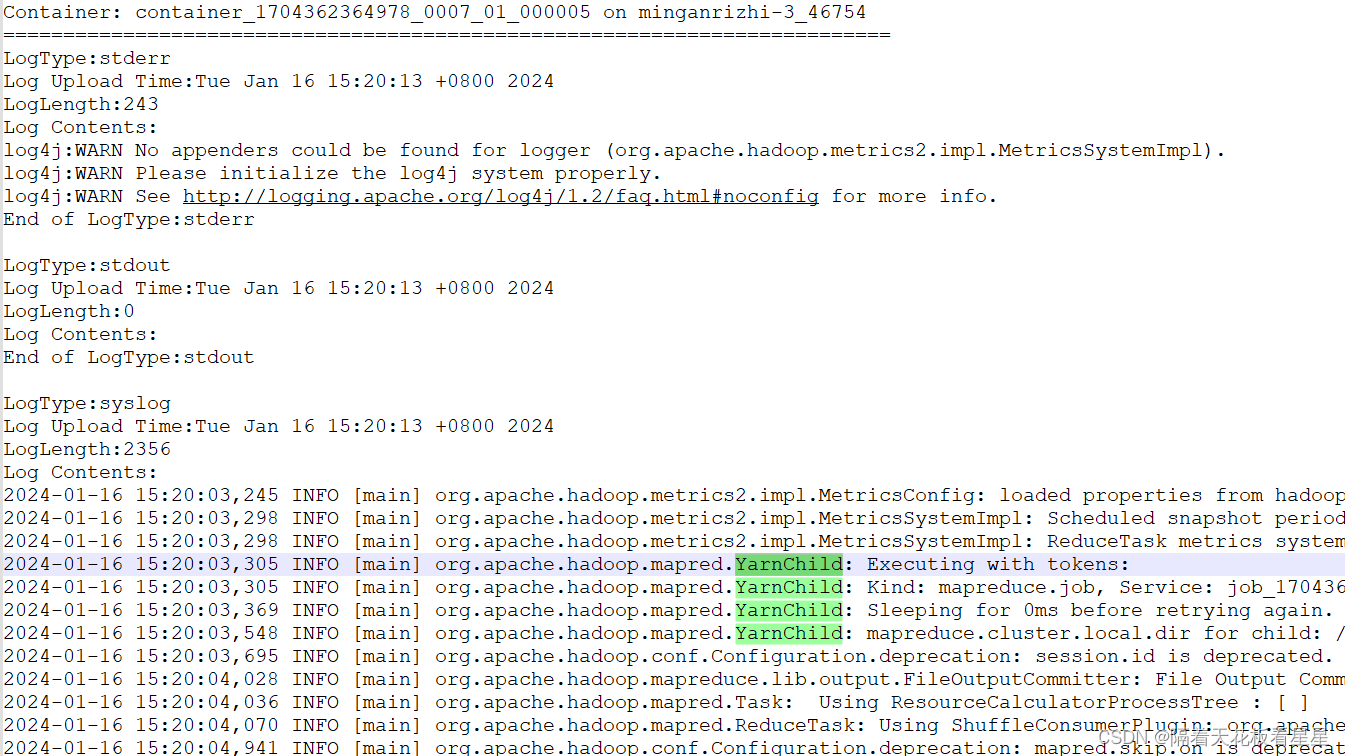
有兴趣的同学可以看一个任务的Yarn日志,也可以看我的<Hadoop-MapReduce-跟着日志理解整体流程>一篇中的日志,就可以发现ApplicationMaster容器和MapTask、ReduceTask所在容器的的日志开头分别就是MRAppMaster和YarnChid


MRAppMaster的启动参数是在YARNRunner中配置的:
public class YARNRunner implements ClientProtocol {private List<String> setupAMCommand(Configuration jobConf) {List<String> vargs = new ArrayList<>(8);vargs.add(MRApps.crossPlatformifyMREnv(jobConf, Environment.JAVA_HOME)+ "/bin/java");//......省略......vargs.add(MRJobConfig.APPLICATION_MASTER_CLASS);//......省略......return vargs;}
}
YarnChid的启动参数是在MapReduceChildJVM中配置的:
public class MapReduceChildJVM {public static List<String> getVMCommand(InetSocketAddress taskAttemptListenerAddr, Task task, JVMId jvmID) {TaskAttemptID attemptID = task.getTaskID();JobConf conf = task.conf;Vector<String> vargs = new Vector<String>(8);vargs.add(MRApps.crossPlatformifyMREnv(task.conf, Environment.JAVA_HOME)+ "/bin/java");//......省略......vargs.add(YarnChild.class.getName());  // main of Child//......省略......return vargsFinal;}
}
YarnChid启动后会启动MapTask或者ReduceTask

四、调用细节(源码跟读)
1、MRAppMaster
MRAppMaster是Map Reduce应用程序母版。状态机被封装在Job接口的实现中。所有状态更改都通过作业界面进行。每个事件都会导致作业中的有限状态转换。
MR AppMaster是松散耦合服务的组合。服务之间通过事件进行交互。这些组件类似于Actors模型。该组件对接收到的事件进行操作,并将事件发送到其他组件。
这使它保持高度并发性,而不需要同步或只需要最少的同步。
事件由中央调度机制进行调度。所有组件都注册到Dispatcher。
使用AppContext在不同组件之间共享信息。
我们先从MRAppMaster的main方法开始捋
public static void main(String[] args) {try {mainStarted = true;//设置默认异常处理Thread.setDefaultUncaughtExceptionHandler(new YarnUncaughtExceptionHandler());//获取容器相关信息:容器id、容器所在的NodeManager信息、应用提交时间String containerIdStr =System.getenv(Environment.CONTAINER_ID.name());String nodeHostString = System.getenv(Environment.NM_HOST.name());String nodePortString = System.getenv(Environment.NM_PORT.name());String nodeHttpPortString =System.getenv(Environment.NM_HTTP_PORT.name());String appSubmitTimeStr =System.getenv(ApplicationConstants.APP_SUBMIT_TIME_ENV);//校验容器相关信息validateInputParam(containerIdStr,Environment.CONTAINER_ID.name());validateInputParam(nodeHostString, Environment.NM_HOST.name());validateInputParam(nodePortString, Environment.NM_PORT.name());validateInputParam(nodeHttpPortString,Environment.NM_HTTP_PORT.name());validateInputParam(appSubmitTimeStr,ApplicationConstants.APP_SUBMIT_TIME_ENV);ContainerId containerId = ContainerId.fromString(containerIdStr);//根据containerId 获取ApplicationAttemptId //ContainerId:表示集群中容器的全局唯一标识符//ApplicationAttemptId:表示ApplicationMaster对给定ApplicationId的特定尝试,由于ApplicationMaster的临时故障,如硬件故障、连接问题等,在计划应用程序的节点上,可能需要多次尝试才能运行应用程序。ApplicationAttemptId applicationAttemptId =containerId.getApplicationAttemptId();if (applicationAttemptId != null) {CallerContext.setCurrent(new CallerContext.Builder("mr_appmaster_" + applicationAttemptId.toString()).build());}long appSubmitTime = Long.parseLong(appSubmitTimeStr);//构建MRAppMasterMRAppMaster appMaster =new MRAppMaster(applicationAttemptId, containerId, nodeHostString,Integer.parseInt(nodePortString),Integer.parseInt(nodeHttpPortString), appSubmitTime);//在JVM正常关闭期间接收到AND信号时运行的关闭挂钩。ShutdownHookManager.get().addShutdownHook(new MRAppMasterShutdownHook(appMaster), SHUTDOWN_HOOK_PRIORITY);//构建 map/reduce 作业配置JobConf conf = new JobConf(new YarnConfiguration());//添加配置资源(启动MRAppMaster 时配置过)conf.addResource(new Path(MRJobConfig.JOB_CONF_FILE));MRWebAppUtil.initialize(conf);//记录系统属性String systemPropsToLog = MRApps.getSystemPropertiesToLog(conf);if (systemPropsToLog != null) {LOG.info(systemPropsToLog);}String jobUserName = System.getenv(ApplicationConstants.Environment.USER.name());conf.set(MRJobConfig.USER_NAME, jobUserName);//初始化并启动该作业的AppMasterinitAndStartAppMaster(appMaster, conf, jobUserName);} catch (Throwable t) {LOG.error("Error starting MRAppMaster", t);ExitUtil.terminate(1, t);}}下面我们接着看initAndStartAppMaster()
protected static void initAndStartAppMaster(final MRAppMaster appMaster,final JobConf conf, String jobUserName) throws IOException,InterruptedException {//设置UGI的静态配置UserGroupInformation.setConfiguration(conf);// MAPREDUCE-6565: 需要设置SecurityUtil的配置。SecurityUtil.setConfiguration(conf);//安全框架已经将令牌加载到当前的UGI中,只需使用它们Credentials credentials =UserGroupInformation.getCurrentUser().getCredentials();LOG.info("Executing with tokens: {}", credentials.getAllTokens());//使用登录名创建用户。它旨在用于RPC中的远程用户,因为它没有任何凭据。UserGroupInformation appMasterUgi = UserGroupInformation.createRemoteUser(jobUserName);//将给定的凭据添加到此用户。appMasterUgi.addCredentials(credentials);//现在删除AM->RM令牌,这样任务就没有它了Iterator<Token<?>> iter = credentials.getAllTokens().iterator();while (iter.hasNext()) {Token<?> token = iter.next();if (token.getKind().equals(AMRMTokenIdentifier.KIND_NAME)) {iter.remove();}}//将所有凭据从一个凭据对象复制到另一个。现有的机密和令牌将被覆盖。conf.getCredentials().addAll(credentials);appMasterUgi.doAs(new PrivilegedExceptionAction<Object>() {@Overridepublic Object run() throws Exception {//服务所需的所有初始化代码。//在特定服务实例的生命周期中,此方法只会被调用一次。//有兴趣的同学可以进去看看,我这里大致总结下它做了什么:// 1、创建作业类加载器// 2、获得作业所需的令牌,并将其放入UGI// 3、创建事件调度程序接口。它根据事件类型将事件分派给已注册的事件处理程序。// 4、将事件调度程序添加到管理的服务列表// 5、创建尝试任务完成监控(如果任务尝试在FINISHING状态下停留的时间过长,则此类会生成TA_TIMED_OUT。)// 6、将尝试任务完成监控添加到管理的服务列表// 7、根据尝试任务创建心的jobid// 8、判断是用新API还是旧API// 9、获取该作业输出格式的输出提交器。它负责确保正确提交输出。// 10、检查该作业在HDFS上的临时目录是否存在// 11、构建用于处理来自JobClient的请求的服务// 12、创建用于处理输出提交的服务并添加到管理的服务列表// 13、处理来自RM的抢占请求// 14、创建用于处理对TaskUmplicalProtocol的请求的服务并添加到管理的服务列表// 15、创建用于记录作业历史事件的服务,并注册到事件调度程序中// 16、创建该作业的事件调度服务并注册到事件调度程序中// 17、创建投机者组件事件调度服务并注册到事件调度程序中(任务尝试的状态更新将发送到此组件)并注册到事件调度程序// 18、启动临时目录清理程序// 19、构建从ResourceManager分配容器的服务(如果是uber模式,则是伪造容器)并注册到事件调度程序// 20、构建通过NodeManager启动分配容器的相应服务并注册到事件调度程序// 21、最后添加JobHistoryEventHandler并添加到管理的服务列表appMaster.init(conf);//启动该作业的AppMasterappMaster.start();if(appMaster.errorHappenedShutDown) {throw new IOException("Was asked to shut down.");}return null;}});}下面我们接着看appMaster.start(),它最终还是会调用本类的serviceStart()
protected void serviceStart() throws Exception {amInfos = new LinkedList<AMInfo>();//因为作业有失败重试功能,假如这一次是重试作业旧需要覆盖上一次的Task并清理上一次的临时目录和输出completedTasksFromPreviousRun = new HashMap<TaskId, TaskInfo>();processRecovery();cleanUpPreviousJobOutput();//当前AM生成的当前AMInfo(里面有AppAttemptId、开始时间、所在容器id、所在NodeManager域名和端口)AMInfo amInfo =MRBuilderUtils.newAMInfo(appAttemptID, startTime, containerID, nmHost,nmPort, nmHttpPort);//创建并初始化(但不启动)单例job。//并将job完成事件和处理程序注册到事件调度程序中job = createJob(getConfig(), forcedState, shutDownMessage);//为所有以前的AM发送一个MR AM启动的事件。for (AMInfo info : amInfos) {dispatcher.getEventHandler().handle(new JobHistoryEvent(job.getID(), new AMStartedEvent(info.getAppAttemptId(), info.getStartTime(), info.getContainerId(),info.getNodeManagerHost(), info.getNodeManagerPort(), info.getNodeManagerHttpPort(), appSubmitTime)));}//为此AM发送一个MR AM启动的事件。dispatcher.getEventHandler().handle(new JobHistoryEvent(job.getID(), new AMStartedEvent(amInfo.getAppAttemptId(), amInfo.getStartTime(), amInfo.getContainerId(),amInfo.getNodeManagerHost(), amInfo.getNodeManagerPort(), amInfo.getNodeManagerHttpPort(), this.forcedState == null ? null: this.forcedState.toString(), appSubmitTime)));amInfos.add(amInfo);//metrics system(度量系统)初始化并启动DefaultMetricsSystem.initialize("MRAppMaster");boolean initFailed = false;if (!errorHappenedShutDown) {// create a job event for job initializationJobEvent initJobEvent = new JobEvent(job.getID(), JobEventType.JOB_INIT);// Send init to the job (this does NOT trigger job execution)// This is a synchronous call, not an event through dispatcher. We want// job-init to be done completely here.jobEventDispatcher.handle(initJobEvent);// If job is still not initialized, an error happened during// initialization. Must complete starting all of the services so failure// events can be processed.initFailed = (((JobImpl)job).getInternalState() != JobStateInternal.INITED);// JobImpl's InitTransition is done (call above is synchronous), so the// "uber-decision" (MR-1220) has been made. Query job and switch to// ubermode if appropriate (by registering different container-allocator// and container-launcher services/event-handlers).if (job.isUber()) {speculatorEventDispatcher.disableSpeculation();LOG.info("MRAppMaster uberizing job " + job.getID()+ " in local container (\"uber-AM\") on node "+ nmHost + ":" + nmPort + ".");} else {// send init to speculator only for non-uber jobs. // This won't yet start as dispatcher isn't started yet.dispatcher.getEventHandler().handle(new SpeculatorEvent(job.getID(), clock.getTime()));LOG.info("MRAppMaster launching normal, non-uberized, multi-container "+ "job " + job.getID() + ".");}// Start ClientService here, since it's not initialized if// errorHappenedShutDown is trueclientService.start();}//启动所有组件super.serviceStart();//最终设置作业类加载器MRApps.setClassLoader(jobClassLoader, getConfig());if (initFailed) {JobEvent initFailedEvent = new JobEvent(job.getID(), JobEventType.JOB_INIT_FAILED);jobEventDispatcher.handle(initFailedEvent);} else {//所有组件都已启动后,启动作业startJobs();}}下面我们接着看startJobs(),可以覆盖此项以实例化多个作业并创建工作流
protected void startJobs() {/** 创建一个作业启动事件(JobEventType.JOB_START)来启动 */JobEvent startJobEvent = new JobStartEvent(job.getID(),recoveredJobStartTime);/** 发送作业启动事件。这将触发作业执行 */dispatcher.getEventHandler().handle(startJobEvent);}下面我们看下JobEventType.JOB_START事件的处理,作业启动事件和处理程序在JobImpl中。
2、JobImpl
JobImpl是作业界面的实施。维护作业的状态机。读和写调用使用ReadWriteLock实现并发。
关于作业的状态有NEW、INITED、SETUP、RUNNING、KILL_WAIT、COMMITTING、SUCCEEDED、FAIL_WAIT、FAIL_ABORT、KILL_ABORT、FAILED、KILLED、INTERNAL_ERROR、AM_REBOOT等,有兴趣的同学可以跟读下每个状态的转换细节,这里不一一跟读了,
protected static finalStateMachineFactory<JobImpl, JobStateInternal, JobEventType, JobEvent> stateMachineFactory= new StateMachineFactory<JobImpl, JobStateInternal, JobEventType, JobEvent>(JobStateInternal.NEW)// Transitions from NEW state// Transitions from INITED state.addTransition(JobStateInternal.INITED, JobStateInternal.SETUP,JobEventType.JOB_START,new StartTransition())// Transitions from SETUP state.addTransition(JobStateInternal.SETUP, JobStateInternal.RUNNING,JobEventType.JOB_SETUP_COMPLETED,new SetupCompletedTransition())// Transitions from RUNNING state// Transitions from KILL_WAIT state.// Transitions from COMMITTING state// Transitions from SUCCEEDED state// Transitions from FAIL_WAIT state//Transitions from FAIL_ABORT state// Transitions from KILL_ABORT state// Transitions from FAILED state// Transitions from KILLED state// No transitions from INTERNAL_ERROR state. Ignore all.// No transitions from AM_REBOOT state. Ignore all.// create the topology tables.installTopology();以下是JobEventType.JOB_START事件的处理程序
public static class StartTransitionimplements SingleArcTransition<JobImpl, JobEvent> {/*** 这个转换在事件调度器线程中执行,尽管它是在MRAppMaster的startJobs()方法中触发的。*/@Overridepublic void transition(JobImpl job, JobEvent event) {JobStartEvent jse = (JobStartEvent) event;if (jse.getRecoveredJobStartTime() != -1L) {job.startTime = jse.getRecoveredJobStartTime();} else {job.startTime = job.clock.getTime();}JobInitedEvent jie =new JobInitedEvent(job.oldJobId,job.startTime,job.numMapTasks, job.numReduceTasks,job.getState().toString(),job.isUber());job.eventHandler.handle(new JobHistoryEvent(job.jobId, jie));JobInfoChangeEvent jice = new JobInfoChangeEvent(job.oldJobId,job.appSubmitTime, job.startTime);job.eventHandler.handle(new JobHistoryEvent(job.jobId, jice));job.metrics.runningJob(job);//CommitterEventType.JOB_SETUP事件处理job.eventHandler.handle(new CommitterJobSetupEvent(job.jobId, job.jobContext));}}JOB_SETUP事件是由CommitterEventHandler处理
3、CommitterEventHandler
CommitterEventHandler负责处理JOB_SETUP、JOB_COMMIT、JOB_ABORT、TASK_ABORT事件
public class CommitterEventHandler extends AbstractServiceimplements EventHandler<CommitterEvent> {public void run() {LOG.info("Processing the event " + event.toString());switch (event.getType()) {case JOB_SETUP:handleJobSetup((CommitterJobSetupEvent) event);break;case JOB_COMMIT:handleJobCommit((CommitterJobCommitEvent) event);break;case JOB_ABORT:handleJobAbort((CommitterJobAbortEvent) event);break;case TASK_ABORT:handleTaskAbort((CommitterTaskAbortEvent) event);break;default:throw new YarnRuntimeException("Unexpected committer event "+ event.toString());}}//处理JOB_SETUP事件protected void handleJobSetup(CommitterJobSetupEvent event) {try {committer.setupJob(event.getJobContext());//现在job的状态为JobEventType.JOB_SETUP_COMPLETEDcontext.getEventHandler().handle(new JobSetupCompletedEvent(event.getJobID()));} catch (Exception e) {LOG.warn("Job setup failed", e);context.getEventHandler().handle(new JobSetupFailedEvent(event.getJobID(), StringUtils.stringifyException(e)));}}}4、再回JobImpl
JobEventType.JOB_SETUP_COMPLETED的处理程序为SetupCompletedTransition(),在第2步中有。
private static class SetupCompletedTransitionimplements SingleArcTransition<JobImpl, JobEvent> {@Overridepublic void transition(JobImpl job, JobEvent event) {job.setupProgress = 1.0f;//调度MapTaskjob.scheduleTasks(job.mapTasks, job.numReduceTasks == 0);//调度ReduceTaskjob.scheduleTasks(job.reduceTasks, true);//如果没有任务,只需过渡到已完成的工作状态if (job.numReduceTasks == 0 && job.numMapTasks == 0) {job.eventHandler.handle(new JobEvent(job.jobId,JobEventType.JOB_COMPLETED));}}}protected void scheduleTasks(Set<TaskId> taskIDs,boolean recoverTaskOutput) {for (TaskId taskID : taskIDs) {TaskInfo taskInfo = completedTasksFromPreviousRun.remove(taskID);if (taskInfo != null) {//如果是重试任务需要覆盖eventHandler.handle(new TaskRecoverEvent(taskID, taskInfo,committer, recoverTaskOutput));} else {//新任务,需要做任务调度处理,我们看这块的逻辑eventHandler.handle(new TaskEvent(taskID, TaskEventType.T_SCHEDULE));}}}5、TaskImpl
TaskImpl是任务接口的实现,维护任务的状态机。任务的状态有NEW、SCHEDULED、RUNNING、KILL_WAIT、SUCCEEDED、FAILED
private static final StateMachineFactory<TaskImpl, TaskStateInternal, TaskEventType, TaskEvent> stateMachineFactory = new StateMachineFactory<TaskImpl, TaskStateInternal, TaskEventType, TaskEvent>(TaskStateInternal.NEW)// 定义Task的状态机// Transitions from NEW state.addTransition(TaskStateInternal.NEW, TaskStateInternal.SCHEDULED, TaskEventType.T_SCHEDULE, new InitialScheduleTransition())// Transitions from SCHEDULED state//启动第一次尝试时,任务状态设置为RUNNING// Transitions from RUNNING state// Transitions from KILL_WAIT state// Transitions from SUCCEEDED state// Transitions from FAILED state // create the topology tables.installTopology();可以看到处理事件调用的是InitialScheduleTransition()
private static class InitialScheduleTransitionimplements SingleArcTransition<TaskImpl, TaskEvent> {@Overridepublic void transition(TaskImpl task, TaskEvent event) {task.addAndScheduleAttempt(Avataar.VIRGIN);task.scheduledTime = task.clock.getTime();task.sendTaskStartedEvent();}
}private void addAndScheduleAttempt(Avataar avataar, boolean reschedule) {TaskAttempt attempt = addAttempt(avataar);inProgressAttempts.add(attempt.getID());//schedule the nextAttemptNumberif (failedAttempts.size() > 0 || reschedule) {eventHandler.handle(new TaskAttemptEvent(attempt.getID(),TaskAttemptEventType.TA_RESCHEDULE));} else {//将任务状态变成TaskAttemptEventType.TA_SCHEDULE)eventHandler.handle(new TaskAttemptEvent(attempt.getID(),TaskAttemptEventType.TA_SCHEDULE));}}private void sendTaskStartedEvent() {launchTime = getLaunchTime();//创建事件以记录任务的开始TaskStartedEvent tse = new TaskStartedEvent(TypeConverter.fromYarn(taskId), launchTime,TypeConverter.fromYarn(taskId.getTaskType()),getSplitsAsString());eventHandler.handle(new JobHistoryEvent(taskId.getJobId(), tse));historyTaskStartGenerated = true;}public static org.apache.hadoop.mapreduce.TaskType fromYarn(TaskType taskType) {switch (taskType) {case MAP:return org.apache.hadoop.mapreduce.TaskType.MAP;case REDUCE:return org.apache.hadoop.mapreduce.TaskType.REDUCE;default:throw new YarnRuntimeException("Unrecognized task type: " + taskType);}}
6、TaskAttemptImpl
TaskAttemptImpl是尝试任务的实现,因为有失败重试机制,因此每一次在容器中运行的任务都先称为尝试任务,当尝试任务运行成功后,对应的任务也会标记为成功。
TaskAttemptImpl维护尝试任务的状态机。任务的状态有NEW、UNASSIGNED、ASSIGNED、RUNNING、SUCCESS_FINISHING_CONTAINER、FAIL_FINISHING_CONTAINER、COMMIT_PENDING、SUCCESS_CONTAINER_CLEANUP、FAIL_CONTAINER_CLEANUP、KILL_CONTAINER_CLEANUP、FAIL_TASK_CLEANUP、KILL_TASK_CLEANUP、SUCCEEDED、FAILED、KILLED
private static final StateMachineFactory<TaskAttemptImpl, TaskAttemptStateInternal, TaskAttemptEventType, TaskAttemptEvent>stateMachineFactory= new StateMachineFactory<TaskAttemptImpl, TaskAttemptStateInternal, TaskAttemptEventType, TaskAttemptEvent>(TaskAttemptStateInternal.NEW)// Transitions from the NEW state..addTransition(TaskAttemptStateInternal.NEW, TaskAttemptStateInternal.UNASSIGNED,TaskAttemptEventType.TA_SCHEDULE, new RequestContainerTransition(false))// Transitions from the UNASSIGNED state..addTransition(TaskAttemptStateInternal.UNASSIGNED,TaskAttemptStateInternal.ASSIGNED, TaskAttemptEventType.TA_ASSIGNED,new ContainerAssignedTransition())// Transitions from the ASSIGNED state.// Transitions from RUNNING state.// Transitions from SUCCESS_FINISHING_CONTAINER state// Transitions from COMMIT_PENDING state// Transitions from SUCCESS_CONTAINER_CLEANUP state// kill and cleanup the container// Transitions from FAIL_CONTAINER_CLEANUP state.// Transitions from KILL_CONTAINER_CLEANUP// Transitions from FAIL_TASK_CLEANUP// run the task cleanup// Transitions from KILL_TASK_CLEANUP// Transitions from SUCCEEDED// Transitions from FAILED state// Transitions from KILLED state// create the topology tables.installTopology();可以看到处理TaskAttemptEventType.TA_SCHEDULE事件的逻辑是RequestContainerTransition()
static class RequestContainerTransition implementsSingleArcTransition<TaskAttemptImpl, TaskAttemptEvent> {private final boolean rescheduled;public RequestContainerTransition(boolean rescheduled) {this.rescheduled = rescheduled;}@SuppressWarnings("unchecked")@Overridepublic void transition(TaskAttemptImpl taskAttempt, TaskAttemptEvent event) {//告诉任何投机者我们正在请求一个容器taskAttempt.eventHandler.handle(new SpeculatorEvent(taskAttempt.getID().getTaskId(), +1));//申请容器if (rescheduled) {taskAttempt.eventHandler.handle(ContainerRequestEvent.createContainerRequestEventForFailedContainer(taskAttempt.attemptId, taskAttempt.resourceCapability));} else {//处理ContainerAllocator.EventType.CONTAINER_REQ事件taskAttempt.eventHandler.handle(new ContainerRequestEvent(taskAttempt.attemptId, taskAttempt.resourceCapability,taskAttempt.dataLocalHosts.toArray(new String[taskAttempt.dataLocalHosts.size()]),taskAttempt.dataLocalRacks.toArray(new String[taskAttempt.dataLocalRacks.size()])));}}}7、LocalContainerAllocator
LocalContainerAllocator负责在本地分配容器。不分配真正的容器;而是为所有请求发送一个已分配的事件。也处理ContainerAllocator.EventType.CONTAINER_REQ事件
public void handle(ContainerAllocatorEvent event) {if (event.getType() == ContainerAllocator.EventType.CONTAINER_REQ) {LOG.info("Processing the event " + event.toString());//分配与AM相同的容器IDContainerId cID =ContainerId.newContainerId(getContext().getApplicationAttemptId(),this.containerId.getContainerId());Container container = recordFactory.newRecordInstance(Container.class);container.setId(cID);NodeId nodeId = NodeId.newInstance(this.nmHost, this.nmPort);container.setResource(Resource.newInstance(0, 0));container.setNodeId(nodeId);container.setContainerToken(null);container.setNodeHttpAddress(this.nmHost + ":" + this.nmHttpPort);//将容器分配的事件发送到任务尝试if (event.getAttemptID().getTaskId().getTaskType() == TaskType.MAP) {JobCounterUpdateEvent jce =new JobCounterUpdateEvent(event.getAttemptID().getTaskId().getJobId());// TODO Setting OTHER_LOCAL_MAP for now.jce.addCounterUpdate(JobCounter.OTHER_LOCAL_MAPS, 1);eventHandler.handle(jce);}//此时处理TaskAttemptEventType.TA_ASSIGNED事件eventHandler.handle(new TaskAttemptContainerAssignedEvent(event.getAttemptID(), container, applicationACLs));}}8、再回TaskAttemptImpl
第6步已经写了TaskAttemptEventType.TA_ASSIGNED事件的处理逻辑:new ContainerAssignedTransition()
private static class ContainerAssignedTransition implementsSingleArcTransition<TaskAttemptImpl, TaskAttemptEvent> {@SuppressWarnings({ "unchecked" })@Overridepublic void transition(final TaskAttemptImpl taskAttempt, TaskAttemptEvent event) {final TaskAttemptContainerAssignedEvent cEvent = (TaskAttemptContainerAssignedEvent) event;Container container = cEvent.getContainer();taskAttempt.container = container;//这是真正的TasktaskAttempt.remoteTask = taskAttempt.createRemoteTask();taskAttempt.jvmID =new WrappedJvmID(taskAttempt.remoteTask.getTaskID().getJobID(),taskAttempt.remoteTask.isMapTask(),taskAttempt.container.getId().getContainerId());taskAttempt.taskAttemptListener.registerPendingTask(taskAttempt.remoteTask, taskAttempt.jvmID);taskAttempt.computeRackAndLocality();//启动容器//为给定的Task尝试创建要启动的容器对象ContainerLaunchContext launchContext = createContainerLaunchContext(cEvent.getApplicationACLs(), taskAttempt.conf, taskAttempt.jobToken,taskAttempt.remoteTask, taskAttempt.oldJobId, taskAttempt.jvmID,taskAttempt.taskAttemptListener, taskAttempt.credentials);taskAttempt.eventHandler.handle(new ContainerRemoteLaunchEvent(taskAttempt.attemptId,launchContext, container, taskAttempt.remoteTask));// 向投机者发送我们的容器需求得到满足的事件taskAttempt.eventHandler.handle(new SpeculatorEvent(taskAttempt.getID().getTaskId(), -1));}}static ContainerLaunchContext createContainerLaunchContext(Map<ApplicationAccessType, String> applicationACLs,Configuration conf, Token<JobTokenIdentifier> jobToken, Task remoteTask,final org.apache.hadoop.mapred.JobID oldJobId,WrappedJvmID jvmID,TaskAttemptListener taskAttemptListener,Credentials credentials) {synchronized (commonContainerSpecLock) {if (commonContainerSpec == null) {commonContainerSpec = createCommonContainerLaunchContext(applicationACLs, conf, jobToken, oldJobId, credentials);}}//填写通用规范中缺少的每个容器所需的字段boolean userClassesTakesPrecedence =conf.getBoolean(MRJobConfig.MAPREDUCE_JOB_USER_CLASSPATH_FIRST, false);//通过从公共环境克隆来设置环境。Map<String, String> env = commonContainerSpec.getEnvironment();Map<String, String> myEnv = new HashMap<String, String>(env.size());myEnv.putAll(env);if (userClassesTakesPrecedence) {myEnv.put(Environment.CLASSPATH_PREPEND_DISTCACHE.name(), "true");}MapReduceChildJVM.setVMEnv(myEnv, remoteTask);//设置启动命令 这里会调用MapReduceChildJVM的getVMCommand()List<String> commands = MapReduceChildJVM.getVMCommand(taskAttemptListener.getAddress(), remoteTask, jvmID);//复制ByteBuffers以供多个容器访问。Map<String, ByteBuffer> myServiceData = new HashMap<String, ByteBuffer>();for (Entry<String, ByteBuffer> entry : commonContainerSpec.getServiceData().entrySet()) {myServiceData.put(entry.getKey(), entry.getValue().duplicate());}//构建实际的容器ContainerLaunchContext container = ContainerLaunchContext.newInstance(commonContainerSpec.getLocalResources(), myEnv, commands,myServiceData, commonContainerSpec.getTokens().duplicate(),applicationACLs);return container;}9、MapReduceChildJVM
这里就会加载YarnChild,启动运行MapTask、ReduceTask的容器
public static List<String> getVMCommand(InetSocketAddress taskAttemptListenerAddr, Task task, JVMId jvmID) {TaskAttemptID attemptID = task.getTaskID();JobConf conf = task.conf;Vector<String> vargs = new Vector<String>(8);vargs.add(MRApps.crossPlatformifyMREnv(task.conf, Environment.JAVA_HOME)+ "/bin/java");// Add child (task) java-vm options.//// The following symbols if present in mapred.{map|reduce}.child.java.opts // value are replaced:// + @taskid@ is interpolated with value of TaskID.// Other occurrences of @ will not be altered.//// Example with multiple arguments and substitutions, showing// jvm GC logging, and start of a passwordless JVM JMX agent so can// connect with jconsole and the likes to watch child memory, threads// and get thread dumps.//// <property>// <name>mapred.map.child.java.opts</name>// <value>-Xmx 512M -verbose:gc -Xloggc:/tmp/@taskid@.gc \// -Dcom.sun.management.jmxremote.authenticate=false \// -Dcom.sun.management.jmxremote.ssl=false \// </value>// </property>//// <property>// <name>mapred.reduce.child.java.opts</name>// <value>-Xmx 1024M -verbose:gc -Xloggc:/tmp/@taskid@.gc \// -Dcom.sun.management.jmxremote.authenticate=false \// -Dcom.sun.management.jmxremote.ssl=false \// </value>// </property>//String javaOpts = getChildJavaOpts(conf, task.isMapTask());javaOpts = javaOpts.replace("@taskid@", attemptID.toString());String [] javaOptsSplit = javaOpts.split(" ");for (int i = 0; i < javaOptsSplit.length; i++) {vargs.add(javaOptsSplit[i]);}Path childTmpDir = new Path(MRApps.crossPlatformifyMREnv(conf, Environment.PWD),YarnConfiguration.DEFAULT_CONTAINER_TEMP_DIR);vargs.add("-Djava.io.tmpdir=" + childTmpDir);MRApps.addLog4jSystemProperties(task, vargs, conf);if (conf.getProfileEnabled()) {if (conf.getProfileTaskRange(task.isMapTask()).isIncluded(task.getPartition())) {final String profileParams = conf.get(task.isMapTask()? MRJobConfig.TASK_MAP_PROFILE_PARAMS: MRJobConfig.TASK_REDUCE_PROFILE_PARAMS, conf.getProfileParams());vargs.add(String.format(profileParams,getTaskLogFile(TaskLog.LogName.PROFILE)));}}// Add main class and its arguments vargs.add(YarnChild.class.getName()); // main of Child// pass TaskAttemptListener's addressvargs.add(taskAttemptListenerAddr.getAddress().getHostAddress()); vargs.add(Integer.toString(taskAttemptListenerAddr.getPort())); vargs.add(attemptID.toString()); // pass task identifier// Finally add the jvmIDvargs.add(String.valueOf(jvmID.getId()));vargs.add("1>" + getTaskLogFile(TaskLog.LogName.STDOUT));vargs.add("2>" + getTaskLogFile(TaskLog.LogName.STDERR));// Final commmandStringBuilder mergedCommand = new StringBuilder();for (CharSequence str : vargs) {mergedCommand.append(str).append(" ");}Vector<String> vargsFinal = new Vector<String>(1);vargsFinal.add(mergedCommand.toString());return vargsFinal;}五、总结
1、MRAppMaster启动
2、初始化并启动job
3、处理各种job状态
4、启动Task
5、处理各种Task事件
6、启动尝试任务
7、处理各种尝试任务事件
8、在尝试任务的TaskAttemptEventType.TA_SCHEDULE事件处理时申请容器
9、调用java命令配置主类YarnChild启动容器运行MapTask或者ReduceTask
移除元素)


工作原理介绍(详解篇2))


)


