部署k8s集群
- 基础环境配置
- 安装container
- 安装runc
- 安装CNI插件
- 部署1.24版本k8s集群(flannel)
- 安装crictl
- 使用kubeadm部署集群
- 节点加入集群
- 部署flannel网络
- 配置dashboard
本集群基于ubuntu2204系统使用kubeadm工具部署1.24版本k8s,容器运行时使用containerd(官方推荐),网络插件会选择使用flannel(适用小型集群)calico(适用大型复杂集群)
| 主机名 | IP | 机器资源 |
|---|---|---|
| master | 192.168.200.170 | 6G_6C_150G |
| worker01 | 192.168.200.171 | 6G_6C_150G |
| worker02 | 192.168.200.172 | 6G_6C_150G |
基础环境配置
脚本配置主机名、主机映射、集群免密、时间同步、关闭swap交换分区等等
root@localhost:~# cat init.sh
#!/bin/bash# 定义节点信息
NODES=("192.168.200.170 master root" "192.168.200.171 worker01 root" "192.168.200.172 worker02 root")# 定义当前节点的密码(默认集群统一密码)
HOST_PASS="000000"# 时间同步的目标节点
TIME_SERVER=master# 时间同步的地址段
TIME_SERVER_IP=192.160.200.0/24# 欢迎界面
cat > /etc/motd <<EOF#################################       Welcome  to  k8s       #################################
EOF# 修改主机名
for node in "${NODES[@]}"; doip=$(echo "$node" | awk '{print $1}')hostname=$(echo "$node" | awk '{print $2}')# 获取当前节点的主机名和 IPcurrent_ip=$(hostname -I | awk '{print $1}')current_hostname=$(hostname)# 检查当前节点与要修改的节点信息是否匹配if [[ "$current_ip" == "$ip" && "$current_hostname" != "$hostname" ]]; thenecho "Updating hostname to $hostname on $current_ip..."hostnamectl set-hostname "$hostname"if [ $? -eq 0 ]; thenecho "Hostname updated successfully."elseecho "Failed to update hostname."fibreakfi
done# 遍历节点信息并添加到 hosts 文件
for node in "${NODES[@]}"; doip=$(echo "$node" | awk '{print $1}')hostname=$(echo "$node" | awk '{print $2}')# 检查 hosts 文件中是否已存在相应的解析if grep -q "$ip $hostname" /etc/hosts; thenecho "Host entry for $hostname already exists in /etc/hosts."else# 添加节点的解析条目到 hosts 文件sudo sh -c "echo '$ip $hostname' >> /etc/hosts"echo "Added host entry for $hostname in /etc/hosts."fi
doneif [[ ! -s ~/.ssh/id_rsa.pub ]]; thenssh-keygen -t rsa -N '' -f ~/.ssh/id_rsa -q -b 2048
fi# 检查并安装 sshpass 工具
if ! which sshpass &> /dev/null; thenecho "sshpass 工具未安装,正在安装 sshpass..."sudo apt-get install -y sshpass
fi# 遍历所有节点进行免密操作
for node in "${NODES[@]}"; doip=$(echo "$node" | awk '{print $1}')hostname=$(echo "$node" | awk '{print $2}')user=$(echo "$node" | awk '{print $3}')# 使用 sshpass 提供密码,并自动确认密钥sshpass -p "$HOST_PASS" ssh-copy-id -o StrictHostKeyChecking=no -i /root/.ssh/id_rsa.pub "$user@$hostname"
done# 时间同步
apt install -y chrony
if [[ $TIME_SERVER_IP == *$(hostname -I)* ]]; then# 配置当前节点为时间同步源sed -i '20,23s/^/#/g' /etc/chrony/chrony.confecho "server $TIME_SERVER iburst maxsources 2" >> /etc/chrony/chrony.confecho "allow $TIME_SERVER_IP" >> /etc/chrony/chrony.confecho "local stratum 10" >> /etc/chrony/chrony.conf
else# 配置当前节点同步到目标节点sed -i '20,23s/^/#/g' /etc/chrony/chrony.confecho "pool $TIME_SERVER iburst maxsources 2" >> /etc/chrony/chrony.conf
fi# 重启并启用 chrony 服务
systemctl restart chronyd
systemctl enable chronyd# 关闭交换分区
swapoff -a
sed -i 's/.*swap.*/#&/' /etc/fstab#配置 Linux 主机以支持 Kubernetes 网络和容器桥接网络
cat <<EOF | sudo tee /etc/modules-load.d/k8s.conf
overlay
br_netfilter
EOFsudo modprobe overlay
sudo modprobe br_netfiltercat <<EOF | sudo tee /etc/sysctl.d/k8s.conf
net.bridge.bridge-nf-call-iptables  = 1
net.bridge.bridge-nf-call-ip6tables = 1
net.ipv4.ip_forward                 = 1
EOFsudo sysctl --systemecho "###############################################################"
echo "#################      k8s集群初始化成功     ####################"
echo "###############################################################"
root@localhost:~#
root@localhost:~# bash init.sh
root@localhost:~# bash
root@master:~# hostname -i
192.168.200.170
root@master:~# scp init.sh worker01:/root
init.sh                                                                                     100% 3590     5.4MB/s   00:00
root@master:~# scp init.sh worker02:/root
init.sh                                                                                     100% 3590     8.3MB/s   00:00
root@master:~#
root@localhost:~# bash init.sh
root@localhost:~# bash
root@worker01:~# hostname -i
192.168.200.171
root@localhost:~# bash init.sh
root@localhost:~# bash
root@worker02:~# hostname -i
192.168.200.172
安装container
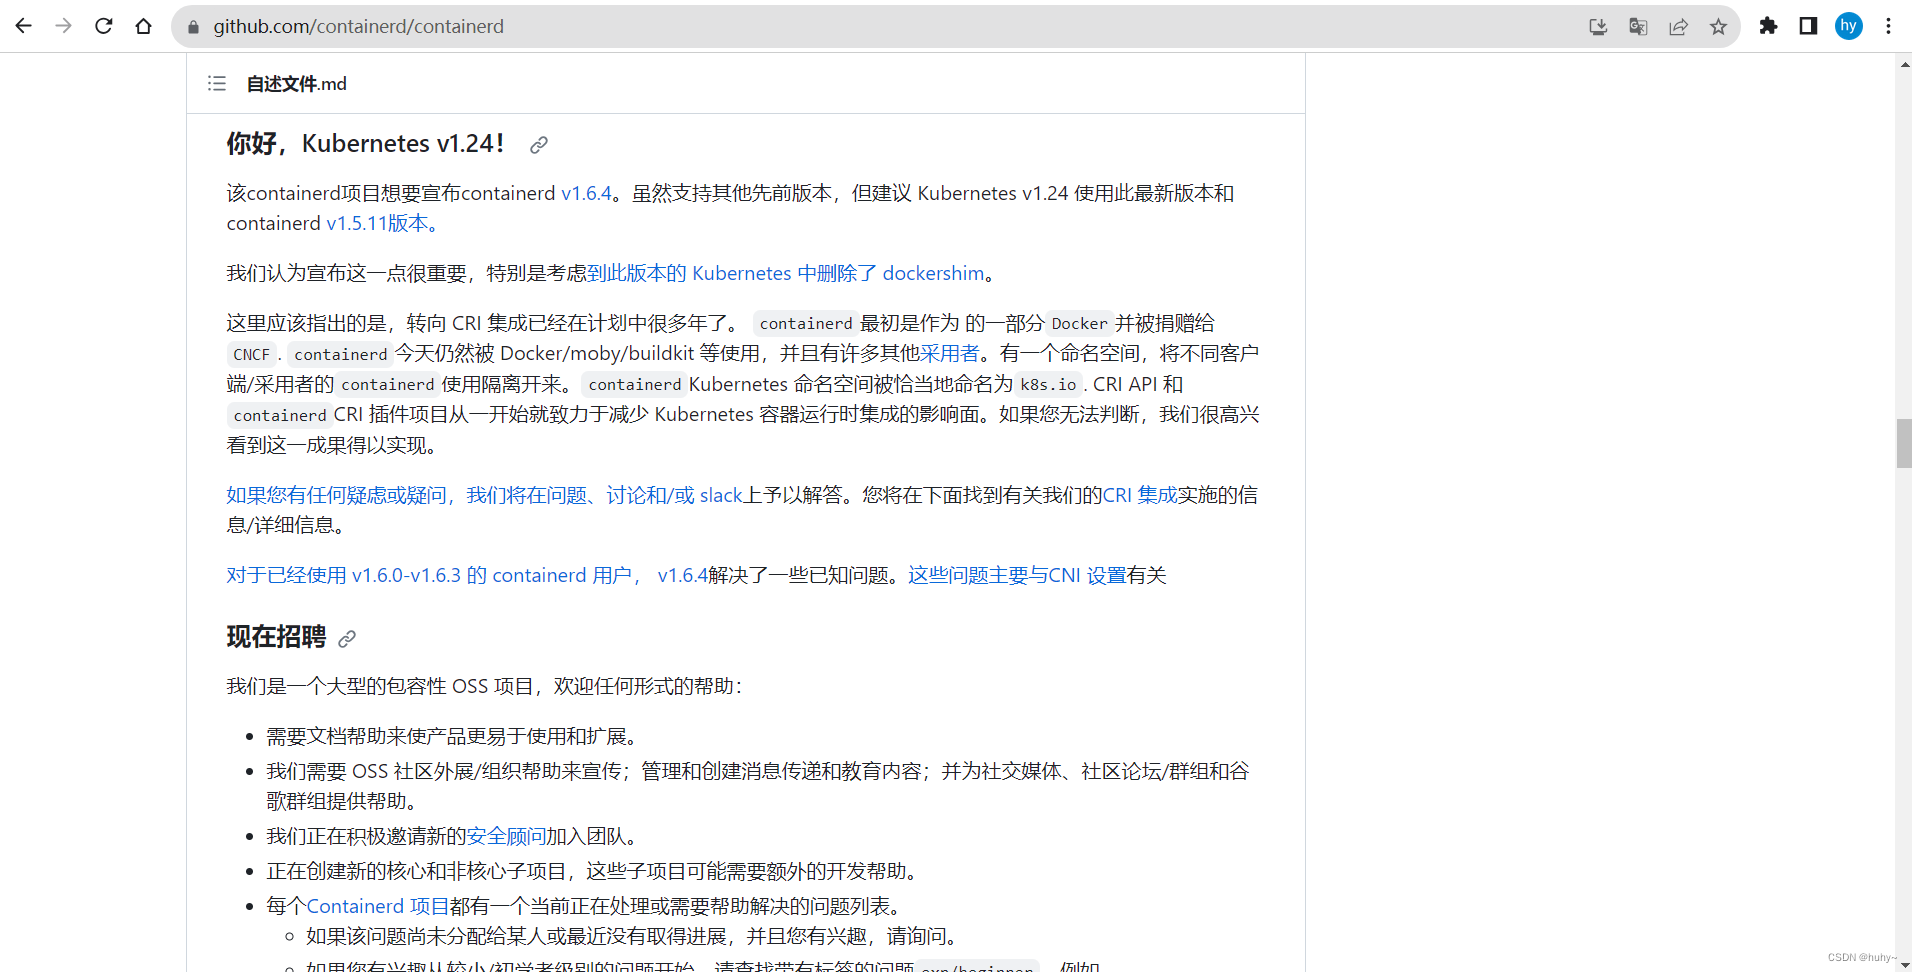
在官网中描述containerd的版本尽量使用最新版本,然后下载
GitHub下载地址;https://github.com/containerd/containerd/releases/tag/v1.6.24
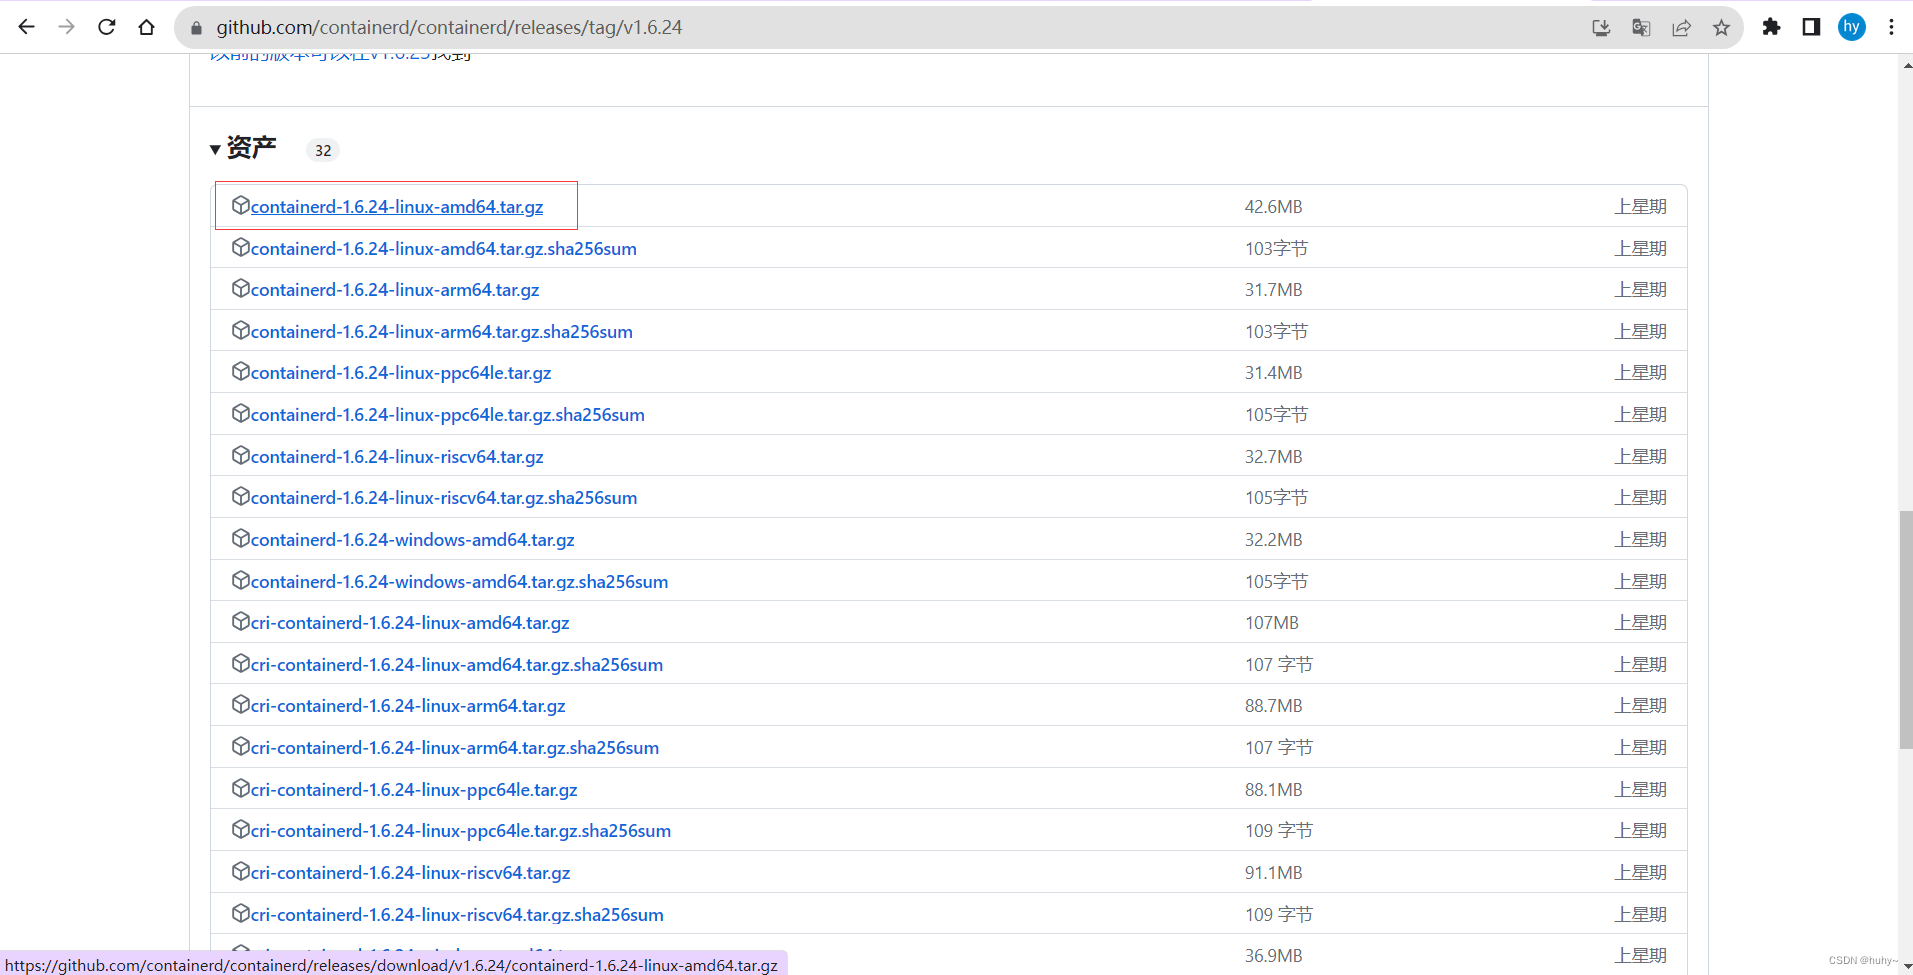
下载后将压缩包给上传到三台机器,并配置
#!/bin/bashtar -zxf containerd-1.6.24-linux-amd64.tar.gz -C /usr/local/#修改配置文件
cat > /etc/systemd/system/containerd.service <<eof
# Copyright The containerd Authors.
#
# Licensed under the Apache License, Version 2.0 (the "License");
# you may not use this file except in compliance with the License.
# You may obtain a copy of the License at
#
#     http://www.apache.org/licenses/LICENSE-2.0
#
# Unless required by applicable law or agreed to in writing, software
# distributed under the License is distributed on an "AS IS" BASIS,
# WITHOUT WARRANTIES OR CONDITIONS OF ANY KIND, either express or implied.
# See the License for the specific language governing permissions and
# limitations under the License.[Unit]
Description=containerd container runtime
Documentation=https://containerd.io
After=network.target local-fs.target[Service]
#uncomment to enable the experimental sbservice (sandboxed) version of containerd/cri integration
#Environment="ENABLE_CRI_SANDBOXES=sandboxed"
ExecStartPre=-/sbin/modprobe overlay
ExecStart=/usr/local/bin/containerdType=notify
Delegate=yes
KillMode=process
Restart=always
RestartSec=5
# Having non-zero Limit*s causes performance problems due to accounting overhead
# in the kernel. We recommend using cgroups to do container-local accounting.
LimitNPROC=infinity
LimitCORE=infinity
LimitNOFILE=infinity
# Comment TasksMax if your systemd version does not supports it.
# Only systemd 226 and above support this version.
TasksMax=infinity
OOMScoreAdjust=-999[Install]
WantedBy=multi-user.target
eof#加载生效
systemctl daemon-reload
systemctl enable --now containerd#查看版本并生成配置文件
ctr version
mkdir /etc/containerd
containerd config default > /etc/containerd/config.toml
systemctl restart containerd
root@master:~# bash ctr_install.sh
Created symlink /etc/systemd/system/multi-user.target.wants/containerd.service → /etc/systemd/system/containerd.service.
Client:Version:  v1.6.24Revision: 61f9fd88f79f081d64d6fa3bb1a0dc71ec870523Go version: go1.20.8Server:Version:  v1.6.24Revision: 61f9fd88f79f081d64d6fa3bb1a0dc71ec870523UUID: aeb8105e-81f6-4e35-8e5e-daeca1f3cba8
root@worker01:~# bash ctr_install.sh
Created symlink /etc/systemd/system/multi-user.target.wants/containerd.service → /etc/systemd/system/containerd.service.
Client:Version:  v1.6.24Revision: 61f9fd88f79f081d64d6fa3bb1a0dc71ec870523Go version: go1.20.8Server:Version:  v1.6.24Revision: 61f9fd88f79f081d64d6fa3bb1a0dc71ec870523UUID: 2f44bdcb-f14f-4a50-84d7-849b66072202
root@worker02:~# bash ctr_install.sh
Created symlink /etc/systemd/system/multi-user.target.wants/containerd.service → /etc/systemd/system/containerd.service.
Client:Version:  v1.6.24Revision: 61f9fd88f79f081d64d6fa3bb1a0dc71ec870523Go version: go1.20.8Server:Version:  v1.6.24Revision: 61f9fd88f79f081d64d6fa3bb1a0dc71ec870523UUID: 719c4f89-9f87-41d4-a8d5-2078b3eca1b4
安装runc
版本对应要求如下
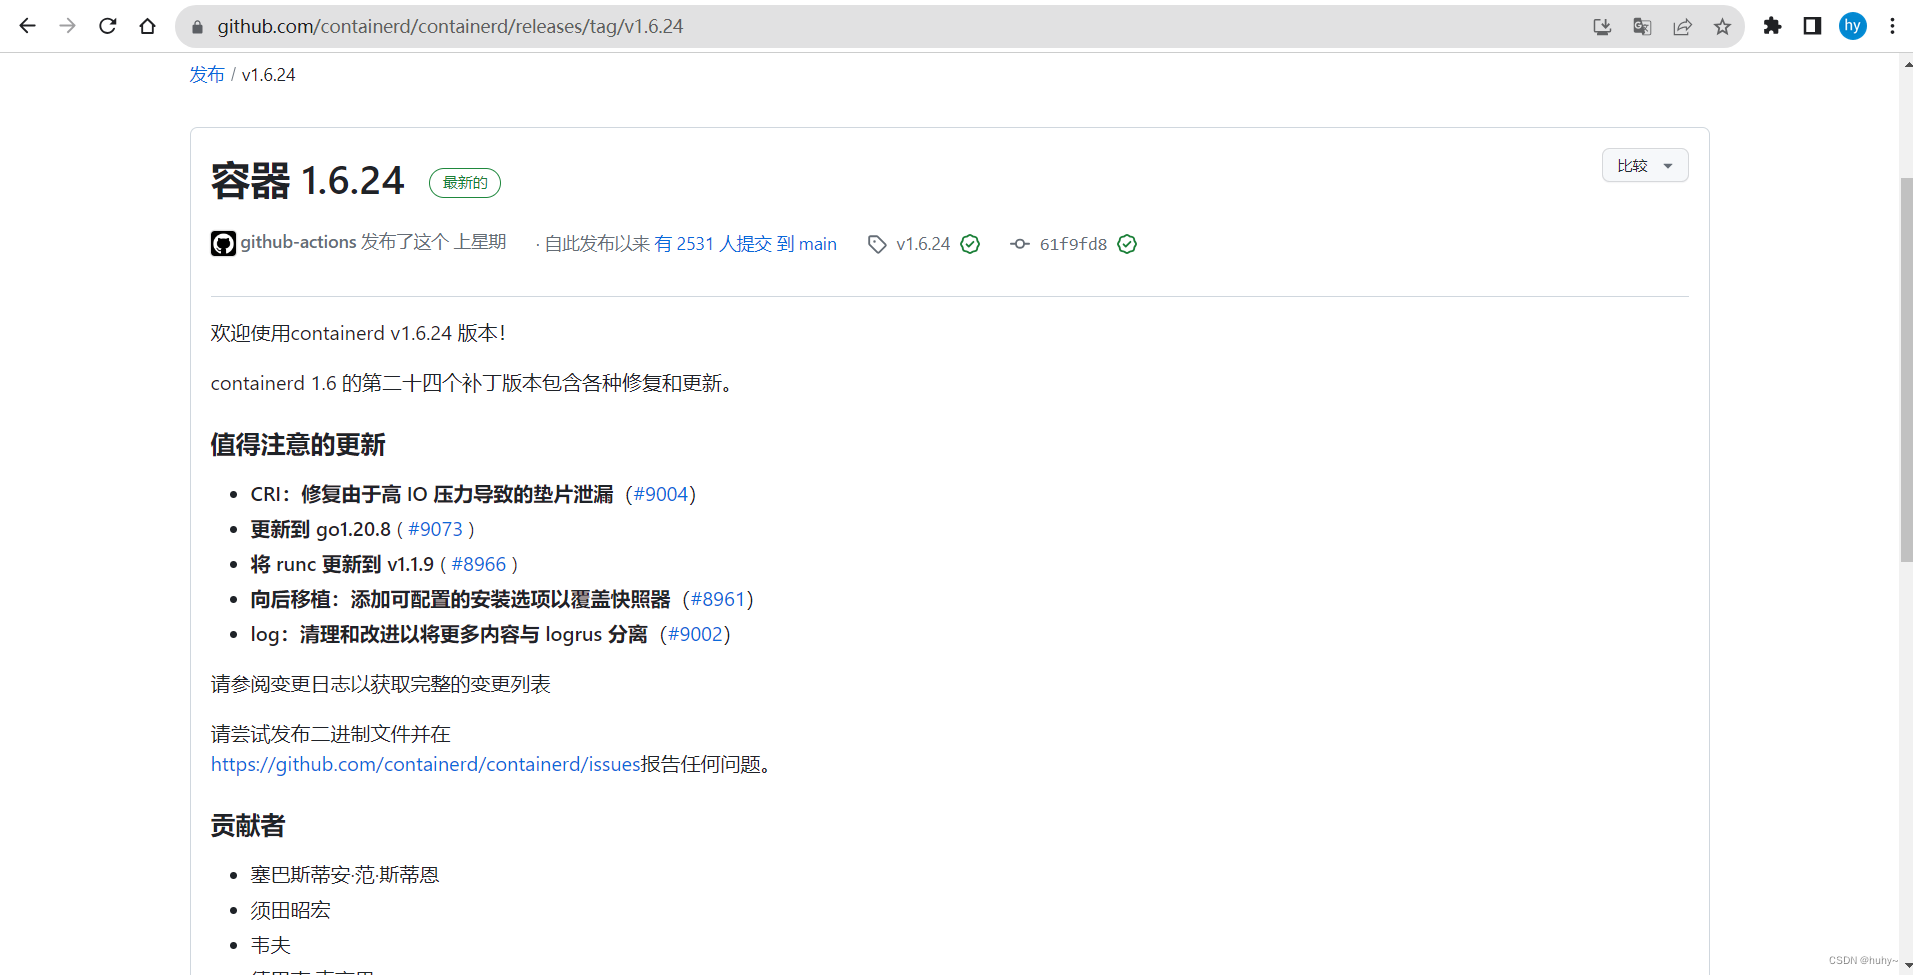
GitHub下载地址:https://github.com/opencontainers/runc/releases/tag/v1.1.9
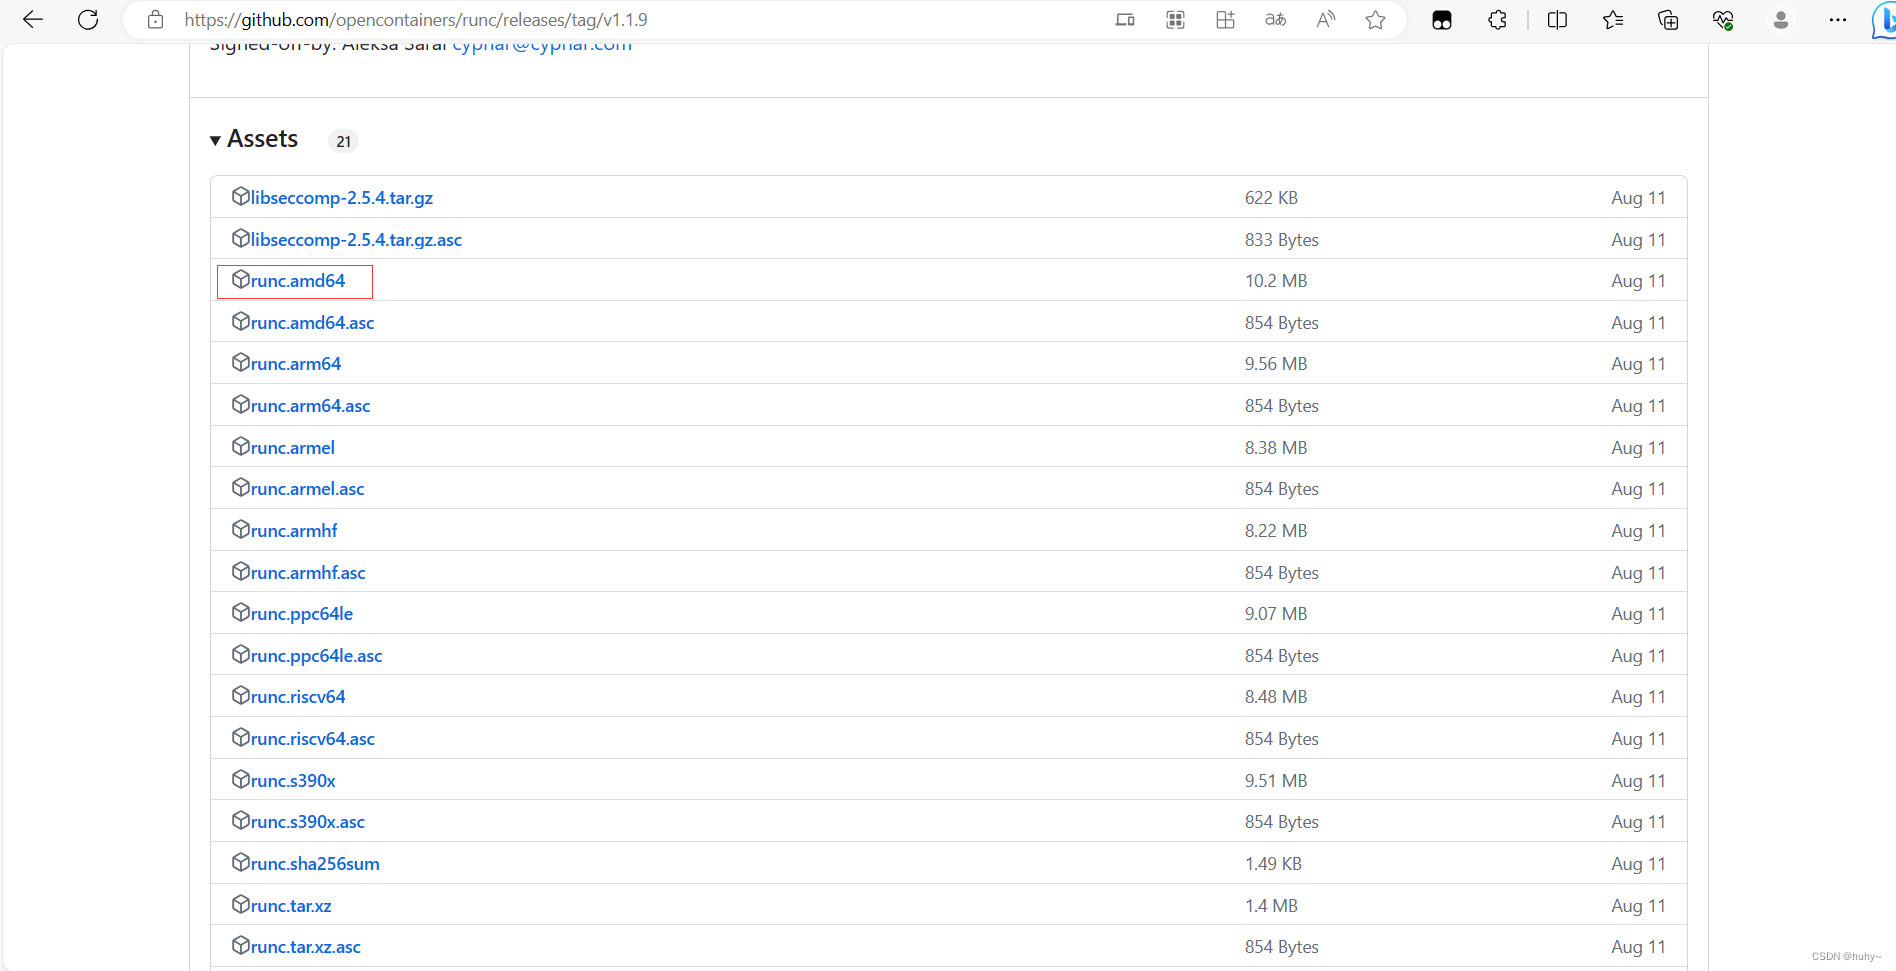
上传到机器并安装
root@master:~# install -m 755 runc.amd64 /usr/local/sbin/runc
root@master:~# runc -v
runc version 1.1.9
commit: v1.1.9-0-gccaecfcb
spec: 1.0.2-dev
go: go1.20.3
libseccomp: 2.5.4
root@master:~#
root@worker01:~# install -m 755 runc.amd64 /usr/local/sbin/runc
root@worker01:~# runc -v
runc version 1.1.9
commit: v1.1.9-0-gccaecfcb
spec: 1.0.2-dev
go: go1.20.3
libseccomp: 2.5.4
root@worker01:~#
root@worker02:~# install -m 755 runc.amd64 /usr/local/sbin/runc
root@worker02:~# runc -v
runc version 1.1.9
commit: v1.1.9-0-gccaecfcb
spec: 1.0.2-dev
go: go1.20.3
libseccomp: 2.5.4
root@worker02:~#
安装CNI插件
GitHub下载:https://github.com/containernetworking/plugins/releases/tag/v1.3.0
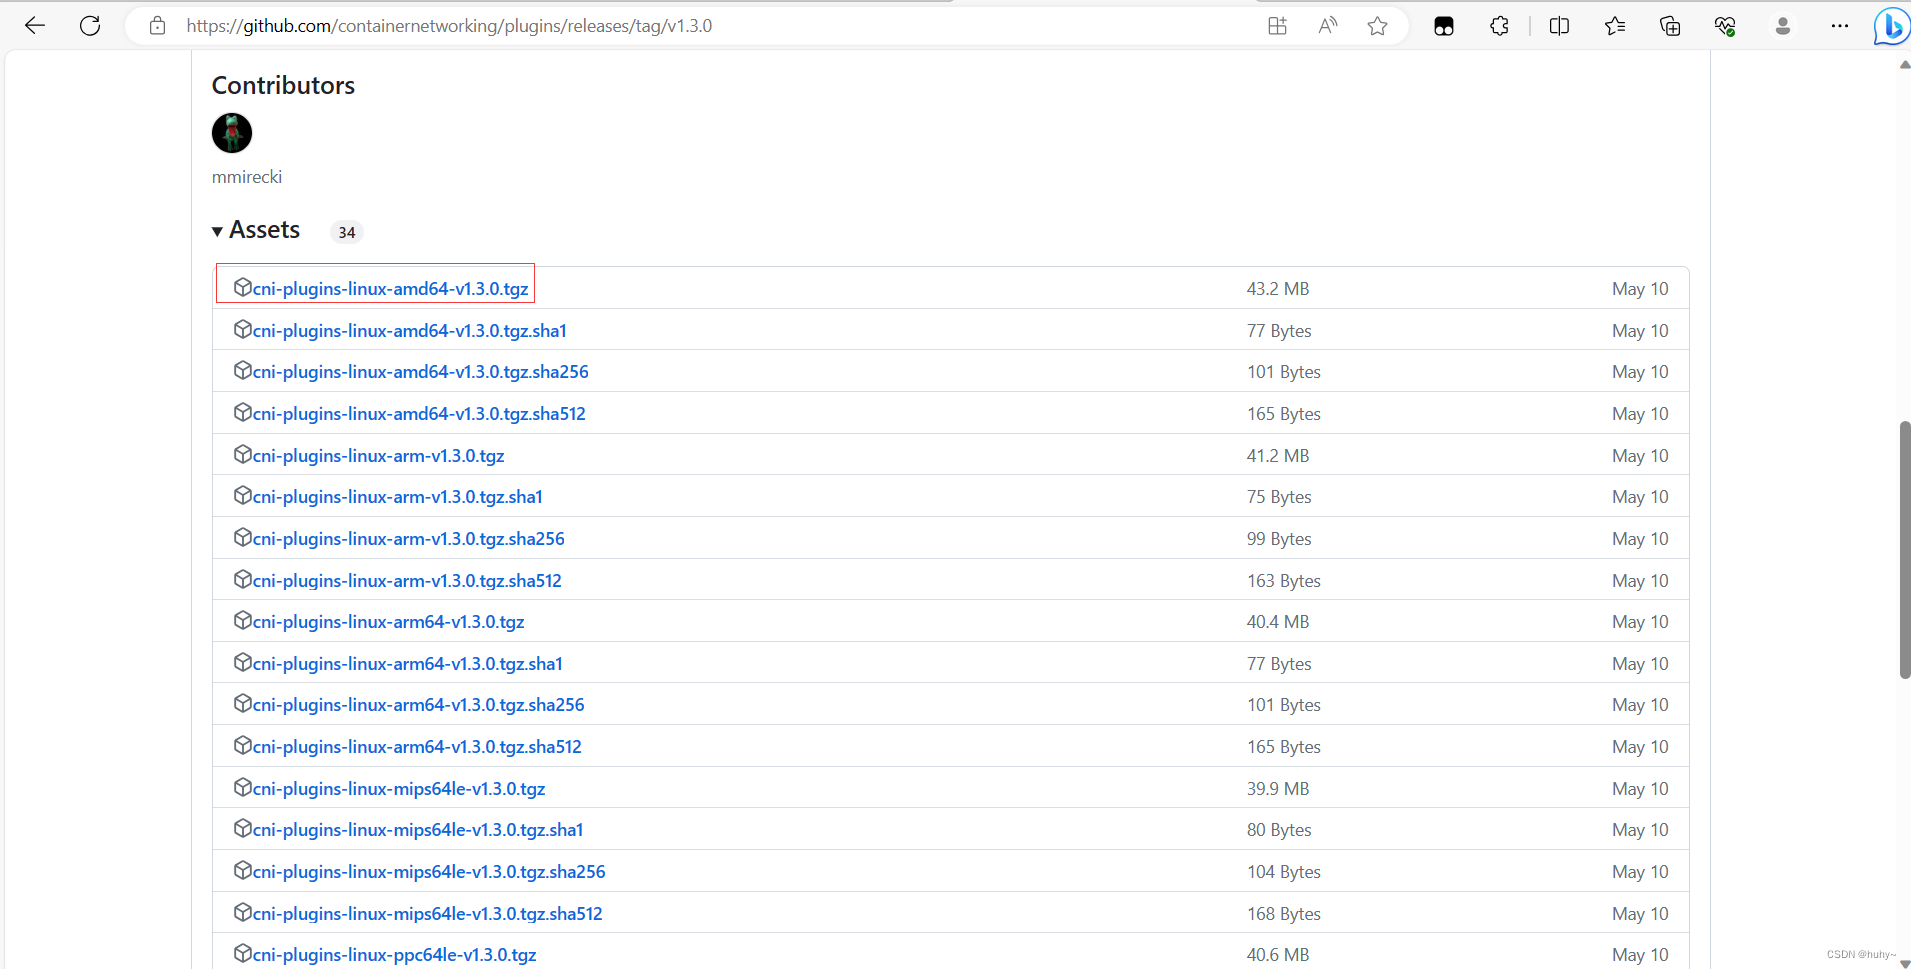
上传到机器后并配置
root@master:~# mkdir -p /opt/cni/bin
root@master:~# tar -zxf cni-plugins-linux-amd64-v1.3.0.tgz -C /opt/cni/bin
root@worker01:~# mkdir -p /opt/cni/bin
root@worker01:~# tar -zxf cni-plugins-linux-amd64-v1.3.0.tgz -C /opt/cni/bin
root@worker02:~# mkdir -p /opt/cni/bin
root@worker02:~# tar -zxf cni-plugins-linux-amd64-v1.3.0.tgz -C /opt/cni/bin
配置加速和驱动
#!/bin/bashsed -i 's/config_path\ =.*/config_path = \"\/etc\/containerd\/certs.d\"/g' /etc/containerd/config.toml
mkdir -p /etc/containerd/certs.d/docker.iocat > /etc/containerd/certs.d/docker.io/hosts.toml << EOF
server = "https://docker.io"
[host."https://o90diikg.mirror.aliyuncs.com"]capabilities = ["pull", "resolve"]
EOF#cgroup 驱动
sed -i 's/SystemdCgroup\ =\ false/SystemdCgroup\ =\ true/g' /etc/containerd/config.toml
sed -i 's/sandbox_image\ =.*/sandbox_image\ =\ "registry.aliyuncs.com\/google_containers\/pause:3.8"/g' /etc/containerd/config.toml|grep sandbox_imagesystemctl daemon-reload ; systemctl restart containerd
root@master:~# bash jiasu.sh
root@worker01:~# bash jiasu.sh
root@worker02:~# bash jiasu.sh
部署1.24版本k8s集群(flannel)
安装crictl
GitHub下载地址:https://github.com/kubernetes-sigs/cri-tools/releases/tag/v1.24.0
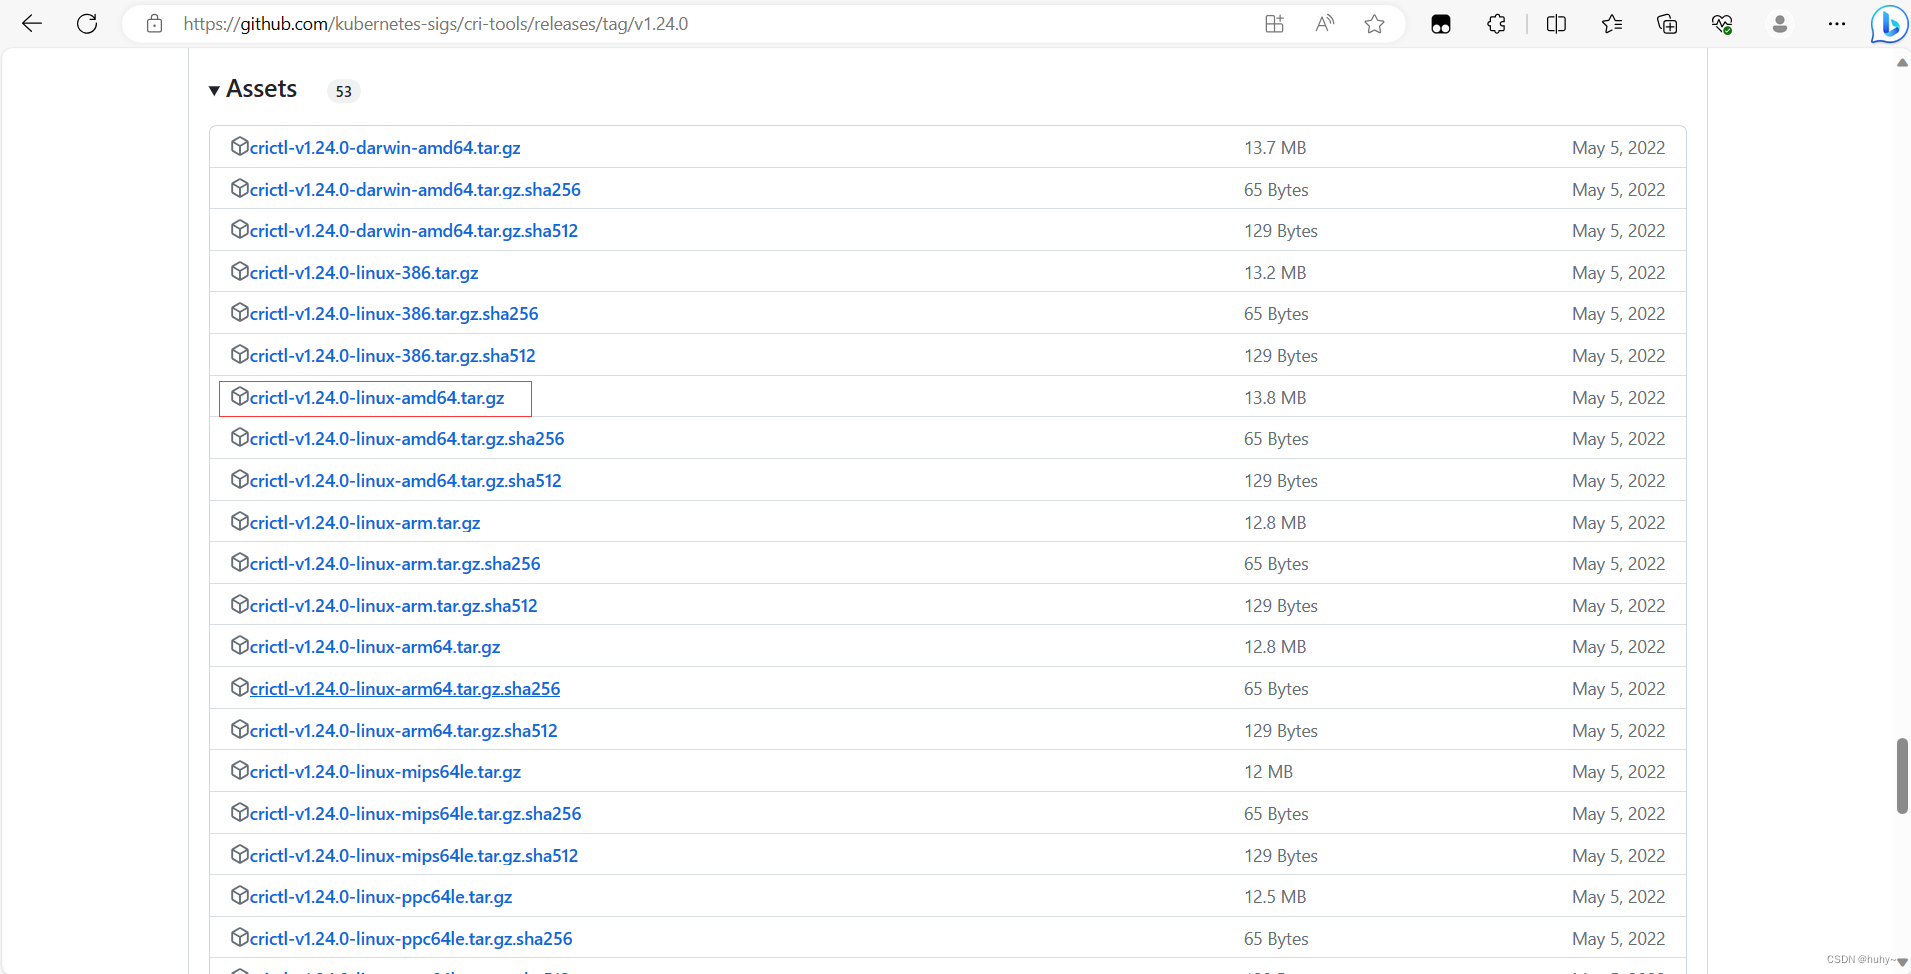
上传机器并配置
#!/bin/bashtar -zxf crictl-v1.24.0-linux-amd64.tar.gz -C /usr/local/bin/cat >>  /etc/crictl.yaml << EOF
runtime-endpoint: unix:///var/run/containerd/containerd.sock
image-endpoint: unix:///var/run/containerd/containerd.sock
timeout: 10
debug: true
EOFsystemctl daemon-reload;systemctl restart containerd
crictl -v
root@master:~# bash cri-install.sh
crictl version v1.24.0
root@worker01:~# bash cri-install.sh
crictl version v1.24.0
root@worker02:~# bash cri-install.sh
crictl version v1.24.0
使用kubeadm部署集群
配置阿里云k8s仓库,官方教程:https://developer.aliyun.com/mirror/kubernetes?spm=a2c6h.13651102.0.0.cf2f1b11HCUTHe
#!/bin/bash
apt-get update && apt-get install -y apt-transport-https
curl https://mirrors.aliyun.com/kubernetes/apt/doc/apt-key.gpg | apt-key add -
cat <<EOF >/etc/apt/sources.list.d/kubernetes.list
deb https://mirrors.aliyun.com/kubernetes/apt/ kubernetes-xenial main
EOF
apt-get update
root@master:~# bash apt.sh
root@worker01:~# bash apt.sh
root@worker02:~# bash apt.sh
安装kubeadm、kubelet、kubectl(1.24.0版本)
root@master:~# apt install -y kubelet=1.24.0-00 kubeadm=1.24.0-00 kubectl=1.24.0-00
root@master:~# kubeadm version
kubeadm version: &version.Info{Major:"1", Minor:"24", GitVersion:"v1.24.0", GitCommit:"4ce5a8954017644c5420bae81d72b09b735c21f0", GitTreeState:"clean", BuildDate:"2022-05-03T13:44:24Z", GoVersion:"go1.18.1", Compiler:"gc", Platform:"linux/amd64"}
root@worker01:~# apt install -y kubelet=1.24.0-00 kubeadm=1.24.0-00 kubectl=1.24.0-00
root@worker02:~# apt install -y kubelet=1.24.0-00 kubeadm=1.24.0-00 kubectl=1.24.0-00
生成默认的配置文件并修改
root@master:~# kubeadm config print init-defaults > kubeadm.yaml
root@master:~# cat kubeadm.yaml
apiVersion: kubeadm.k8s.io/v1beta3
bootstrapTokens:
- groups:- system:bootstrappers:kubeadm:default-node-tokentoken: abcdef.0123456789abcdefttl: 24h0m0susages:- signing- authentication
kind: InitConfiguration
localAPIEndpoint:advertiseAddress: 192.168.200.170 #修改为master的IPbindPort: 6443
nodeRegistration:criSocket: unix:///var/run/containerd/containerd.sockimagePullPolicy: IfNotPresentname: master #修改为master节点主机名taints: null
---
apiServer:timeoutForControlPlane: 4m0s
apiVersion: kubeadm.k8s.io/v1beta3
certificatesDir: /etc/kubernetes/pki
clusterName: kubernetes
controllerManager: {}
dns: {}
etcd:local:dataDir: /var/lib/etcd
imageRepository: registry.aliyuncs.com/google_containers #修改为阿里云仓库
kind: ClusterConfiguration
kubernetesVersion: 1.24.0 #根据实际版本号修改
networking:dnsDomain: cluster.localserviceSubnet: 10.96.0.0/12podSubnet: 10.244.0.0/16   ## 设置pod网段
scheduler: {}#添加内容:配置kubelet的CGroup为systemd
---
kind: KubeletConfiguration
apiVersion: kubelet.config.k8s.io/v1beta1
cgroupDriver: systemd
root@master:~#
下载镜像
root@master:~# kubeadm config images pull --image-repository=registry.aliyuncs.com/google_containers  --kubernetes-version=v1.24.0
[config/images] Pulled registry.aliyuncs.com/google_containers/kube-apiserver:v1.24.0
[config/images] Pulled registry.aliyuncs.com/google_containers/kube-controller-manager:v1.24.0
[config/images] Pulled registry.aliyuncs.com/google_containers/kube-scheduler:v1.24.0
[config/images] Pulled registry.aliyuncs.com/google_containers/kube-proxy:v1.24.0
[config/images] Pulled registry.aliyuncs.com/google_containers/pause:3.7
[config/images] Pulled registry.aliyuncs.com/google_containers/etcd:3.5.3-0
[config/images] Pulled registry.aliyuncs.com/google_containers/coredns:v1.8.6
开始初始化
root@master:~# kubeadm init --config kubeadm.yaml
.........
Your Kubernetes control-plane has initialized successfully!To start using your cluster, you need to run the following as a regular user:mkdir -p $HOME/.kubesudo cp -i /etc/kubernetes/admin.conf $HOME/.kube/configsudo chown $(id -u):$(id -g) $HOME/.kube/configAlternatively, if you are the root user, you can run:export KUBECONFIG=/etc/kubernetes/admin.confYou should now deploy a pod network to the cluster.
Run "kubectl apply -f [podnetwork].yaml" with one of the options listed at:https://kubernetes.io/docs/concepts/cluster-administration/addons/Then you can join any number of worker nodes by running the following on each as root:kubeadm join 192.168.200.170:6443 --token abcdef.0123456789abcdef \--discovery-token-ca-cert-hash sha256:a0265437e9252df5ca6d92db35ab087b8e76d0ac92be78a230539e084a99a49d
root@master:~#
配置访问k8s集群
root@master:~# mkdir -p $HOME/.kube
root@master:~# sudo cp -i /etc/kubernetes/admin.conf $HOME/.kube/config
root@master:~# sudo chown $(id -u):$(id -g) $HOME/.kube/config
节点加入集群
root@worker01:~# kubeadm join 192.168.200.170:6443 --token abcdef.0123456789abcdef --discovery-token-ca-cert-hash sha256:a0265437e9252df5ca6d92db35ab087b8e76d0ac92be78a230539e084a99a49d
[preflight] Running pre-flight checks[WARNING SystemVerification]: missing optional cgroups: blkio
[preflight] Reading configuration from the cluster...
[preflight] FYI: You can look at this config file with 'kubectl -n kube-system get cm kubeadm-config -o yaml'
[kubelet-start] Writing kubelet configuration to file "/var/lib/kubelet/config.yaml"
[kubelet-start] Writing kubelet environment file with flags to file "/var/lib/kubelet/kubeadm-flags.env"
[kubelet-start] Starting the kubelet
[kubelet-start] Waiting for the kubelet to perform the TLS Bootstrap...This node has joined the cluster:
* Certificate signing request was sent to apiserver and a response was received.
* The Kubelet was informed of the new secure connection details.Run 'kubectl get nodes' on the control-plane to see this node join the cluster.root@worker01:~#
root@worker02:~# kubeadm join 192.168.200.170:6443 --token abcdef.0123456789abcdef --discovery-token-ca-cert-hash sha256:a0265437e9252df5ca6d92db35ab087b8e76d0ac92be78a230539e084a99a49d
[preflight] Running pre-flight checks[WARNING SystemVerification]: missing optional cgroups: blkio
[preflight] Reading configuration from the cluster...
[preflight] FYI: You can look at this config file with 'kubectl -n kube-system get cm kubeadm-config -o yaml'
[kubelet-start] Writing kubelet configuration to file "/var/lib/kubelet/config.yaml"
[kubelet-start] Writing kubelet environment file with flags to file "/var/lib/kubelet/kubeadm-flags.env"
[kubelet-start] Starting the kubelet
[kubelet-start] Waiting for the kubelet to perform the TLS Bootstrap...This node has joined the cluster:
* Certificate signing request was sent to apiserver and a response was received.
* The Kubelet was informed of the new secure connection details.Run 'kubectl get nodes' on the control-plane to see this node join the cluster.root@worker02:~#
验证集群,因为还没有部署网络coredns还起不来,并且是notready状态
root@master:~# kubectl get nodes
NAME       STATUS     ROLES           AGE    VERSION
master     NotReady   control-plane   6m8s   v1.24.0
worker01   NotReady   <none>          104s   v1.24.0
worker02   NotReady   <none>          21s    v1.24.0
root@master:~# kubectl get pods -A
NAMESPACE     NAME                             READY   STATUS    RESTARTS   AGE
kube-system   coredns-74586cf9b6-j8ncr         0/1     Pending   0          7m28s
kube-system   coredns-74586cf9b6-rk88b         0/1     Pending   0          7m28s
kube-system   etcd-master                      1/1     Running   0          7m33s
kube-system   kube-apiserver-master            1/1     Running   0          7m35s
kube-system   kube-controller-manager-master   1/1     Running   0          7m33s
kube-system   kube-proxy-gwrst                 1/1     Running   0          7m28s
kube-system   kube-proxy-hpsfj                 1/1     Running   0          110s
kube-system   kube-proxy-xz8c7                 1/1     Running   0          3m13s
kube-system   kube-scheduler-master            1/1     Running   0          7m33s
root@master:~#
注:node节点是不能使用kubectl命令的,需要做以下操作
root@worker01:~# kubectl get nodes
The connection to the server localhost:8080 was refused - did you specify the right host or port?
root@worker01:~# scp -r root@master:/etc/kubernetes/admin.conf /etc/kubernetes/admin.conf
admin.conf                                                                                 100% 5643    13.2MB/s   00:00
root@worker01:~# echo "export KUBECONFIG=/etc/kubernetes/admin.conf" >> /etc/profile
root@worker01:~# source /etc/profile
root@worker01:~# kubectl get nodes
NAME       STATUS     ROLES           AGE     VERSION
master     NotReady   control-plane   10m     v1.24.0
worker01   NotReady   <none>          6m26s   v1.24.0
worker02   NotReady   <none>          5m3s    v1.24.0
root@worker01:~#
部署flannel网络
根据官网部署:https://github.com/flannel-io/flannel
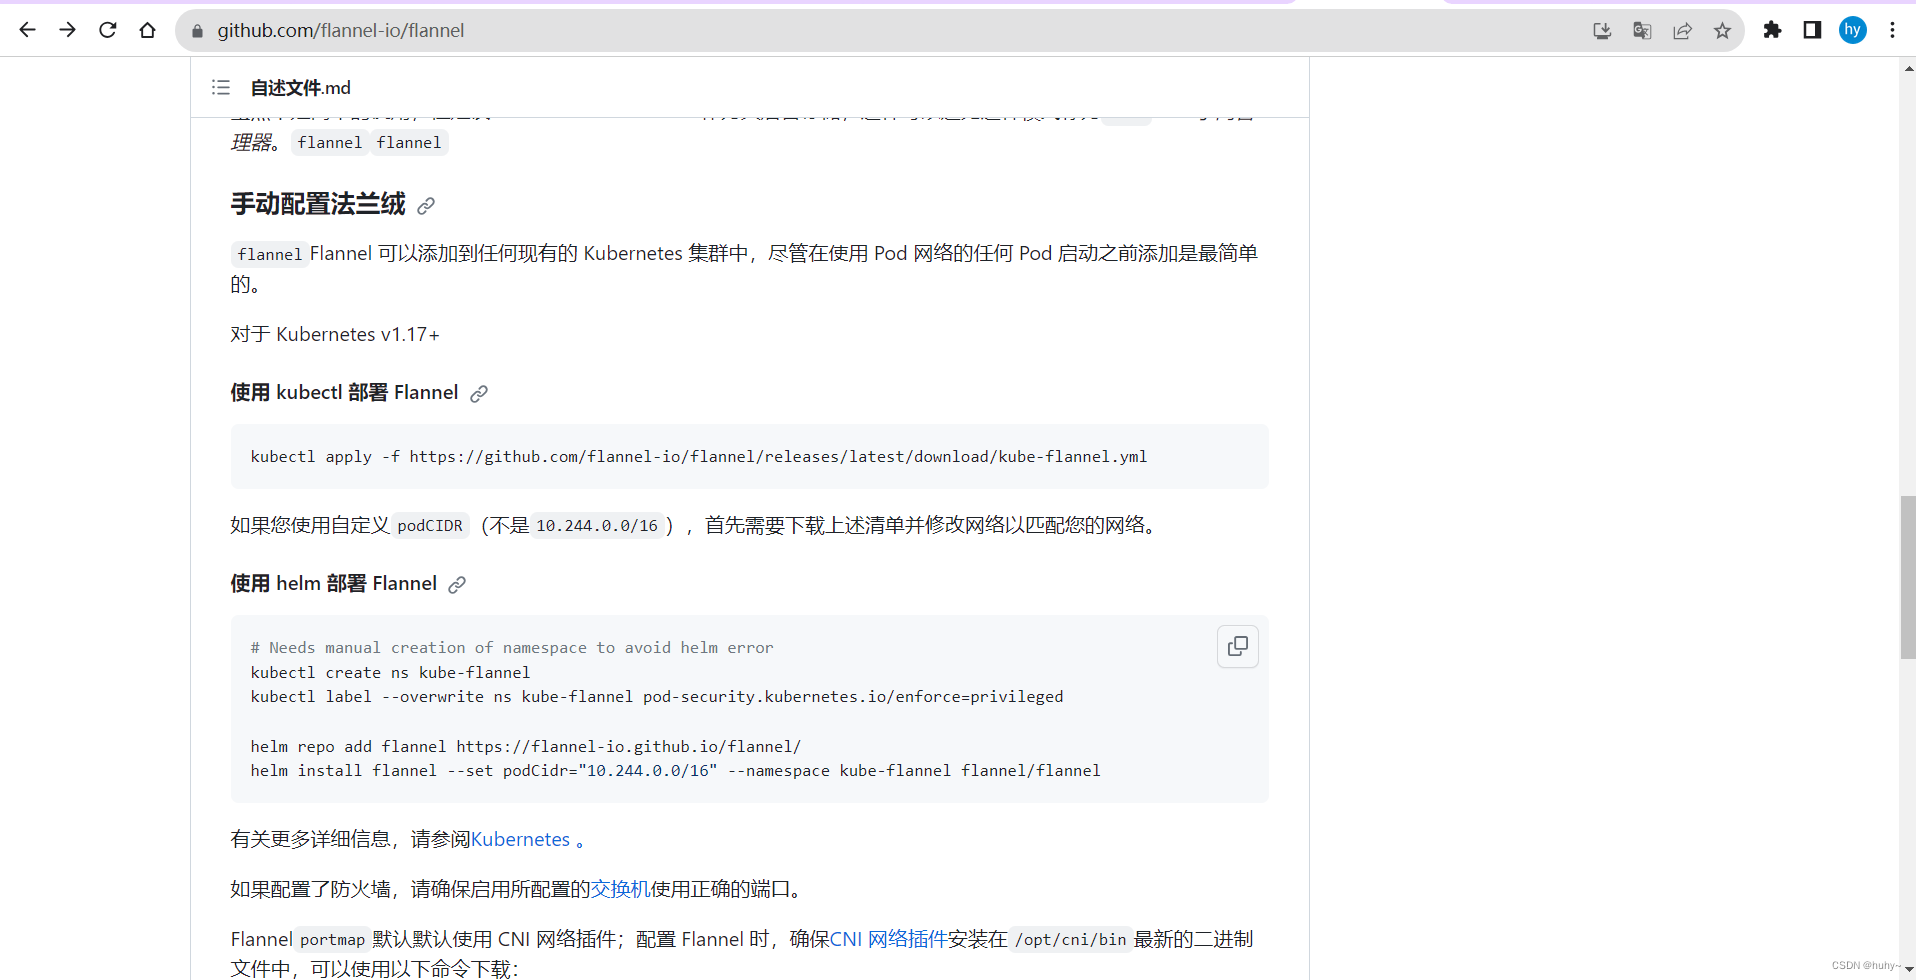
注;官网配置文件中的镜像都是国外的,我已经拉取到本地并推送到阿里云上了,可直接使用文件如下,需要注意的一点就是里面的podcidr网络要和你在kubeadm中配置的podcidr网络一致,如果需要自定义自行同步修改
apiVersion: v1
kind: Namespace
metadata:labels:k8s-app: flannelpod-security.kubernetes.io/enforce: privilegedname: kube-flannel
---
apiVersion: v1
kind: ServiceAccount
metadata:labels:k8s-app: flannelname: flannelnamespace: kube-flannel
---
apiVersion: rbac.authorization.k8s.io/v1
kind: ClusterRole
metadata:labels:k8s-app: flannelname: flannel
rules:
- apiGroups:- ""resources:- podsverbs:- get
- apiGroups:- ""resources:- nodesverbs:- get- list- watch
- apiGroups:- ""resources:- nodes/statusverbs:- patch
- apiGroups:- networking.k8s.ioresources:- clustercidrsverbs:- list- watch
---
apiVersion: rbac.authorization.k8s.io/v1
kind: ClusterRoleBinding
metadata:labels:k8s-app: flannelname: flannel
roleRef:apiGroup: rbac.authorization.k8s.iokind: ClusterRolename: flannel
subjects:
- kind: ServiceAccountname: flannelnamespace: kube-flannel
---
apiVersion: v1
data:cni-conf.json: |{"name": "cbr0","cniVersion": "0.3.1","plugins": [{"type": "flannel","delegate": {"hairpinMode": true,"isDefaultGateway": true}},{"type": "portmap","capabilities": {"portMappings": true}}]}net-conf.json: |{"Network": "10.244.0.0/16","Backend": {"Type": "vxlan"}}
kind: ConfigMap
metadata:labels:app: flannelk8s-app: flanneltier: nodename: kube-flannel-cfgnamespace: kube-flannel
---
apiVersion: apps/v1
kind: DaemonSet
metadata:labels:app: flannelk8s-app: flanneltier: nodename: kube-flannel-dsnamespace: kube-flannel
spec:selector:matchLabels:app: flannelk8s-app: flanneltemplate:metadata:labels:app: flannelk8s-app: flanneltier: nodespec:affinity:nodeAffinity:requiredDuringSchedulingIgnoredDuringExecution:nodeSelectorTerms:- matchExpressions:- key: kubernetes.io/osoperator: Invalues:- linuxcontainers:- args:- --ip-masq- --kube-subnet-mgrcommand:- /opt/bin/flanneldenv:- name: POD_NAMEvalueFrom:fieldRef:fieldPath: metadata.name- name: POD_NAMESPACEvalueFrom:fieldRef:fieldPath: metadata.namespace- name: EVENT_QUEUE_DEPTHvalue: "5000"image: registry.cn-hangzhou.aliyuncs.com/huhy481556/flannel:v0.22.3name: kube-flannelresources:requests:cpu: 100mmemory: 50MisecurityContext:capabilities:add:- NET_ADMIN- NET_RAWprivileged: falsevolumeMounts:- mountPath: /run/flannelname: run- mountPath: /etc/kube-flannel/name: flannel-cfg- mountPath: /run/xtables.lockname: xtables-lockhostNetwork: trueinitContainers:- args:- -f- /flannel- /opt/cni/bin/flannelcommand:- cpimage: registry.cn-hangzhou.aliyuncs.com/huhy481556/flannel-cni-plugin:v1.2.0name: install-cni-pluginvolumeMounts:- mountPath: /opt/cni/binname: cni-plugin- args:- -f- /etc/kube-flannel/cni-conf.json- /etc/cni/net.d/10-flannel.conflistcommand:- cpimage: registry.cn-hangzhou.aliyuncs.com/huhy481556/flannel:v0.22.3name: install-cnivolumeMounts:- mountPath: /etc/cni/net.dname: cni- mountPath: /etc/kube-flannel/name: flannel-cfgpriorityClassName: system-node-criticalserviceAccountName: flanneltolerations:- effect: NoScheduleoperator: Existsvolumes:- hostPath:path: /run/flannelname: run- hostPath:path: /opt/cni/binname: cni-plugin- hostPath:path: /etc/cni/net.dname: cni- configMap:name: kube-flannel-cfgname: flannel-cfg- hostPath:path: /run/xtables.locktype: FileOrCreatename: xtables-lock
root@master:~# kubectl apply -f kube-flannel.yaml
namespace/kube-flannel created
serviceaccount/flannel created
clusterrole.rbac.authorization.k8s.io/flannel created
clusterrolebinding.rbac.authorization.k8s.io/flannel created
configmap/kube-flannel-cfg created
daemonset.apps/kube-flannel-ds created
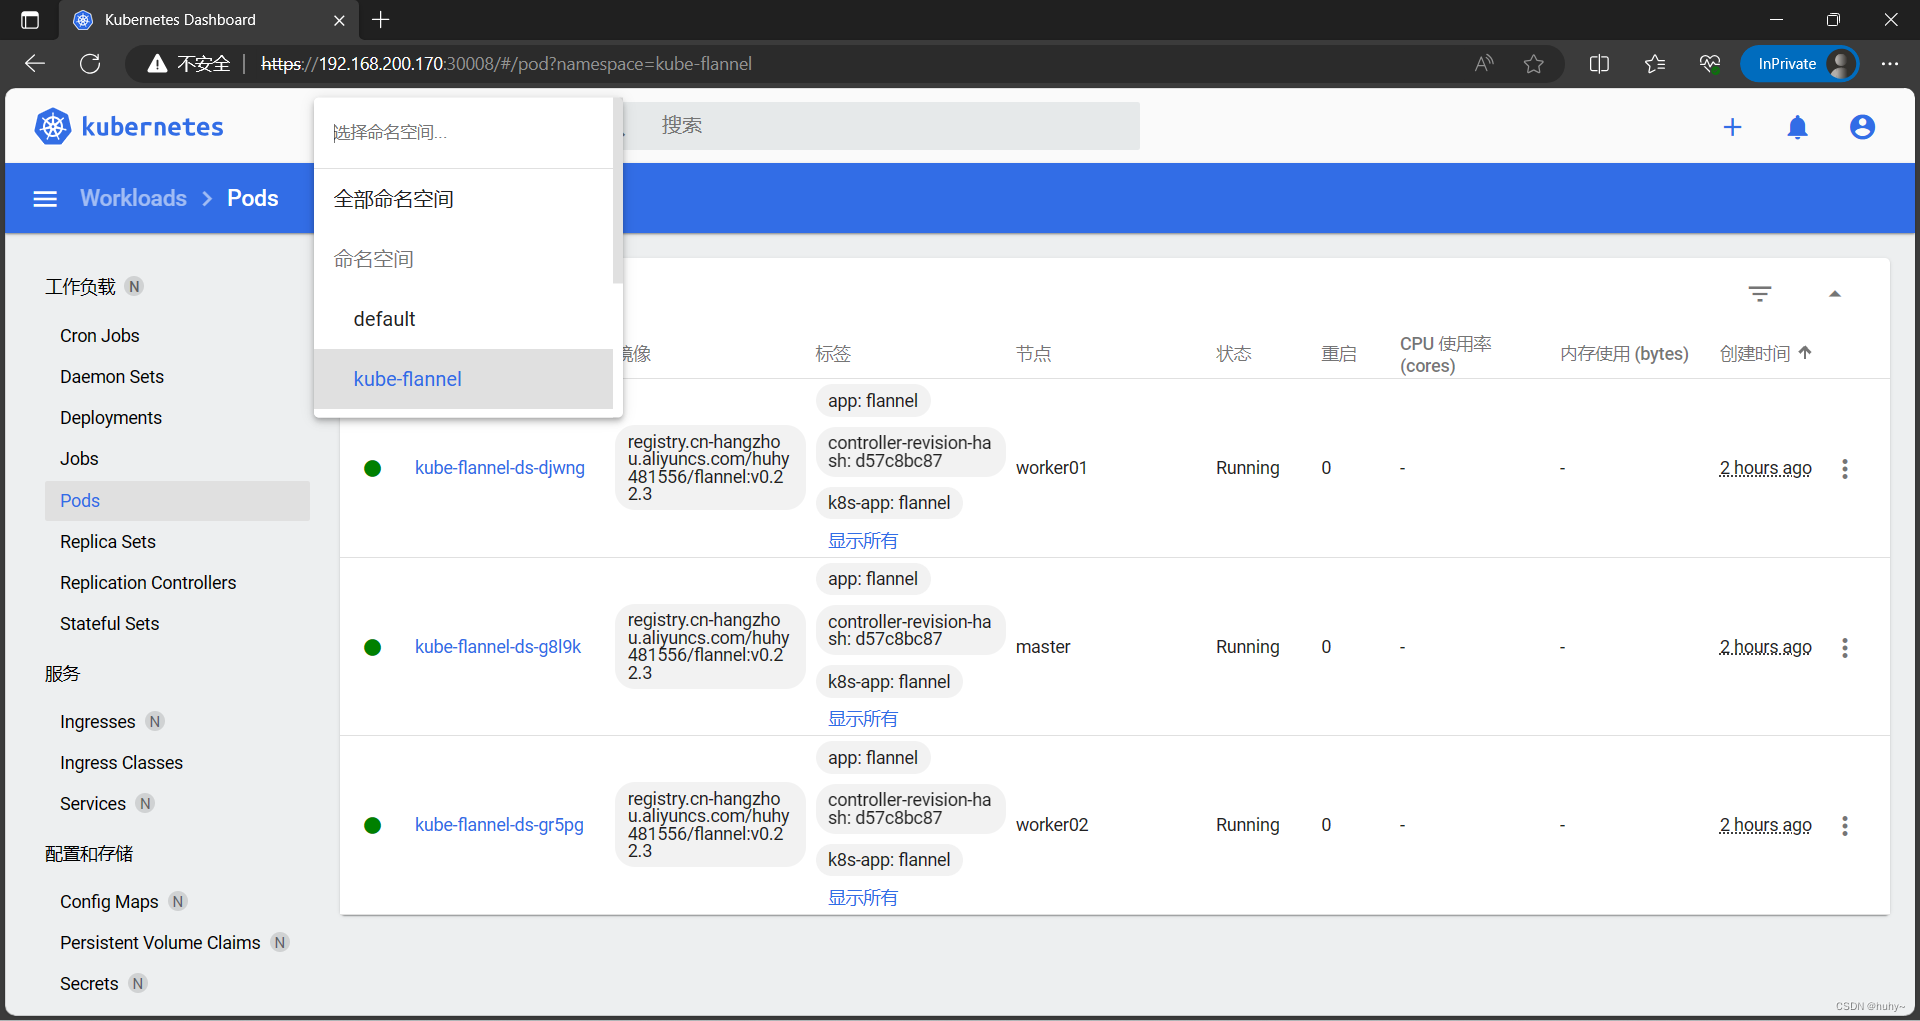
root@master:~# kubectl get pod -n kube-flannel
NAME                    READY   STATUS    RESTARTS   AGE
kube-flannel-ds-djwng   1/1     Running   0          14s
kube-flannel-ds-g8l9k   1/1     Running   0          14s
kube-flannel-ds-gr5pg   1/1     Running   0          14s
root@master:~# kubectl get pod -A
NAMESPACE      NAME                             READY   STATUS    RESTARTS   AGE
kube-flannel   kube-flannel-ds-djwng            1/1     Running   0          2m52s
kube-flannel   kube-flannel-ds-g8l9k            1/1     Running   0          2m52s
kube-flannel   kube-flannel-ds-gr5pg            1/1     Running   0          2m52s
kube-system    coredns-74586cf9b6-v599t         1/1     Running   0          6m27s
kube-system    coredns-74586cf9b6-wbv8c         1/1     Running   0          6m27s
kube-system    etcd-master                      1/1     Running   0          6m40s
kube-system    kube-apiserver-master            1/1     Running   0          6m40s
kube-system    kube-controller-manager-master   1/1     Running   0          6m40s
kube-system    kube-proxy-6fwpp                 1/1     Running   0          5m58s
kube-system    kube-proxy-f5w9f                 1/1     Running   0          6m27s
kube-system    kube-proxy-hgrpc                 1/1     Running   0          5m57s
kube-system    kube-scheduler-master            1/1     Running   0          6m40s
root@master:~#
root@master:~# kubectl get nodes
NAME       STATUS   ROLES           AGE     VERSION
master     Ready    control-plane   6m59s   v1.24.0
worker01   Ready    <none>          6m13s   v1.24.0
worker02   Ready    <none>          6m12s   v1.24.0
root@master:~#
配置k8s命令补全,这样使用Tab就可以补全命令
root@master:~# apt install -y bash-completion
root@master:~# source /usr/share/bash-completion/bash_completion
root@master:~# source <(kubectl completion bash)
root@master:~# echo "source <(kubectl completion bash)" >> ~/.bashrc
配置dashboard
官网最新推荐版本:https://github.com/kubernetes/dashboard/releases/tag/v2.6.1
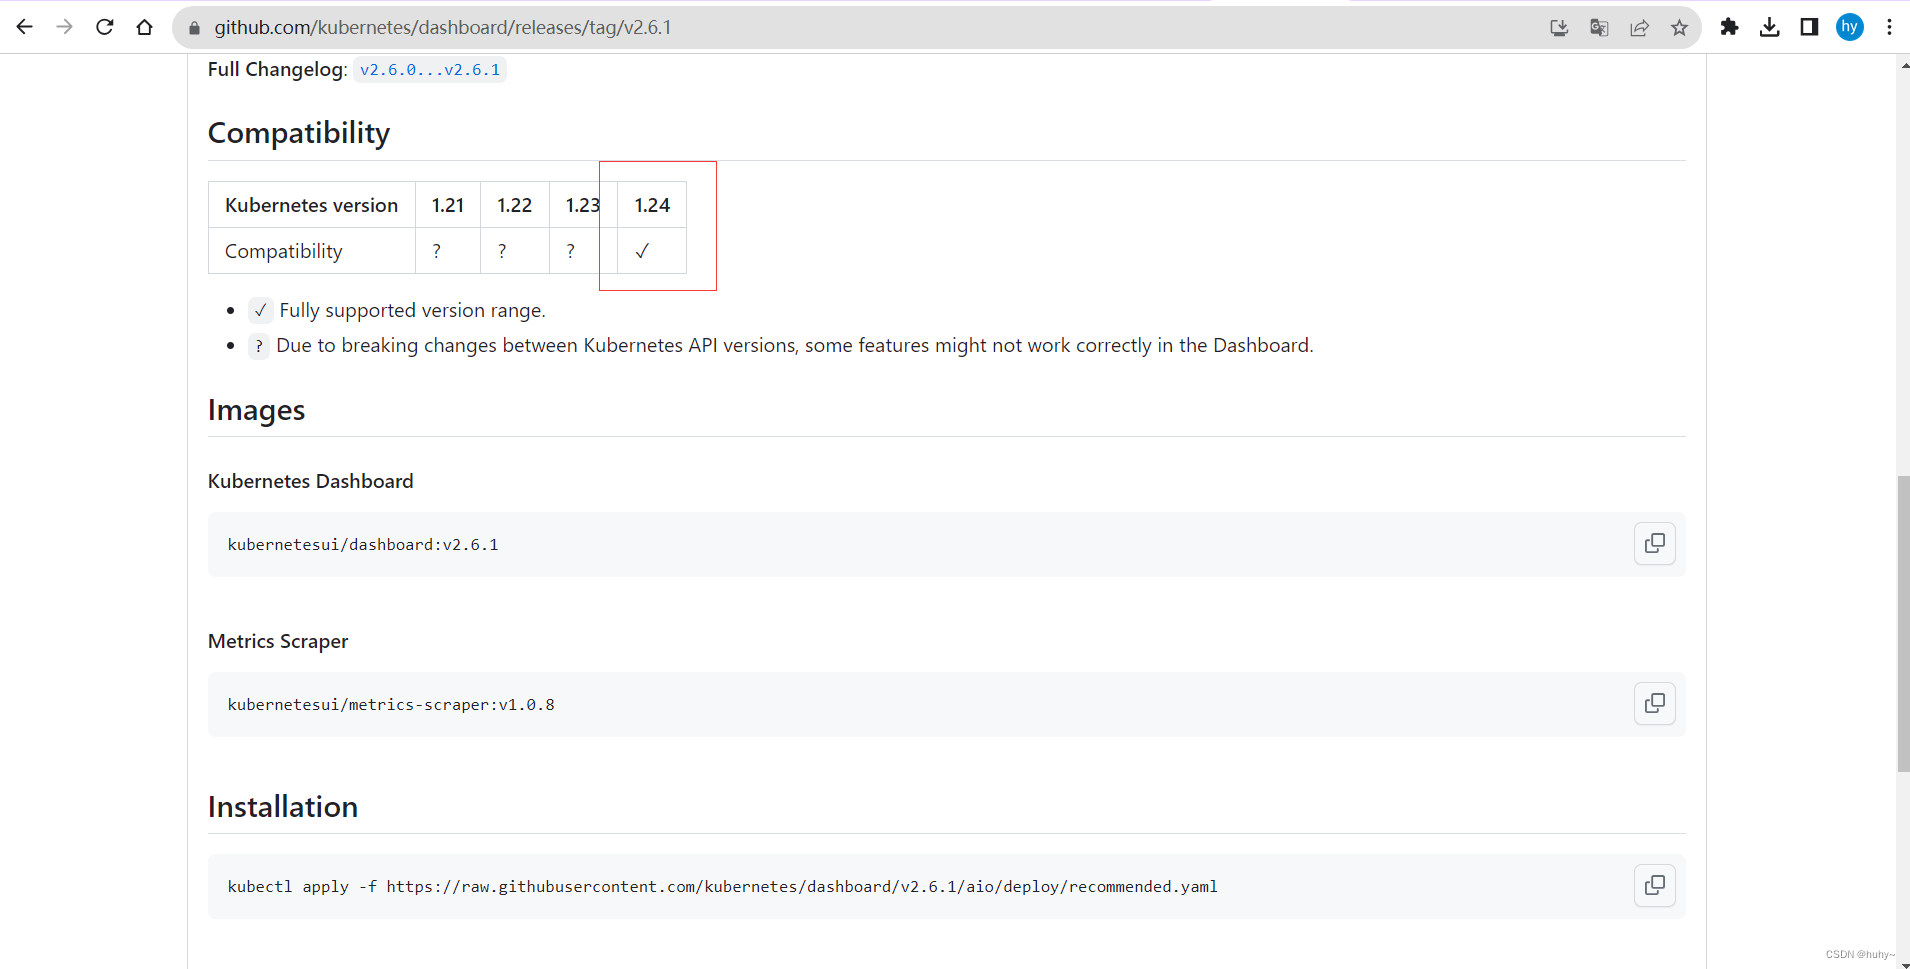
提前下载好镜像,并推送到自己的阿里云
文档地址:https://raw.githubusercontent.com/kubernetes/dashboard/v2.6.1/aio/deploy/recommended.yaml,拉取文档后把镜像拉取地址修改为自己的阿里云地址,并且添加了nodeport打开端口30008,修改后如下
# Copyright 2017 The Kubernetes Authors.
#
# Licensed under the Apache License, Version 2.0 (the "License");
# you may not use this file except in compliance with the License.
# You may obtain a copy of the License at
#
#     http://www.apache.org/licenses/LICENSE-2.0
#
# Unless required by applicable law or agreed to in writing, software
# distributed under the License is distributed on an "AS IS" BASIS,
# WITHOUT WARRANTIES OR CONDITIONS OF ANY KIND, either express or implied.
# See the License for the specific language governing permissions and
# limitations under the License.apiVersion: v1
kind: Namespace
metadata:name: kubernetes-dashboard---apiVersion: v1
kind: ServiceAccount
metadata:labels:k8s-app: kubernetes-dashboardname: kubernetes-dashboardnamespace: kubernetes-dashboard---kind: Service
apiVersion: v1
metadata:labels:k8s-app: kubernetes-dashboardname: kubernetes-dashboardnamespace: kubernetes-dashboard
spec:type: NodePort #添加ports:- port: 443targetPort: 8443nodePort: 30008  # 添加,用于界面端口访问selector:k8s-app: kubernetes-dashboard---apiVersion: v1
kind: Secret
metadata:labels:k8s-app: kubernetes-dashboardname: kubernetes-dashboard-certsnamespace: kubernetes-dashboard
type: Opaque---apiVersion: v1
kind: Secret
metadata:labels:k8s-app: kubernetes-dashboardname: kubernetes-dashboard-csrfnamespace: kubernetes-dashboard
type: Opaque
data:csrf: ""---apiVersion: v1
kind: Secret
metadata:labels:k8s-app: kubernetes-dashboardname: kubernetes-dashboard-key-holdernamespace: kubernetes-dashboard
type: Opaque---kind: ConfigMap
apiVersion: v1
metadata:labels:k8s-app: kubernetes-dashboardname: kubernetes-dashboard-settingsnamespace: kubernetes-dashboard---kind: Role
apiVersion: rbac.authorization.k8s.io/v1
metadata:labels:k8s-app: kubernetes-dashboardname: kubernetes-dashboardnamespace: kubernetes-dashboard
rules:# Allow Dashboard to get, update and delete Dashboard exclusive secrets.- apiGroups: [""]resources: ["secrets"]resourceNames: ["kubernetes-dashboard-key-holder", "kubernetes-dashboard-certs", "kubernetes-dashboard-csrf"]verbs: ["get", "update", "delete"]# Allow Dashboard to get and update 'kubernetes-dashboard-settings' config map.- apiGroups: [""]resources: ["configmaps"]resourceNames: ["kubernetes-dashboard-settings"]verbs: ["get", "update"]# Allow Dashboard to get metrics.- apiGroups: [""]resources: ["services"]resourceNames: ["heapster", "dashboard-metrics-scraper"]verbs: ["proxy"]- apiGroups: [""]resources: ["services/proxy"]resourceNames: ["heapster", "http:heapster:", "https:heapster:", "dashboard-metrics-scraper", "http:dashboard-metrics-scraper"]verbs: ["get"]---kind: ClusterRole
apiVersion: rbac.authorization.k8s.io/v1
metadata:labels:k8s-app: kubernetes-dashboardname: kubernetes-dashboard
rules:# Allow Metrics Scraper to get metrics from the Metrics server- apiGroups: ["metrics.k8s.io"]resources: ["pods", "nodes"]verbs: ["get", "list", "watch"]---apiVersion: rbac.authorization.k8s.io/v1
kind: RoleBinding
metadata:labels:k8s-app: kubernetes-dashboardname: kubernetes-dashboardnamespace: kubernetes-dashboard
roleRef:apiGroup: rbac.authorization.k8s.iokind: Rolename: kubernetes-dashboard
subjects:- kind: ServiceAccountname: kubernetes-dashboardnamespace: kubernetes-dashboard---apiVersion: rbac.authorization.k8s.io/v1
kind: ClusterRoleBinding
metadata:name: kubernetes-dashboard
roleRef:apiGroup: rbac.authorization.k8s.iokind: ClusterRolename: kubernetes-dashboard
subjects:- kind: ServiceAccountname: kubernetes-dashboardnamespace: kubernetes-dashboard---kind: Deployment
apiVersion: apps/v1
metadata:labels:k8s-app: kubernetes-dashboardname: kubernetes-dashboardnamespace: kubernetes-dashboard
spec:replicas: 1revisionHistoryLimit: 10selector:matchLabels:k8s-app: kubernetes-dashboardtemplate:metadata:labels:k8s-app: kubernetes-dashboardspec:securityContext:seccompProfile:type: RuntimeDefaultcontainers:- name: kubernetes-dashboardimage: registry.cn-hangzhou.aliyuncs.com/huhy481556/dashboard:v2.6.1#image: kubernetesui/dashboard:v2.6.1imagePullPolicy: Alwaysports:- containerPort: 8443protocol: TCPargs:- --auto-generate-certificates- --namespace=kubernetes-dashboard# Uncomment the following line to manually specify Kubernetes API server Host# If not specified, Dashboard will attempt to auto discover the API server and connect# to it. Uncomment only if the default does not work.# - --apiserver-host=http://my-address:portvolumeMounts:- name: kubernetes-dashboard-certsmountPath: /certs# Create on-disk volume to store exec logs- mountPath: /tmpname: tmp-volumelivenessProbe:httpGet:scheme: HTTPSpath: /port: 8443initialDelaySeconds: 30timeoutSeconds: 30securityContext:allowPrivilegeEscalation: falsereadOnlyRootFilesystem: truerunAsUser: 1001runAsGroup: 2001volumes:- name: kubernetes-dashboard-certssecret:secretName: kubernetes-dashboard-certs- name: tmp-volumeemptyDir: {}serviceAccountName: kubernetes-dashboardnodeSelector:"kubernetes.io/os": linux# Comment the following tolerations if Dashboard must not be deployed on mastertolerations:- key: node-role.kubernetes.io/mastereffect: NoSchedule---kind: Service
apiVersion: v1
metadata:labels:k8s-app: dashboard-metrics-scrapername: dashboard-metrics-scrapernamespace: kubernetes-dashboard
spec:ports:- port: 8000targetPort: 8000selector:k8s-app: dashboard-metrics-scraper---kind: Deployment
apiVersion: apps/v1
metadata:labels:k8s-app: dashboard-metrics-scrapername: dashboard-metrics-scrapernamespace: kubernetes-dashboard
spec:replicas: 1revisionHistoryLimit: 10selector:matchLabels:k8s-app: dashboard-metrics-scrapertemplate:metadata:labels:k8s-app: dashboard-metrics-scraperspec:securityContext:seccompProfile:type: RuntimeDefaultcontainers:- name: dashboard-metrics-scraperimage: registry.cn-hangzhou.aliyuncs.com/huhy481556/metrics-scraper:v1.0.8#image: kubernetesui/metrics-scraper:v1.0.8ports:- containerPort: 8000protocol: TCPlivenessProbe:httpGet:scheme: HTTPpath: /port: 8000initialDelaySeconds: 30timeoutSeconds: 30volumeMounts:- mountPath: /tmpname: tmp-volumesecurityContext:allowPrivilegeEscalation: falsereadOnlyRootFilesystem: truerunAsUser: 1001runAsGroup: 2001serviceAccountName: kubernetes-dashboardnodeSelector:"kubernetes.io/os": linux# Comment the following tolerations if Dashboard must not be deployed on mastertolerations:- key: node-role.kubernetes.io/mastereffect: NoSchedulevolumes:- name: tmp-volumeemptyDir: {}
root@master:~# kubectl apply -f recommended.yaml
namespace/kubernetes-dashboard created
serviceaccount/kubernetes-dashboard created
service/kubernetes-dashboard created
secret/kubernetes-dashboard-certs created
secret/kubernetes-dashboard-csrf created
secret/kubernetes-dashboard-key-holder created
configmap/kubernetes-dashboard-settings created
role.rbac.authorization.k8s.io/kubernetes-dashboard created
clusterrole.rbac.authorization.k8s.io/kubernetes-dashboard created
rolebinding.rbac.authorization.k8s.io/kubernetes-dashboard created
clusterrolebinding.rbac.authorization.k8s.io/kubernetes-dashboard created
deployment.apps/kubernetes-dashboard created
service/dashboard-metrics-scraper created
deployment.apps/dashboard-metrics-scraper created
root@master:~# kubectl get pod -n kubernetes-dashboard
NAME                                         READY   STATUS    RESTARTS   AGE
dashboard-metrics-scraper-6fb775d6cd-hglgg   1/1     Running   0          71s
kubernetes-dashboard-b8599cfd-dv5gf          1/1     Running   0          71s
root@master:~#
root@master:~# kubectl get svc -n kubernetes-dashboard
NAME                        TYPE        CLUSTER-IP     EXTERNAL-IP   PORT(S)         AGE
dashboard-metrics-scraper   ClusterIP   10.108.20.88   <none>        8000/TCP        135s
kubernetes-dashboard        NodePort    10.99.33.57    <none>        443:30008/TCP   135s
root@master:~#
界面访问: https://IP:30008
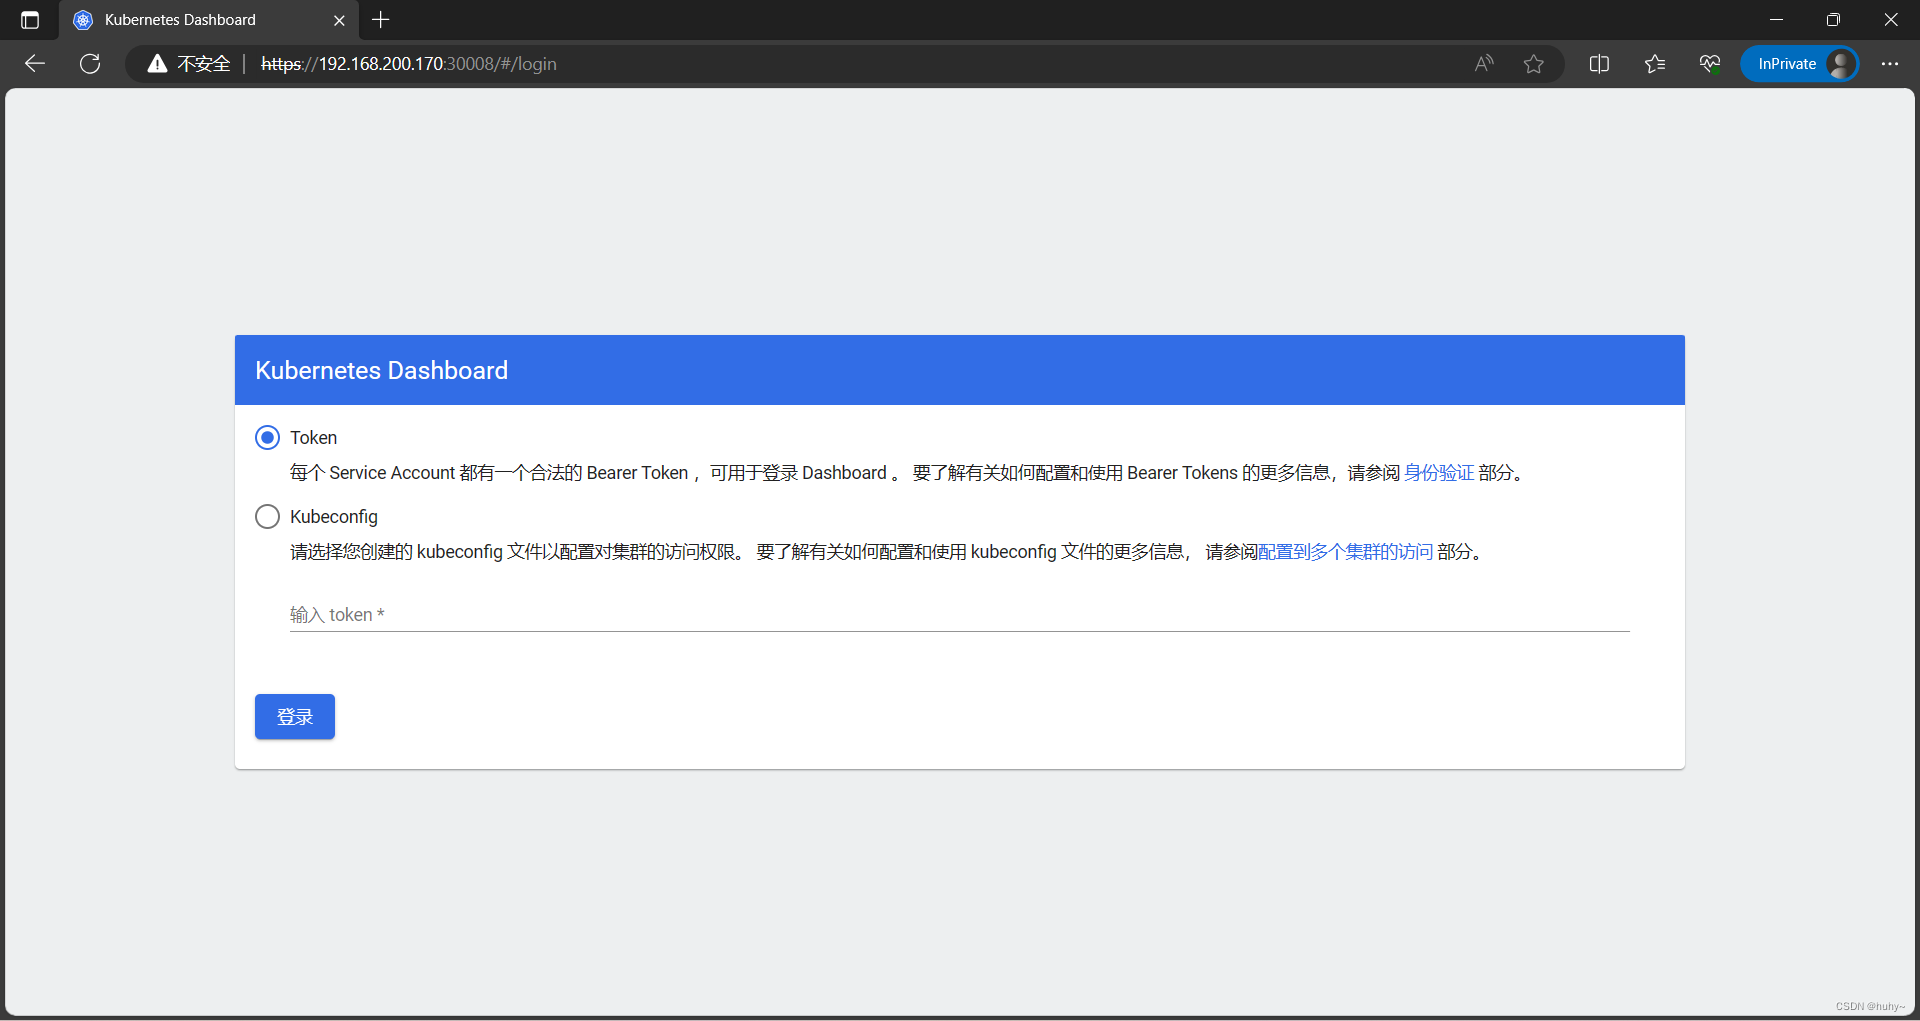
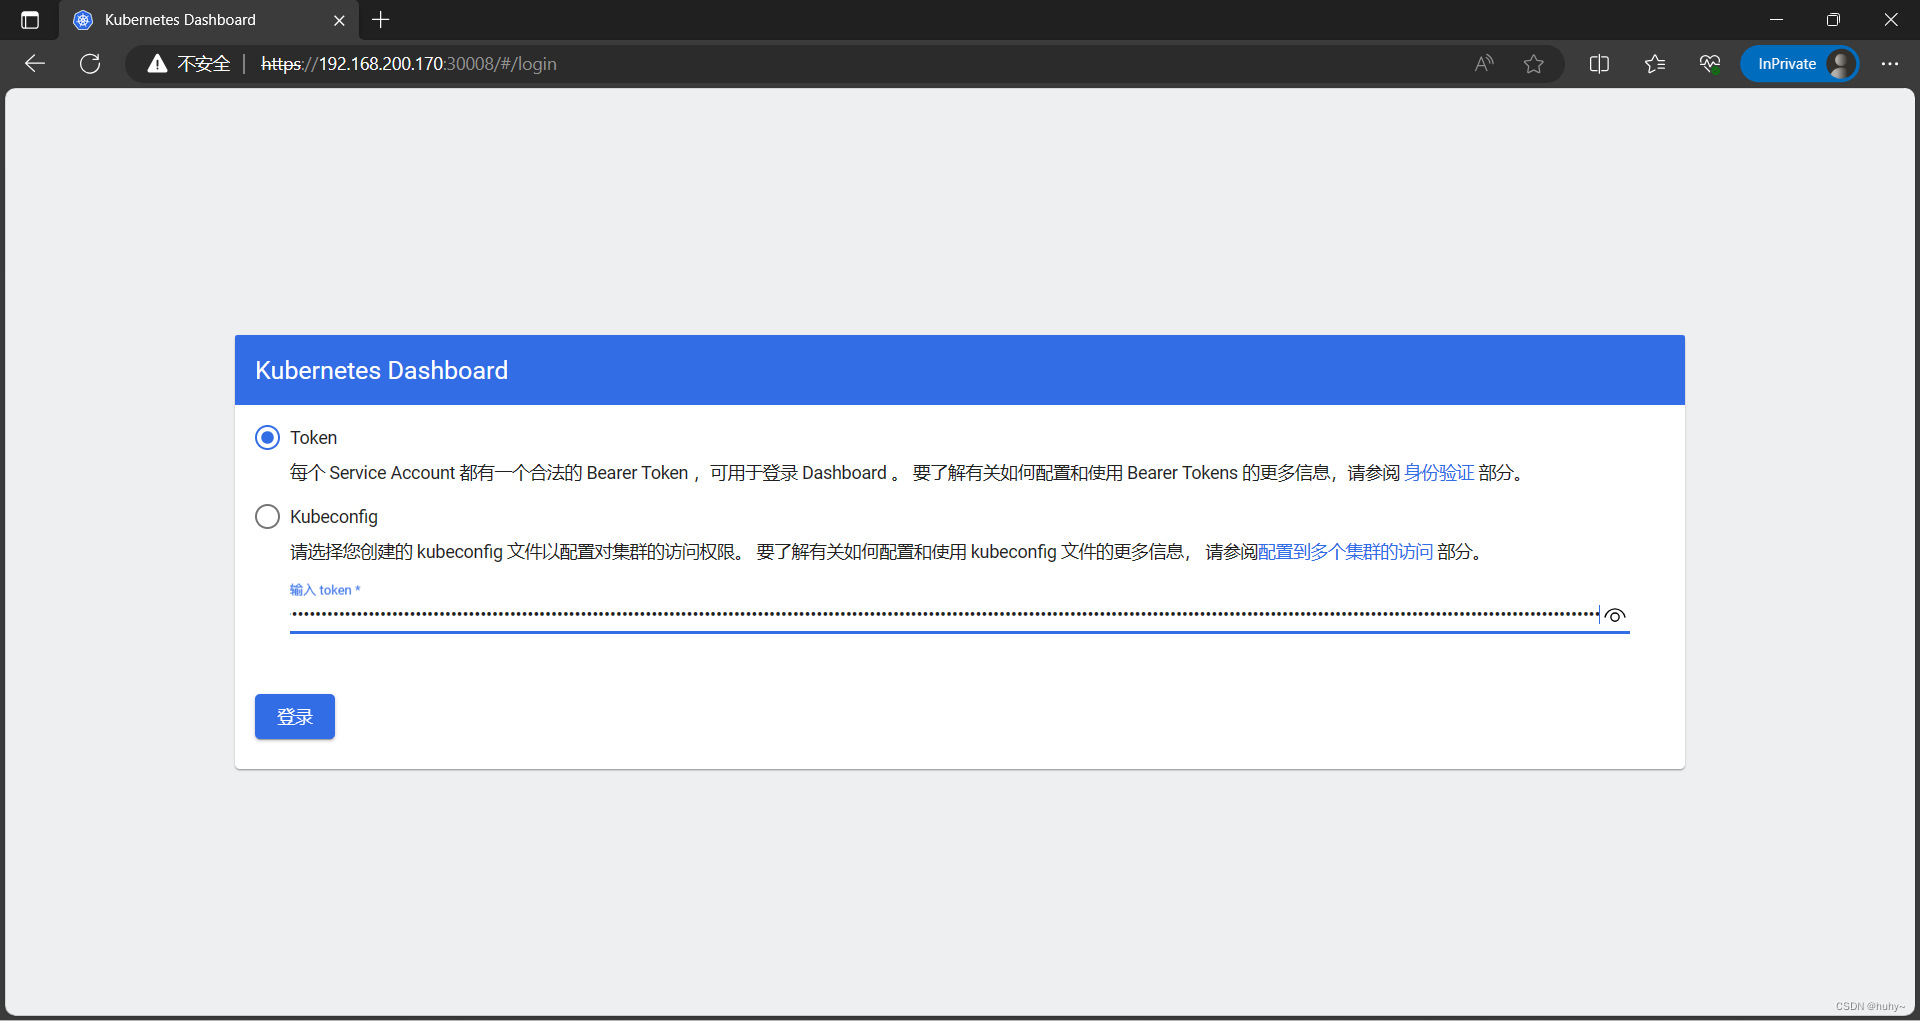
手动生成Token(创建好的Token创建保存好,如果忘记了可以重新生成,但是之前的Token不会被覆盖一样可以使用)
root@master:~# cat test.yaml
kind: ClusterRoleBinding
apiVersion: rbac.authorization.k8s.io/v1
metadata:name: adminannotations:rbac.authorization.kubernetes.io/autoupdate: "true"
roleRef:kind: ClusterRolename: cluster-adminapiGroup: rbac.authorization.k8s.io
subjects:
- kind: ServiceAccountname: adminnamespace: kubernetes-dashboard
---
apiVersion: v1
kind: ServiceAccount
metadata:name: adminnamespace: kubernetes-dashboardlabels:kubernetes.io/cluster-service: "true"addonmanager.kubernetes.io/mode: Reconcile
root@master:~# kubectl apply -f test.yaml
clusterrolebinding.rbac.authorization.k8s.io/admin created
serviceaccount/admin created
root@master:~# kubectl create token admin  -n kubernetes-dashboard
eyJhbGciOiJSUzI1NiIsImtpZCI6IjZGX0pPcGlrQnBZUVFhQUZSV3hVdEF3Z1ZDUnRkWEZGQVdmTUN2cy1sMVEifQ.eyJhdWQiOlsiaHR0cHM6Ly9rdWJlcm5ldGVzLmRlZmF1bHQuc3ZjLmNsdXN0ZXIubG9jYWwiXSwiZXhwIjoxNjk1NjQzODMwLCJpYXQiOjE2OTU2NDAyMzAsImlzcyI6Imh0dHBzOi8va3ViZXJuZXRlcy5kZWZhdWx0LnN2Yy5jbHVzdGVyLmxvY2FsIiwia3ViZXJuZXRlcy5pbyI6eyJuYW1lc3BhY2UiOiJrdWJlcm5ldGVzLWRhc2hib2FyZCIsInNlcnZpY2VhY2NvdW50Ijp7Im5hbWUiOiJhZG1pbiIsInVpZCI6ImMxMGM1NWQ5LTUzYTctNGQ4Yy1hZTRjLTdhODAyNGQyNTU2ZiJ9fSwibmJmIjoxNjk1NjQwMjMwLCJzdWIiOiJzeXN0ZW06c2VydmljZWFjY291bnQ6a3ViZXJuZXRlcy1kYXNoYm9hcmQ6YWRtaW4ifQ.T_aw9JBhZ72kEvgg8qLV2grdwSenP1ZBzOx1T8MK56tKofZA8YFPGkAfWH2Llfif5yvmaMbhw8d96-IsfvmAgkSnVBr0wqKp18S99YwEYY7JzoOkb44H993PsbAWtDaeawKovVvNywh3ZyA4Bf53RNnnKNVALCTDDWVaD2UZVcEqRvye5vpiiClZqS8WcshZ-BaR8XTFjsQbwbWtlOSHKWP0WIEJpwH3FYIsuCttZcKlM-zcko5etSh5Jjvvbznx2fuZsVSWE8O4V7S4MTOF-VWTuNVD367qYDJOgy1yrVCTIoFZvwrQrX47OkiK2phZ1rD8_QrhGuCTJaz50x4csg
root@master:~#
)


)


| 图基本概念与操作)


)


真题解析)


