一、 使用前的准备
-
首先,注册开发者账号,成为高德开放平台开发者
-
登陆之后,在进入「应用管理」 页面「创建新应用」
-
为应用添加 Key,「服务平台」一项请选择「 Web 端 ( JSAPI ) 」
二、安装依赖
// 安装L7 依赖
npm install --save @antv/l7
// 安装第三方底图依赖
npm install --save @antv/l7-maps
三、初始化地图
1. 获取创建的key

2. 注入token中
import { Scene } from '@antv/l7';
import { GaodeMap } from '@antv/l7-maps';
import { useEffect } from 'react';export default () => {useEffect(() => {const scene = new Scene({id: 'map',map: new GaodeMap({style: 'dark',center: [105.770672, 38.159869],zoom: 2.90,token: '你创建的Key',}),});}, []);return (<divid="map"style={{height: 500,width: 800,position: 'relative',justifyContent: 'center',}}></div>);
};
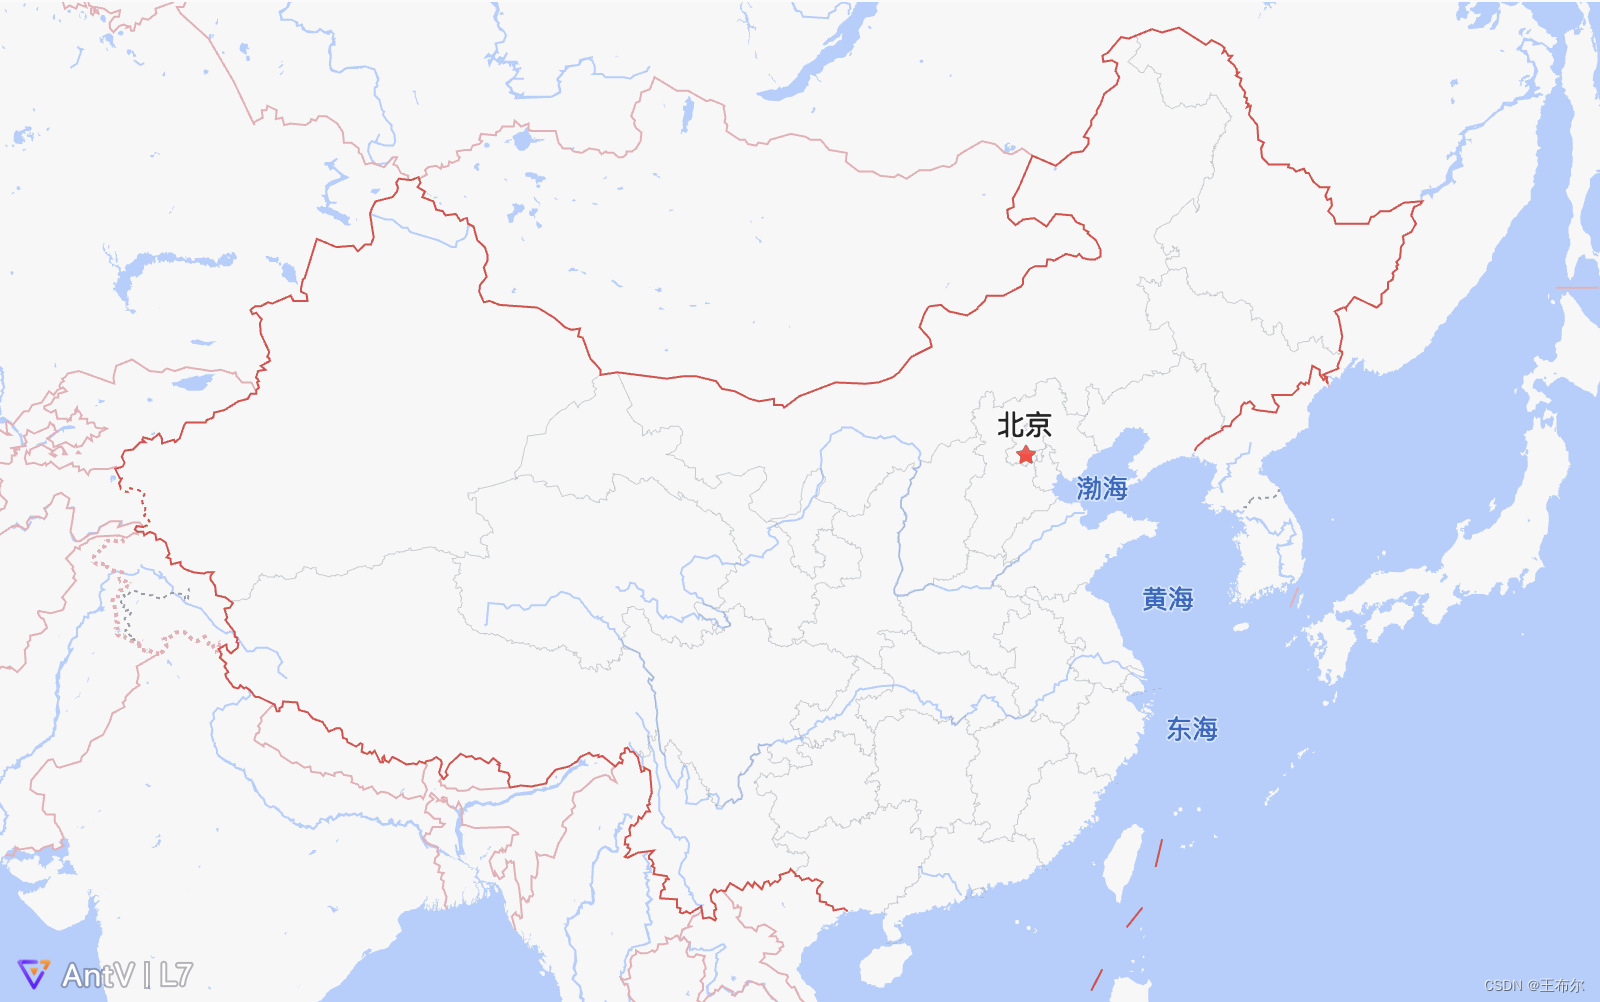
3. 效果图
四、绘制填充图
1. 中国各省 GeoJSON 数据。
https://gw.alipayobjects.com/os/bmw-prod/d6da7ac1-8b4f-4a55-93ea-e81aa08f0cf3.json
2. 填充地图
import { PolygonLayer } from '@antv/l7';const chinaPolygonLayer = new PolygonLayer({}).source(da1).color('name', ['rgb(239,243,255)','rgb(189,215,231)','rgb(107,174,214)','rgb(49,130,189)','rgb(8,81,156)',]);scene.addLayer(chinaPolygonLayer);
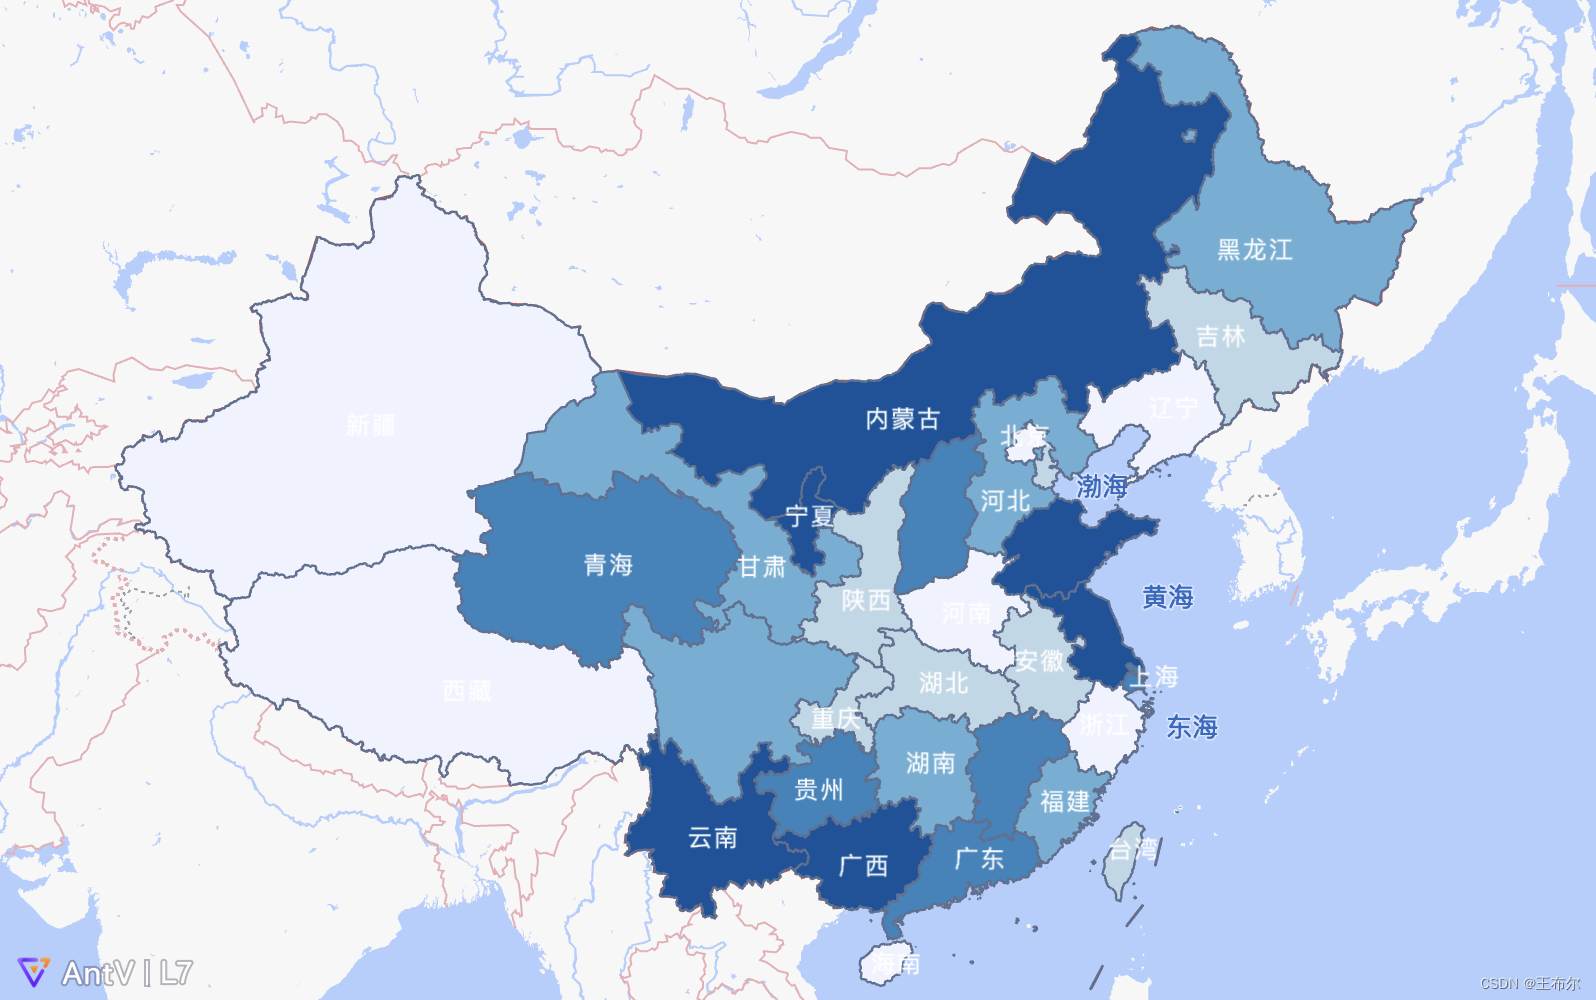
3. 效果
五、增加行政区划描边和行政区划文字标注
1. 数据
https://gw.alipayobjects.com/os/bmw-prod/c4a6aa9d-8923-4193-a695-455fd8f6638c.json
2. 填充地图
import { LineLayer, PointLayer } from '@antv/l7';const layer2 = new LineLayer({zIndex: 2,
}).source(da1).color('rgb(93,112,146)').size(0.6).style({opacity: 1,});scene.addLayer(layer2);const labelLayer = new PointLayer({zIndex: 5,
}).source(da2, {parser: {type: 'json',coordinates: 'center',},}).color('#fff').shape('name', 'text').size(12).style({opacity: 1,stroke: '#fff',strokeWidth: 0,padding: [5, 5],textAllowOverlap: false,});scene.addLayer(labelLayer);
3. 效果
六、定义高亮
1. 默认hover高亮
chinaPolygonLayer.active(true); // 开启默认高亮效果
chinaPolygonLayer.active({ color: 'red' }); // 开启并设置高亮颜色为红色

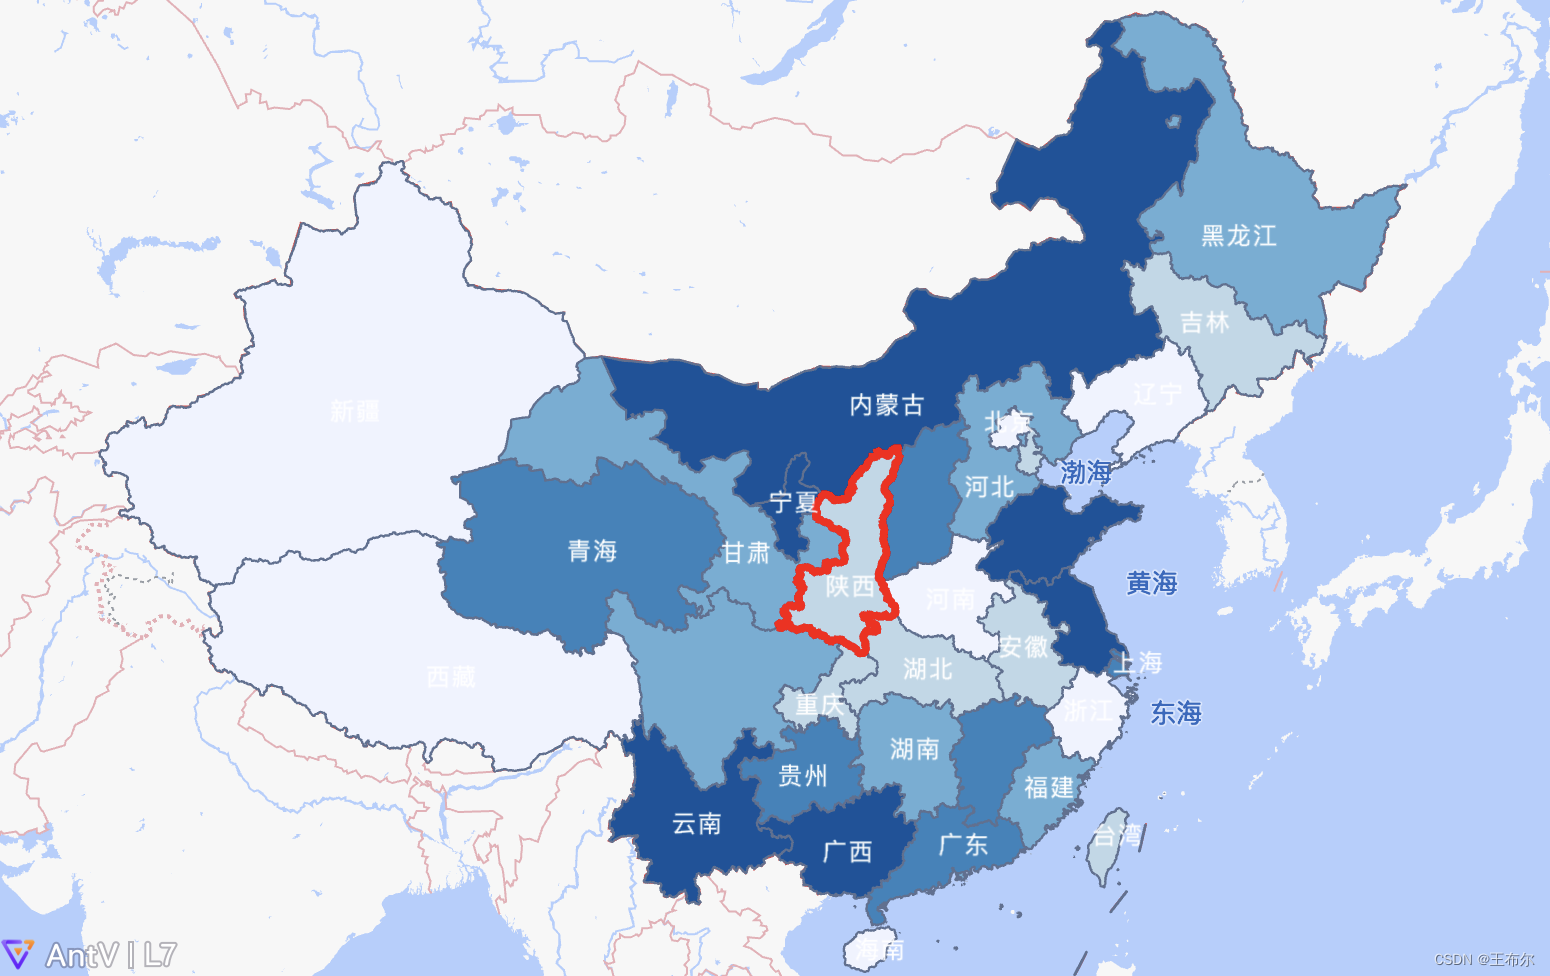
2. 自定义点击高亮
const hightLayer = new LineLayer({zIndex: 4, // 设置显示层级name: 'hightlight'
}) .source({type: 'FeatureCollection',features: [ ]}).shape('line').size(2).color('red');scene.addLayer(hightLayer);// 设置点击生效
chinaPolygonLayer.on('click', feature => {hightLayer.setData({type: 'FeatureCollection',features: [ feature.feature ]});
});
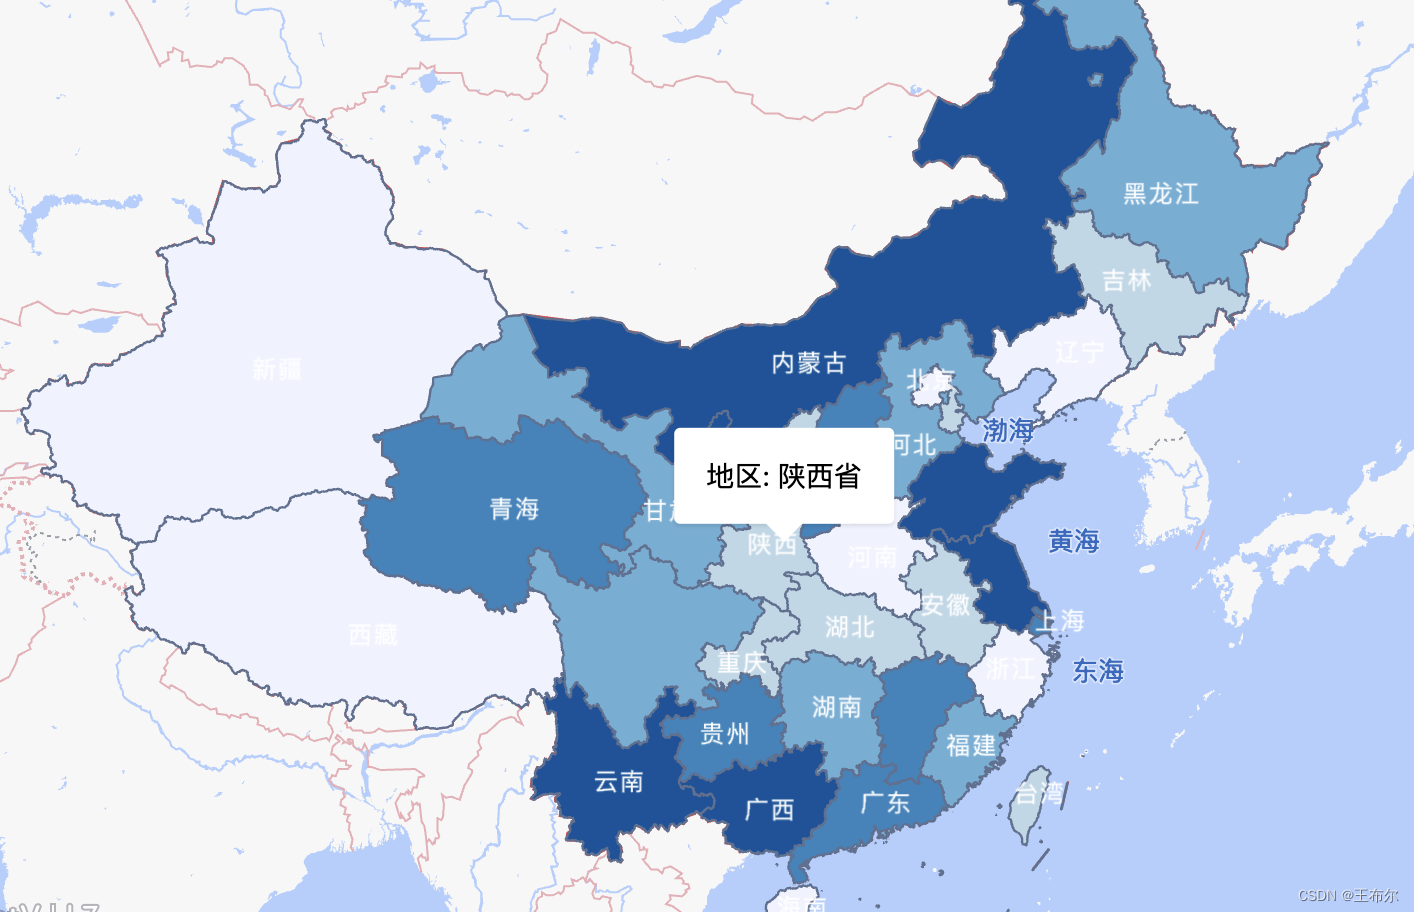
3. 添加hover信息框
import { Popup } from '@antv/l7';chinaPolygonLayer.on('mousemove', (e) => {const popup = new Popup({offsets: [0, 0],closeButton: false,}).setLnglat(e.lngLat).setHTML(`<span>地区: ${e.feature.properties.name}</span>`);scene.addPopup(popup);
}); 
七、添加图例
1. 样式
.infolegend {padding: 5px;background: white;> i {display: inline-block;width: 20px !important;height: 10px;}
}
2. 代码
import { Control } from '@antv/l7'; import './index.less';const legend = new Control({position: 'bottomright',});legend.onAdd = function () {let el = document.createElement('div');el.className = 'infolegend legend';const grades = [0, 10, 20, 50, 100, 200, 500];const color = ['rgb(255,255,217)','rgb(237,248,177)','rgb(199,233,180)','rgb(127,205,187)','rgb(65,182,196)','rgb(29,145,192)','rgb(34,94,168)','rgb(12,44,132)',];for (let i = 0; i < grades.length; i++) {el.innerHTML +='<i style="background:' +color[i] +'"></i> ' +grades[i] +(grades[i + 1] ? '-' + grades[i + 1] + '<br>' : '+');}return el;};scene.addControl(legend);3. 效果
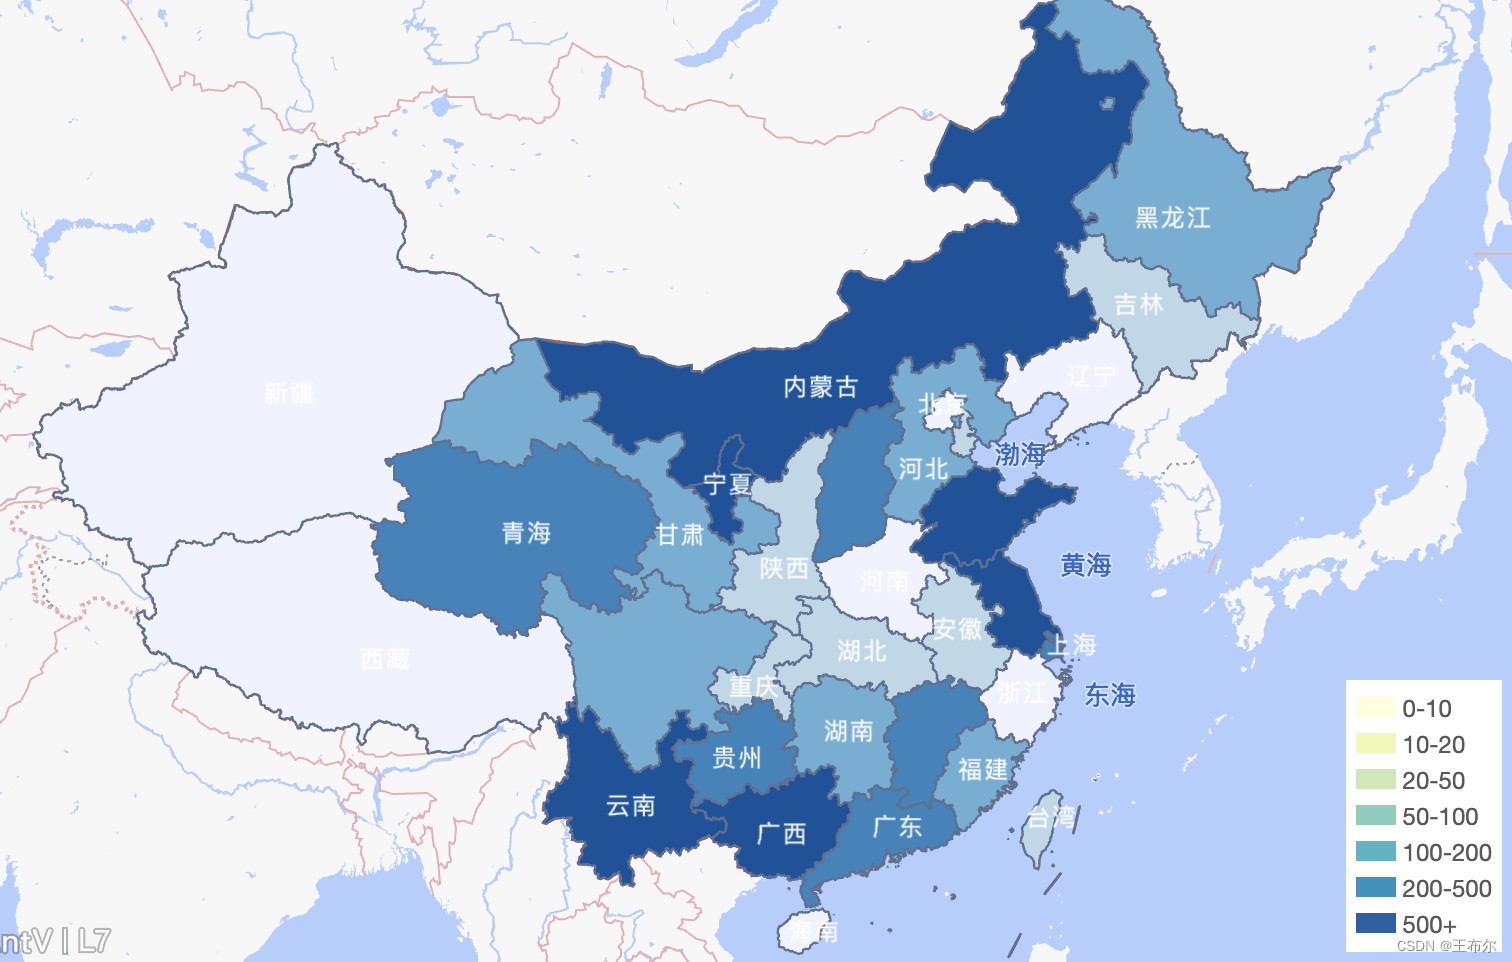
八、成品代码
// JSXimport {Control,LineLayer,PointLayer,PolygonLayer,Popup,Scene,
} from '@antv/l7';
import { GaodeMap } from '@antv/l7-maps';
import { useModel } from '@umijs/max';
import { useEffect } from 'react';
import './index.less';
export default () => {const { da1, da2 } = useModel('maps');useEffect(() => {// 初始化地图const scene = new Scene({id: 'map',map: new GaodeMap({style: 'blank',center: [105.770672, 38.159869],zoom: 2.9,token: 'xxxxxx',}),});// 填充图const color = ['rgb(255,255,217)','rgb(237,248,177)','rgb(199,233,180)','rgb(127,205,187)','rgb(65,182,196)','rgb(29,145,192)','rgb(34,94,168)','rgb(12,44,132)',];const chinaPolygonLayer = new PolygonLayer({}).source(da1).color('name', color);scene.addLayer(chinaPolygonLayer);// 文字标注const layer2 = new LineLayer({zIndex: 2,}).source(da1).color('rgb(93,112,146)').size(0.6).style({opacity: 1,});scene.addLayer(layer2);// 区域描边const labelLayer = new PointLayer({zIndex: 5,}).source(da2, {parser: {type: 'json',coordinates: 'center',},}).color('#fff').shape('name', 'text').size(12).style({opacity: 1,stroke: '#fff',strokeWidth: 0,padding: [5, 5],textAllowOverlap: false,});scene.addLayer(labelLayer);// hover高亮// chinaPolygonLayer.active(true); // 开启默认高亮效果// chinaPolygonLayer.active({ color: 'red' }); // 开启并设置高亮颜色为红色// 设置点击高亮const hightLayer = new LineLayer({zIndex: 4, // 设置显示层级name: 'hightlight',}).source({type: 'FeatureCollection',features: [],}).shape('line').size(2).color('red');scene.addLayer(hightLayer);chinaPolygonLayer.on('click', (feature) => {hightLayer.setData({type: 'FeatureCollection',features: [feature.feature],});});// hover信息框chinaPolygonLayer.on('mousemove', (e) => {const popup = new Popup({offsets: [0, 0],closeButton: false,closeOnClick: true,}).setLnglat(e.lngLat).setHTML(`<span>地区: ${e.feature.properties.name}</span>`);scene.addPopup(popup);});// 右下角图例const legend = new Control({position: 'bottomright',});legend.onAdd = function () {let el = document.createElement('div');el.className = 'infolegend legend';const grades = [0, 10, 20, 50, 100, 200, 500];for (let i = 0; i < grades.length; i++) {el.innerHTML +='<i style="background:' +color[i] +'"></i> ' +grades[i] +(grades[i + 1] ? '-' + grades[i + 1] + '<br>' : '+');}return el;};scene.addControl(legend);}, []);return (<divid="map"style={{height: 500,width: 800,position: 'relative',justifyContent: 'center',}}></div>);
};
// LESS.infolegend {padding: 5px;background: white;> i {display: inline-block;width: 20px !important;height: 10px;}
}
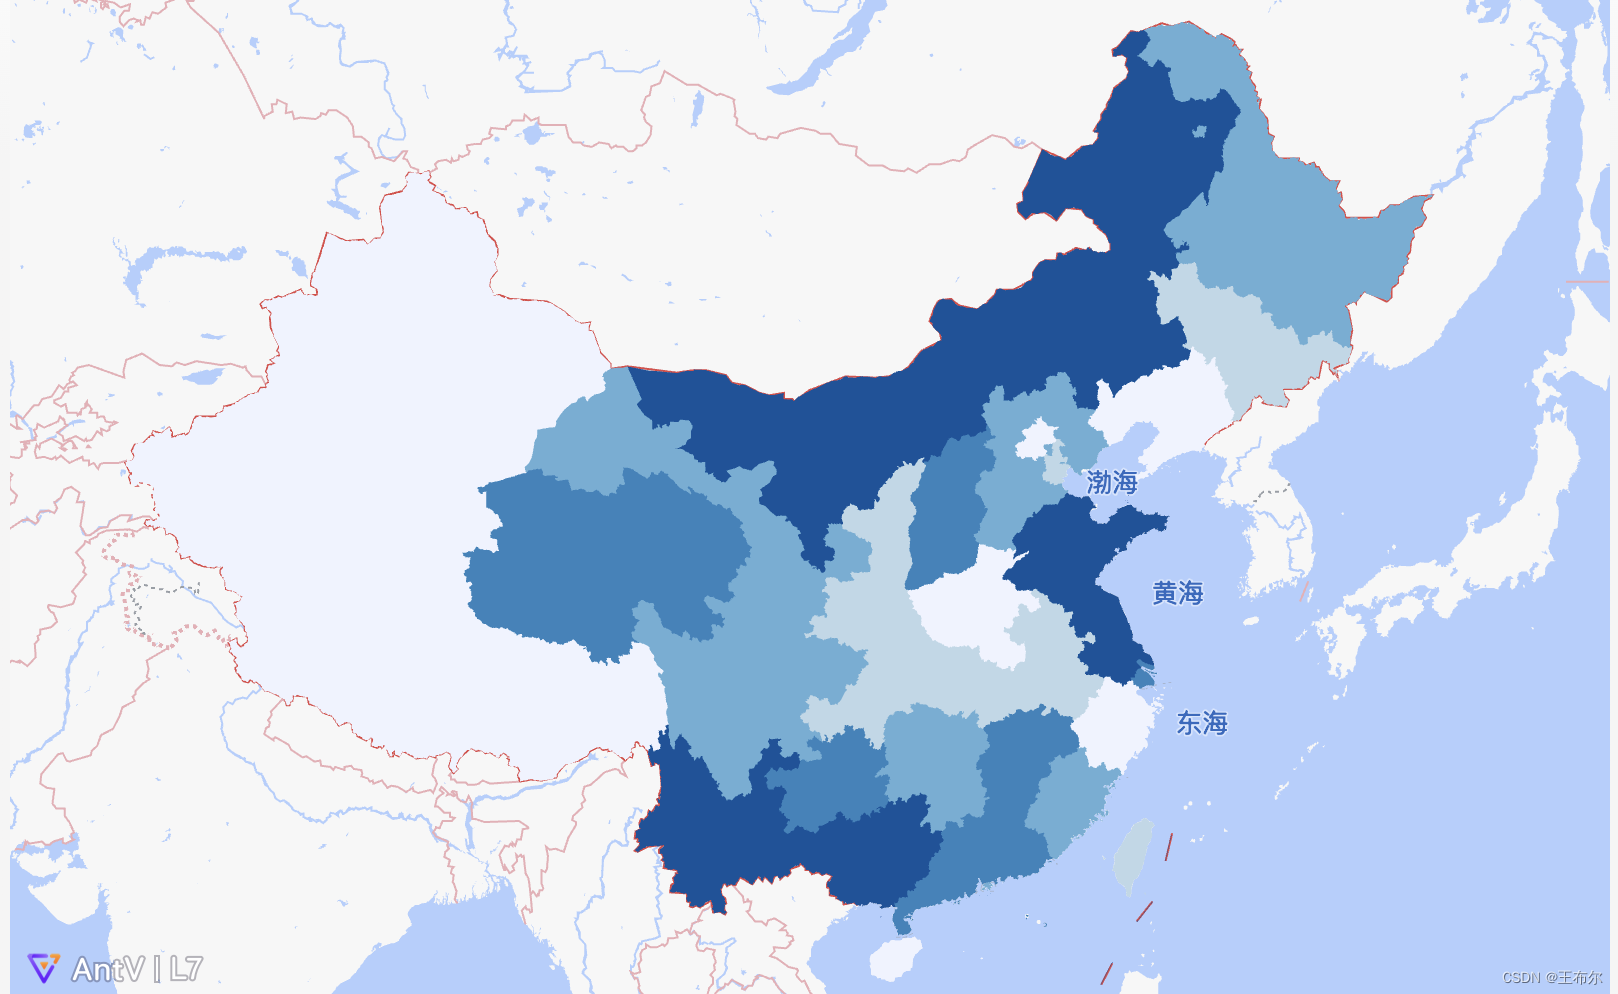


:c++ 复制与拷贝构造函数)


)


