目录
一、分布式 gRPC 开发
1.1、项目结构 & 前置说明
1.1.1、项目结构
1.1.2、protoc 必备依赖
1.1.3、推荐插件(简化开发)
1.1.4、protoc 生成 Java 代码说明
1.2、一元 RPC(代理方式一:阻塞式 BlockingStub)
1.2.1、api 模块
1.2.2、服务端模块
1.2.3、客户端模块
1.3、一元 RPC 扩展(演示 repeated)
1.3.1、api 模块
1.3.2、服务端开发
1.3.3、客户端开发
1.4、服务端流式 RPC(代理方式一:阻塞式 BlockingStub)
1.4.1、api 模块
1.4.2、服务端开发
1.4.3、客户端开发
1.5、服务端流式 RPC(代理方式二:异步式 Stub)
1.6、客户端流式 RPC(代理方式二:异步式 Stub)
1.6.1、api 开发
1.6.2、服务端开发
1.6.3、客户端开发
1.7、双向流式 RPC(代理方式二:异步式 Stub)
1.7.1、api 开发
1.7.2、服务端开发
1.7.3、客户端开发
1.8、一元 RPC 扩展(代理方式三:FutureStub 异步/同步 式)
1.8.1、api 开发
1.8.2、服务端开发
1.8.3、客户端开发(Future同步版)
1.8.4、客户端开发(Future 异步版)
一、分布式 gRPC 开发
1.1、项目结构 & 前置说明
1.1.1、项目结构
gRPC 项目结构主要分成三个 Module:
- xxx-api 模块:用来定义 protobuf IDL 语言,并通过命令创建对应代码.
- xxx-service 模块:实现 api 模块中定义的服务接口,发布 gRPC 服务(创建服务端程序).
- xxx-client 模块:创建服务端 stub(代理),基于 stub 进行 RPC 调用.
可以看出,由于 api 模块既提供了 service 的接口,有提供了 client 的 stub,因此创建完三个 module 之后,client 和 service 中都需要引入 api 模块.
1.1.2、protoc 必备依赖
a)api 模块可以通过 Maven 插件,编译 protobuf 文件,生成 Java 代码,并把他放在我们配置的位置. 那么首先要去配置 pom.xml 文件.
以下配置来自官网:GitHub - grpc/grpc-java: The Java gRPC implementation. HTTP/2 based RPC
依赖如下:
<dependencies><dependency><groupId>io.grpc</groupId><artifactId>grpc-netty-shaded</artifactId><version>1.60.0</version><scope>runtime</scope></dependency><dependency><groupId>io.grpc</groupId><artifactId>grpc-protobuf</artifactId><version>1.60.0</version></dependency><dependency><groupId>io.grpc</groupId><artifactId>grpc-stub</artifactId><version>1.60.0</version></dependency><dependency> <!-- necessary for Java 9+ --><groupId>org.apache.tomcat</groupId><artifactId>annotations-api</artifactId><version>6.0.53</version><scope>provided</scope></dependency></dependencies>
构建插件如下:
<build><extensions><extension><groupId>kr.motd.maven</groupId><artifactId>os-maven-plugin</artifactId><version>1.7.1</version></extension></extensions><plugins><plugin><groupId>org.xolstice.maven.plugins</groupId><artifactId>protobuf-maven-plugin</artifactId><version>0.6.1</version><configuration><protocArtifact>com.google.protobuf:protoc:3.24.0:exe:${os.detected.classifier}</protocArtifact><pluginId>grpc-java</pluginId><pluginArtifact>io.grpc:protoc-gen-grpc-java:1.60.0:exe:${os.detected.classifier}</pluginArtifact><!-- 输出目录 --><outputDirectory>${basedir}/src/main/java</outputDirectory><!-- 每次执行命令时不清空之前生成的代码(追加的方式) --><clearOutputDirectory>false</clearOutputDirectory></configuration><executions><execution><goals><goal>compile</goal><goal>compile-custom</goal></goals></execution></executions></plugin><plugin><groupId>org.apache.maven.plugins</groupId><artifactId>maven-compiler-plugin</artifactId><configuration><source>17</source><target>17</target></configuration></plugin></plugins></build>
Ps:上述代码中注释涉及到的内容需要自己配置(官网没有配置)。

complie 命令就是通过 protoc 命令将 message 转化成实体数据.
complie-custom 命令就是用来生成服务接口 service 的.
1.1.3、推荐插件(简化开发)
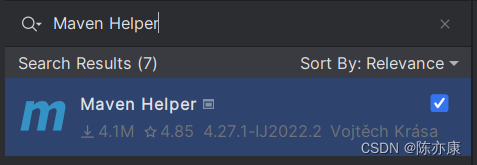
a)为了简便开发,建议大家下载以下插件,可以自定义命令,也就是说可以把上述多个命令打包成一个命令.


生成目录对应关系如下:

b)如果不满意配置也可以从这里删除

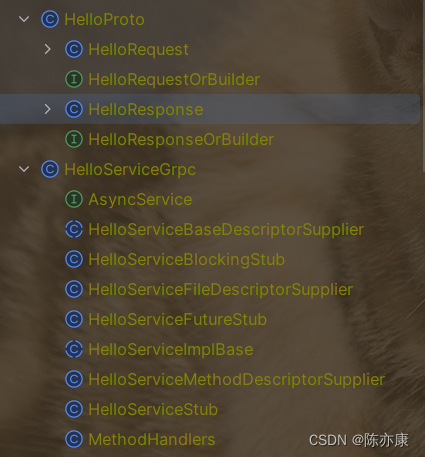
1.1.4、protoc 生成 Java 代码说明

- HelloRequest:请求实体对象.
- HelloResponse:响应实体对象.
- HelloServiceGrpc:对应 proto 文件中定义的服务.
- 服务名+Impl+Base:对应真正的服务接口,开发的时候,继承这个类,并覆盖其中的方法.
- Stub:凡是 Stub 结尾的这些类型,就是 client 的代理对象. 这些 stub 结尾的区别就是网络通信方式不同(同步、异步).
1.2、一元 RPC(代理方式一:阻塞式 BlockingStub)
当 client 发起调用以后,提交数据,机会阻塞等待服务端响应。
Ps:实际的开发中,95% 的应用场景都是一元 RPC 这种通信方式.
1.2.1、api 模块
syntax = "proto3";option java_multiple_files = false;
option java_package = "com.cyk";
option java_outer_classname = "HelloProto";message HelloRequest {string name = 1;
}message HelloResponse {string result = 1;
}service HelloService {rpc hello(HelloRequest) returns(HelloResponse) {};
}
Ps:不要忘记再次通过 maven 插件生成代码!
1.2.2、服务端模块
a)继承 HelloServiceGrpc,实现自定义的 hello 方法.
public class HelloServiceImpl extends HelloServiceGrpc.HelloServiceImplBase {public void hello(HelloProto.HelloRequest request, StreamObserver<HelloProto.HelloResponse> responseObserver) {//1.接收 client 的请求参数String name = request.getName();//2.业务处理System.out.println("name: " + name);//3.封装响应HelloProto.HelloResponse response = HelloProto.HelloResponse.newBuilder().setResult("ok!") //填充数据.build();//通过这个方法,把响应消息回传给 clientresponseObserver.onNext(response);//通知 client,整个服务结束(底层返回一个标记,client 就能监听到)responseObserver.onCompleted();}}
b)服务端绑定端口、发布服务、创建服务对象,启动服务器
public class GrpcServer1 {public static void main(String[] args) throws IOException, InterruptedException {//1.绑定端口ServerBuilder serverBuilder = ServerBuilder.forPort(9000);//2.发布服务serverBuilder.addService(new HelloServiceImpl());//3.创建服务对象Server server = serverBuilder.build();server.start();server.awaitTermination();}
}
1.2.3、客户端模块
public class Client1 {public static void main(String[] args) {//1.创建通信管道ManagedChannel managedChannel = ManagedChannelBuilder.forAddress("localhost", 9000).usePlaintext().build();//2.创建代理对象 stubtry {HelloServiceGrpc.HelloServiceBlockingStub helloService = HelloServiceGrpc.newBlockingStub(managedChannel);//3.完成 RPC 调用//3.1 准备参数HelloProto.HelloRequest request = HelloProto.HelloRequest.newBuilder().setName("cyk").build();//3.2 进行 rpc 调用HelloProto.HelloResponse response = helloService.hello(request);System.out.println("response: " + response);} catch (Exception e) {e.printStackTrace();} finally {managedChannel.shutdown();}}}
1.3、一元 RPC 扩展(演示 repeated)
1.3.1、api 模块
syntax = "proto3";option java_multiple_files = false;
option java_package = "com.cyk";
option java_outer_classname = "HelloProto";message HelloRequest {string name = 1;
}message HelloResponse {string result = 1;
}message HelloListRequest {repeated string name = 1;
}service HelloService {rpc hello(HelloRequest) returns(HelloResponse) {};rpc helloList(HelloListRequest) returns(HelloResponse) {};
}
Ps:不要忘记再次通过 maven 插件生成代码!
1.3.2、服务端开发
@Overridepublic void helloList(HelloProto.HelloListRequest request, StreamObserver<HelloProto.HelloResponse> responseObserver) {//1.获取 client 的请求参数ProtocolStringList nameList = request.getNameList();//2.业务处理for(String name : nameList) {System.out.println("name: " + name);}//3.封装响应HelloProto.HelloResponse response = HelloProto.HelloResponse.newBuilder().setResult("ok!").build();//通过这个方法,把响应消息回传给 clientresponseObserver.onNext(response);//通知 client,整个服务结束(底层返回一个标记,client 就能监听到)responseObserver.onCompleted();}
1.3.3、客户端开发
public class Client2 {public static void main(String[] args) {//1.创建通信管道ManagedChannel managedChannel = ManagedChannelBuilder.forAddress("localhost", 9000).usePlaintext().build();//2.创建代理对象 stubtry {HelloServiceGrpc.HelloServiceBlockingStub helloService = HelloServiceGrpc.newBlockingStub(managedChannel);//3.完成 RPC 调用//3.1 准备参数HelloProto.HelloListRequest request = HelloProto.HelloListRequest.newBuilder().addName("cyk1").addName("cyk2").addName("cyk3").addName("cyk4").build();//3.2 进行 rpc 调用HelloProto.HelloResponse response = helloService.helloList(request);System.out.println("response: " + response);} catch (Exception e) {e.printStackTrace();} finally {managedChannel.shutdown();}}}
1.4、服务端流式 RPC(代理方式一:阻塞式 BlockingStub)
客户端发送一个请求对象,服务端可以在未来多个不同的时刻返回不同的响应对象.
例如,你去投一个股票,一旦股票有变化,就会给你返回结果.
1.4.1、api 模块
service HelloService {//一元 RPCrpc hello1(HelloRequest) returns(HelloResponse) {};//服务端流式 RPCrpc hello2(HelloRequest) returns(stream HelloResponse) {};}message HelloRequest {string name = 1;
}message HelloResponse {string result = 1;
}
Ps:不要忘记再次通过 maven 插件生成代码!
1.4.2、服务端开发
服务端通过 sleep 模拟在接受到请求之后,每秒返回一个响应(实际的开发中,一般不会是固定的间隔的时间).
@Overridepublic void hello2(HelloProto.HelloRequest request, StreamObserver<HelloProto.HelloResponse> responseObserver) {//1.获取请求参数String name = request.getName();//2.进行业务处理System.out.println("name: " + name);//3.封装响应for(int i = 1; i <= 10; i++) {HelloProto.HelloResponse response = HelloProto.HelloResponse.newBuilder().setResult("ok~ - " + i).build();//返回响应responseObserver.onNext(response);//模拟每秒发送一个数据try {Thread.sleep(1000);} catch (InterruptedException e) {throw new RuntimeException(e);}}//结束responseObserver.onCompleted();}
1.4.3、客户端开发
客户端远程调用后,会返回一个迭代器(收到服务端 onCompleted 标志),这个迭代器中就包含了服务端发送 onCompleted 标志前,不同时刻返回的响应.
public class Client2 {public static void main(String[] args) {//1.创建通信通道ManagedChannel managedChannel = ManagedChannelBuilder.forAddress("localhost", 9000).usePlaintext().build();try {//2.获取代理对象HelloServiceGrpc.HelloServiceBlockingStub helloService = HelloServiceGrpc.newBlockingStub(managedChannel);//3.准备参数HelloProto.HelloRequest request = HelloProto.HelloRequest.newBuilder().setName("cyk").build();//4.rpc调用//此时获取到的是一个迭代器Iterator<HelloProto.HelloResponse> helloResponseIterator = helloService.hello2(request);while(helloResponseIterator.hasNext()) {String result = helloResponseIterator.next().getResult();System.out.println("result: " + result);}System.out.println("end!");} catch (Exception e) {e.printStackTrace();} finally {managedChannel.shutdownNow();}}}
由于这里采用的是 阻塞式 服务端流RPC ,因此在服务端返回 omCompleted 标志之前,客户端会阻塞在 hasNext() 这里. 客户端运行结果如下:

1.5、服务端流式 RPC(代理方式二:异步式 Stub)
api 和 server 都不用变,只有 client 需要修改,如下:

可以看到,在获取 gRPC 代理对象时,有三种方式,其中 newStub 就是异步方式,newBlockingStub 就是同步(阻塞) 的方式,newFutrueStub 即可以同步,也可以异步(几乎不用最后这种方式).
因此这里就是使用 newStub 的方式创建代理对象.
public class Client2 {public static void main(String[] args) {//1.创建通信通道ManagedChannel managedChannel = ManagedChannelBuilder.forAddress("localhost", 9000).usePlaintext().build();try {//2.获取代理对象(异步式)HelloServiceGrpc.HelloServiceStub helloServiceStub = HelloServiceGrpc.newStub(managedChannel);//3.准备参数HelloProto.HelloRequest request = HelloProto.HelloRequest.newBuilder().setName("cyk").build();//4.rpc调用(不会阻塞在这里,会继续执行后面的逻辑)helloServiceStub.hello2(request, new StreamObserver<HelloProto.HelloResponse>() {/*** 服务端每调用一次 onNext,都会触发该方法(实现异步的本质)* @param helloResponse*/@Overridepublic void onNext(HelloProto.HelloResponse helloResponse) {System.out.println("收到服务端响应: " + helloResponse.getResult());}/*** 服务端抛出异常时,触发该方法.* @param throwable*/@Overridepublic void onError(Throwable throwable) {System.out.println("服务端执行出错!msg: " + throwable.getMessage());}/*** 服务端调用 onCompleted 方法,就会触发该方法.*/@Overridepublic void onCompleted() {System.out.println("服务端所有信息发送完毕!");}});System.out.println("end!"); //因为不会在前面阻塞住,因此就会直接执行到这里(异步)//不设置等待时间,会导致服务端还没来得及反应就结束了managedChannel.awaitTermination(12, TimeUnit.SECONDS);} catch (Exception e) {e.printStackTrace();} finally {managedChannel.shutdownNow();}}}
客户端执行结果如下:

1.6、客户端流式 RPC(代理方式二:异步式 Stub)
客户端在不同时间发送多个请求,服务端只返回一个结果.
1.6.1、api 开发
service HelloService {//一元 RPCrpc hello1(HelloRequest) returns(HelloResponse) {};//服务端流式 RPCrpc hello2(HelloRequest) returns(stream HelloResponse) {};//客户端流式 RPCrpc hello3(stream HelloRequest) returns(HelloResponse) {};}message HelloRequest {string name = 1;
}message HelloResponse {string result = 1;
}
1.6.2、服务端开发
public StreamObserver<HelloProto.HelloRequest> hello3(StreamObserver<HelloProto.HelloResponse> responseObserver) {return new StreamObserver<HelloProto.HelloRequest>() {@Overridepublic void onNext(HelloProto.HelloRequest helloRequest) {System.out.println("收到 client 请求: " + helloRequest.getName());}@Overridepublic void onError(Throwable throwable) {System.out.println("客户端异常: " + throwable.getMessage());}@Overridepublic void onCompleted() {//1.构造响应HelloProto.HelloResponse response = HelloProto.HelloResponse.newBuilder().setResult("ok!").build();//2.返回响应responseObserver.onNext(response);responseObserver.onCompleted();}};}
1.6.3、客户端开发
public class Client3 {public static void main(String[] args) {//1.创建通信通道ManagedChannel managedChannel = ManagedChannelBuilder.forAddress("localhost", 9000).usePlaintext().build();try {//2.获取代理对象(异步式)HelloServiceGrpc.HelloServiceStub helloServiceStub = HelloServiceGrpc.newStub(managedChannel);//3.rpc调用(不会阻塞在这里,会继续执行后面的逻辑)StreamObserver<HelloProto.HelloRequest> helloRequestStreamObserver = helloServiceStub.hello3(new StreamObserver<HelloProto.HelloResponse>() {@Overridepublic void onNext(HelloProto.HelloResponse helloResponse) {System.out.println("收到服务端响应: " + helloResponse.getResult());}@Overridepublic void onError(Throwable throwable) {System.out.println("服务端响应异常! msg:" + throwable.getMessage());}@Overridepublic void onCompleted() {System.out.println("服务端响应结束!");}});//4.客户端发送数据到服务端for(int i = 1; i <= 10; i++) {//4.1 准备参数HelloProto.HelloRequest request = HelloProto.HelloRequest.newBuilder().setName("cyk" + i).build();//4.2 发送数据helloRequestStreamObserver.onNext(request);//4.3 不同时刻发送数据Thread.sleep(1000);}System.out.println("end!"); //因为不会在前面阻塞住,因此就会直接执行到这里(异步)//5.结束响应helloRequestStreamObserver.onCompleted();managedChannel.awaitTermination(12, TimeUnit.SECONDS);} catch (Exception e) {e.printStackTrace();} finally {managedChannel.shutdownNow();}}}
1.7、双向流式 RPC(代理方式二:异步式 Stub)
客户端在不同时刻可以发送多个请求,服务端也可以在接受到不同时刻的请求时进行响应.
最典型的例子就是,QQ 聊天、微信聊天这种.
1.7.1、api 开发
syntax = "proto3";option java_multiple_files = false;
option java_package = "org.cyk";
option java_outer_classname = "HelloProto";service HelloService {//一元 RPCrpc hello1(HelloRequest) returns(HelloResponse) {};//服务端流式 RPCrpc hello2(HelloRequest) returns(stream HelloResponse) {};//客户端流式 RPCrpc hello3(stream HelloRequest) returns(HelloResponse) {};//双向流式 RPCrpc hello4(stream HelloRequest) returns(stream HelloResponse) {};}message HelloRequest {string name = 1;
}message HelloResponse {string result = 1;
}
1.7.2、服务端开发
@Overridepublic StreamObserver<HelloProto.HelloRequest> hello4(StreamObserver<HelloProto.HelloResponse> responseObserver) {return new StreamObserver<HelloProto.HelloRequest>() {@Overridepublic void onNext(HelloProto.HelloRequest helloRequest) {//处理客户端请求System.out.println("收到客户端请求: " + helloRequest.getName());//返回响应responseObserver.onNext(HelloProto.HelloResponse.newBuilder().setResult("ok~").build());}@Overridepublic void onError(Throwable throwable) {System.out.println("客户端出错! msg:" + throwable.getMessage());}@Overridepublic void onCompleted() {//处理客户端结束System.out.println("客户端请求结束!");//服务端返回结束标志responseObserver.onCompleted();}};}
1.7.3、客户端开发
public class Client4 {public static void main(String[] args) {//1.创建通信通道ManagedChannel managedChannel = ManagedChannelBuilder.forAddress("localhost", 9000).usePlaintext().build();try {//2.获取代理对象(异步式)HelloServiceGrpc.HelloServiceStub helloServiceStub = HelloServiceGrpc.newStub(managedChannel);//3.rpc调用(不会阻塞在这里,会继续执行后面的逻辑)StreamObserver<HelloProto.HelloRequest> helloRequestStreamObserver = helloServiceStub.hello4(new StreamObserver<HelloProto.HelloResponse>() {@Overridepublic void onNext(HelloProto.HelloResponse helloResponse) {System.out.println("收到服务端响应: " + helloResponse.getResult());}@Overridepublic void onError(Throwable throwable) {System.out.println("服务端响应异常! msg:" + throwable.getMessage());}@Overridepublic void onCompleted() {System.out.println("服务端响应结束!");}});//4.客户端发送数据到服务端for(int i = 1; i <= 10; i++) {//4.1 准备参数HelloProto.HelloRequest request = HelloProto.HelloRequest.newBuilder().setName("cyk" + i).build();//4.2 发送数据helloRequestStreamObserver.onNext(request);//4.3 不同时刻发送数据Thread.sleep(1000);}System.out.println("end!"); //因为不会在前面阻塞住,因此就会直接执行到这里(异步)//5.结束响应helloRequestStreamObserver.onCompleted();managedChannel.awaitTermination(12, TimeUnit.SECONDS);} catch (Exception e) {e.printStackTrace();} finally {managedChannel.shutdownNow();}}}
1.8、一元 RPC 扩展(代理方式三:FutureStub 异步/同步 式)
FutureStub 只能用于一元 RPC,既可以实现同步式,也可以实现异步式.
1.8.1、api 开发
syntax = "proto3";option java_multiple_files = false;
option java_package = "org.cyk";
option java_outer_classname = "FutureProto";service FutureService {rpc future(FutureRequest) returns(FutureResponse) {};}message FutureRequest {string name = 1;
}message FutureResponse {string data = 1;
}
1.8.2、服务端开发
public class FutureServiceImpl extends FutureServiceGrpc.FutureServiceImplBase {@Overridepublic void future(FutureProto.FutureRequest request, StreamObserver<FutureProto.FutureResponse> responseObserver) {//1.接受客户端请求String name = request.getName();//2.业务处理System.out.println("name: " + name);//3.构造响应FutureProto.FutureResponse response = FutureProto.FutureResponse.newBuilder().setData("ok!").build();//4.返回响应和标记responseObserver.onNext(response);responseObserver.onCompleted();}}
这里另起了一个服务Impl,别忘了发布服务.
public class GrpcServer1 {public static void main(String[] args) throws IOException, InterruptedException {//1.绑定端口号ServerBuilder serverBuilder = ServerBuilder.forPort(9000);//2.发布服务serverBuilder.addService(new HelloServiceImpl());serverBuilder.addService(new FutureServiceImpl());//3.创建服务对象Server server = serverBuilder.build();//4.启动服务server.start();server.awaitTermination();}
}
1.8.3、客户端开发(Future同步版)
public class Client5 {public static void main(String[] args) {//1.创建通信通道ManagedChannel managedChannel = ManagedChannelBuilder.forAddress("localhost", 9000).usePlaintext().build();try {//2.获取代理对象FutureServiceGrpc.FutureServiceFutureStub futureServiceFutureStub = FutureServiceGrpc.newFutureStub(managedChannel);//3.准备参数FutureProto.FutureRequest request = FutureProto.FutureRequest.newBuilder().setName("cyk").build();//4.rpc调用ListenableFuture<FutureProto.FutureResponse> response = futureServiceFutureStub.future(request);System.out.println("result: " + response.get().getData());} catch (Exception e) {e.printStackTrace();} finally {managedChannel.shutdownNow();}}}
1.8.4、客户端开发(Future 异步版)
public class Client5 {public static void main(String[] args) {//1.创建通信通道ManagedChannel managedChannel = ManagedChannelBuilder.forAddress("localhost", 9000).usePlaintext().build();try {//2.获取代理对象FutureServiceGrpc.FutureServiceFutureStub futureServiceFutureStub = FutureServiceGrpc.newFutureStub(managedChannel);ListenableFuture<FutureProto.FutureResponse> response = futureServiceFutureStub.future(FutureProto.FutureRequest.newBuilder().setName("cyk").build());//3.rpc调用Futures.addCallback(response, new FutureCallback<FutureProto.FutureResponse>() {@Overridepublic void onSuccess(FutureProto.FutureResponse result) {System.out.println("收到服务器异步响应:" + result);}@Overridepublic void onFailure(Throwable t) {System.out.println(t.getMessage());}}, Executors.newCachedThreadPool());System.out.println("前面的操作不会阻塞,会直接执行到这里~");managedChannel.awaitTermination(12, TimeUnit.SECONDS);} catch (Exception e) {e.printStackTrace();} finally {managedChannel.shutdownNow();}}}


