文章目录
- 1 前言
- 1.1 背景
- 2 数据集
- 3 实现过程
- 4 CNN网络实现
- 5 模型训练部分
- 6 模型评估
- 7 预测结果
- 8 最后
1 前言
🔥 优质竞赛项目系列,今天要分享的是
基于CNN实现谣言检测
该项目较为新颖,适合作为竞赛课题方向,学长非常推荐!
🧿 更多资料, 项目分享:
https://gitee.com/dancheng-senior/postgraduate
1.1 背景
社交媒体的发展在加速信息传播的同时,也带来了虚假谣言信息的泛滥,往往会引发诸多不安定因素,并对经济和社会产生巨大的影响。
2 数据集
本项目所使用的数据是从新浪微博不实信息举报平台抓取的中文谣言数据,数据集中共包含1538条谣言和1849条非谣言。
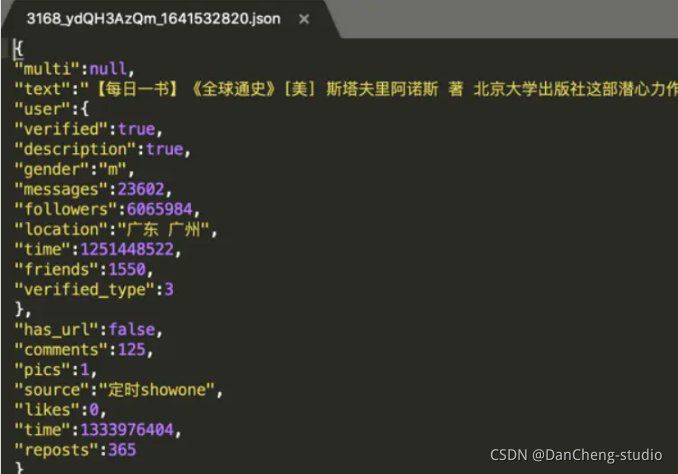
如下图所示,每条数据均为json格式,其中text字段代表微博原文的文字内容。

每个文件夹里又有很多新闻文本。
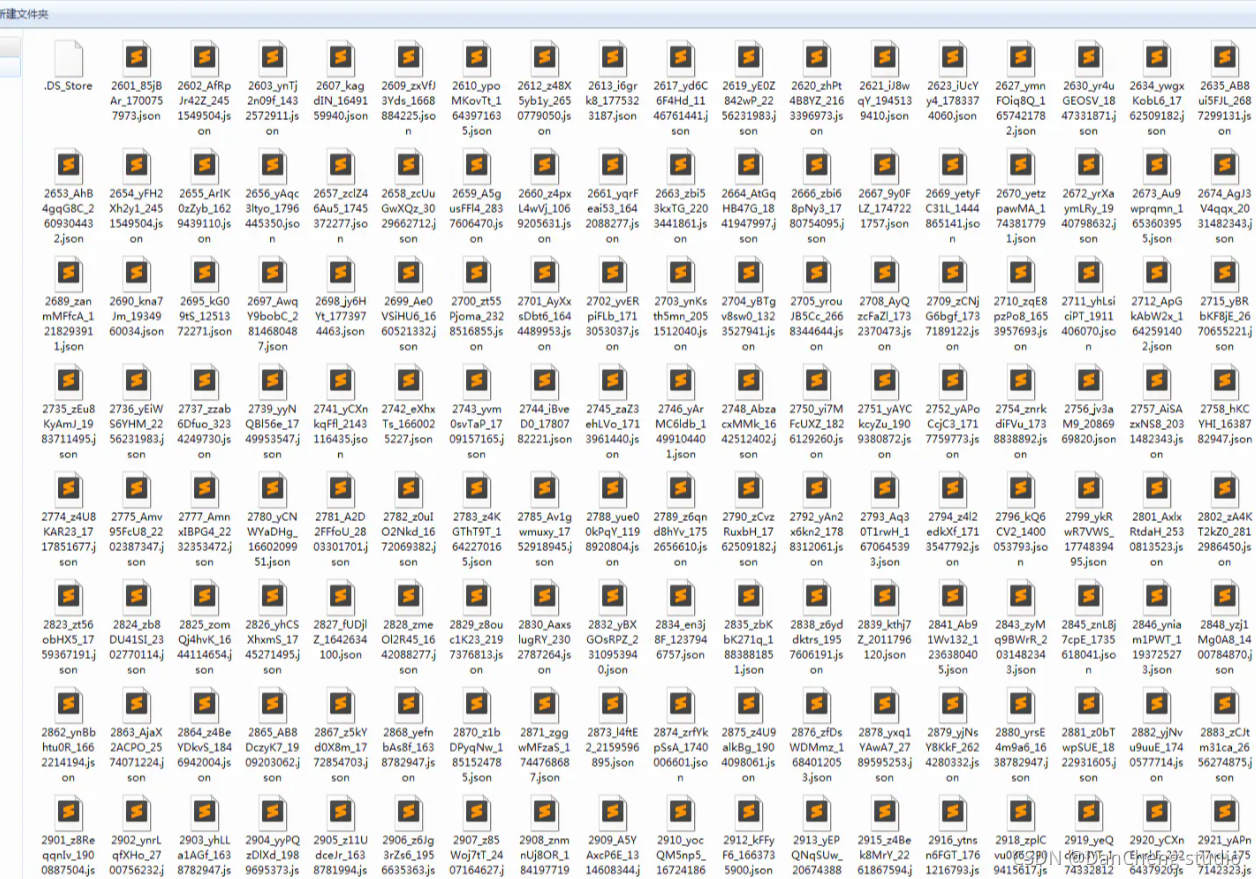
每个文本又是json格式,具体内容如下:
3 实现过程
步骤入下:
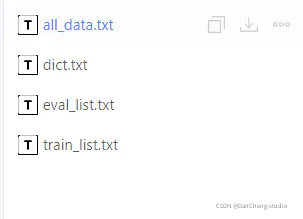
*(1)解压数据,读取并解析数据,生成all_data.txt
*(2)生成数据字典,即dict.txt
*(3)生成数据列表,并进行训练集与验证集的划分,train_list.txt 、eval_list.txt
*(4)定义训练数据集提供器train_reader和验证数据集提供器eval_reader
import zipfile
import os
import io
import random
import json
import matplotlib.pyplot as plt
import numpy as np
import paddle
import paddle.fluid as fluid
from paddle.fluid.dygraph.nn import Conv2D, Linear, Embedding
from paddle.fluid.dygraph.base import to_variable#解压原始数据集,将Rumor_Dataset.zip解压至data目录下
src_path="/home/aistudio/data/data36807/Rumor_Dataset.zip" #这里填写自己项目所在的数据集路径
target_path="/home/aistudio/data/Chinese_Rumor_Dataset-master"
if(not os.path.isdir(target_path)):z = zipfile.ZipFile(src_path, 'r')z.extractall(path=target_path)z.close()#分别为谣言数据、非谣言数据、全部数据的文件路径
rumor_class_dirs = os.listdir(target_path+"非开源数据集") # 这里填写自己项目所在的数据集路径
non_rumor_class_dirs = os.listdir(target_path+"非开源数据集")
original_microblog = target_path+"非开源数据集"
#谣言标签为0,非谣言标签为1
rumor_label="0"
non_rumor_label="1"#分别统计谣言数据与非谣言数据的总数
rumor_num = 0
non_rumor_num = 0
all_rumor_list = []
all_non_rumor_list = []#解析谣言数据
for rumor_class_dir in rumor_class_dirs: if(rumor_class_dir != '.DS_Store'):#遍历谣言数据,并解析with open(original_microblog + rumor_class_dir, 'r') as f:rumor_content = f.read()rumor_dict = json.loads(rumor_content)all_rumor_list.append(rumor_label+"\t"+rumor_dict["text"]+"\n")rumor_num +=1
#解析非谣言数据
for non_rumor_class_dir in non_rumor_class_dirs: if(non_rumor_class_dir != '.DS_Store'):with open(original_microblog + non_rumor_class_dir, 'r') as f2:non_rumor_content = f2.read()non_rumor_dict = json.loads(non_rumor_content)all_non_rumor_list.append(non_rumor_label+"\t"+non_rumor_dict["text"]+"\n")non_rumor_num +=1print("谣言数据总量为:"+str(rumor_num))
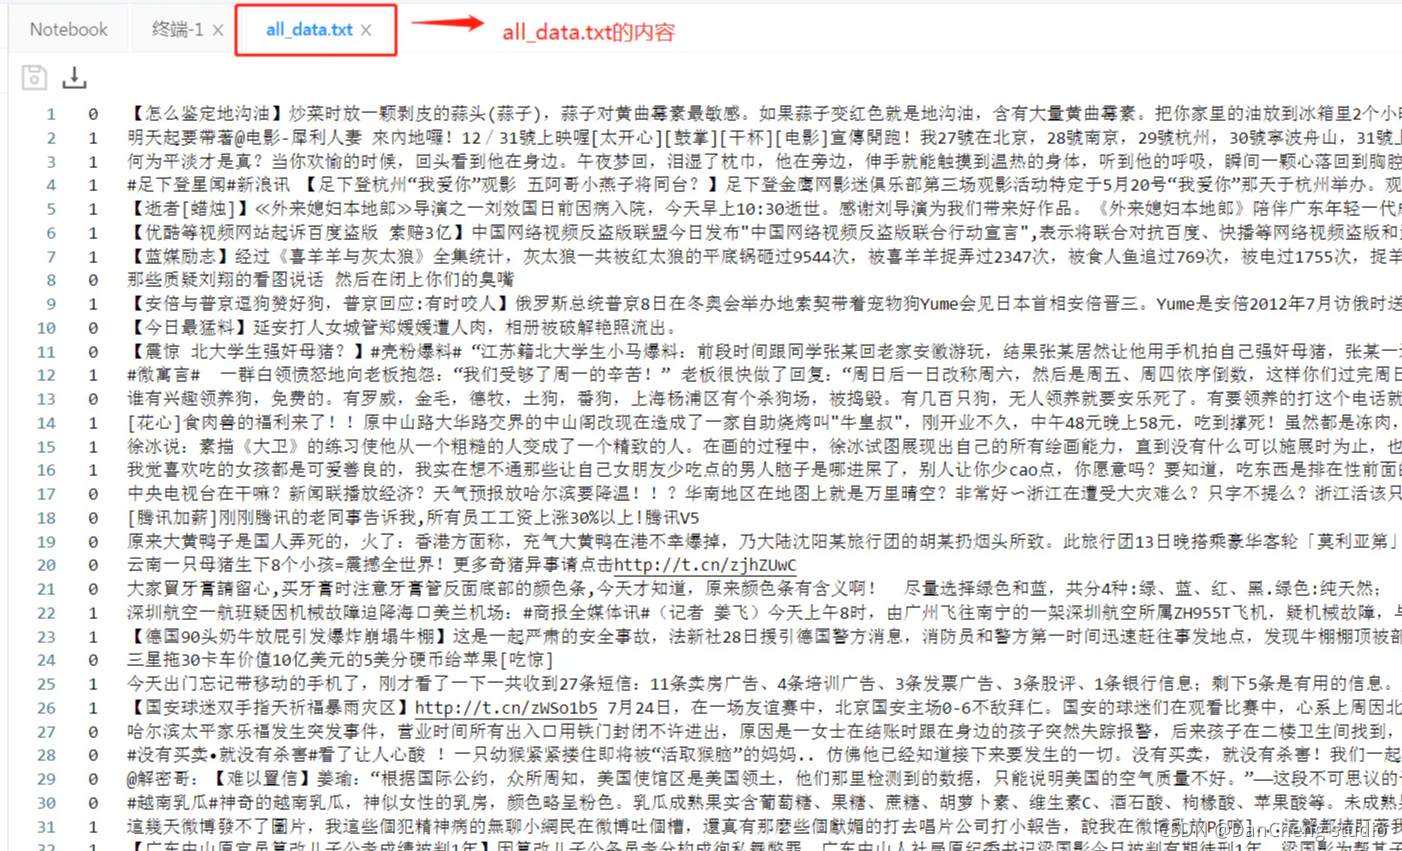
print("非谣言数据总量为:"+str(non_rumor_num))#全部数据进行乱序后写入all_data.txt
data_list_path="/home/aistudio/data/"
all_data_path=data_list_path + "all_data.txt"
all_data_list = all_rumor_list + all_non_rumor_listrandom.shuffle(all_data_list)#在生成all_data.txt之前,首先将其清空
with open(all_data_path, 'w') as f:f.seek(0)f.truncate() with open(all_data_path, 'a') as f:for data in all_data_list:f.write(data)
print('all_data.txt已生成')
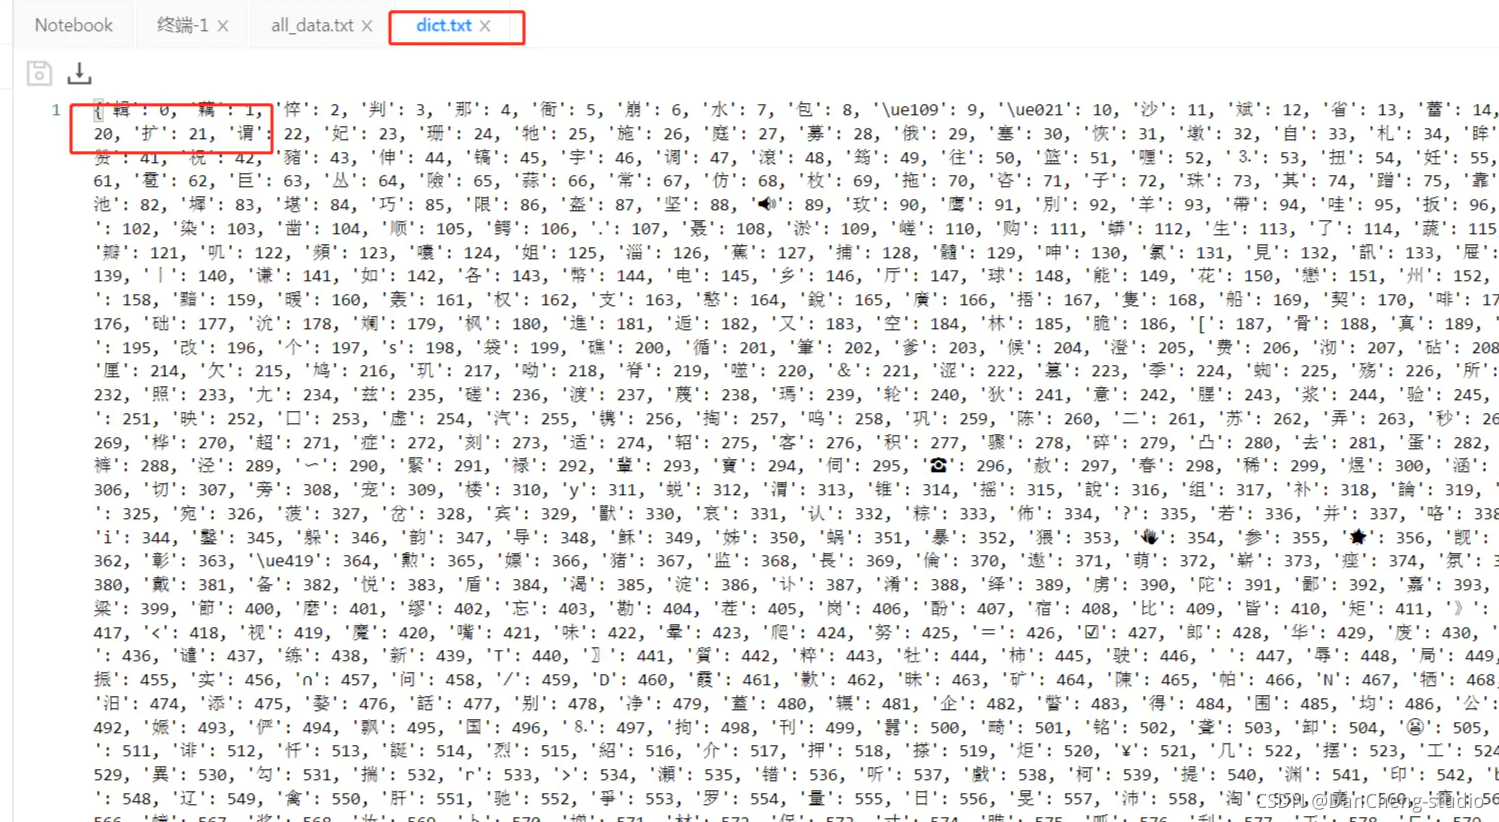
接下来就是生成数据字典。
# 生成数据字典
def create_dict(data_path, dict_path):
with open(dict_path, ‘w’) as f:
f.seek(0)
f.truncate()
dict_set = set()# 读取全部数据with open(data_path, 'r', encoding='utf-8') as f:lines = f.readlines()# 把数据生成一个元组for line in lines:content = line.split('\t')[-1].replace('\n', '')for s in content:dict_set.add(s)# 把元组转换成字典,一个字对应一个数字dict_list = []i = 0for s in dict_set:dict_list.append([s, i])i += 1# 添加未知字符dict_txt = dict(dict_list)end_dict = {"": i}dict_txt.update(end_dict)# 把这些字典保存到本地中with open(dict_path, 'w', encoding='utf-8') as f:f.write(str(dict_txt))print("数据字典生成完成!",'\t','字典长度为:',len(dict_list))
我们可以查看一下dict_txt的内容
接下来就是数据列表的生成
# 创建序列化表示的数据,并按照一定比例划分训练数据与验证数据
def create_data_list(data_list_path):
with open(os.path.join(data_list_path, 'dict.txt'), 'r', encoding='utf-8') as f_data:dict_txt = eval(f_data.readlines()[0])with open(os.path.join(data_list_path, 'all_data.txt'), 'r', encoding='utf-8') as f_data:lines = f_data.readlines()i = 0with open(os.path.join(data_list_path, 'eval_list.txt'), 'a', encoding='utf-8') as f_eval,\open(os.path.join(data_list_path, 'train_list.txt'), 'a', encoding='utf-8') as f_train:for line in lines:title = line.split('\t')[-1].replace('\n', '')lab = line.split('\t')[0]t_ids = ""if i % 8 == 0:for s in title:temp = str(dict_txt[s])t_ids = t_ids + temp + ','t_ids = t_ids[:-1] + '\t' + lab + '\n'f_eval.write(t_ids)else:for s in title:temp = str(dict_txt[s])t_ids = t_ids + temp + ','t_ids = t_ids[:-1] + '\t' + lab + '\n'f_train.write(t_ids)i += 1print("数据列表生成完成!")
定义数据读取器
def data_reader(file_path, phrase, shuffle=False):
all_data = []
with io.open(file_path, “r”, encoding=‘utf8’) as fin:
for line in fin:
cols = line.strip().split(“\t”)
if len(cols) != 2:
continue
label = int(cols[1])
wids = cols[0].split(",")all_data.append((wids, label))if shuffle:if phrase == "train":random.shuffle(all_data)def reader():for doc, label in all_data:yield doc, labelreturn readerclass SentaProcessor(object):def __init__(self, data_dir,):self.data_dir = data_dirdef get_train_data(self, data_dir, shuffle):return data_reader((self.data_dir + "train_list.txt"), "train", shuffle)def get_eval_data(self, data_dir, shuffle):return data_reader((self.data_dir + "eval_list.txt"), "eval", shuffle)def data_generator(self, batch_size, phase='train', shuffle=True):if phase == "train":return paddle.batch(self.get_train_data(self.data_dir, shuffle),batch_size,drop_last=True)elif phase == "eval":return paddle.batch(self.get_eval_data(self.data_dir, shuffle),batch_size,drop_last=True)else:raise ValueError("Unknown phase, which should be in ['train', 'eval']")
总之在数据处理这一块需要我们注意的是一共生成以下的几个文件。
4 CNN网络实现
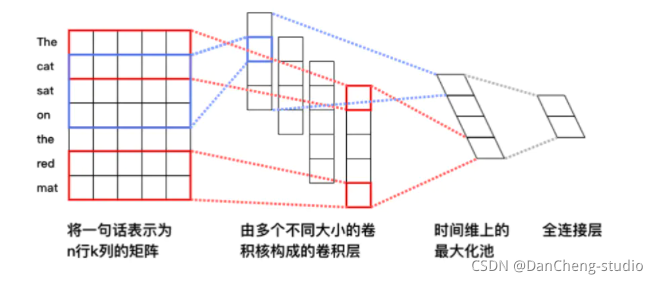
接下来就是构建以及配置卷积神经网络(Convolutional Neural Networks,
CNN),开篇也说了,其实这里有很多模型的选择,之所以选择CNN是因为让我们熟悉CNN的相关实现。 输入词向量序列,产生一个特征图(feature
map),对特征图采用时间维度上的最大池化(max pooling over
time)操作得到此卷积核对应的整句话的特征,最后,将所有卷积核得到的特征拼接起来即为文本的定长向量表示,对于文本分类问题,将其连接至softmax即构建出完整的模型。在实际应用中,我们会使用多个卷积核来处理句子,窗口大小相同的卷积核堆叠起来形成一个矩阵,这样可以更高效的完成运算。另外,我们也可使用窗口大小不同的卷积核来处理句子。具体的流程如下:
首先我们构建单层CNN神经网络。
#单层class SimpleConvPool(fluid.dygraph.Layer):def __init__(self,num_channels, # 通道数num_filters, # 卷积核数量filter_size, # 卷积核大小batch_size=None): # 16super(SimpleConvPool, self).__init__()self.batch_size = batch_sizeself._conv2d = Conv2D(num_channels = num_channels,num_filters = num_filters,filter_size = filter_size,act='tanh')self._pool2d = fluid.dygraph.Pool2D(pool_size = (150 - filter_size[0]+1,1),pool_type = 'max',pool_stride=1)def forward(self, inputs):# print('SimpleConvPool_inputs数据纬度',inputs.shape) # [16, 1, 148, 128]x = self._conv2d(inputs)x = self._pool2d(x)x = fluid.layers.reshape(x, shape=[self.batch_size, -1])return xclass CNN(fluid.dygraph.Layer):def __init__(self):super(CNN, self).__init__()self.dict_dim = train_parameters["vocab_size"]self.emb_dim = 128 #emb纬度self.hid_dim = [32] #卷积核数量self.fc_hid_dim = 96 #fc参数纬度self.class_dim = 2 #分类数self.channels = 1 #输入通道数self.win_size = [[3, 128]] # 卷积核尺寸self.batch_size = train_parameters["batch_size"] self.seq_len = train_parameters["padding_size"]self.embedding = Embedding( size=[self.dict_dim + 1, self.emb_dim],dtype='float32', is_sparse=False)self._simple_conv_pool_1 = SimpleConvPool(self.channels,self.hid_dim[0],self.win_size[0],batch_size=self.batch_size)self._fc1 = Linear(input_dim = self.hid_dim[0],output_dim = self.fc_hid_dim,act="tanh")self._fc_prediction = Linear(input_dim = self.fc_hid_dim,output_dim = self.class_dim,act="softmax")def forward(self, inputs, label=None):emb = self.embedding(inputs) # [2400, 128]# print('CNN_emb',emb.shape) emb = fluid.layers.reshape( # [16, 1, 150, 128]emb, shape=[-1, self.channels , self.seq_len, self.emb_dim])# print('CNN_emb',emb.shape)conv_3 = self._simple_conv_pool_1(emb)fc_1 = self._fc1(conv_3)prediction = self._fc_prediction(fc_1)if label is not None:acc = fluid.layers.accuracy(prediction, label=label)return prediction, accelse:return prediction接下来就是参数的配置,不过为了在模型训练过程中更直观的查看我们训练的准确率,我们首先利用python的matplotlib.pyplt函数实现一个可视化图,具体的实现如下:
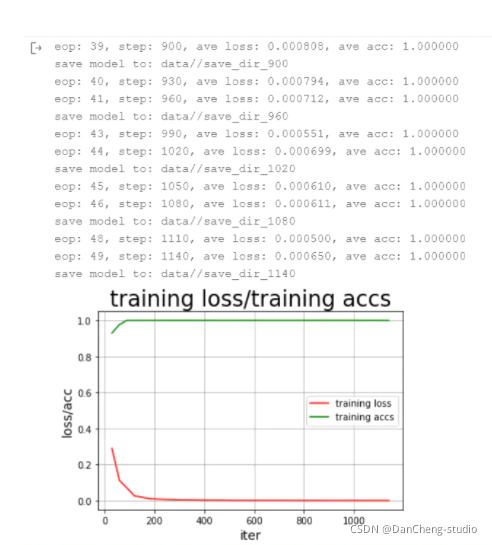
def draw_train_process(iters, train_loss, train_accs):
title=“training loss/training accs”
plt.title(title, fontsize=24)
plt.xlabel(“iter”, fontsize=14)
plt.ylabel(“loss/acc”, fontsize=14)
plt.plot(iters, train_loss, color=‘red’, label=‘training loss’)
plt.plot(iters, train_accs, color=‘green’, label=‘training accs’)
plt.legend()
plt.grid()
plt.show()
5 模型训练部分
def train():
with fluid.dygraph.guard(place = fluid.CUDAPlace(0)): # 因为要进行很大规模的训练,因此我们用的是GPU,如果没有安装GPU的可以使用下面一句,把这句代码注释掉即可
# with fluid.dygraph.guard(place = fluid.CPUPlace()):
processor = SentaProcessor( data_dir="data/")train_data_generator = processor.data_generator(batch_size=train_parameters["batch_size"],phase='train',shuffle=True)model = CNN()sgd_optimizer = fluid.optimizer.Adagrad(learning_rate=train_parameters["adam"],parameter_list=model.parameters())steps = 0Iters,total_loss, total_acc = [], [], []for eop in range(train_parameters["epoch"]):for batch_id, data in enumerate(train_data_generator()):steps += 1#转换为 variable 类型doc = to_variable(np.array([np.pad(x[0][0:train_parameters["padding_size"]], #对句子进行padding,全部填补为定长150(0, train_parameters["padding_size"] - len(x[0][0:train_parameters["padding_size"]])),'constant',constant_values=(train_parameters["vocab_size"])) # 用 的id 进行填补for x in data]).astype('int64').reshape(-1))#转换为 variable 类型label = to_variable(np.array([x[1] for x in data]).astype('int64').reshape(train_parameters["batch_size"], 1))model.train() #使用训练模式prediction, acc = model(doc, label)loss = fluid.layers.cross_entropy(prediction, label)avg_loss = fluid.layers.mean(loss)avg_loss.backward()sgd_optimizer.minimize(avg_loss)model.clear_gradients()if steps % train_parameters["skip_steps"] == 0:Iters.append(steps)total_loss.append(avg_loss.numpy()[0])total_acc.append(acc.numpy()[0])print("eop: %d, step: %d, ave loss: %f, ave acc: %f" %(eop, steps,avg_loss.numpy(),acc.numpy()))if steps % train_parameters["save_steps"] == 0:save_path = train_parameters["checkpoints"]+"/"+"save_dir_" + str(steps)print('save model to: ' + save_path)fluid.dygraph.save_dygraph(model.state_dict(),save_path)# breakdraw_train_process(Iters, total_loss, total_acc)
训练的过程以及训练的结果如下:
6 模型评估
def to_eval():
with fluid.dygraph.guard(place = fluid.CUDAPlace(0)):
processor = SentaProcessor(data_dir=“data/”) #写自己的路径
eval_data_generator = processor.data_generator(batch_size=train_parameters["batch_size"],phase='eval',shuffle=False)model_eval = CNN() #示例化模型model, _ = fluid.load_dygraph("data//save_dir_180.pdparams") #写自己的路径model_eval.load_dict(model)model_eval.eval() # 切换为eval模式total_eval_cost, total_eval_acc = [], []for eval_batch_id, eval_data in enumerate(eval_data_generator()):eval_np_doc = np.array([np.pad(x[0][0:train_parameters["padding_size"]],(0, train_parameters["padding_size"] -len(x[0][0:train_parameters["padding_size"]])),'constant',constant_values=(train_parameters["vocab_size"]))for x in eval_data]).astype('int64').reshape(-1)eval_label = to_variable(np.array([x[1] for x in eval_data]).astype('int64').reshape(train_parameters["batch_size"], 1))eval_doc = to_variable(eval_np_doc)eval_prediction, eval_acc = model_eval(eval_doc, eval_label)loss = fluid.layers.cross_entropy(eval_prediction, eval_label)avg_loss = fluid.layers.mean(loss)total_eval_cost.append(avg_loss.numpy()[0])total_eval_acc.append(eval_acc.numpy()[0])print("Final validation result: ave loss: %f, ave acc: %f" %(np.mean(total_eval_cost), np.mean(total_eval_acc) ))
评估准确率如下:

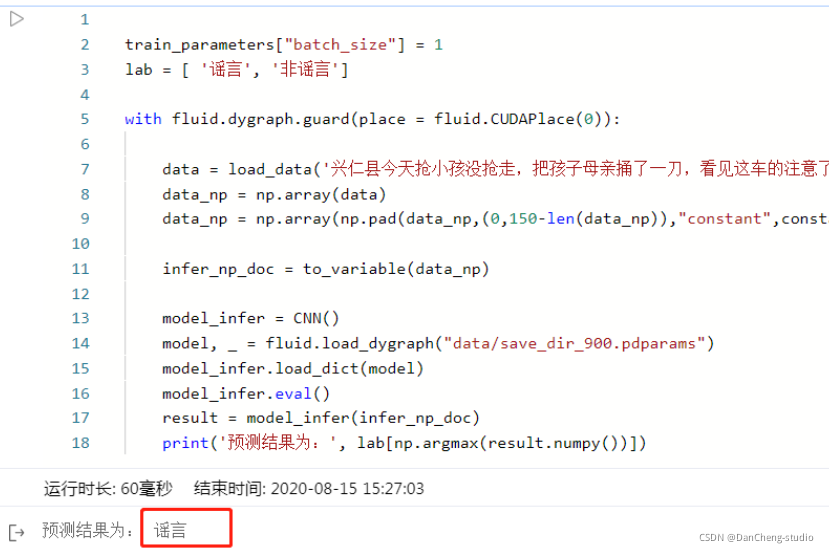
7 预测结果
# 获取数据
def load_data(sentence):
# 读取数据字典
with open(‘data/dict.txt’, ‘r’, encoding=‘utf-8’) as f_data:
dict_txt = eval(f_data.readlines()[0])
dict_txt = dict(dict_txt)
# 把字符串数据转换成列表数据
keys = dict_txt.keys()
data = []
for s in sentence:
# 判断是否存在未知字符
if not s in keys:
s = ‘’
data.append(int(dict_txt[s]))
return data
train_parameters["batch_size"] = 1
lab = [ '谣言', '非谣言']with fluid.dygraph.guard(place = fluid.CUDAPlace(0)):data = load_data('兴仁县今天抢小孩没抢走,把孩子母亲捅了一刀,看见这车的注意了,真事,车牌号辽HFM055!!!!!赶紧散播! 都别带孩子出去瞎转悠了 尤其别让老人自己带孩子出去 太危险了 注意了!!!!辽HFM055北京现代朗动,在各学校门口抢小孩!!!110已经 证实!!全市通缉!!')data_np = np.array(data)data_np = np.array(np.pad(data_np,(0,150-len(data_np)),"constant",constant_values =train_parameters["vocab_size"])).astype('int64').reshape(-1)infer_np_doc = to_variable(data_np)model_infer = CNN()model, _ = fluid.load_dygraph("data/save_dir_900.pdparams")model_infer.load_dict(model)model_infer.eval()result = model_infer(infer_np_doc)print('预测结果为:', lab[np.argmax(result.numpy())])
8 最后
🧿 更多资料, 项目分享:
https://gitee.com/dancheng-senior/postgraduate

新手向)


的元素,用//表达式匹配不到(附解决办法))

![[LitCTF 2023]这是什么?SQL !注一下 !](http://pic.xiahunao.cn/[LitCTF 2023]这是什么?SQL !注一下 !)


)


