引言
熟悉的小伙伴都知道我自用有一台NAS,并为此折腾了不少内容:
西蒙宫:折腾,用J3455搭建家庭nas
西蒙宫:让家庭NAS走向世界,兼谈Zerotier
西蒙宫:折腾——组装NAS编译安装ffmpeg
在NAS上部署了Nextcloud与Seafile文件服务,以及Jellyfin影音服务等内容,其中不少服务都依赖mysql数据库,然而这台nas总是命途多舛,最近又一次意外断电,导致mysql服务又挂了。
原因挺容易理解,mysql对数据的操作非常精密,一旦断电,内存中的数据来不及写入硬盘就容易发生错误。
于是,我陷入了沉思...
忽然脑中电光一闪,能不能在闲置VPS上部署一个数据库,让家庭NAS的所有服务都使用远程数据库呢?因为VPS不会断电,所以上面的数据库比较安全。
开源Mariadb是oracle的mysql数据库的有力替代品,而且mariadb对mysql的各个api兼容非常好,所以考虑使用Mariadb咯。
数据库的部署
Mariadb的安装在ubuntu 18.04上可以参考这里。
简要步骤如下:
首先更新库信息
sudo apt update官方库里就有mariadb,直接安装
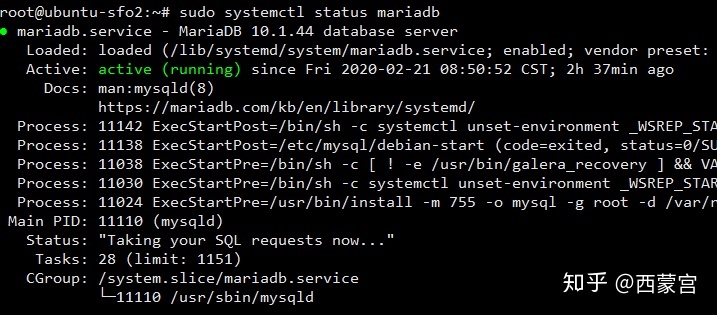
sudo apt install mariadb-server数据库服务会自动开始,可以通过以下命令查看:
sudo systemctl status mariadb
可以使用下面的命令查看mariadb的版本:
mysql -V
接下来有个重要步骤关系到服务器的安全
sudo mysql_secure_installation命令执行后需要回复一些问题,并设置数据库root密码,各位按需回答yes或no就可以了,这里略过。
安装完成后,可以尝试连接数据库
mysql -u root -p
至此,mariadb的安装过程结束。
配置远程访问
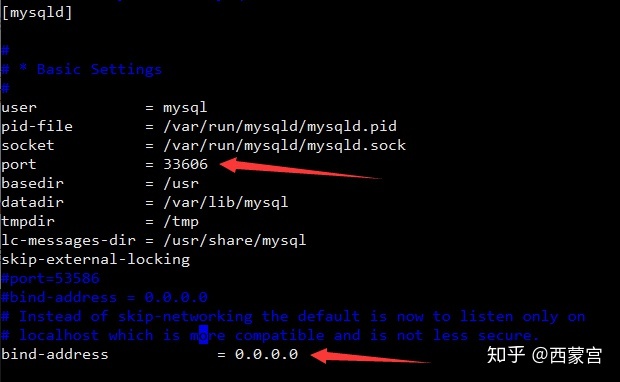
一般的mysql的配置文件是在/etc/mysql/my.cnf,mariadb也可找到这个文件,仔细阅读该文件的注释内容,可以知道mariadb的配置项集中于另一文件,其路径如下,使用vi打开:
vi /etc/mysql/mariadb.conf.d/50-server.cnf将绑定ip地址从127.0.0.1改为0.0.0.0
同时更改绑定端口号从3306改为你想要的一个数值,例如33606,注意不要使用被防火墙保护的端口。

更改完毕后,重启数据库,应用配置文件
service mysql restart创建数据库和用户,配置权限
接下来就很正常的配置新用户、数据库和配置权限。
1.登录Mysql
[root@xufeng Desktop]# mysql -u root -p
Enter password:
2.添加新的用户
允许本地 IP访问localhost的Mysql数据库
MariaDB [(none)]> create user 'editest'@'localhost' identified by 'editest123456';
Query OK, 0 rows affected (0.06 sec)
允许外网IP访问数据库editest,本命令包含上面的命令,是所有的IP都可以访问该数据库
MariaDB [(none)]> create user 'editest'@'%' identified by 'editest123456';
Query OK, 0 rows affected (0.00 sec)
用户创建完成后,刷新授权
MariaDB [(none)]> flush privileges;
Query OK, 0 rows affected (0.00 sec)
3.创建一个新的数据库,并使用show databases命令查看数据库是否创建OK
MariaDB [(none)]> create database editestdb DEFAULT CHARSET utf8 COLLATE utf8_general_ci;
Query OK, 1 row affected (0.01 sec)MariaDB [(none)]> show databases;
+--------------------+
| Database           |
+--------------------+
| information_schema |
| confluence         |
| editestdb          |
| mysql              |
| performance_schema |
| sys                |
+--------------------+
6 rows in set (0.00 sec)
4.将改用户editest赋权给数据库editestdb,并刷新授权
MariaDB [(none)]> grant all privileges on `editestdb`.* to 'editest'@'localhost' identified by 'editest123456' with grant option;
Query OK, 0 rows affected, 1 warning (0.00 sec)MariaDB [(none)]> grant all privileges on `editestdb`.* to 'editest'@'%' identified by 'editest123456' with grant option;
Query OK, 0 rows affected, 1 warning (0.01 sec)MariaDB [(none)]> flush privileges;
Query OK, 0 rows affected (0.00 sec)
5.退出 root 重新登录,使用editest登录检查本地登录是否正常,输入密码后,正常登录,并使用show databases命令查看数据库赋权是否正常。
[root@xufeng Desktop]# mysql -u editest -p
Enter password:
Welcome to the MySQL monitor.  Commands end with ; or g.
Your MySQL connection id is 7
Server version: 5.7.22 MySQL Community Server (GPL)Copyright (c) 2000, 2018, Oracle and/or its affiliates. All rights reserved.Oracle is a registered trademark of Oracle Corporation and/or its
affiliates. Other names may be trademarks of their respective
owners.Type 'help;' or 'h' for help. Type 'c' to clear the current input statement.MariaDB [(none)]> show databases;
+--------------------+
| Database           |
+--------------------+
| information_schema |
| editestdb          |
+--------------------+
2 rows in set (0.00 sec)
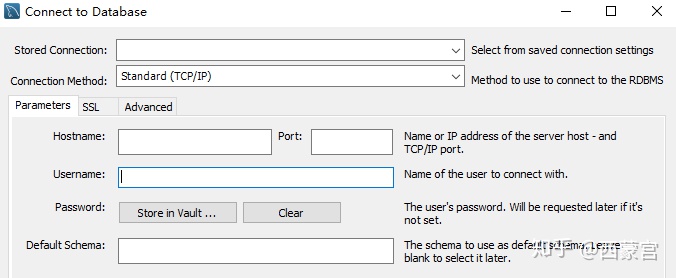
6.验证远程IP地址登录是否正常,使用MySQL Workbench配置数据库并进行验证OK

至此结束。
欢迎交流讨论~


)


-原创力文档...)


![[JavaScript] 函数同名问题](http://pic.xiahunao.cn/[JavaScript] 函数同名问题)
.docx...)
)