Centos7配置Jenkins
jenkins 官方下载地址:https://mirrors.jenkins-ci.org/redhat/
maven 官方下载地址:https://archive.apache.org/dist/maven/maven-3/
tomcat 官方下载地址:https://tomcat.apache.org/download-90.cgi
1、配置jdk
下载后将文件上传到云服务器上
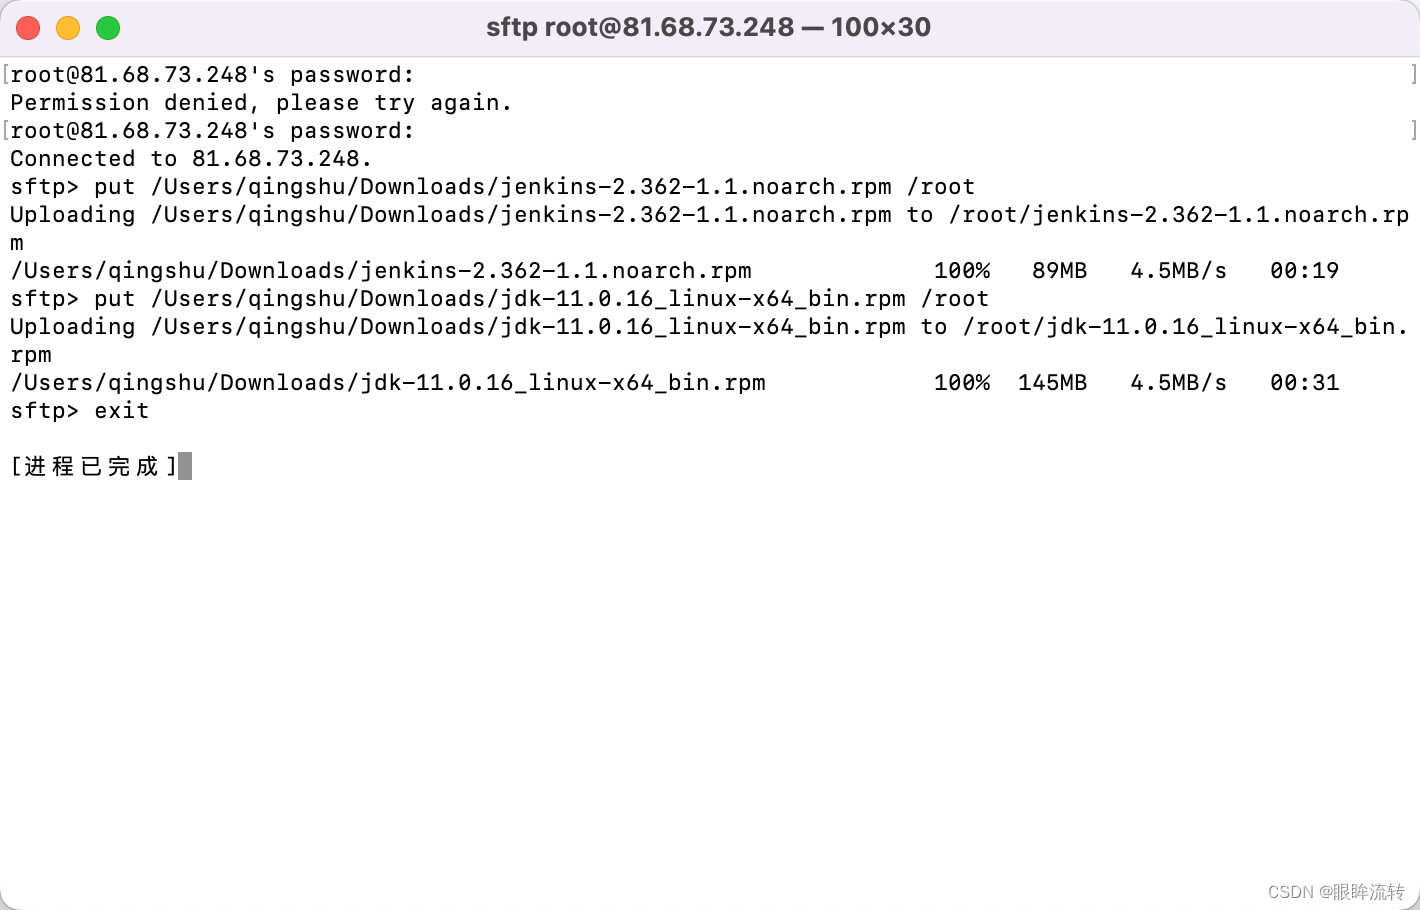
我们这里选择rpm安装方式(主要是比较方便
rpm -ivh jdk-11.0.16_linux-x64_bin.rpm
which java

这样就成功了
2、安装jenkins
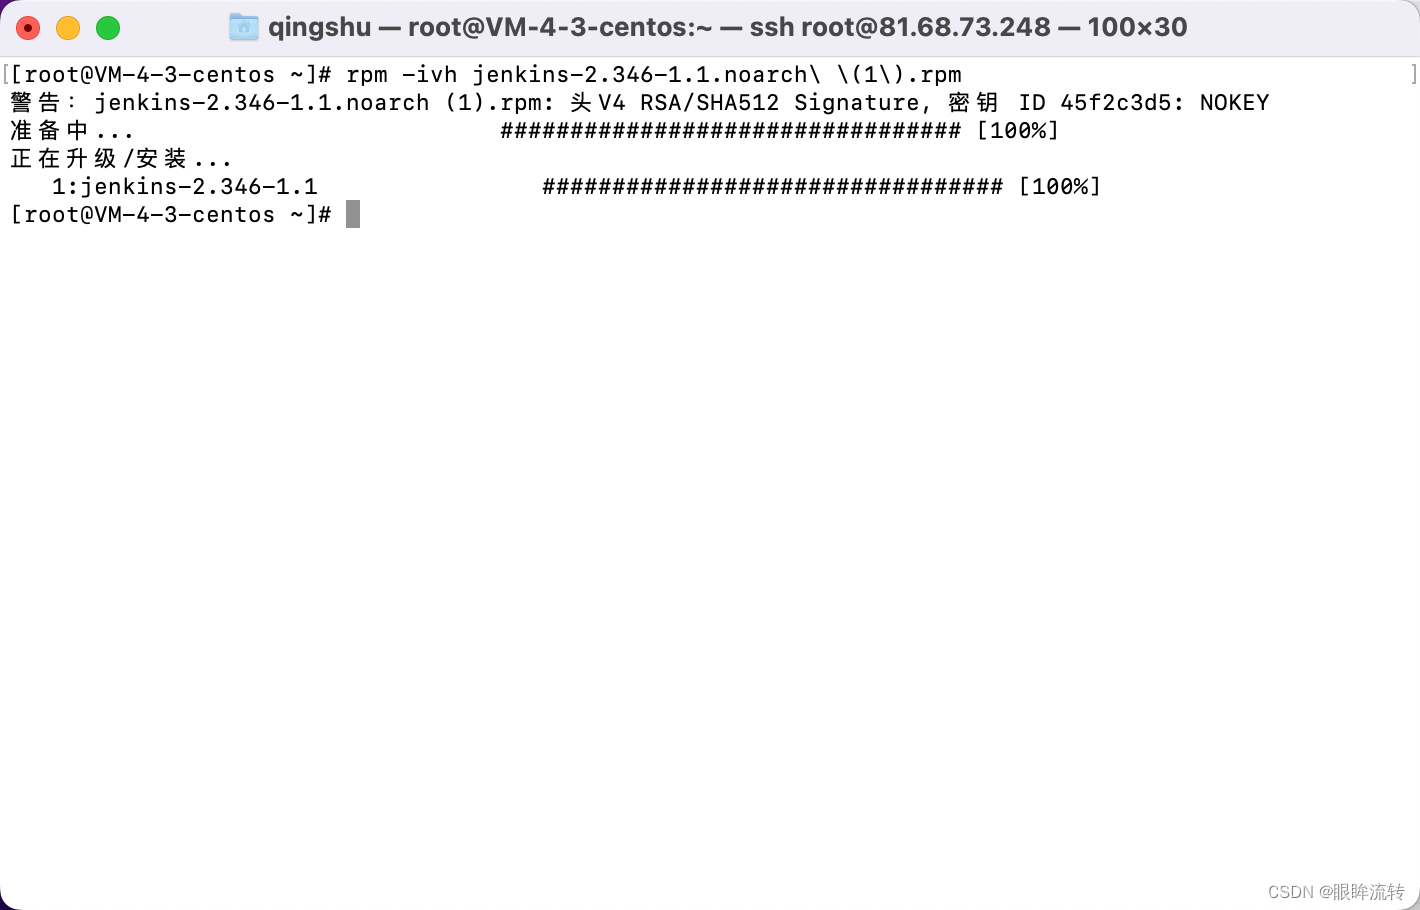
安装jenkins
rpm -ivh jenkins-2.346-1.1.noarch.rpm
卸载jenkins
rpm -e jenkins
find / -iname jenkins | xargs -n 1000 rm -rf
which jenkins
3、jenkins配置、启动
修改配置文件1
vim /usr/lib/systemd/system/jenkins.service
设置信息1
Environment="JENKINS_PORT=8999"
修改配置文件2
vim /etc/sysconfig/jenkins
设置信息2
JENKINS_USER="root"
JENKINS_PORT="8999"
配置文件生效
systemctl daemon-reload
启动jenkins(你可能会遇到启动超时的错误,不要担心多试几遍,虽然我也不知道为什么
systemctl start jenkins
访问:http://10.112.18.11:8080
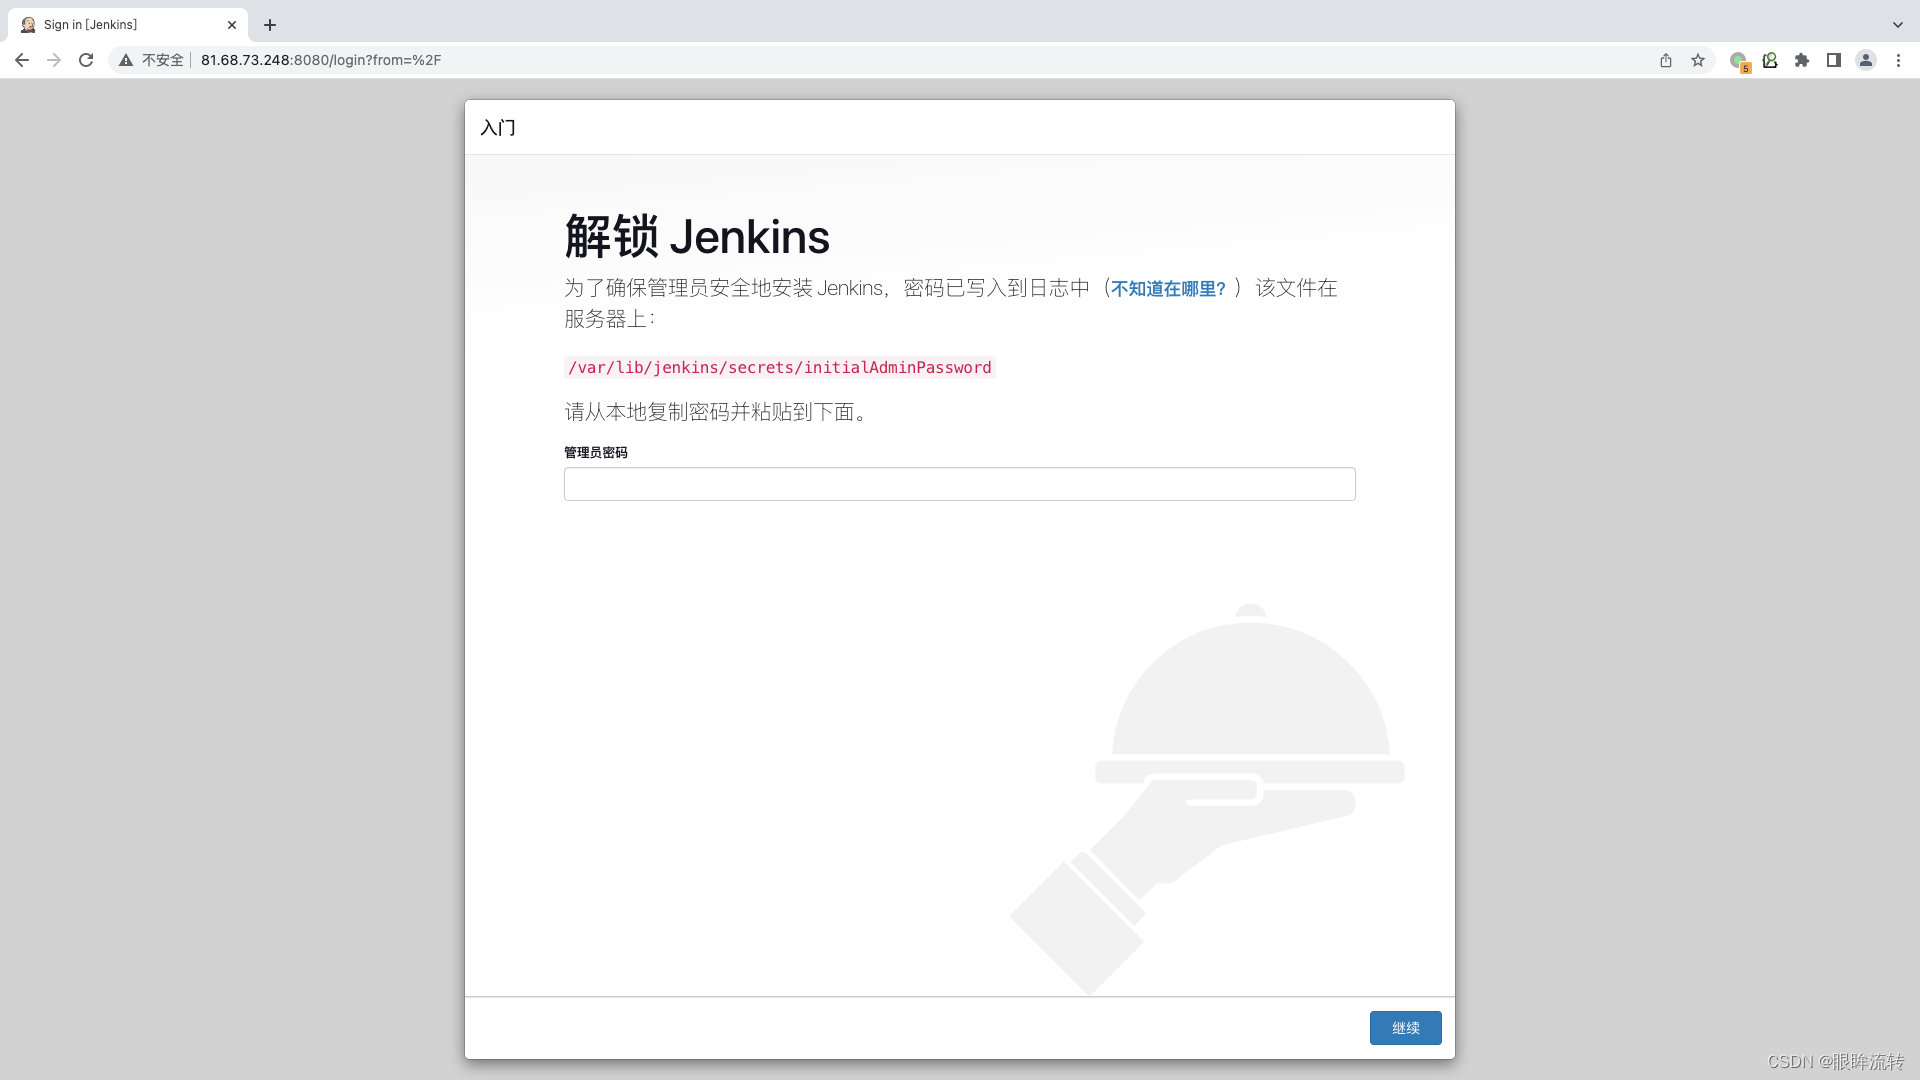
获取密码,解锁jenkins
cat /var/lib/jenkins/secrets/initialAdminPassword
跳过插件安装


创建管理员
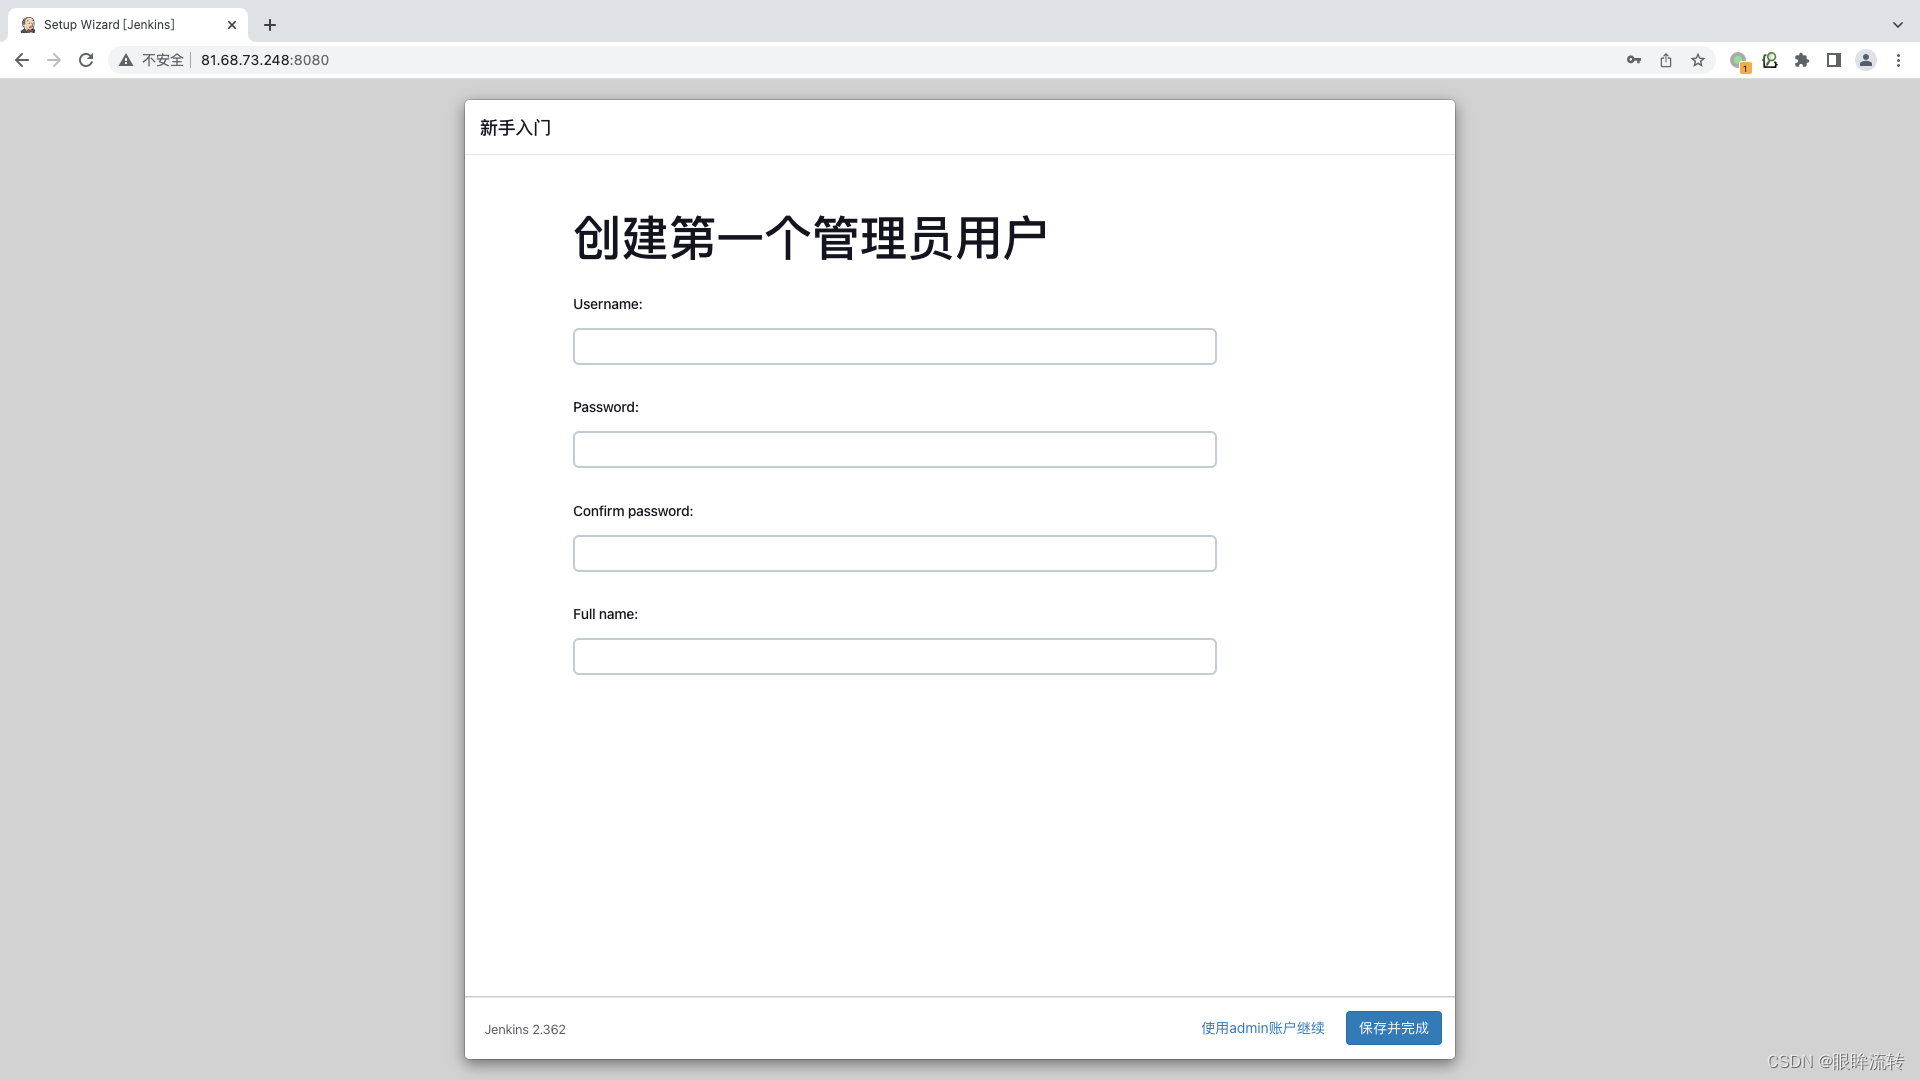
实例配置

进入jenkins
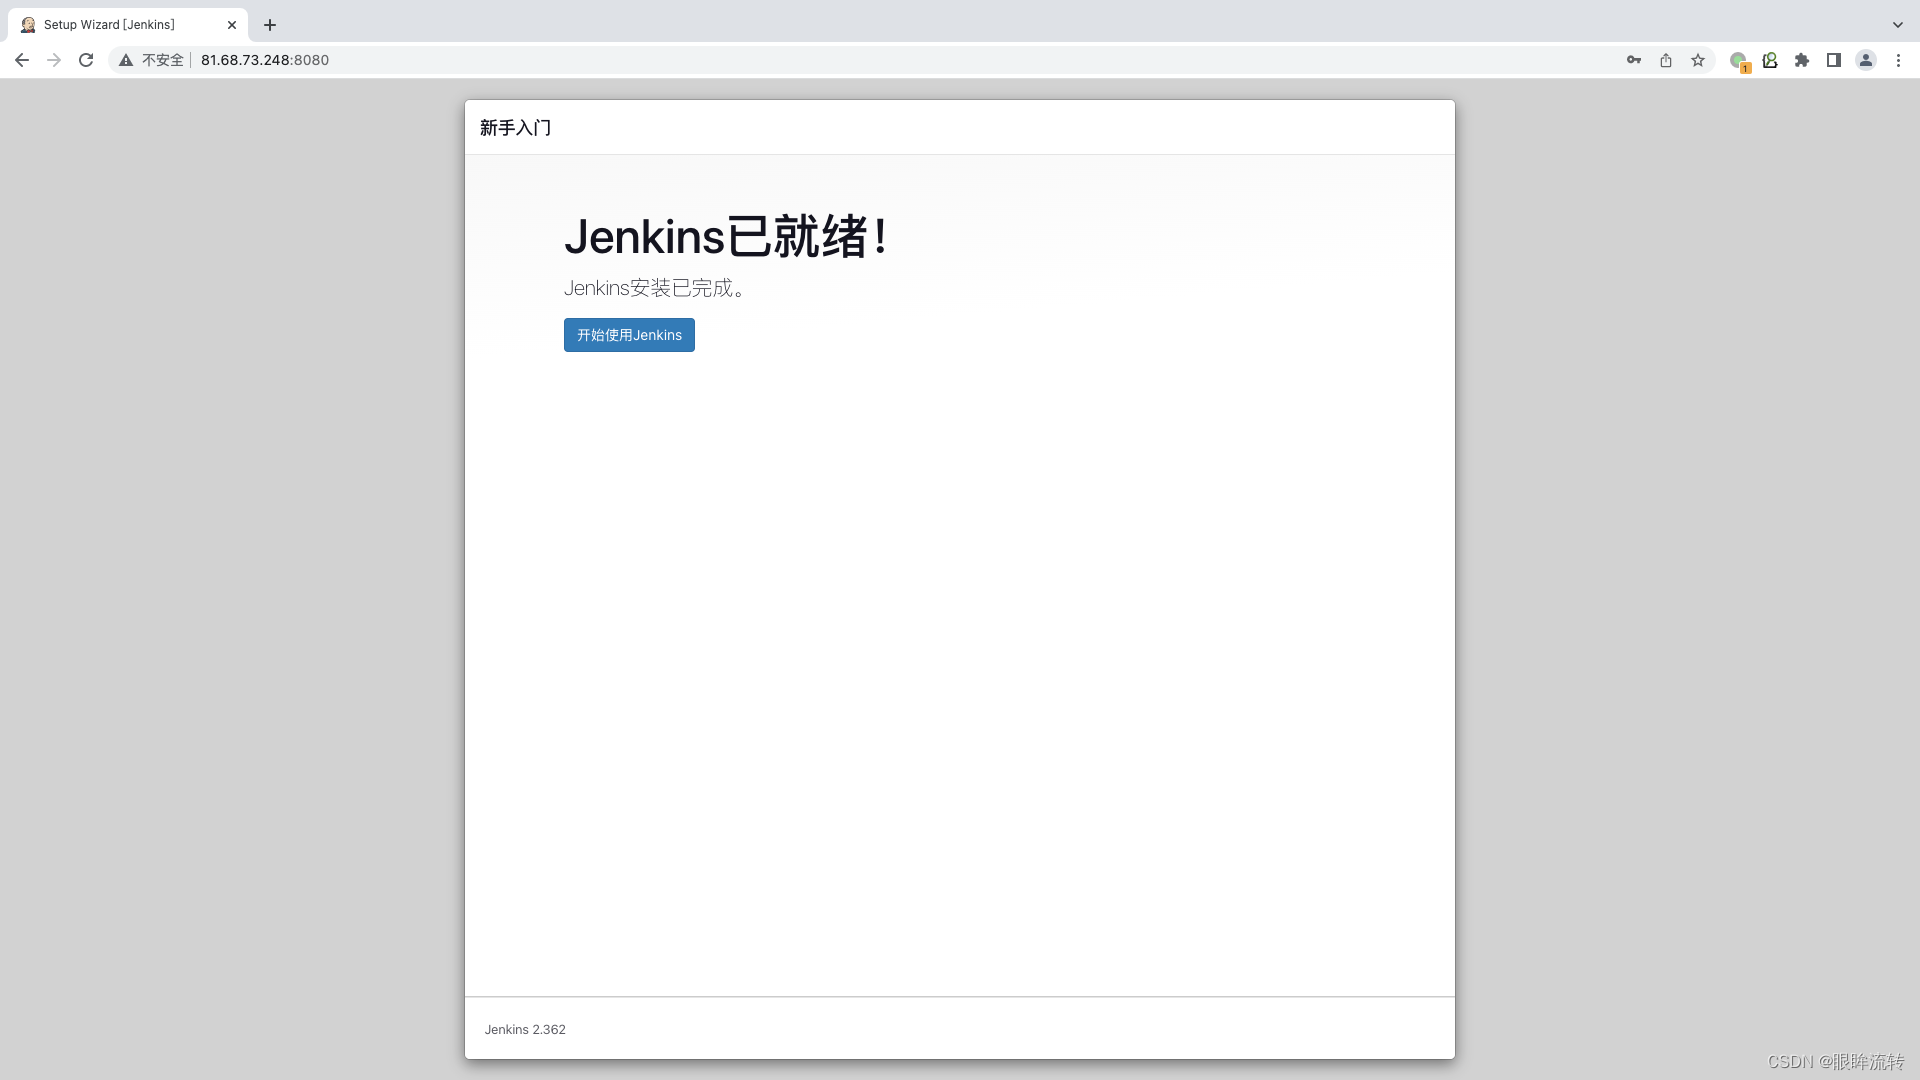
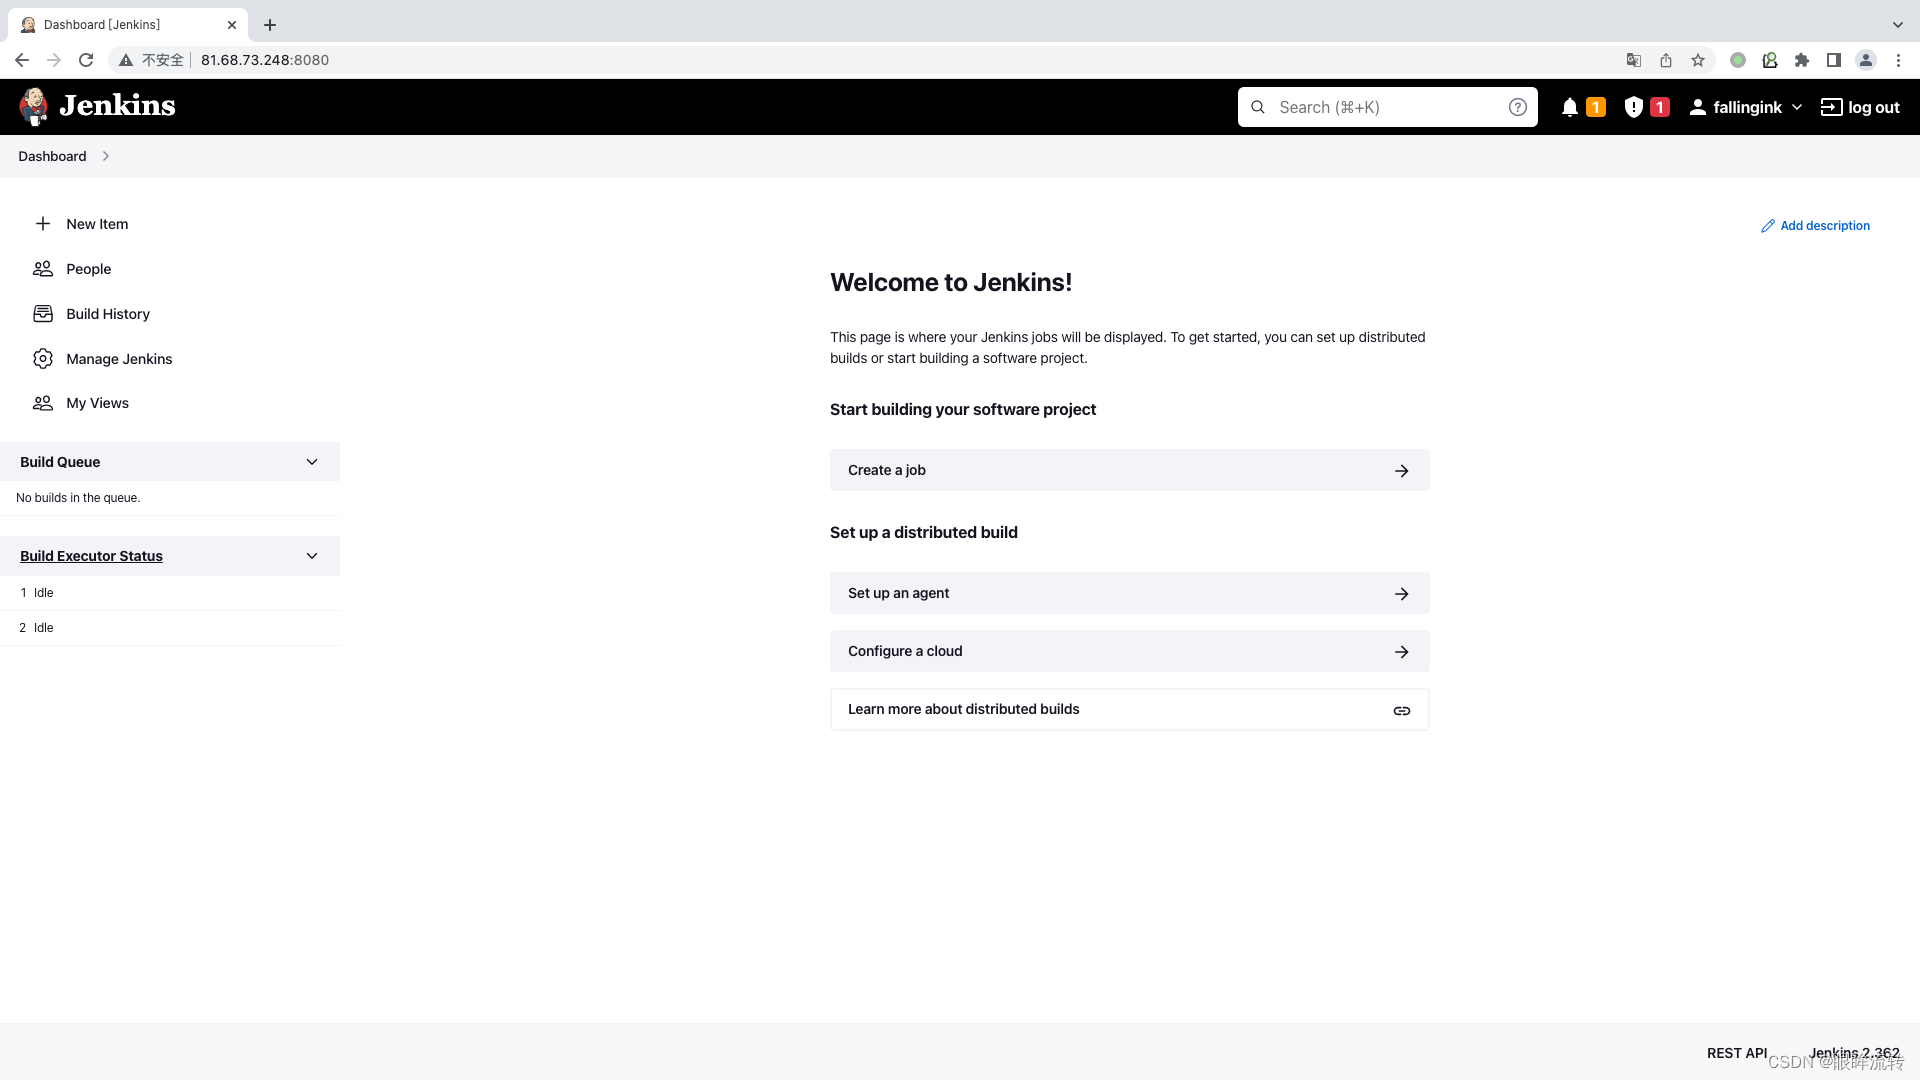
4、jenkins插件
Jenkins->Manage Jenkins->Manage Plugins
Localization: Chinese (Simplified)
Role-based Authorization Strategy
Credentials Binding Plugin
Git
Deploy to container
pipeline
Generic Webhook Trigger
Email Extension Template
SonarQube Scanner
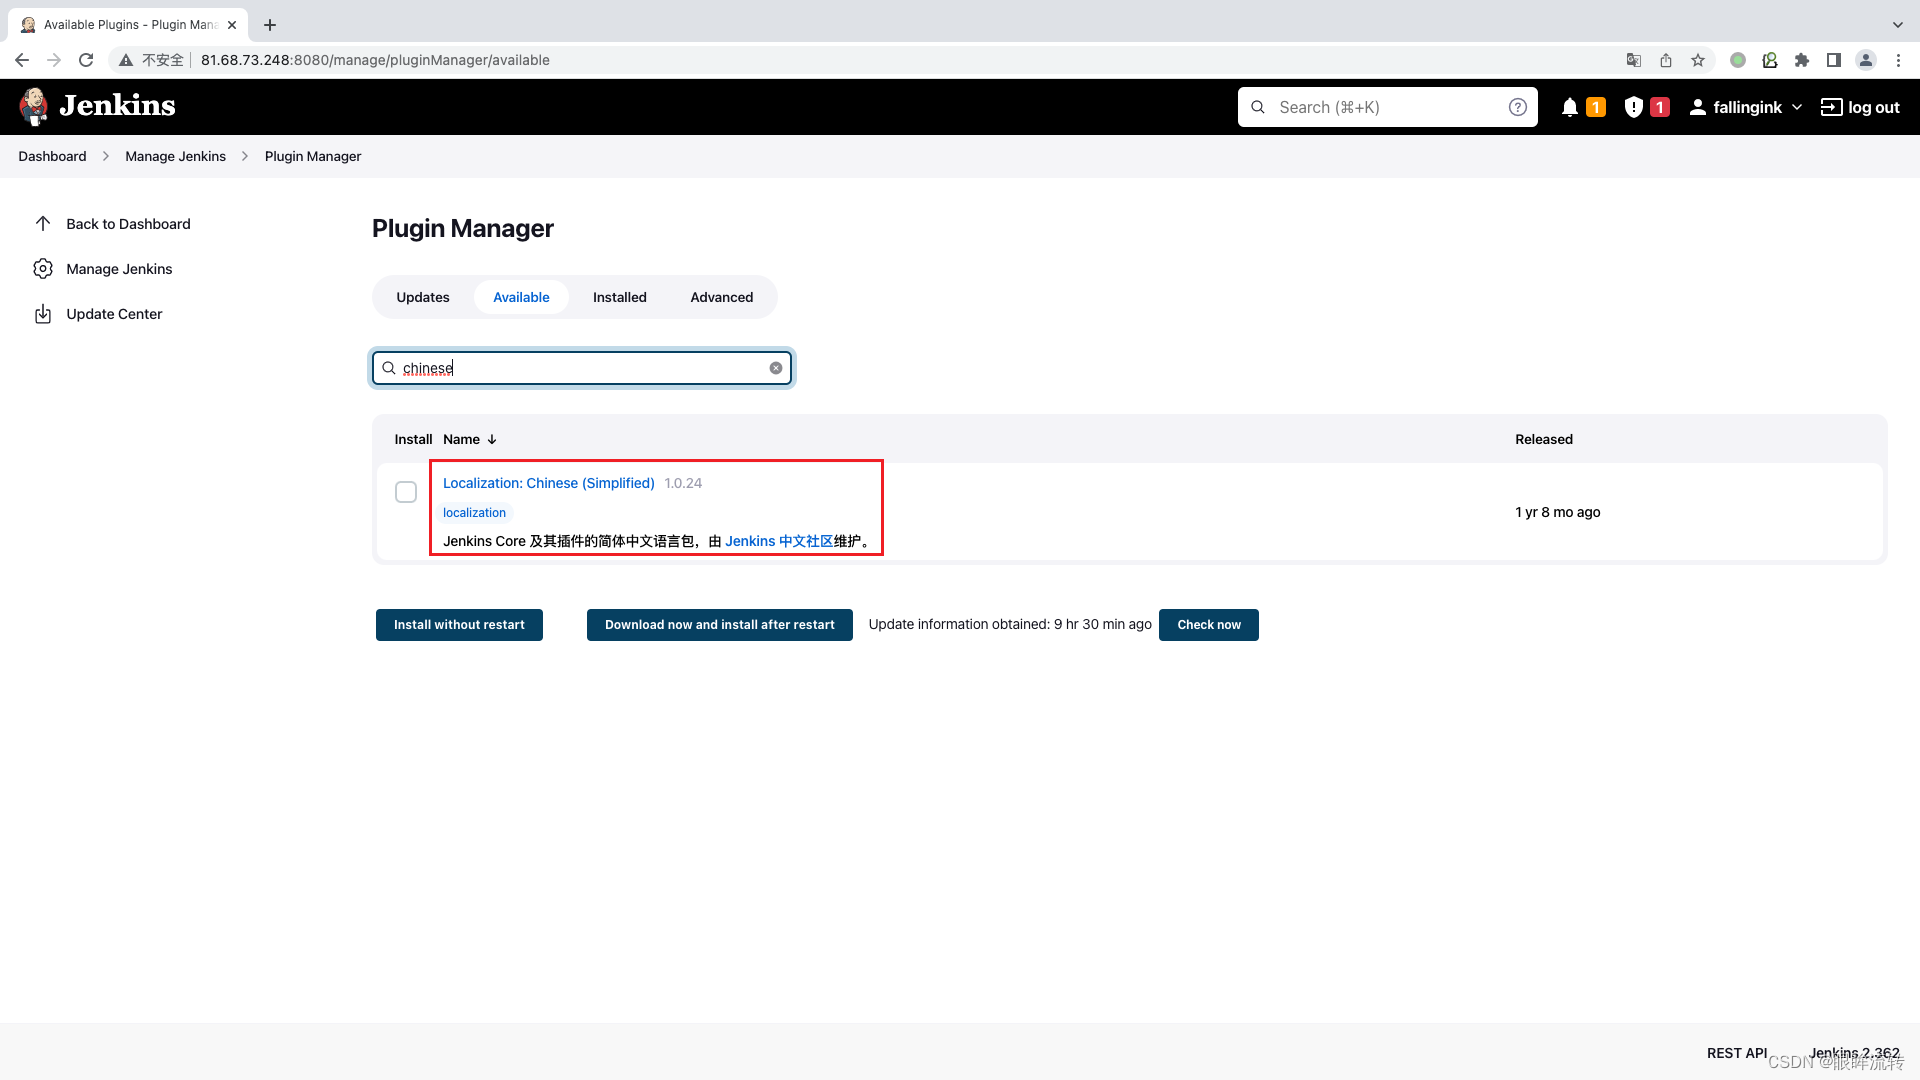
等待所有插件下载完毕,在插件页面重启或者通过systemctl restart jenkins重启后即安装成功
5、jenkins权限
修改授权策略
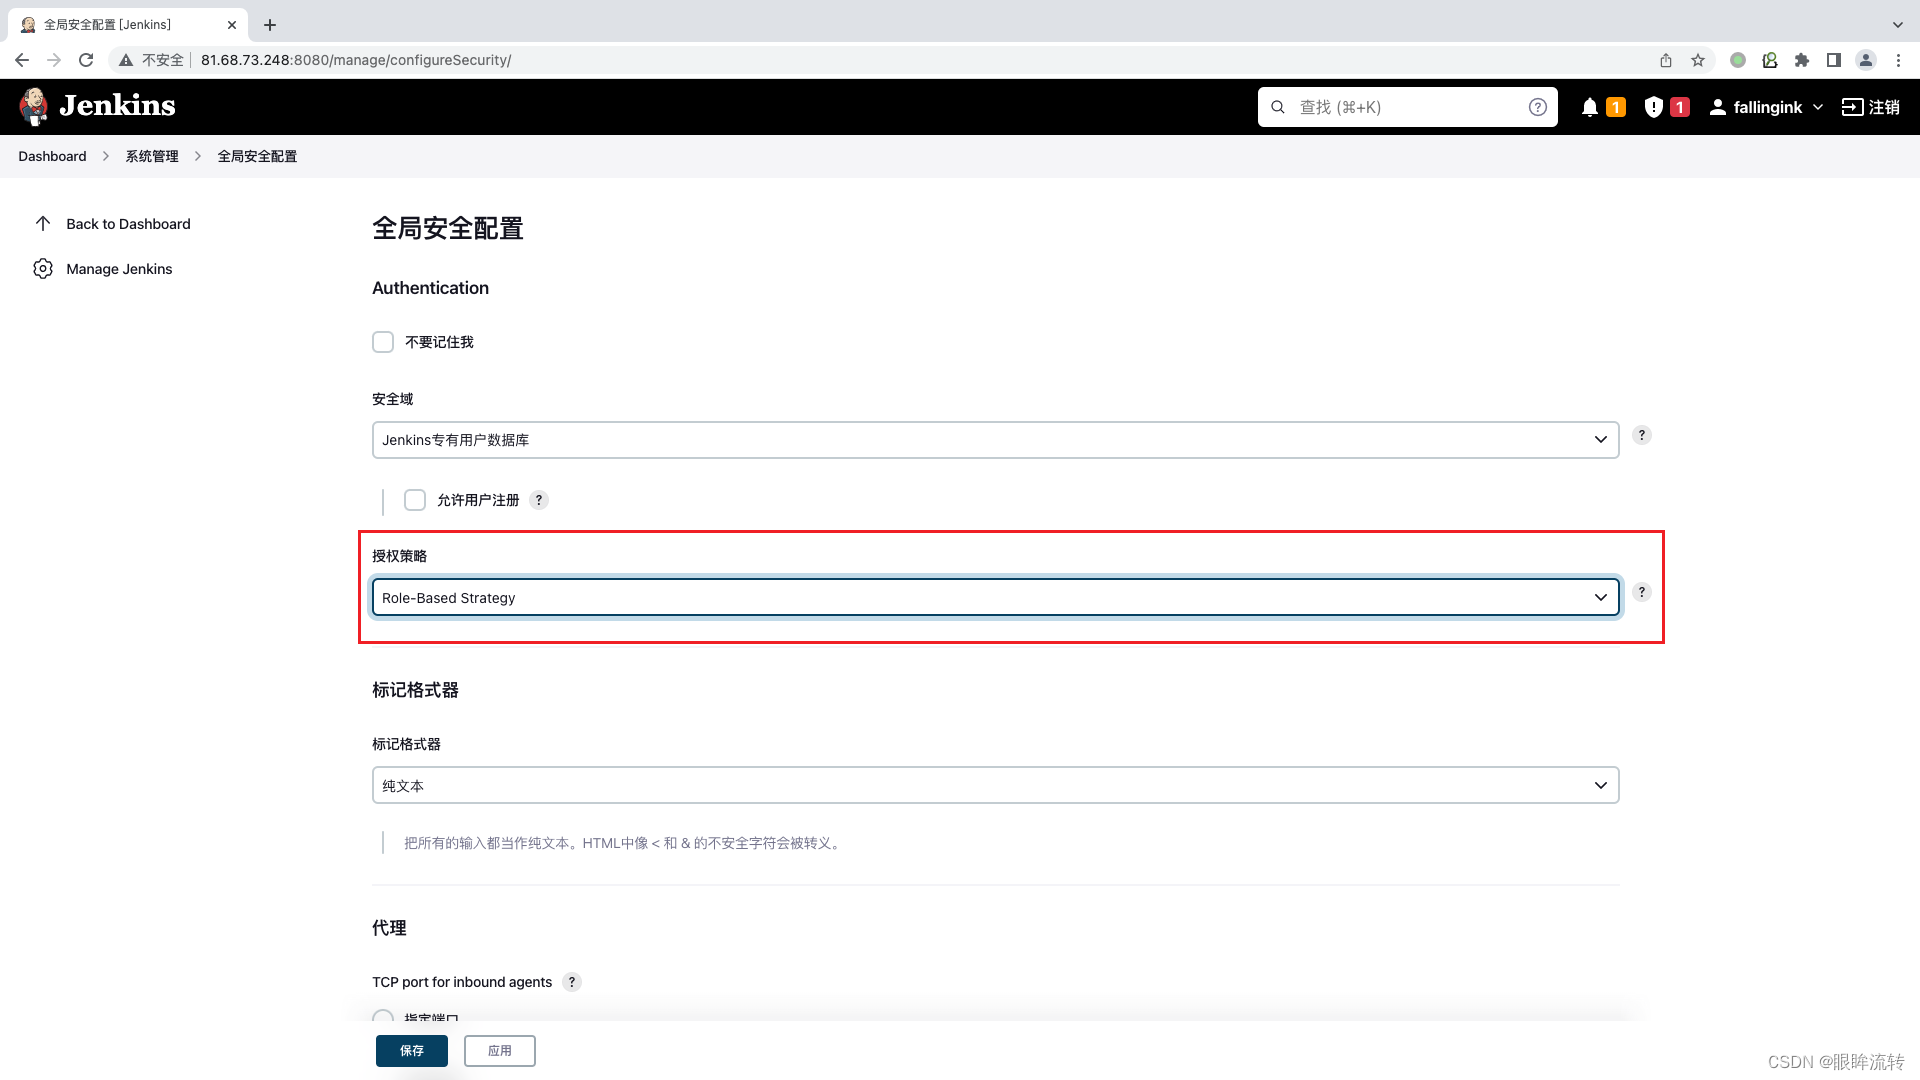
jenkins->系统管理->全局安全配置
修改授权策略为Role-based Strategy(做的所有操作,一定记得保存
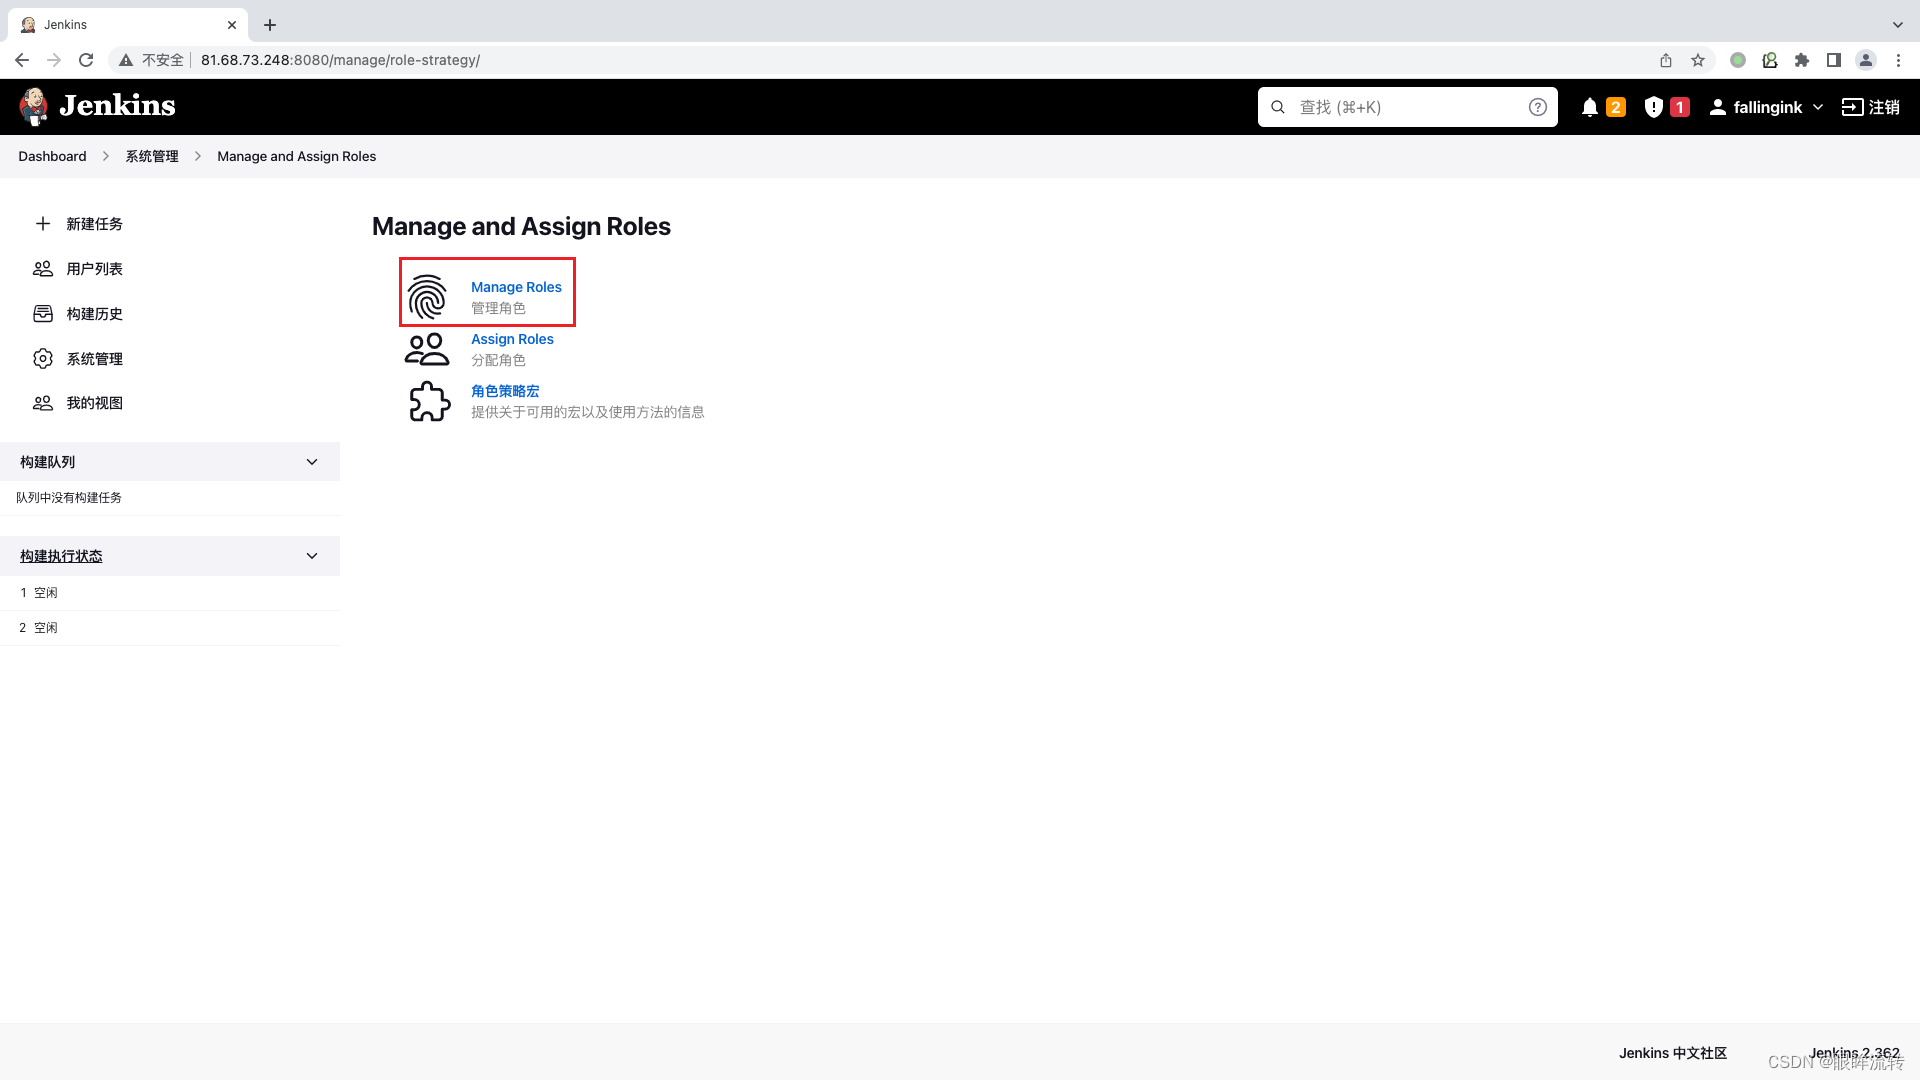
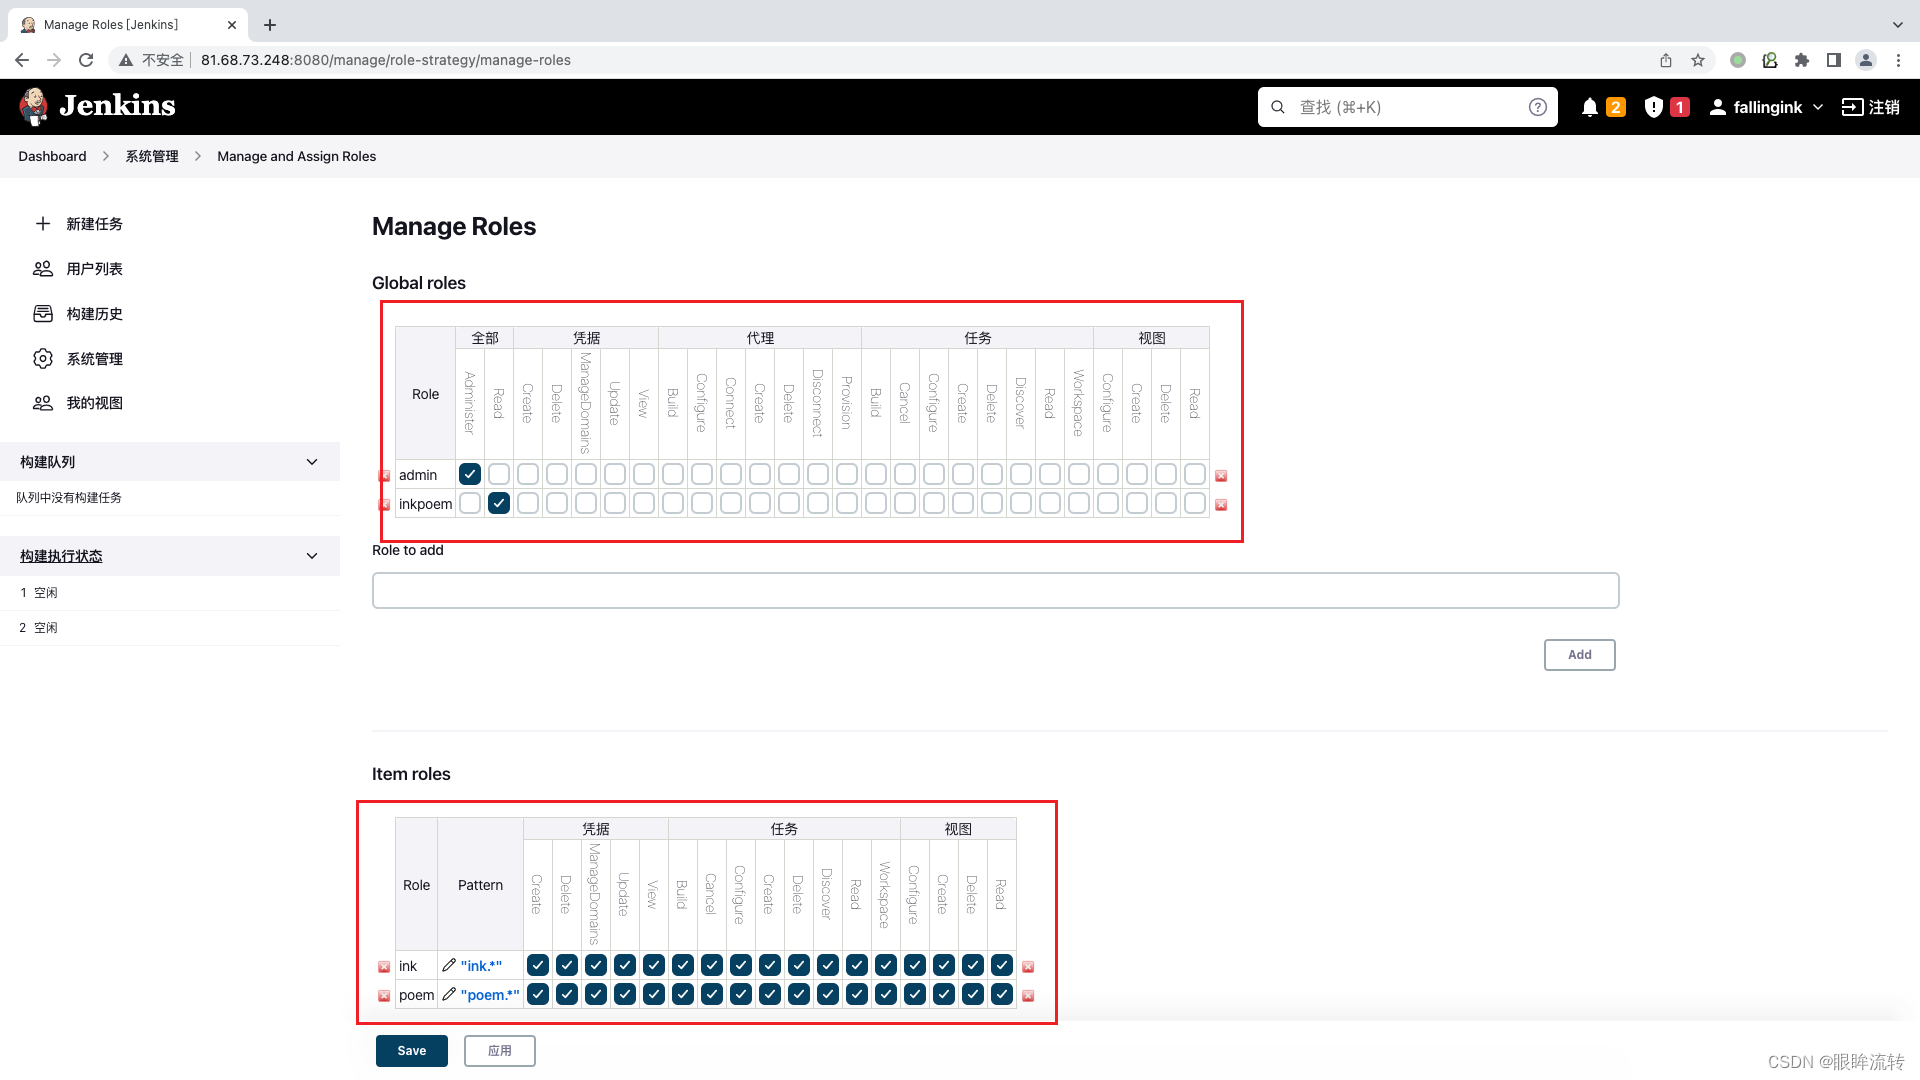
创建角色
Jenkins->系统管理->Manage and Assign Roles
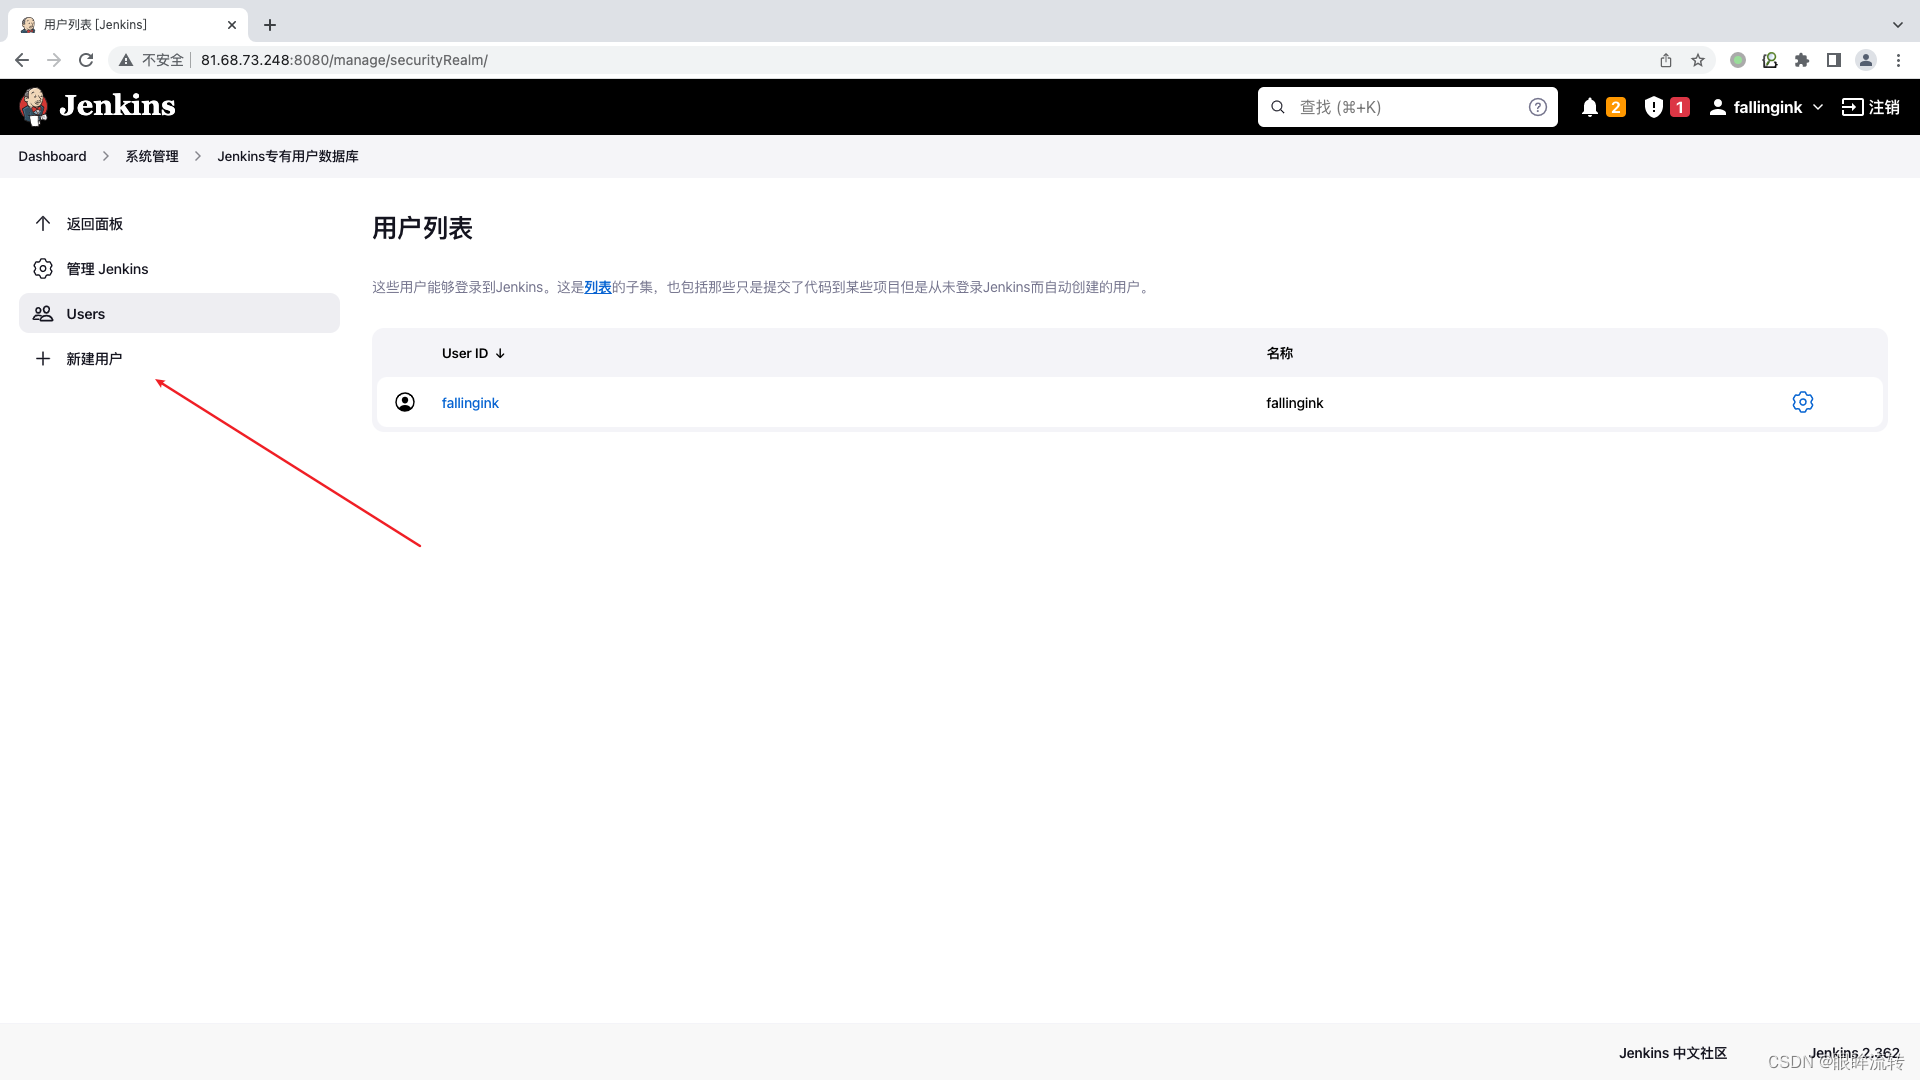
添加用户
Jenkins->系统管理->管理用户

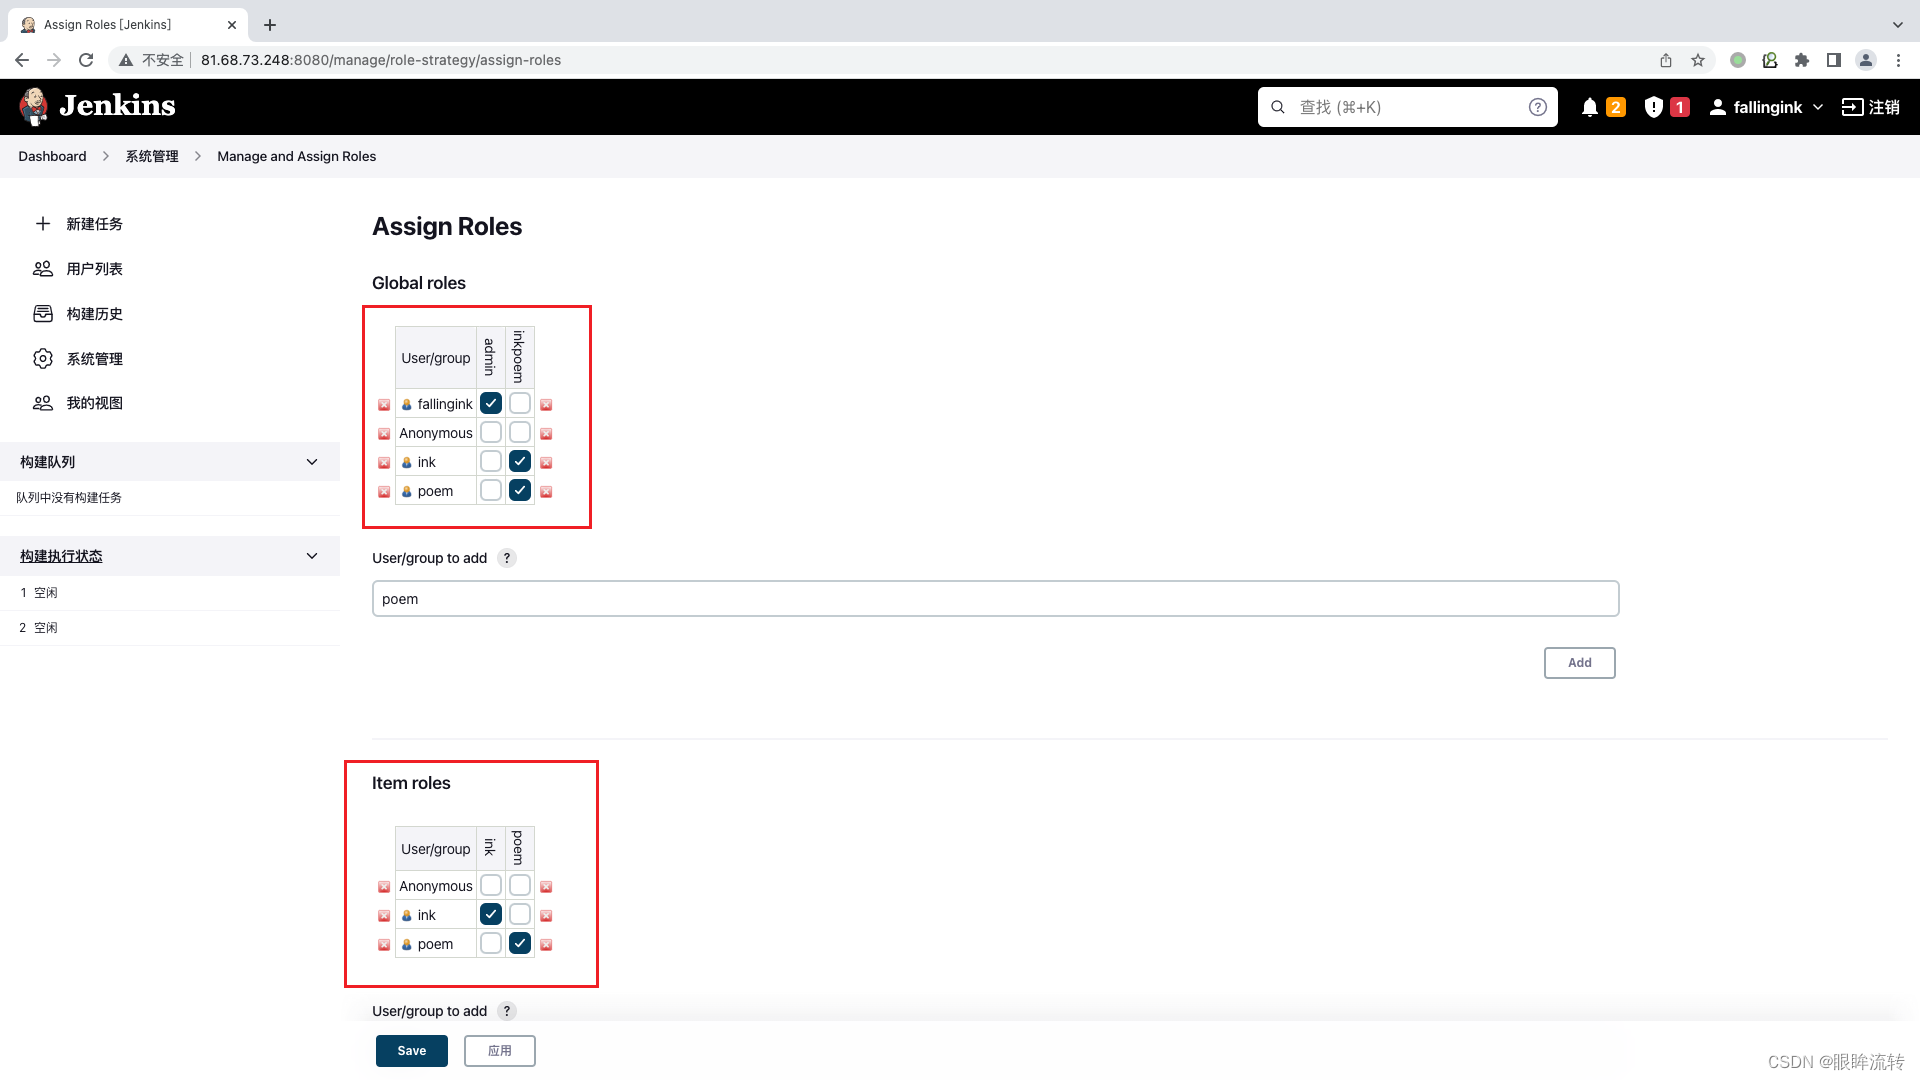
授予角色
6、配置git
yum install git -y
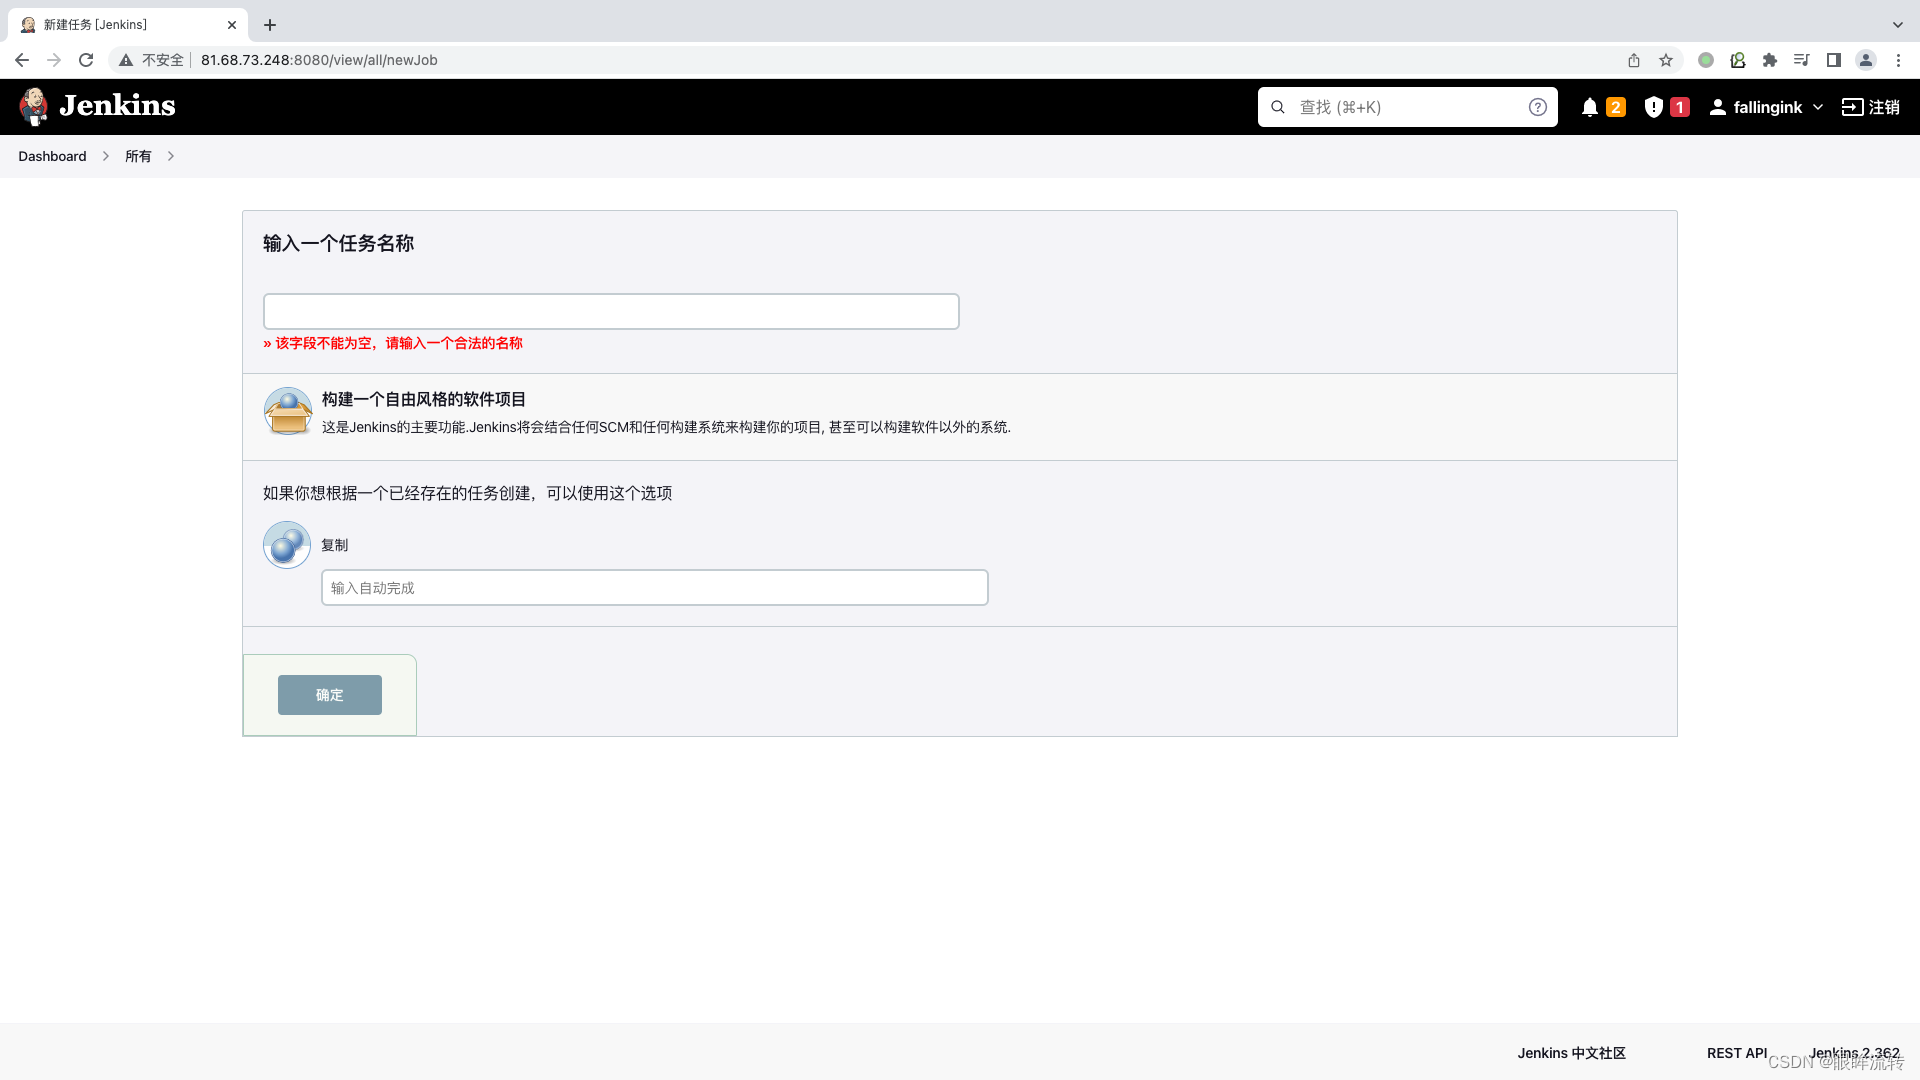
创建项目
7、jenkins凭证
比如连接gitlab需要的一些凭证
用户密码凭证
添加凭证

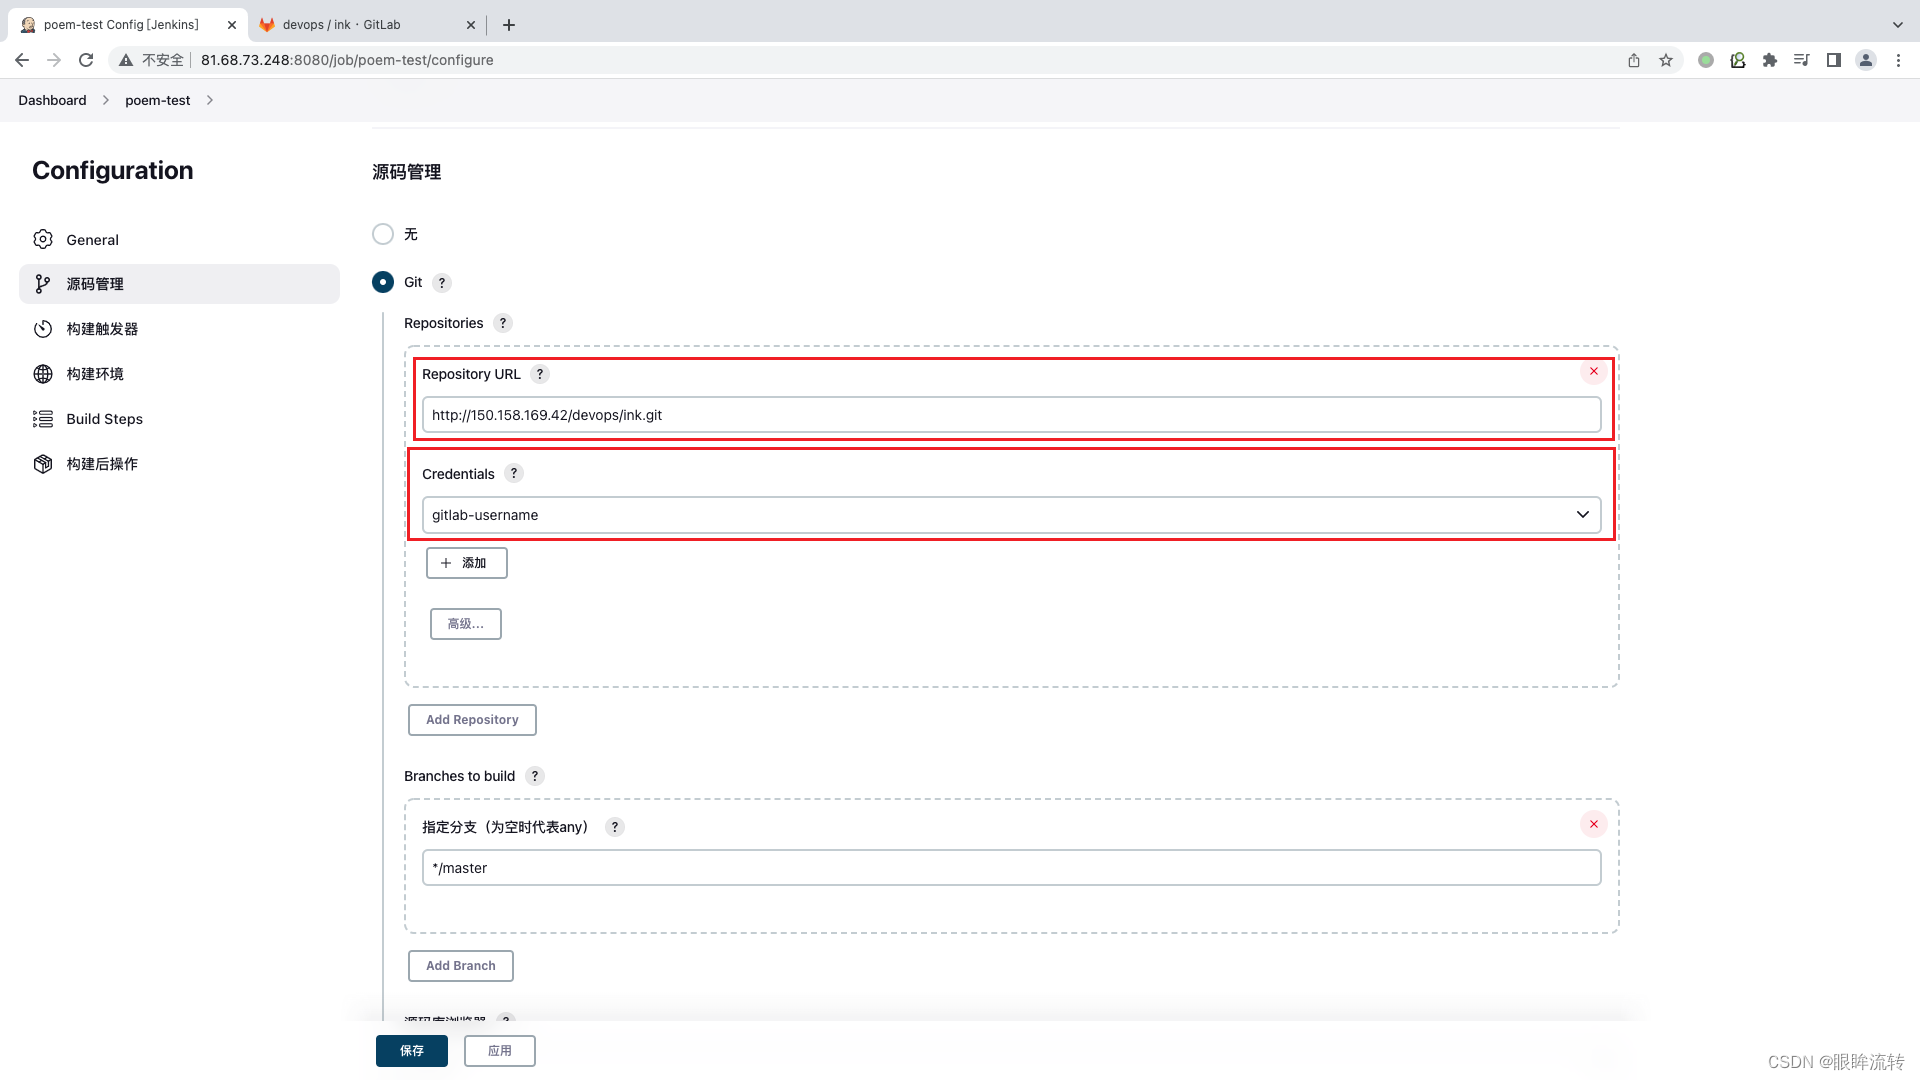
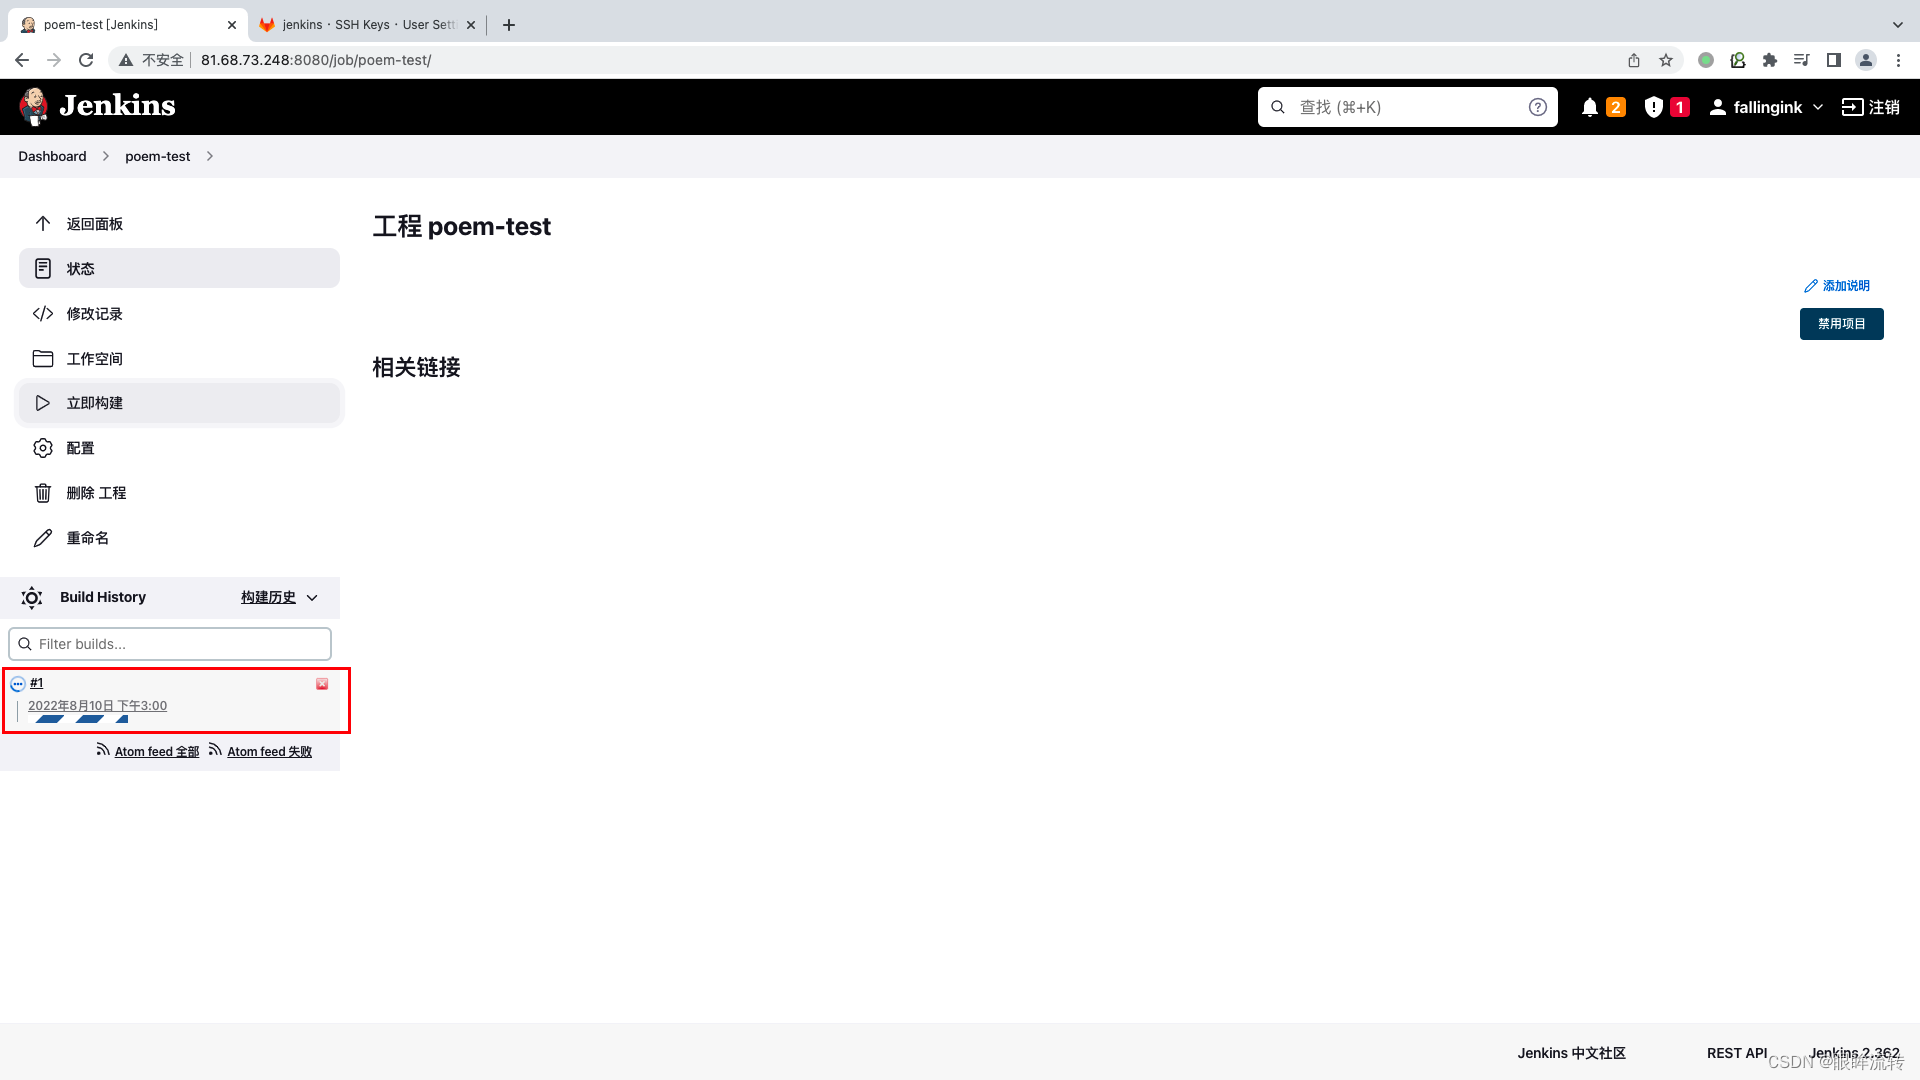
保存,立即构建

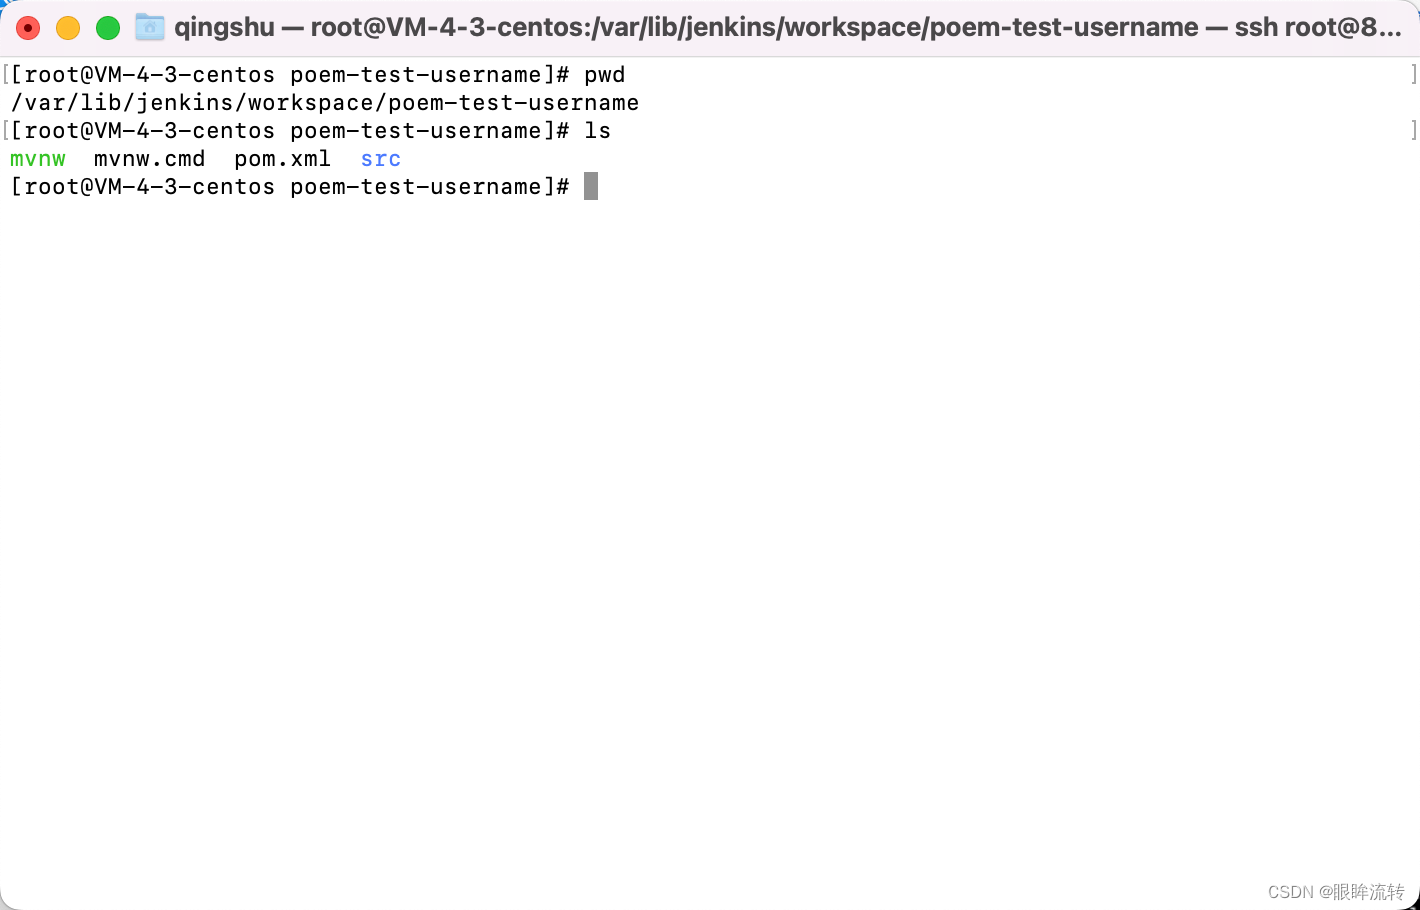
进入目录/var/lib/jenkins/workspace/poem-test-username
SSH凭证
SSH不知道为什么一直配置不成功,,,,,这里就暂时跳过
8、配置maven
tar -zxvf apache-maven-3.6.3-bin.tar.gz
vim /opt/apache-maven-3.6.3/conf/setting.xml
<localRepository>/opt/apache-maven-3.6.3/repo/</localRepository>
<mirror><id>nexus-aliyun</id>  <mirrorOf>*,!jeecg,!jeecg-snapshots</mirrorOf>  <name>Nexus aliyun</name>  <url>http://maven.aliyun.com/nexus/content/groups/public</url>
</mirror>
vi /etc/profile
export MAVEN_HOME=/opt/apache-maven-3.6.3
export PATH=$PATH:$MAVEN_HOME/bin
source /etc/profile
mvn -v
# 记得加权限
chmod 777 /opt/apache-maven-3.6.3/repo/

9、自动构建
jenkins->系统管理->全局工具配置
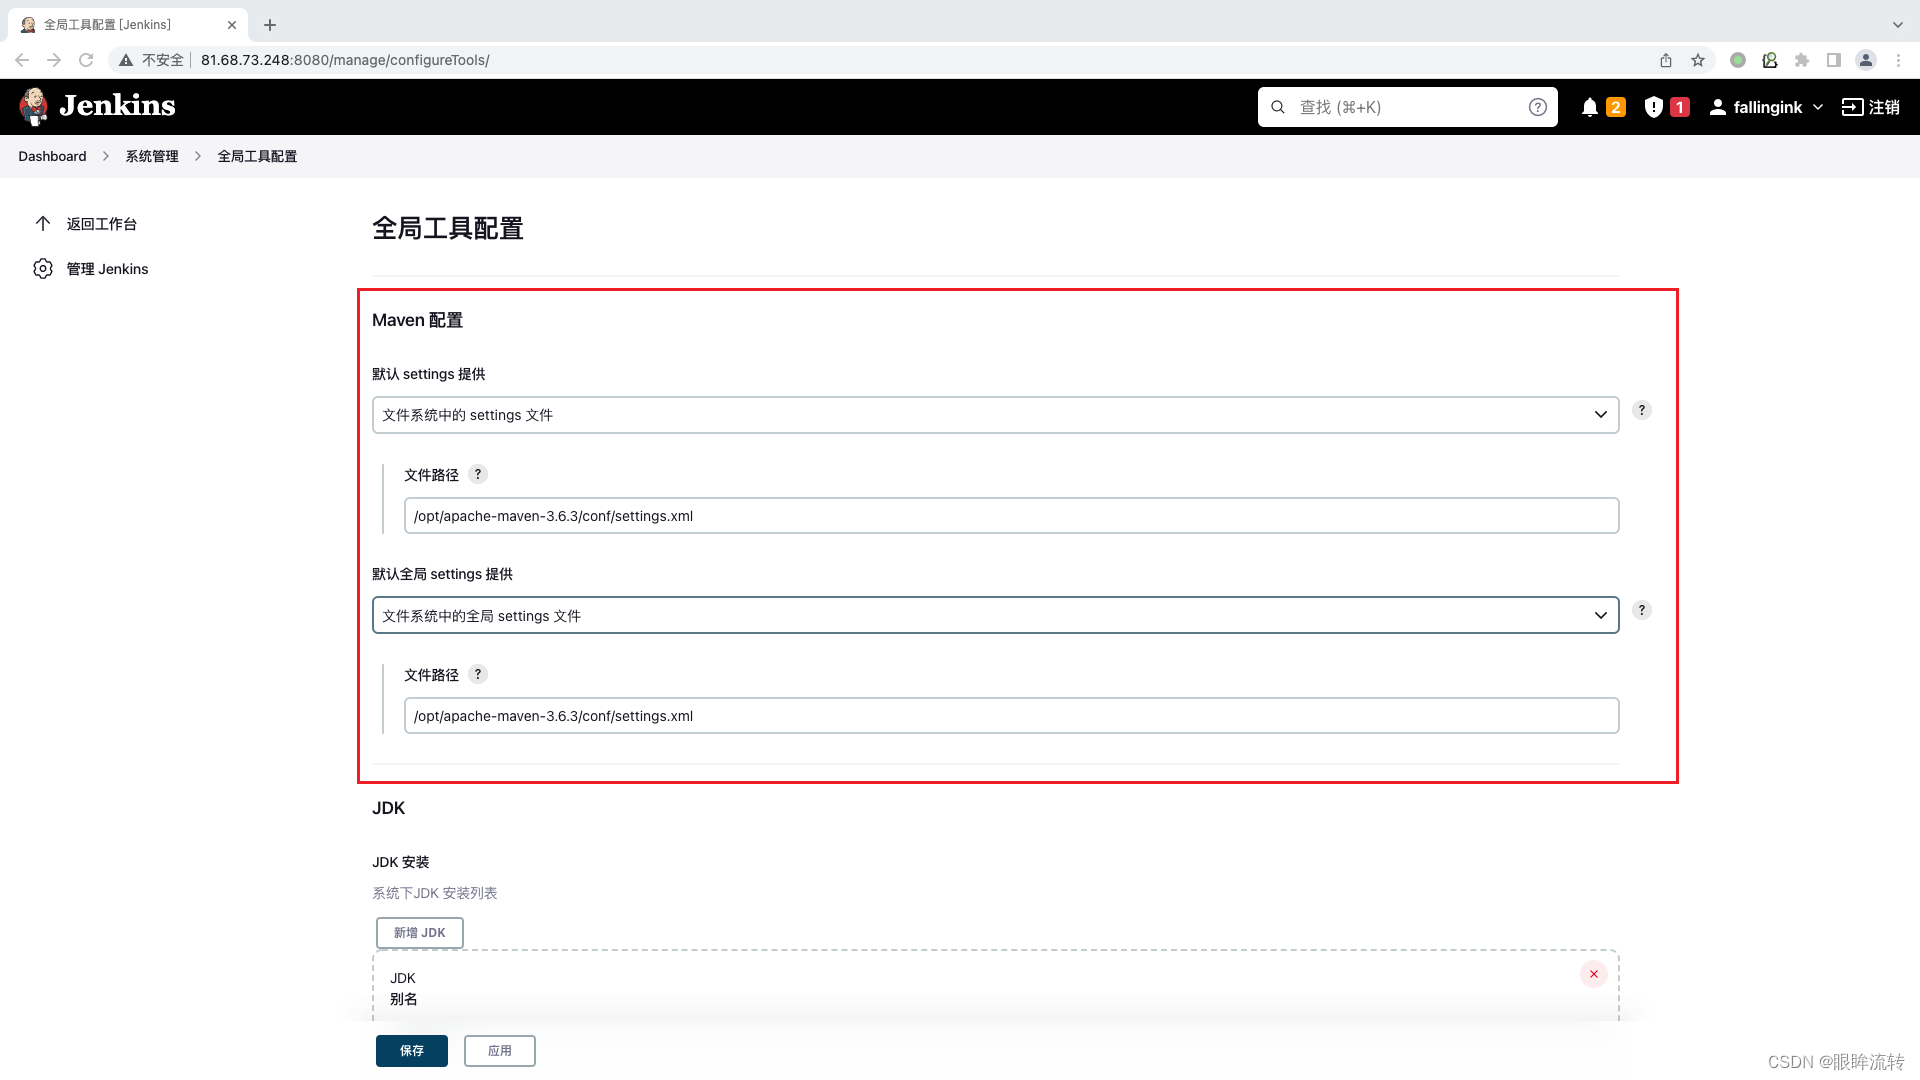
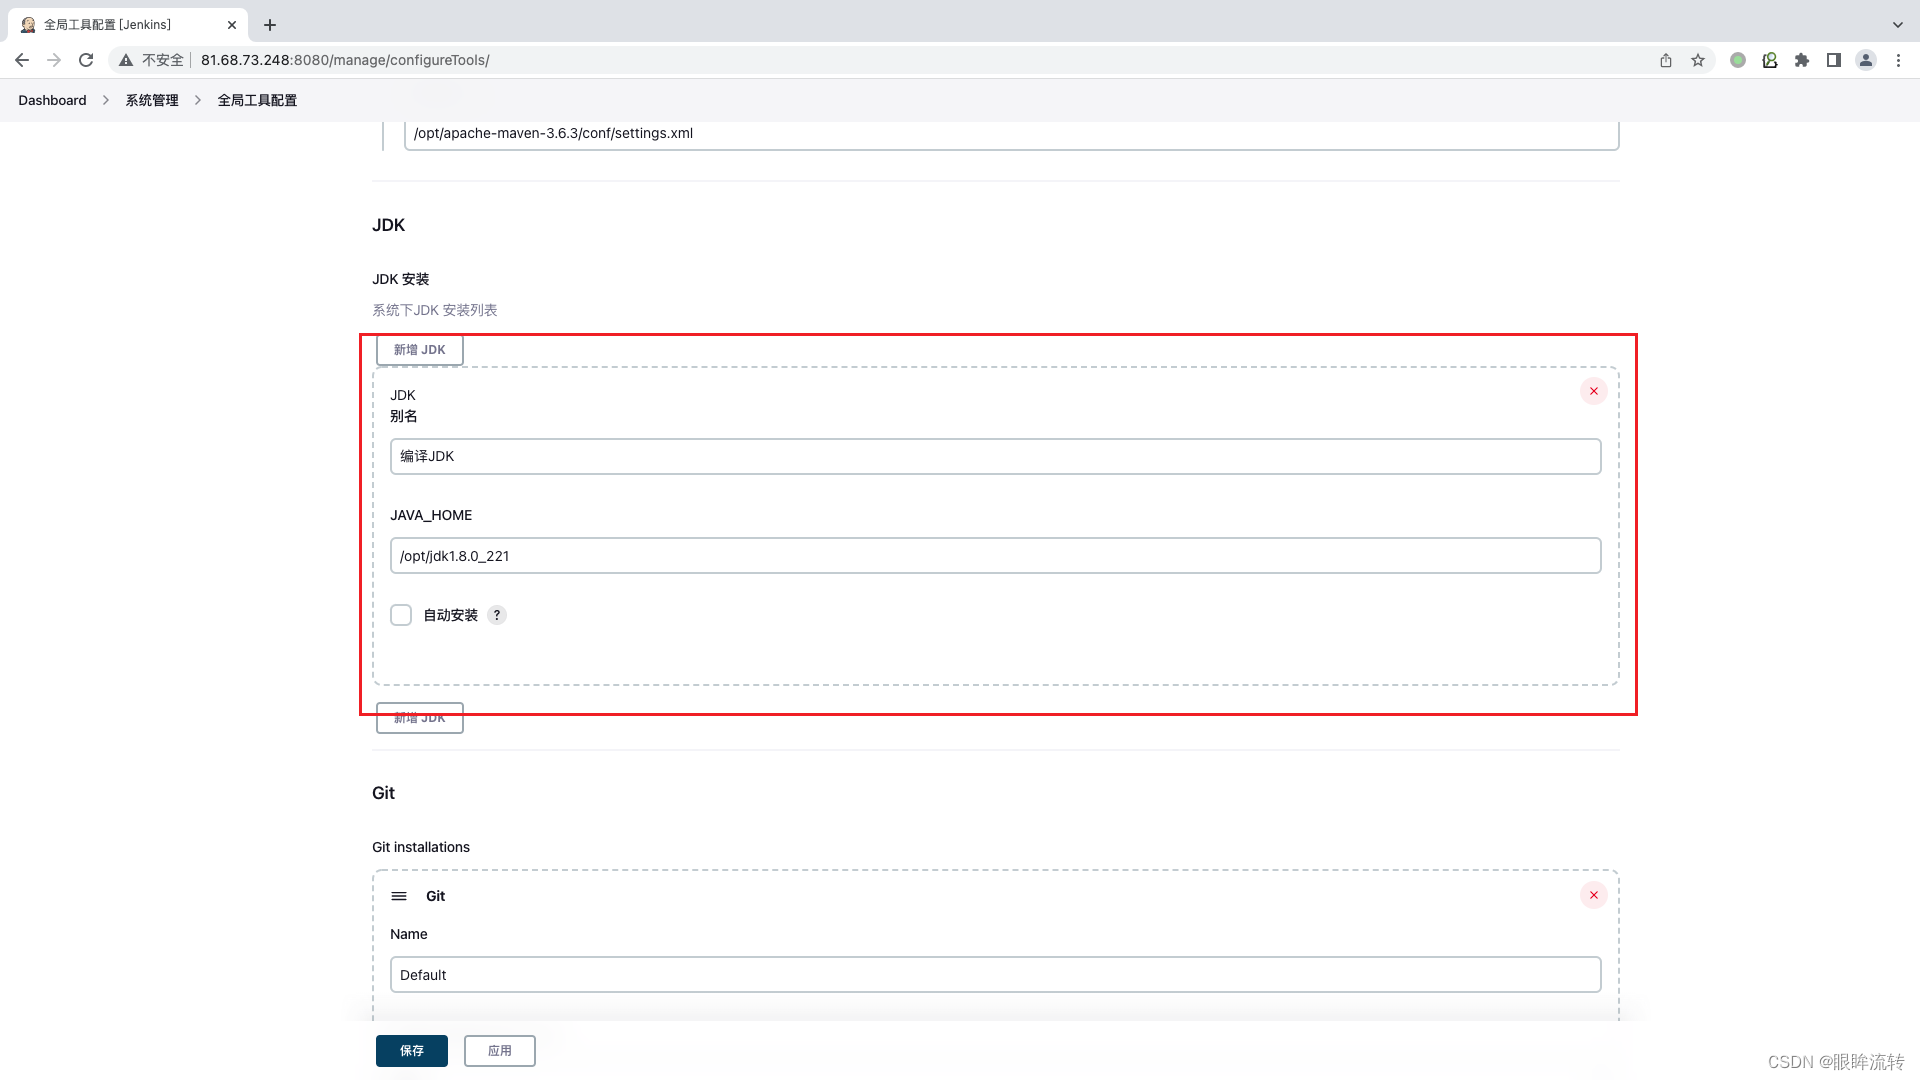

jenkins->系统配置

添加构建步骤

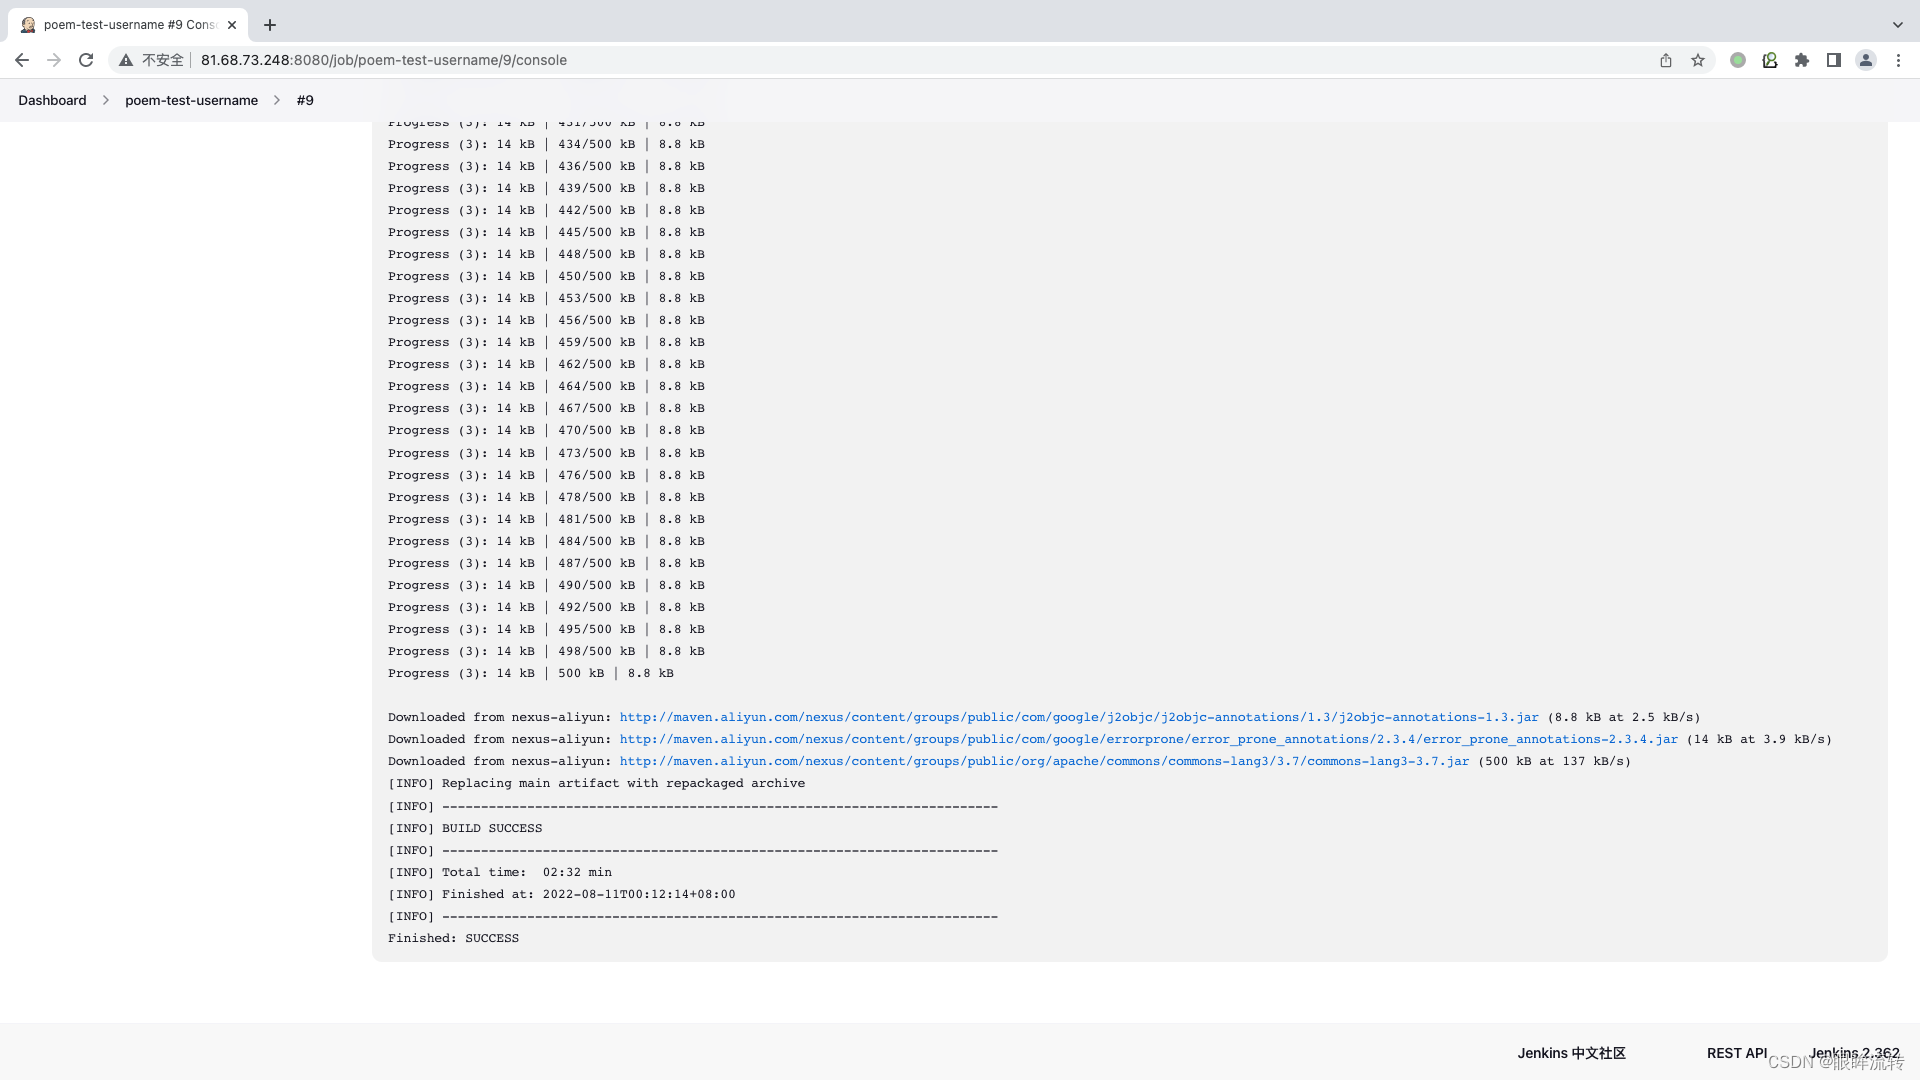
测试
10、配置tomcat
注意服务器需要有jdk
tar -zxvf apache-tomcat-9.0.50.tar.gz
/opt/apache-tomcat-9.0.50/bin/startup.sh
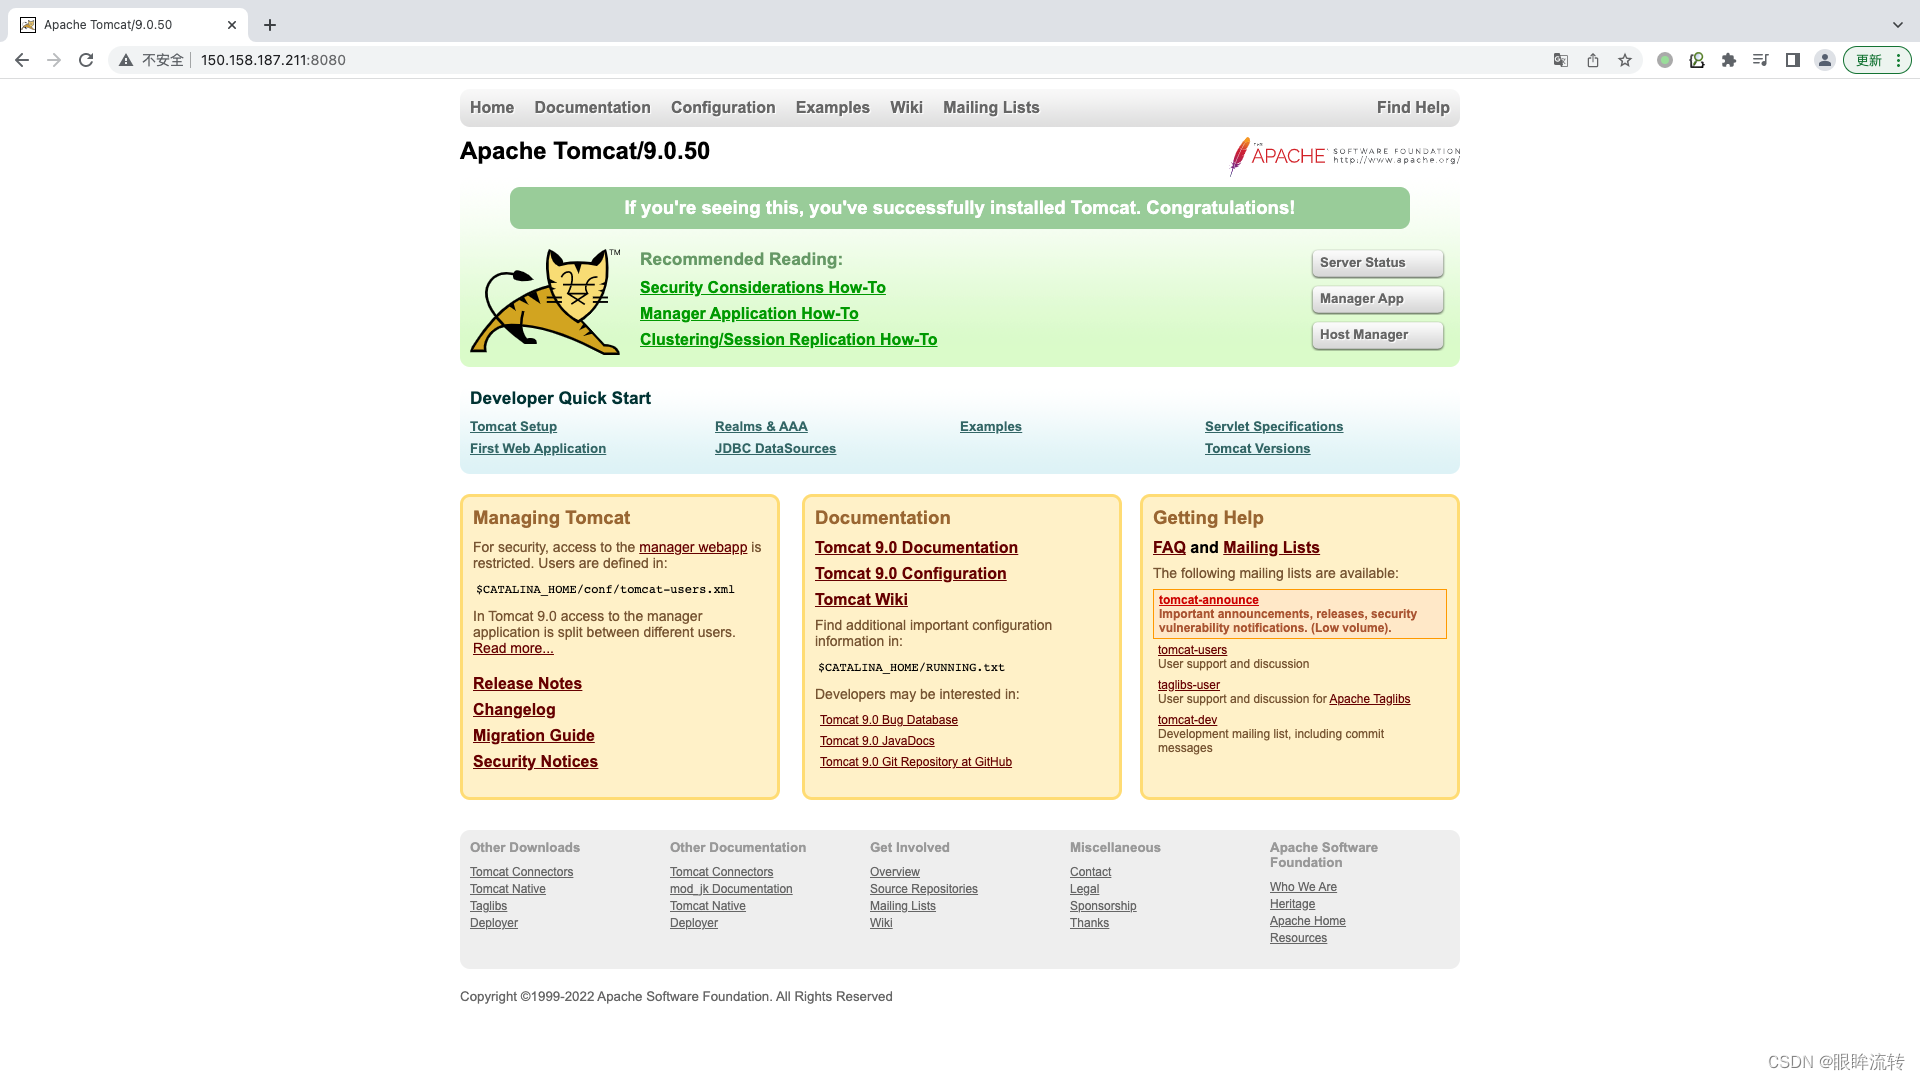
为tomcat配置用户角色权限
vim /opt/apache-tomcat-9.0.50/conf/tomcat-users.xml
<!-- Inside <CATALINA_HOME>/conf/tomcat-users.xml -->
<!-- Inside the <tomcat-users> element --><!-- Roles for Web Application Manager /manager/html/ -->
<role rolename="manager-gui" />
<role rolename="manager-script" />
<role rolename="manager-jmx" />
<role rolename="manager-status" />
<!-- Role for Virtual Host Manager /host-manager/html/ -->
<role rolename="admin-gui" /><!-- Create user and assign roles -->
<user username="jenkins" password="xumeng" roles="manager-script,manager-gui,manager-jmx,manager-status,admin-gui" />
12345678910111213
vim /opt/apache-tomcat-9.0.50/webapps/manager/META-INF/context.xml
1
<?xml version="1.0" encoding="UTF-8"?>
<!--Licensed to the Apache Software Foundation (ASF) under one or morecontributor license agreements.  See the NOTICE file distributed withthis work for additional information regarding copyright ownership.The ASF licenses this file to You under the Apache License, Version 2.0(the "License"); you may not use this file except in compliance withthe License.  You may obtain a copy of the License athttp://www.apache.org/licenses/LICENSE-2.0Unless required by applicable law or agreed to in writing, softwaredistributed under the License is distributed on an "AS IS" BASIS,WITHOUT WARRANTIES OR CONDITIONS OF ANY KIND, either express or implied.See the License for the specific language governing permissions andlimitations under the License.
-->
<Context antiResourceLocking="false" privileged="true" ><CookieProcessor className="org.apache.tomcat.util.http.Rfc6265CookieProcessor"sameSiteCookies="strict" /><Valve className="org.apache.catalina.valves.RemoteAddrValve"allow="127\.\d+\.\d+\.\d+|::1|0:0:0:0:0:0:0:1|\d+\.\d+\.\d+\.\d+" /><Manager sessionAttributeValueClassNameFilter="java\.lang\.(?:Boolean|Integer|Long|Number|String)|org\.apache\.catalina\.filters\.CsrfPreventionFilter\$LruCache(?:\$1)?|java\.util\.(?:Linked)?HashMap"/>
</Context>
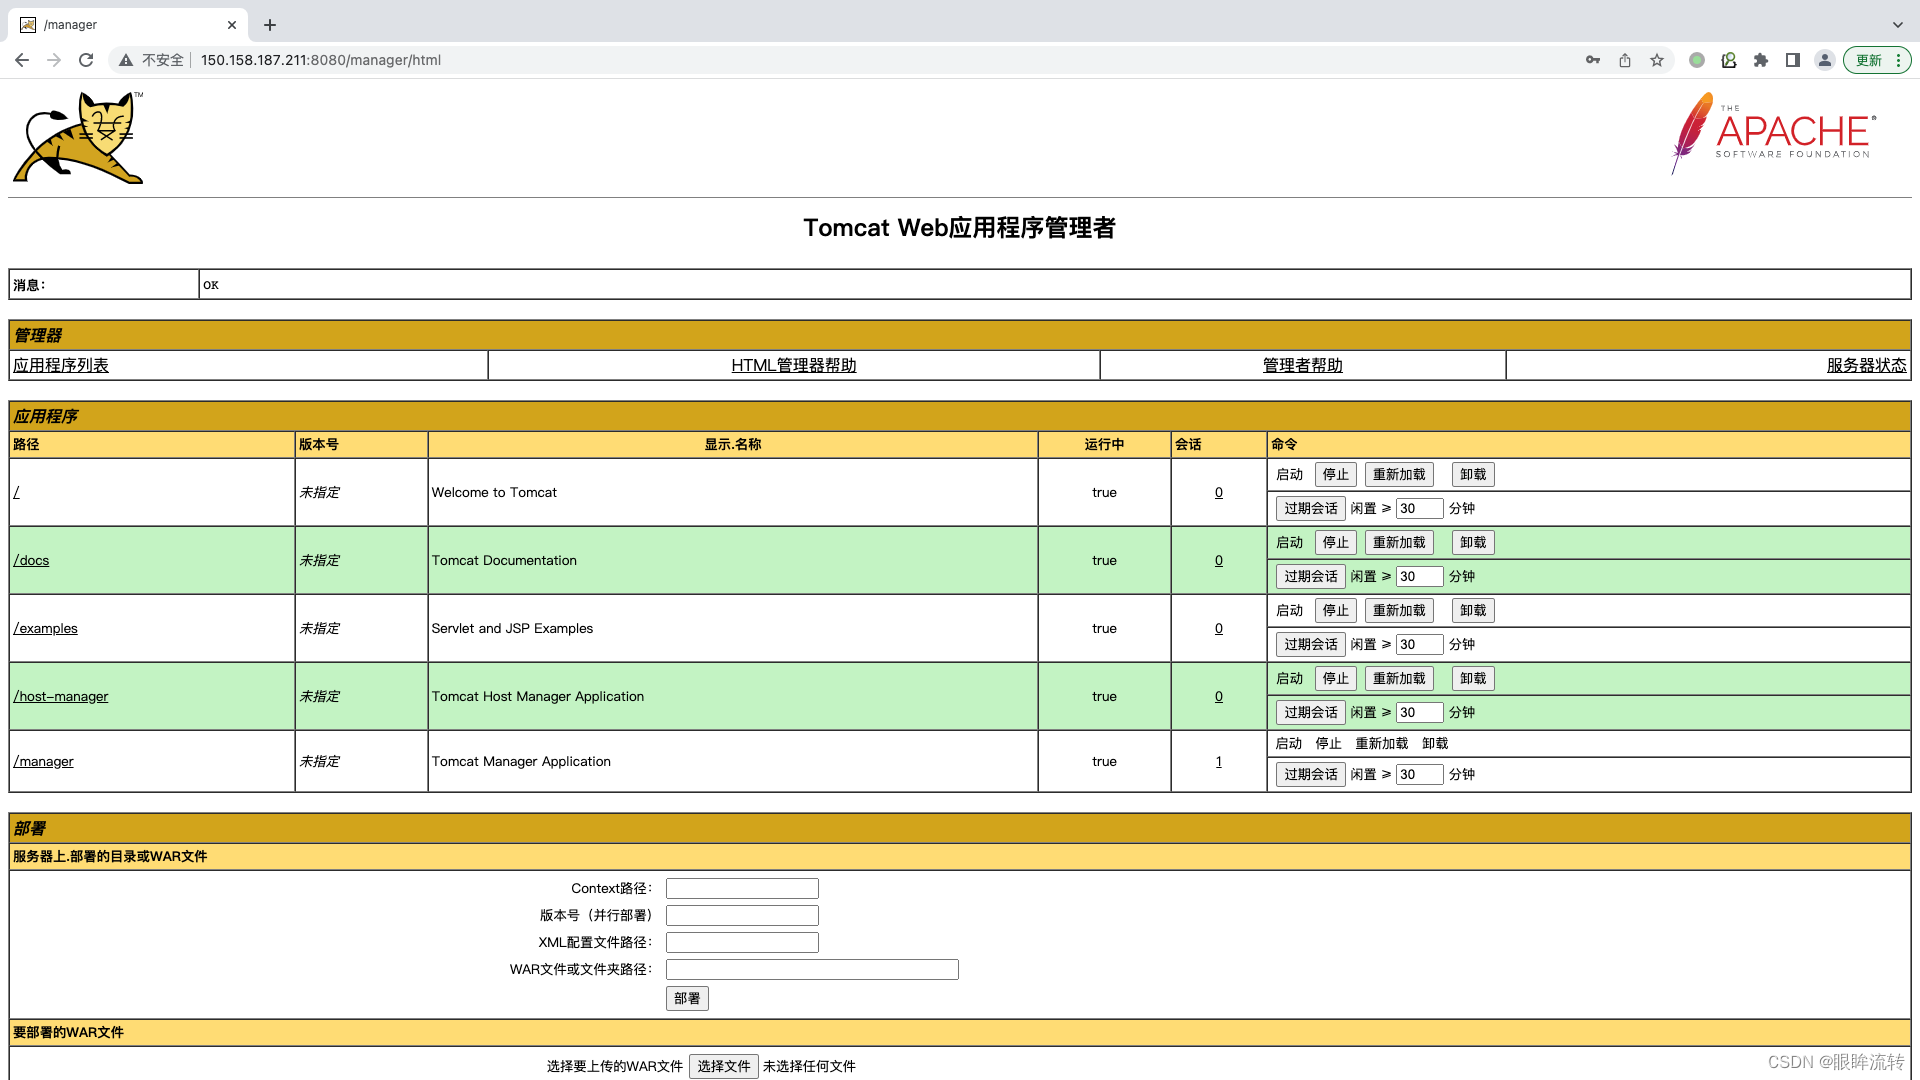
重启输入账户密码即可进入tomcat管理界面
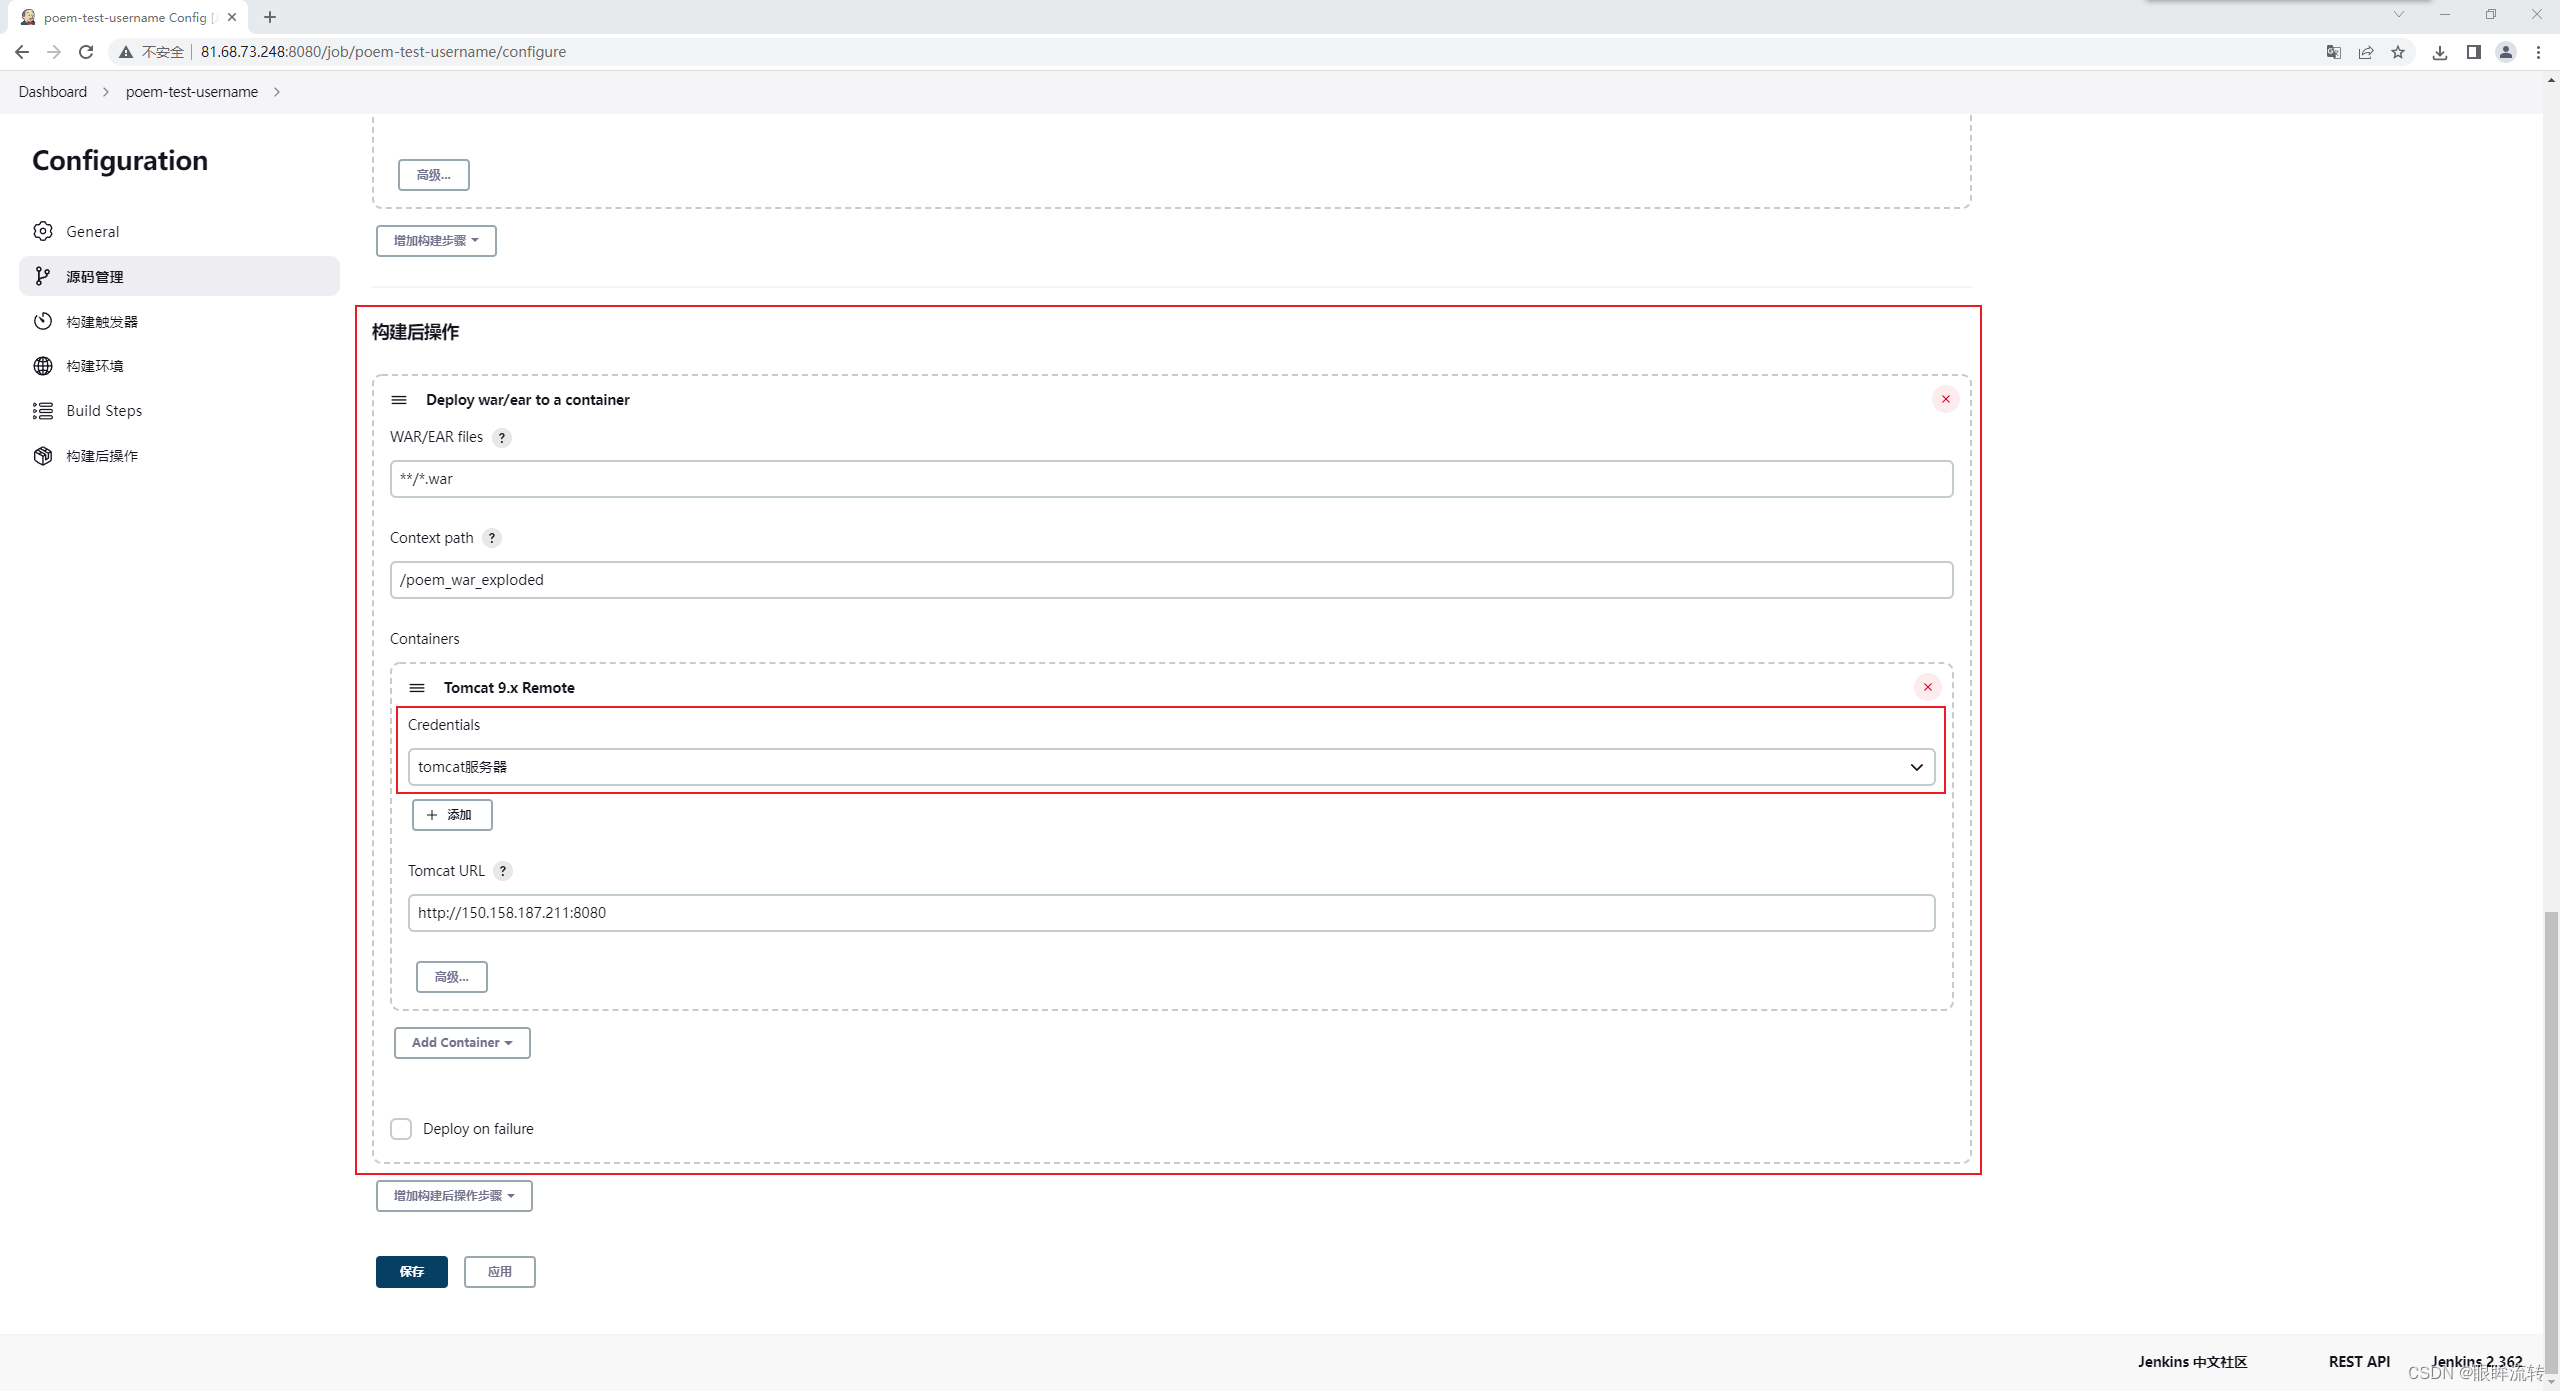
配置好登陆进去后回到jenkins配置构建后的步骤(Credentials中填写的是tomcat中填写的账号密码
立即构建
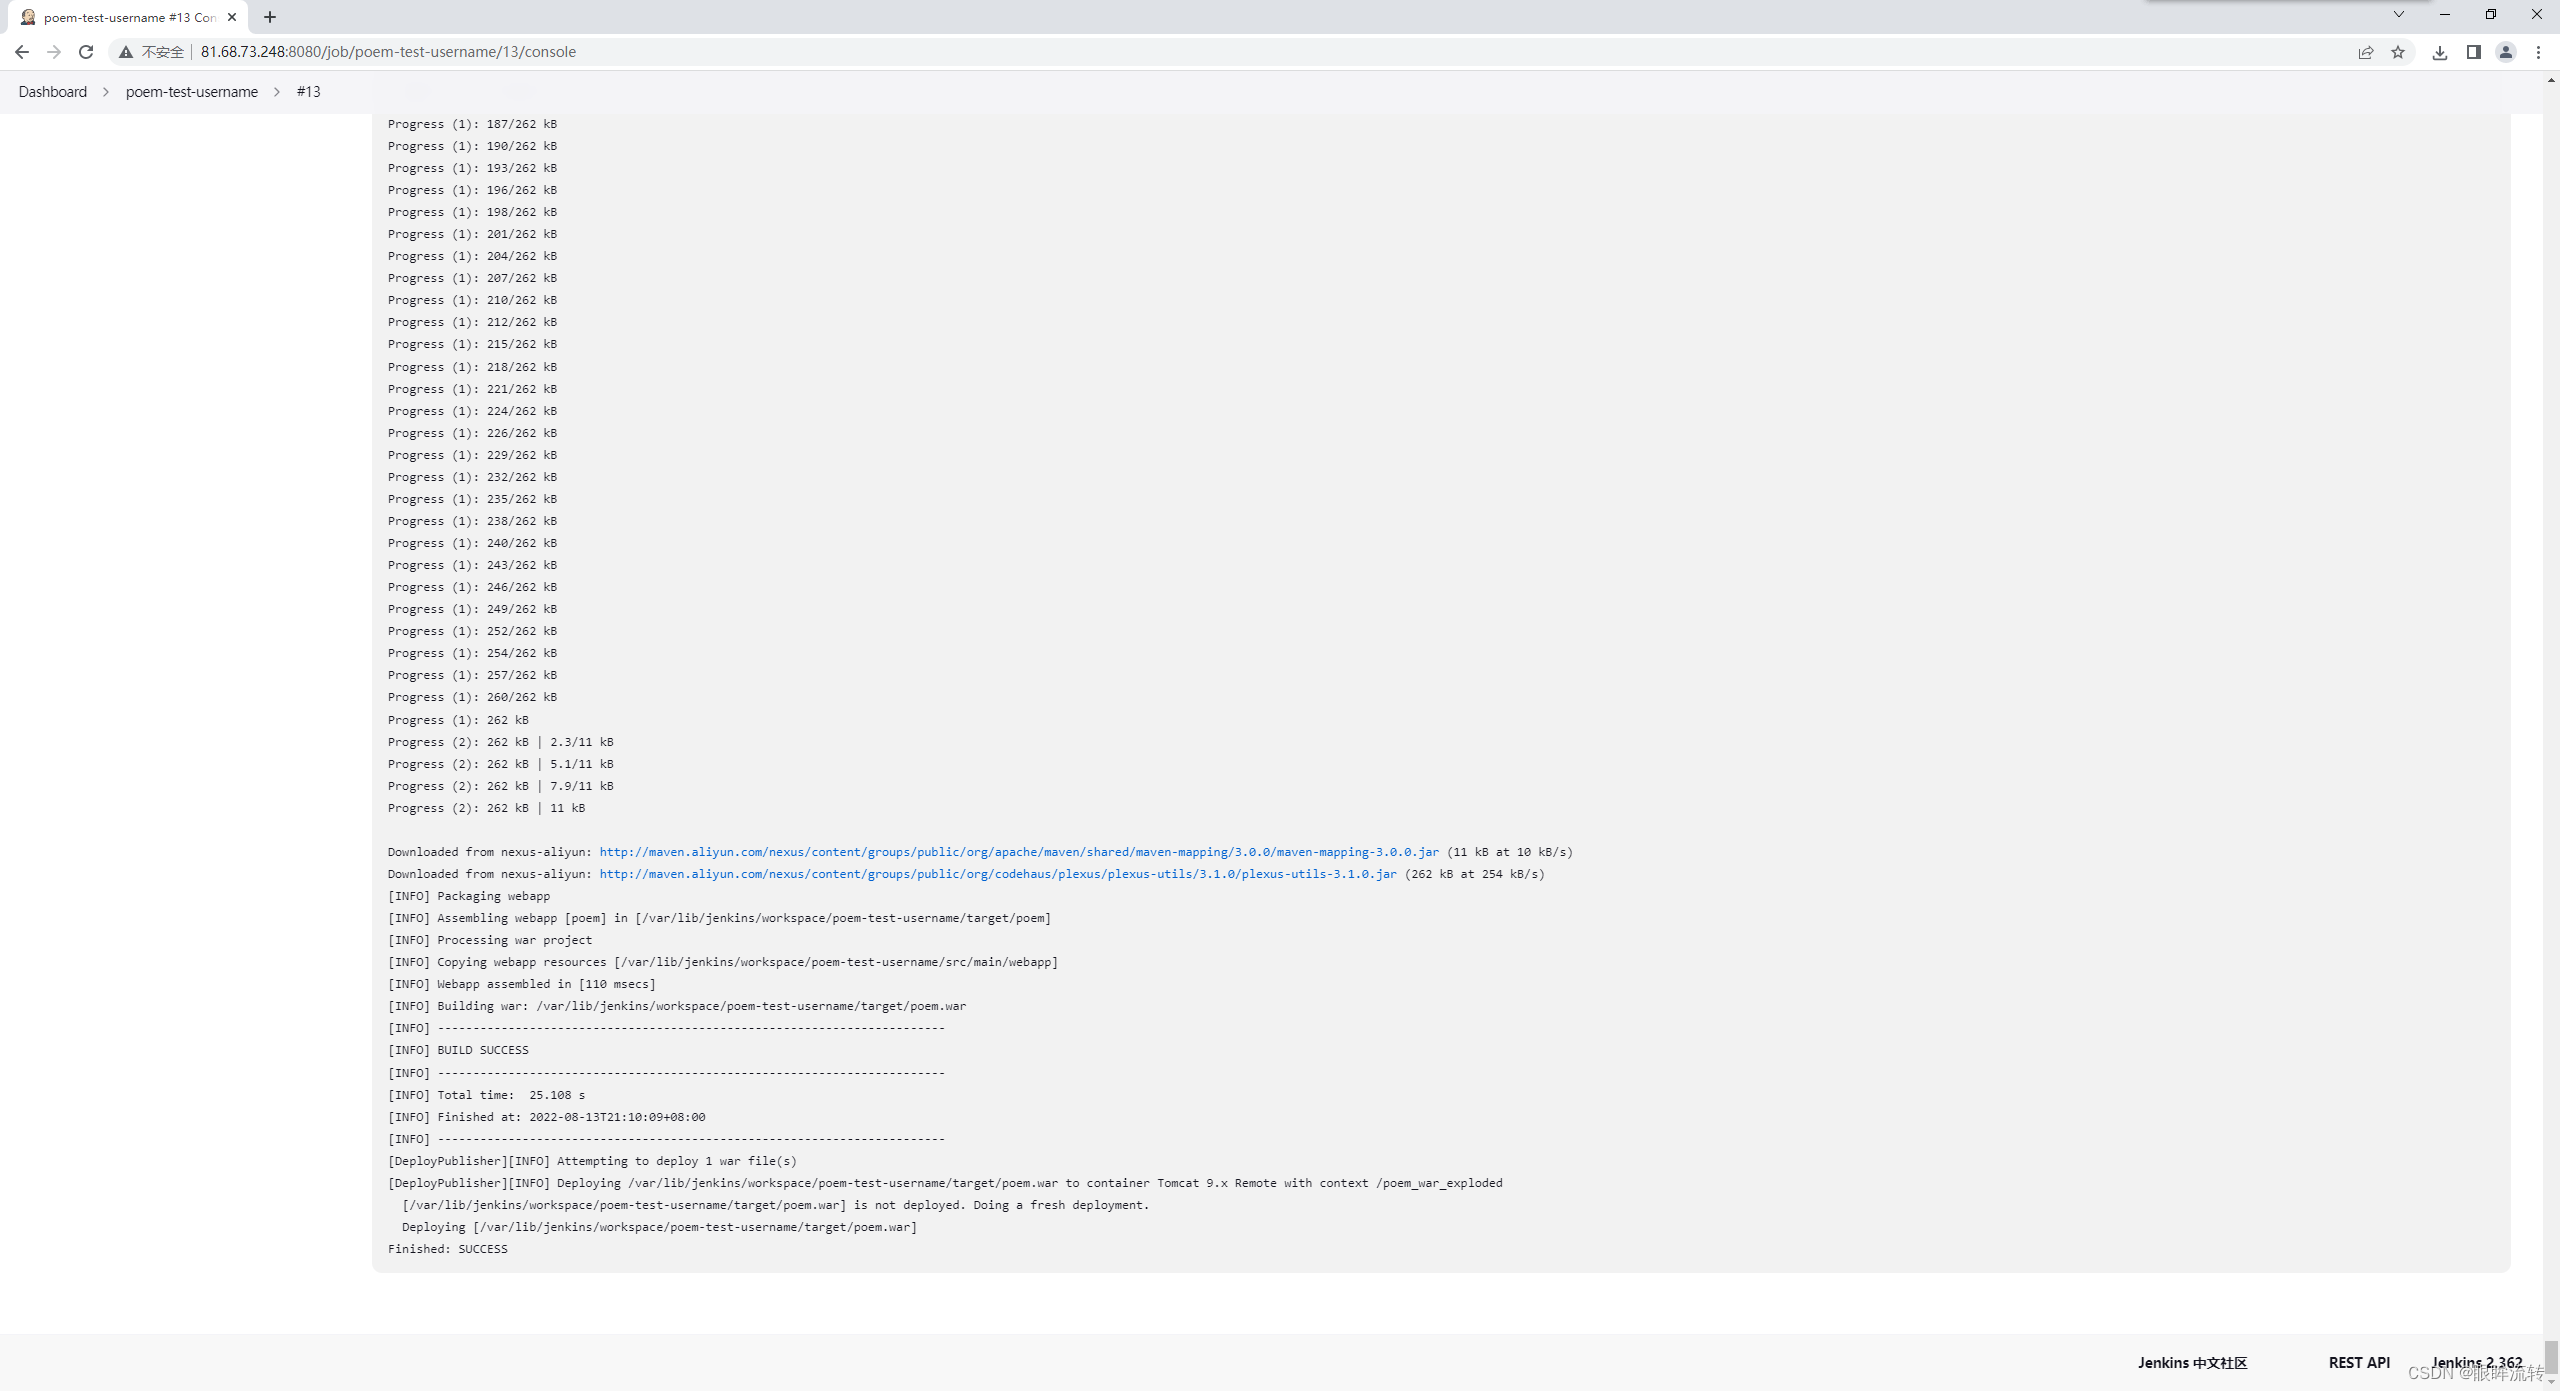
构建成功后去tomcat查看


在编译器中改变代码,提交到gitlab,重新构建

11、Pipeline
就是一套运行在 Jenkins 上的工作流框架,将原来独立运行于单个或者多个节点 的任务连接起来,实现单个任务难以完成的复杂流程编排和可视化的工作。
语法主要分为两种
- Declarative
- Scripted
Declarative
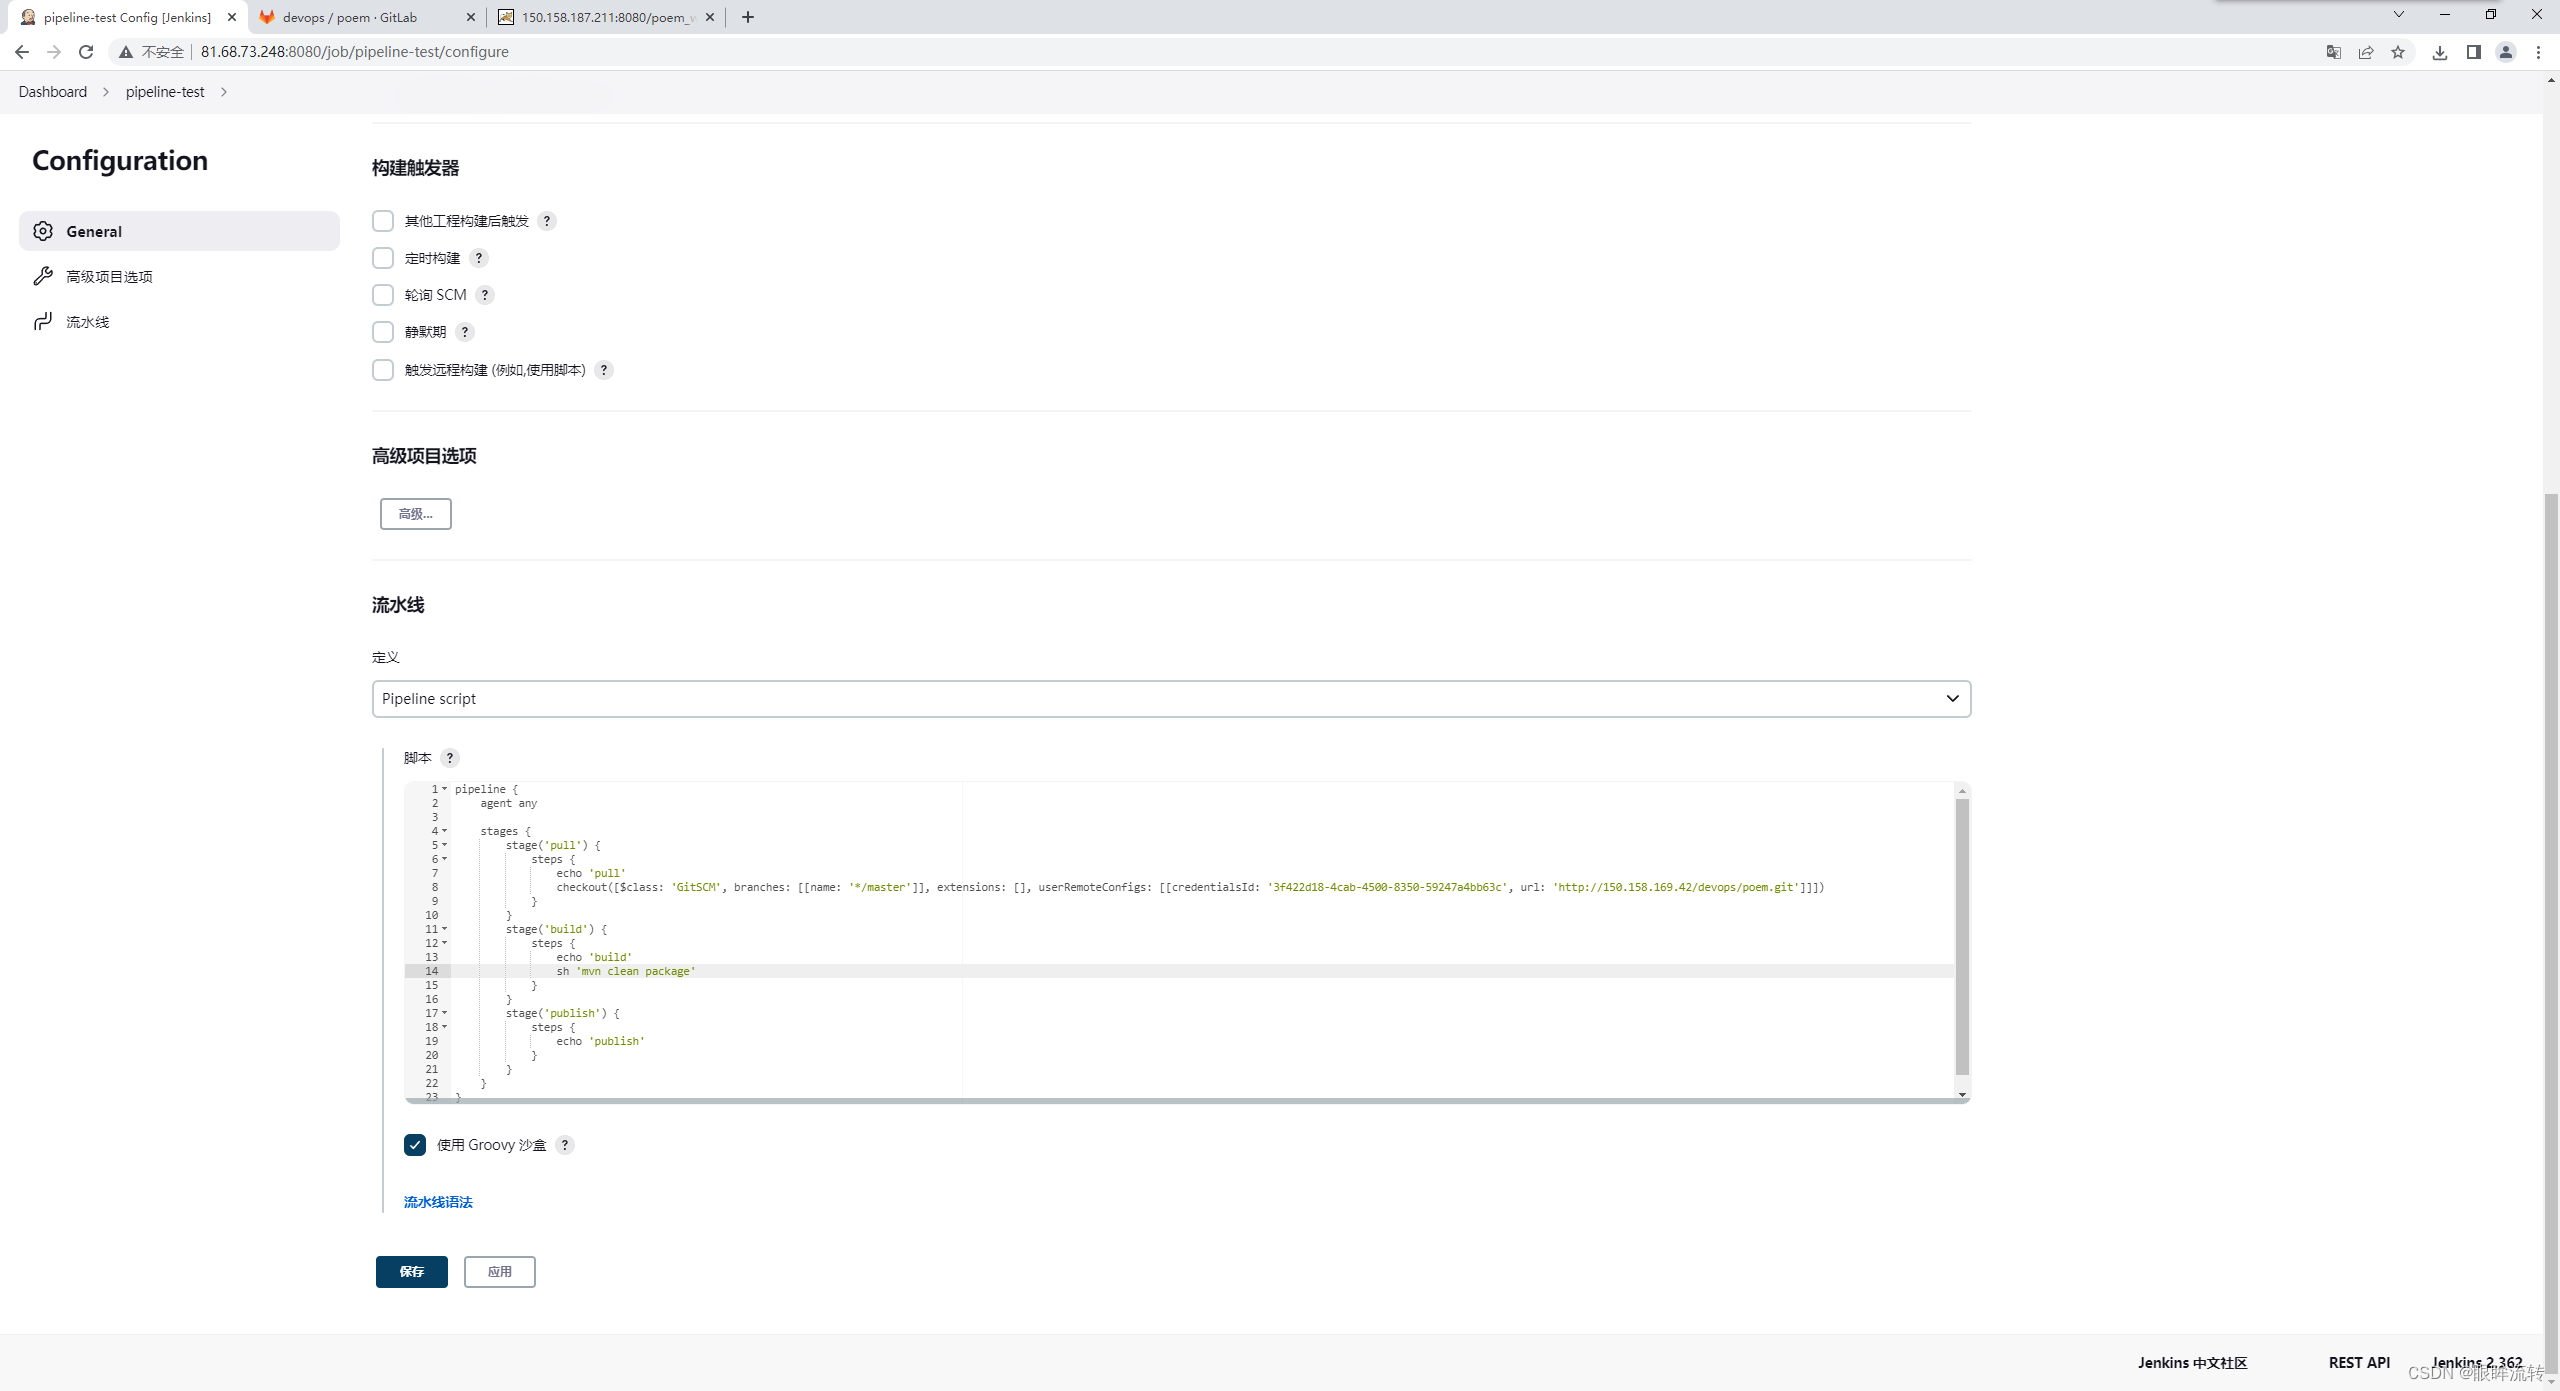
新建流水线项目

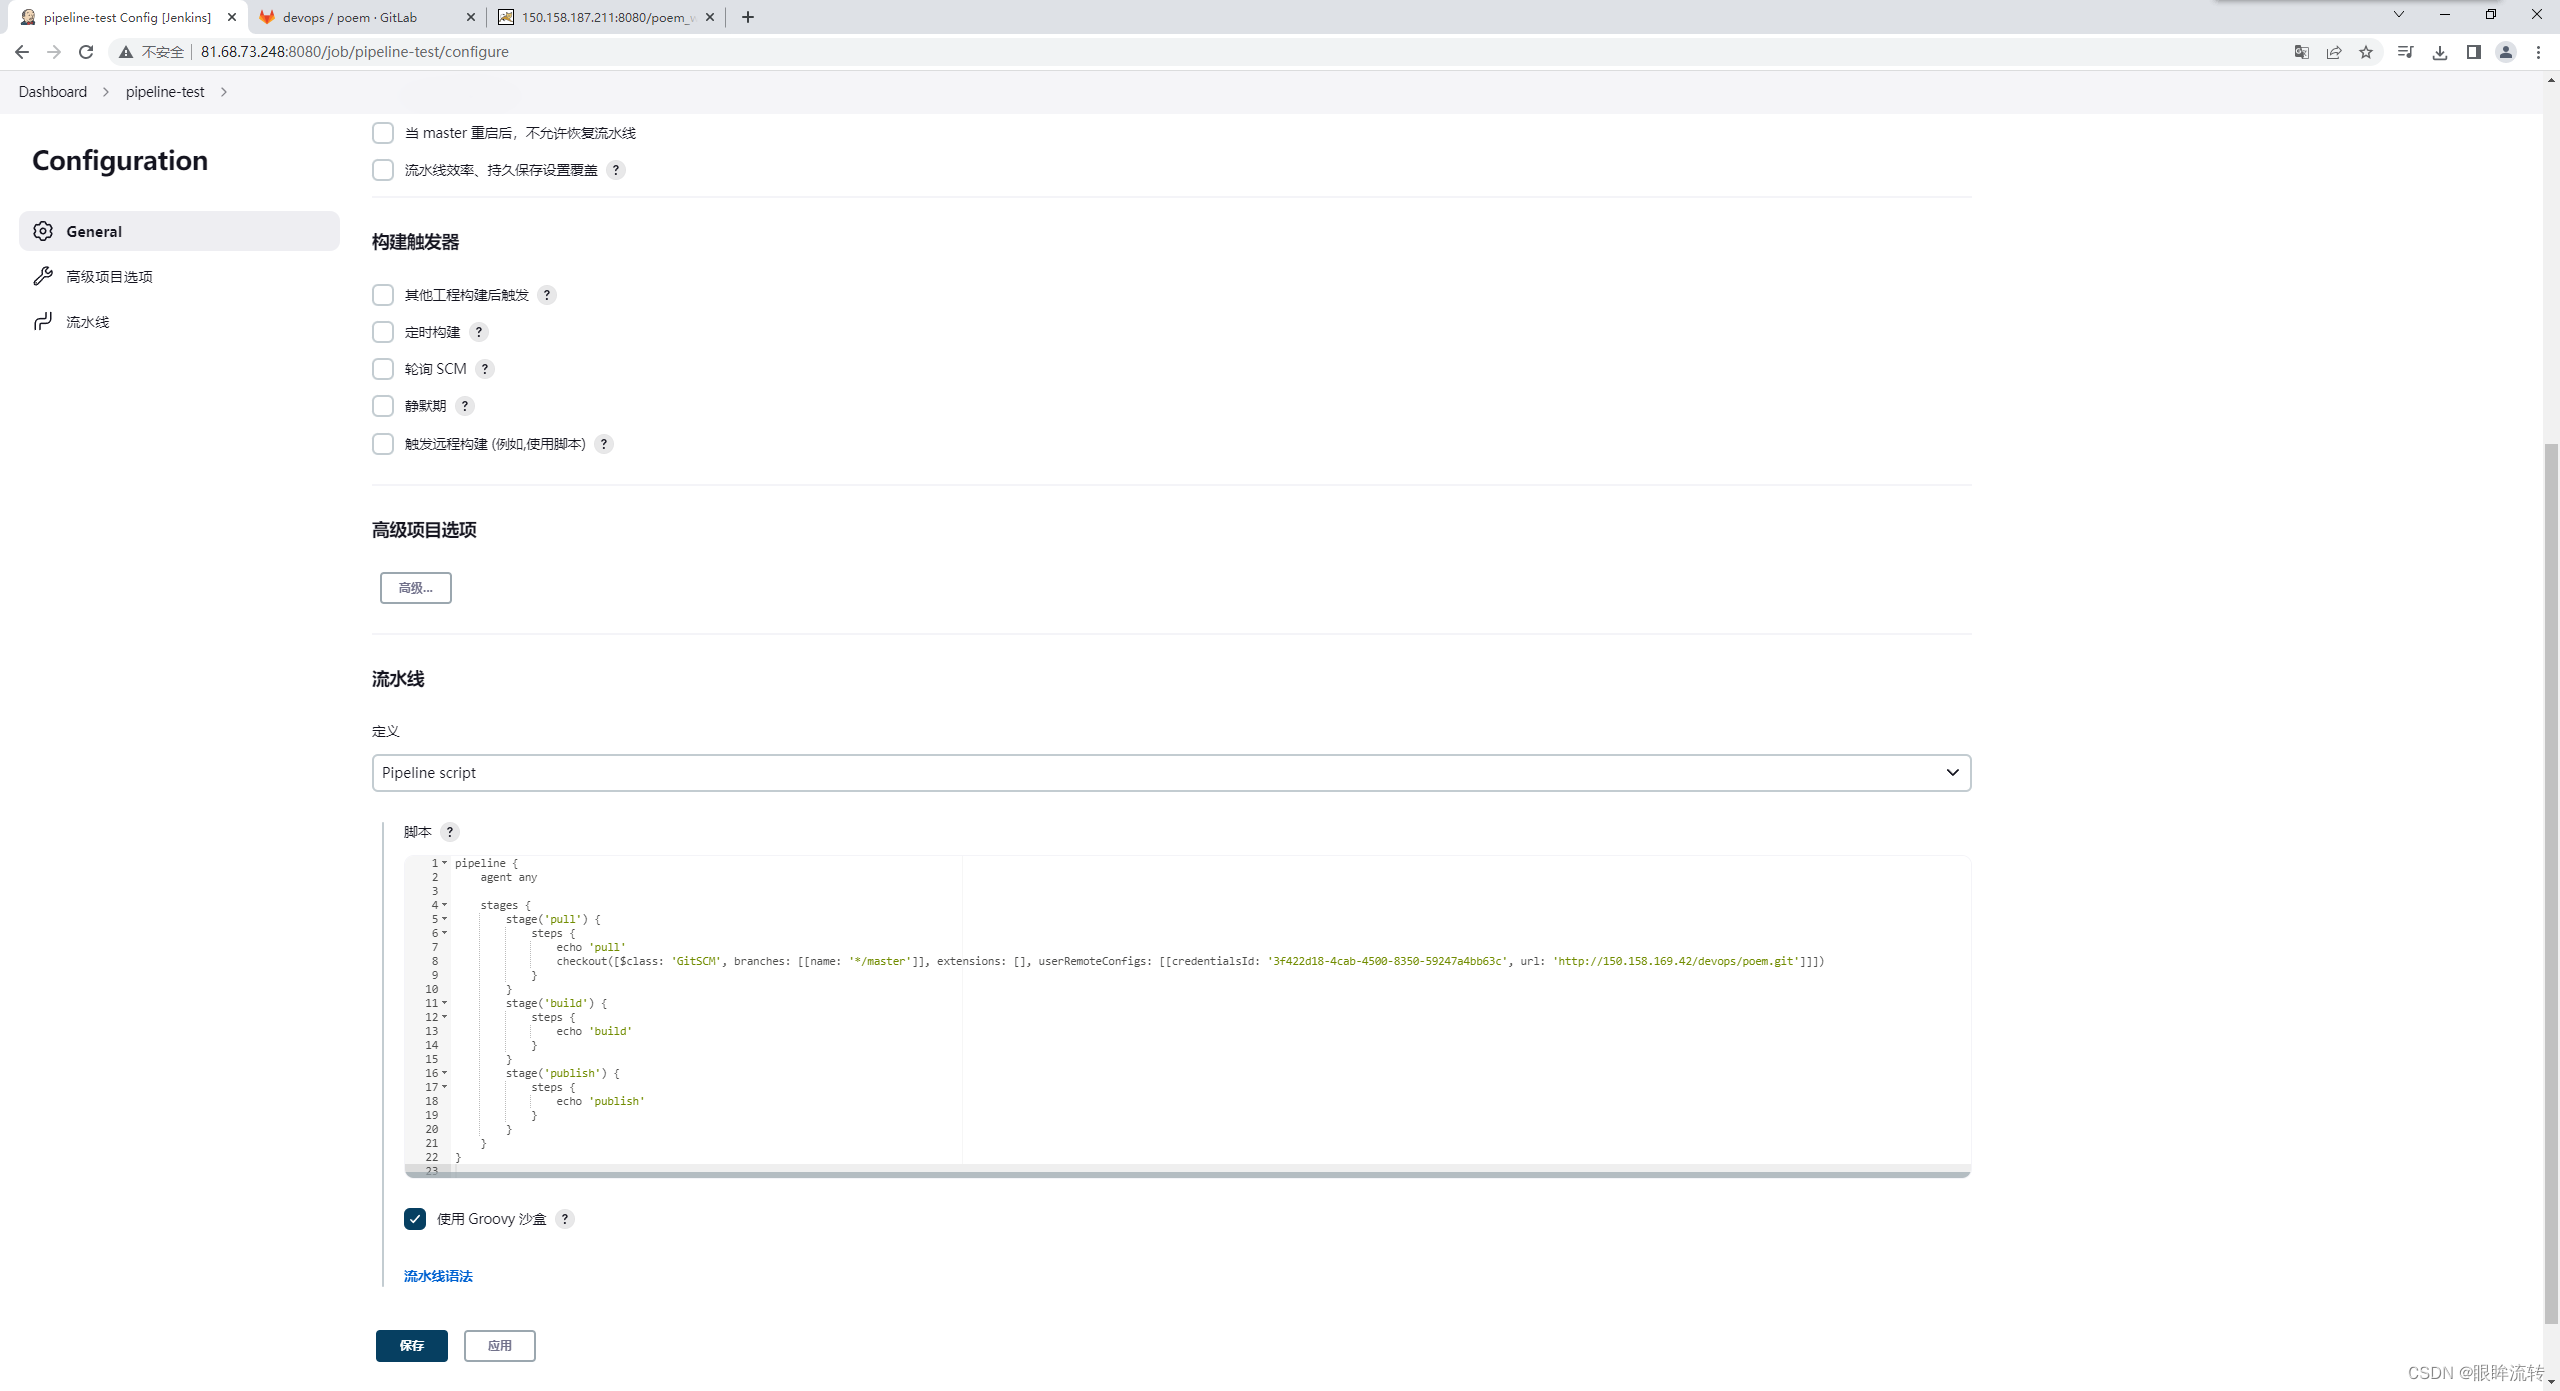
语法形式
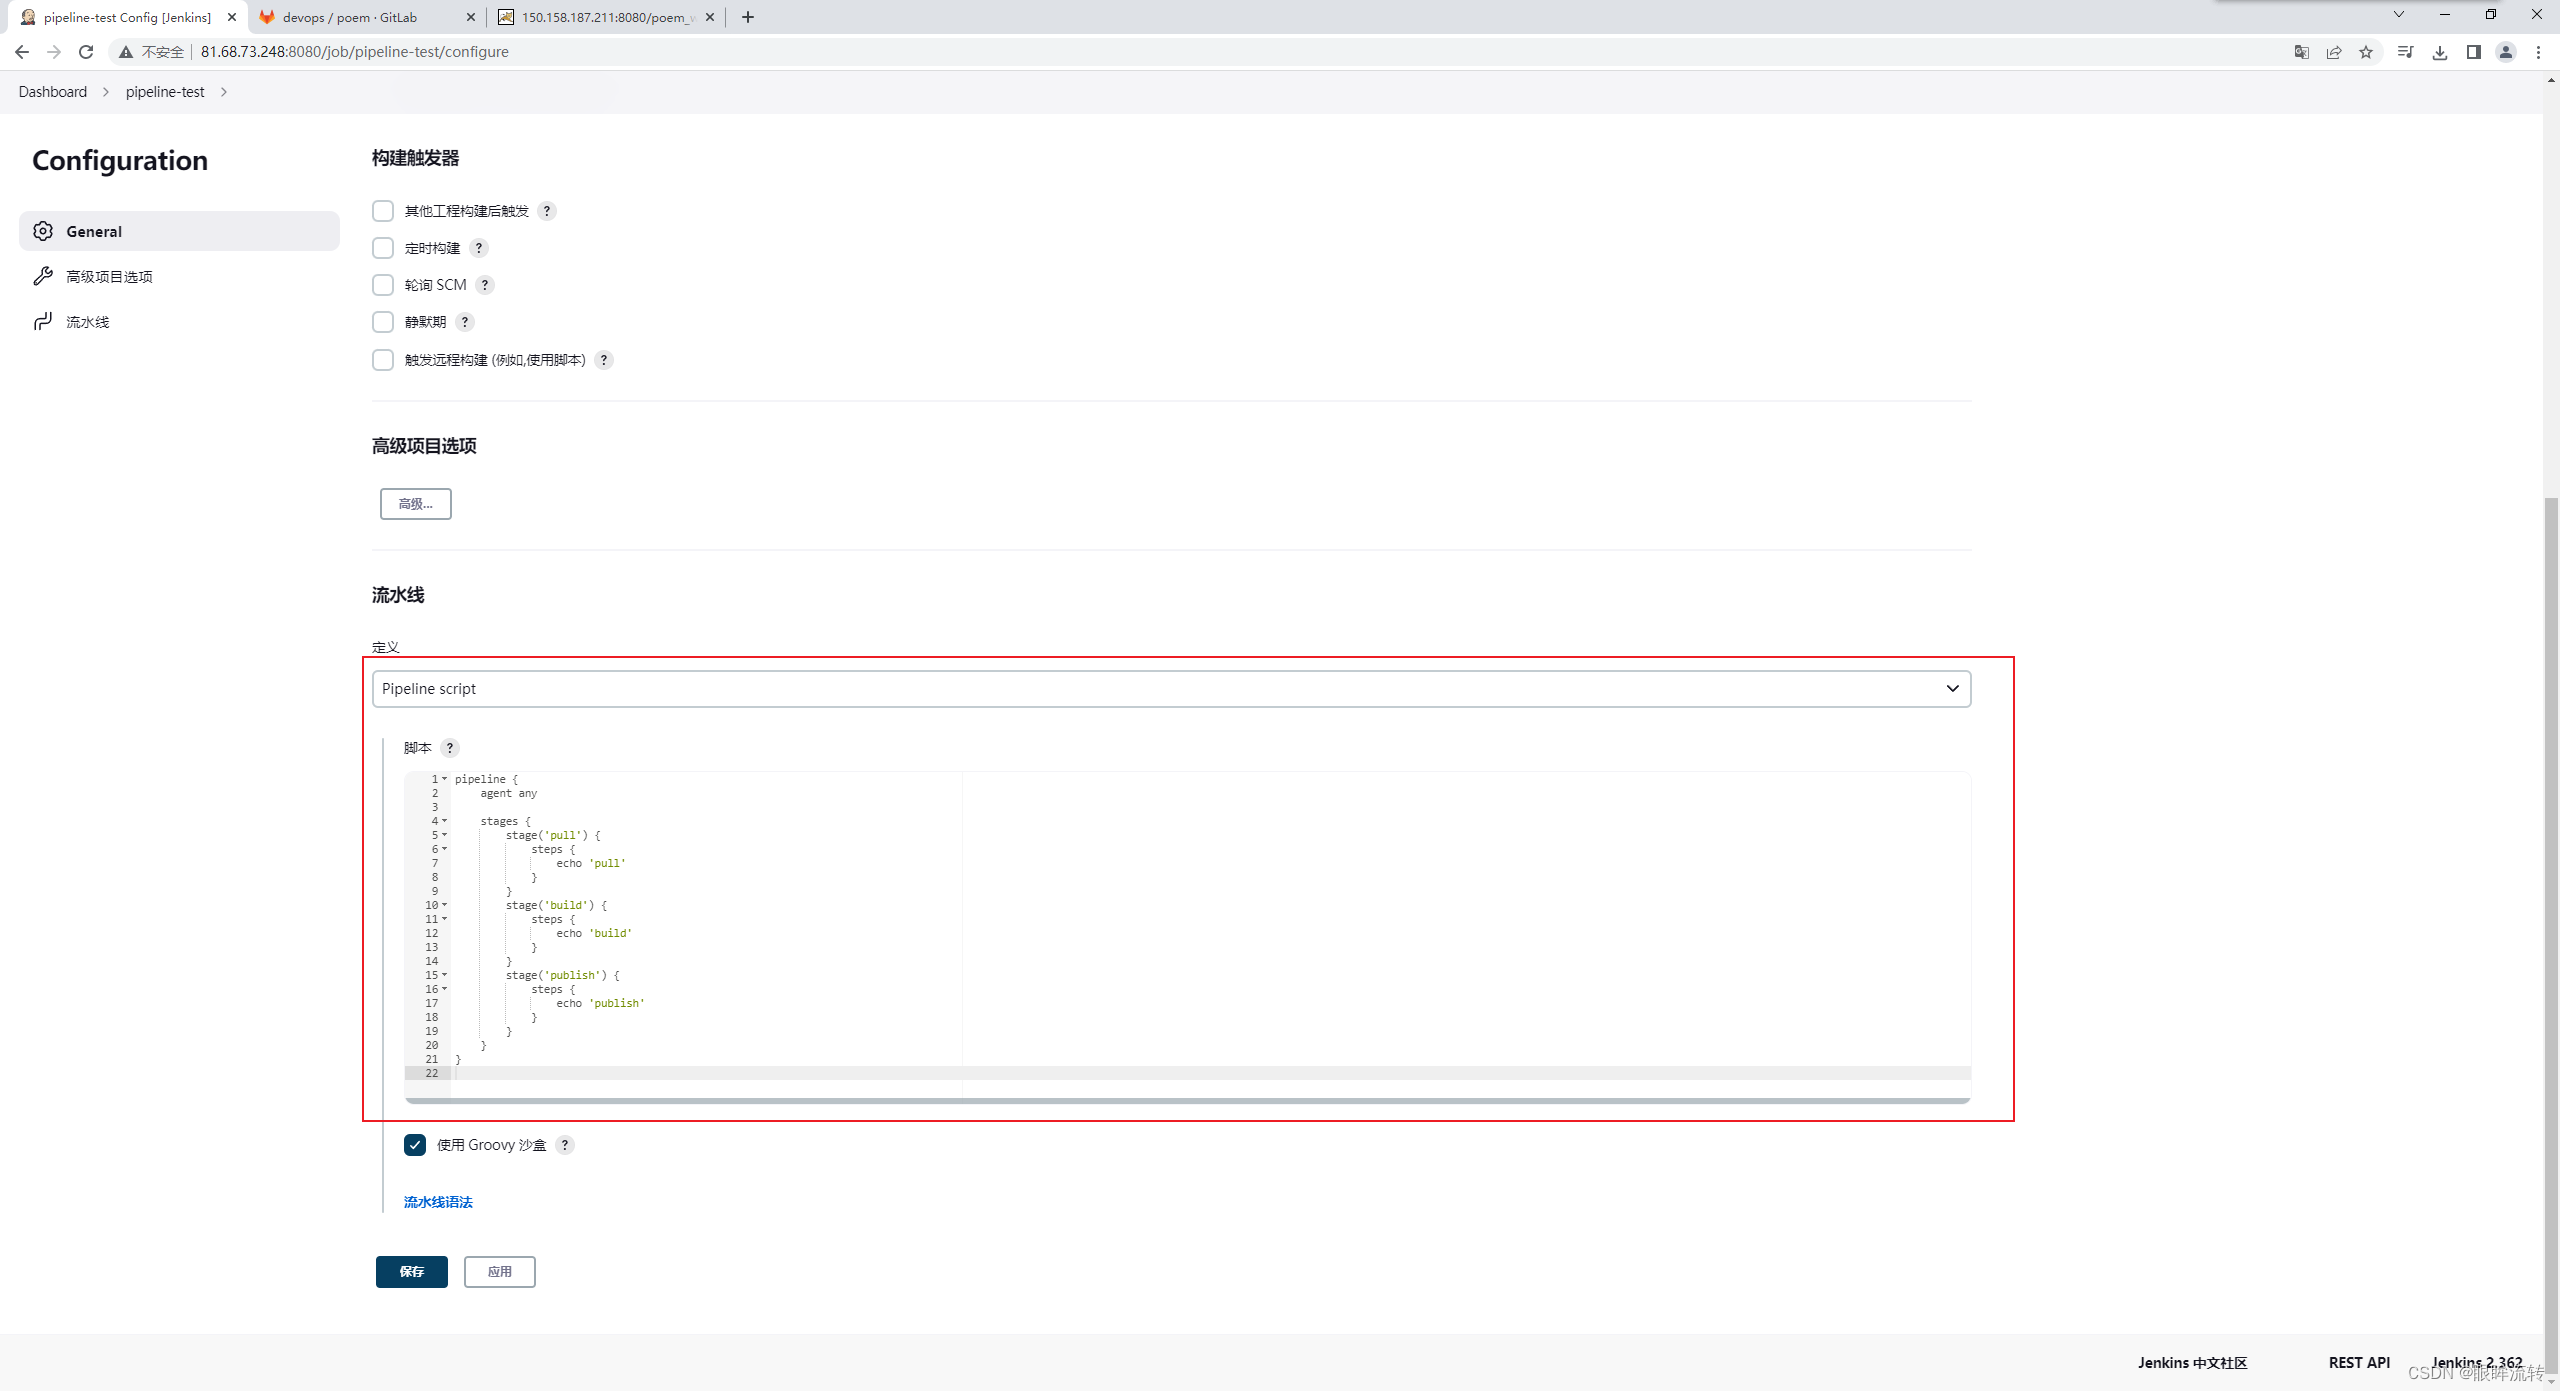
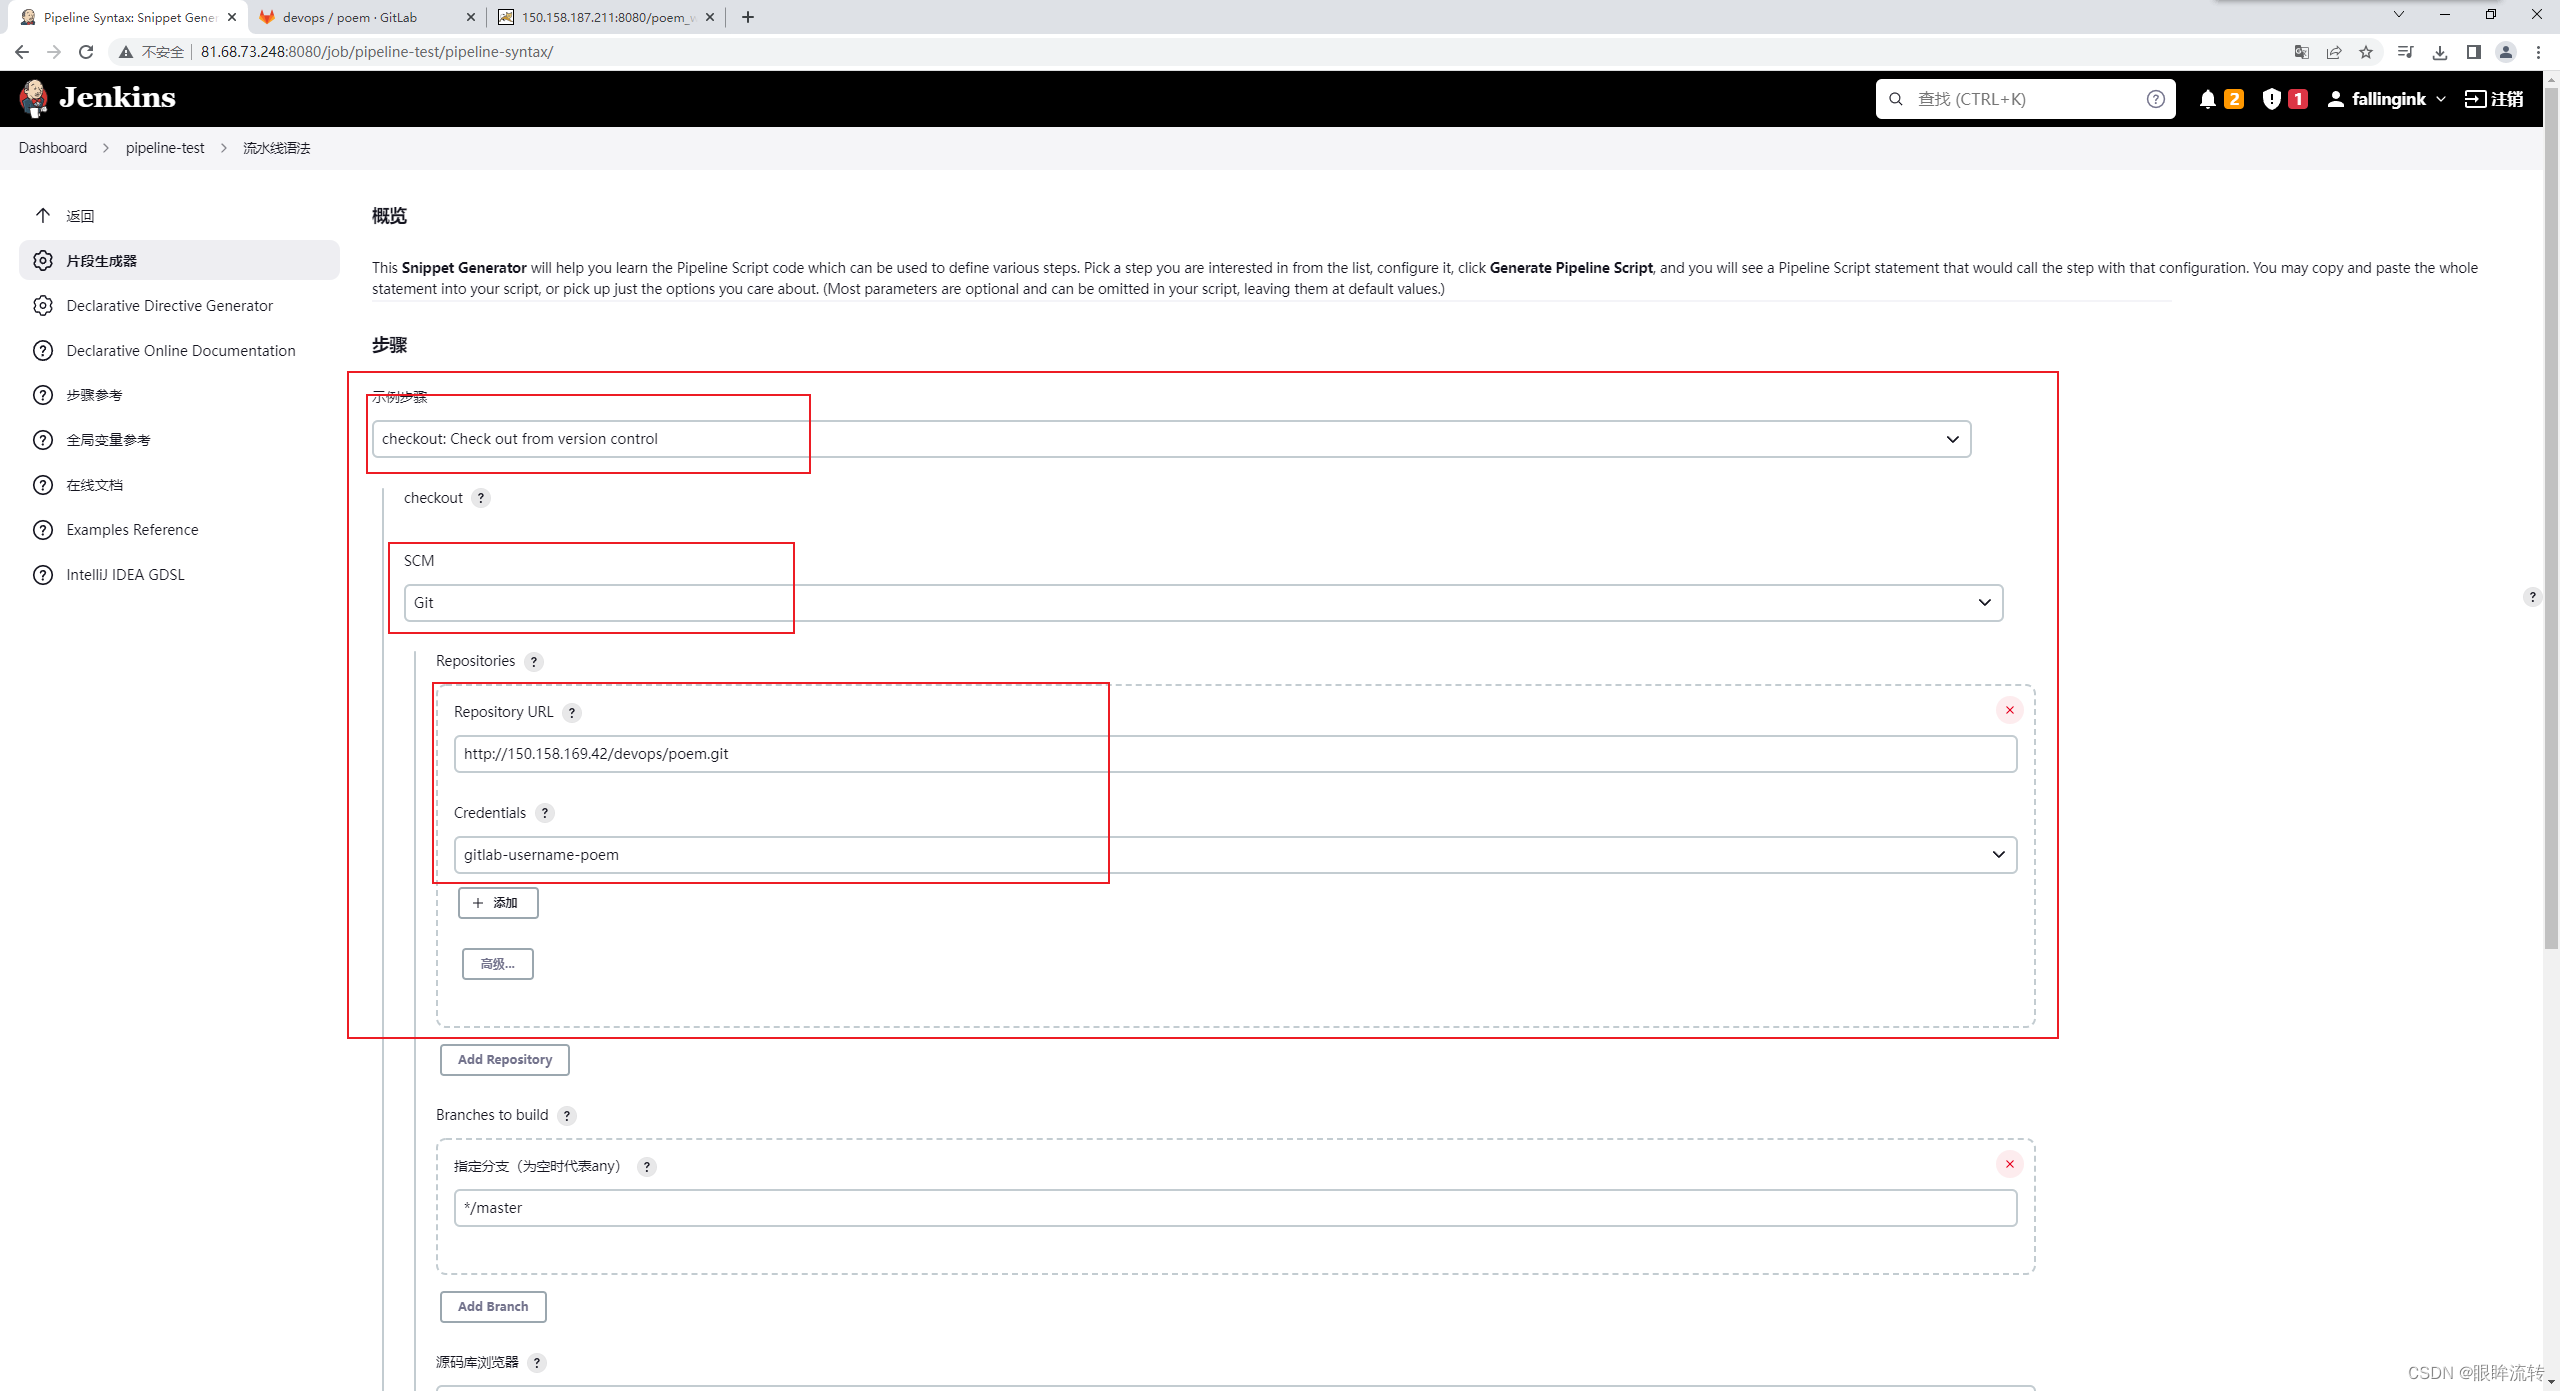
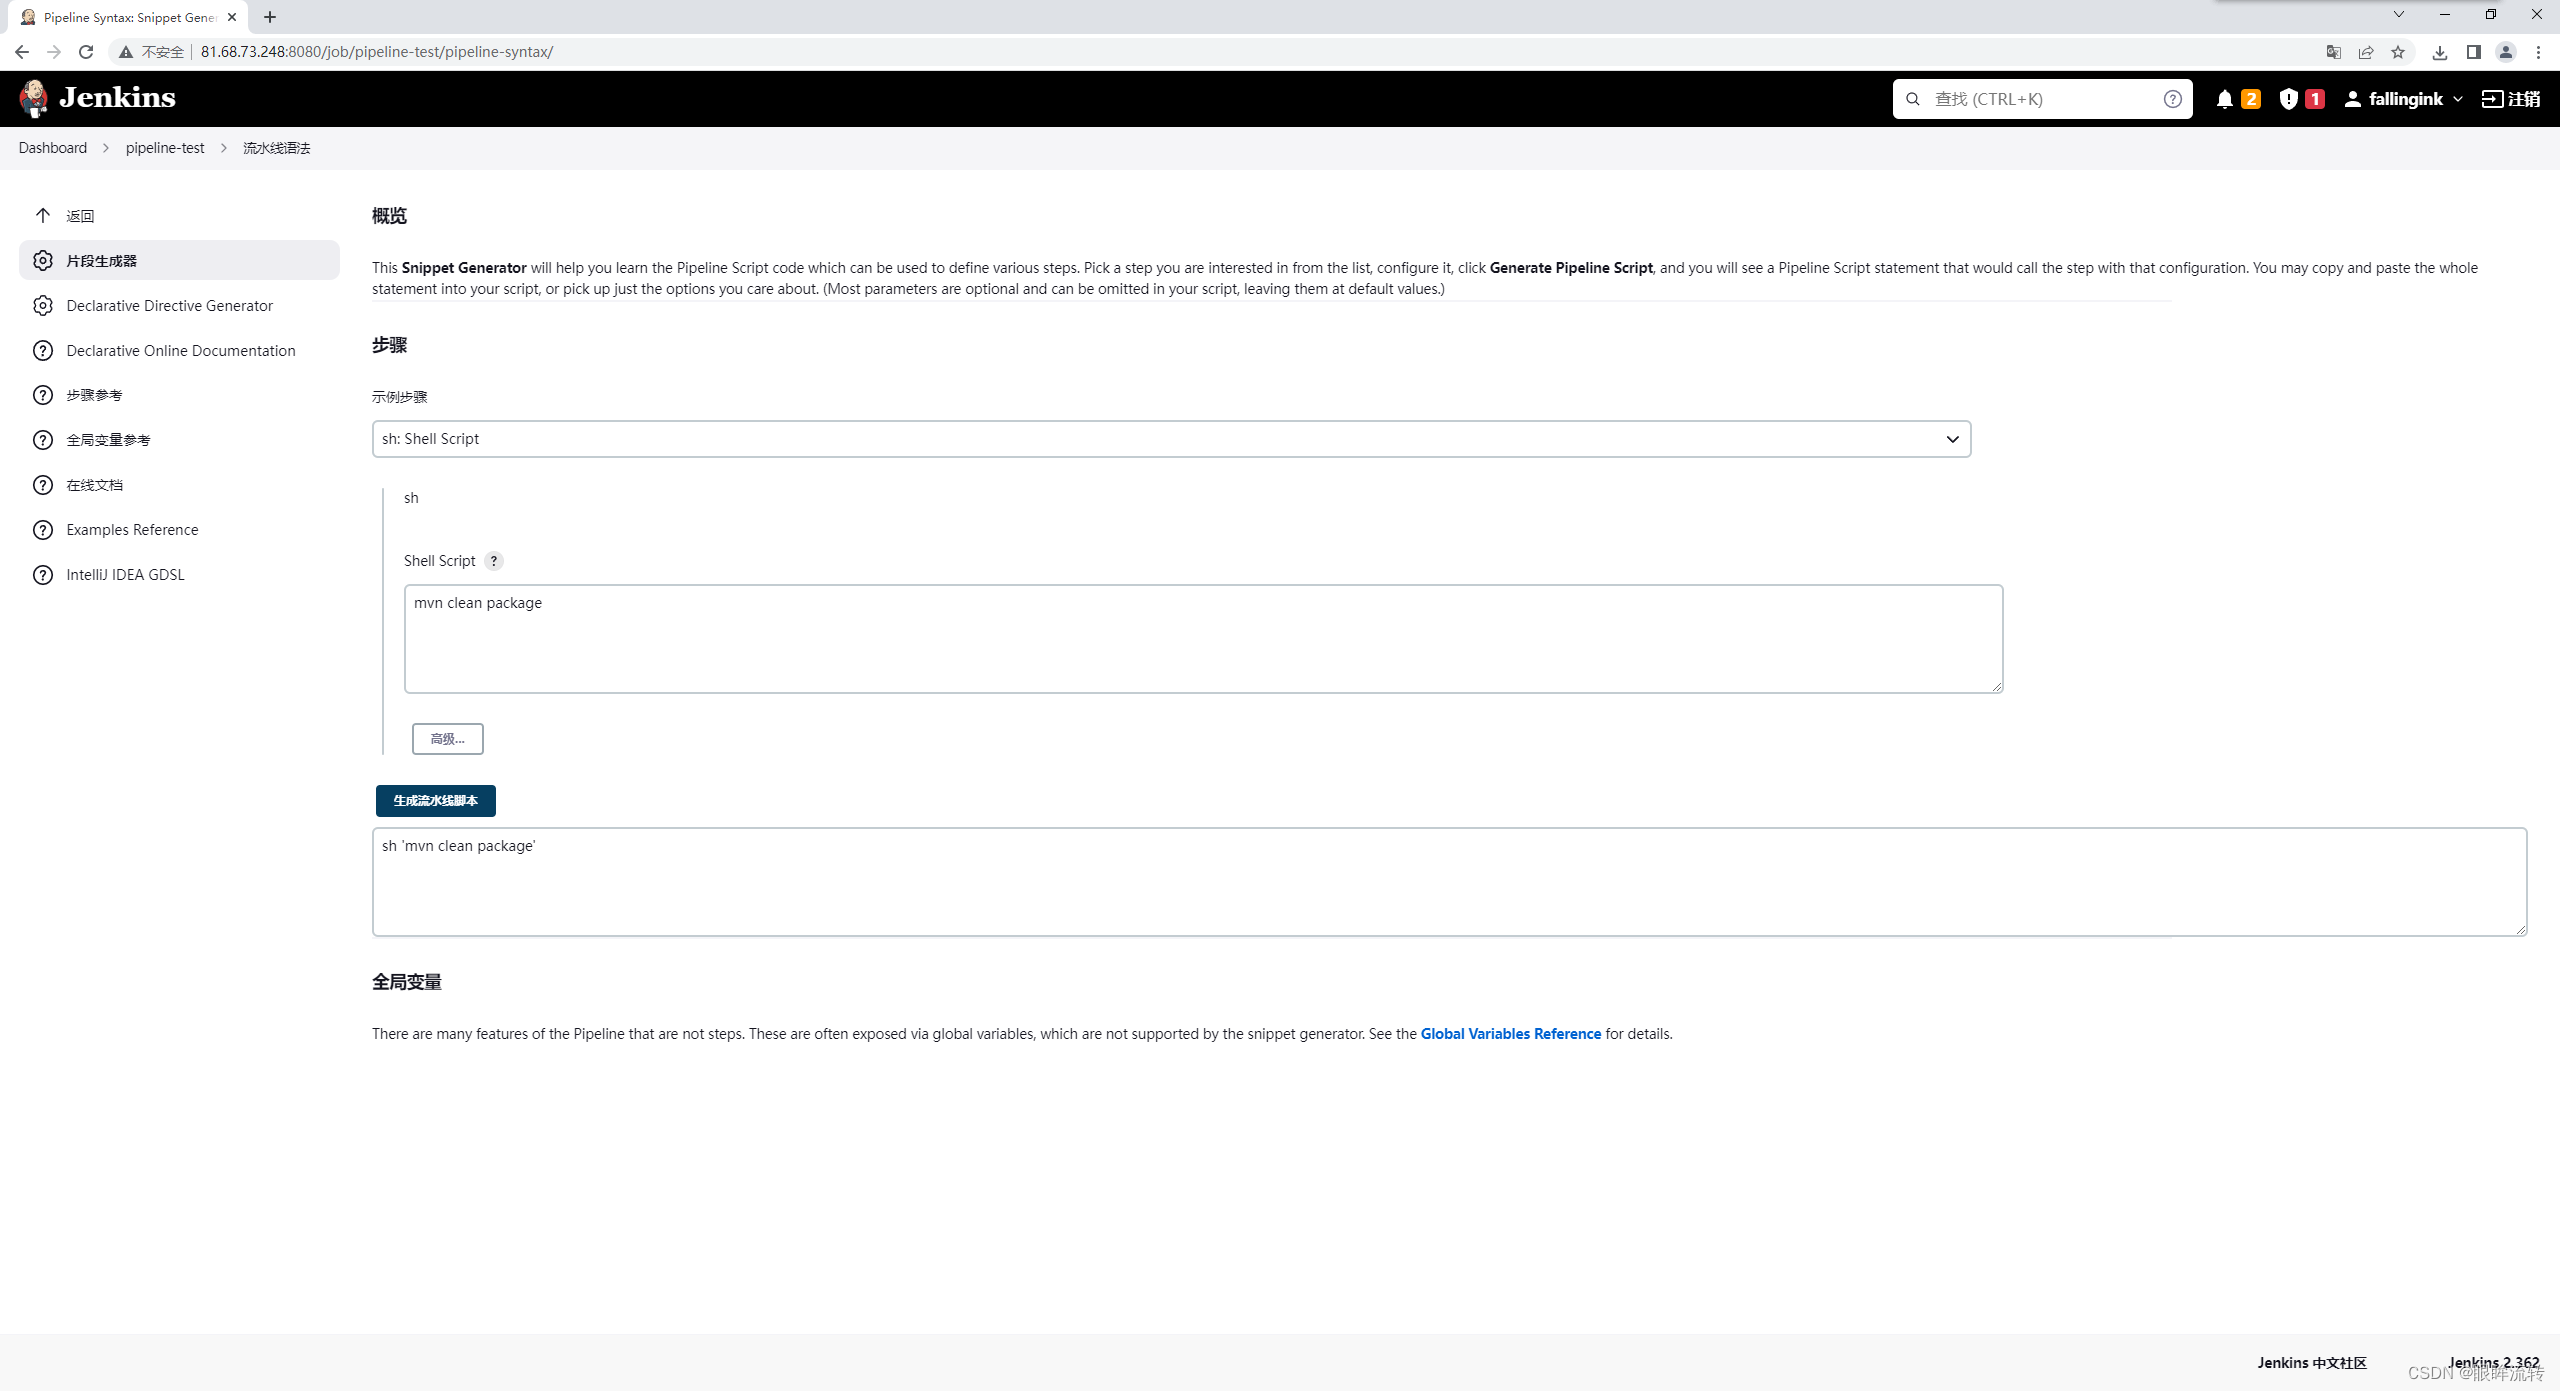
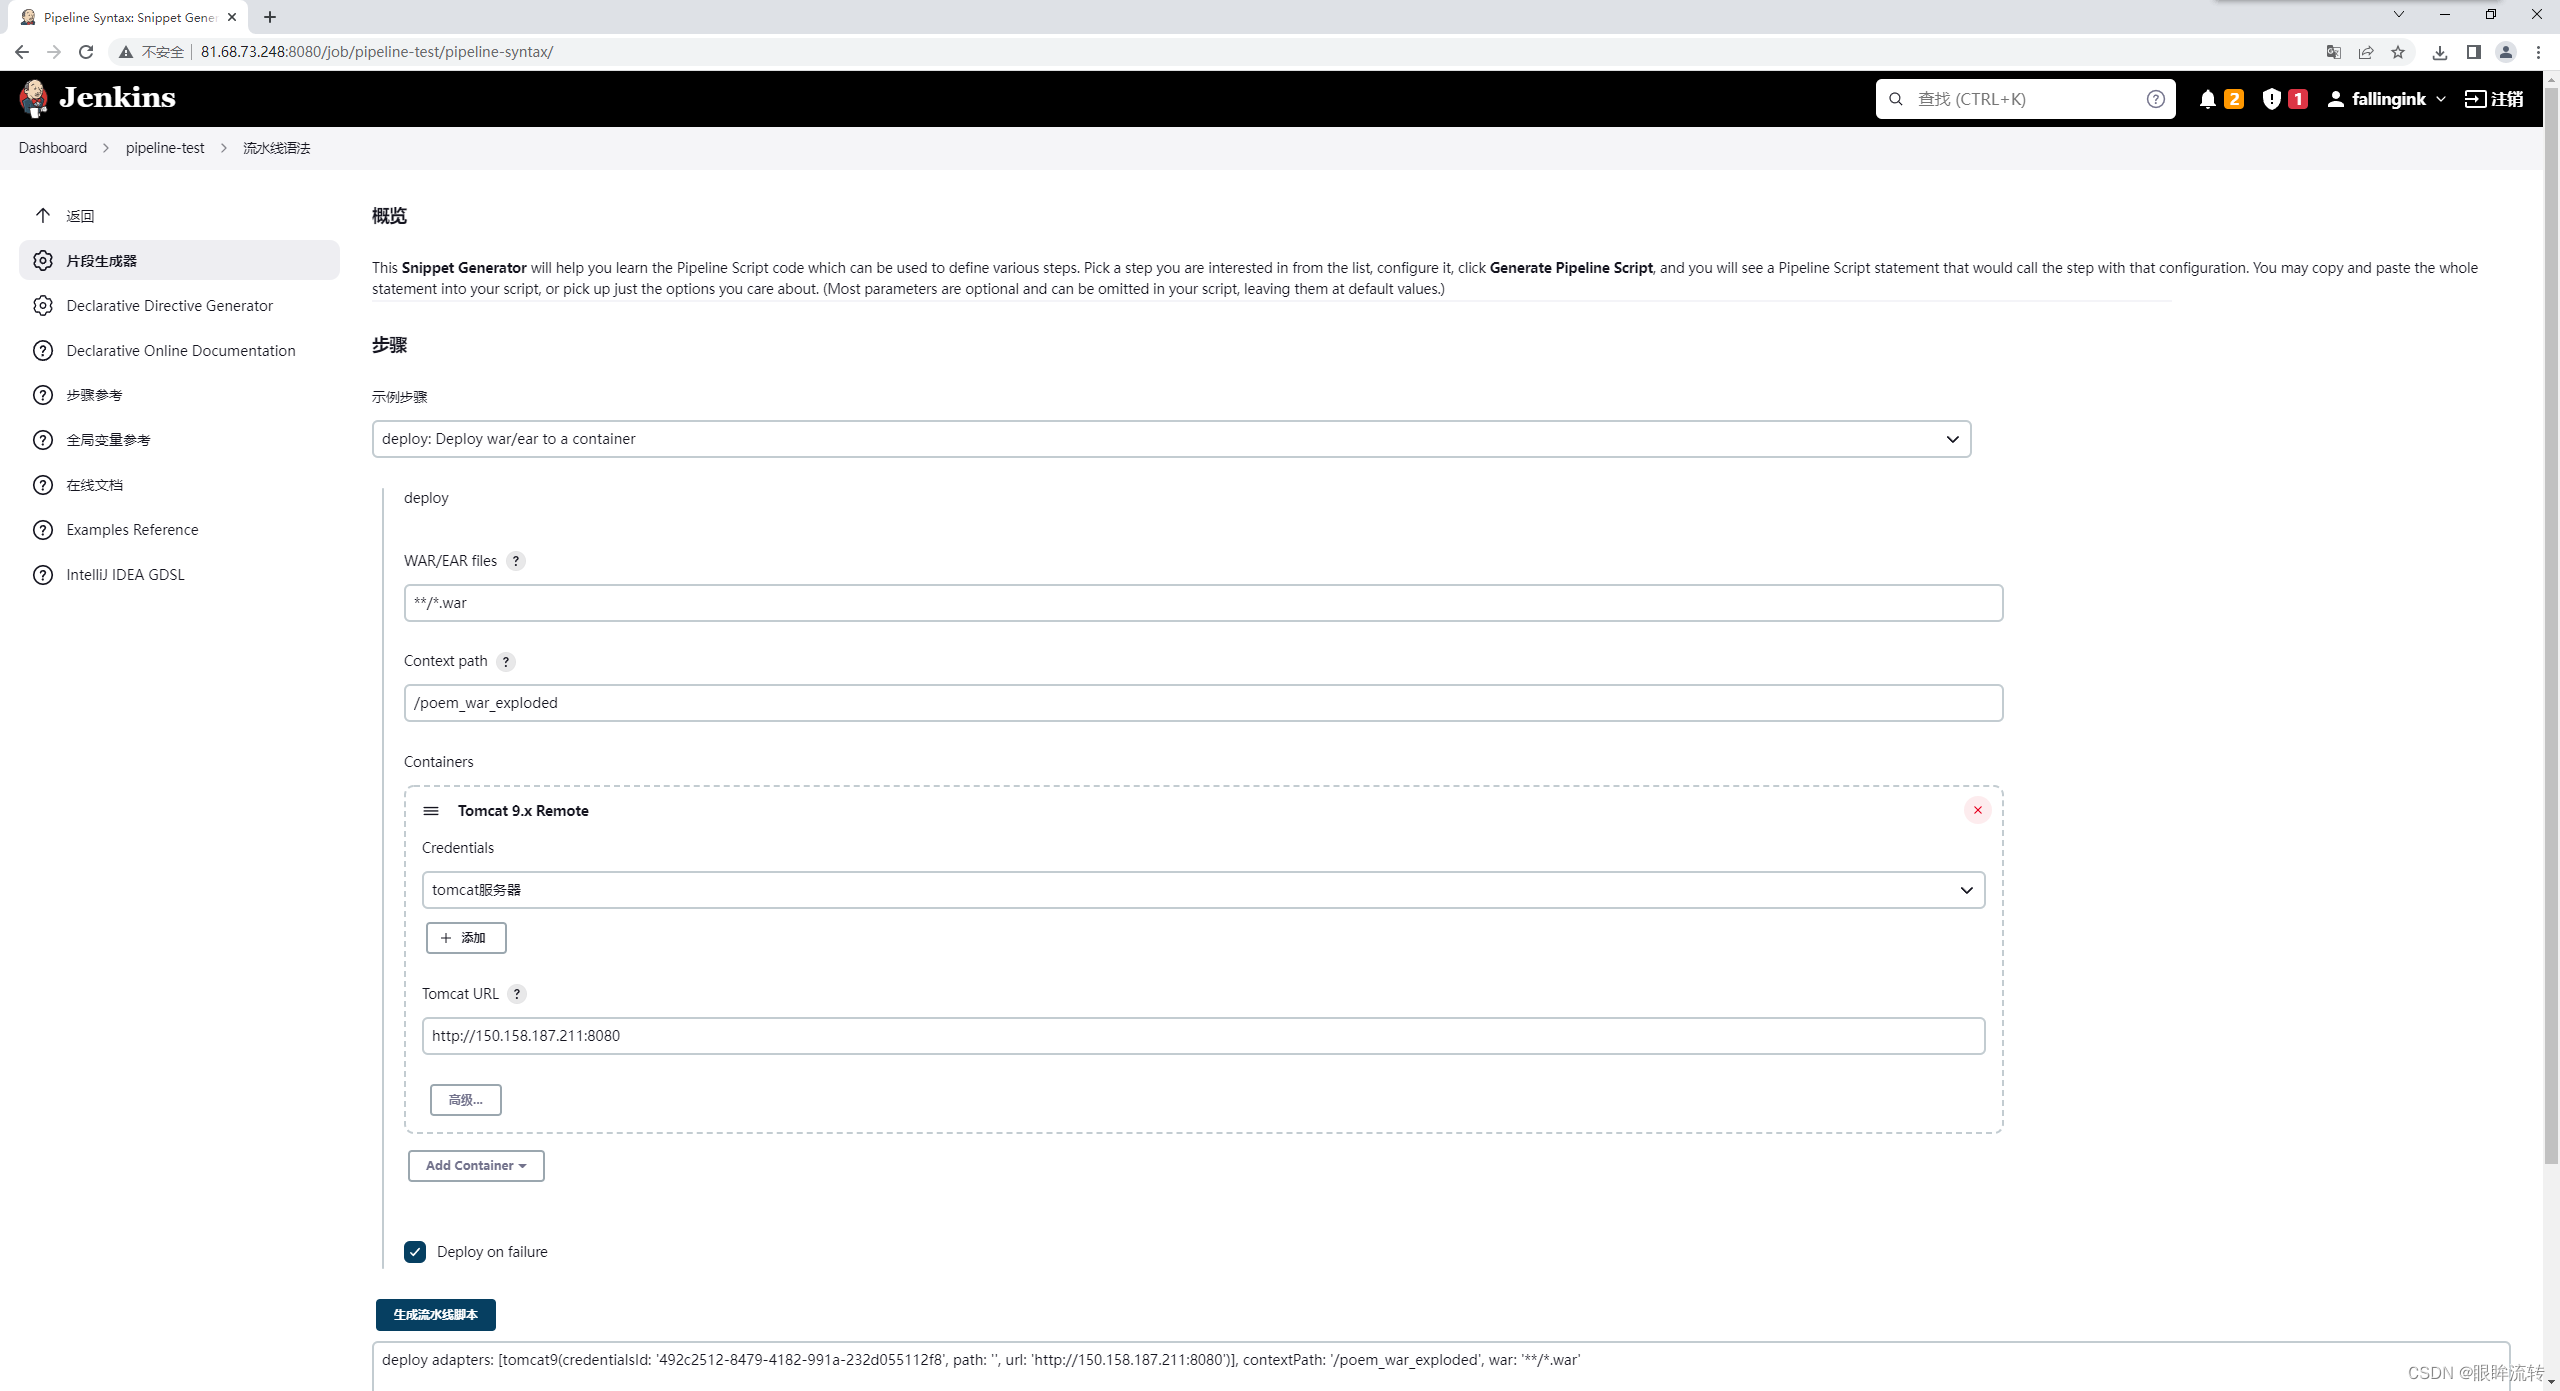
语法生成
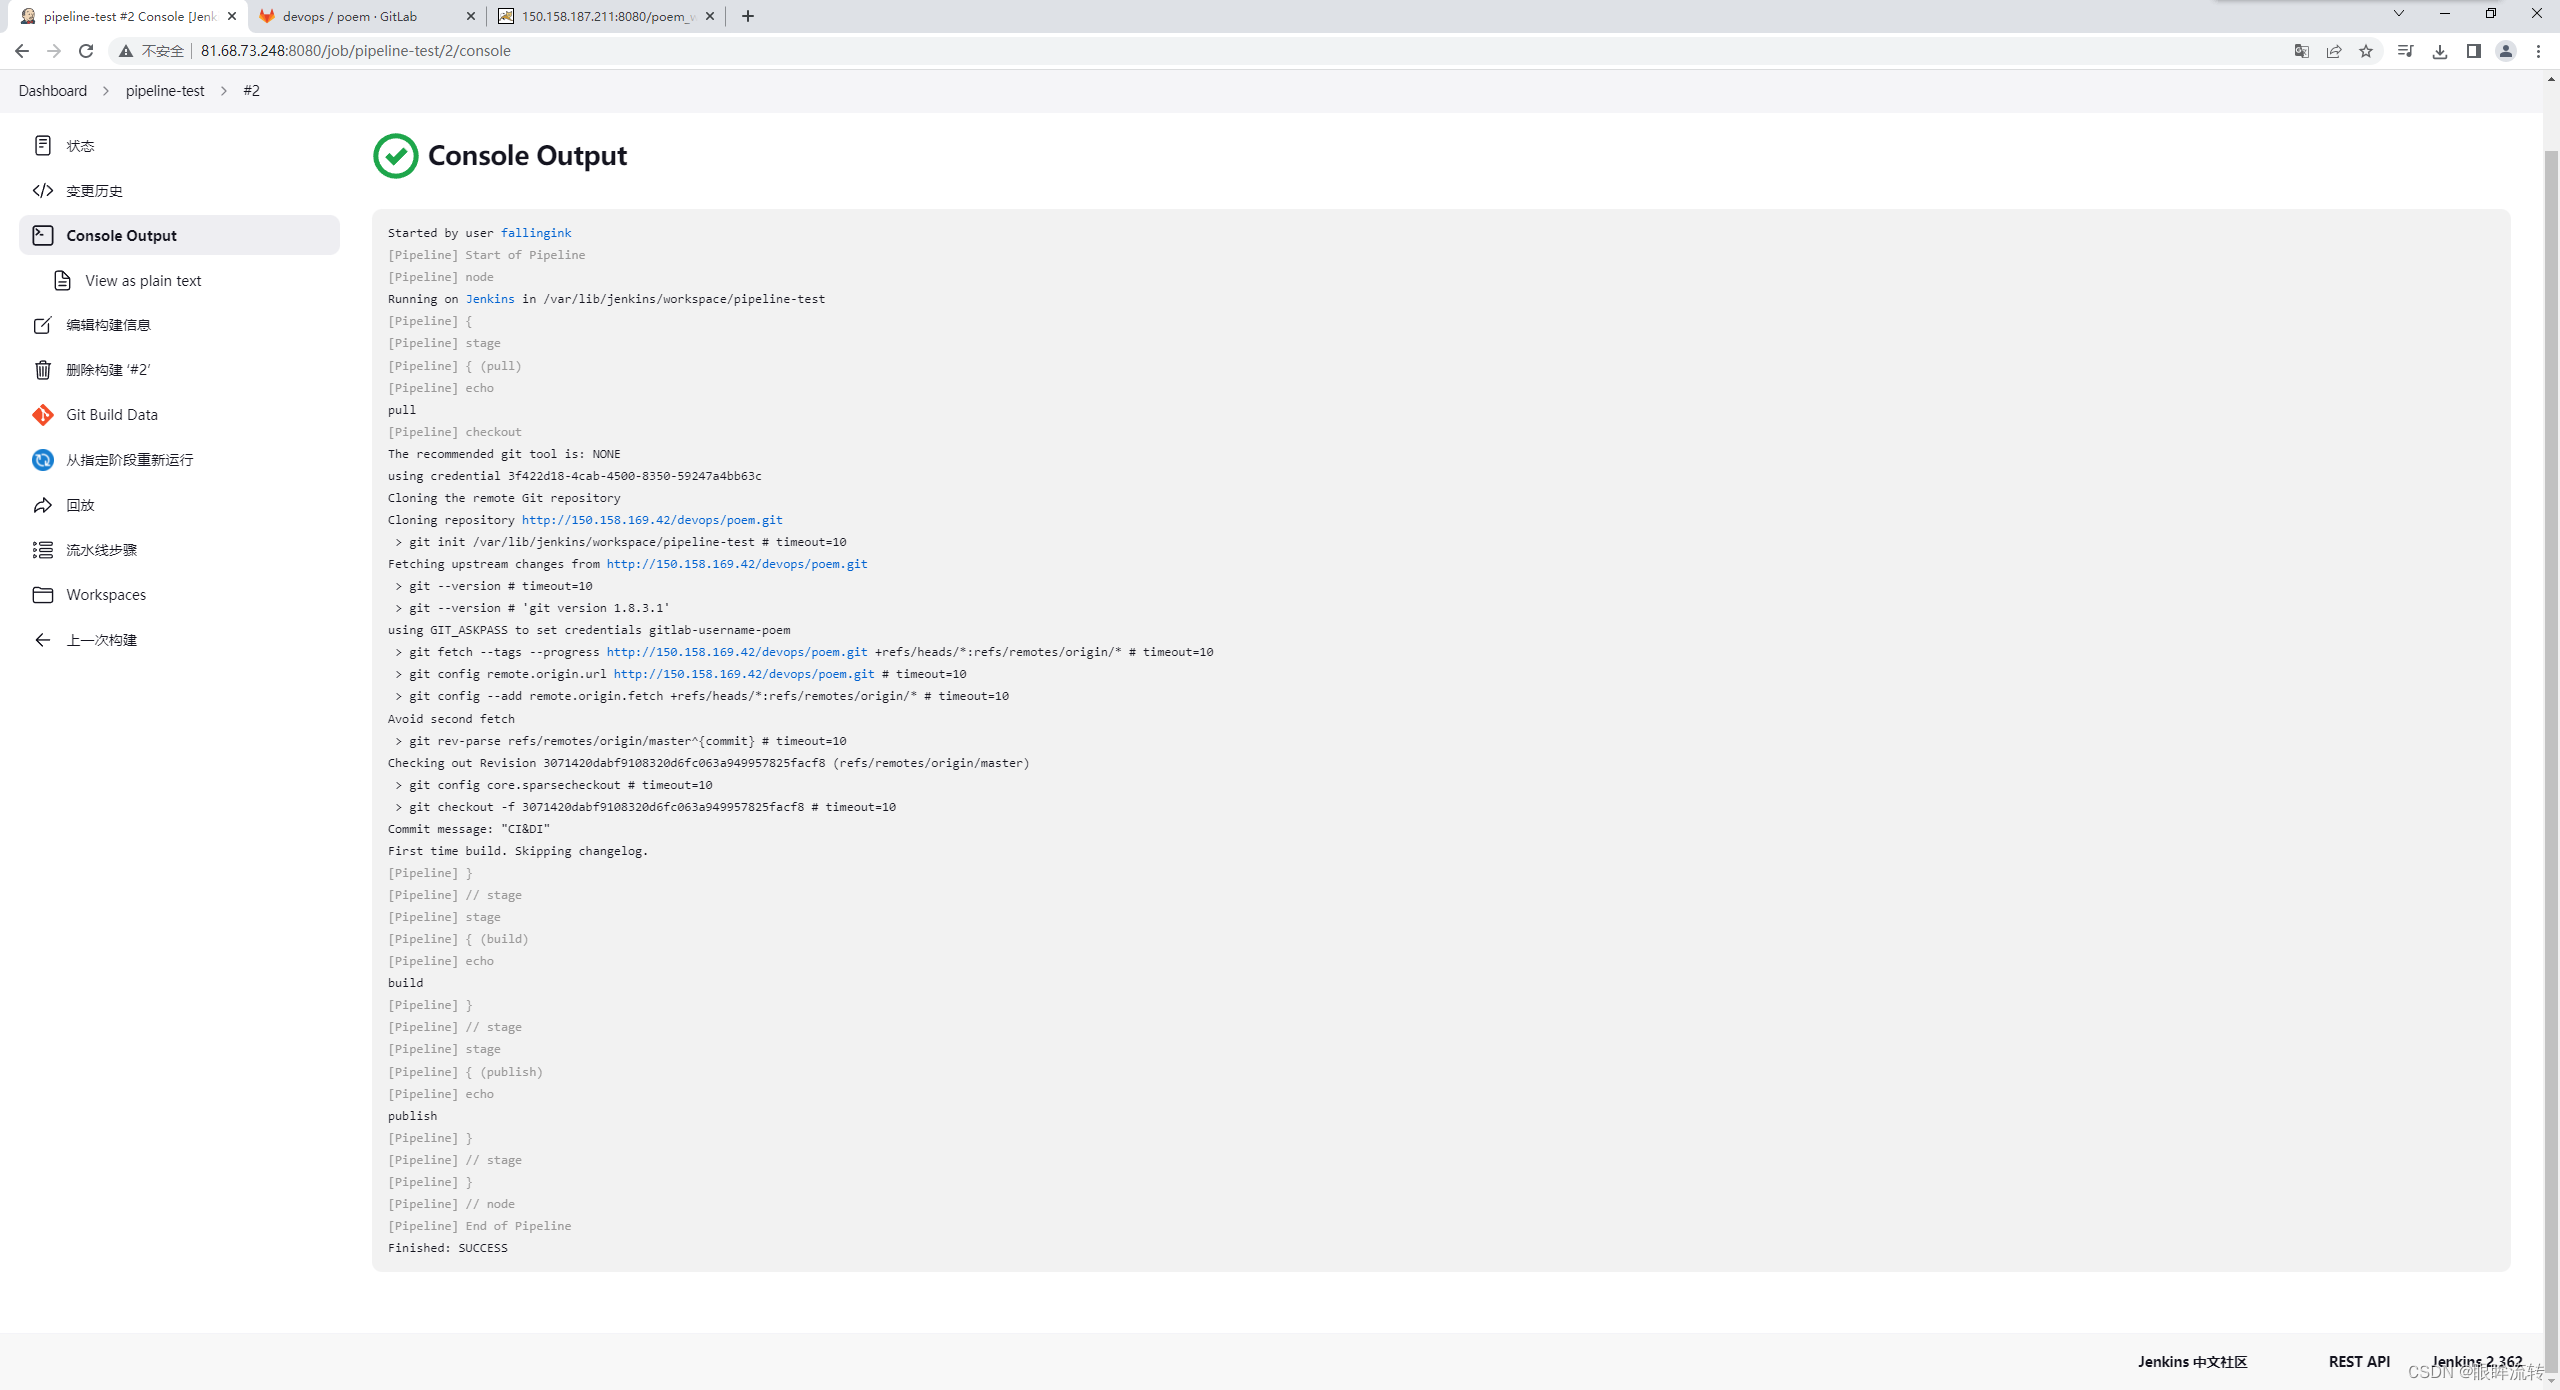
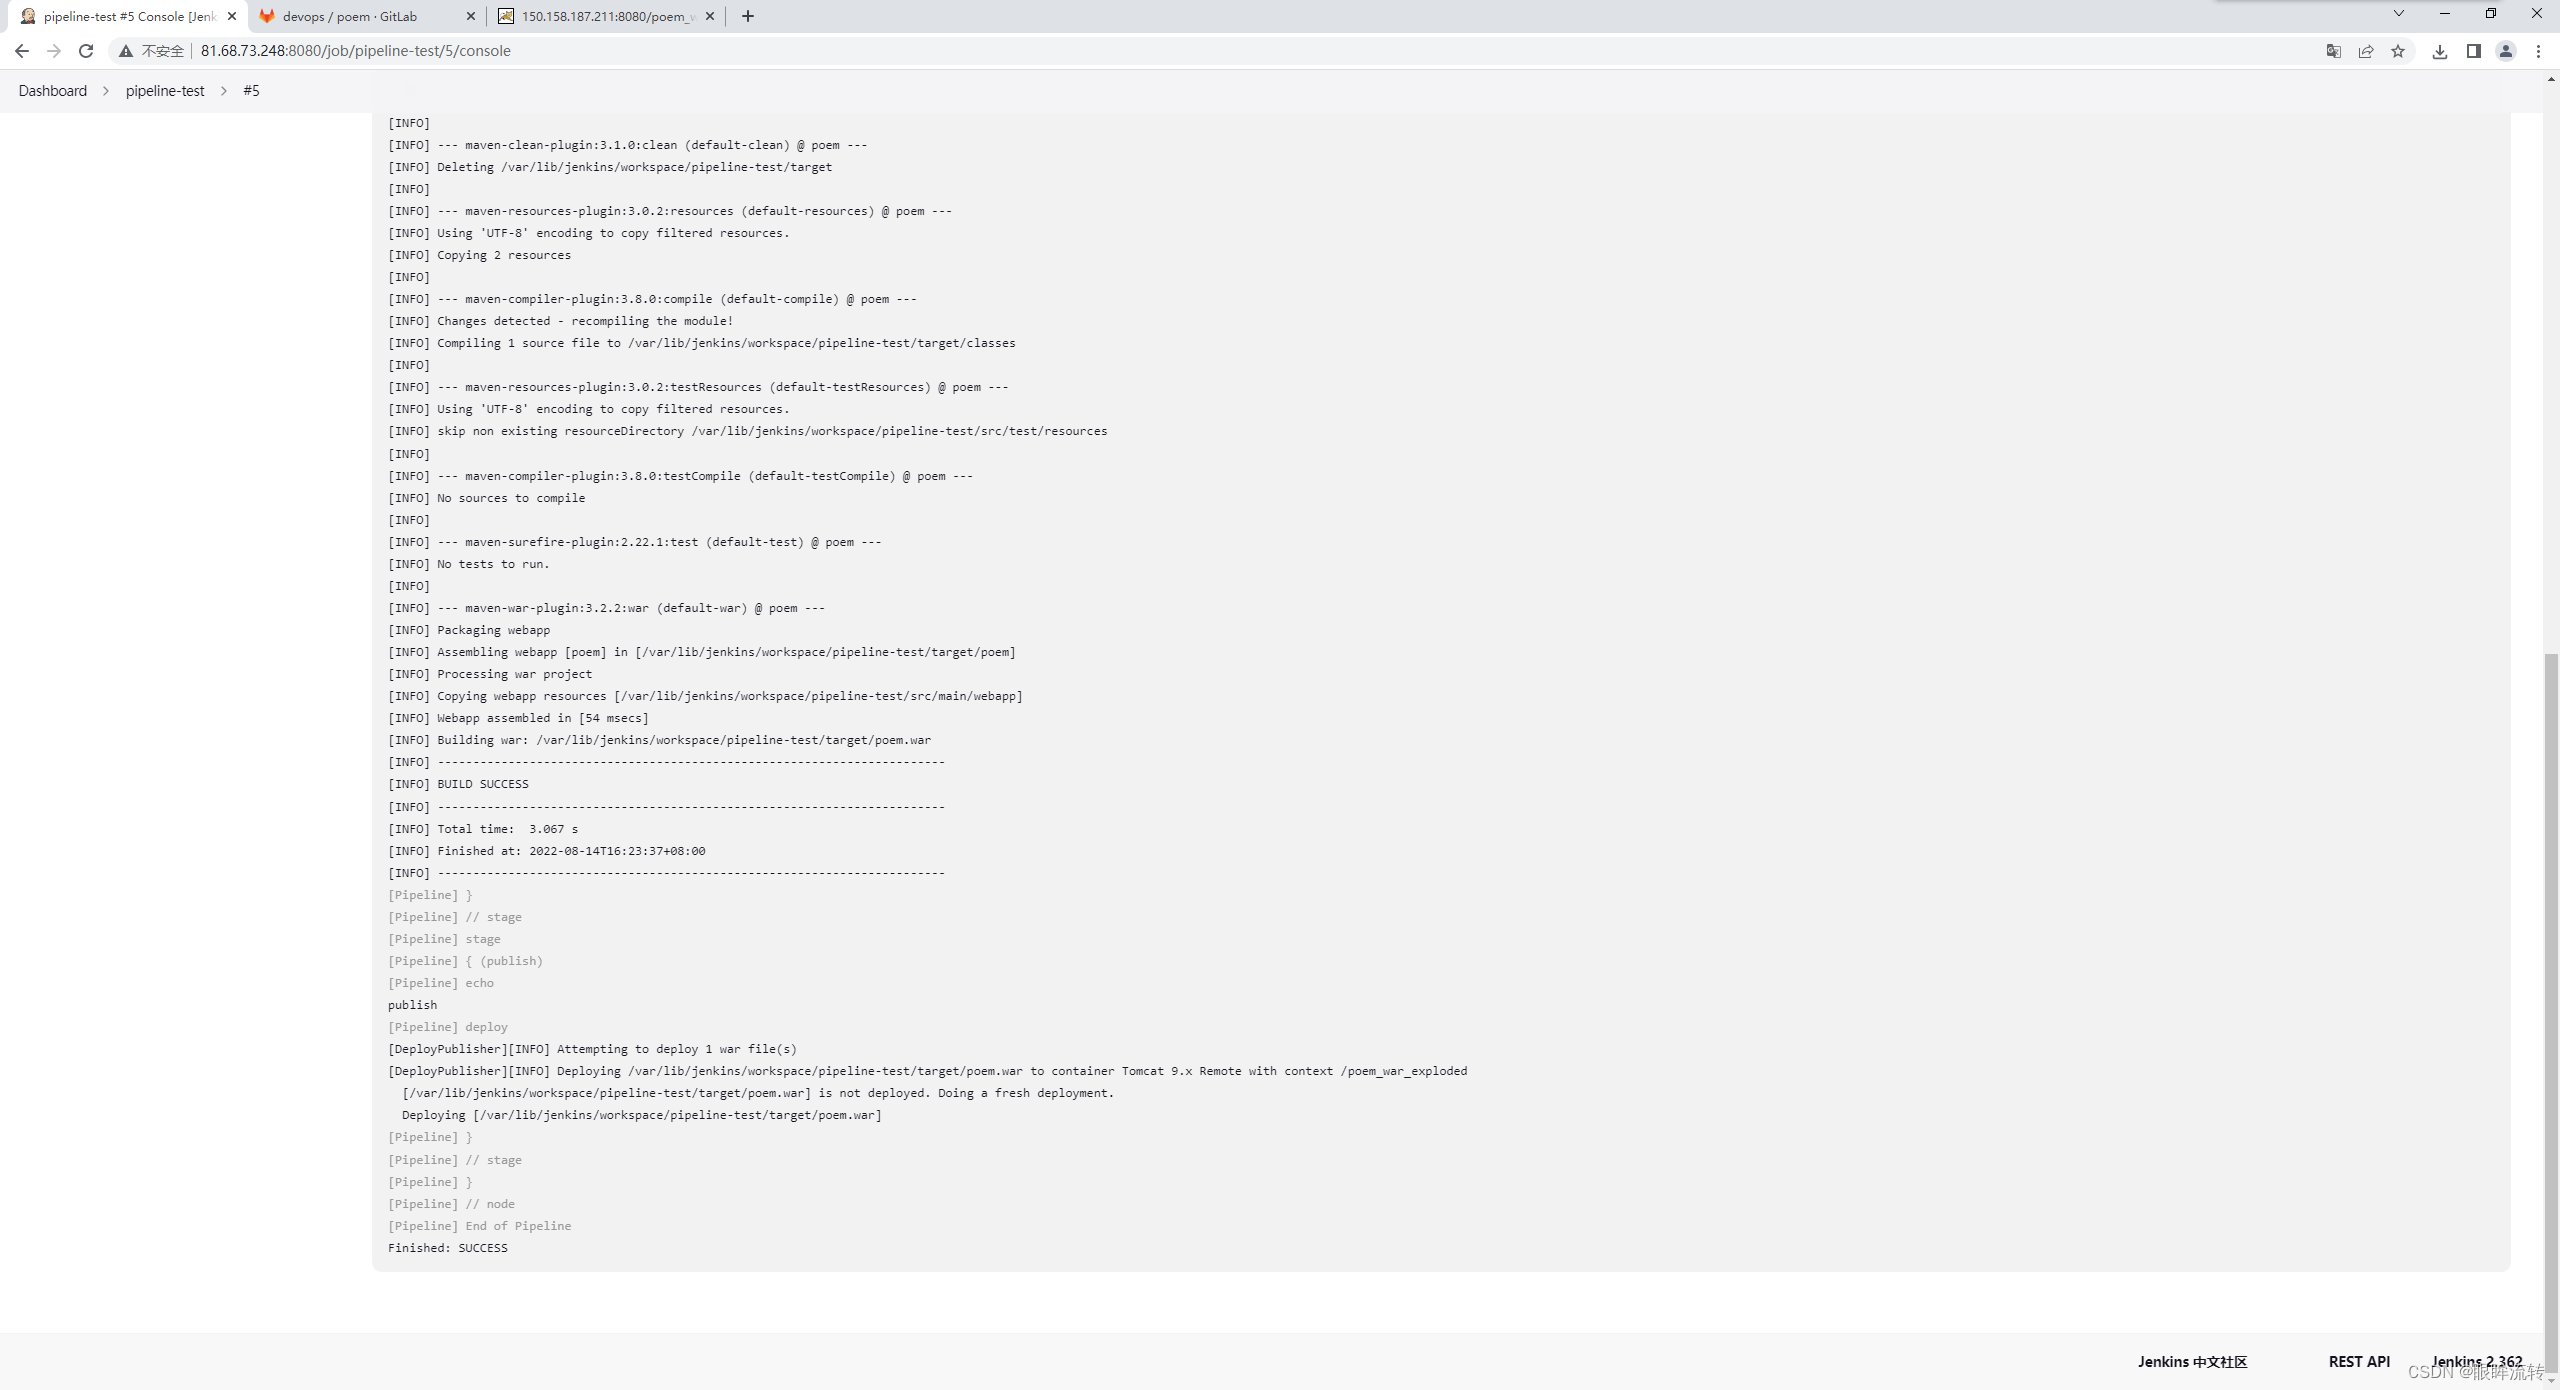
- 从git拉取代码
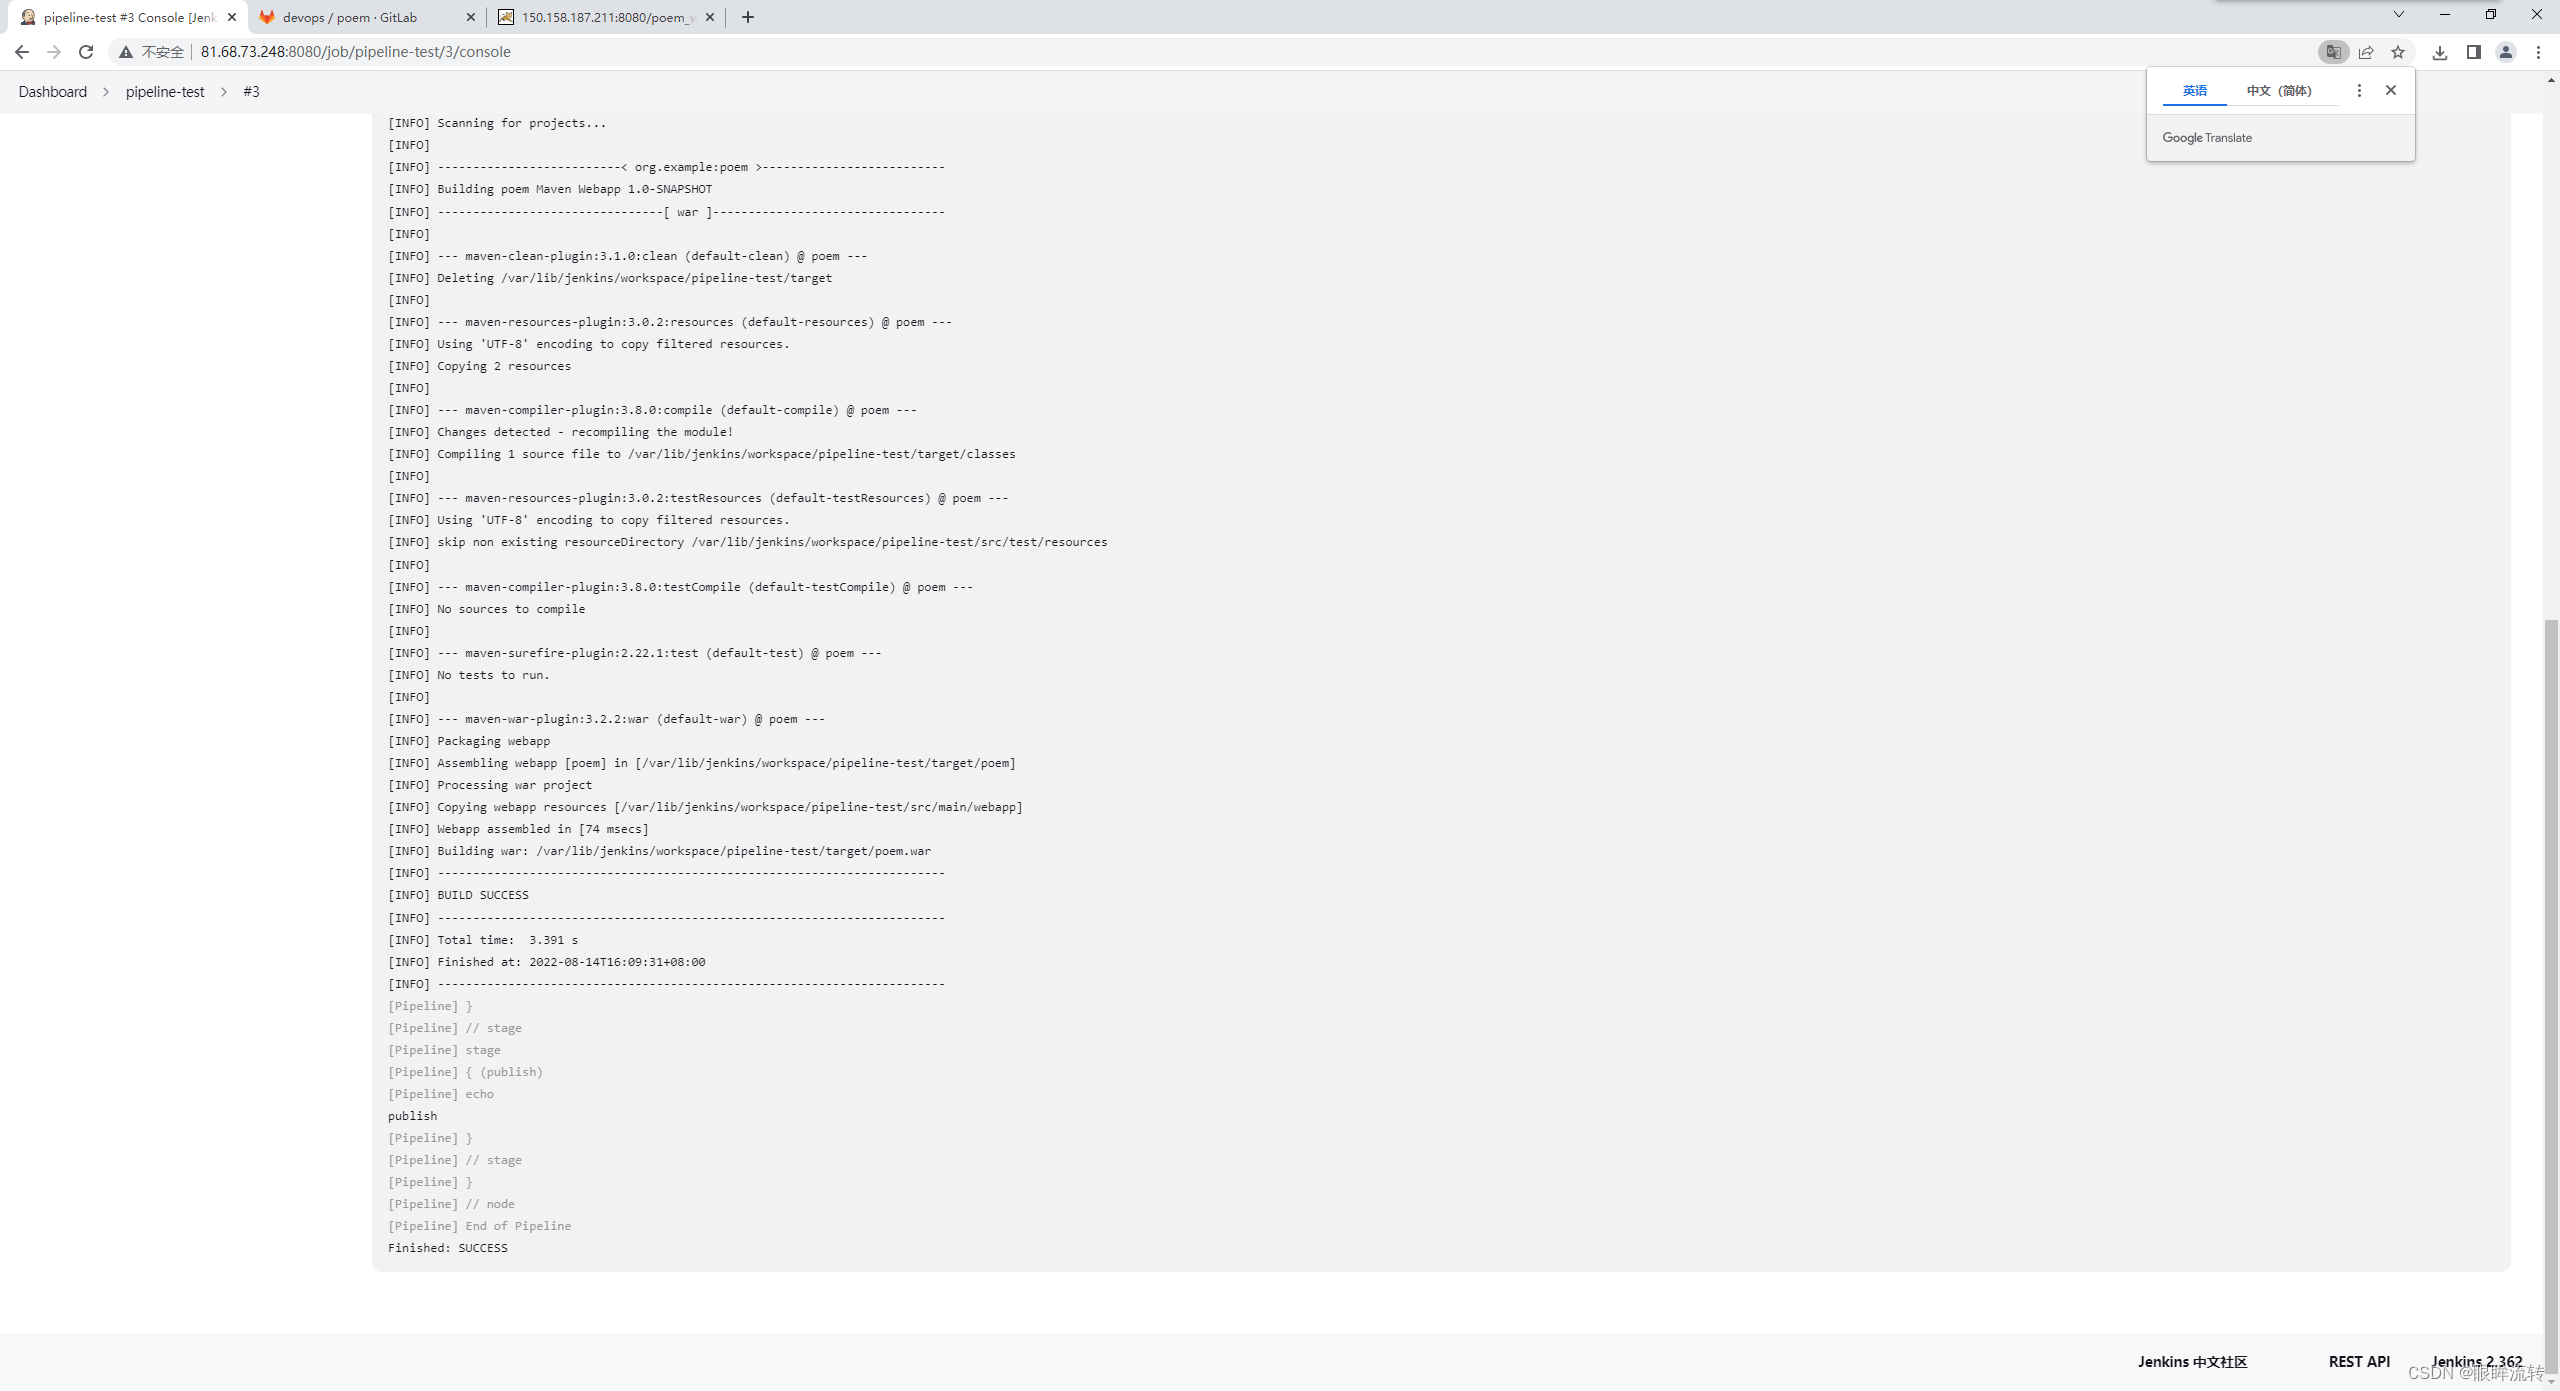
- 构建
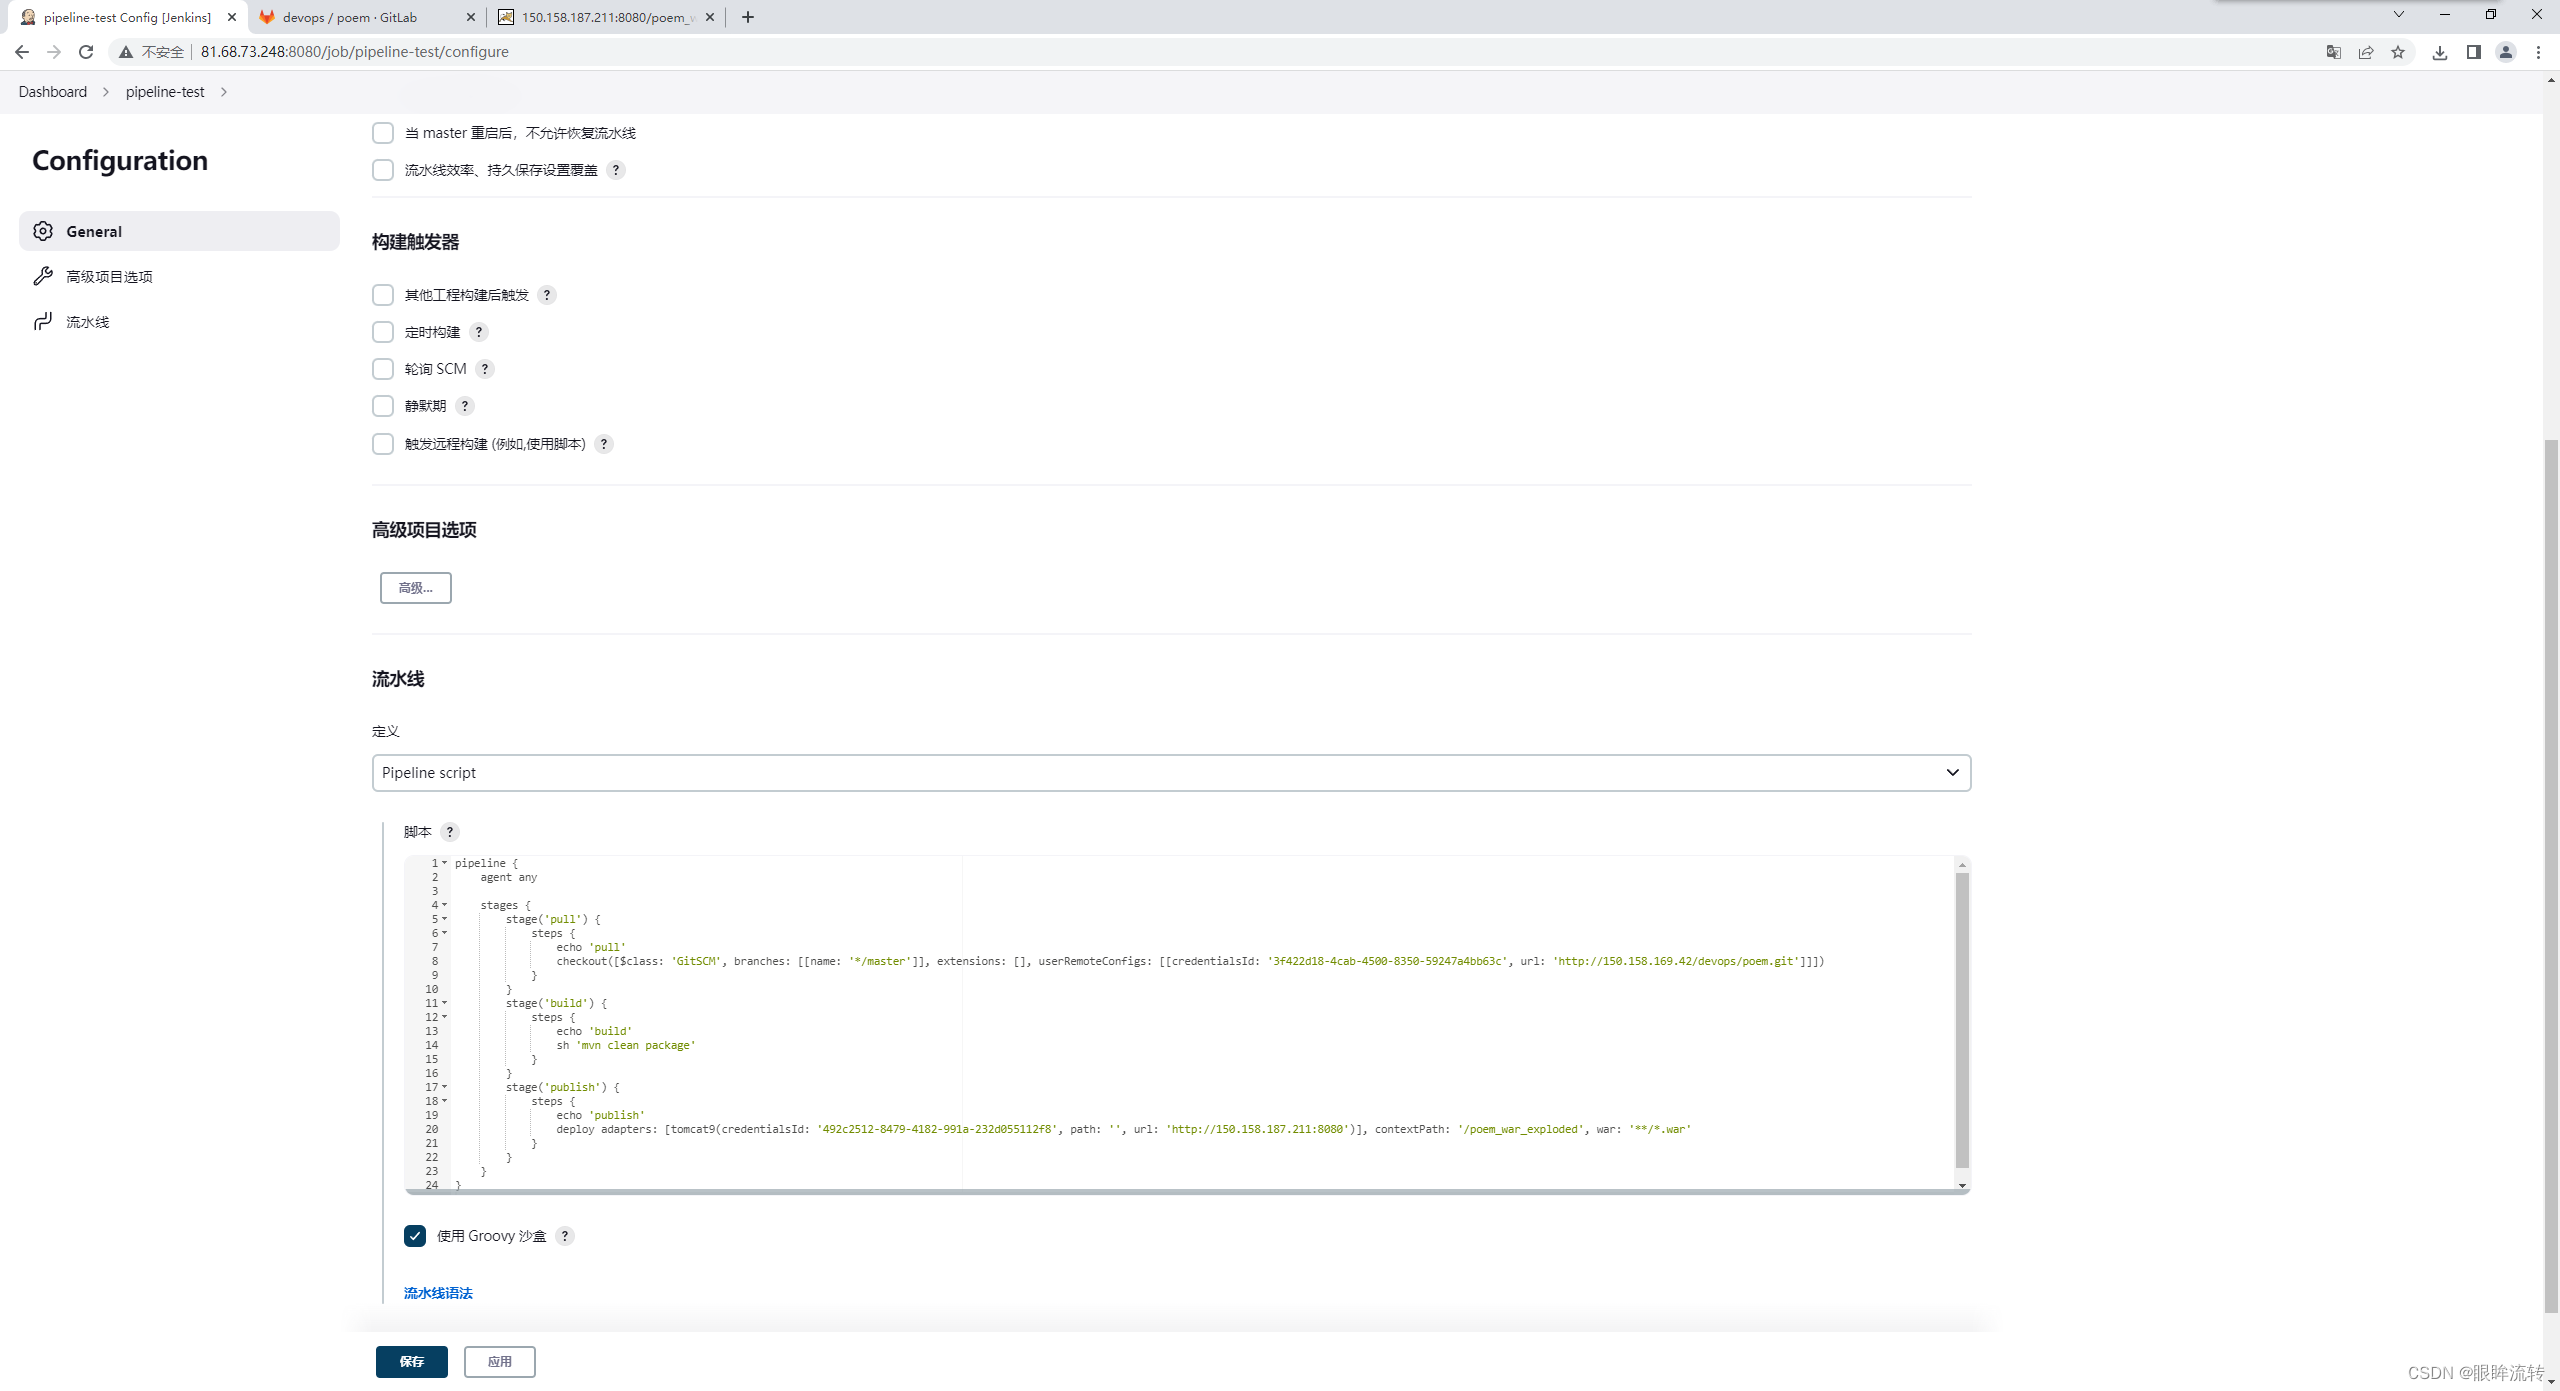
- 部署
Scripted
因为2.x建议使用Declarative语法,这里不再记录
12、内置构建触发器
- 触发远程构建
- 其他工程构建后触发(Build after other projects are build)
- 定时构建(Build periodically)
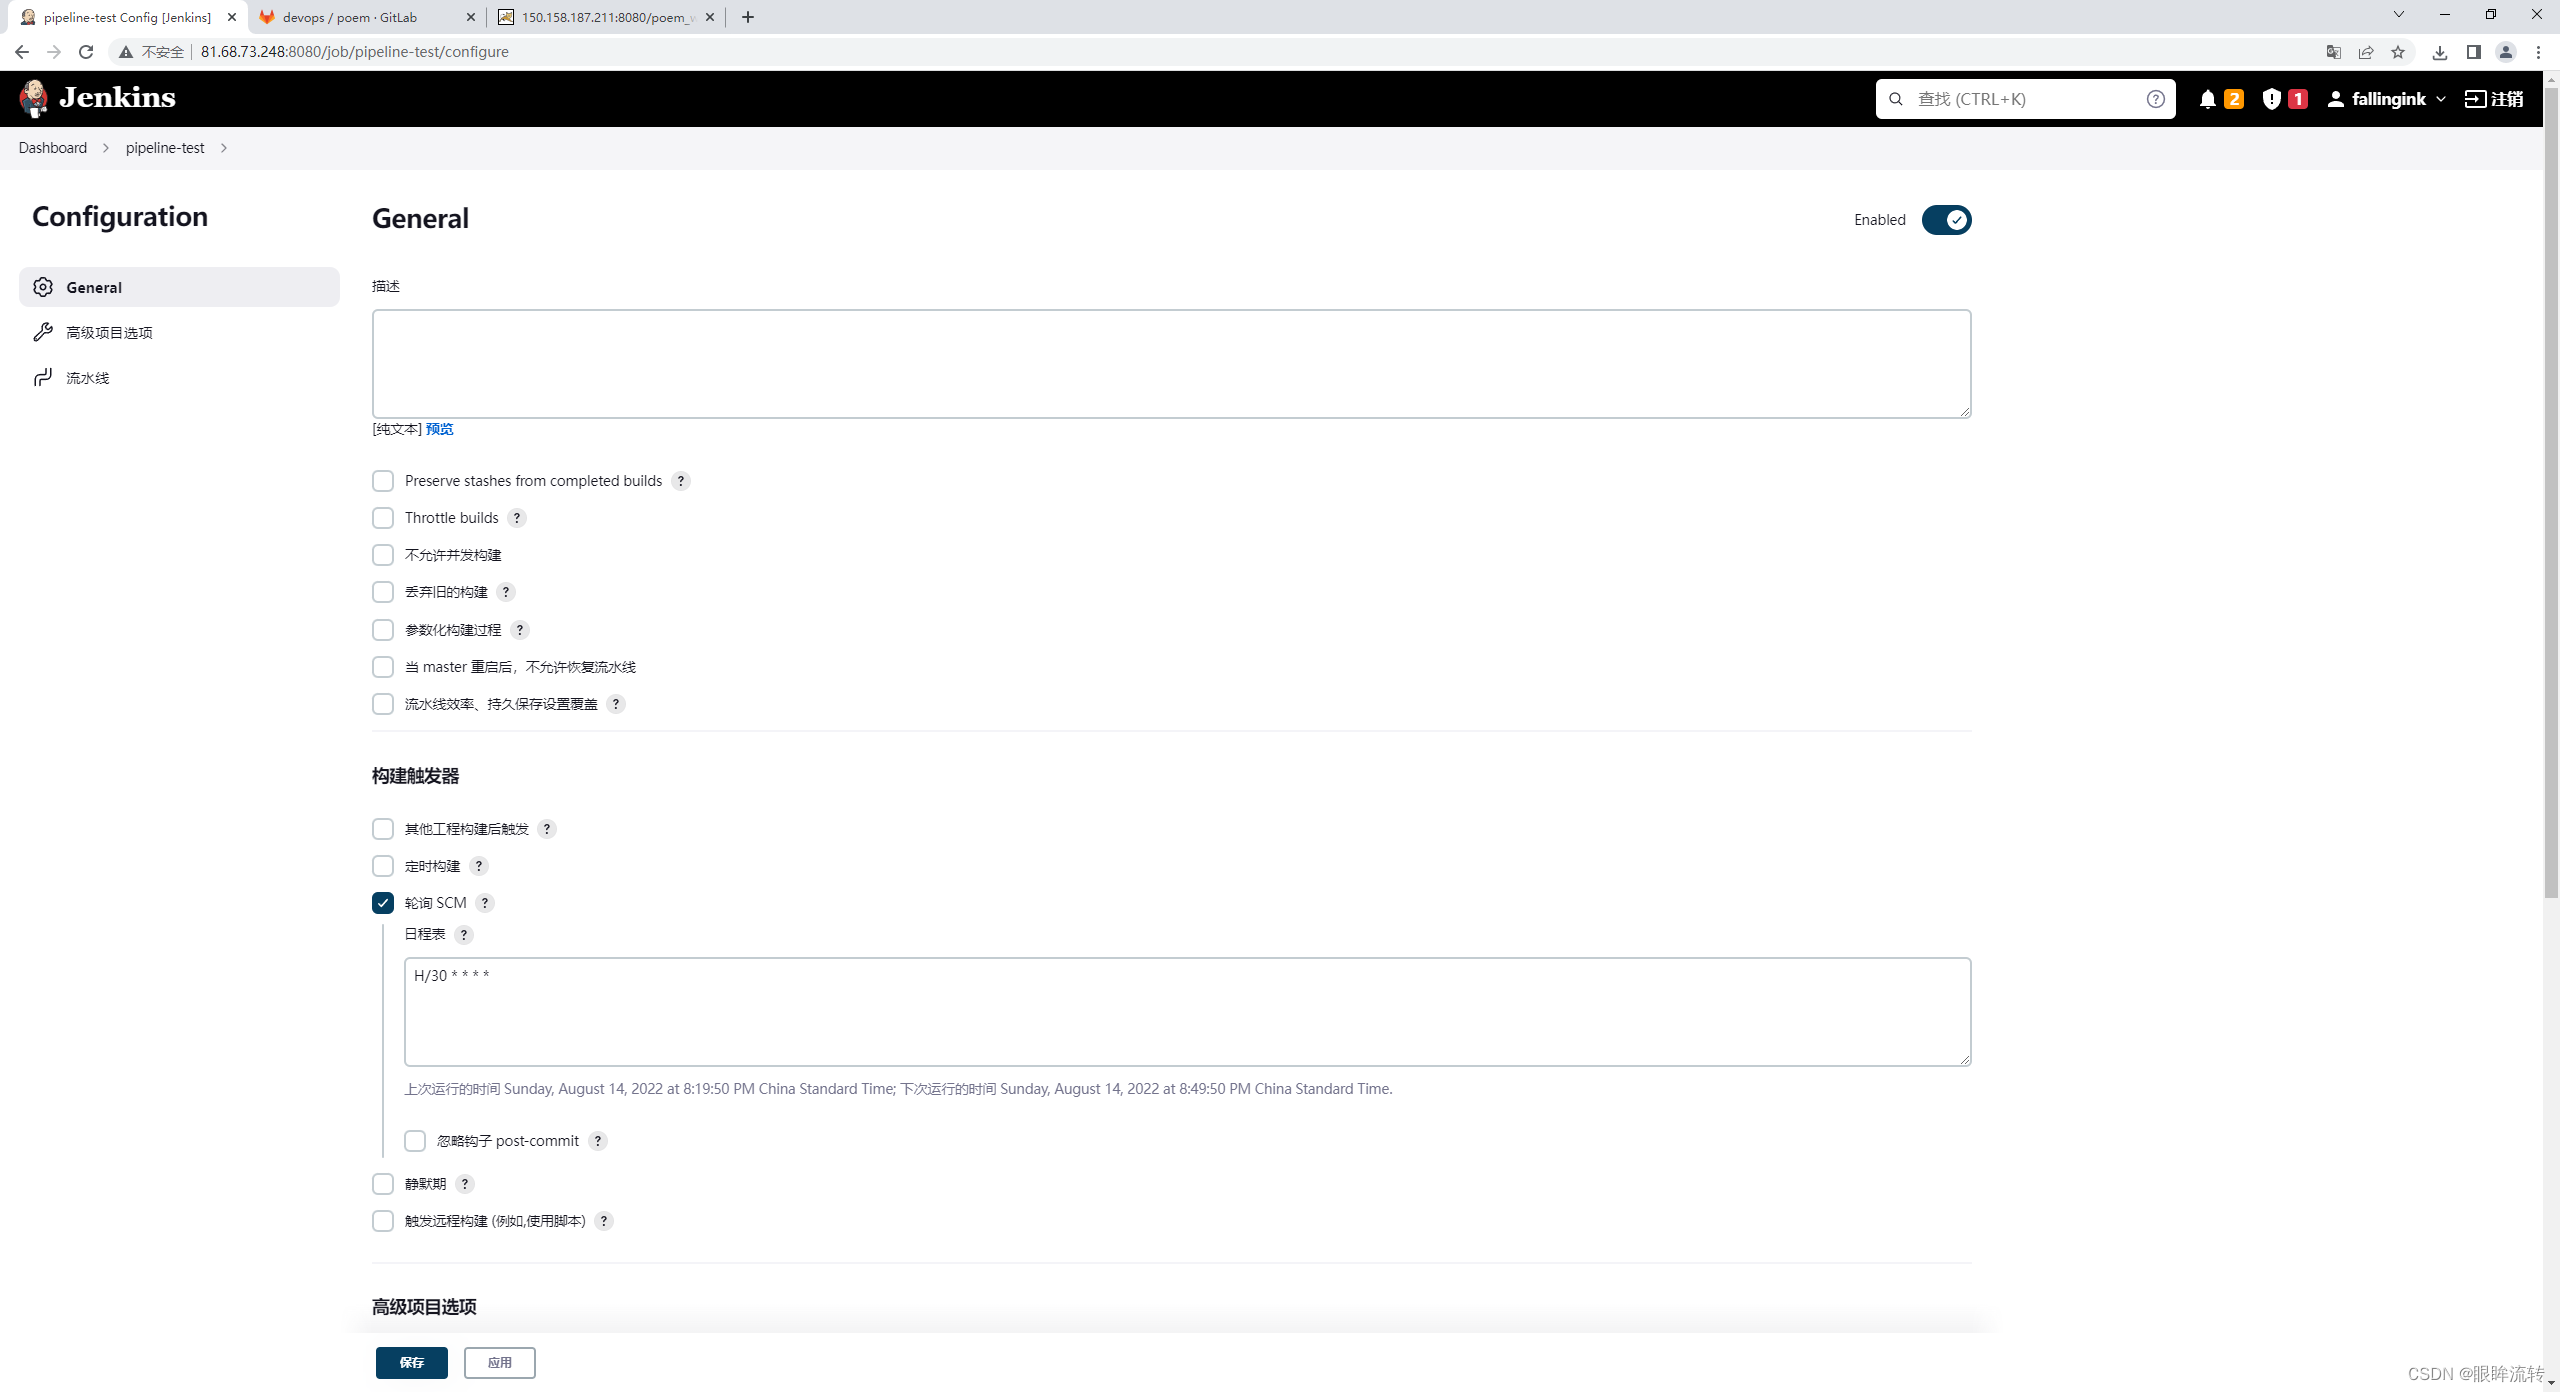
- 轮询SCM(Poll SCM)
触发远程构建(远程触发构建)

触发构建

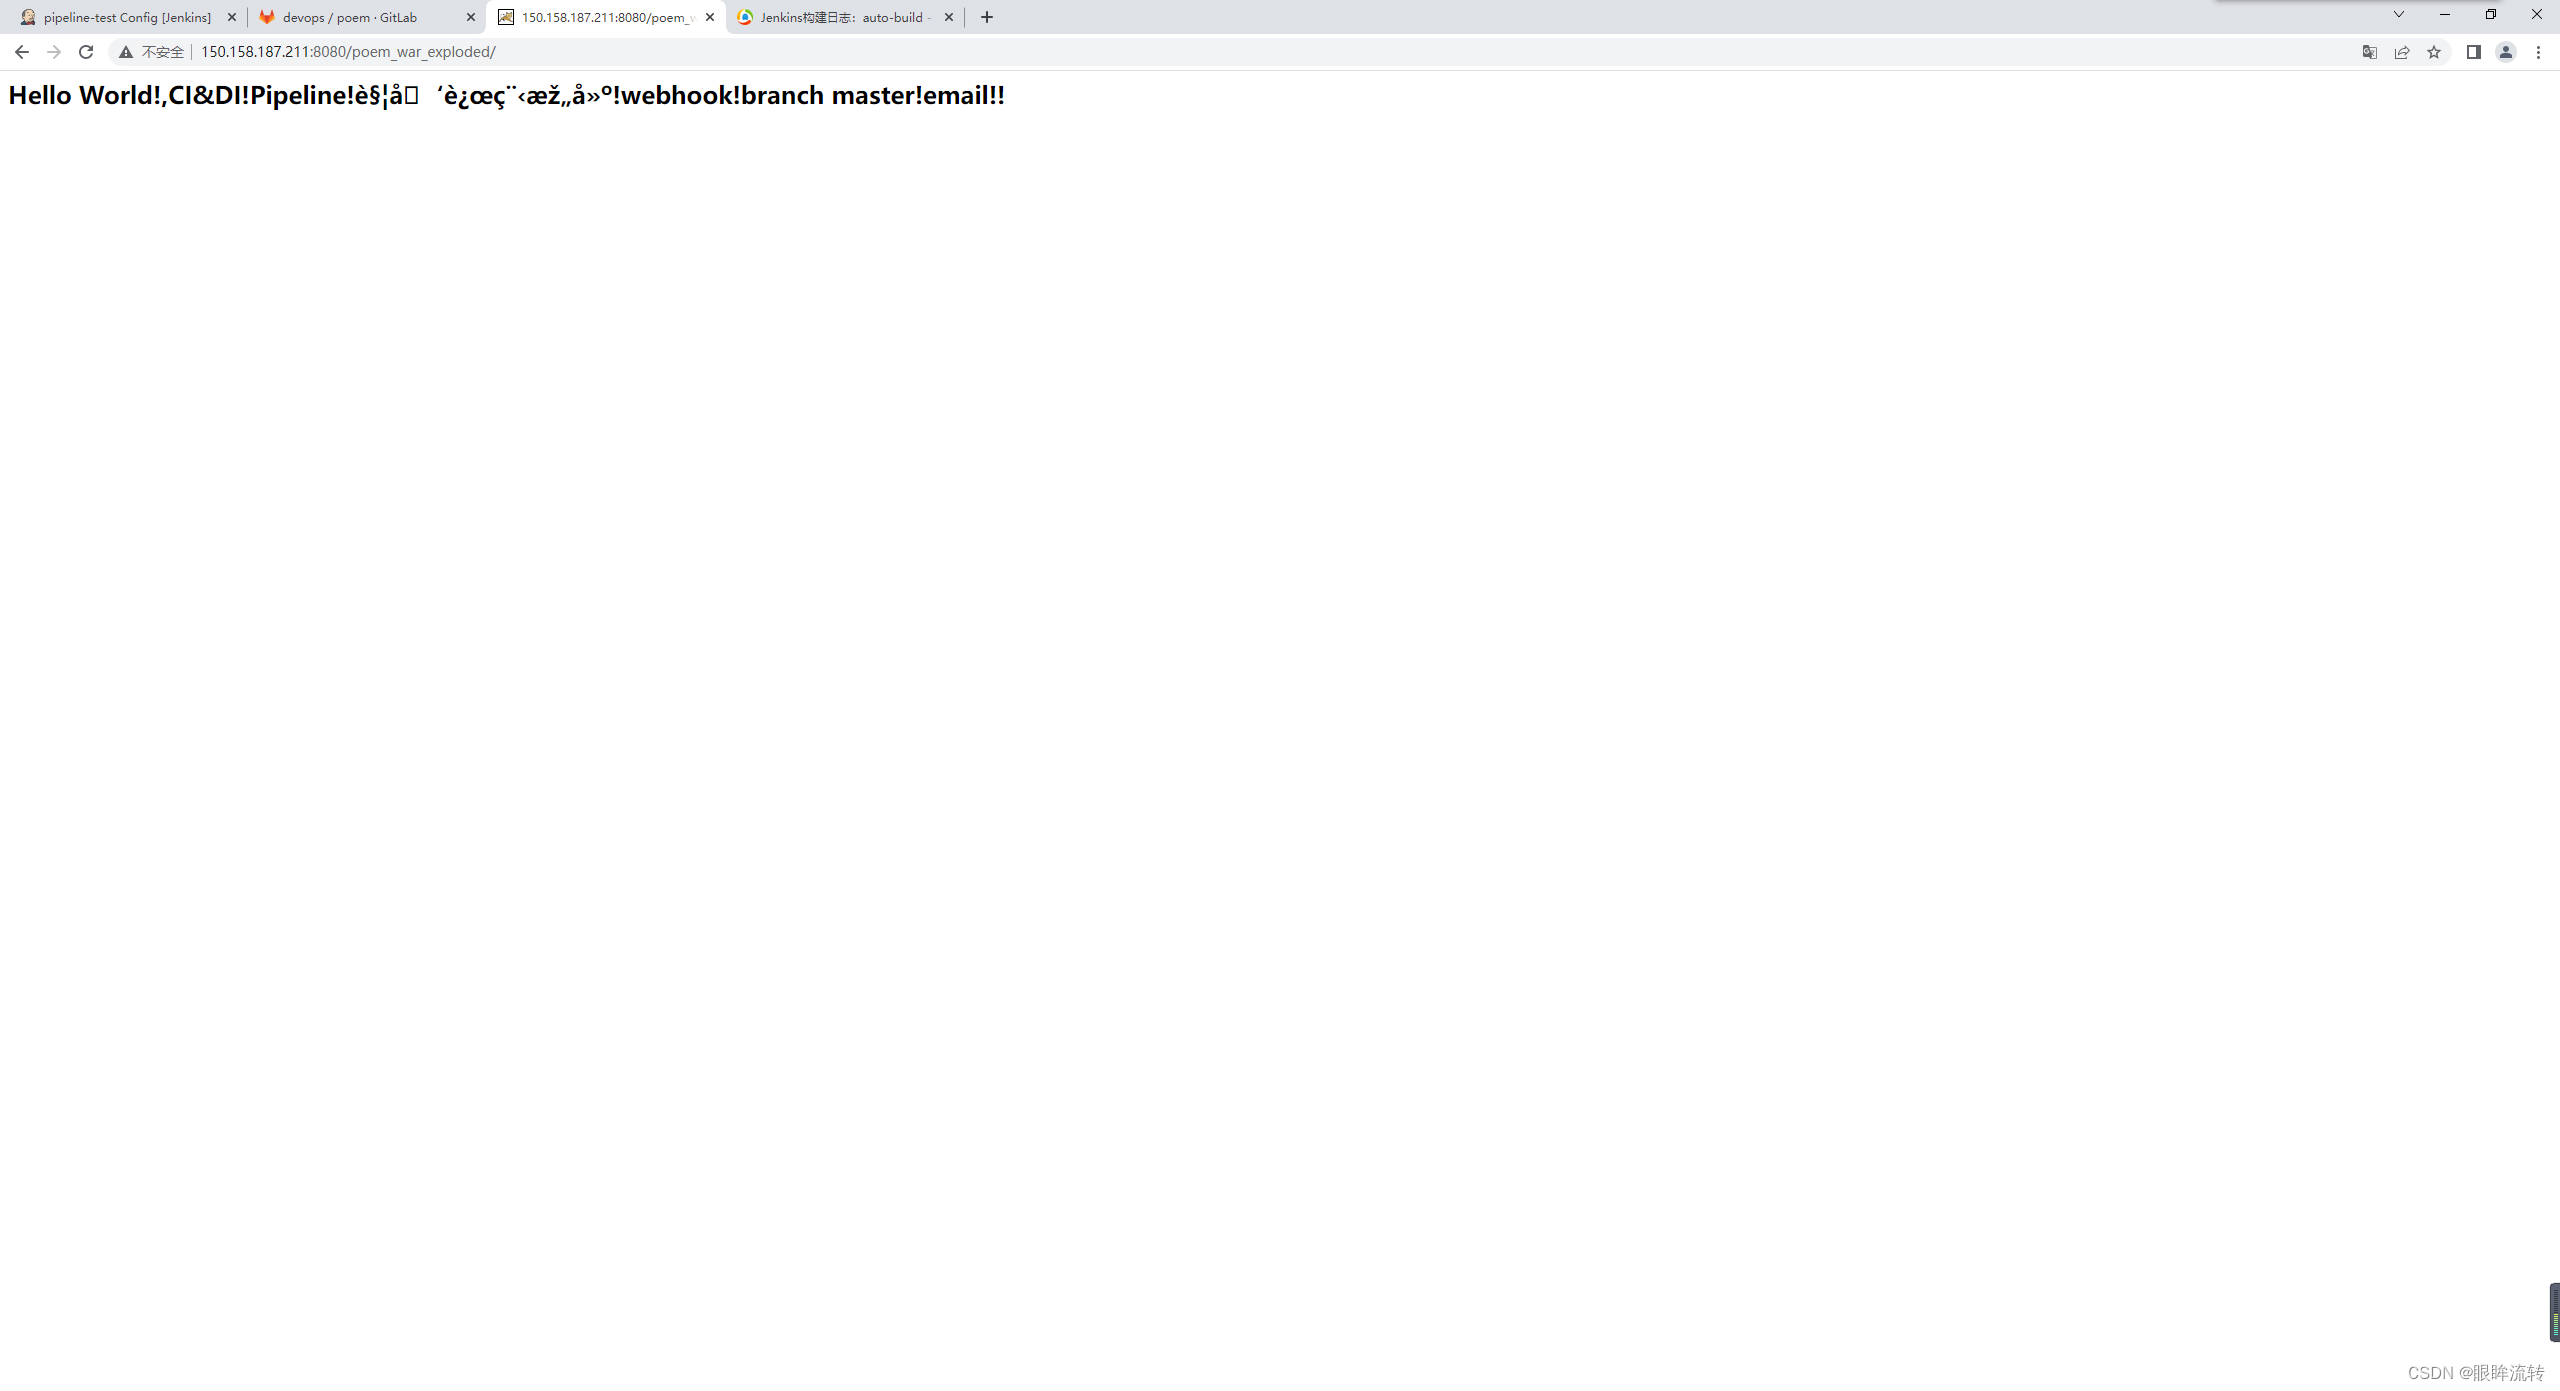
查看效果(这里乱码了,不过问题不大,看出来更新了,,,,,,,

其他工程构建后触发(Build after other projects are build)
填写项目名称选择触发类型即可

定时构建(Build periodically)
使用的是一种类似cron表达式的方式
依次为:分 时 日 月 周
每30分钟构建一次

轮询SCM(Poll SCM)
指定时扫描本地代码仓库的代码是否有变更,如果代码有变更就触发项目构建
13、webhook自动触发构建
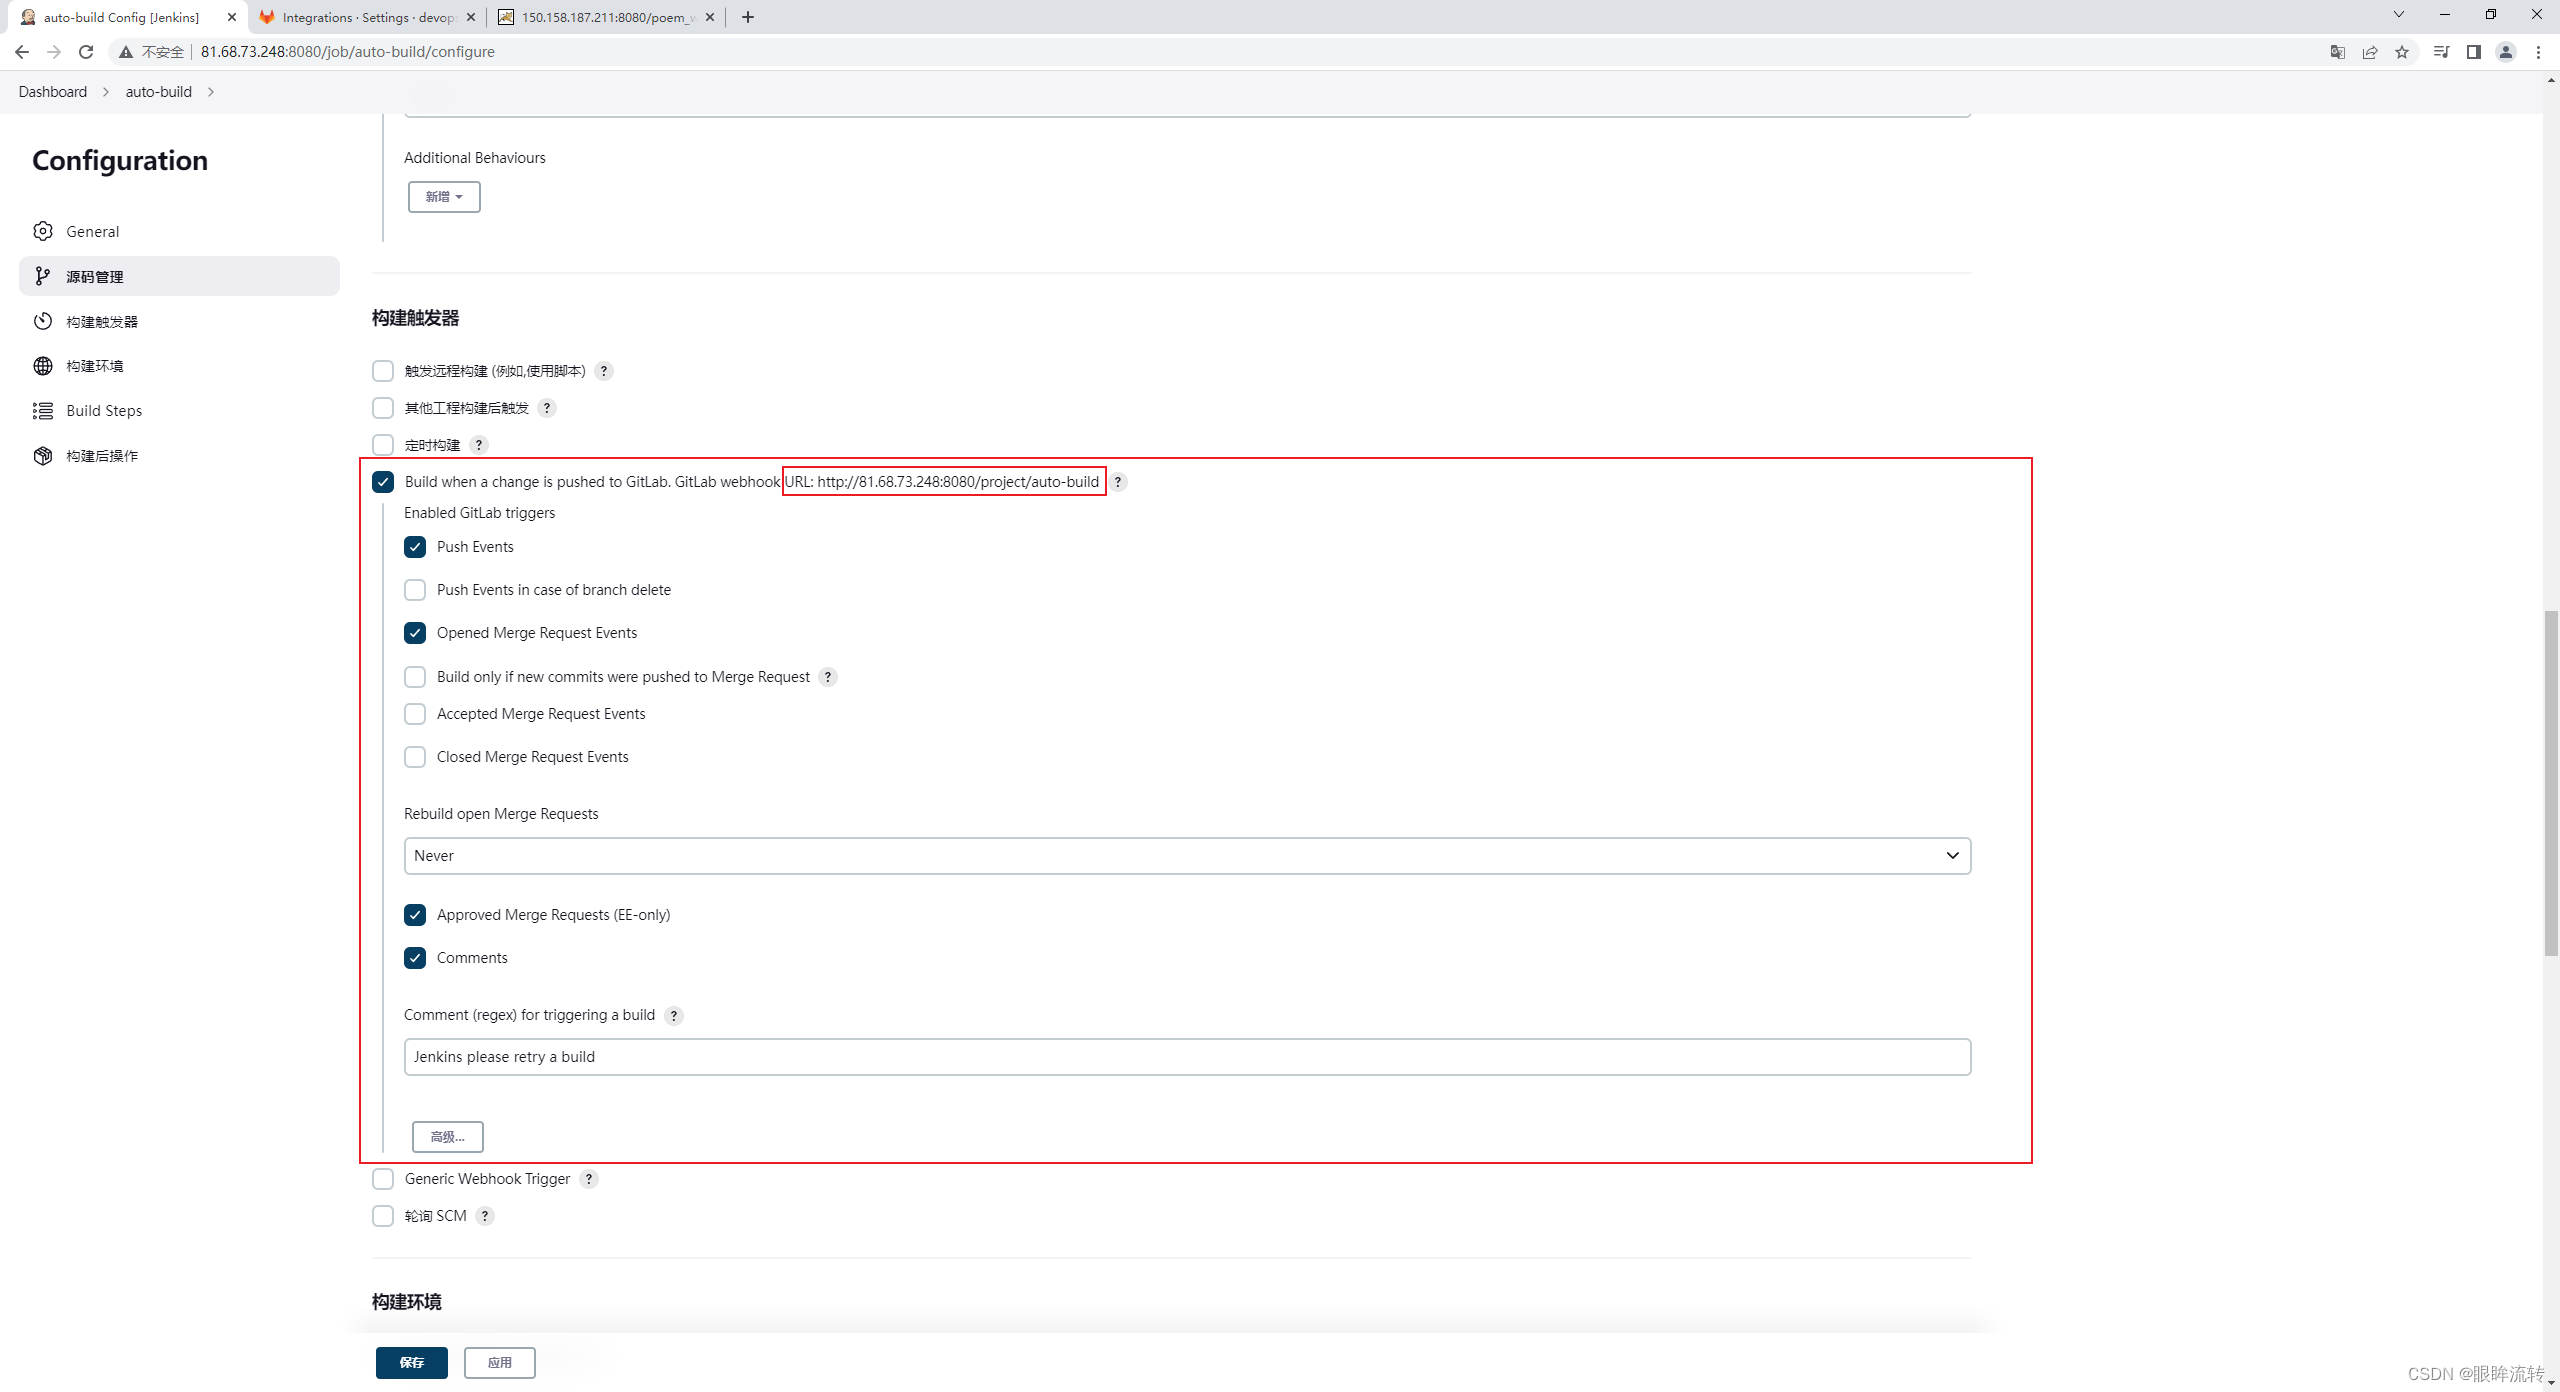
在项目中开启:Build when a change is pushed to GitLab. GitLab webhook URL: xxx
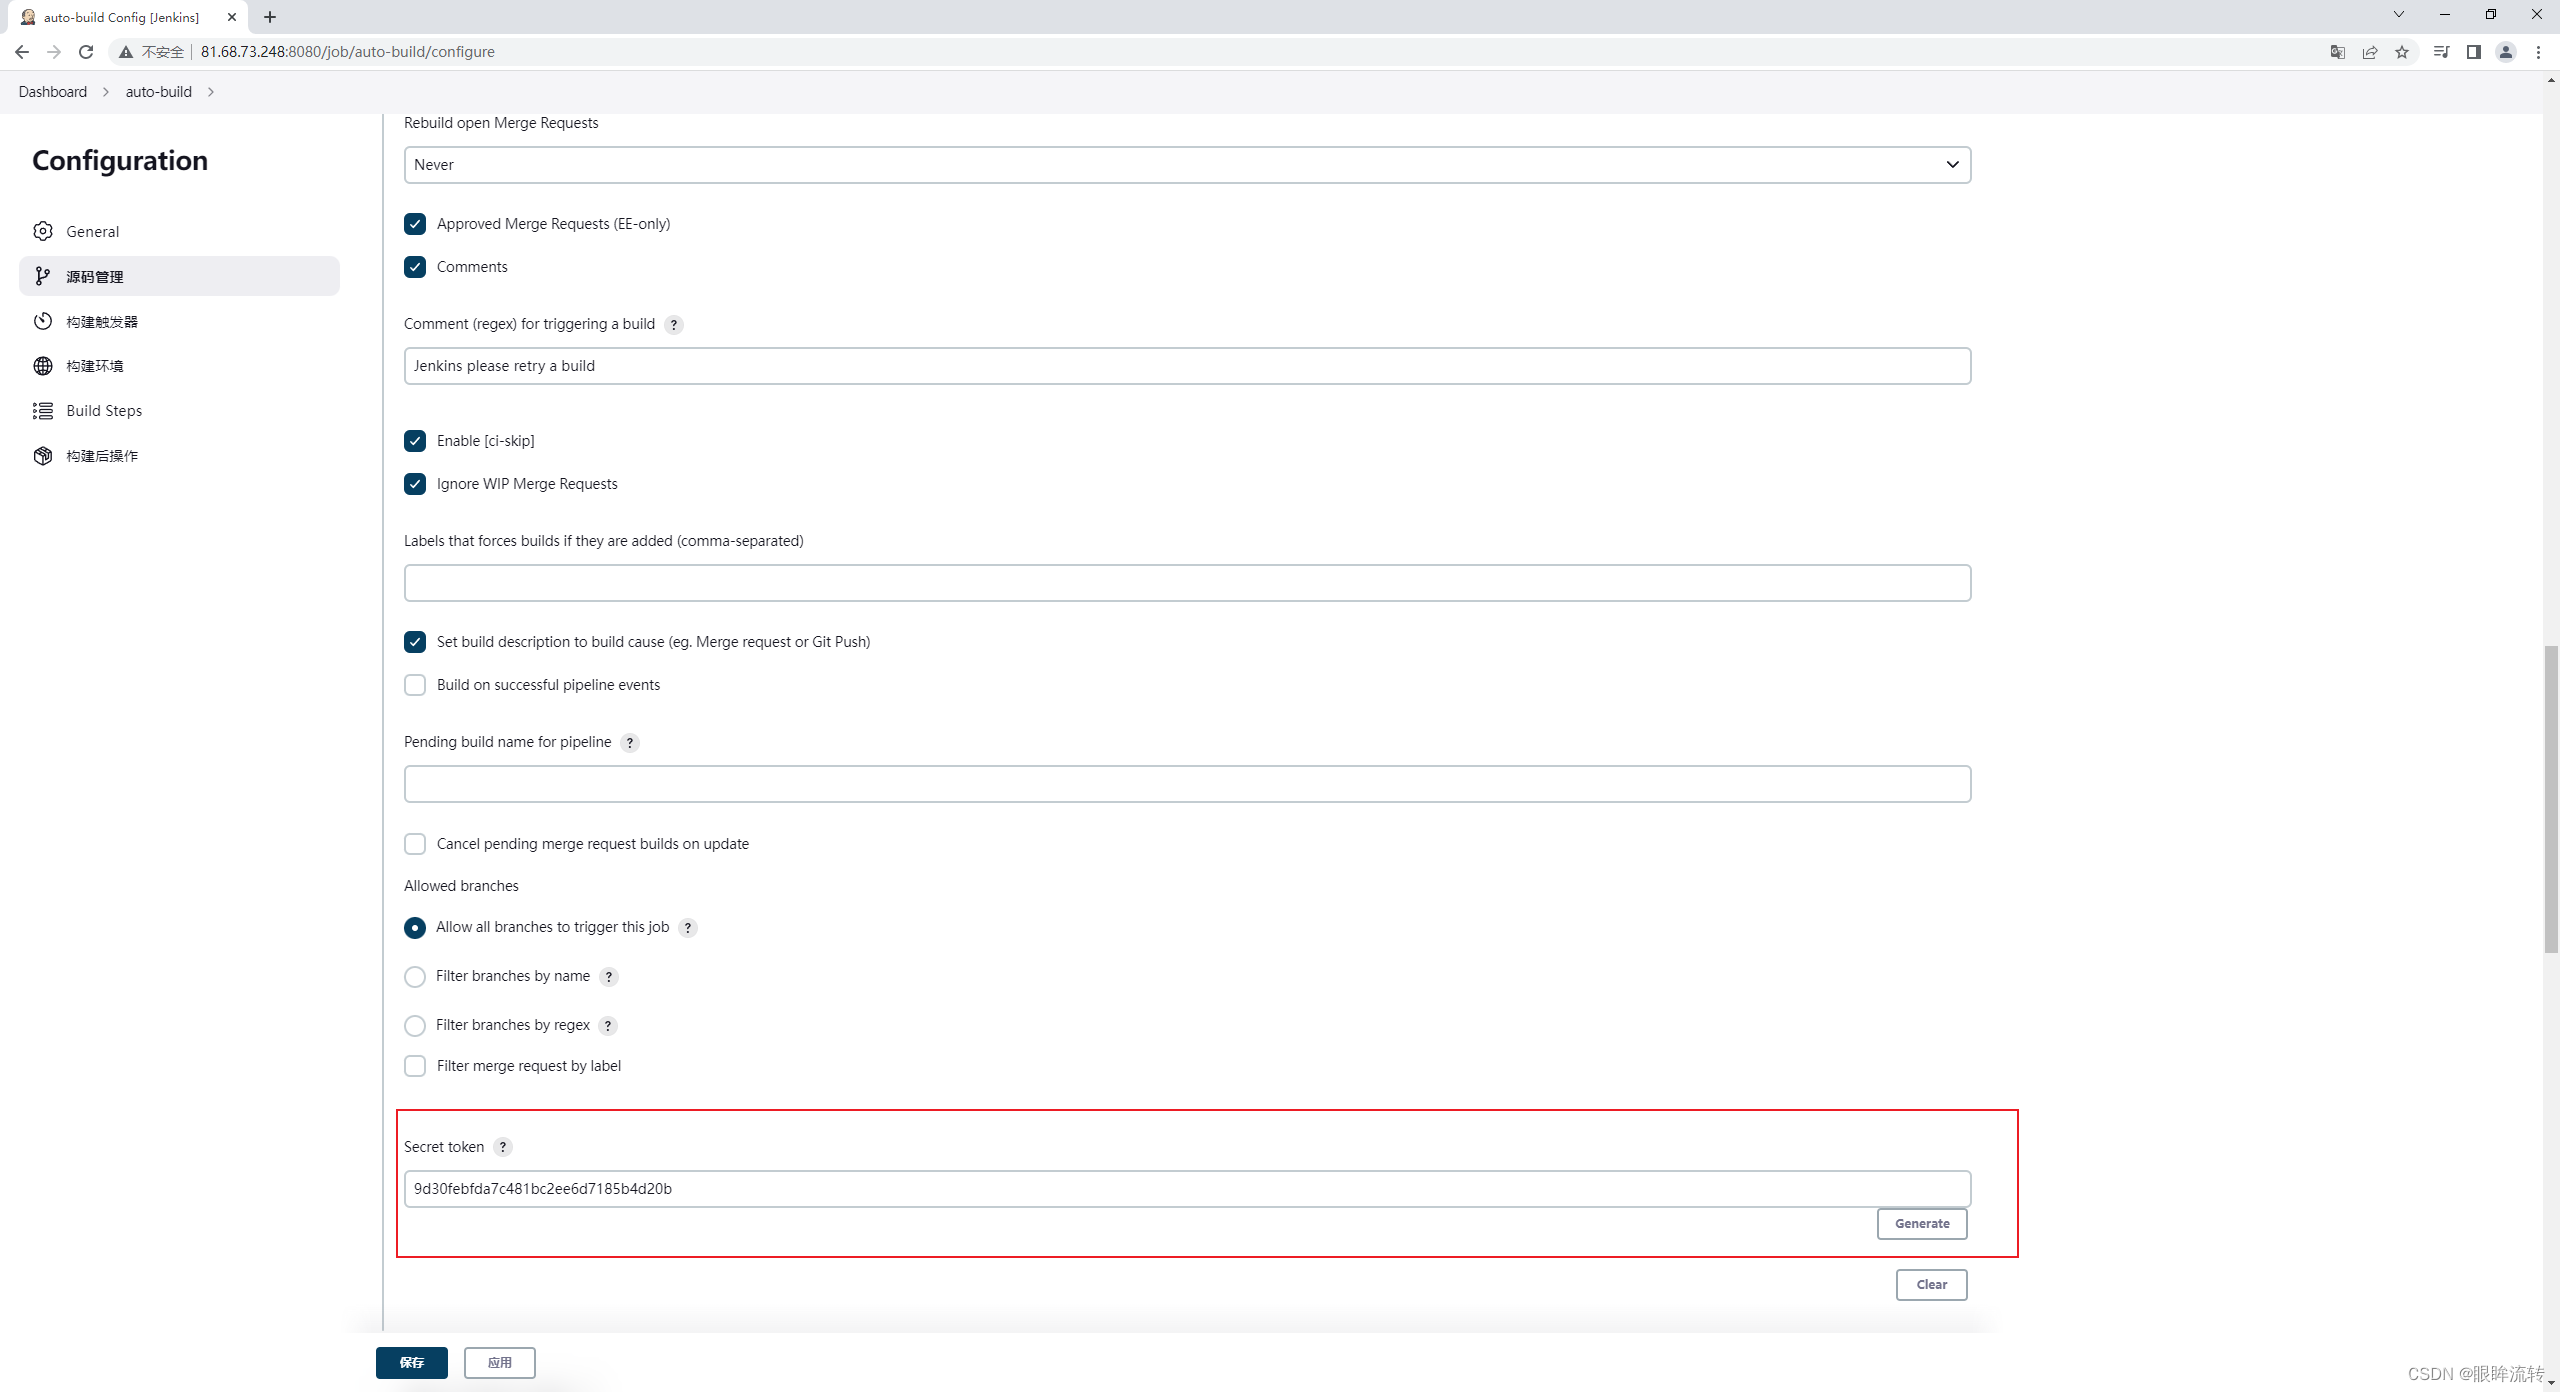
在GitLab webhook构建触发器中设置令牌
gitlab设置webhook地址
gitlab->setting->integrations

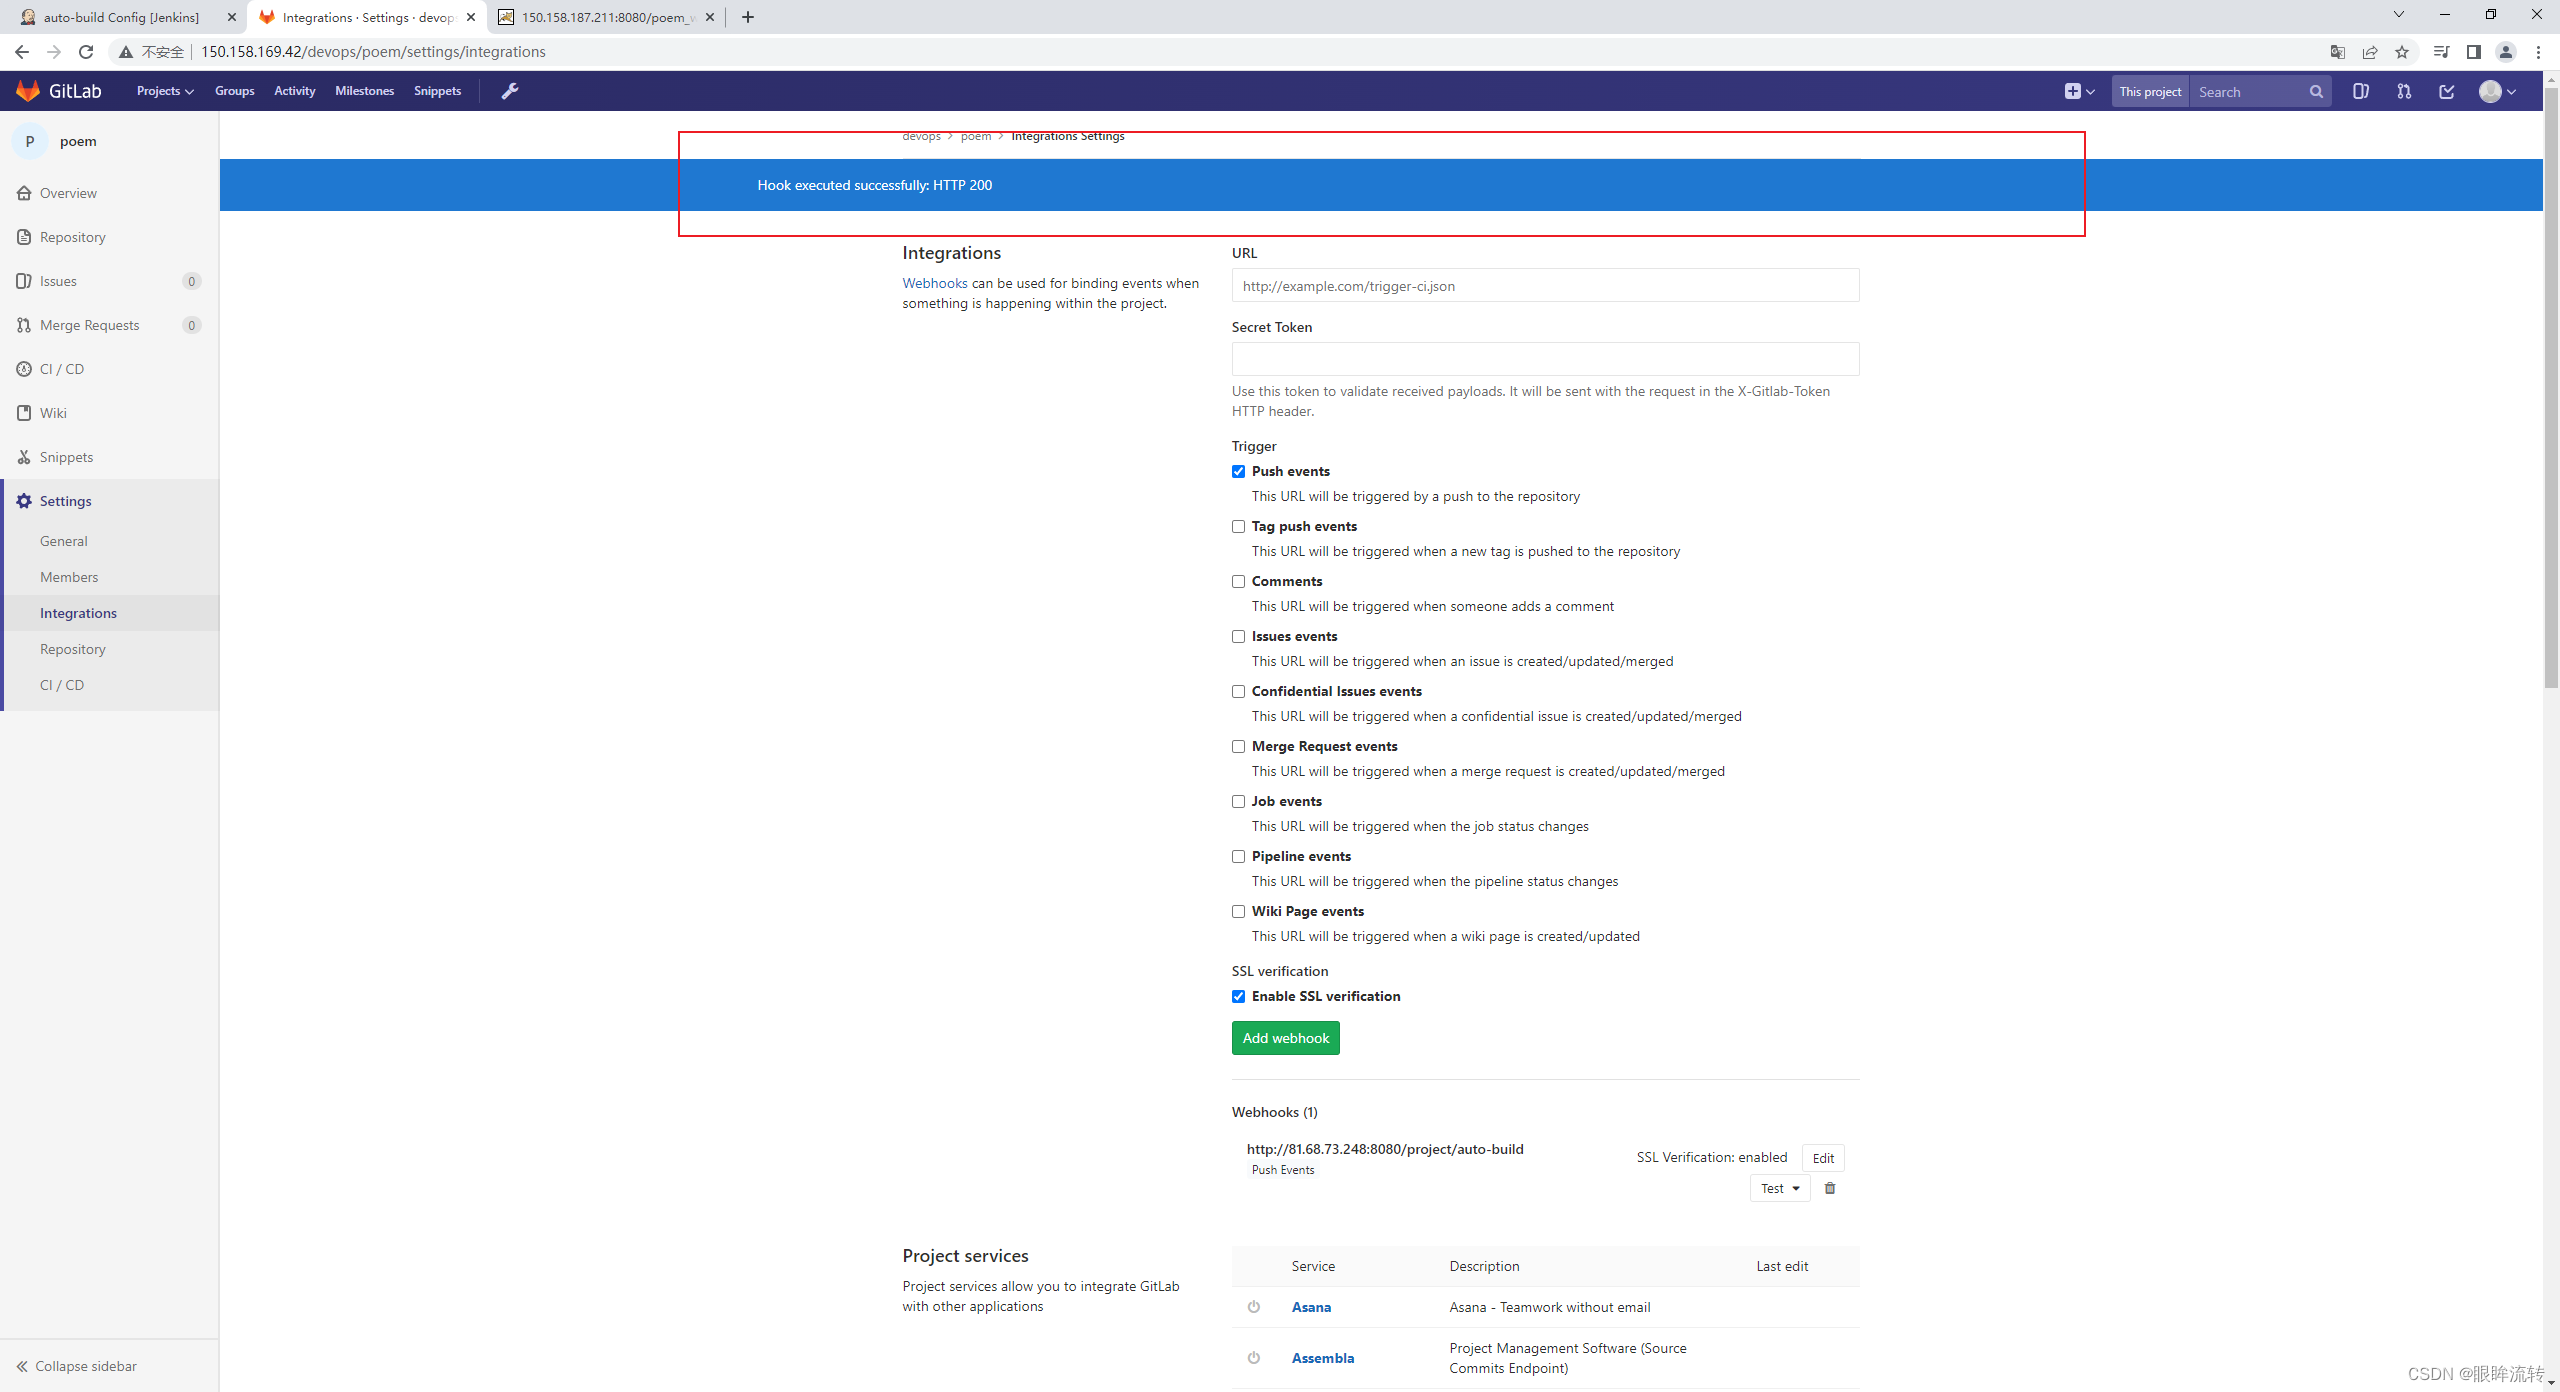
测试webhook
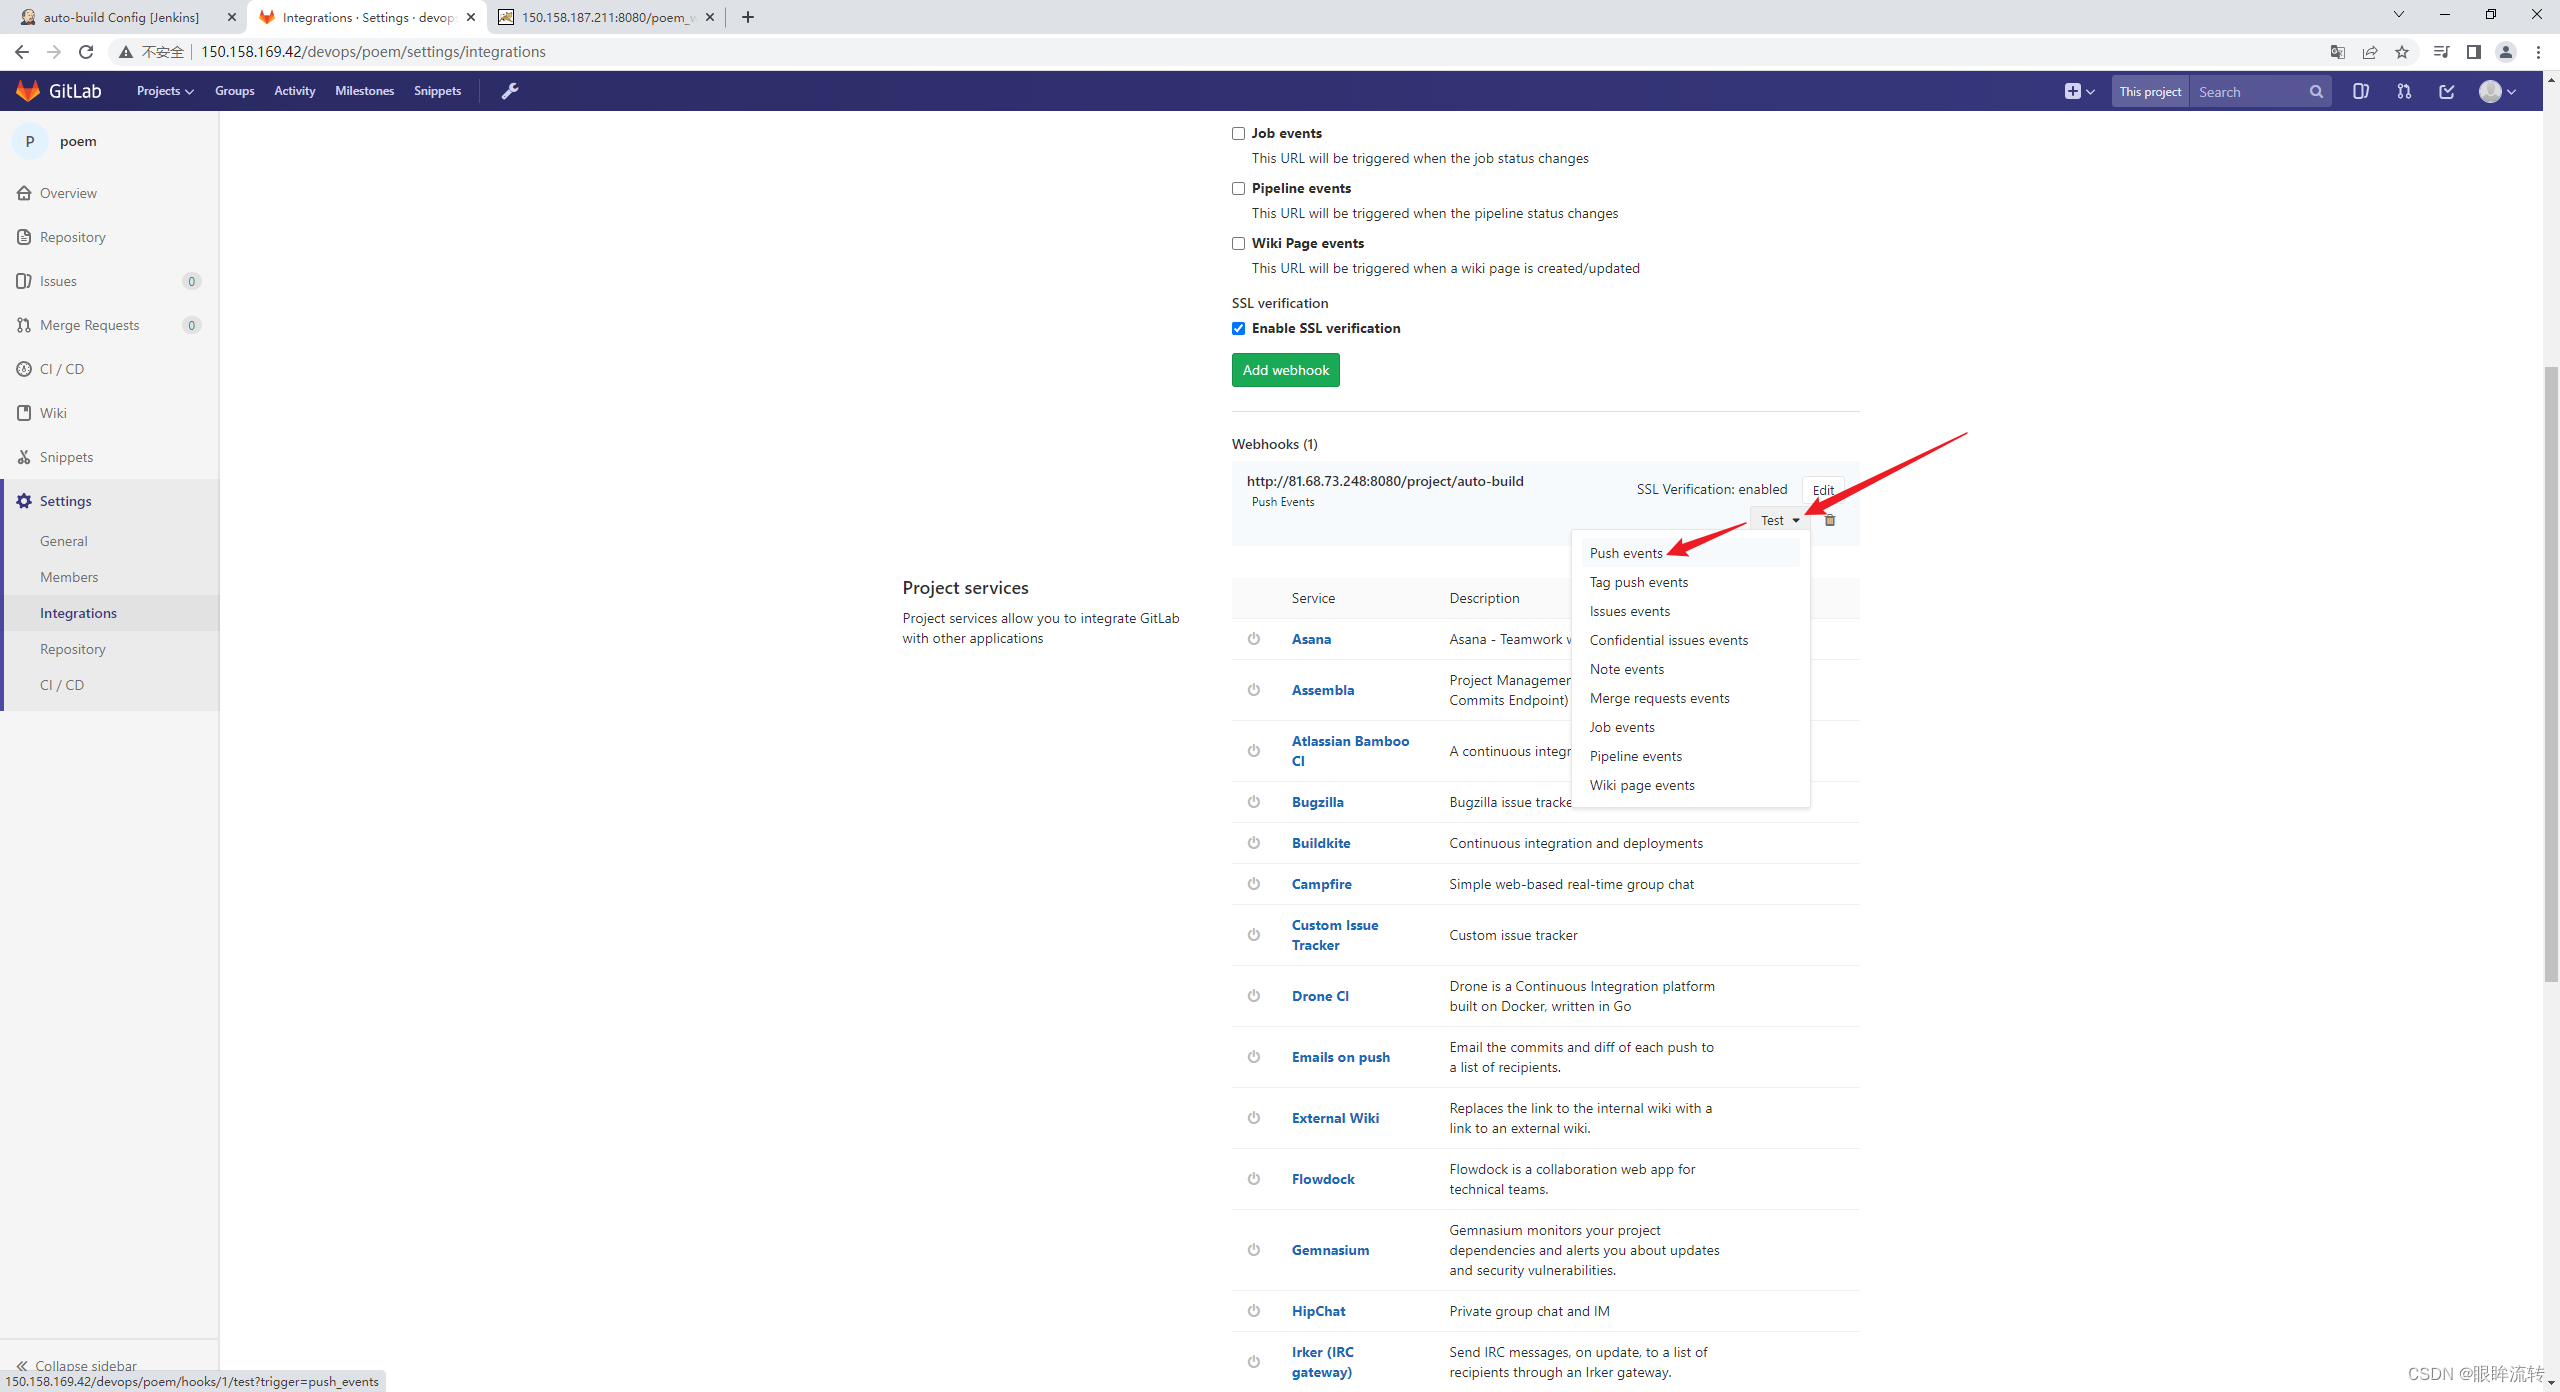
200成功
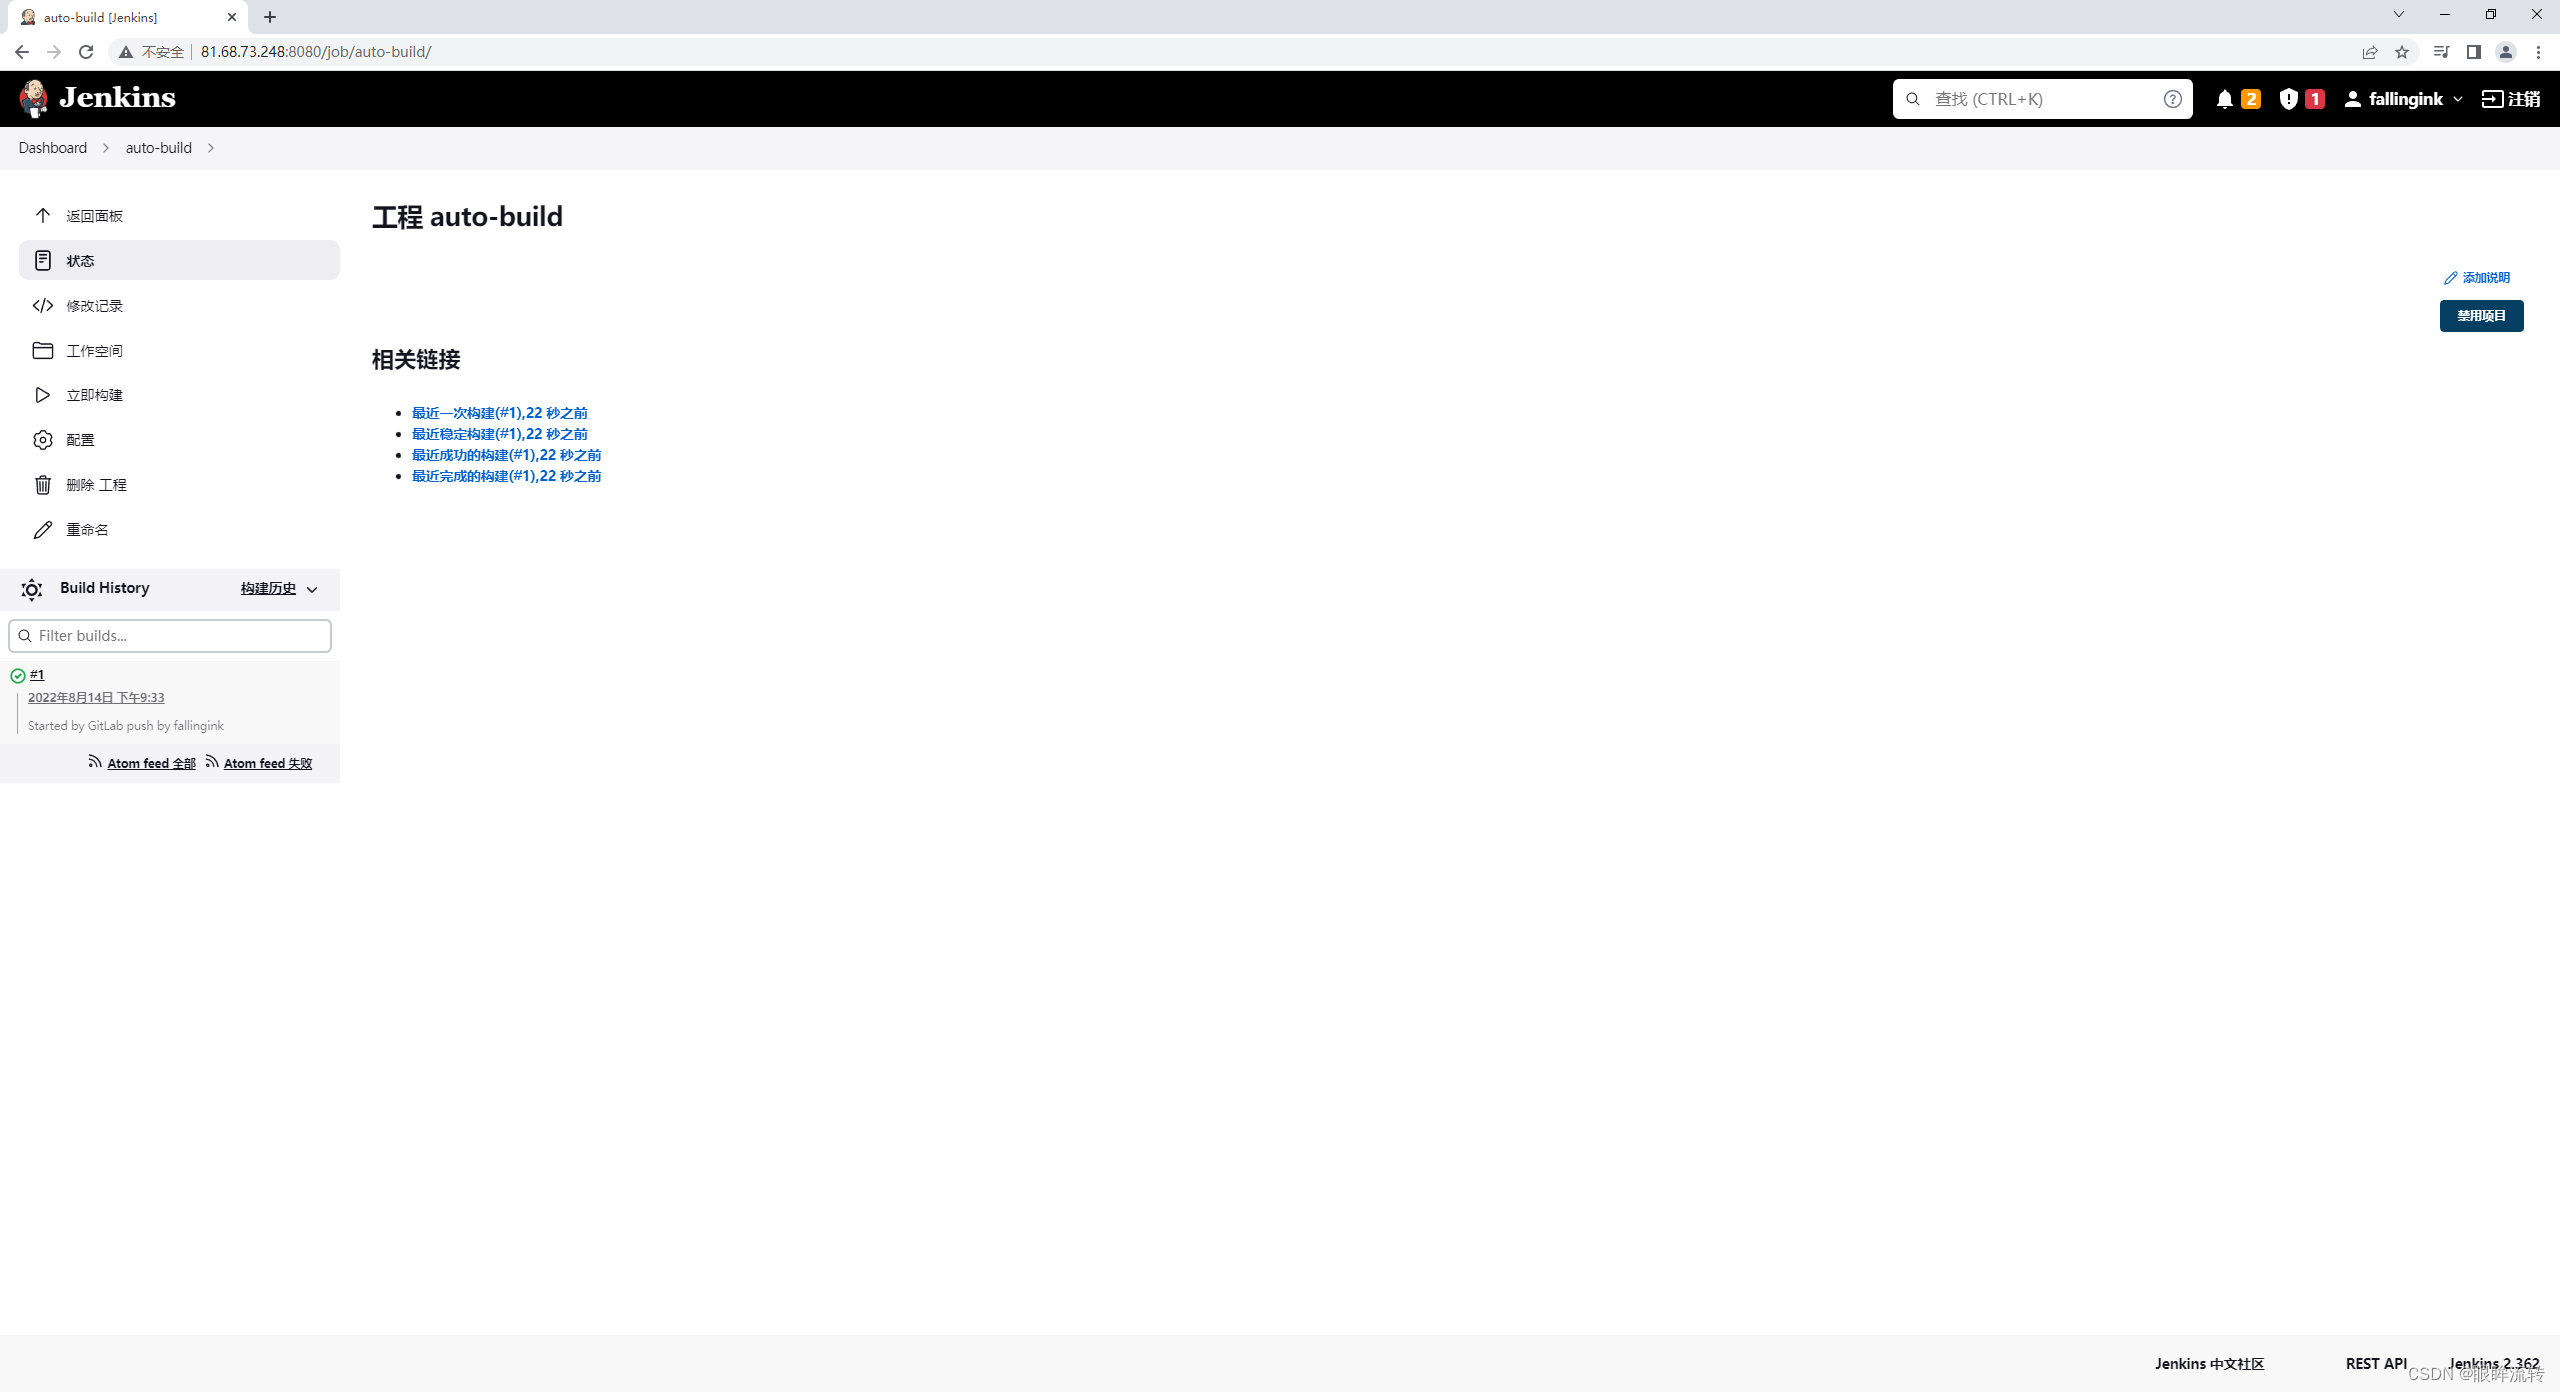
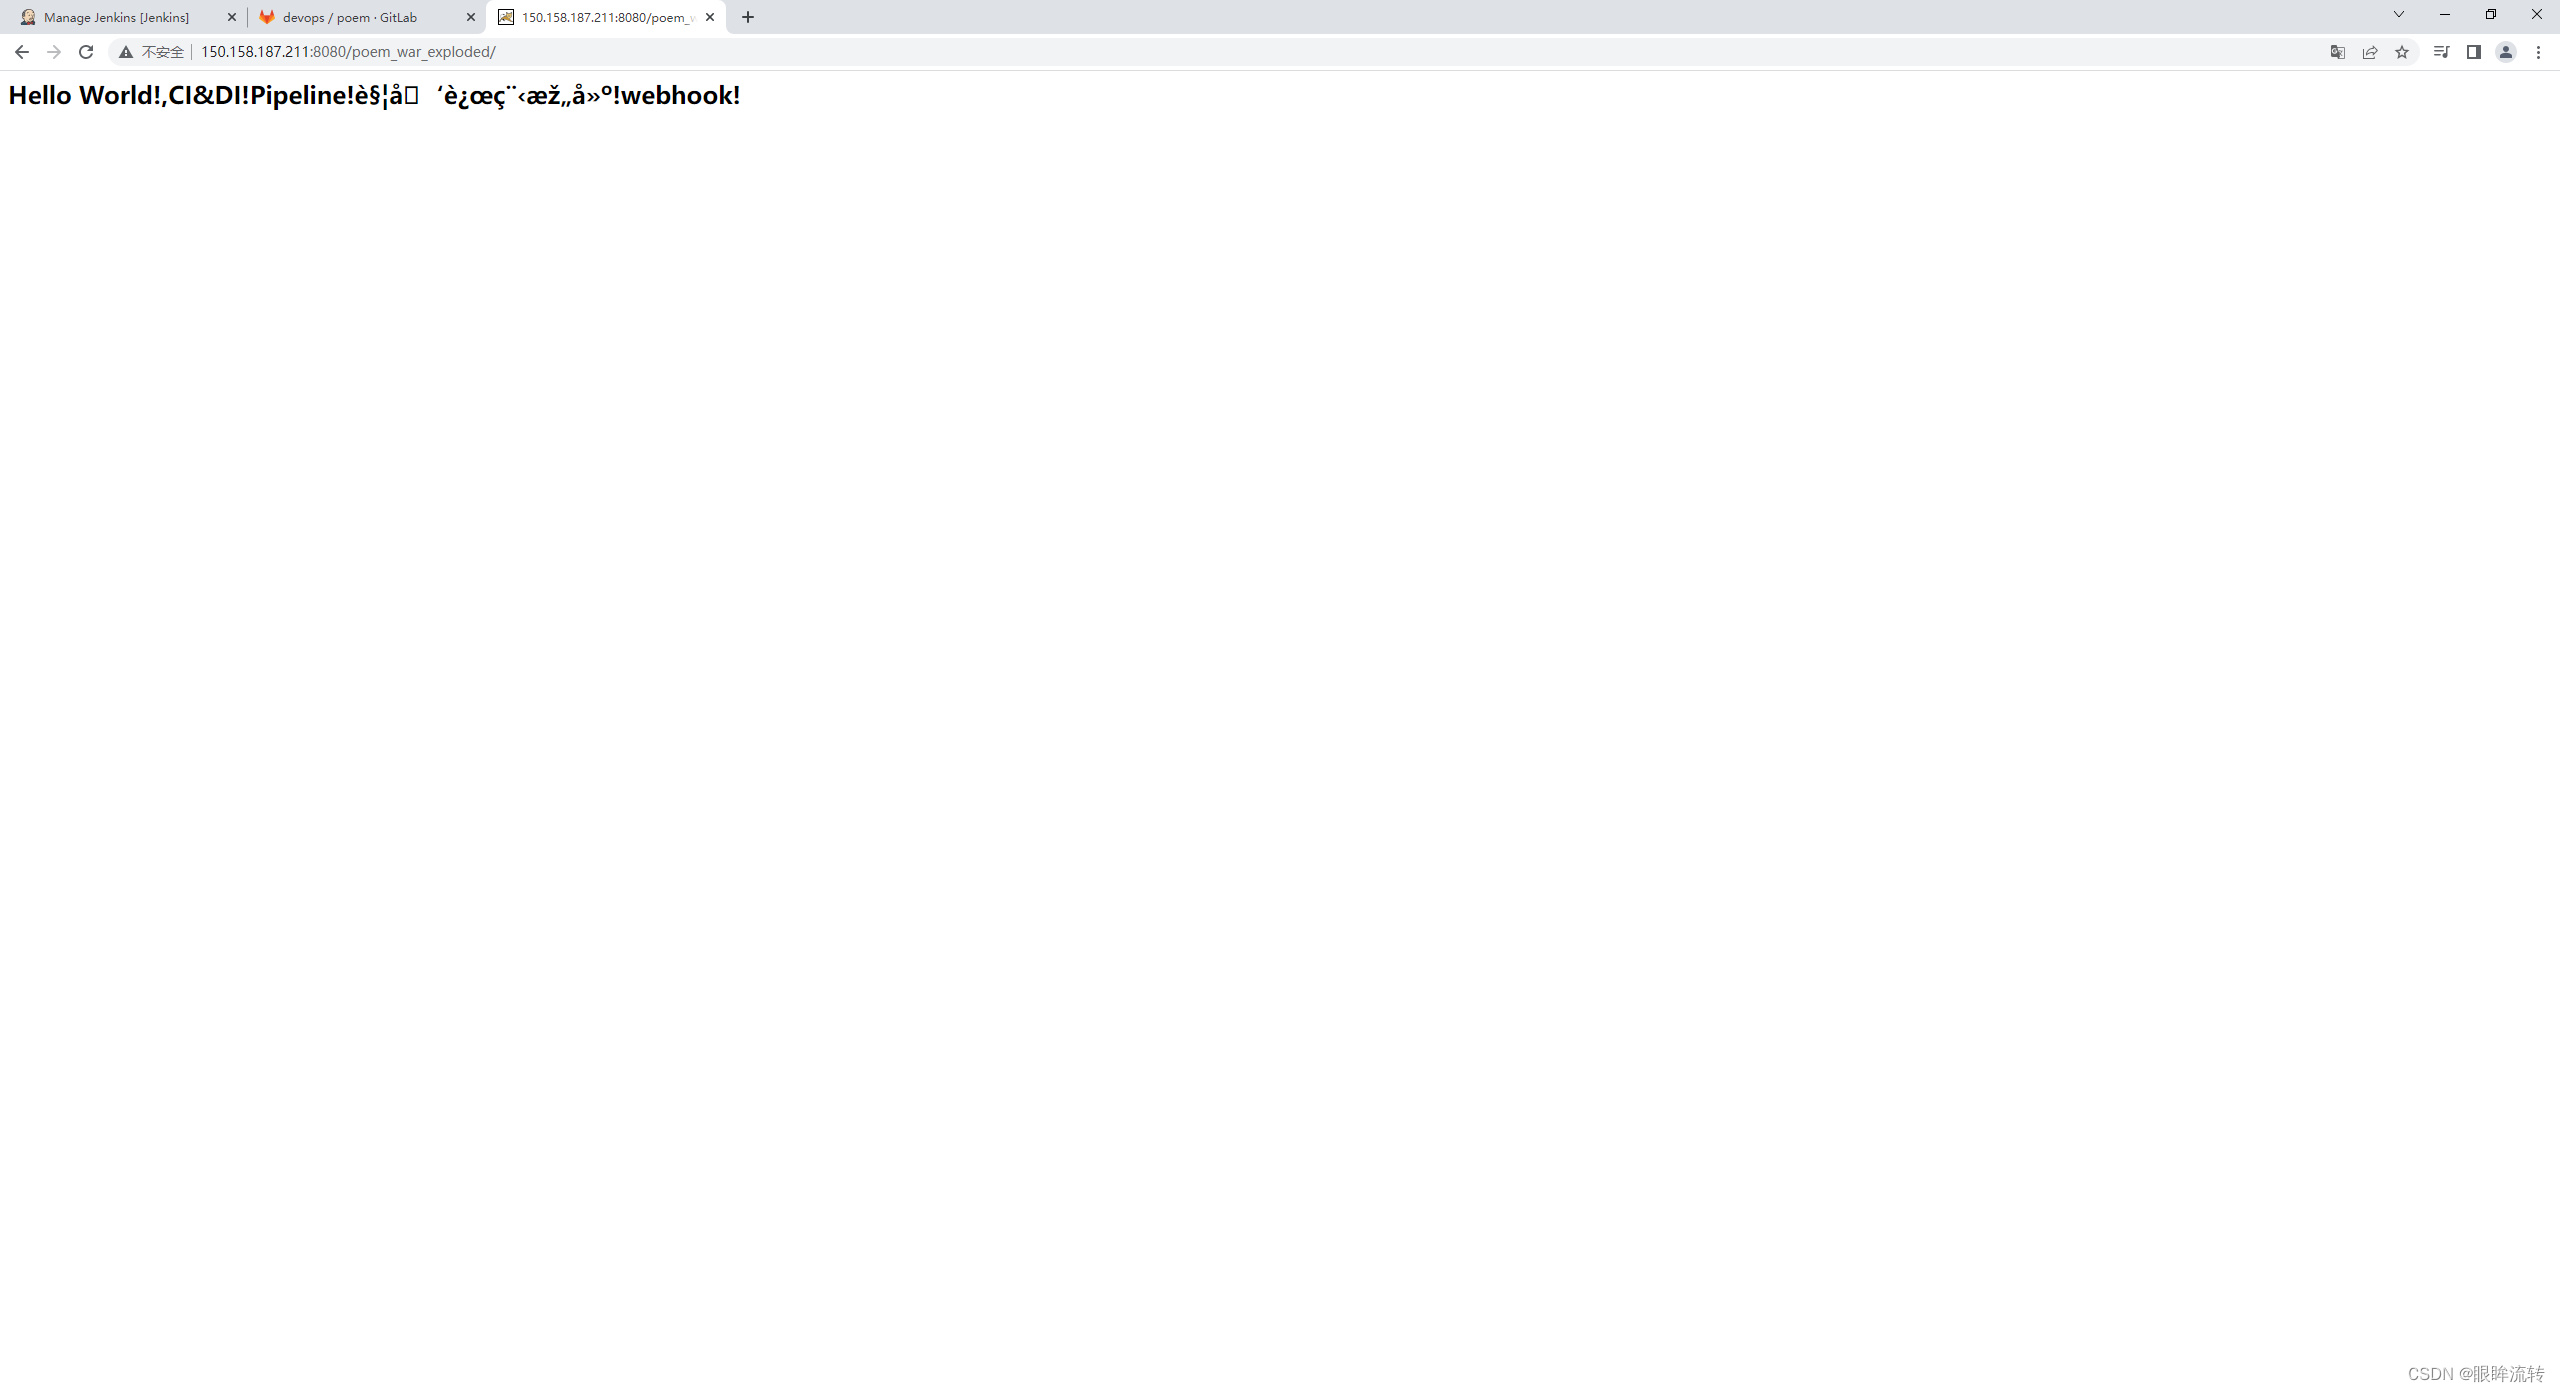
查看jenkins构建结果

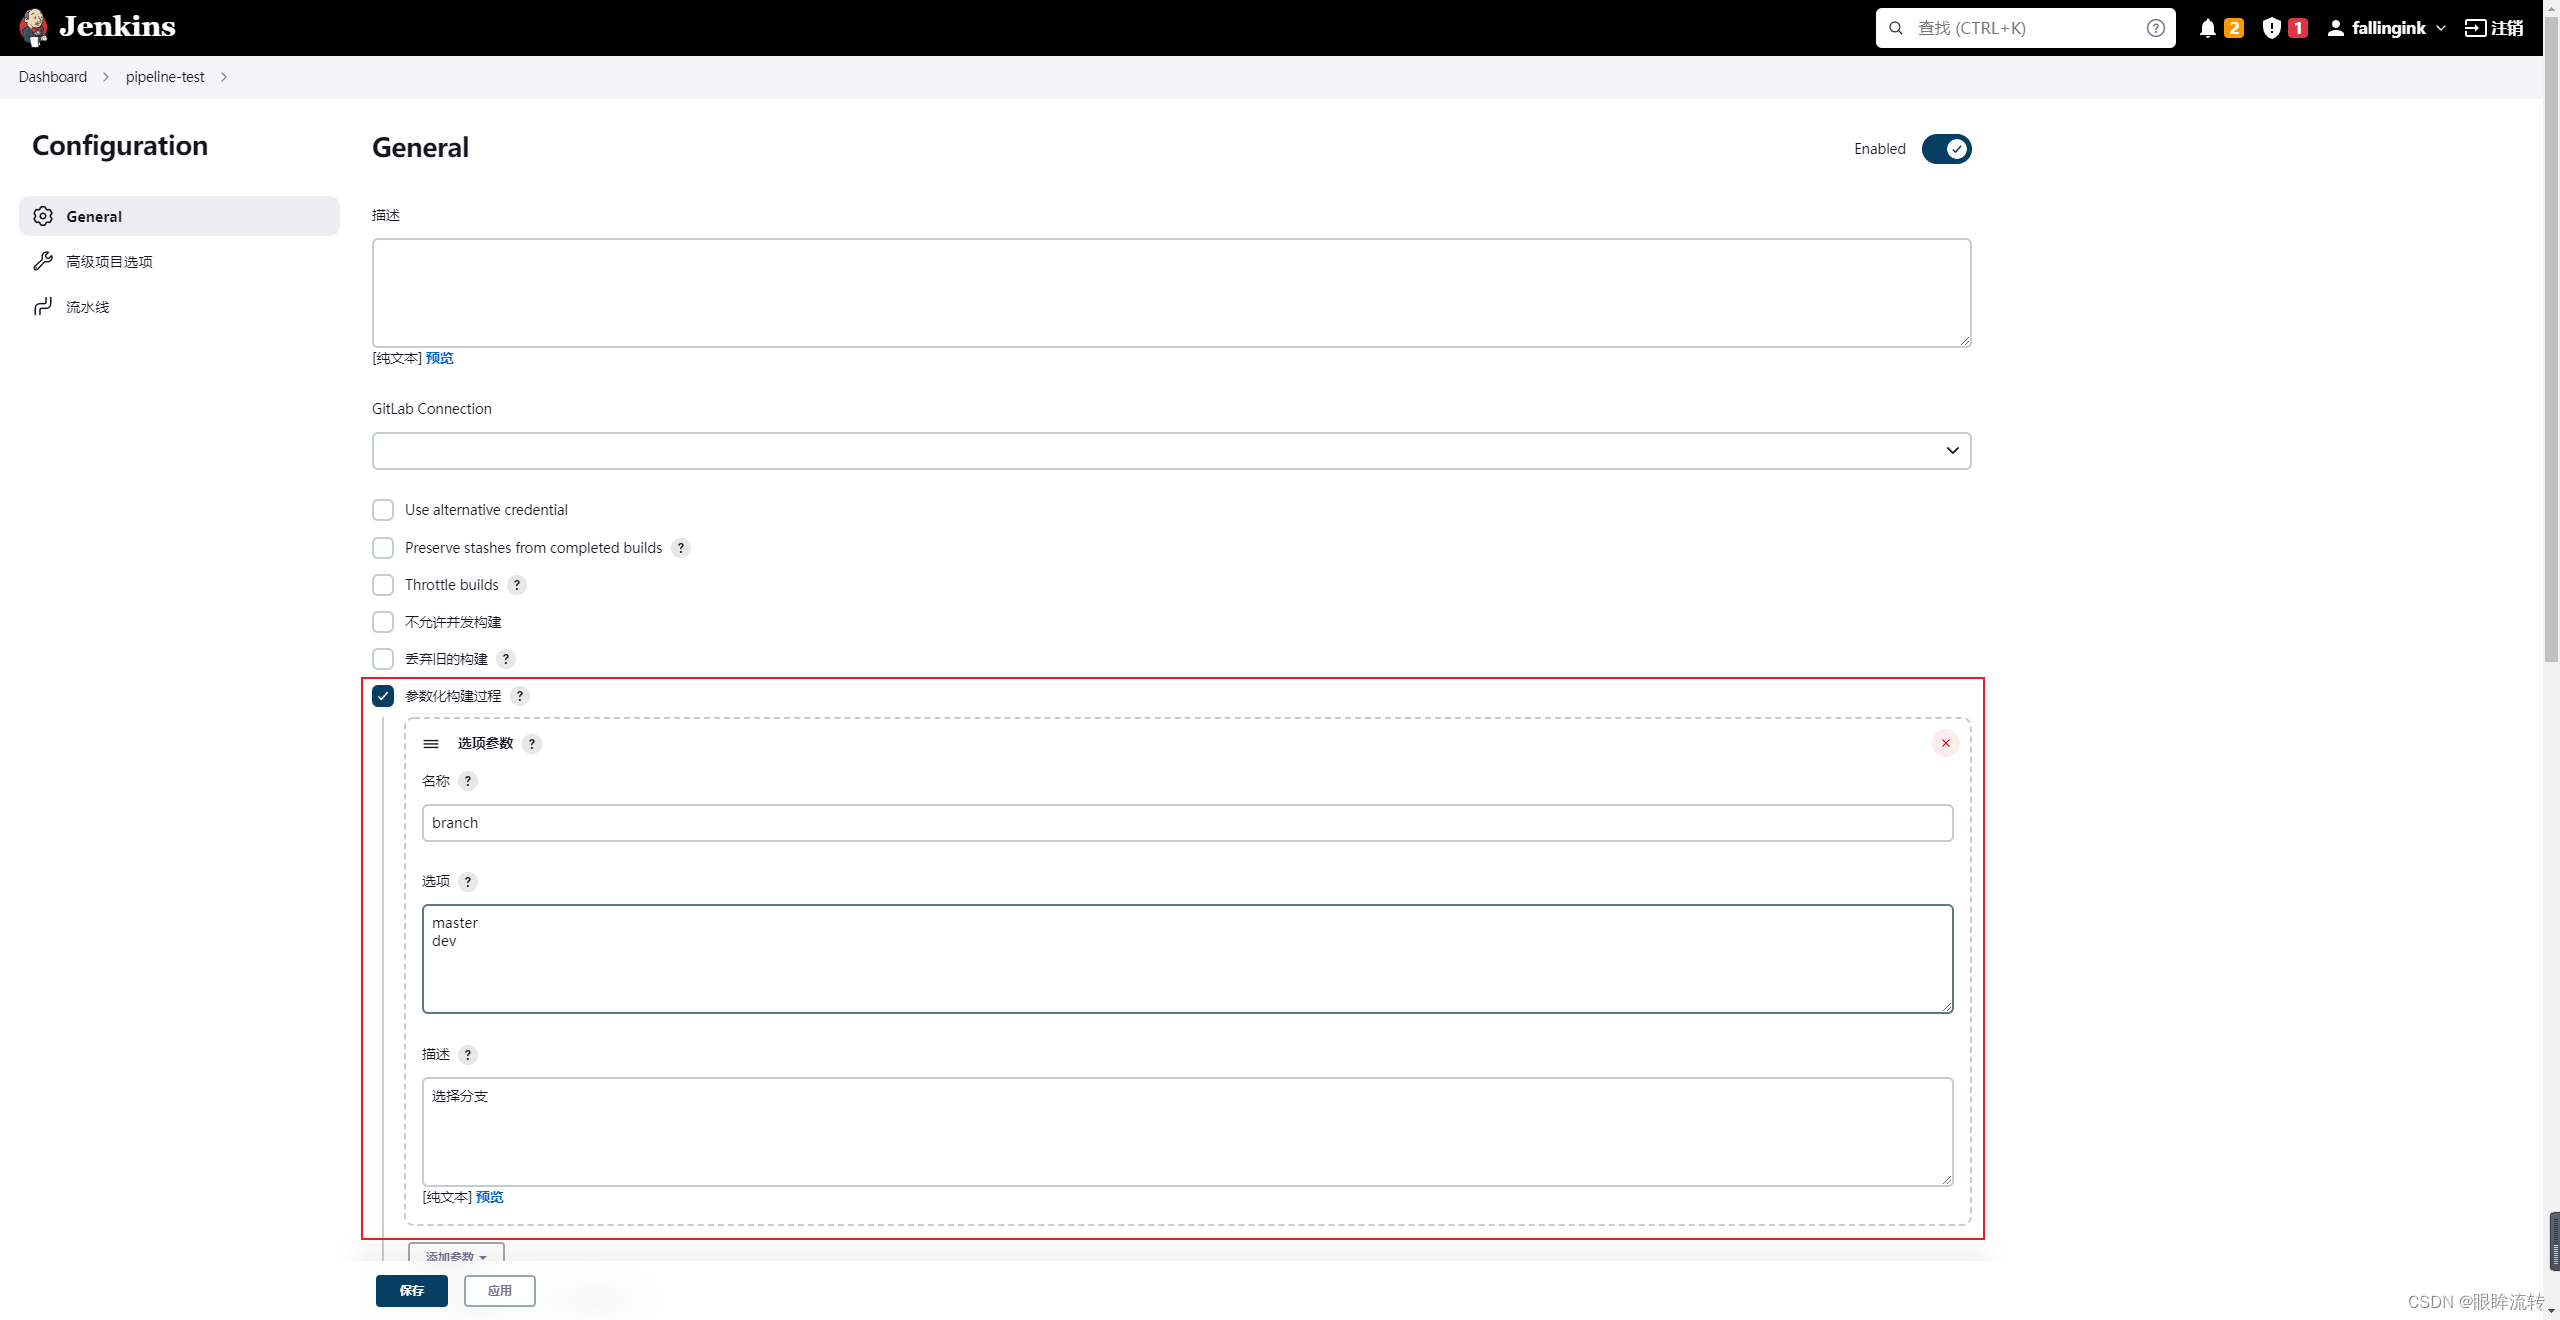
14、参数化构建
git分支命名规则
| 分支 | 命名 | 说明 |
|---|---|---|
| 主分支 | master | 主分支,所有提供给用户使用的正式版本,都在这个主分支上发布 |
| 开发分支 | dev | 开发分支,永远是功能最新最全的分支 |
| 功能分支 | feature-* | 新功能分支,某个功能点正在开发阶段 |
| 发布版本 | release-* | 发布定期要上线的功能 |
| 修复分支 | bug-* | 修复线上代码的 bug |
设置参数
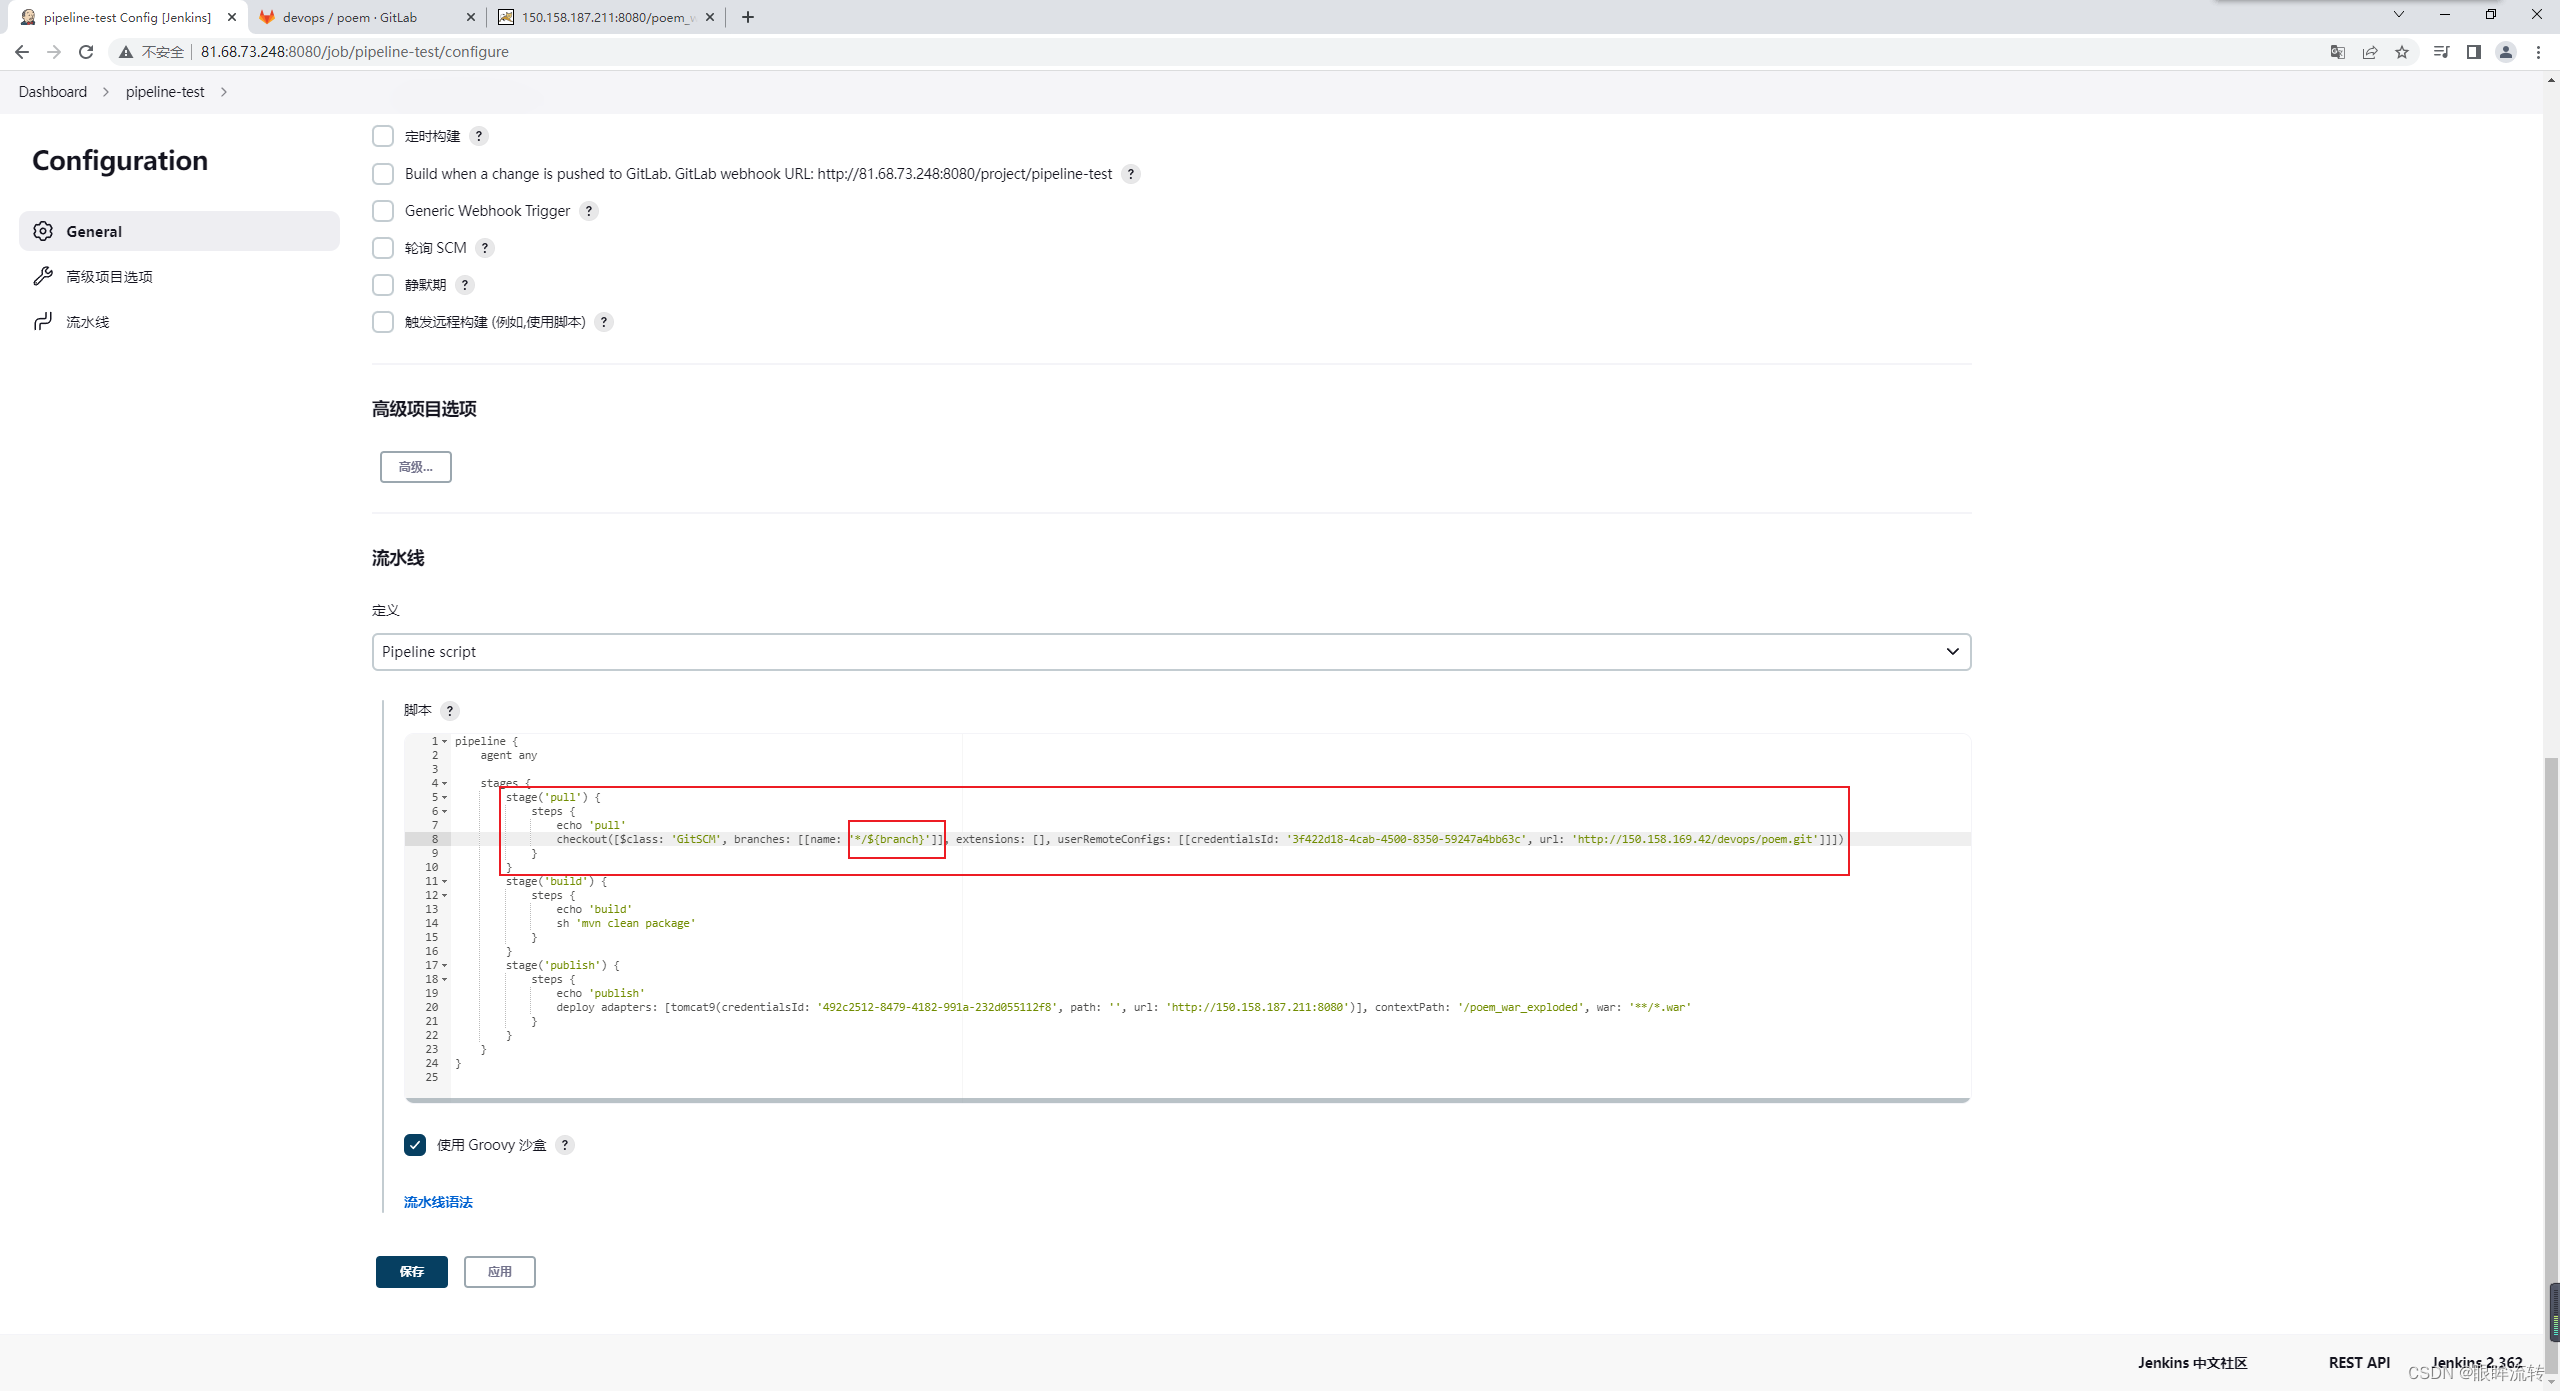
修改流水线脚本
选择参数
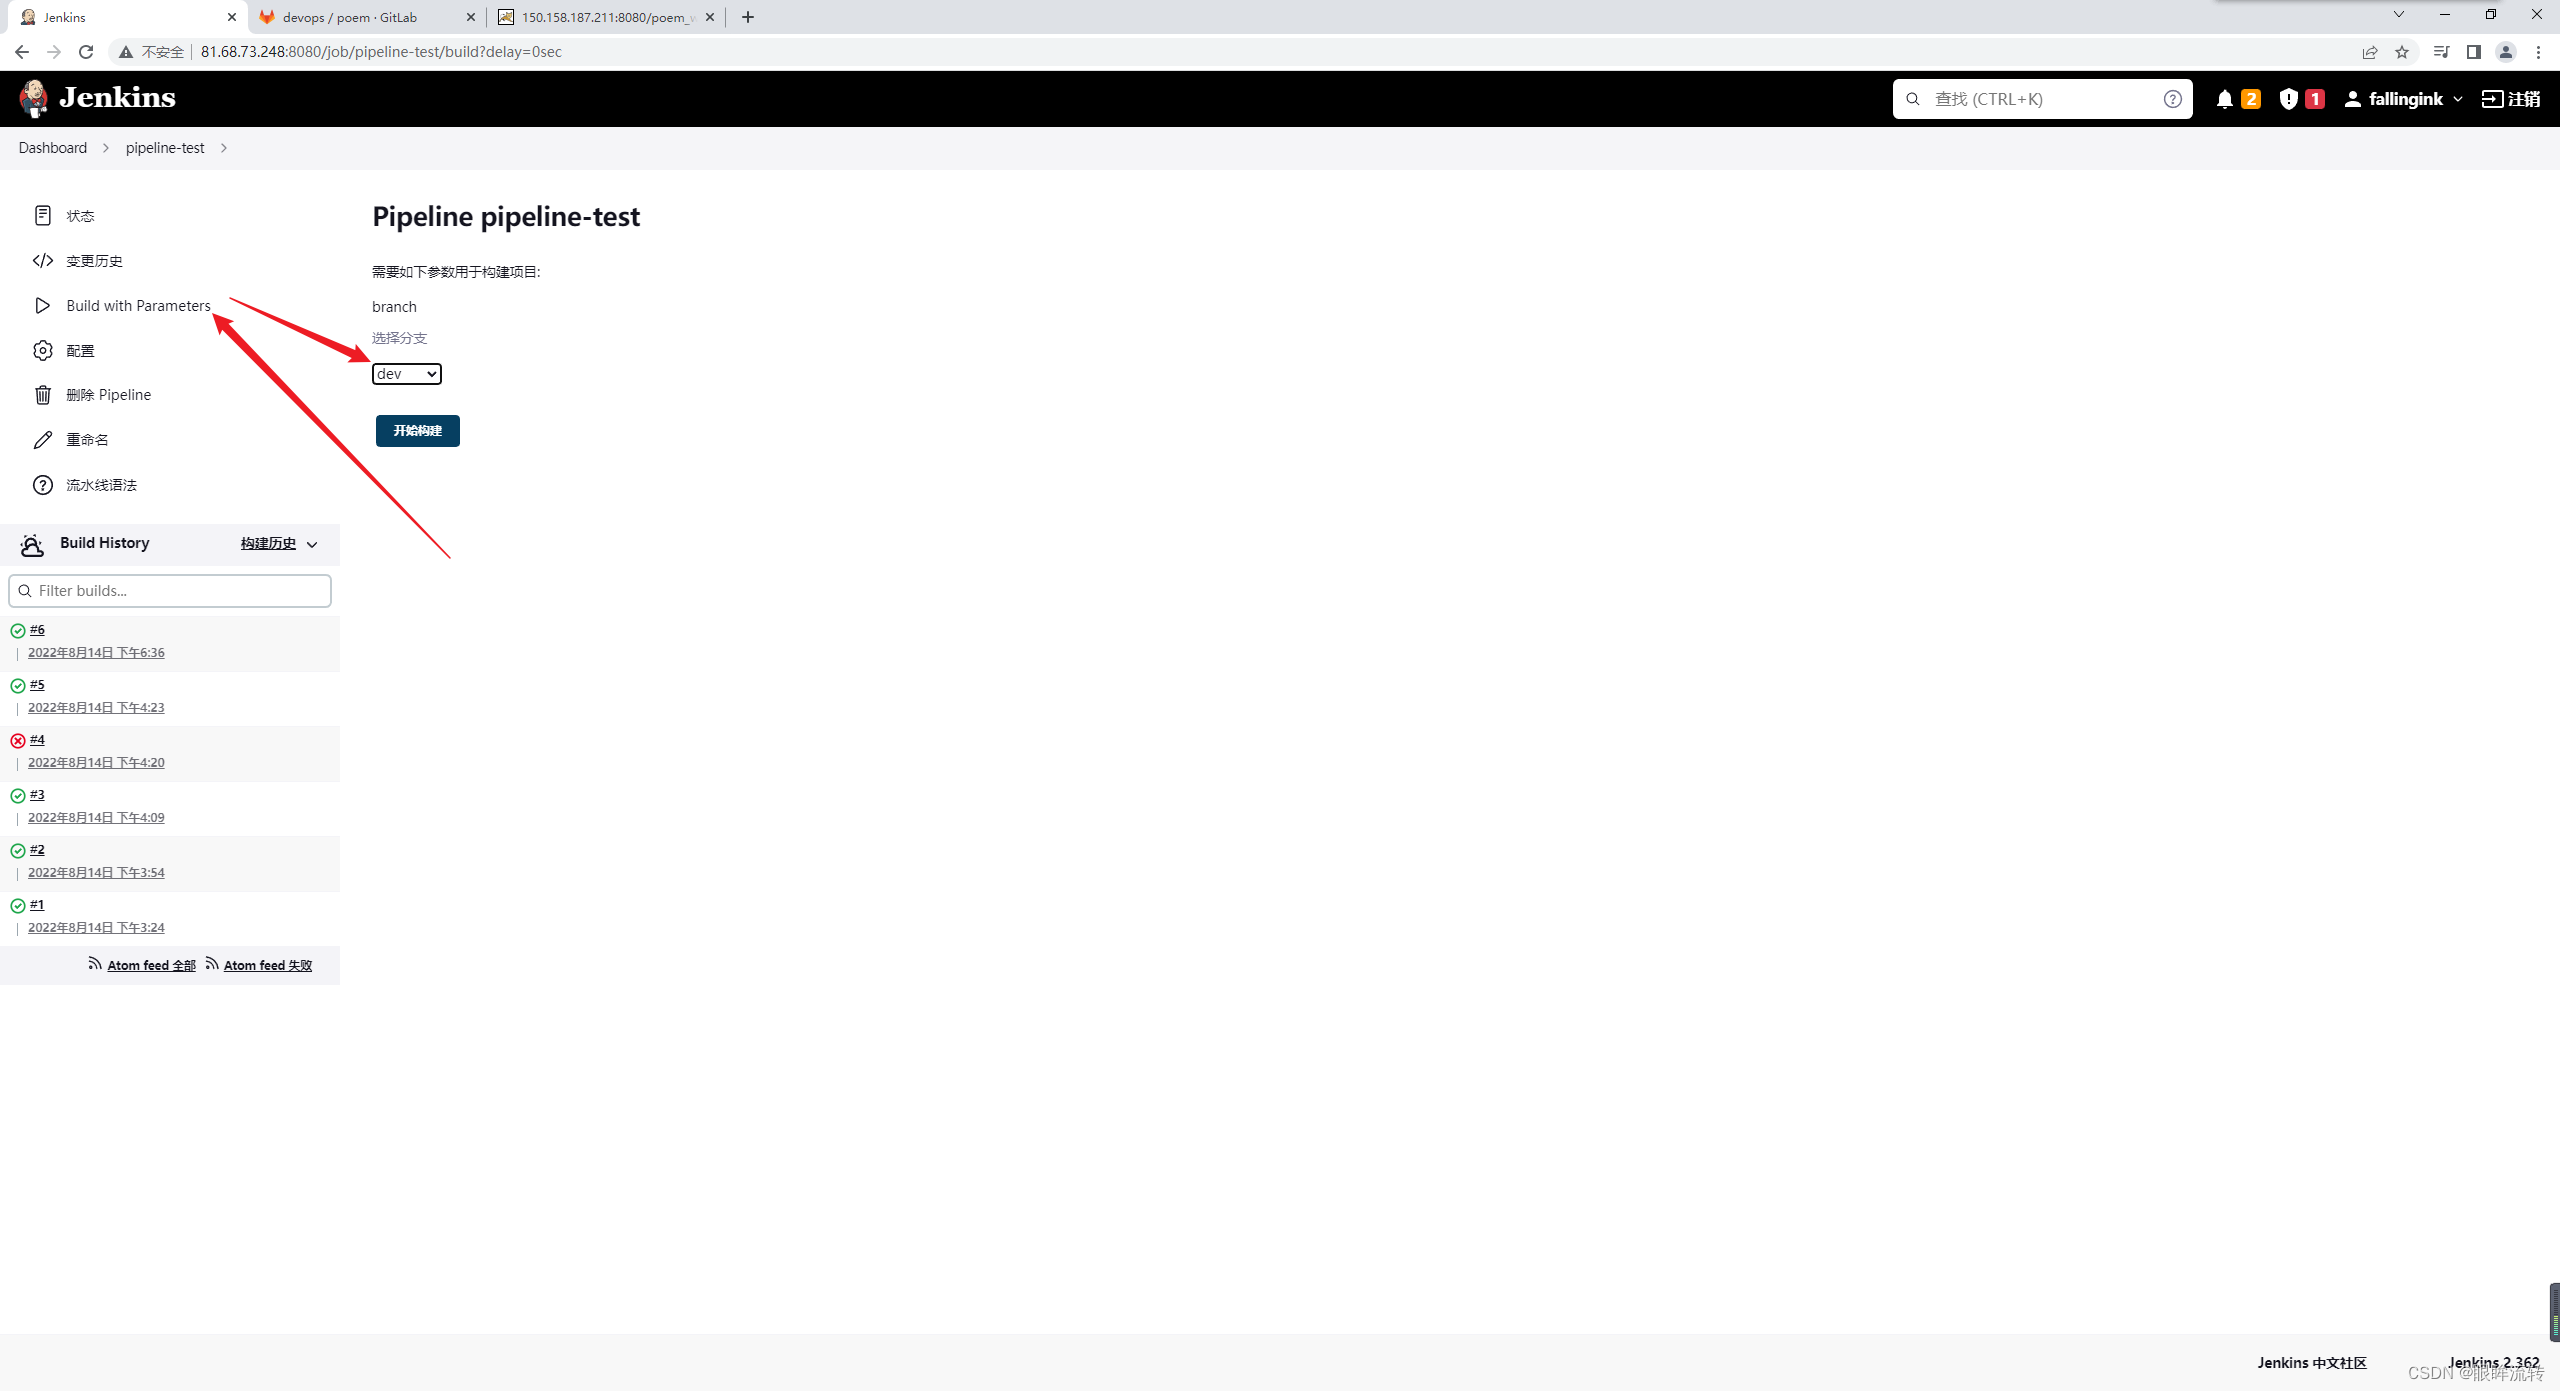
构建

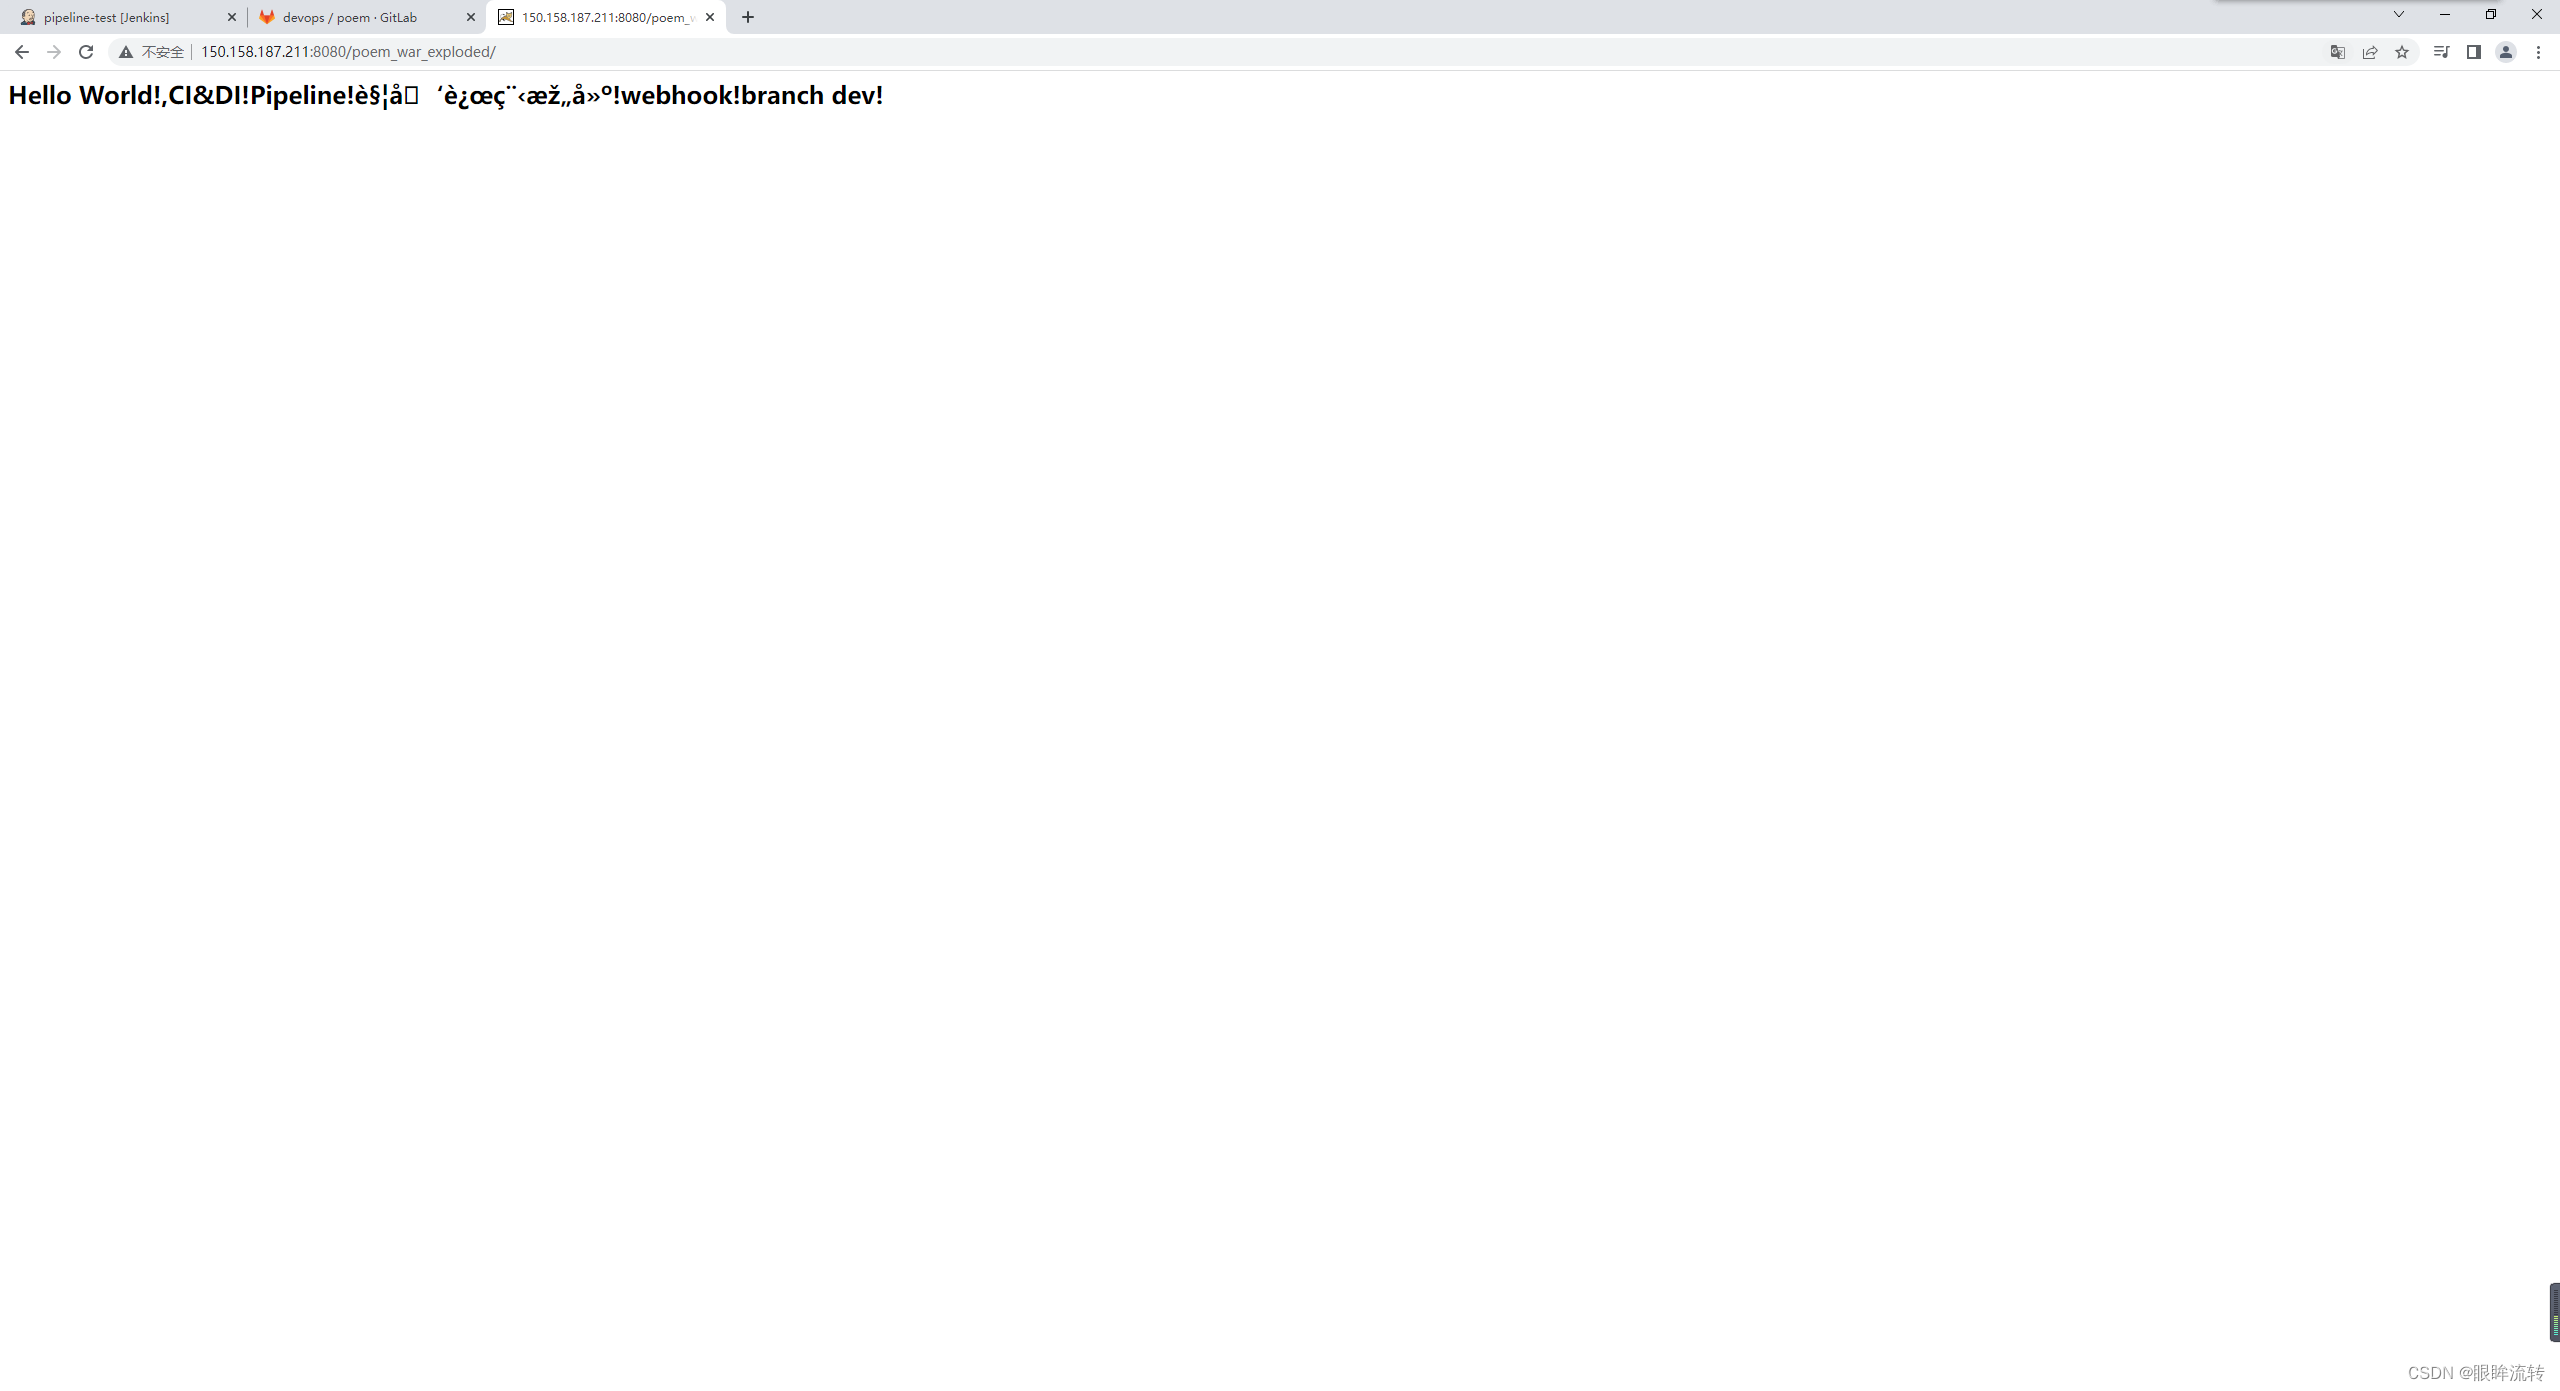
结果
15、邮件
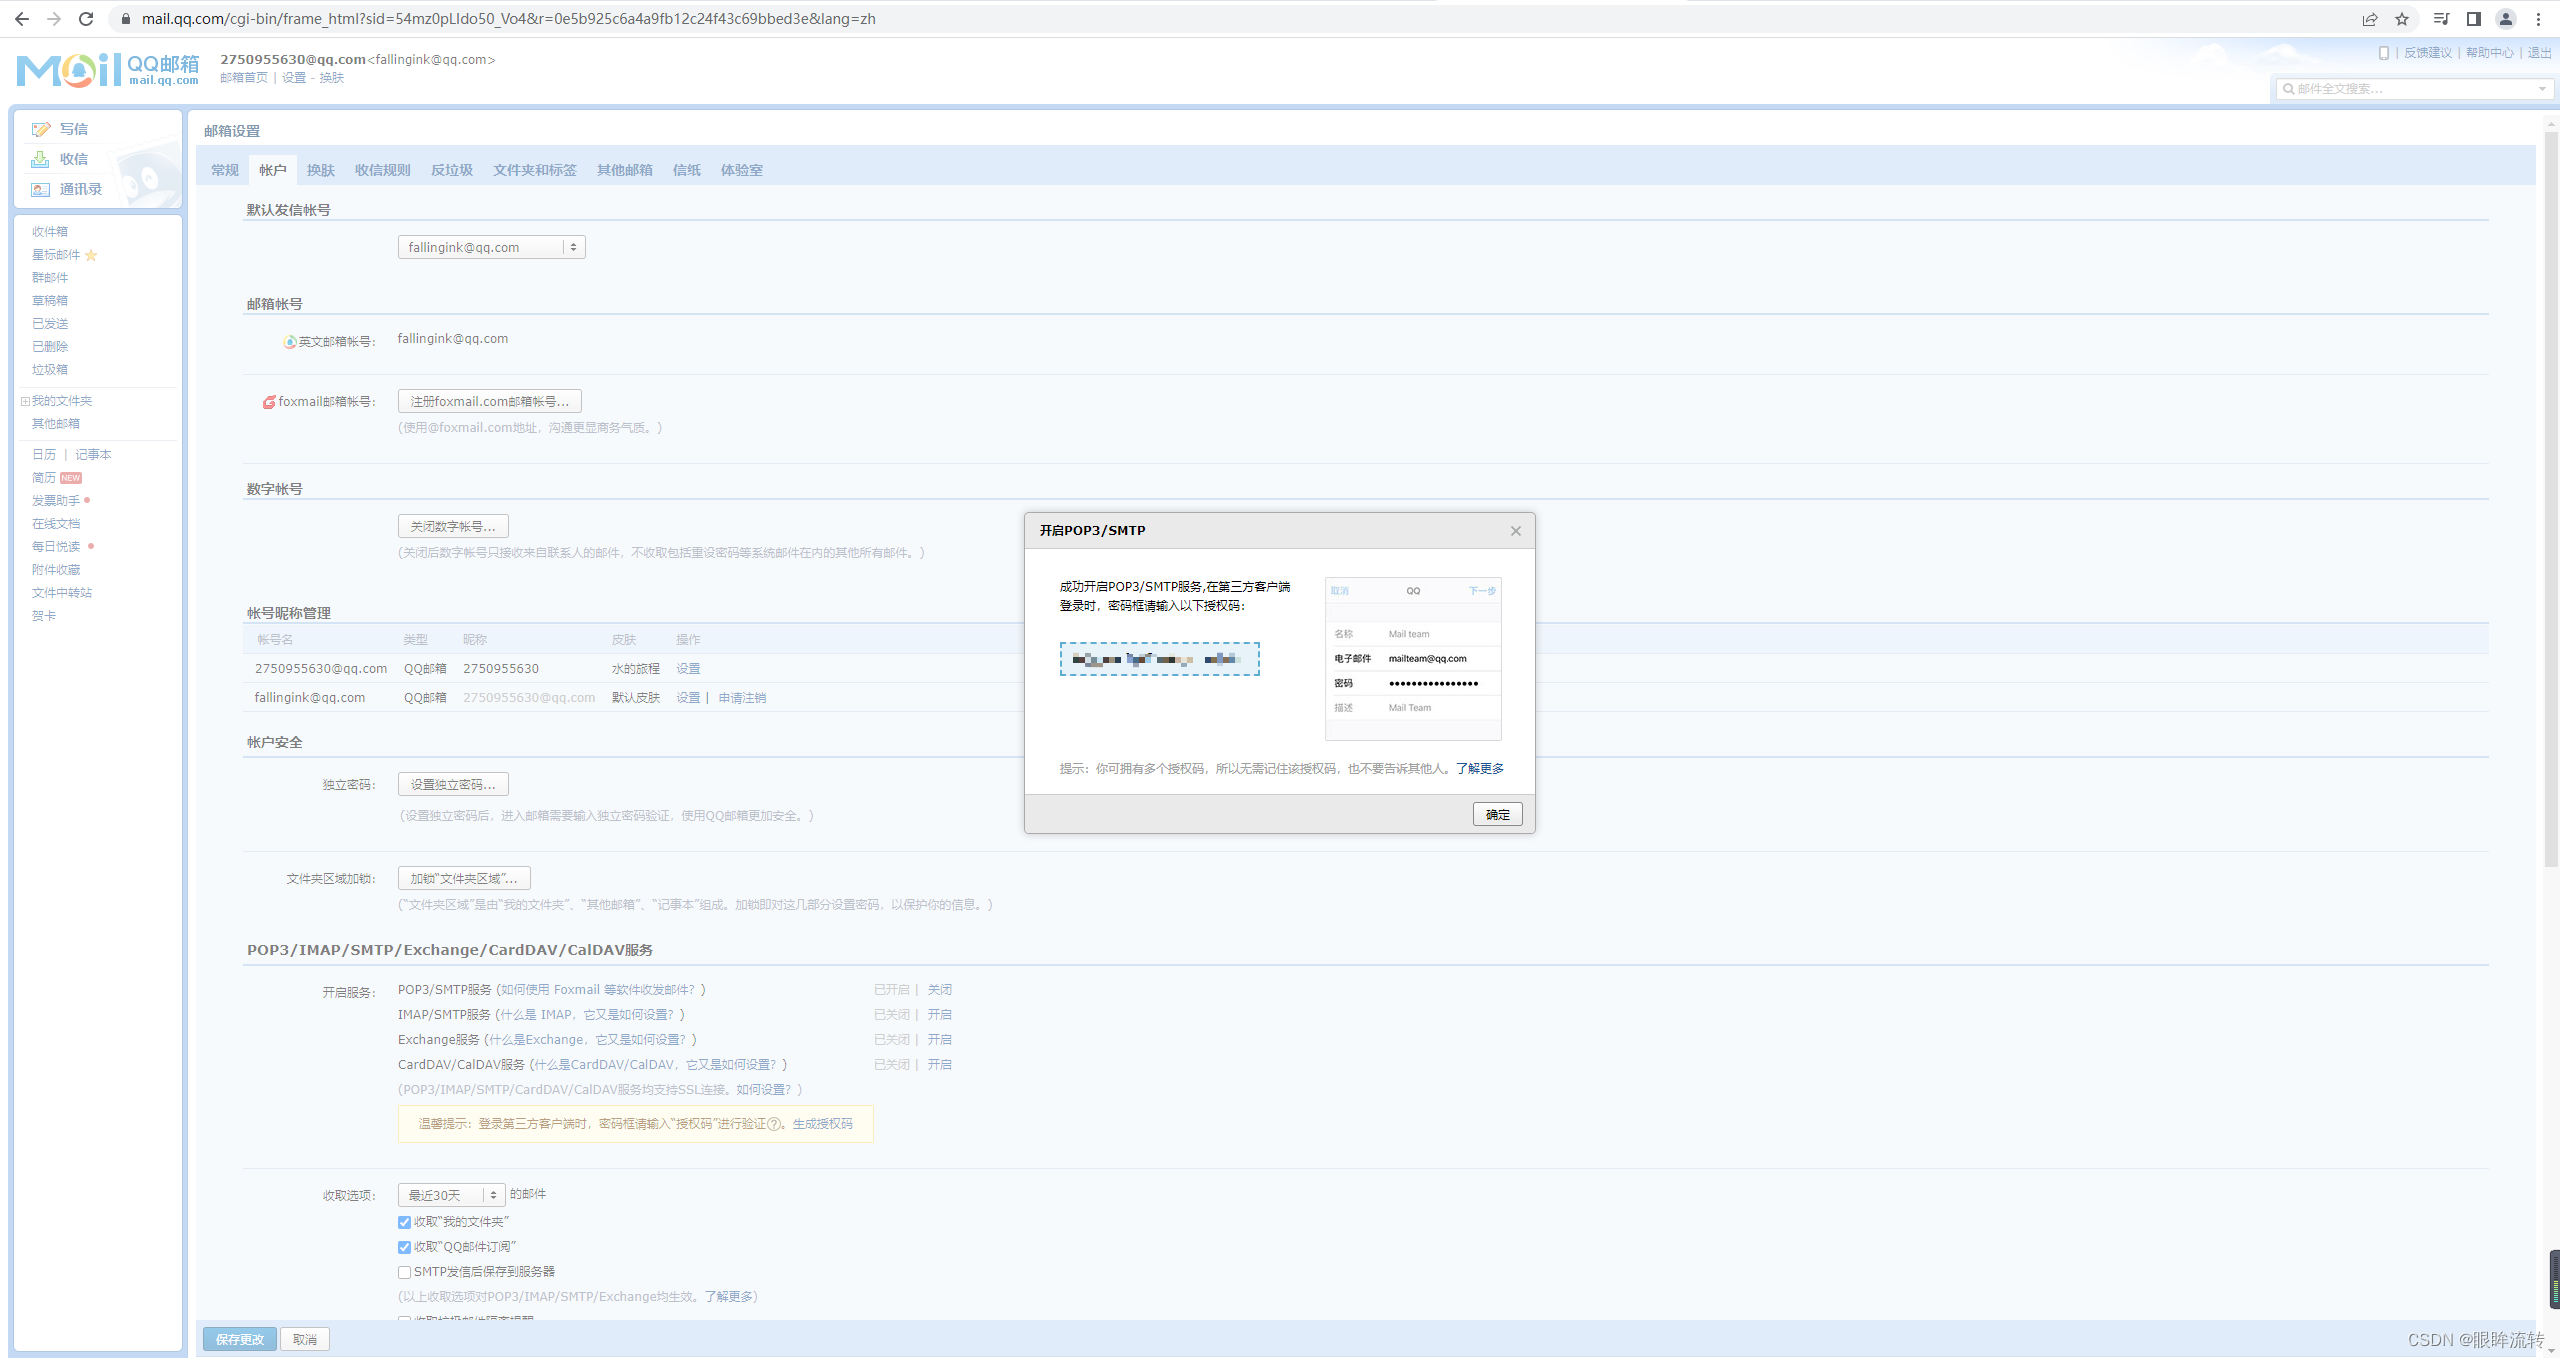
开启邮箱POP3/SMTP服务
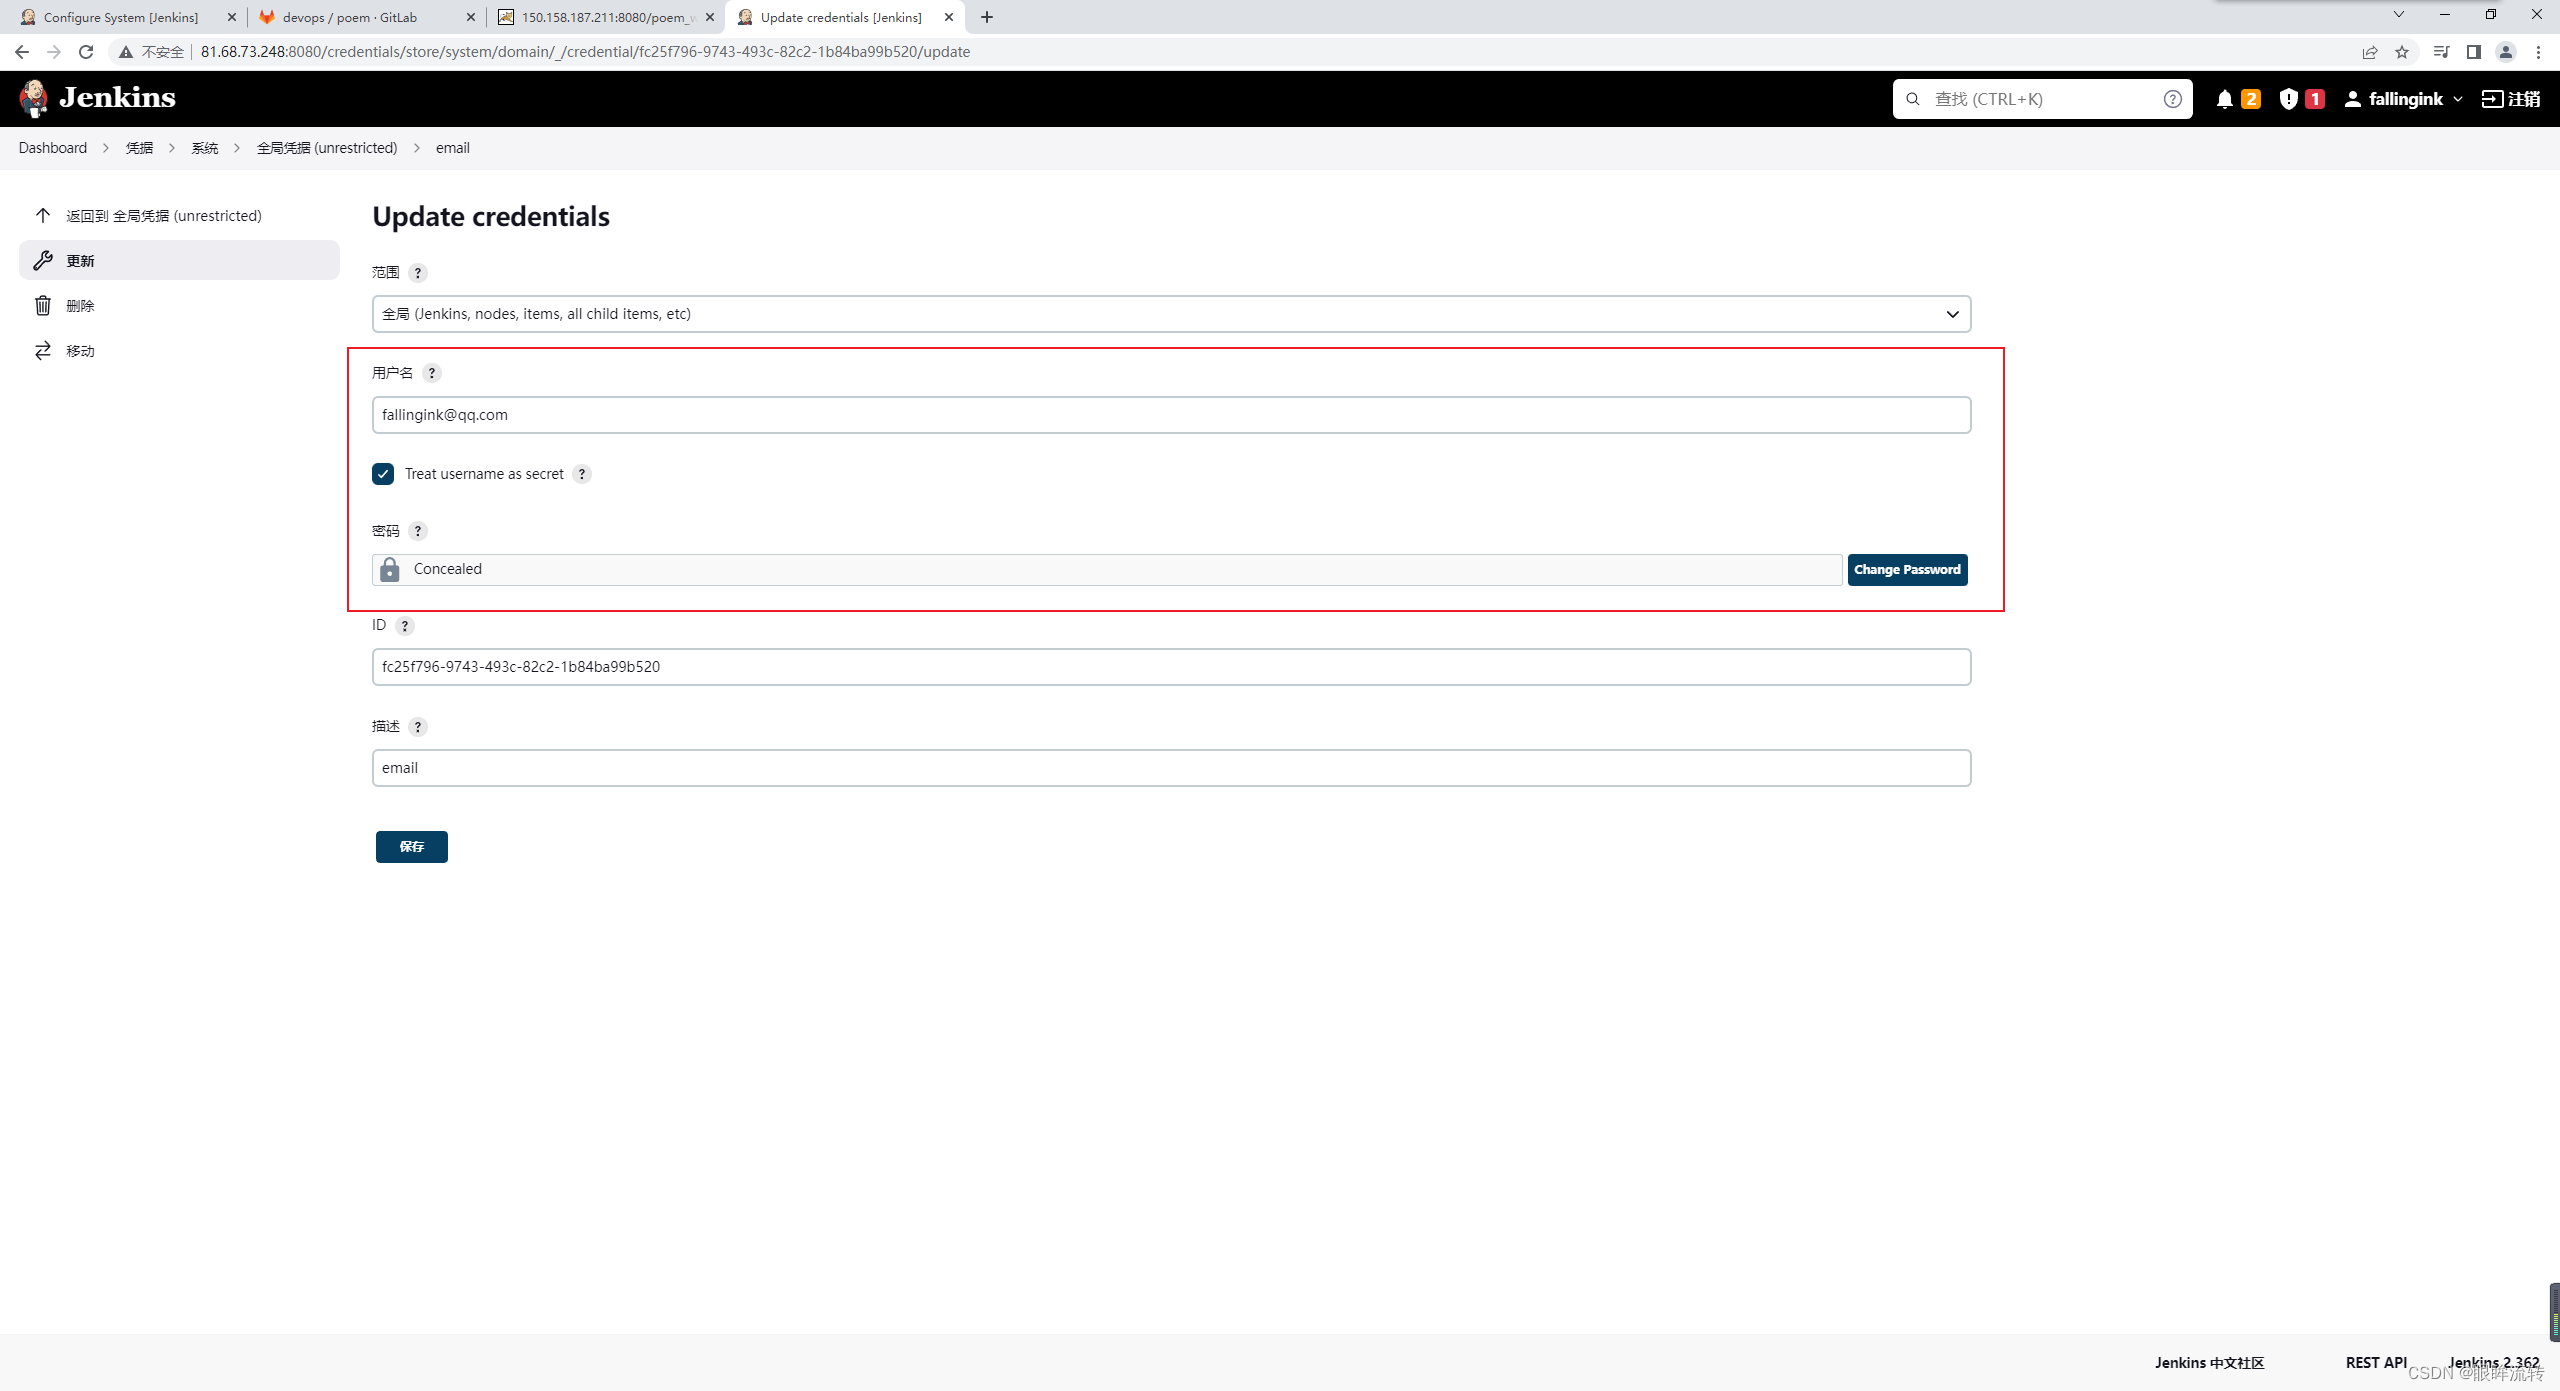
配置email凭证
jenkins->系统管理->系统配置
系统管理员邮件地址

Extended E-mail Notification
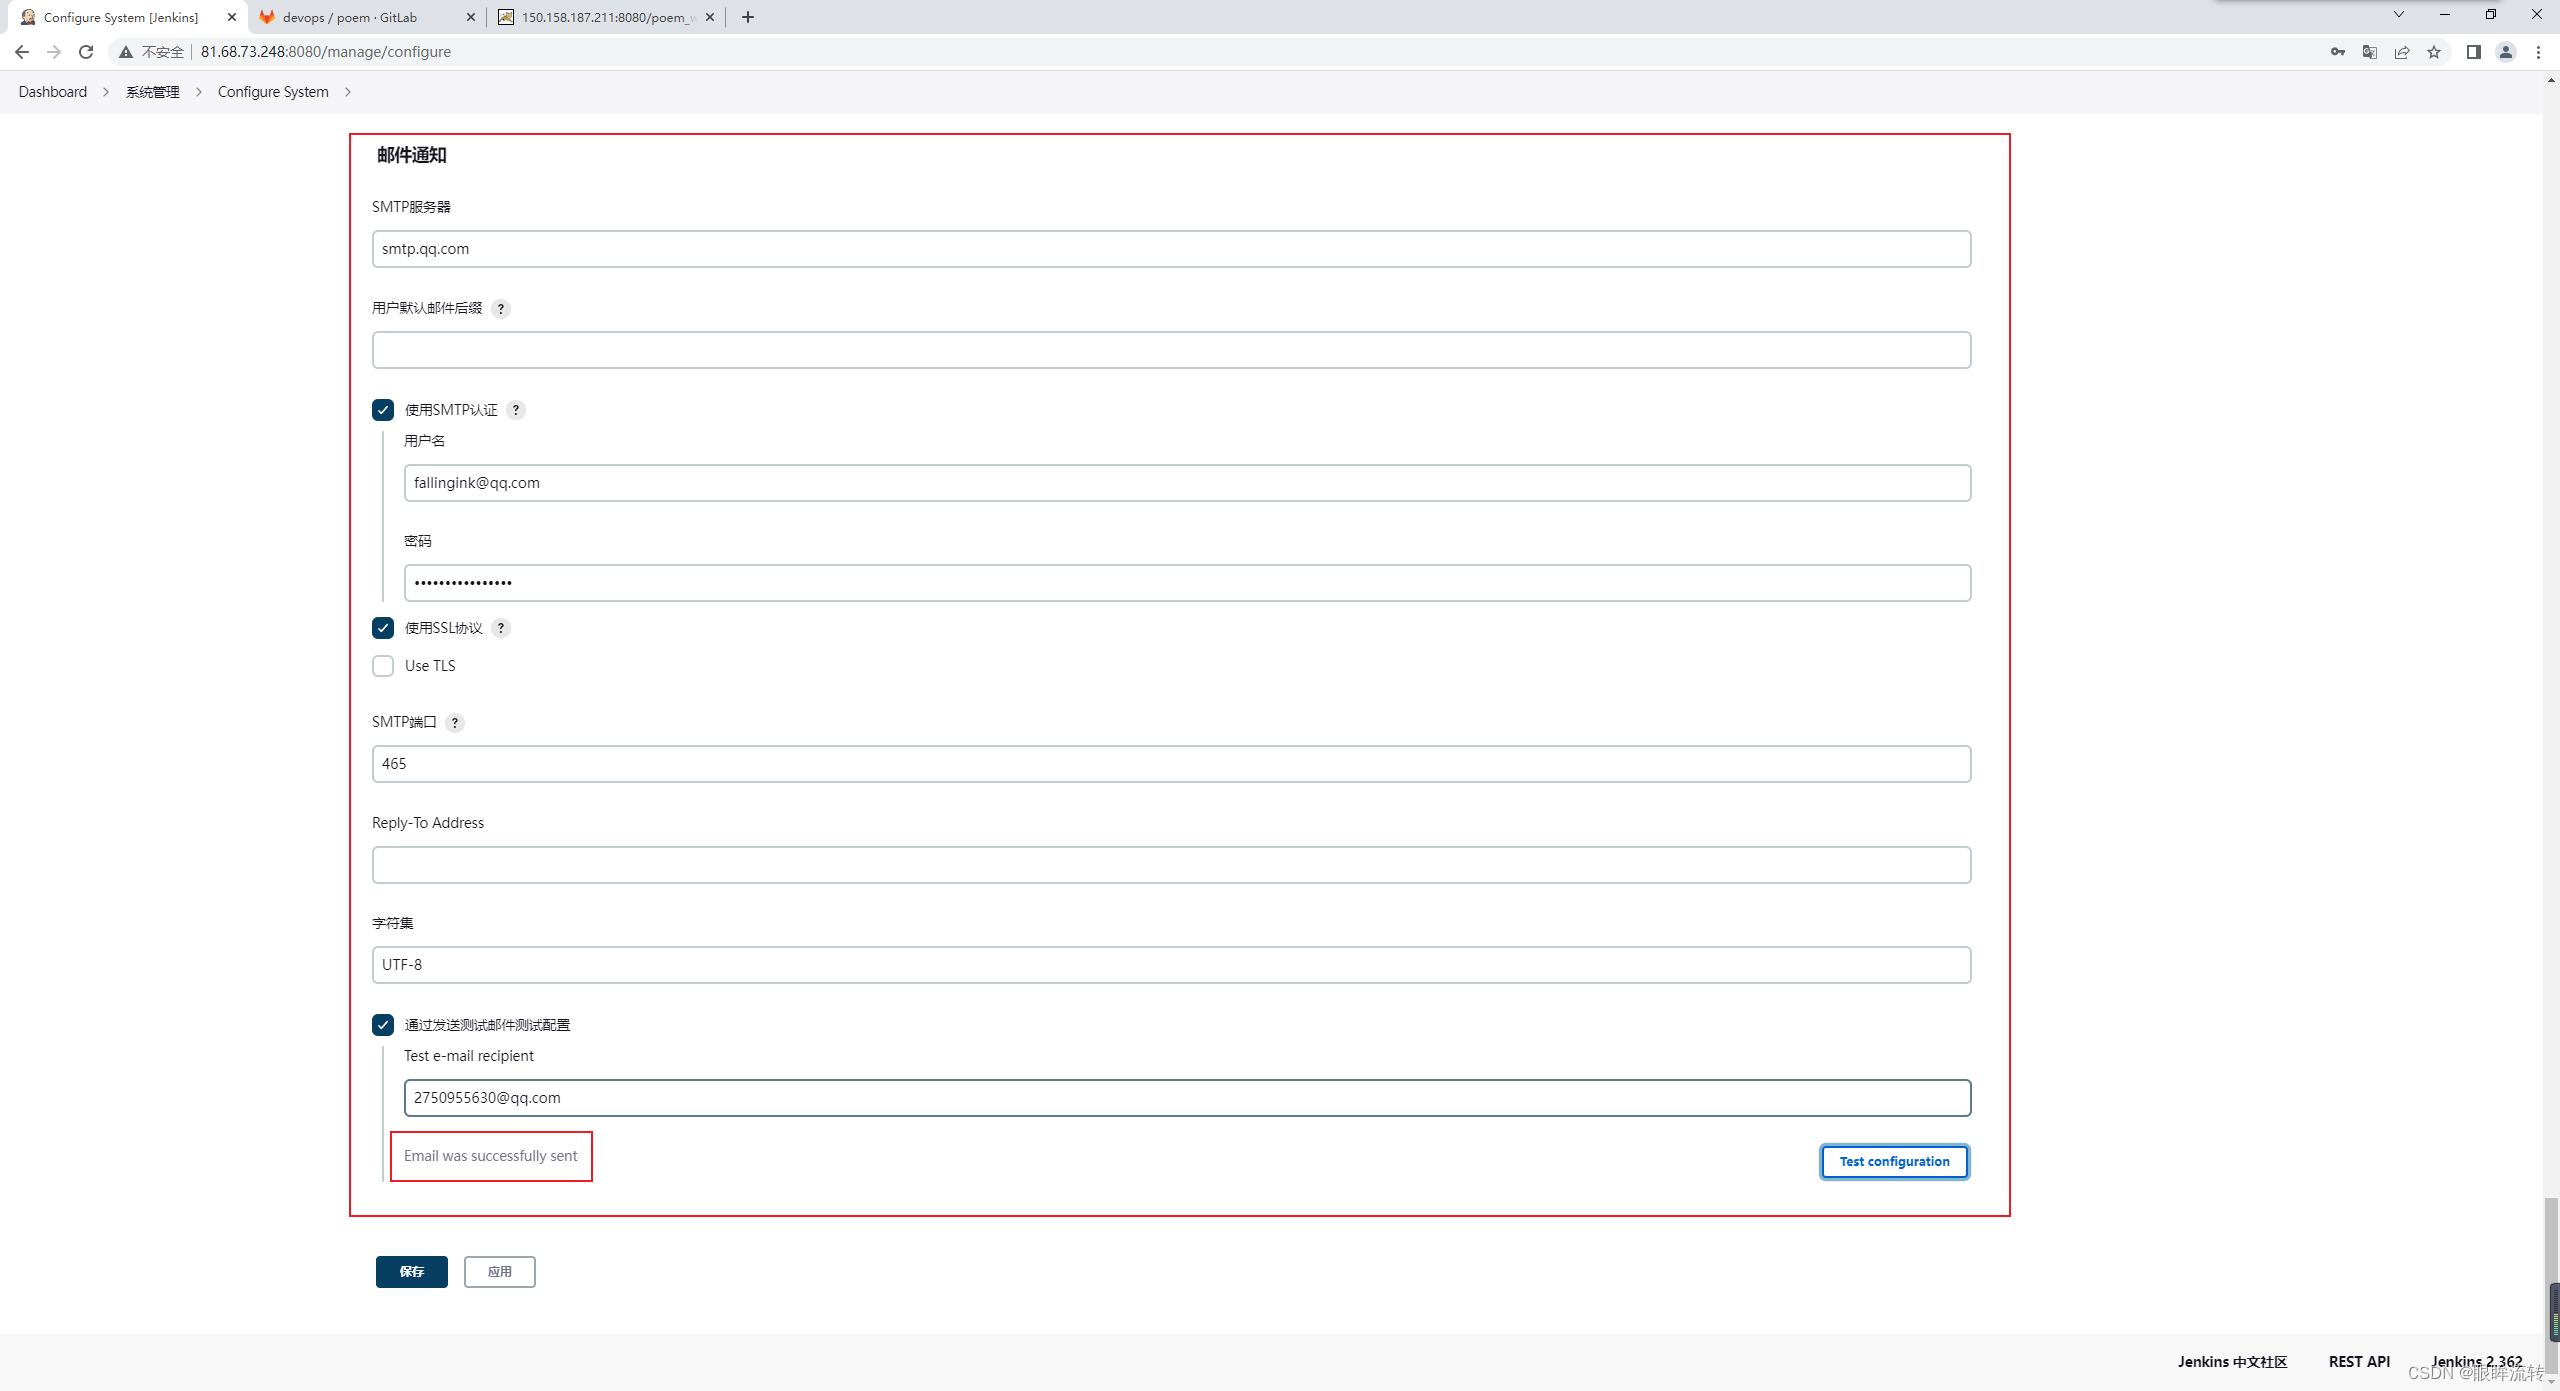
配置邮件服务器、邮件内容格式

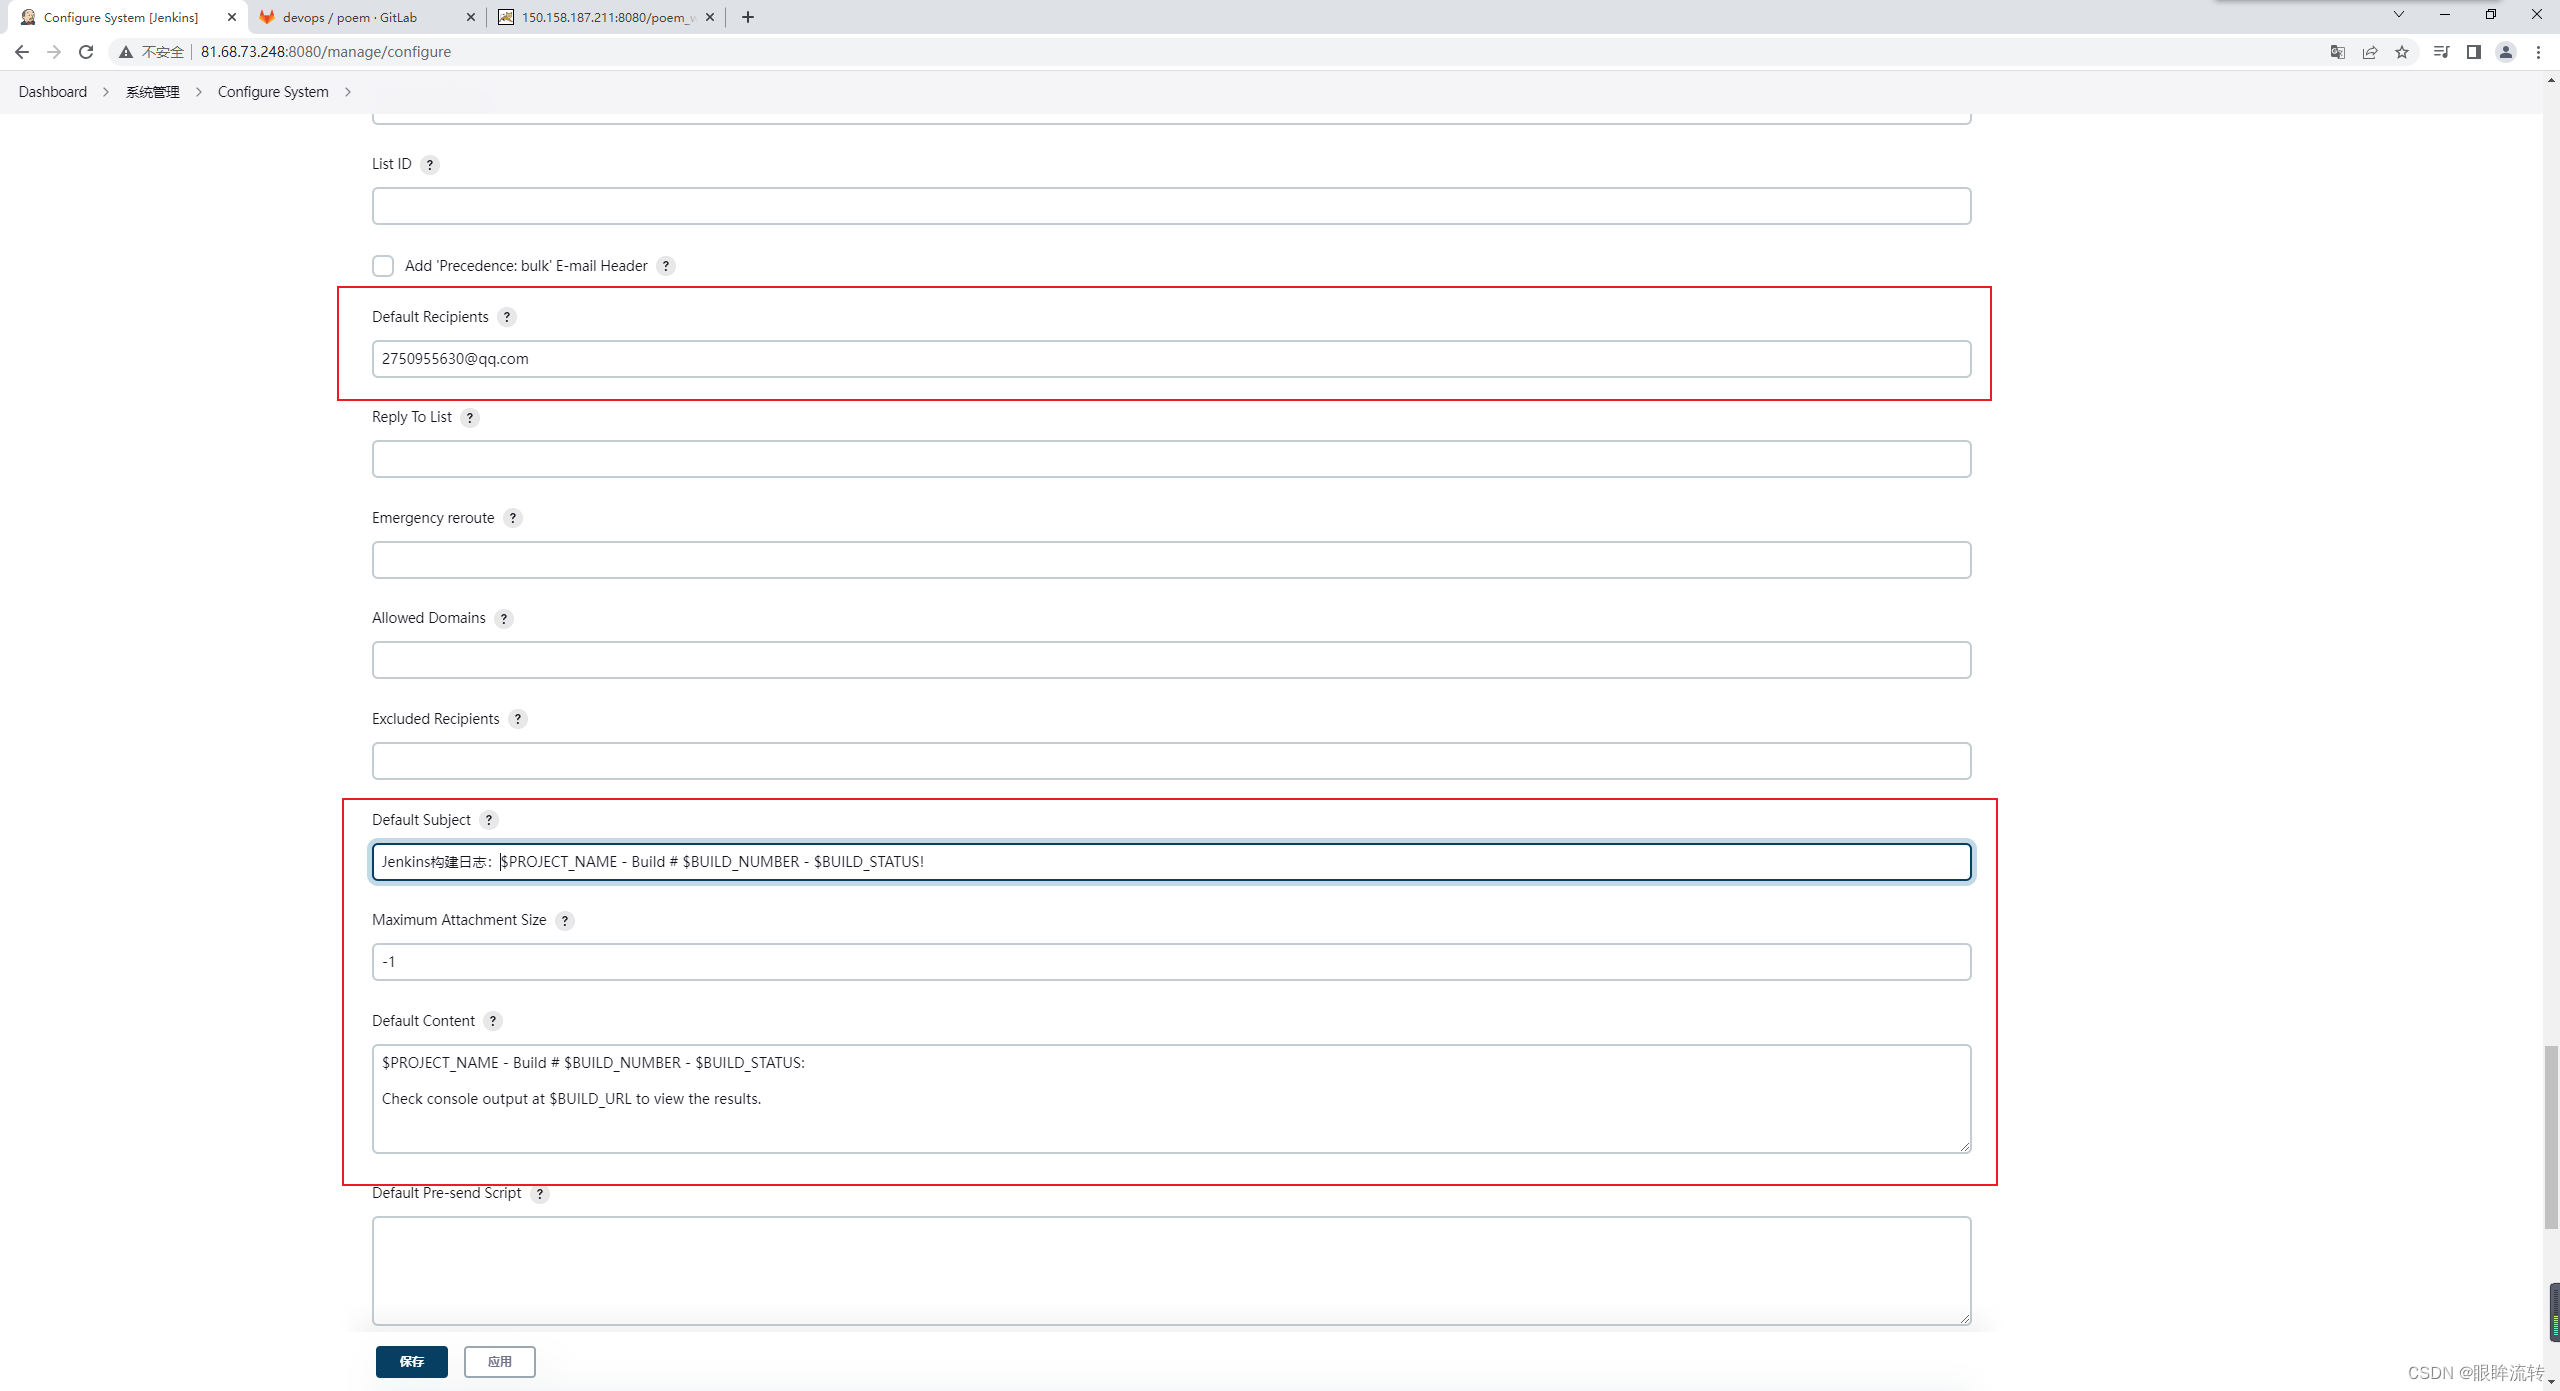
配置默认收件人、邮件内容
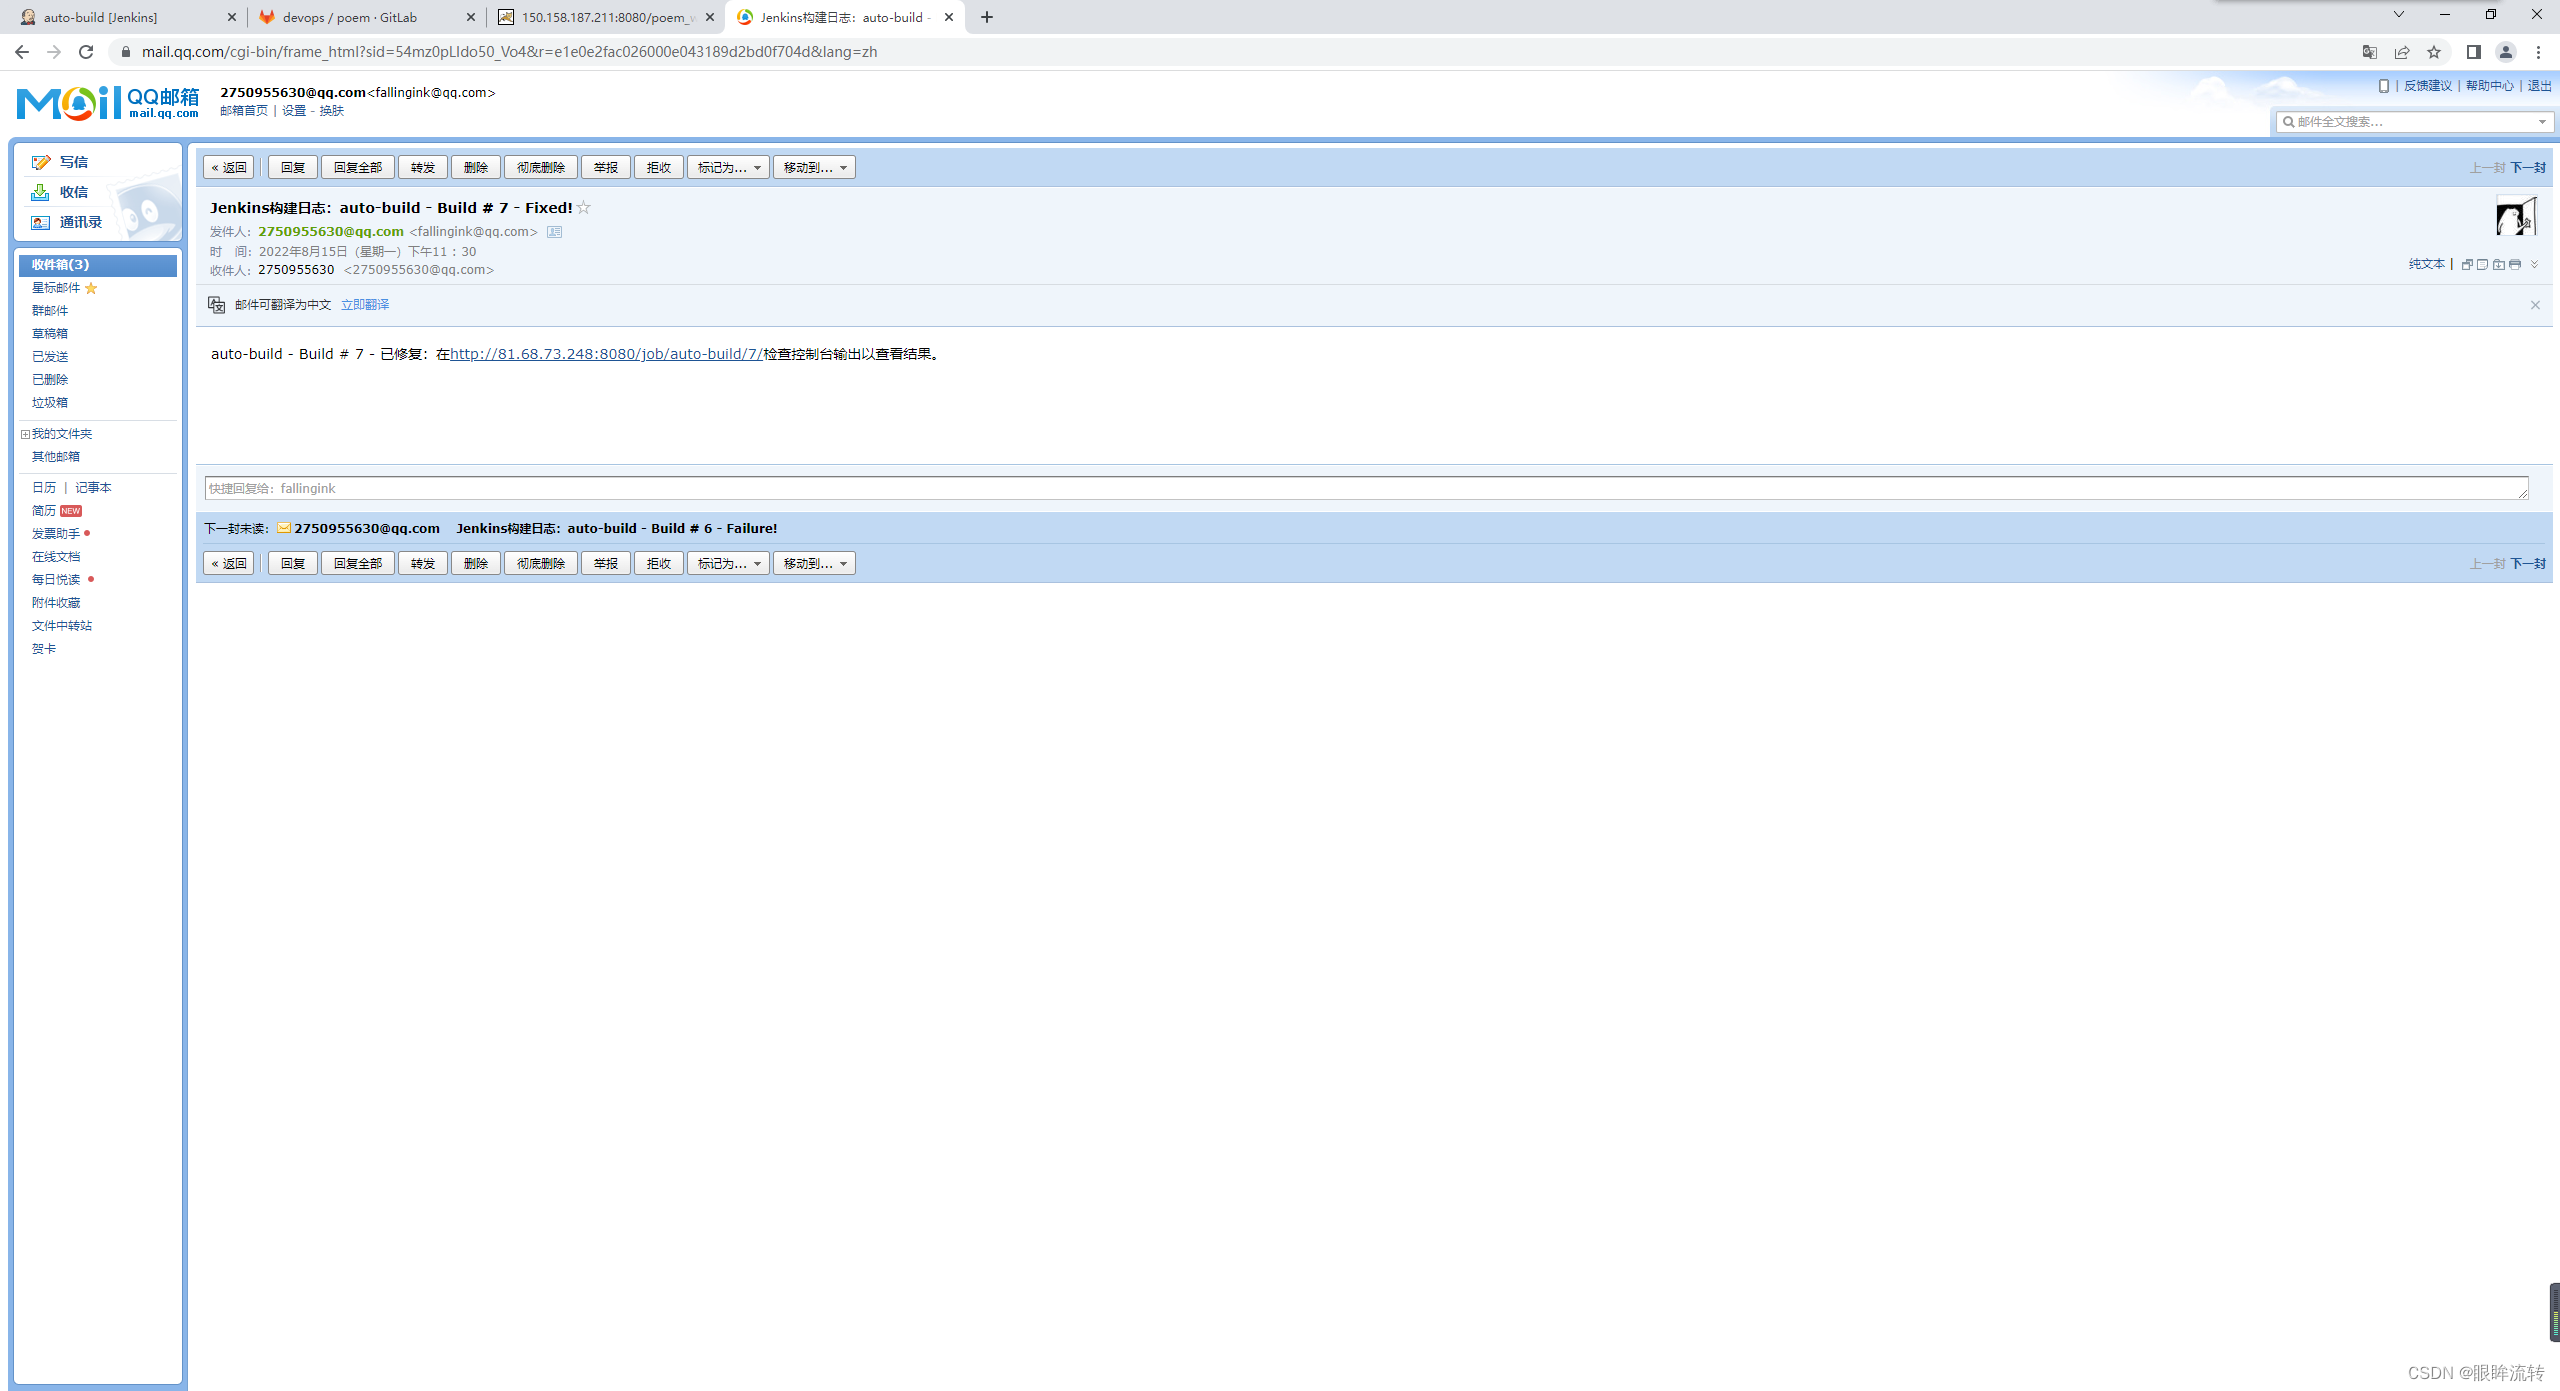
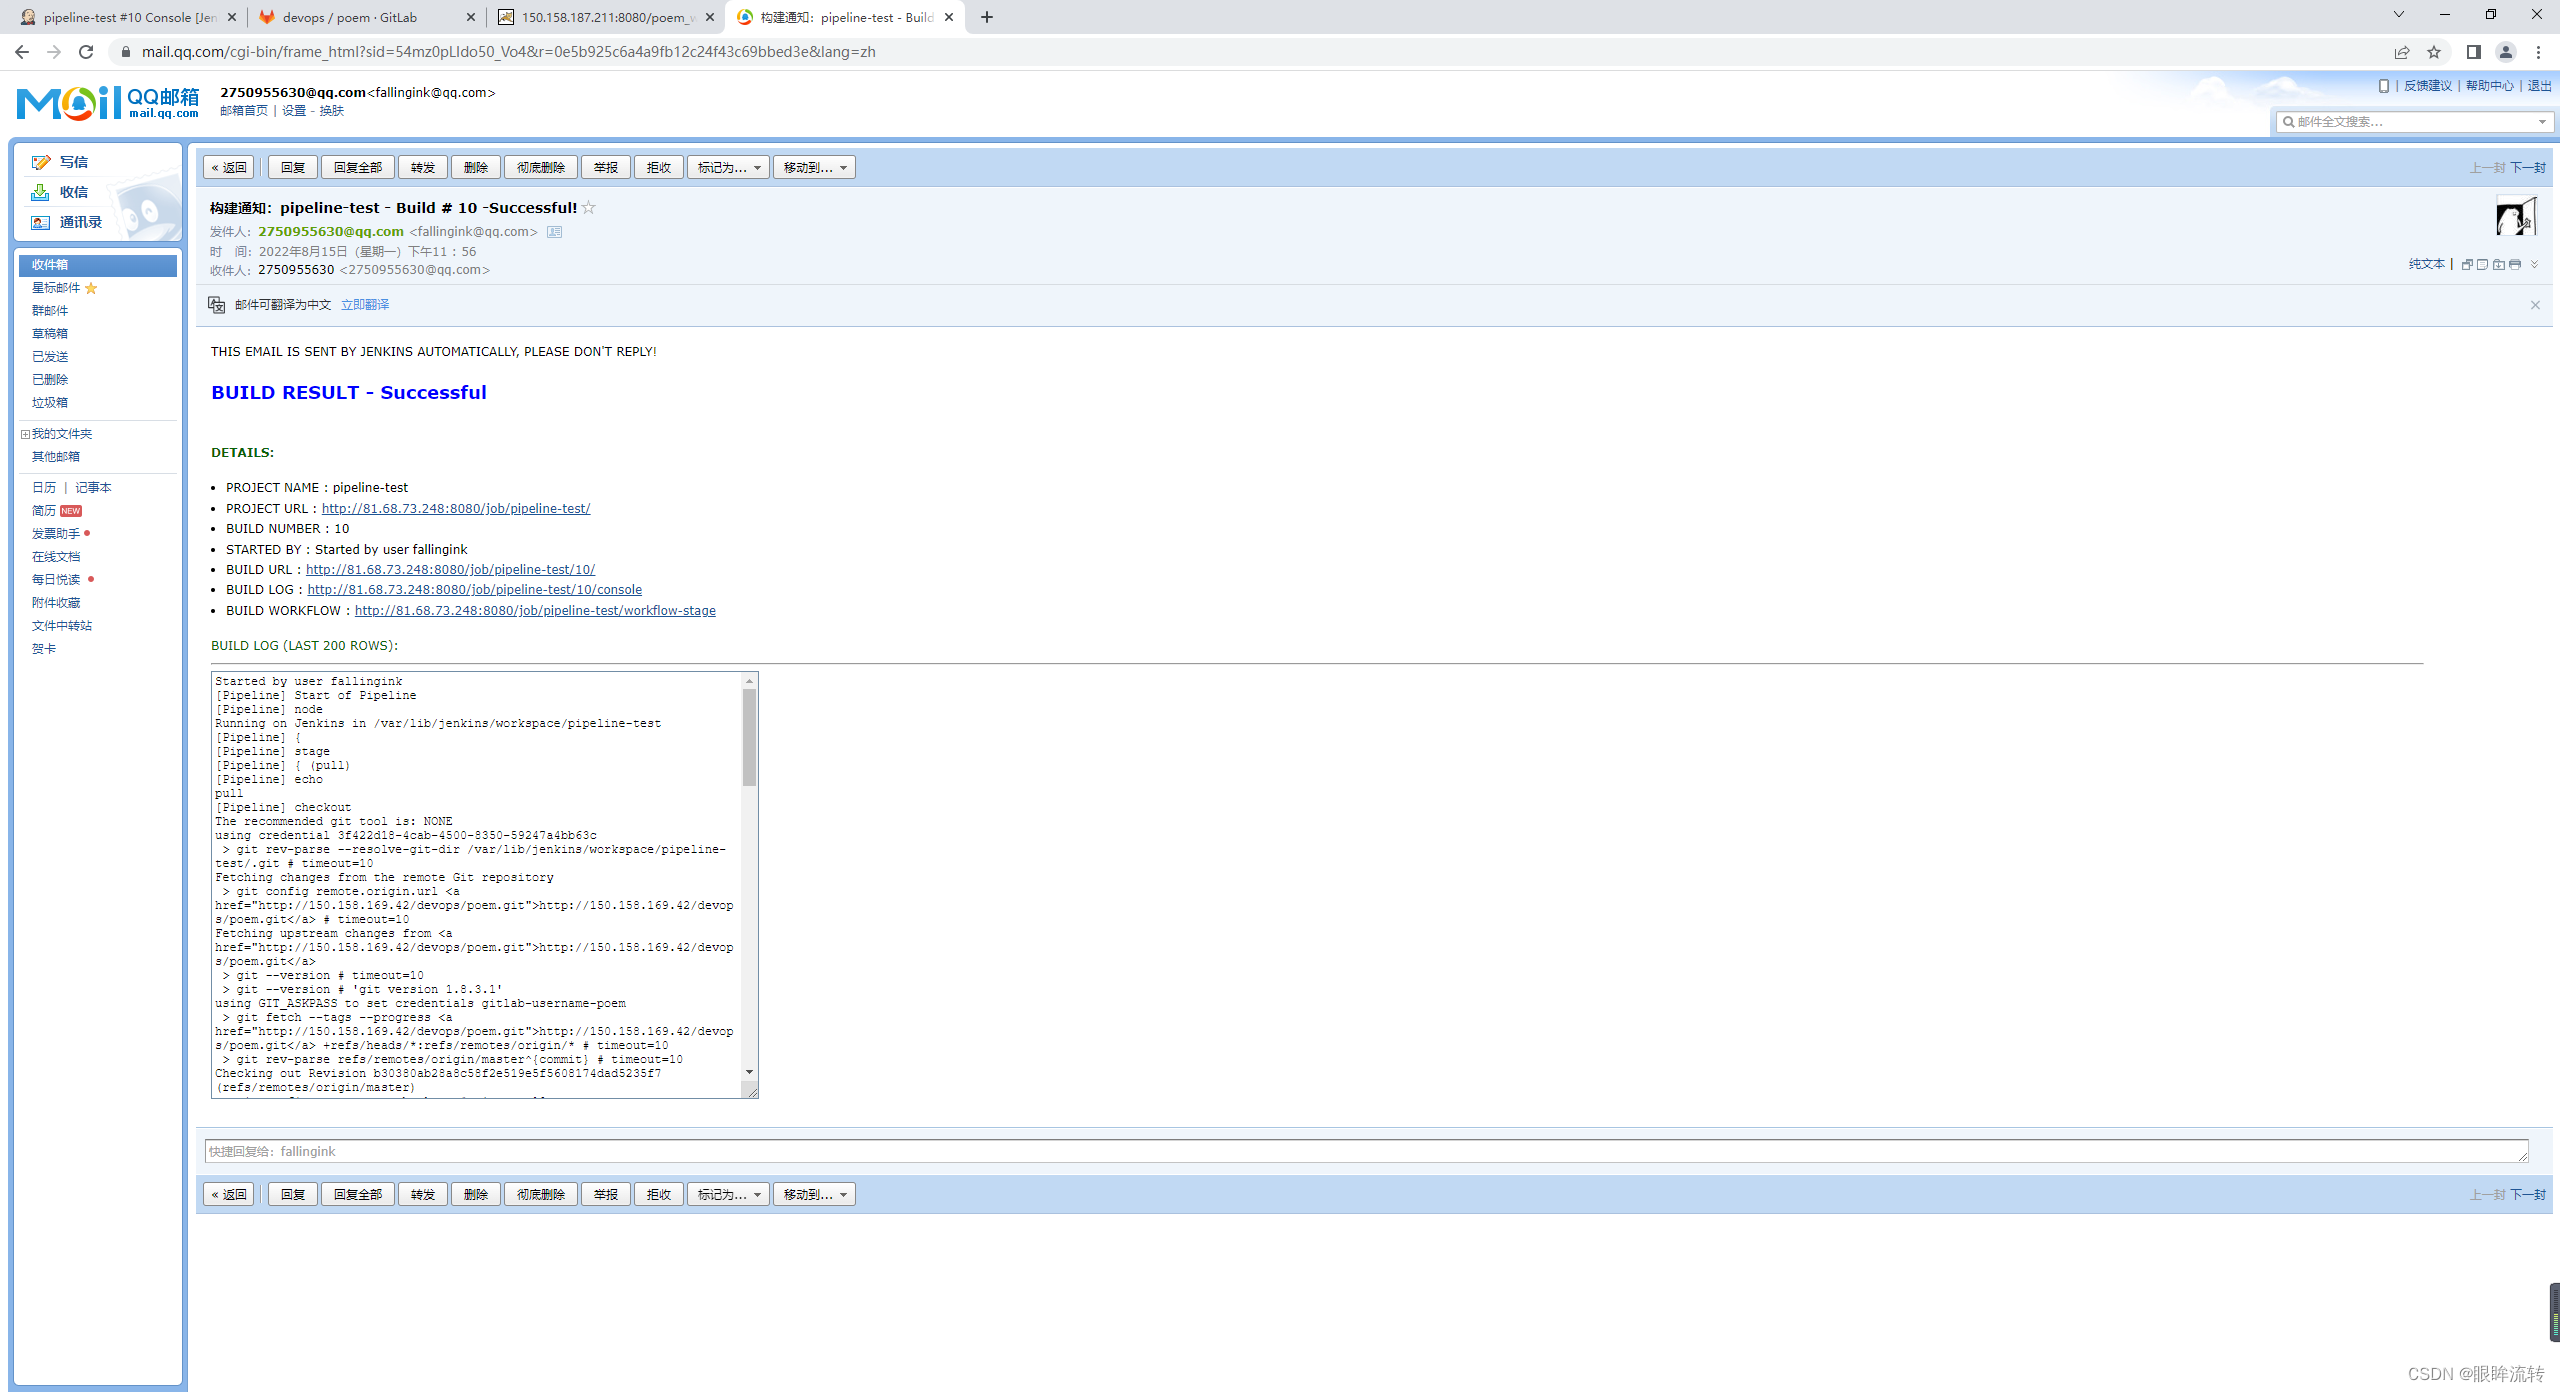
邮件测试
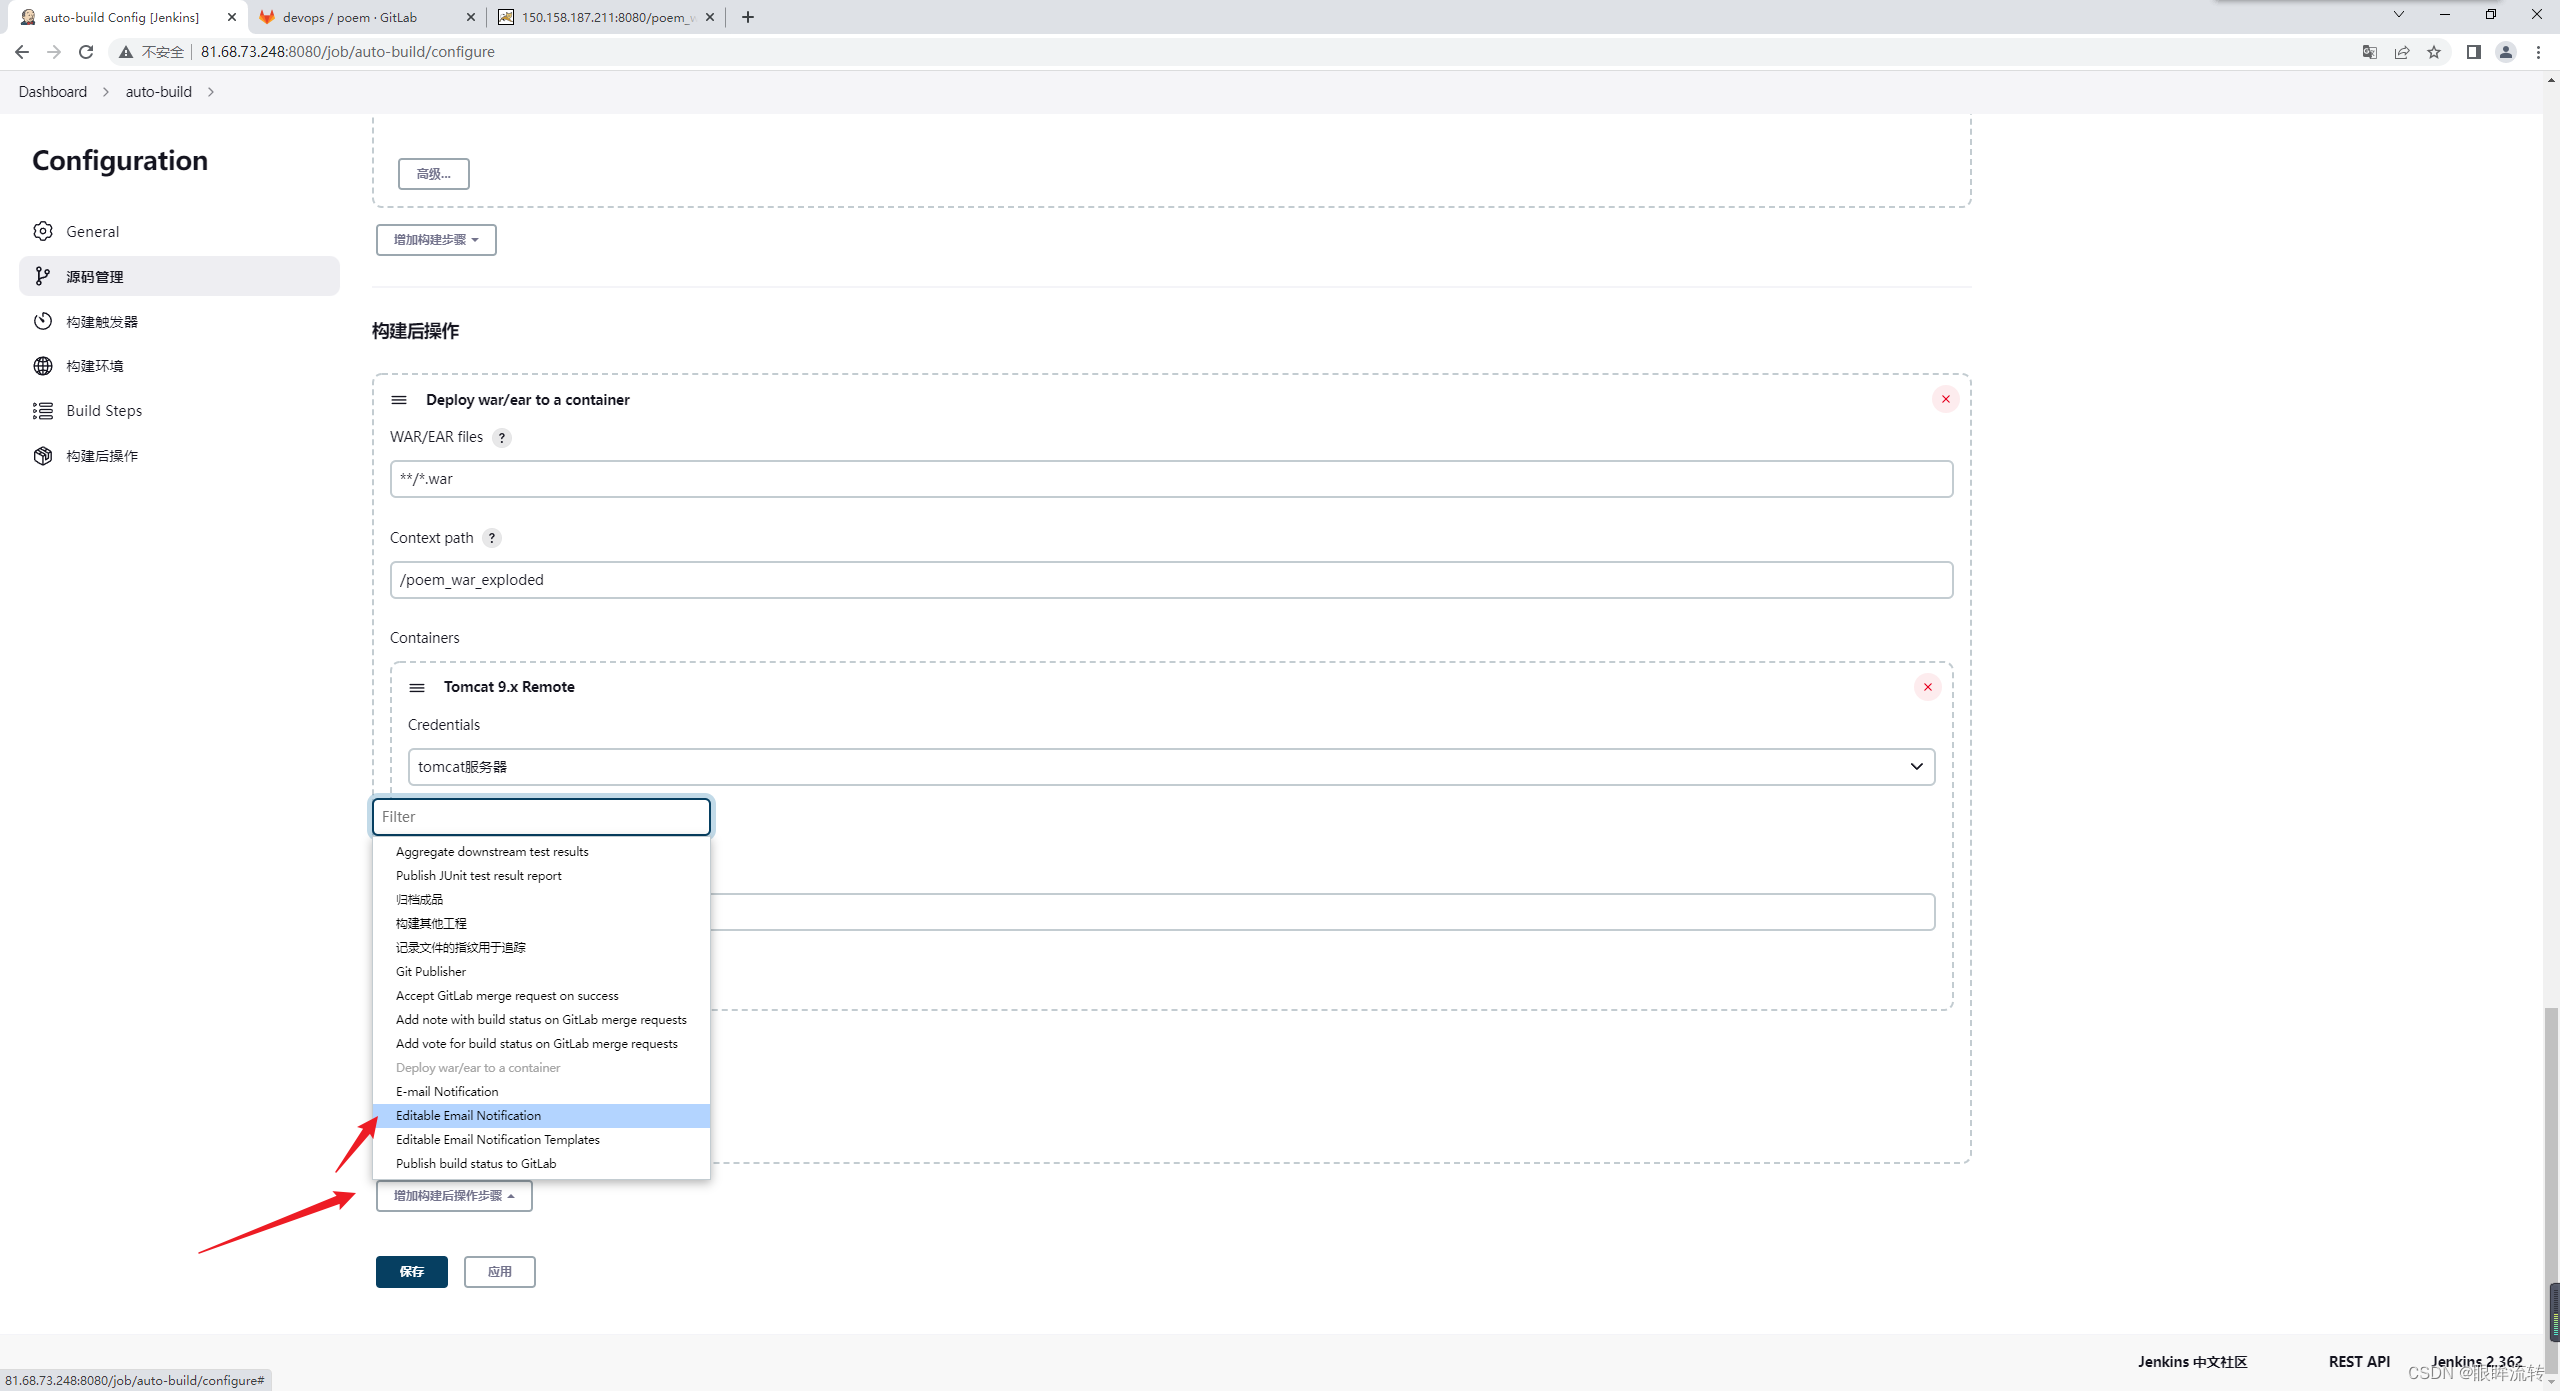
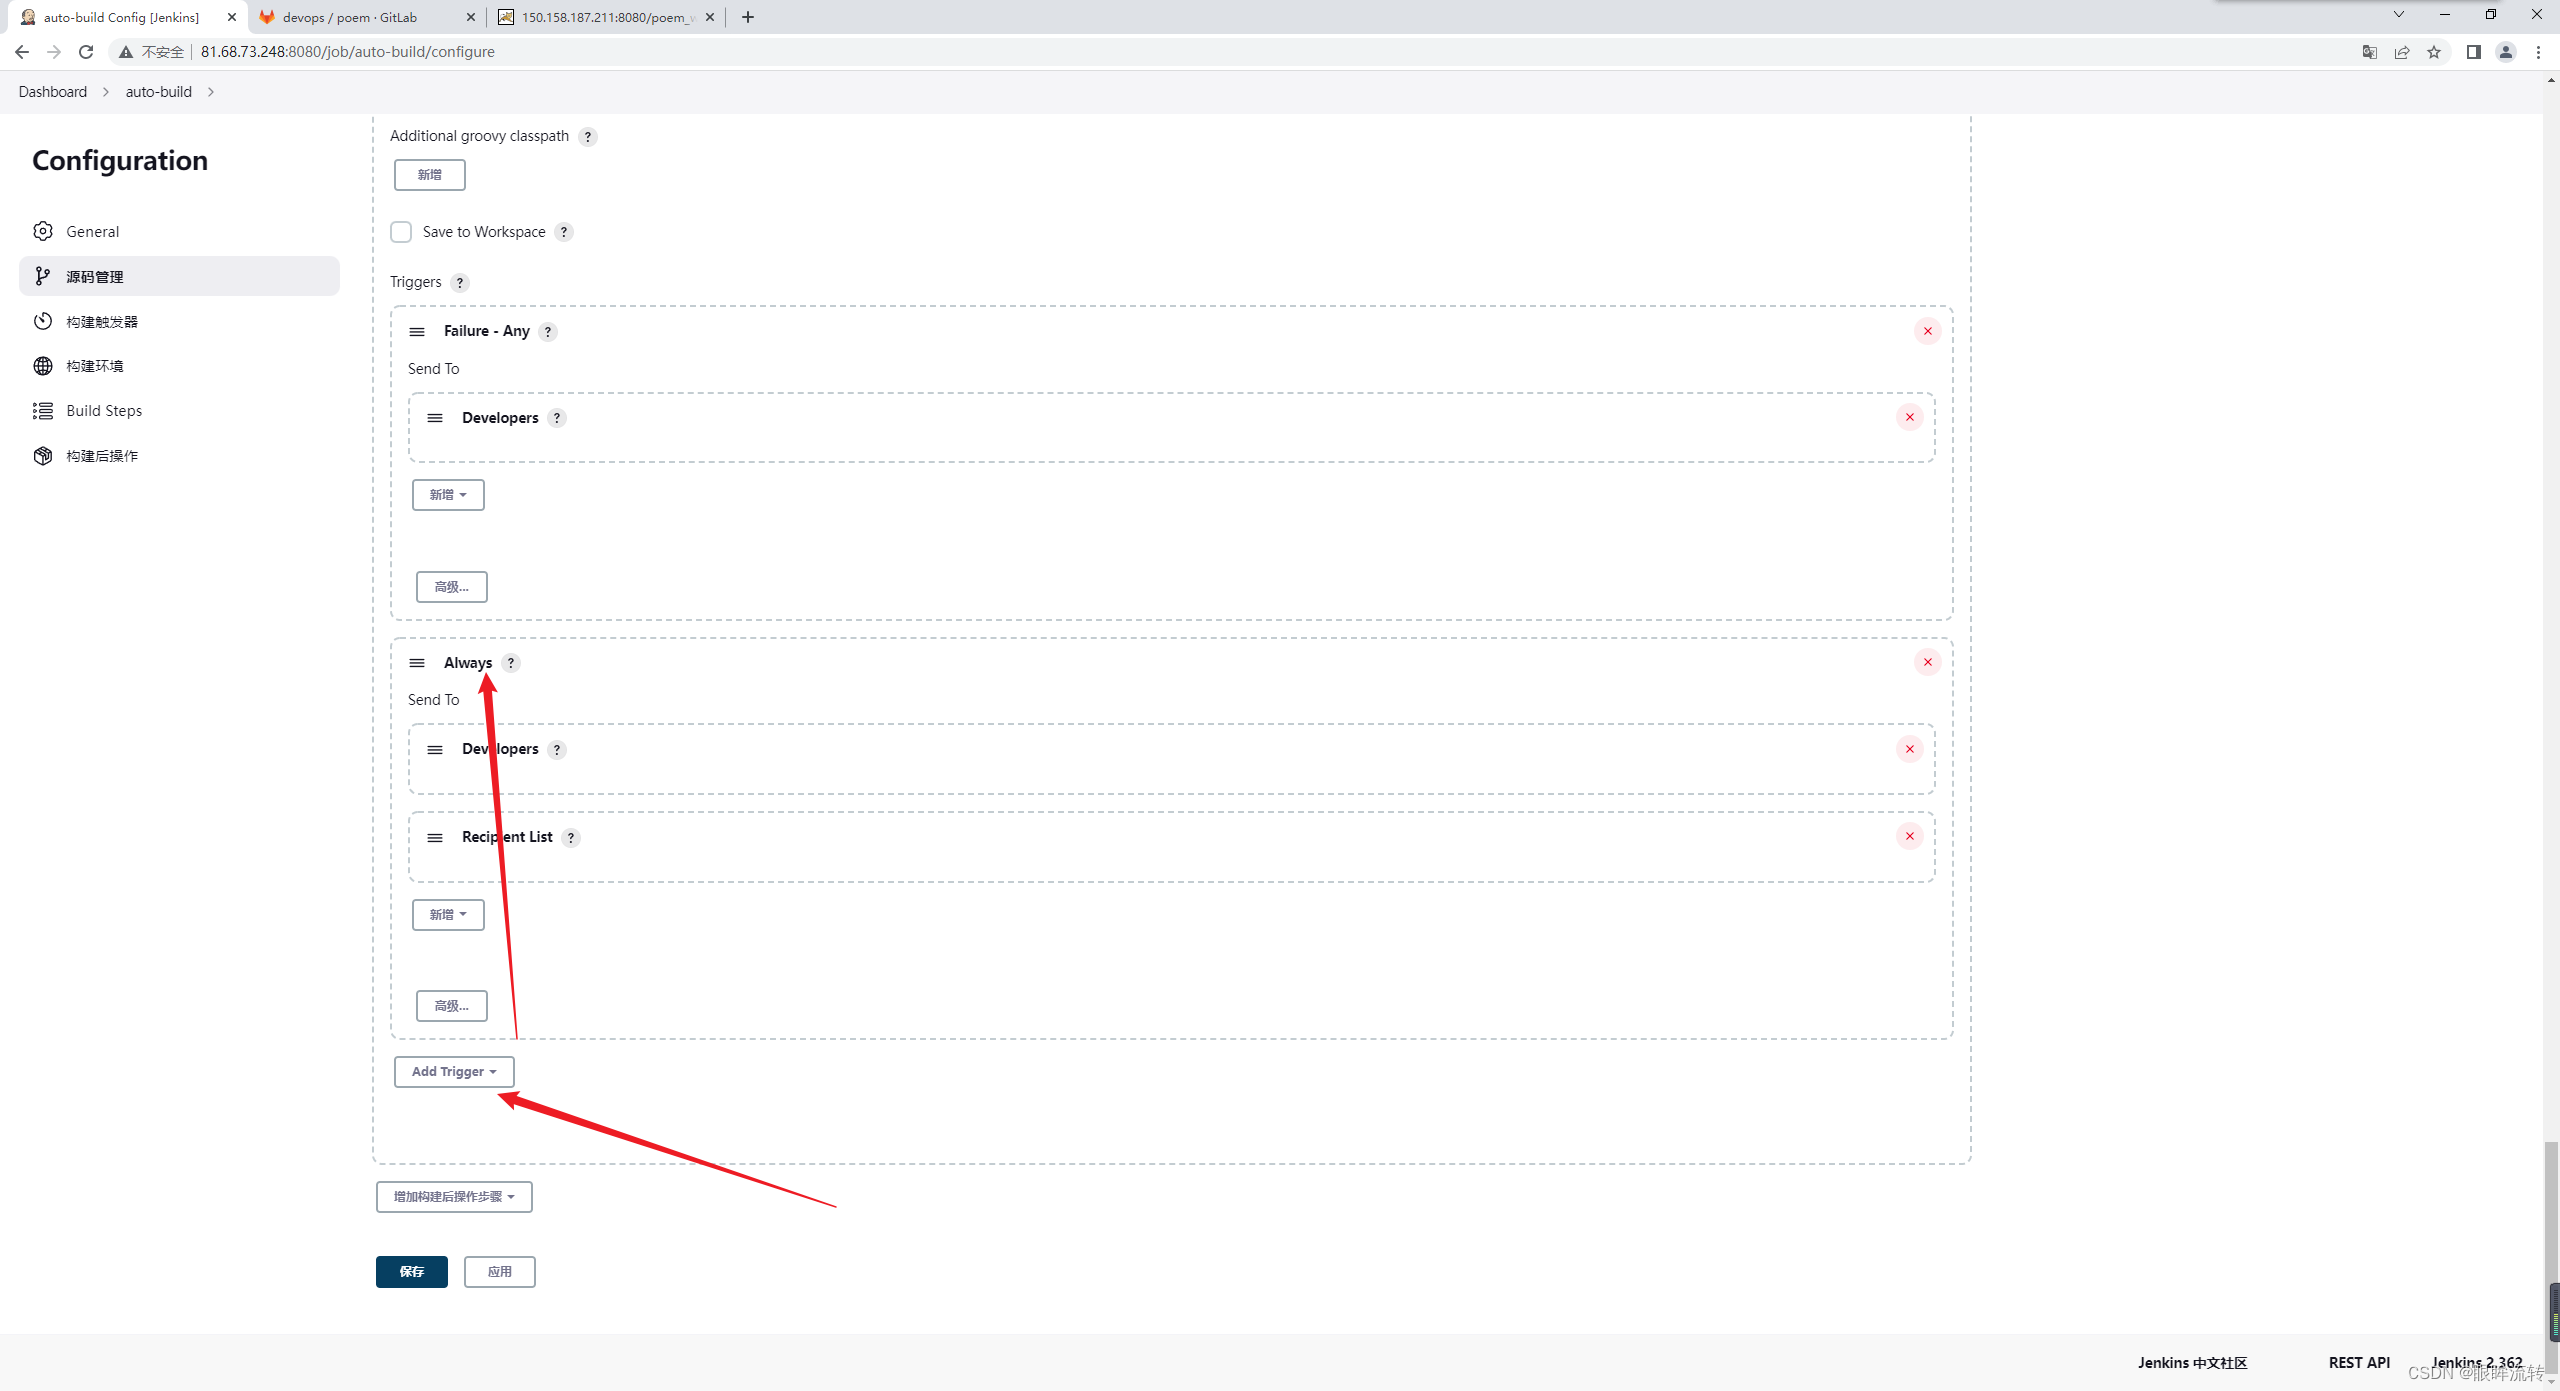
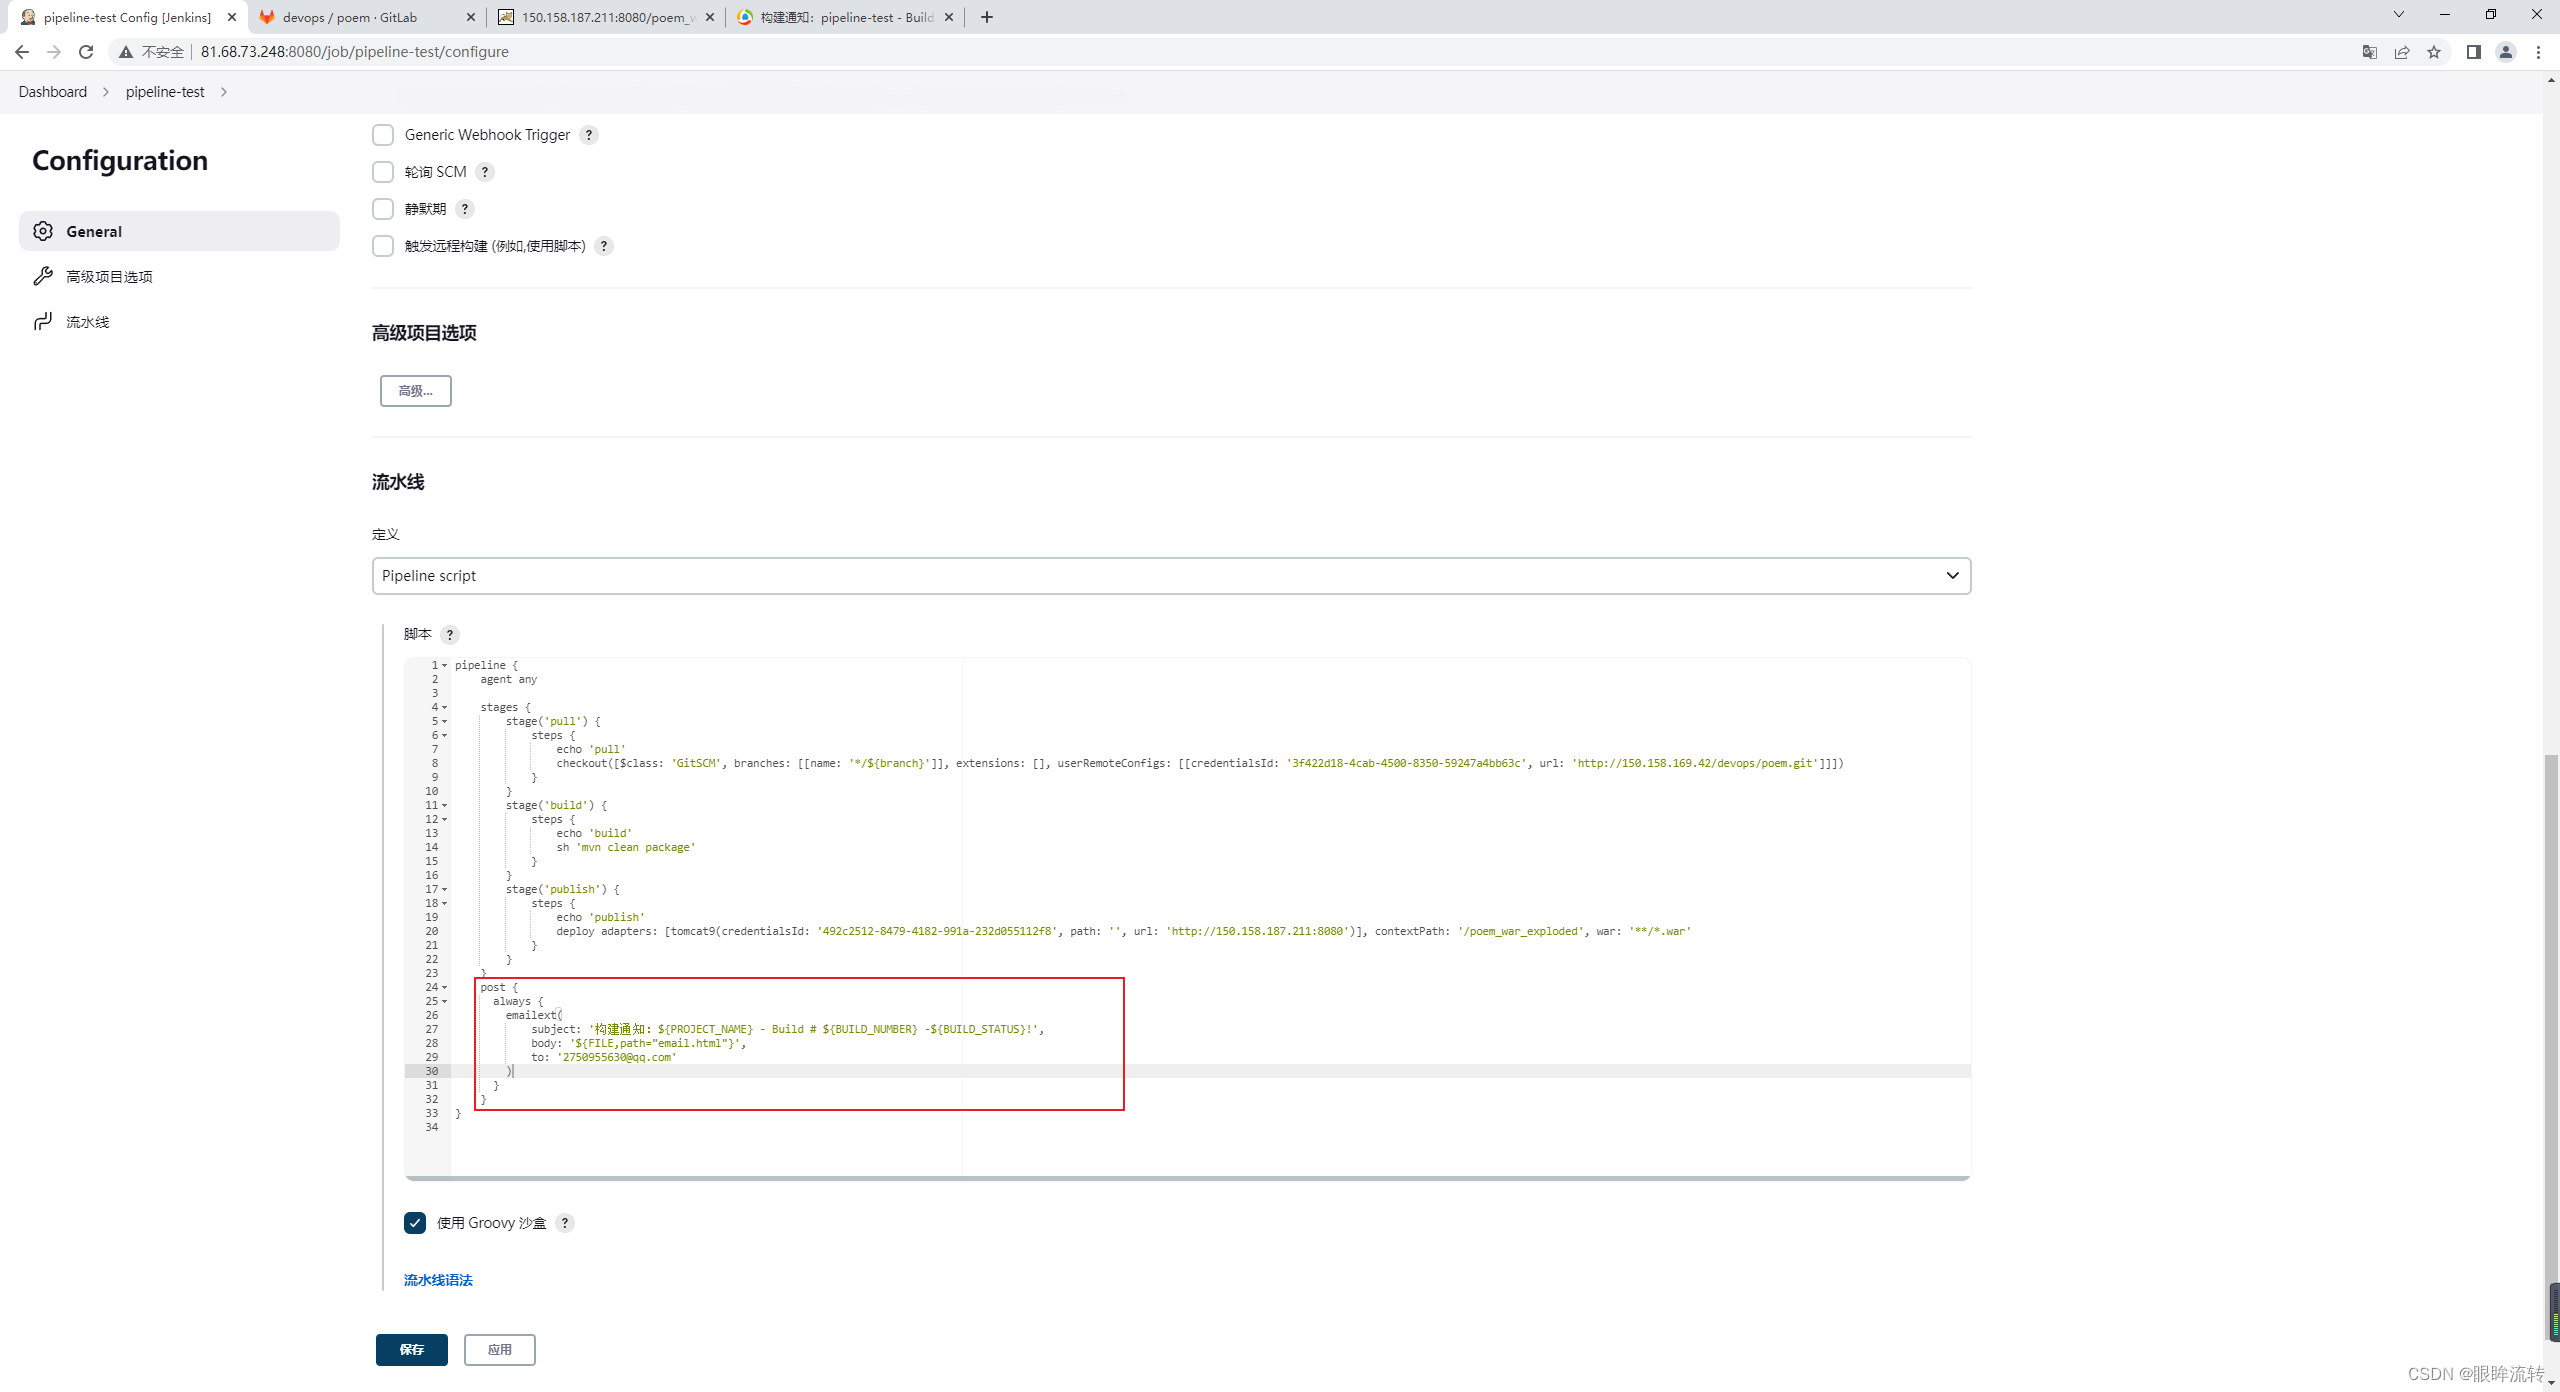
配置构建后发送邮件1
配置构建后发送邮件2
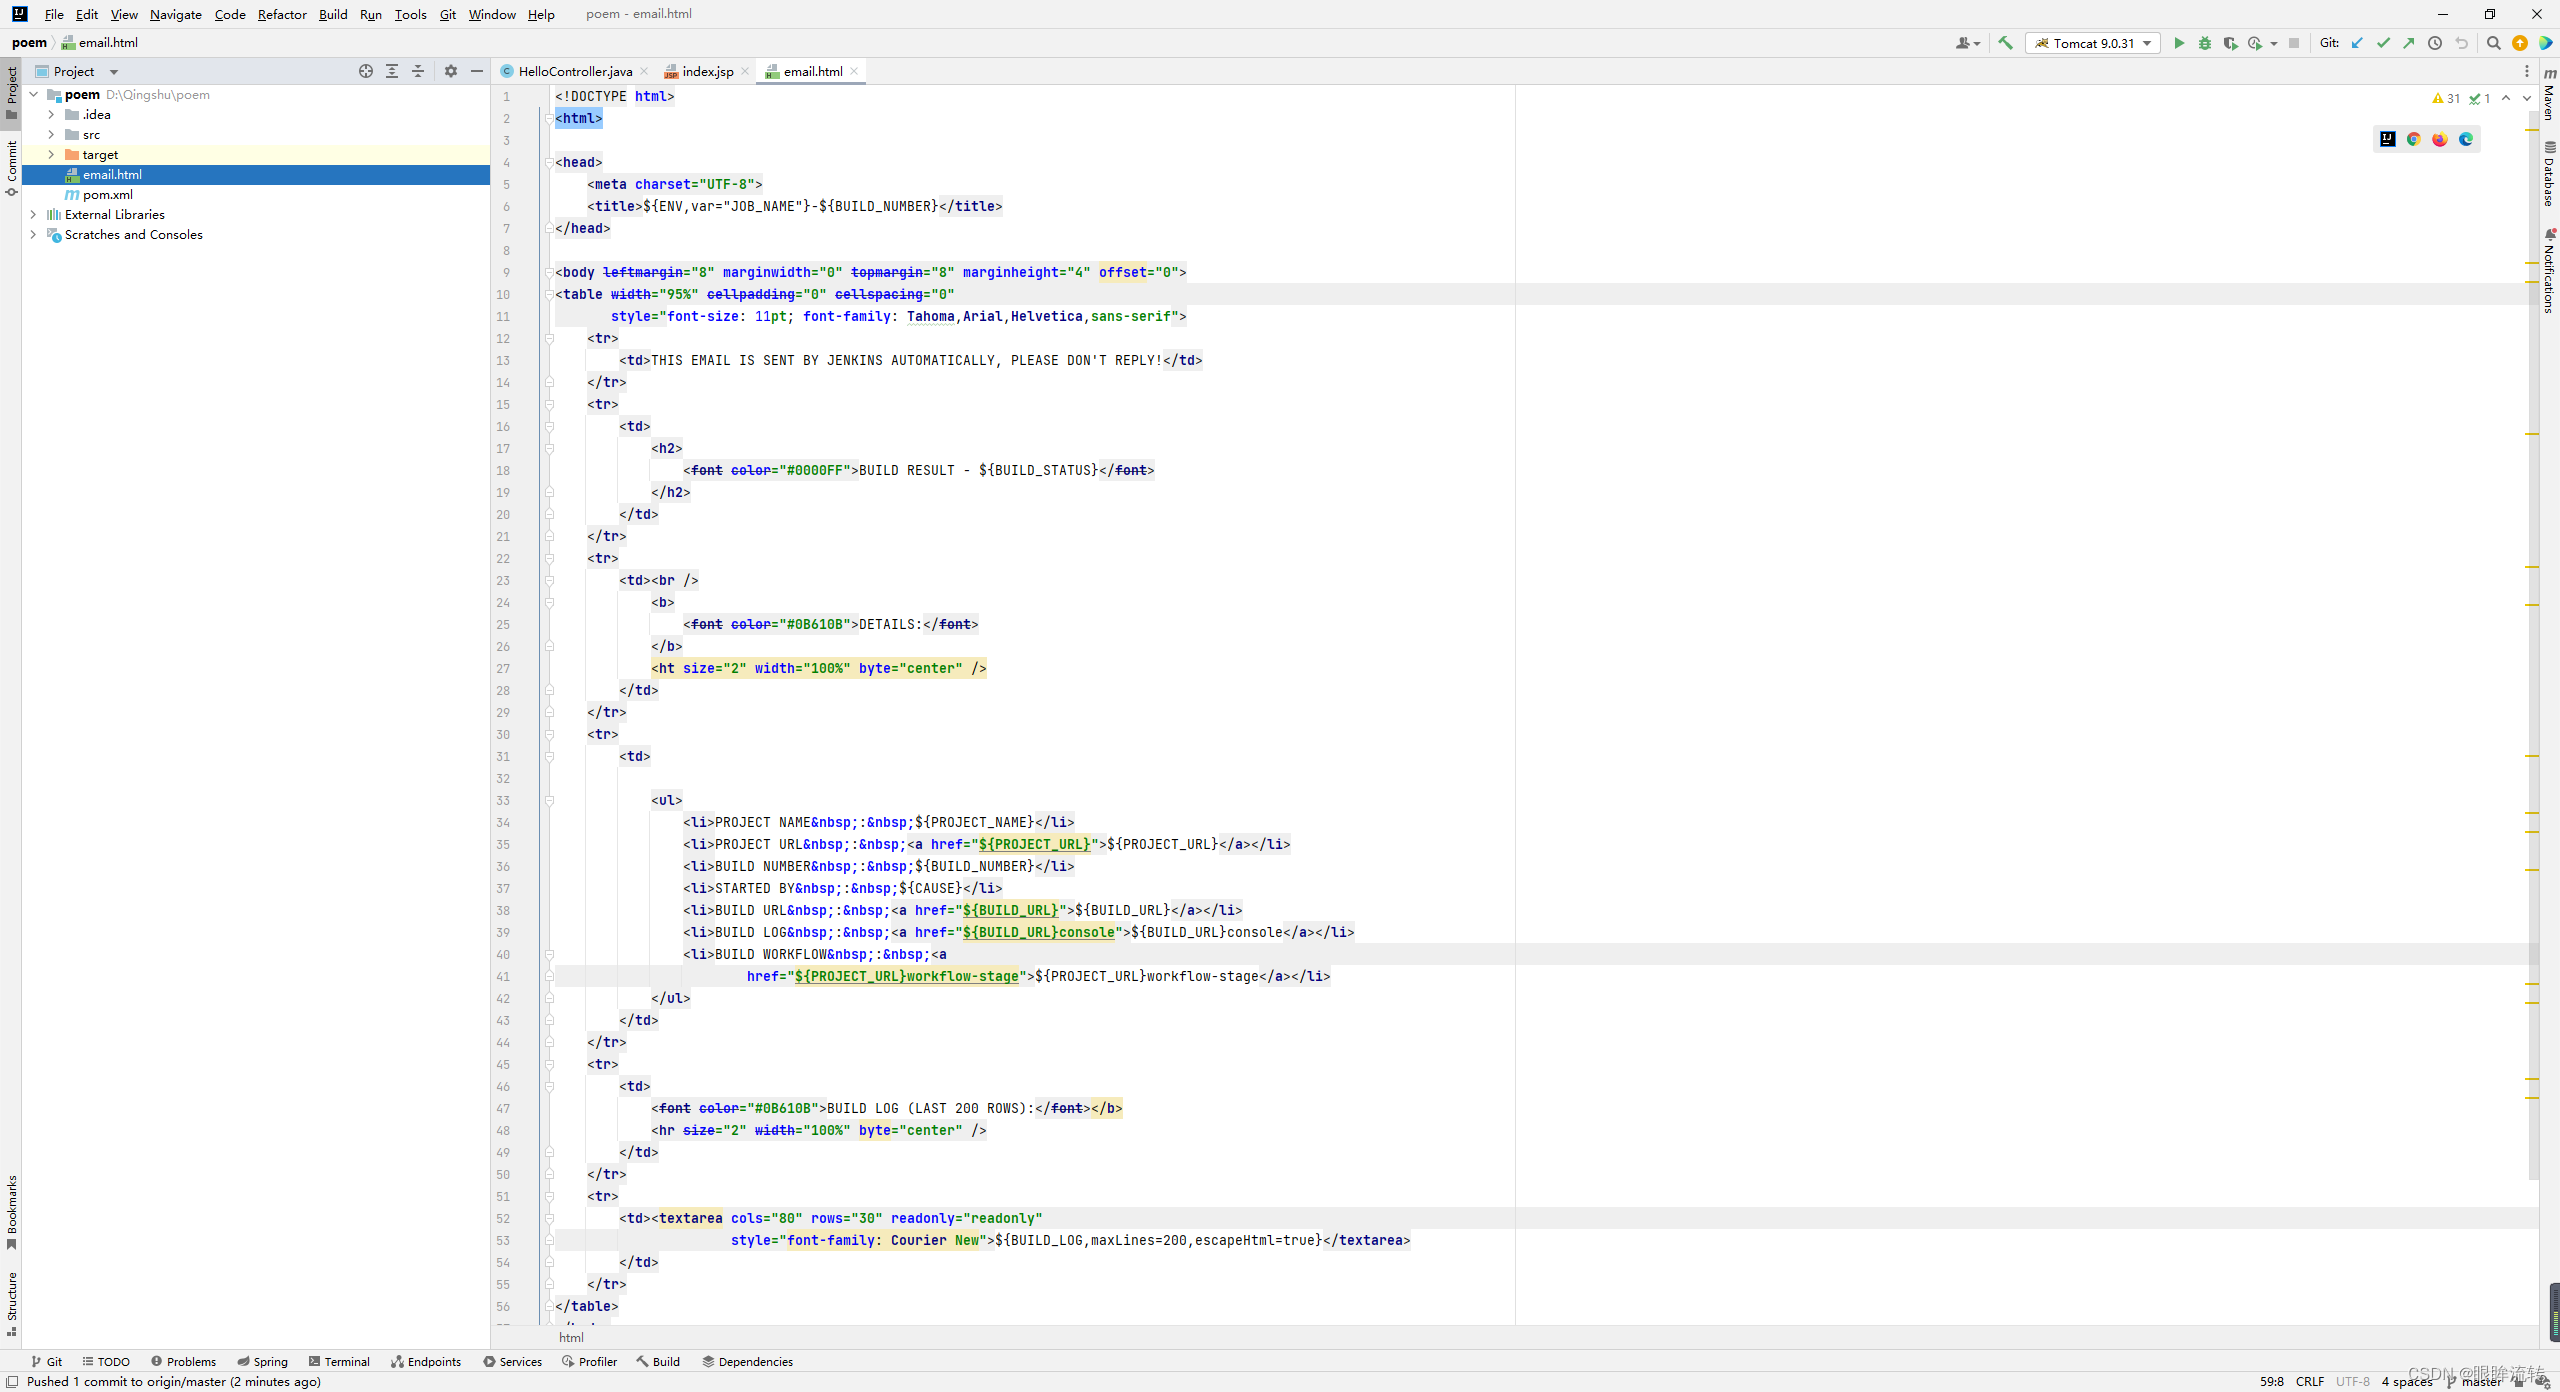
<!DOCTYPE html>
<html><head><meta charset="UTF-8"><title>${ENV,var="JOB_NAME"}-${BUILD_NUMBER}</title>
</head><body leftmargin="8" marginwidth="0" topmargin="8" marginheight="4" offset="0">
<table width="95%" cellpadding="0" cellspacing="0"style="font-size: 11pt; font-family: Tahoma,Arial,Helvetica,sans-serif"><tr><td>THIS EMAIL IS SENT BY JENKINS AUTOMATICALLY, PLEASE DON'T REPLY!</td></tr><tr><td><h2><font color="#0000FF">BUILD RESULT - ${BUILD_STATUS}</font></h2></td></tr><tr><td><br /><b><font color="#0B610B">DETAILS:</font></b><ht size="2" width="100%" byte="center" /></td></tr><tr><td><ul><li>PROJECT NAME : ${PROJECT_NAME}</li><li>PROJECT URL : <a href="${PROJECT_URL}">${PROJECT_URL}</a></li><li>BUILD NUMBER : ${BUILD_NUMBER}</li><li>STARTED BY : ${CAUSE}</li><li>BUILD URL : <a href="${BUILD_URL}">${BUILD_URL}</a></li><li>BUILD LOG : <a href="${BUILD_URL}console">${BUILD_URL}console</a></li><li>BUILD WORKFLOW : <ahref="${PROJECT_URL}workflow-stage">${PROJECT_URL}workflow-stage</a></li></ul></td></tr><tr><td><font color="#0B610B">BUILD LOG (LAST 200 ROWS):</font></b><hr size="2" width="100%" byte="center" /></td></tr><tr><td><textarea cols="80" rows="30" readonly="readonly"style="font-family: Courier New">${BUILD_LOG,maxLines=200,escapeHtml=true}</textarea></td></tr>
</table>
</body></html>
16、代码审查
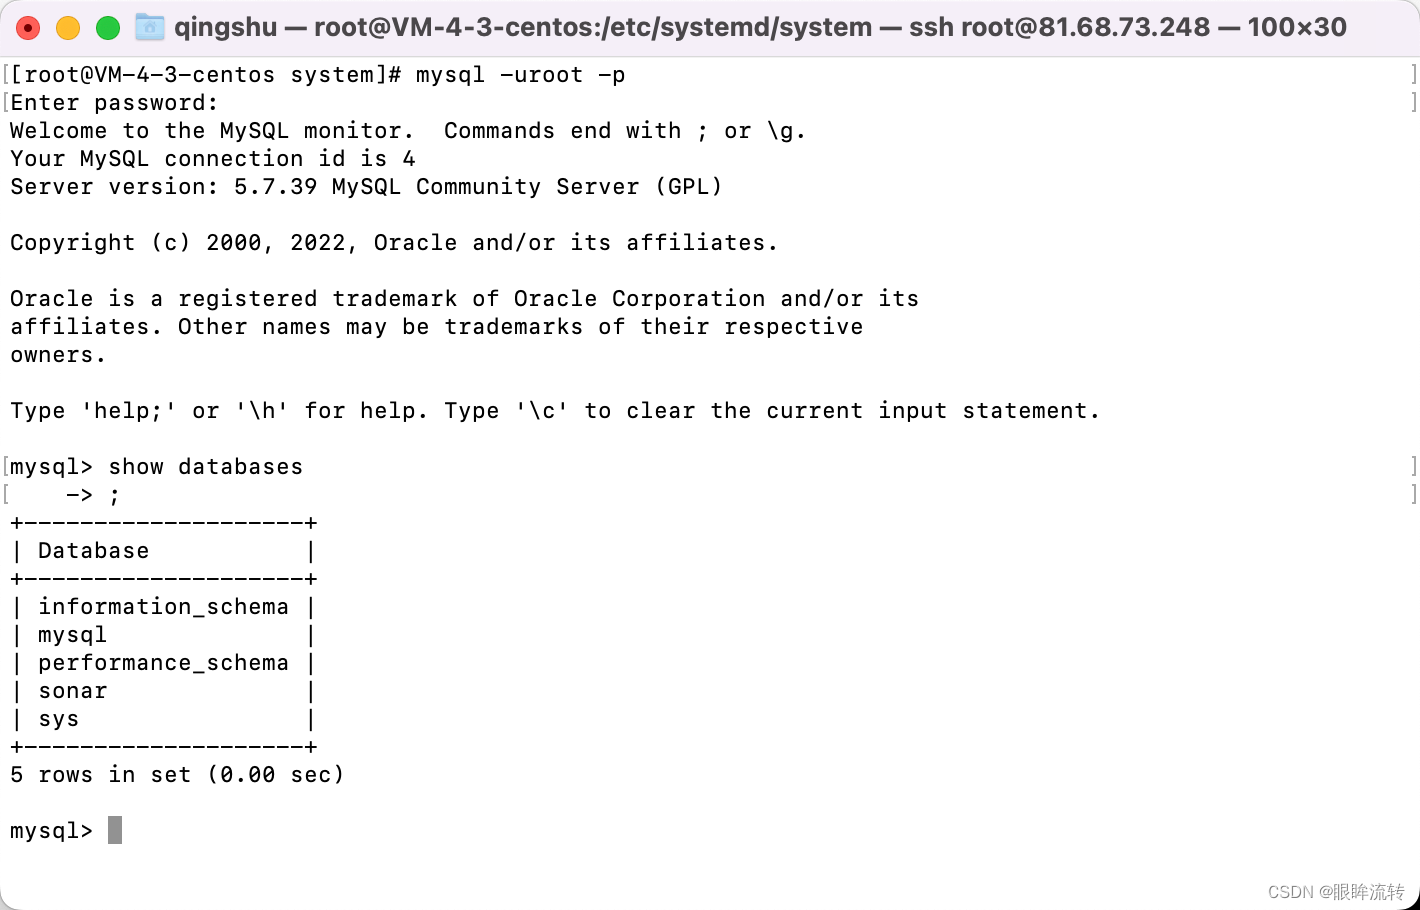
默认已经配置过mysql数据库并且拥有一个名为sonar的数据库
下载sonar并上传到服务器
https://www.sonarqube.org/downloads/
安装unzip
yum install unzip
解压
unzip sonarqube-9.6.0.59041.zip
创建sonar用户
useradd sonar
更改sonar目录权限
chmod -R 777 /opt/sonarqube-9.6.0.59041/
更改sonar配置文件
vim /opt/sonarqube-9.6.0.59041/conf/sonar.properties
sonar.jdbc.username=root
sonar.jdbc.password=xumeng2233.
onar.jdbc.url=jdbc:mysql://localhost:3306/sonar?useUnicode=true&characterEncoding=utf8&rewriteBatchedStatements=true&useConfigs=maxPerformance&useSSL=false
启动sonar
su sonar /opt/sonarqube-9.6.0.59041/bin/linux-x86-64/sonar.sh start
http://81.68.73.248:9000/
默认账号密码是admin-admin
生成token

设置凭证

下载SonarQube Scanner,并上传到服务器(自动安装会使用非预期的jdk,所以我们自己安装
SonarQube Scanner 官网:https://docs.sonarqube.org/latest/analysis/scan/sonarscanner/
unzip sonar-scanner-cli-4.7.0.2747-linux.zip
配置SonarQube Scanner
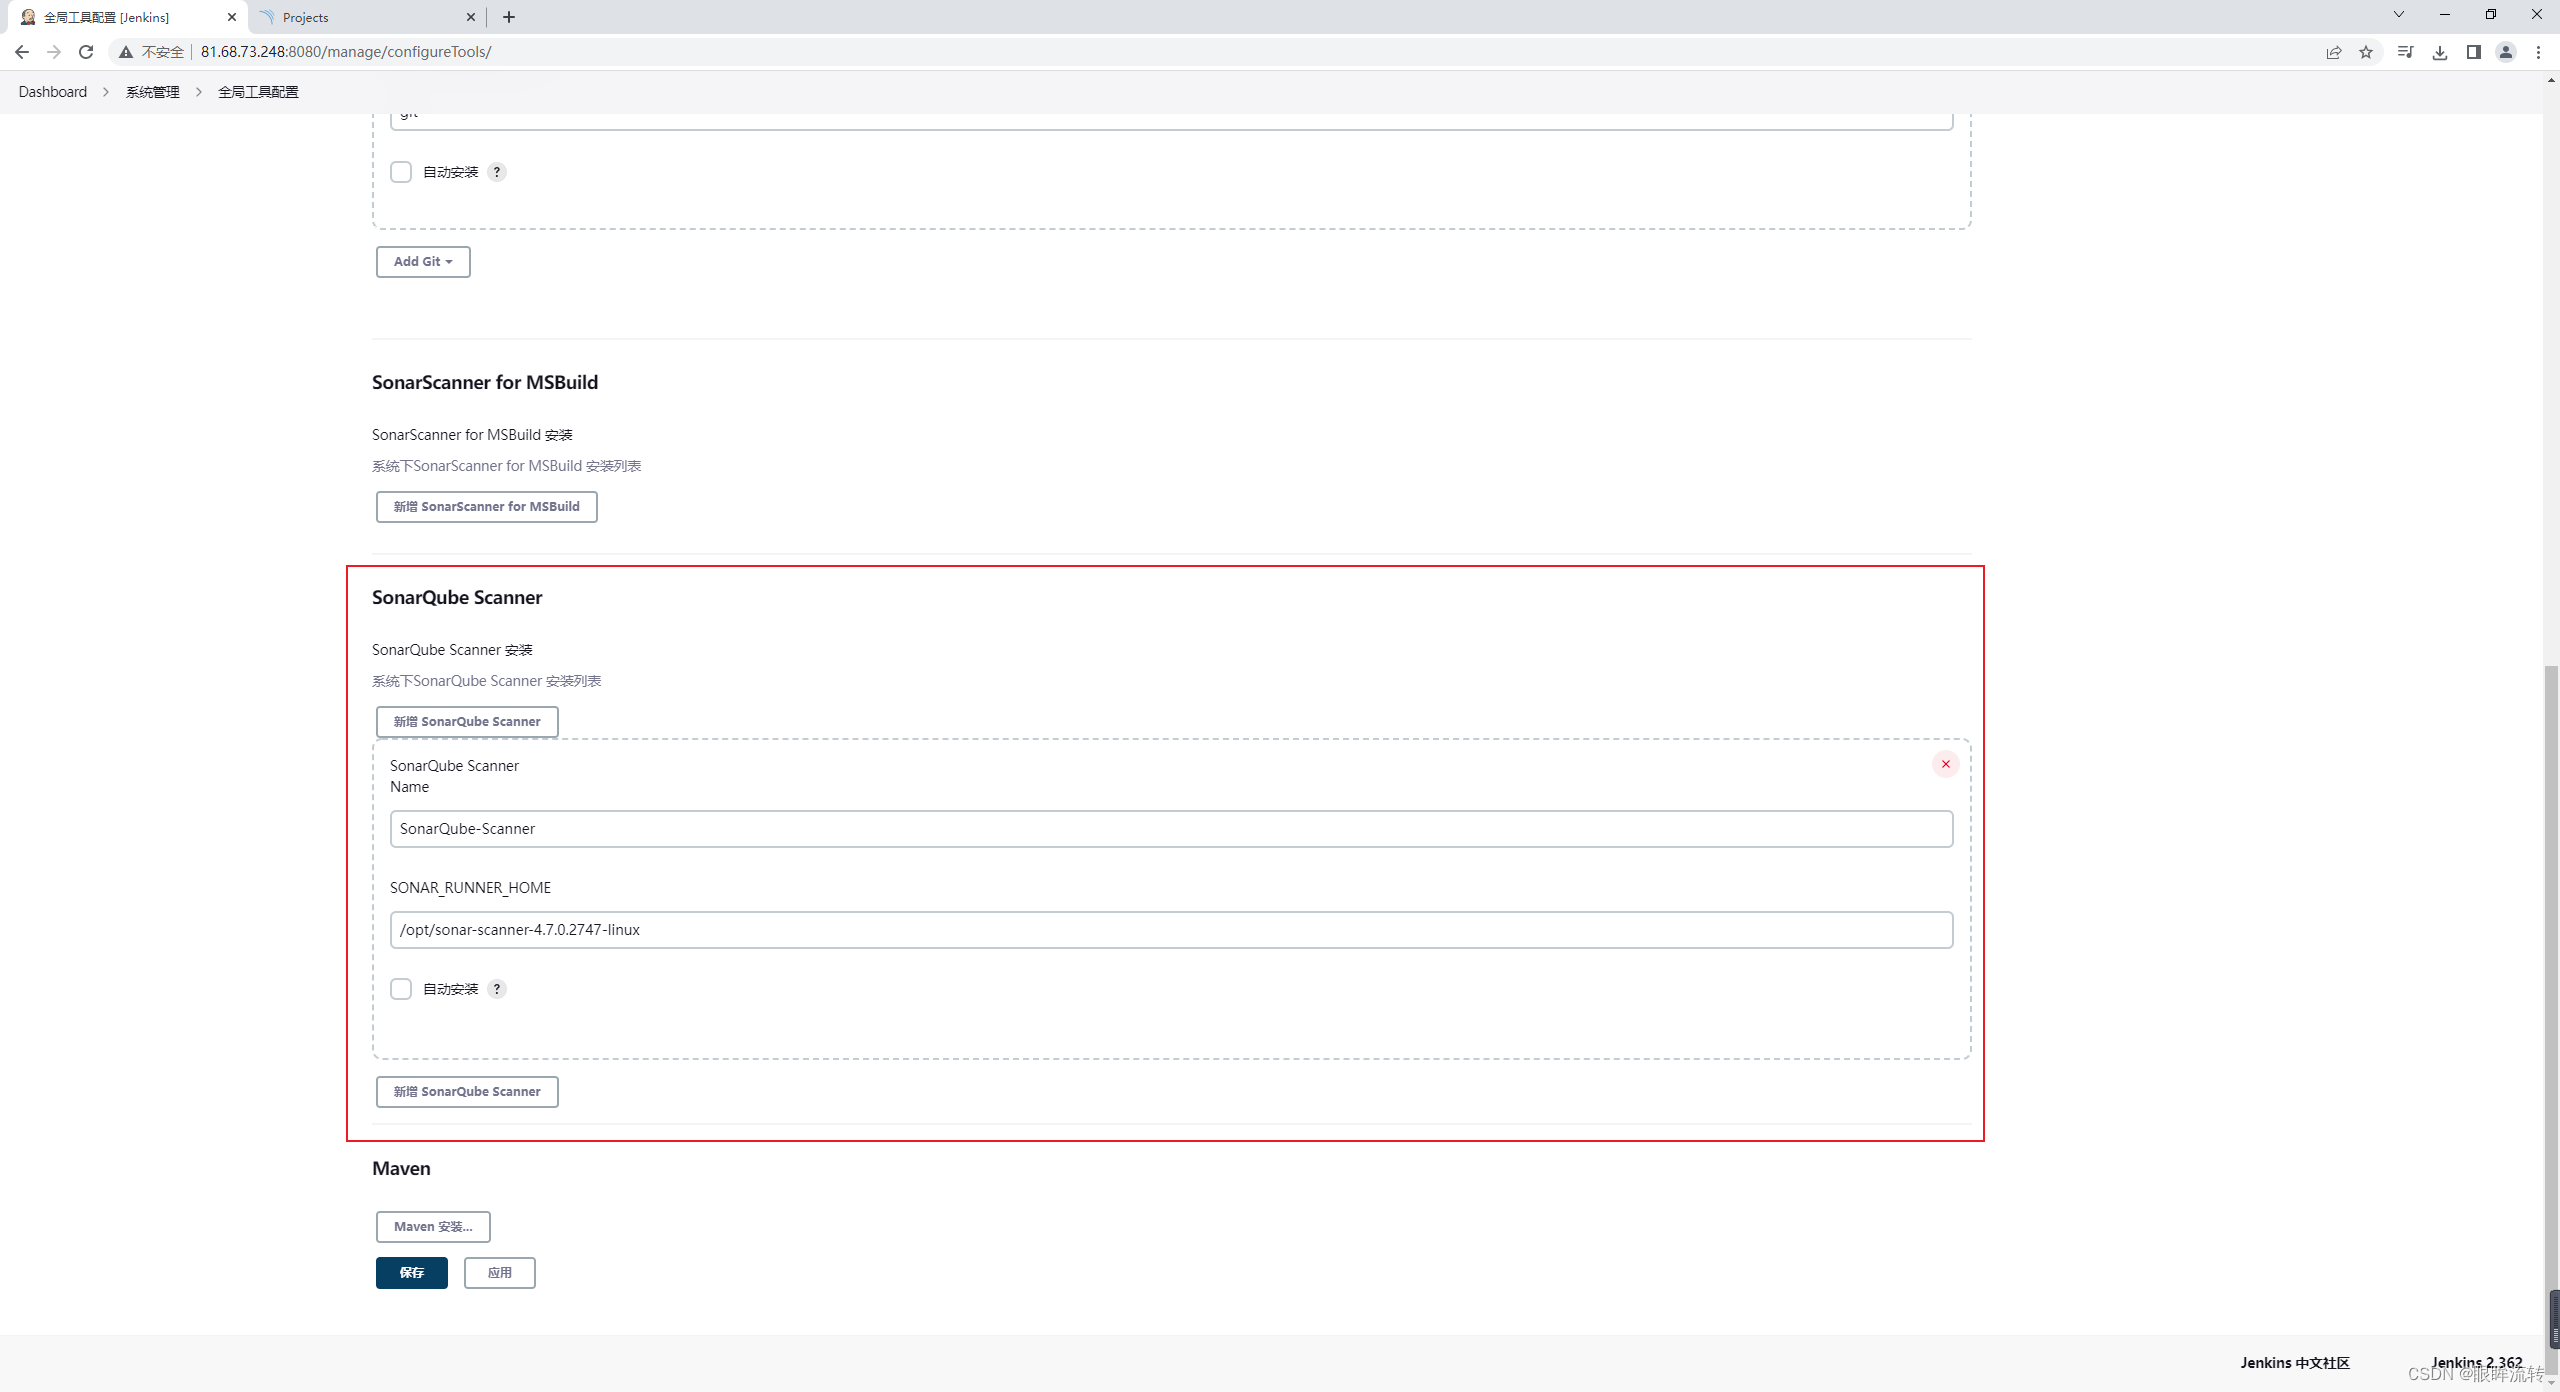
配置sonar服务
jenkins->系统管理->系统配置

配置项目扫描1
# must be unique in a given SonarQube instance
sonar.projectKey=auto_build
# this is the name and version displayed in the SonarQube UI. Was mandatory prior to SonarQube 6.1.
sonar.projectName=auto_build
sonar.projectVersion=1.0
# Path is relative to the sonar-project.properties file. Replace "\" by "/" on Windows.
# This property is optional if sonar.modules is set.
sonar.sources=.
sonar.exclusions=**/test/**,**/target/**
# Encoding of the source code. Default is default system encoding
sonar.sourceEncoding=UTF-8
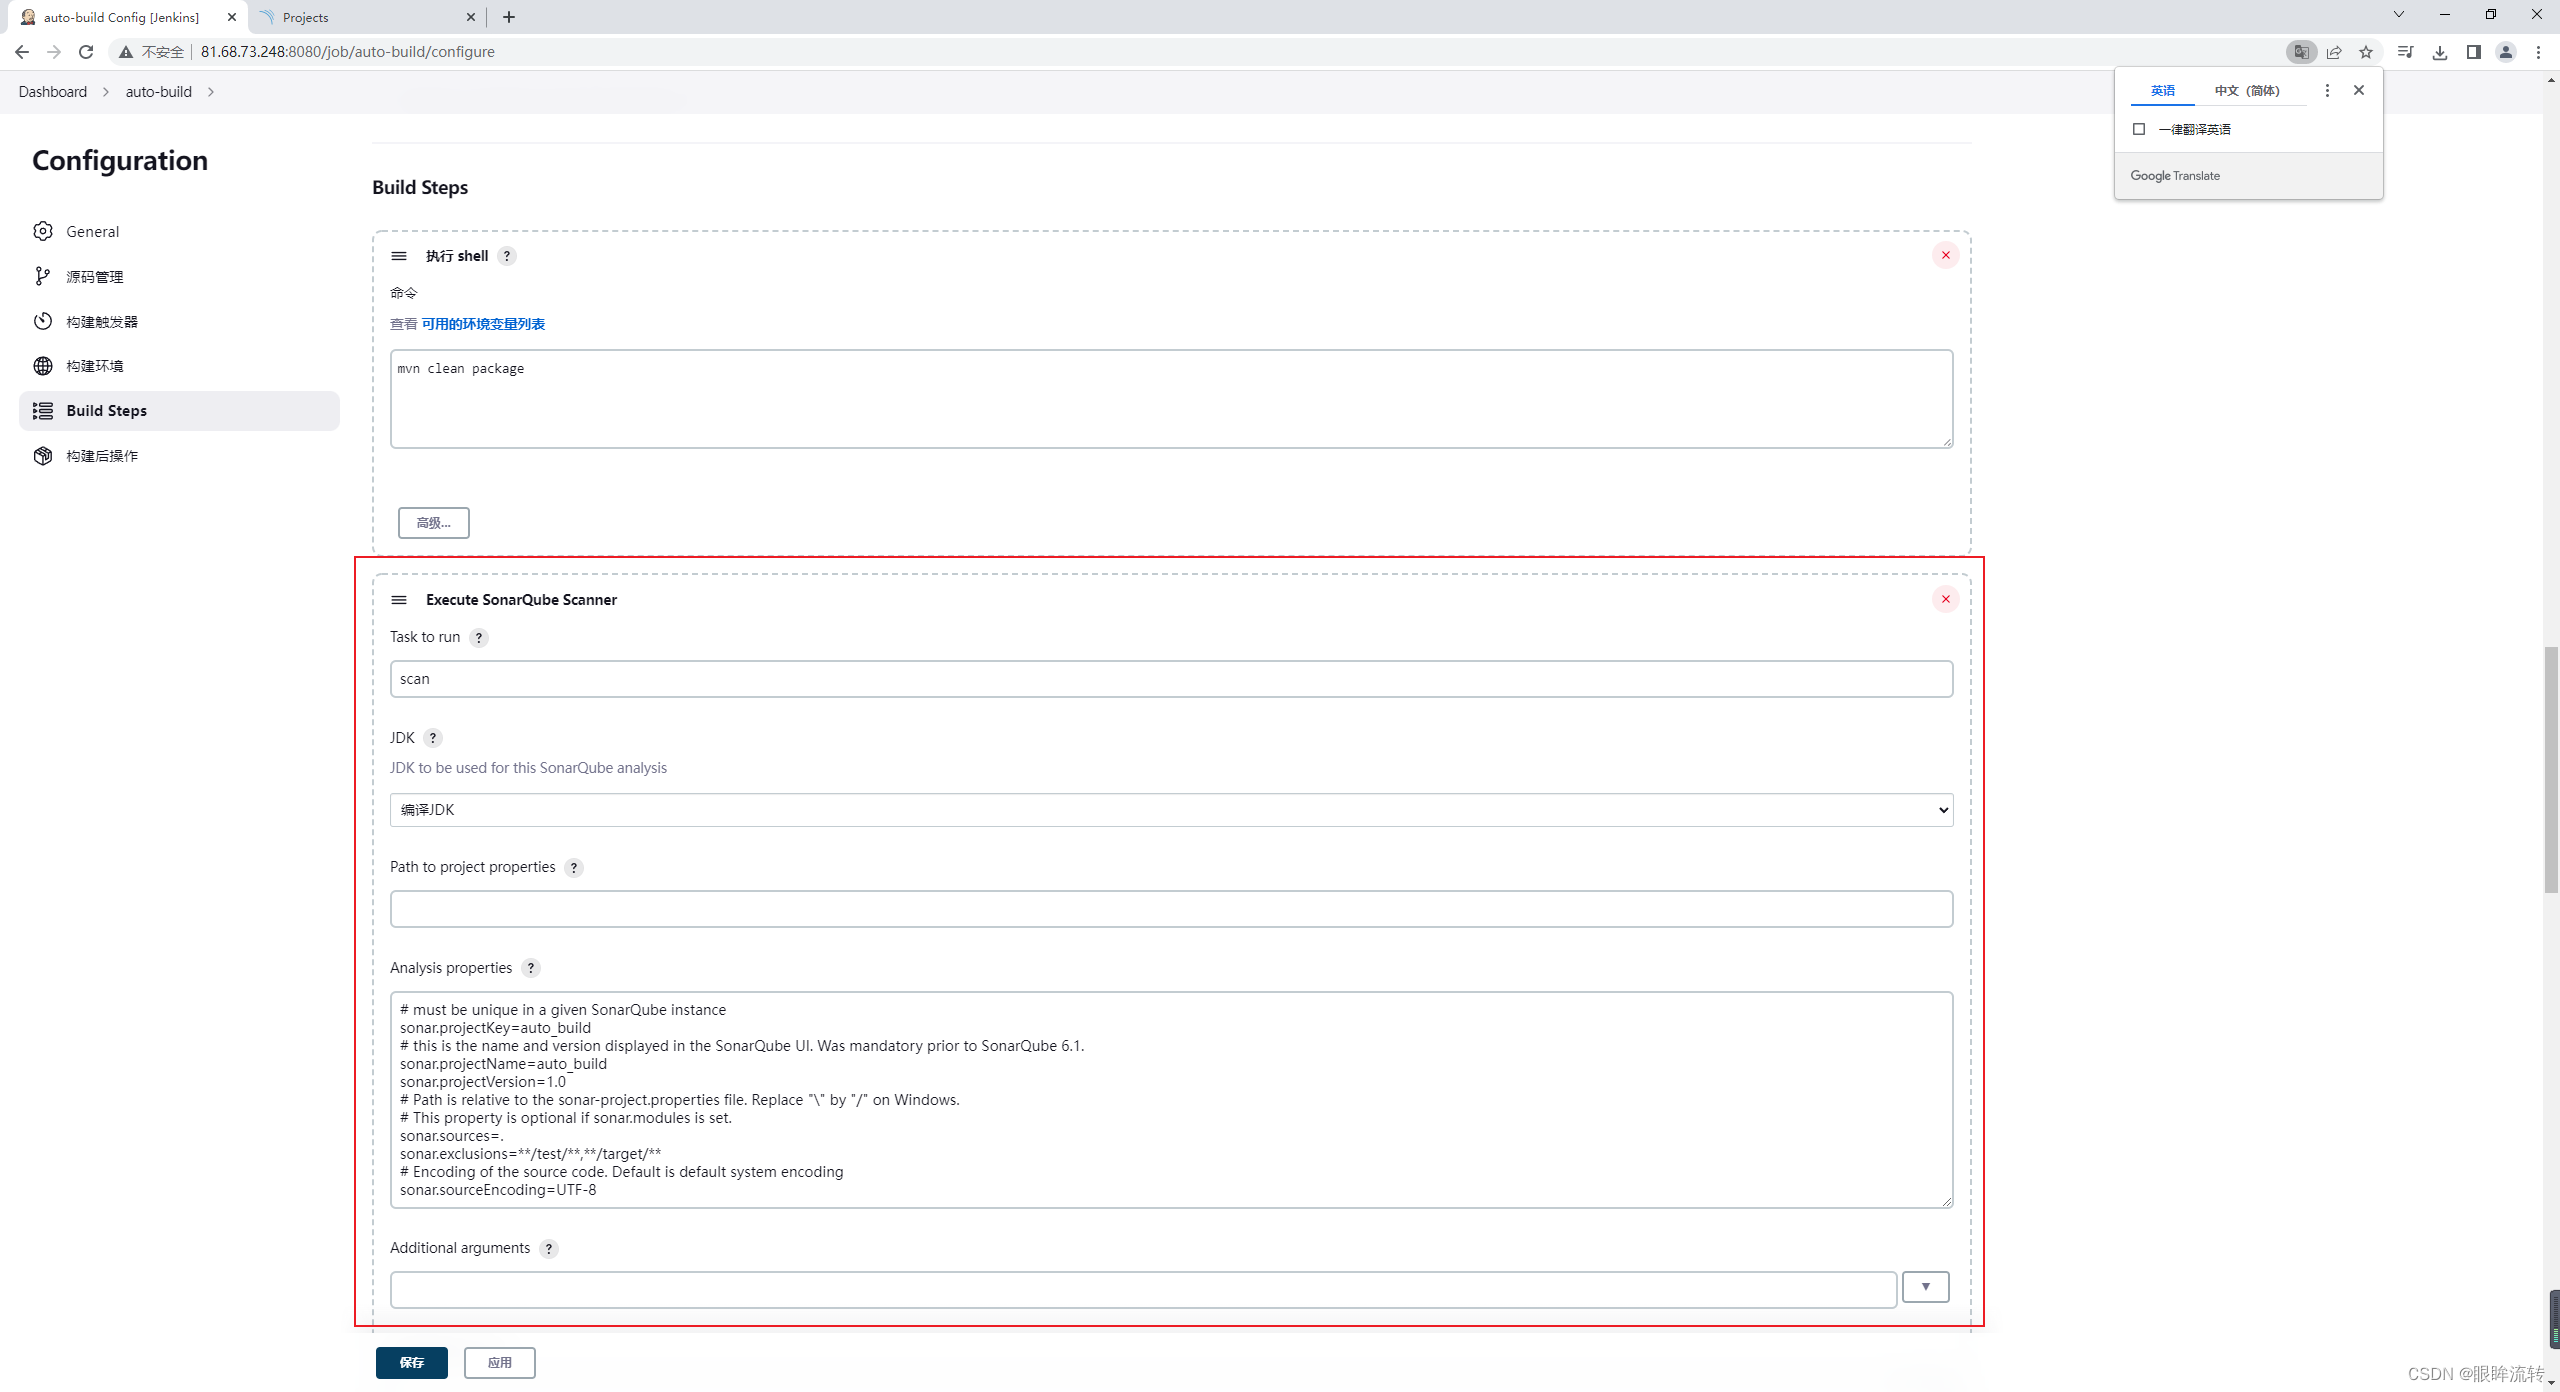
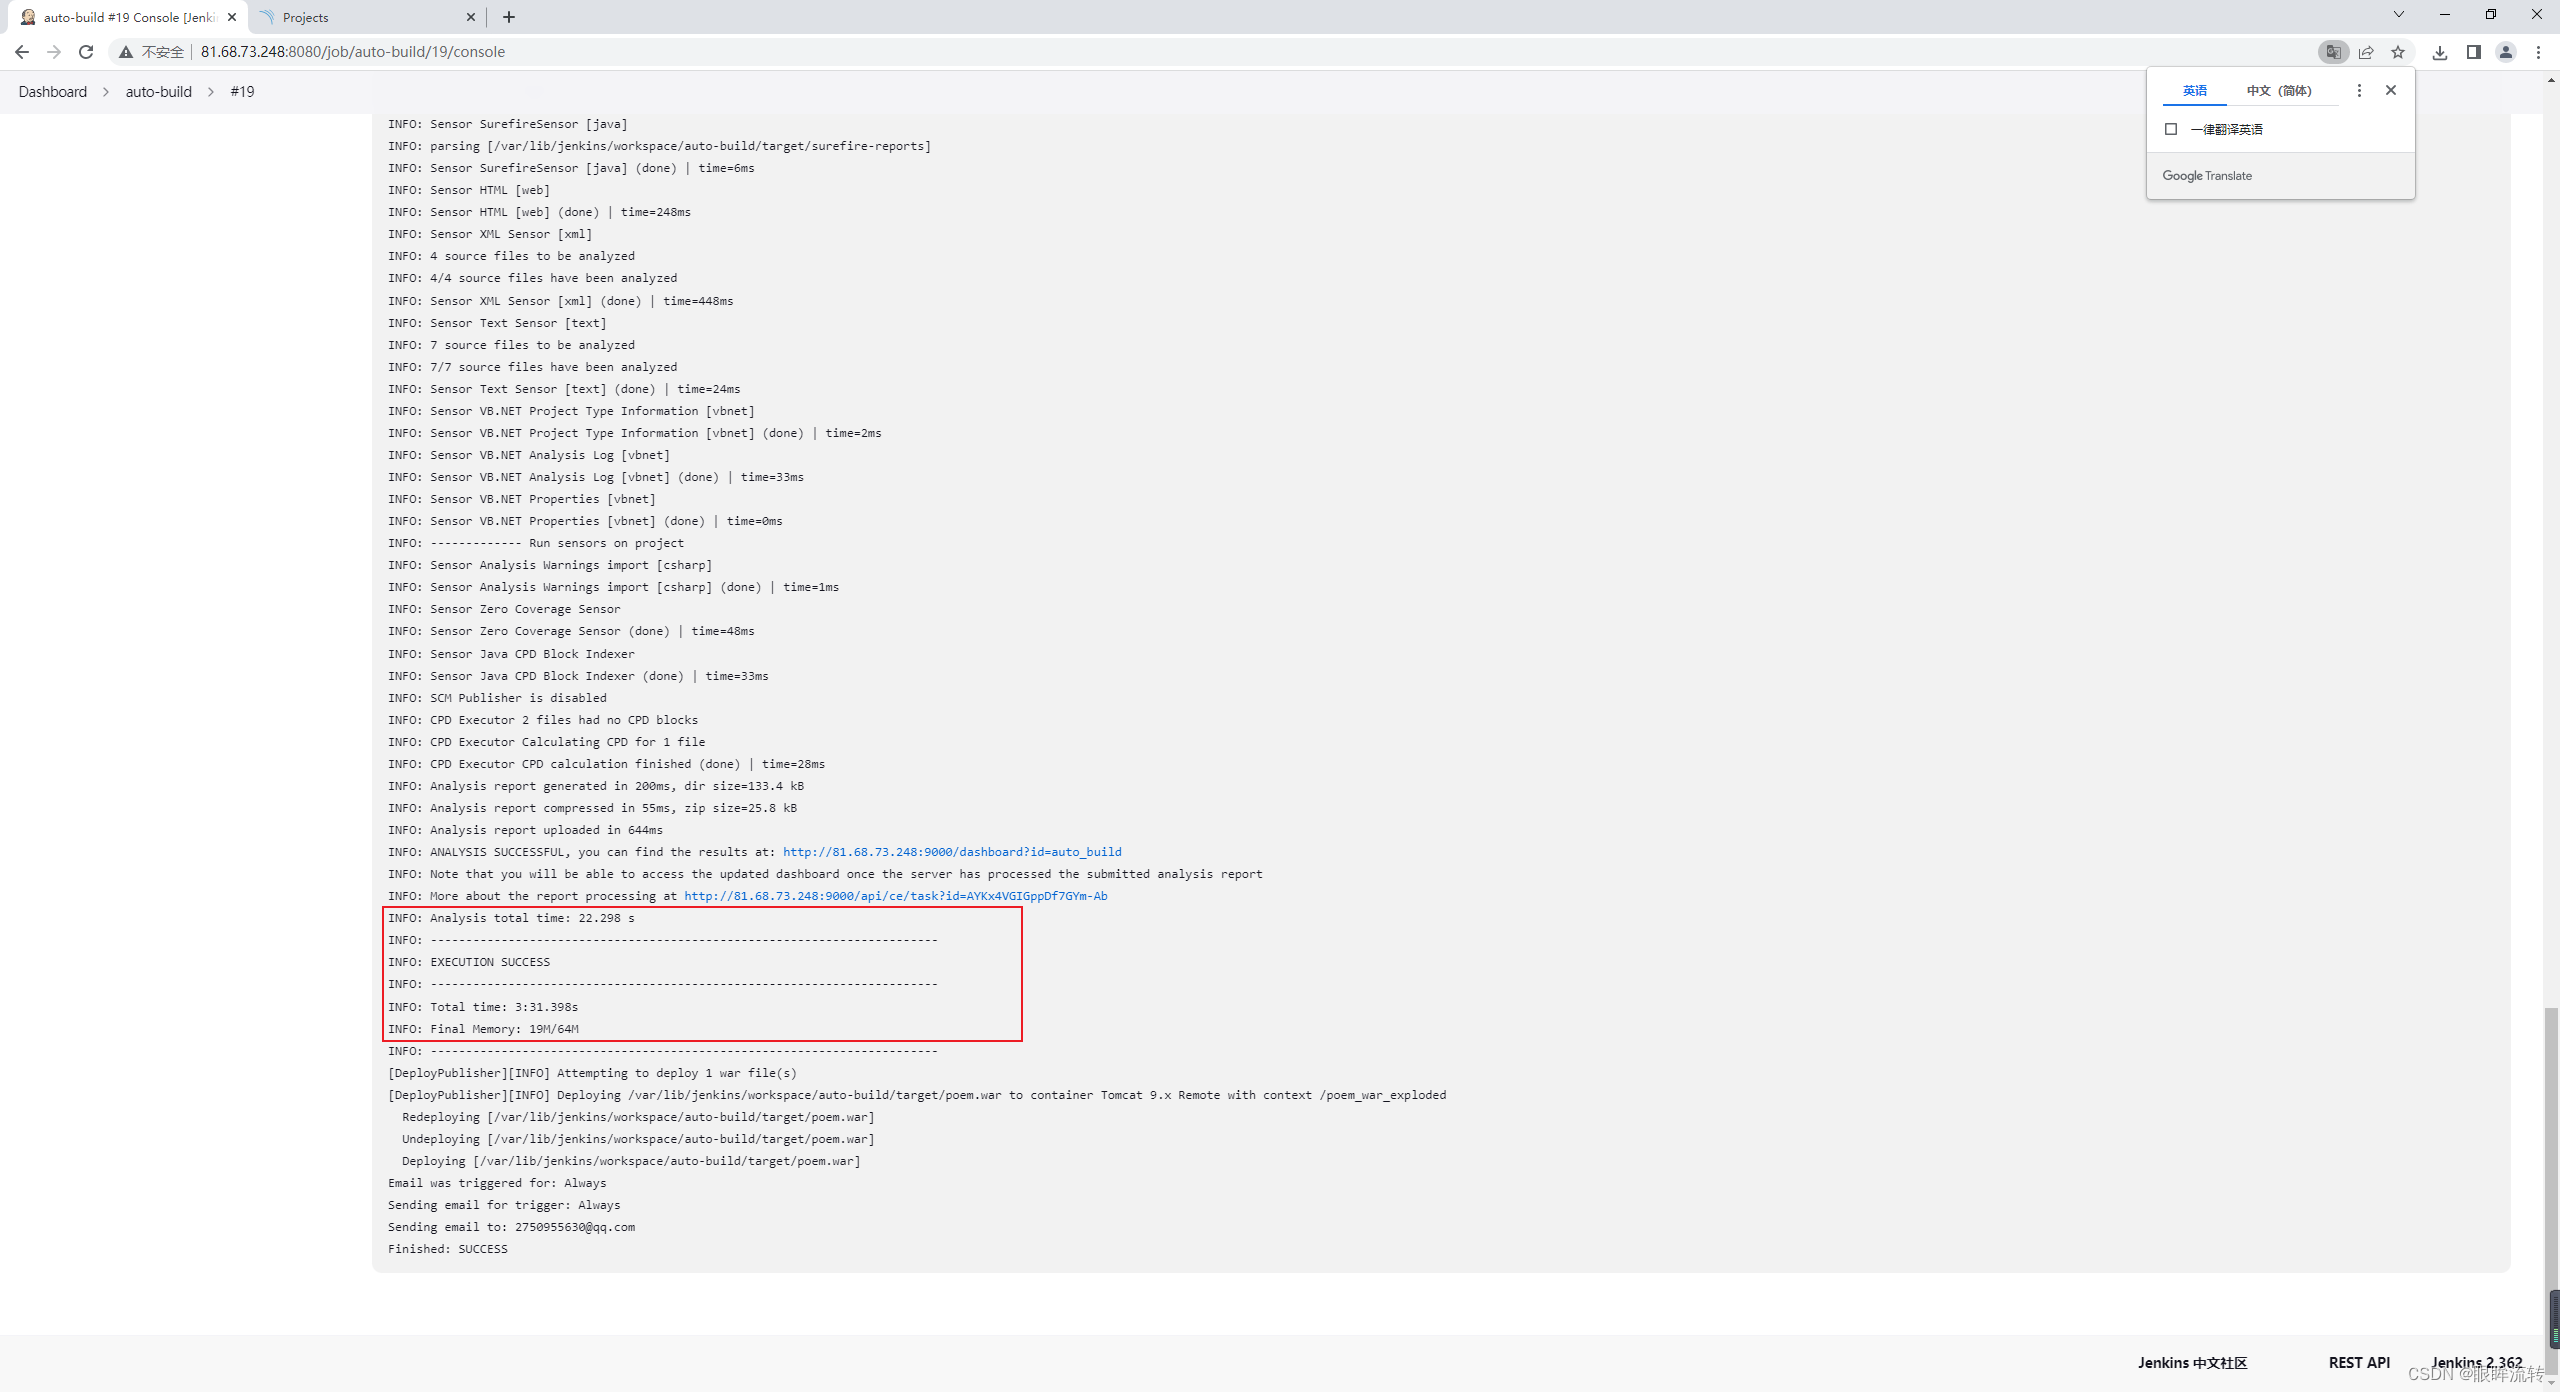
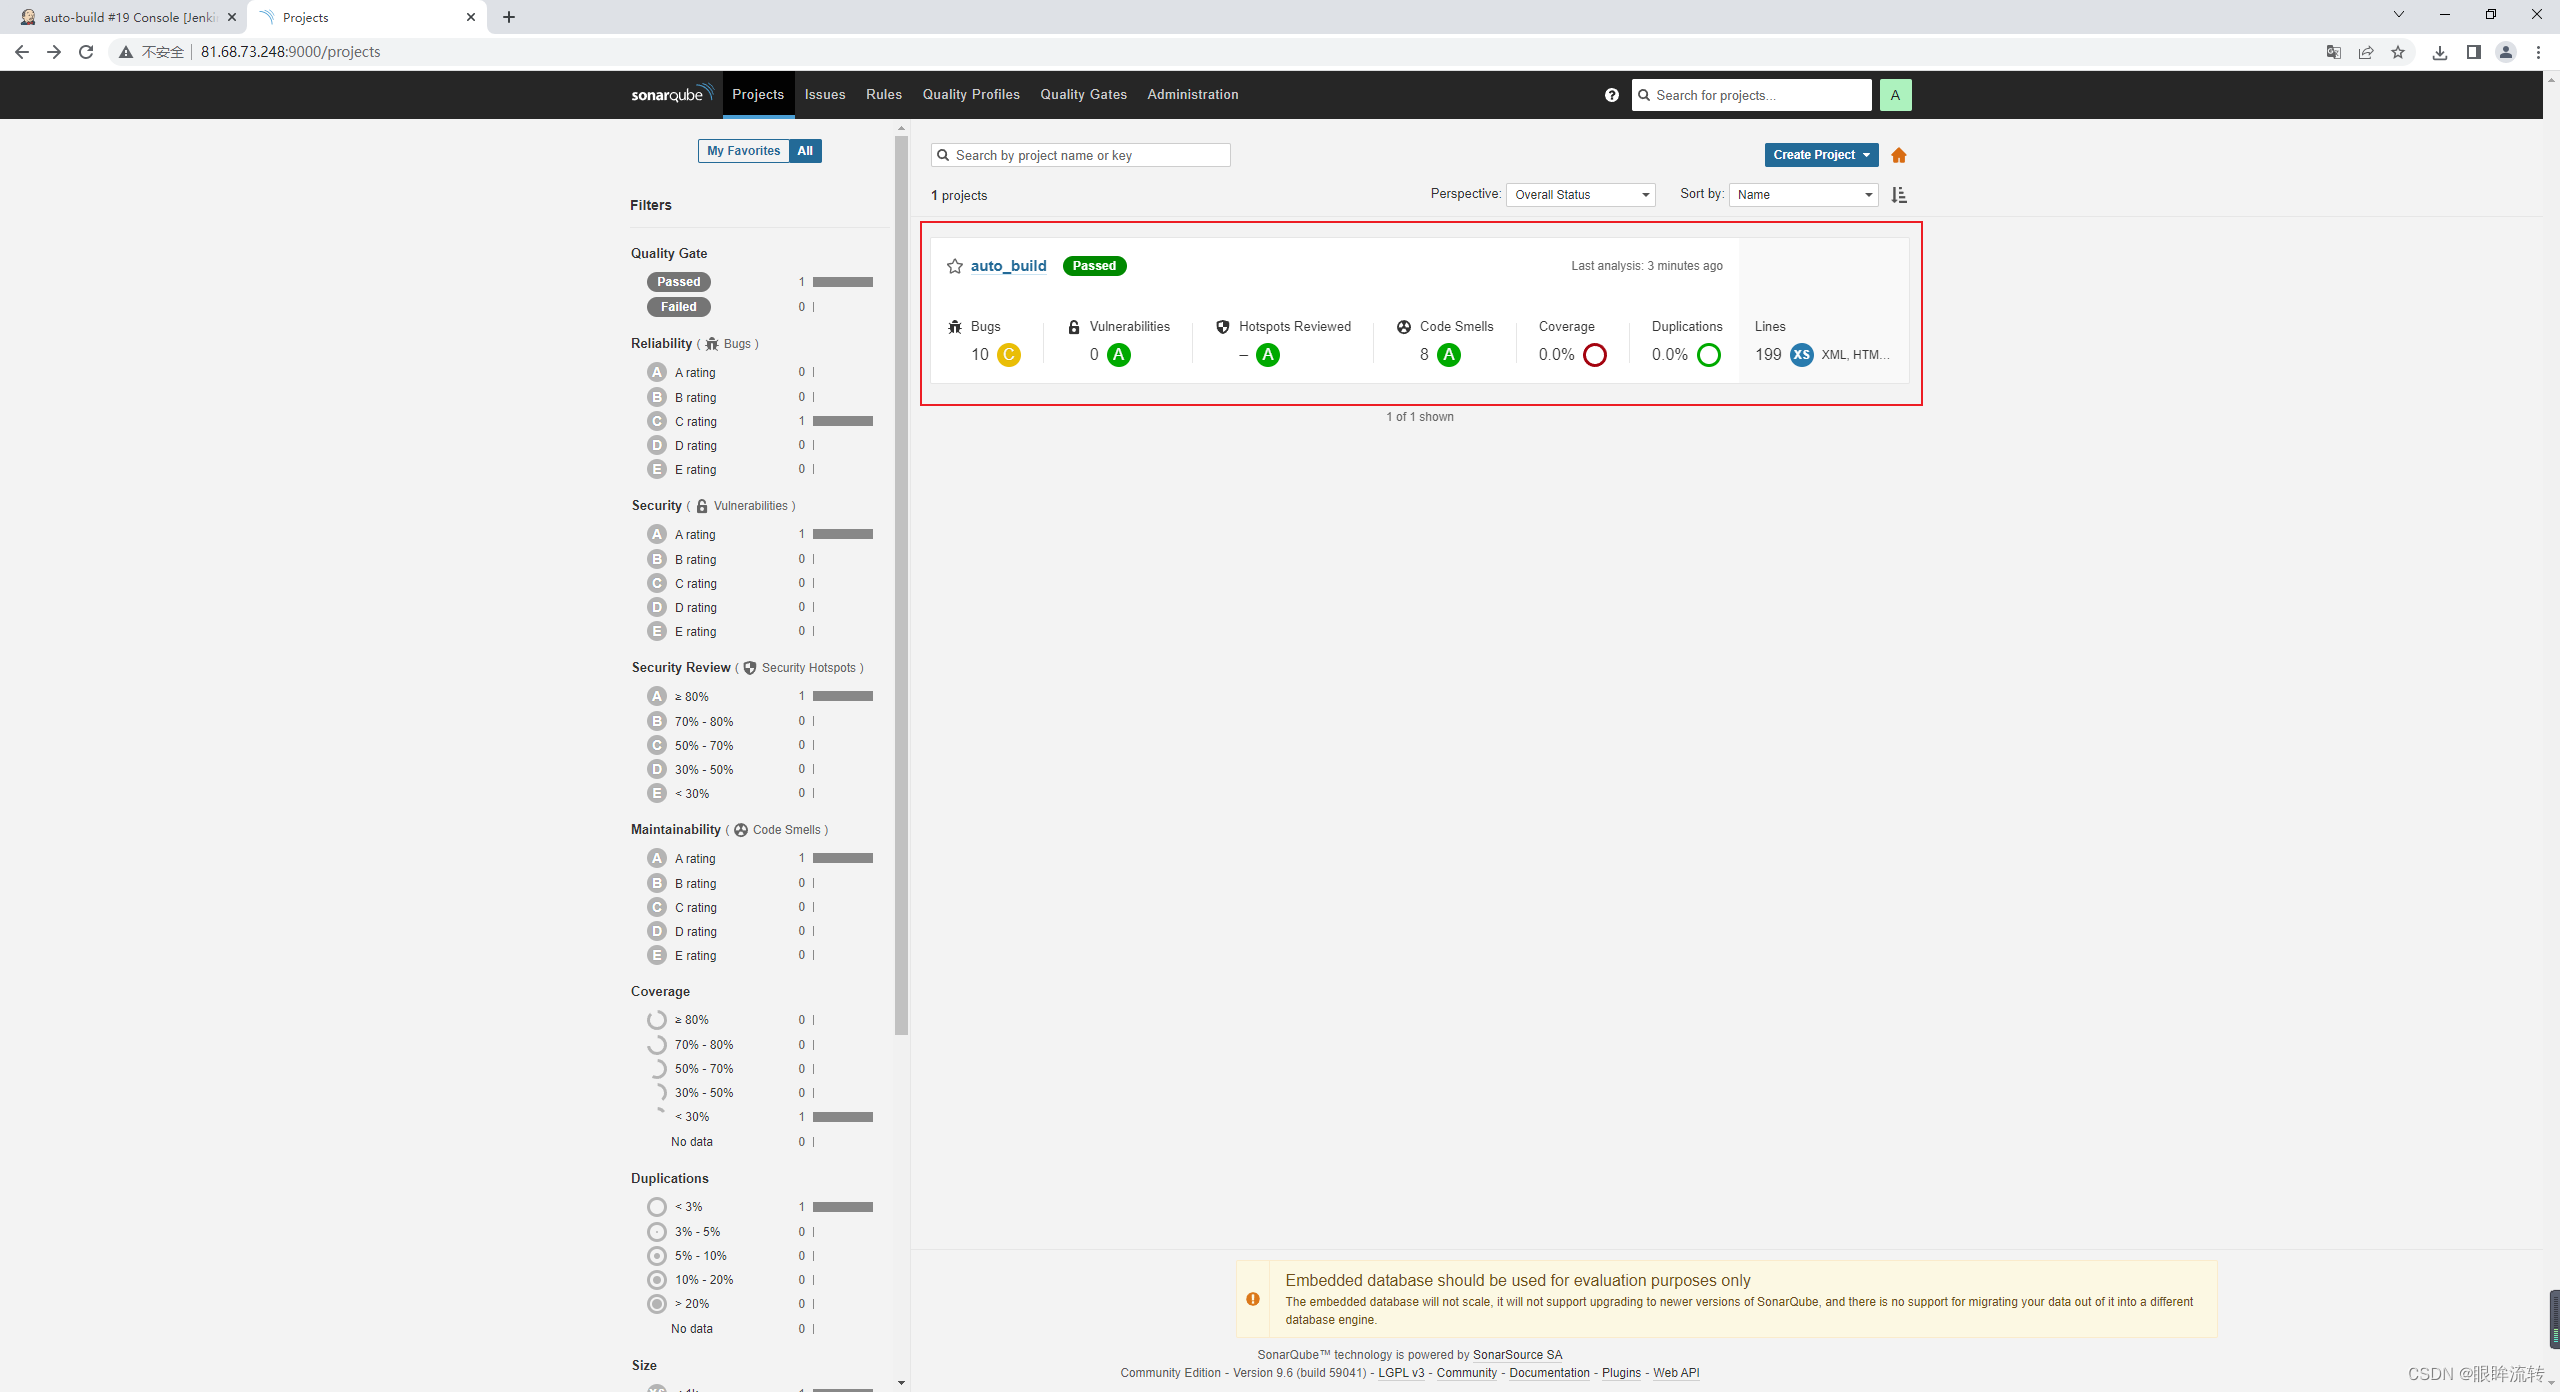
配置项目扫描2
在项目下创建sonar-project.properties(src同级
# must be unique in a given SonarQube instance
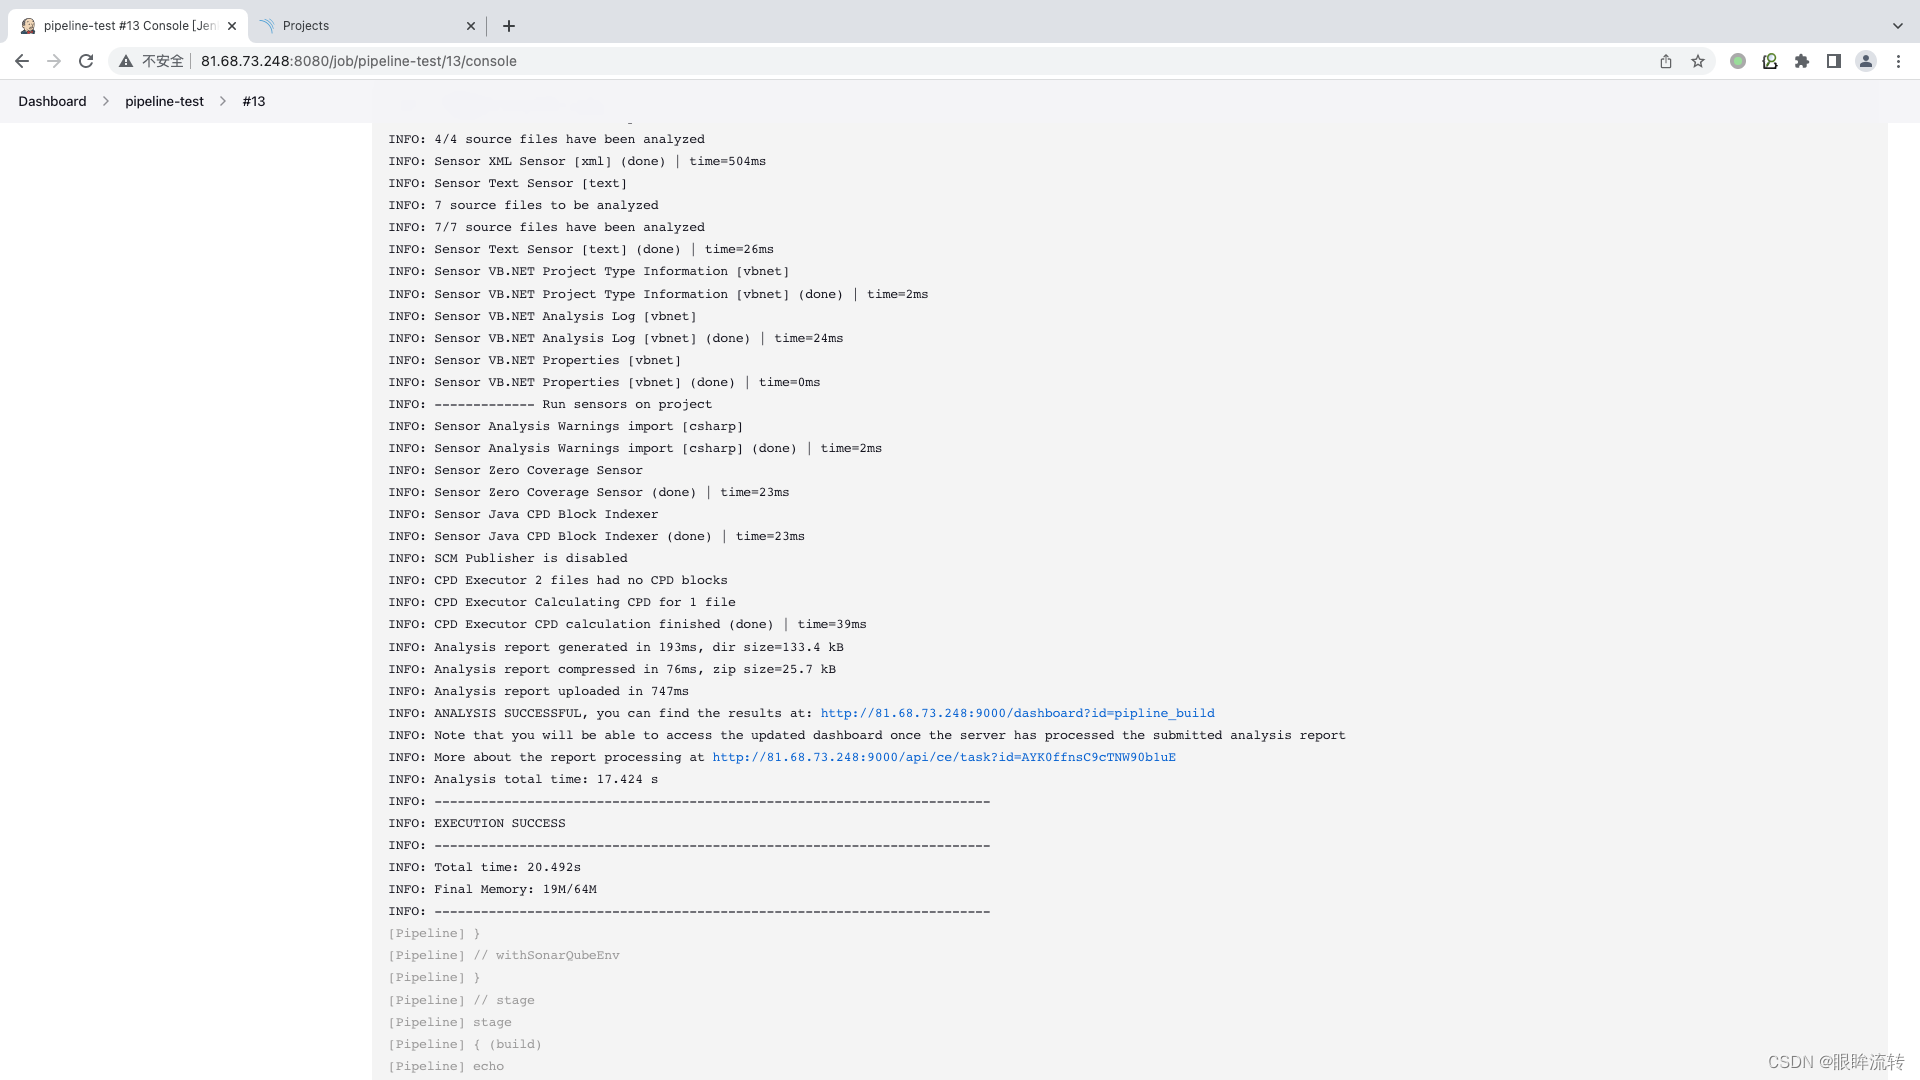
sonar.projectKey=pipline_build
# this is the name and version displayed in the SonarQube UI. Was mandatory prior to SonarQube 6.1.
sonar.projectName=pipline_build
sonar.projectVersion=1.0
# Path is relative to the sonar-project.properties file. Replace "\" by "/" on Windows.
# This property is optional if sonar.modules is set.
sonar.sources=.
sonar.exclusions=**/test/**,**/target/**
# Encoding of the source code. Default is default system encoding
sonar.sourceEncoding=UTF-8
1234567891011
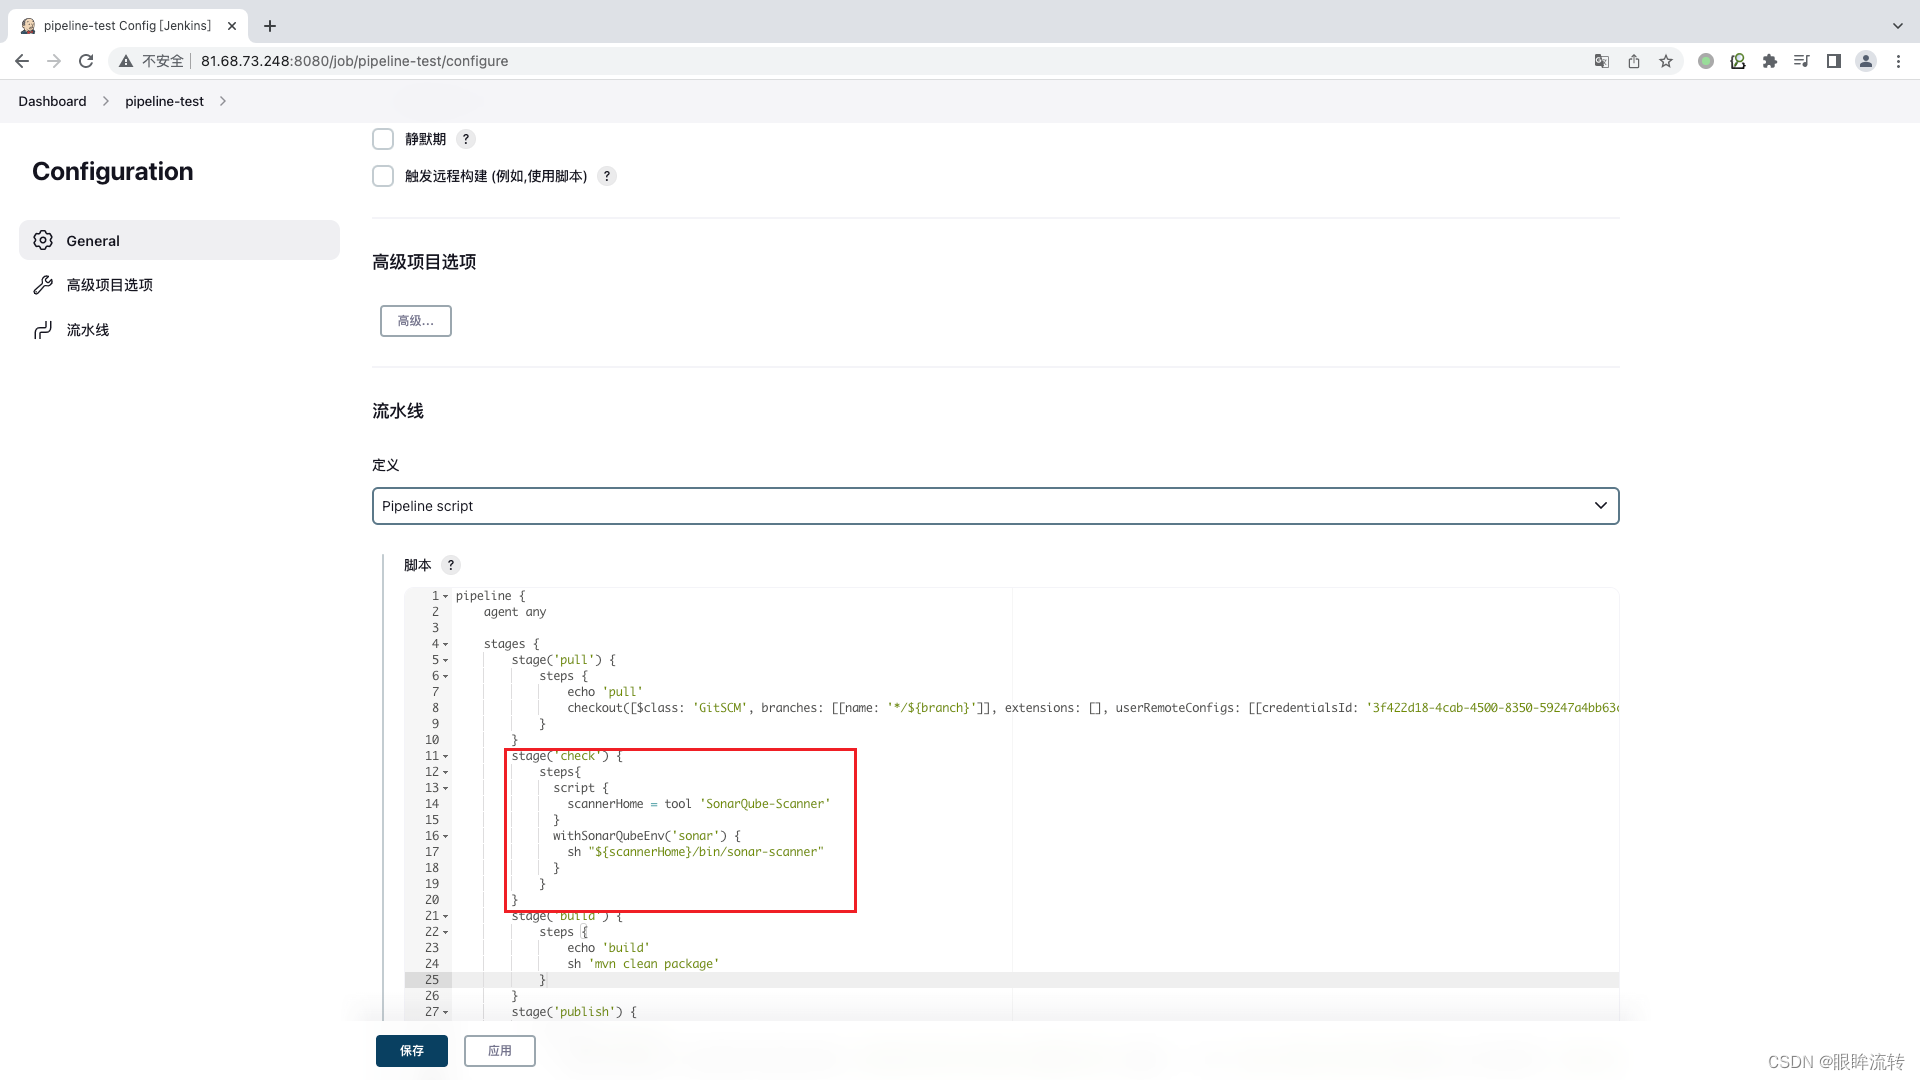
pipeline {agent anystages {stage('pull') {steps {echo 'pull'checkout([$class: 'GitSCM', branches: [[name: '*/${branch}']], extensions: [], userRemoteConfigs: [[credentialsId: '3f422d18-4cab-4500-8350-59247a4bb63c', url: 'http://150.158.169.42/devops/poem.git']]])}}stage('check') {steps{script {scannerHome = tool 'SonarQube-Scanner'}withSonarQubeEnv('sonar') {sh "${scannerHome}/bin/sonar-scanner"}}}stage('build') {steps {echo 'build'sh 'mvn clean package'}}stage('publish') {steps {echo 'publish'deploy adapters: [tomcat9(credentialsId: '492c2512-8479-4182-991a-232d055112f8', path: '', url: 'http://150.158.187.211:8080')], contextPath: '/poem_war_exploded', war: '**/*.war'}}}post {always {emailext(subject: '构建通知:${PROJECT_NAME} - Build # ${BUILD_NUMBER} -${BUILD_STATUS}!',body: '${FILE,path="email.html"}',to: '2750955630@qq.com')}}
}


进行分组时,分组值存在null值会报NPE(空指针)错误,使用时要注意)


...)
:删除集合中满足给定条件的所有元素)


,新材料为生物计算机打造“神经元”和“突触”...)
,Microsoft微软邮箱 outlook、hotmail 打开pop和imap的方法)


