环境准备
虚拟机装好之后,按照官网步骤检查虚拟机内核版本,必须在3.10以上版本,故此处安装redhat_7.2
# uname -r
3.10.0-327.el7.x86_64
安装docker:
yum install docker-io
有依赖是直接安装具体的依赖软件,解决依赖
docker安装成功,启动docker服务
service docker start
并设置为开机自启动
chkconfig docker on
现在我们需要制作docker镜像,可以通过Dockerfile或者是在现有的镜像上修改之后commit。
此处选择在现有的镜像基础上修改后commit并push到私有镜像库,以方便后期使用。
以下以Apache+svn(搭建svn环境)为例说明docker 镜像的制作build、提交commit、上传push过程
一、获取docker基础镜像
从docker公有库down一个适合自己系统的镜像(我此处down的是centos)
docker pull centos
运行down下来的docker容器:
docker run -it centos /bin/bash
[root@84292236ae90 /]#
进入docker容器,进行svn环境搭建,此处的 84292236ae90 即为你对于centos镜像修改的ID,提交时只需要提交该ID的内容即可。
二、在镜像中安装部署svn+Apache
此处使用yum安装
yum -y install subversion mod_dav_svn httpd
安装成功后,配置初始化svn、用户,权限(此处对于svn环境的搭建不做详细的说明)
配置完成使用exit 退出docker容器
三、重启Apache
为了使得docker容器可以使用宿主机的端口,此处映射宿主机的端口到docker容器
docker -p 参数把虚拟机的80端口映射到容器的80端口;虚拟机的80端口在 Vagrantfile 中被绑定到主机的8080端口,也就是:主机8080->虚拟机80->容器80
sudo docker run -t -i -p 80:80 -v /vagrant/htdocs:/var/www/html custom/httpd /bin/bash
# 启动 Apache
apachectl -k start
[root@bogon svn_apache]# sudo docker run -t -i -p 80:80 -v /vagrant/htdocs:/var/www/html test /bin/bash
[root@84292236ae90 /]# apachectl -k start
Passing arguments to httpd using apachectl is no longer supported.
You can only start/stop/restart httpd using this script.
If you want to pass extra arguments to httpd, edit the
/etc/sysconfig/httpd config file.
[root@84292236ae90 /]# ps -ef|grep httpd
root 18 1 7 18:44 ? 00:00:00 /usr/sbin/httpd -k start
svn 19 18 0 18:44 ? 00:00:00 /usr/sbin/httpd -k start
svn 20 18 0 18:44 ? 00:00:00 /usr/sbin/httpd -k start
svn 21 18 0 18:44 ? 00:00:00 /usr/sbin/httpd -k start
svn 22 18 0 18:44 ? 00:00:00 /usr/sbin/httpd -k start
svn 23 18 0 18:44 ? 00:00:00 /usr/sbin/httpd -k start
root 25 1 0 18:44 ? 00:00:00 grep --color=auto httpd
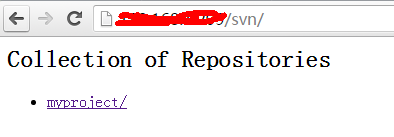
使用url访问:

四、提交对镜像所做的修改
docker commit -m "Added svn+apache" -a "yayad" 84292236ae90 centos-svn
提交至本地的centos-svn镜像,目前只存在于本机器,为了便于其他机器使用,需要提交至公有库/私有个人库,根据个人选择。
此处我提交至个人私有库:
1.找到本地镜像的ID:docker images
[root@bogon opt]# docker images
REPOSITORY TAG IMAGE ID CREATED VIRTUAL SIZE
firstdocker latest a3062f931635 2 hours ago 342.6 MB
centos-svn latest 4dea4adb699d 2 hours ago 396.4 MB
yayad/centos_svn latest 4dea4adb699d 2 hours ago 396.4 MB
centos latest bb3d629a7cbc 10 days ago 196.6 MB
2.docker tag /:
docker tag 4dea4adb699d yayad/centos_svn
3.push docker镜像到官方的个人私有库
docker push yayad/centos_svn
push时会提示输入库的账号、密码和邮箱,此处需要提前注册docker.hub
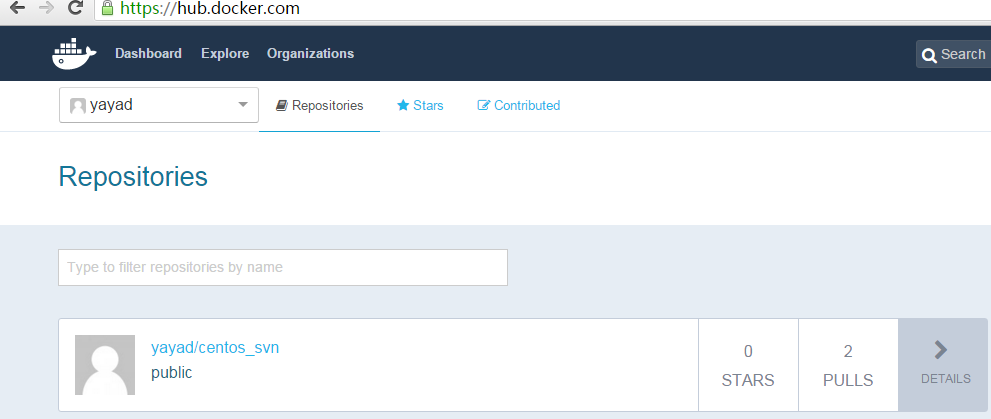
push 成功后在个人私有库即可看到push的镜像

此时就可以在其他已经安装docker环境的机器上执行docker pull centos-svn down该镜像并直接使用svn环境,无需再安装配置。
五、让Apache服务在后台自动running
但如何在启动容器的同时自动启动Apache服务,不用再需要手动启动,那么我就只需要在宿主机上监控容器的状态是否running,以下方式即可实现。
1.通过dockerfile 来build
编辑dockerfile
[root@bogon svn_apache]# cat Dockerfile
FROM yayad/centos_svn
ENTRYPOINT apachectl -k start && /bin/bash
build 新image,设置tag为df
[root@bogon svn_apache]# docker build -t yayad/centos_svn:df .
Sending build context to Docker daemon 2.048 kB
Sending build context to Docker daemon
Step 0 : FROM yayad/centos_svn
---> 52561e4f9e39
Step 1 : ENTRYPOINT apachectl -k start && /bin/bash
---> Running in 30cab1c3a861
---> de5ad506e7dc
Removing intermediate container 30cab1c3a861
Successfully built de5ad506e7dc
查看build的image
[root@bogon svn_apache]# docker images
REPOSITORY TAG IMAGE ID CREATED VIRTUAL SIZE
yayad/centos_svn df de5ad506e7dc 11 seconds ago 396.5 MB
启动容器查看配置结果
[root@bogon svn_apache]# docker run -it yayad/centos_svn:df /bin/bash
Passing arguments to httpd using apachectl is no longer supported.
You can only start/stop/restart httpd using this script.
If you want to pass extra arguments to httpd, edit the
/etc/sysconfig/httpd config file.
Passing arguments to httpd using apachectl is no longer supported.
You can only start/stop/restart httpd using this script.
If you want to pass extra arguments to httpd, edit the
/etc/sysconfig/httpd config file.
httpd (pid 9) already running
[root@1dce83066942 /]#
Apache服务已经启动起来了
2.修改容器的bashrc
以bash启动容器:
#docker run -it -p 80:80 -v /vagrant/htdocs:/var/www/html yayad/centos_svn /bin/bash
[root@87da9f94dc08 /]# vim /etc/bashrc
#add by dy 添加到最后
apachectl -k start
若需要可以把修改后的image commit之后使用。
想提及一下的问题:删除本地一些多余的名称为NONE的images,报错,删除失败,使用如下的方式解决了,但具体内在联系还不太清楚
docker ps -a | grep "Exited" | awk '{print $1 }'|xargs docker stop
docker ps -a | grep "Exited" | awk '{print $1 }'|xargs docker rm
docker images|grep none|awk '{print $3 }'|xargs docker rmi


)


![编程c语言顺口溜,C语言运算符优先级顺口溜[转]](http://pic.xiahunao.cn/编程c语言顺口溜,C语言运算符优先级顺口溜[转])


