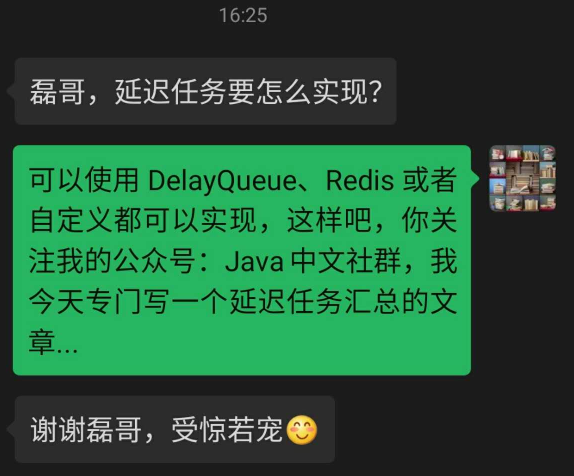
这篇文章的诞生要感谢一位读者,是他让这篇优秀的文章有了和大家见面的机会,重点是优秀文章,哈哈。
事情的经过是这样的...

不用谢我,送人玫瑰,手有余香。相信接下来的内容一定不会让你失望,因为它将是目前市面上最好的关于“延迟任务”的文章,这也一直是我写作追求的目标,让我的每一篇文章都比市面上的好那么一点点。
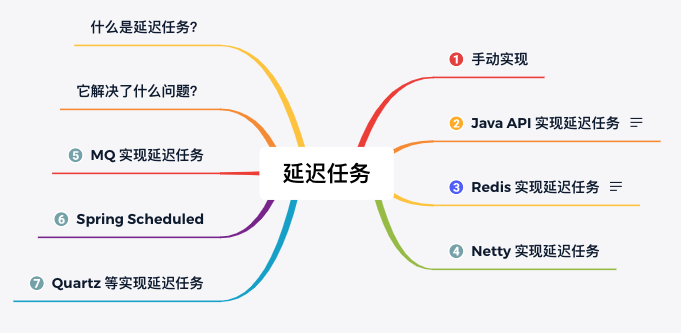
好了,话不多说,直接进入今天的主题,本文的主要内容如下图所示: 
什么是延迟任务?
顾明思议,我们把需要延迟执行的任务叫做延迟任务。
延迟任务的使用场景有以下这些:
- 红包 24 小时未被查收,需要延迟执退还业务;
- 每个月账单日,需要给用户发送当月的对账单;
- 订单下单之后 30 分钟后,用户如果没有付钱,系统需要自动取消订单。
等事件都需要使用延迟任务。
延迟任务实现思路分析
延迟任务实现的关键是在某个时间节点执行某个任务。基于这个信息我们可以想到实现延迟任务的手段有以下两个:
- 自己手写一个“死循环”一直判断当前时间节点有没有要执行的任务;
- 借助 JDK 或者第三方提供的工具类来实现延迟任务。
而通过 JDK 实现延迟任务我们能想到的关键词是:DelayQueue、ScheduledExecutorService,而第三方提供的延迟任务执行方法就有很多了,例如:Redis、Netty、MQ 等手段。
延迟任务实现
下面我们将结合代码来讲解每种延迟任务的具体实现。
1.无限循环实现延迟任务
此方式我们需要开启一个无限循环一直扫描任务,然后使用一个 Map 集合用来存储任务和延迟执行的时间,实现代码如下:
import java.time.Instant;
import java.time.LocalDateTime;
import java.util.HashMap;
import java.util.Iterator;
import java.util.Map;/*** 延迟任务执行方法汇总*/
public class DelayTaskExample {// 存放定时任务private static Map<String, Long> _TaskMap = new HashMap<>();public static void main(String[] args) {System.out.println("程序启动时间:" + LocalDateTime.now());// 添加定时任务_TaskMap.put("task-1", Instant.now().plusSeconds(3).toEpochMilli()); // 延迟 3s// 调用无限循环实现延迟任务loopTask();}/*** 无限循环实现延迟任务*/public static void loopTask() {Long itemLong = 0L;while (true) {Iterator it = _TaskMap.entrySet().iterator();while (it.hasNext()) {Map.Entry entry = (Map.Entry) it.next();itemLong = (Long) entry.getValue();// 有任务需要执行if (Instant.now().toEpochMilli() >= itemLong) {// 延迟任务,业务逻辑执行System.out.println("执行任务:" + entry.getKey() +" ,执行时间:" + LocalDateTime.now());// 删除任务_TaskMap.remove(entry.getKey());}}}}
}
以上程序执行的结果为:
程序启动时间:2020-04-12T18:51:28.188
执行任务:task-1 ,执行时间:2020-04-12T18:51:31.189
可以看出任务延迟了 3s 钟执行了,符合我们的预期。
2.Java API 实现延迟任务
Java API 提供了两种实现延迟任务的方法:DelayQueue 和 ScheduledExecutorService。
① ScheduledExecutorService 实现延迟任务
我们可以使用 ScheduledExecutorService 来以固定的频率一直执行任务,实现代码如下:
public class DelayTaskExample {public static void main(String[] args) {System.out.println("程序启动时间:" + LocalDateTime.now());scheduledExecutorServiceTask();}/*** ScheduledExecutorService 实现固定频率一直循环执行任务*/public static void scheduledExecutorServiceTask() {ScheduledExecutorService executor = Executors.newScheduledThreadPool(1);executor.scheduleWithFixedDelay(new Runnable() {@Overridepublic void run() {// 执行任务的业务代码System.out.println("执行任务" +" ,执行时间:" + LocalDateTime.now());}},2, // 初次执行间隔2, // 2s 执行一次TimeUnit.SECONDS);}
}
以上程序执行的结果为:
程序启动时间:2020-04-12T21:28:10.416
执行任务 ,执行时间:2020-04-12T21:28:12.421
执行任务 ,执行时间:2020-04-12T21:28:14.422
......
可以看出使用 ScheduledExecutorService#scheduleWithFixedDelay(...) 方法之后,会以某个频率一直循环执行延迟任务。
② DelayQueue 实现延迟任务
DelayQueue 是一个支持延时获取元素的无界阻塞队列,队列中的元素必须实现 Delayed 接口,并重写 getDelay(TimeUnit) 和 compareTo(Delayed) 方法,DelayQueue 实现延迟队列的完整代码如下:
public class DelayTest {public static void main(String[] args) throws InterruptedException {DelayQueue delayQueue = new DelayQueue();// 添加延迟任务delayQueue.put(new DelayElement(1000));delayQueue.put(new DelayElement(3000));delayQueue.put(new DelayElement(5000));System.out.println("开始时间:" +  DateFormat.getDateTimeInstance().format(new Date()));while (!delayQueue.isEmpty()){// 执行延迟任务System.out.println(delayQueue.take());}System.out.println("结束时间:" +  DateFormat.getDateTimeInstance().format(new Date()));}static class DelayElement implements Delayed {// 延迟截止时间(单面:毫秒)long delayTime = System.currentTimeMillis();public DelayElement(long delayTime) {this.delayTime = (this.delayTime + delayTime);}@Override// 获取剩余时间public long getDelay(TimeUnit unit) {return unit.convert(delayTime - System.currentTimeMillis(), TimeUnit.MILLISECONDS);}@Override// 队列里元素的排序依据public int compareTo(Delayed o) {if (this.getDelay(TimeUnit.MILLISECONDS) > o.getDelay(TimeUnit.MILLISECONDS)) {return 1;} else if (this.getDelay(TimeUnit.MILLISECONDS) < o.getDelay(TimeUnit.MILLISECONDS)) {return -1;} else {return 0;}}@Overridepublic String toString() {return DateFormat.getDateTimeInstance().format(new Date(delayTime));}}
}
以上程序执行的结果为:
开始时间:2020-4-12 20:40:38
2020-4-12 20:40:39
2020-4-12 20:40:41
2020-4-12 20:40:43
结束时间:2020-4-12 20:40:43
3.Redis 实现延迟任务
使用 Redis 实现延迟任务的方法大体可分为两类:通过 zset 数据判断的方式,和通过键空间通知的方式。
① 通过数据判断的方式
我们借助 zset 数据类型,把延迟任务存储在此数据集合中,然后在开启一个无线循环查询当前时间的所有任务进行消费,实现代码如下(需要借助 Jedis 框架):
import redis.clients.jedis.Jedis;
import utils.JedisUtils;
import java.time.Instant;
import java.util.Set;public class DelayQueueExample {// zset keyprivate static final String _KEY = "myDelayQueue";public static void main(String[] args) throws InterruptedException {Jedis jedis = JedisUtils.getJedis();// 延迟 30s 执行(30s 后的时间)long delayTime = Instant.now().plusSeconds(30).getEpochSecond();jedis.zadd(_KEY, delayTime, "order_1");// 继续添加测试数据jedis.zadd(_KEY, Instant.now().plusSeconds(2).getEpochSecond(), "order_2");jedis.zadd(_KEY, Instant.now().plusSeconds(2).getEpochSecond(), "order_3");jedis.zadd(_KEY, Instant.now().plusSeconds(7).getEpochSecond(), "order_4");jedis.zadd(_KEY, Instant.now().plusSeconds(10).getEpochSecond(), "order_5");// 开启延迟队列doDelayQueue(jedis);}/*** 延迟队列消费* @param jedis Redis 客户端*/public static void doDelayQueue(Jedis jedis) throws InterruptedException {while (true) {// 当前时间Instant nowInstant = Instant.now();long lastSecond = nowInstant.plusSeconds(-1).getEpochSecond(); // 上一秒时间long nowSecond = nowInstant.getEpochSecond();// 查询当前时间的所有任务Set<String> data = jedis.zrangeByScore(_KEY, lastSecond, nowSecond);for (String item : data) {// 消费任务System.out.println("消费:" + item);}// 删除已经执行的任务jedis.zremrangeByScore(_KEY, lastSecond, nowSecond);Thread.sleep(1000); // 每秒轮询一次}}
}
② 通过键空间通知
默认情况下 Redis 服务器端是不开启键空间通知的,需要我们通过 config set notify-keyspace-events Ex 的命令手动开启,开启键空间通知后,我们就可以拿到每个键值过期的事件,我们利用这个机制实现了给每个人开启一个定时任务的功能,实现代码如下:
import redis.clients.jedis.Jedis;
import redis.clients.jedis.JedisPubSub;
import utils.JedisUtils;public class TaskExample {public static final String _TOPIC = "__keyevent@0__:expired"; // 订阅频道名称public static void main(String[] args) {Jedis jedis = JedisUtils.getJedis();// 执行定时任务doTask(jedis);}/*** 订阅过期消息,执行定时任务* @param jedis Redis 客户端*/public static void doTask(Jedis jedis) {// 订阅过期消息jedis.psubscribe(new JedisPubSub() {@Overridepublic void onPMessage(String pattern, String channel, String message) {// 接收到消息,执行定时任务System.out.println("收到消息:" + message);}}, _TOPIC);}
}
4.Netty 实现延迟任务
Netty 是由 JBOSS 提供的一个 Java 开源框架,它是一个基于 NIO 的客户、服务器端的编程框架,使用 Netty 可以确保你快速和简单的开发出一个网络应用,例如实现了某种协议的客户、服务端应用。Netty 相当于简化和流线化了网络应用的编程开发过程,例如:基于 TCP 和 UDP 的 socket 服务开发。
可以使用 Netty 提供的工具类 HashedWheelTimer 来实现延迟任务,实现代码如下。
首先在项目中添加 Netty 引用,配置如下:
<!-- https://mvnrepository.com/artifact/io.netty/netty-common -->
<dependency><groupId>io.netty</groupId><artifactId>netty-common</artifactId><version>4.1.48.Final</version>
</dependency>
Netty 实现的完整代码如下:
public class DelayTaskExample {public static void main(String[] args) {System.out.println("程序启动时间:" + LocalDateTime.now());NettyTask();}/*** 基于 Netty 的延迟任务*/private static void NettyTask() {// 创建延迟任务实例HashedWheelTimer timer = new HashedWheelTimer(3, // 时间间隔TimeUnit.SECONDS,100); // 时间轮中的槽数// 创建一个任务TimerTask task = new TimerTask() {@Overridepublic void run(Timeout timeout) throws Exception {System.out.println("执行任务" +" ,执行时间:" + LocalDateTime.now());}};// 将任务添加到延迟队列中timer.newTimeout(task, 0, TimeUnit.SECONDS);}
}
以上程序执行的结果为:
程序启动时间:2020-04-13T10:16:23.033
执行任务 ,执行时间:2020-04-13T10:16:26.118
HashedWheelTimer 是使用定时轮实现的,定时轮其实就是一种环型的数据结构,可以把它想象成一个时钟,分成了许多格子,每个格子代表一定的时间,在这个格子上用一个链表来保存要执行的超时任务,同时有一个指针一格一格的走,走到那个格子时就执行格子对应的延迟任务,如下图所示:  (图片来源于网络)
以上的图片可以理解为,时间轮大小为 8,某个时间转一格(例如 1s),每格指向一个链表,保存着待执行的任务。
5.MQ 实现延迟任务
如果专门开启一个 MQ 中间件来执行延迟任务,就有点杀鸡用宰牛刀般的奢侈了,不过已经有了 MQ 环境的话,用它来实现延迟任务的话,还是可取的。
几乎所有的 MQ 中间件都可以实现延迟任务,在这里更准确的叫法应该叫延队列。本文就使用 RabbitMQ 为例,来看它是如何实现延迟任务的。
RabbitMQ 实现延迟队列的方式有两种:
- 通过消息过期后进入死信交换器,再由交换器转发到延迟消费队列,实现延迟功能;
- 使用 rabbitmq-delayed-message-exchange 插件实现延迟功能。
注意: 延迟插件 rabbitmq-delayed-message-exchange 是在 RabbitMQ 3.5.7 及以上的版本才支持的,依赖 Erlang/OPT 18.0 及以上运行环境。
由于使用死信交换器比较麻烦,所以推荐使用第二种实现方式 rabbitmq-delayed-message-exchange 插件的方式实现延迟队列的功能。
首先,我们需要下载并安装 rabbitmq-delayed-message-exchange 插件,下载地址:http://www.rabbitmq.com/community-plugins.html
选择相应的对应的版本进行下载,然后拷贝到 RabbitMQ 服务器目录,使用命令 rabbitmq-plugins enable rabbitmq_delayed_message_exchange 开启插件,在使用命令 rabbitmq-plugins list 查询安装的所有插件,安装成功如下图所示:

最后重启 RabbitMQ 服务,使插件生效。
首先,我们先要配置消息队列,实现代码如下:
import com.example.rabbitmq.mq.DirectConfig;
import org.springframework.amqp.core.*;
import org.springframework.context.annotation.Bean;
import org.springframework.context.annotation.Configuration;
import java.util.HashMap;
import java.util.Map;@Configuration
public class DelayedConfig {final static String QUEUE_NAME = "delayed.goods.order";final static String EXCHANGE_NAME = "delayedec";@Beanpublic Queue queue() {return new Queue(DelayedConfig.QUEUE_NAME);}// 配置默认的交换机@BeanCustomExchange customExchange() {Map<String, Object> args = new HashMap<>();args.put("x-delayed-type", "direct");//参数二为类型:必须是x-delayed-messagereturn new CustomExchange(DelayedConfig.EXCHANGE_NAME, "x-delayed-message", true, false, args);}// 绑定队列到交换器@BeanBinding binding(Queue queue, CustomExchange exchange) {return BindingBuilder.bind(queue).to(exchange).with(DelayedConfig.QUEUE_NAME).noargs();}
}
然后添加增加消息的代码,具体实现如下:
import org.springframework.amqp.AmqpException;
import org.springframework.amqp.core.AmqpTemplate;
import org.springframework.amqp.core.Message;
import org.springframework.amqp.core.MessagePostProcessor;
import org.springframework.beans.factory.annotation.Autowired;
import org.springframework.stereotype.Component;
import java.text.SimpleDateFormat;
import java.util.Date;@Component
public class DelayedSender {@Autowiredprivate AmqpTemplate rabbitTemplate;public void send(String msg) {SimpleDateFormat sf = new SimpleDateFormat("yyyy-MM-dd HH:mm:ss");System.out.println("发送时间:" + sf.format(new Date()));rabbitTemplate.convertAndSend(DelayedConfig.EXCHANGE_NAME, DelayedConfig.QUEUE_NAME, msg, new MessagePostProcessor() {@Overridepublic Message postProcessMessage(Message message) throws AmqpException {message.getMessageProperties().setHeader("x-delay", 3000);return message;}});}
}
再添加消费消息的代码:
import org.springframework.amqp.rabbit.annotation.RabbitHandler;
import org.springframework.amqp.rabbit.annotation.RabbitListener;
import org.springframework.stereotype.Component;
import java.text.SimpleDateFormat;
import java.util.Date;@Component
@RabbitListener(queues = "delayed.goods.order")
public class DelayedReceiver {@RabbitHandlerpublic void process(String msg) {SimpleDateFormat sdf = new SimpleDateFormat("yyyy-MM-dd HH:mm:ss");System.out.println("接收时间:" + sdf.format(new Date()));System.out.println("消息内容:" + msg);}
}
最后,我们使用代码测试一下:
import com.example.rabbitmq.RabbitmqApplication;
import com.example.rabbitmq.mq.delayed.DelayedSender;
import org.junit.Test;
import org.junit.runner.RunWith;
import org.springframework.beans.factory.annotation.Autowired;
import org.springframework.boot.test.context.SpringBootTest;
import org.springframework.test.context.junit4.SpringRunner;import java.text.SimpleDateFormat;
import java.util.Date;@RunWith(SpringRunner.class)
@SpringBootTest
public class DelayedTest {@Autowiredprivate DelayedSender sender;@Testpublic void Test() throws InterruptedException {SimpleDateFormat sf = new SimpleDateFormat("yyyy-MM-dd");sender.send("Hi Admin.");Thread.sleep(5 * 1000); //等待接收程序执行之后,再退出测试}
}
以上程序的执行结果如下:
发送时间:2020-04-13 20:47:51
接收时间:2020-04-13 20:47:54
消息内容:Hi Admin.
从结果可以看出,以上程序执行符合延迟任务的实现预期。
6.使用 Spring 定时任务
如果你使用的是 Spring 或 SpringBoot 的项目的话,可以使用借助 Scheduled 来实现,本文将使用 SpringBoot 项目来演示 Scheduled 的实现,实现我们需要声明开启 Scheduled,实现代码如下:
@SpringBootApplication
@EnableScheduling
public class Application {public static void main(String[] args) {SpringApplication.run(Application.class, args);}
}
然后添加延迟任务,实现代码如下:
@Component
public class ScheduleJobs {@Scheduled(fixedDelay = 2 * 1000)public void fixedDelayJob() throws InterruptedException {System.out.println("任务执行,时间:" + LocalDateTime.now());}
}
此时当我们启动项目之后就可以看到任务以延迟了 2s 的形式一直循环执行,结果如下:
任务执行,时间:2020-04-13T14:07:53.349
任务执行,时间:2020-04-13T14:07:55.350
任务执行,时间:2020-04-13T14:07:57.351
...
我们也可以使用 Corn 表达式来定义任务执行的频率,例如使用 @Scheduled(cron = "0/4 * * * * ?") 。
7.Quartz 实现延迟任务
Quartz 是一款功能强大的任务调度器,可以实现较为复杂的调度功能,它还支持分布式的任务调度。
我们使用 Quartz 来实现一个延迟任务,首先定义一个执行任务代码如下:
import org.quartz.JobExecutionContext;
import org.quartz.JobExecutionException;
import org.springframework.scheduling.quartz.QuartzJobBean;import java.time.LocalDateTime;public class SampleJob extends QuartzJobBean {@Overrideprotected void executeInternal(JobExecutionContext jobExecutionContext)throws JobExecutionException {System.out.println("任务执行,时间:" + LocalDateTime.now());}
}
在定义一个 JobDetail 和 Trigger 实现代码如下:
import org.quartz.*;
import org.springframework.context.annotation.Bean;
import org.springframework.context.annotation.Configuration;@Configuration
public class SampleScheduler {@Beanpublic JobDetail sampleJobDetail() {return JobBuilder.newJob(SampleJob.class).withIdentity("sampleJob").storeDurably().build();}@Beanpublic Trigger sampleJobTrigger() {// 3s 后执行SimpleScheduleBuilder scheduleBuilder =SimpleScheduleBuilder.simpleSchedule().withIntervalInSeconds(3).withRepeatCount(1);return TriggerBuilder.newTrigger().forJob(sampleJobDetail()).withIdentity("sampleTrigger").withSchedule(scheduleBuilder).build();}
}
最后在 SpringBoot 项目启动之后开启延迟任务,实现代码如下:
import org.springframework.beans.factory.annotation.Autowired;
import org.springframework.boot.CommandLineRunner;
import org.springframework.scheduling.quartz.SchedulerFactoryBean;/*** SpringBoot 项目启动后执行*/
public class MyStartupRunner implements CommandLineRunner {@Autowiredprivate SchedulerFactoryBean schedulerFactoryBean;@Autowiredprivate SampleScheduler sampleScheduler;@Overridepublic void run(String... args) throws Exception {// 启动定时任务schedulerFactoryBean.getScheduler().scheduleJob(sampleScheduler.sampleJobTrigger());}
}
以上程序的执行结果如下:
2020-04-13 19:02:12.331 INFO 17768 --- [ restartedMain] com.example.demo.DemoApplication : Started DemoApplication in 1.815 seconds (JVM running for 3.088)
任务执行,时间:2020-04-13T19:02:15.019
从结果可以看出在项目启动 3s 之后执行了延迟任务。
总结
本文讲了延迟任务的使用场景,以及延迟任务的 10 种实现方式:
- 手动无线循环;
- ScheduledExecutorService;
- DelayQueue;
- Redis zset 数据判断的方式;
- Redis 键空间通知的方式;
- Netty 提供的 HashedWheelTimer 工具类;
- RabbitMQ 死信队列;
- RabbitMQ 延迟消息插件 rabbitmq-delayed-message-exchange;
- Spring Scheduled;
- Quartz。
最后的话
俗话说:台上一分钟,台下十年功。本文的所有内容皆为作者多年工作积累的结晶,以及熬夜呕心沥血的整理,如果觉得本文有帮助到你,请帮我分享出去,让更多的人看到,谢谢你。
更多精彩内容,请关注微信公众号「Java中文社群」


