

文章目录
- 一、下载、安装、配置依赖
- 1. 安装配置需要的依赖
- 2. Gitlab下载
- 3. 安装Gitlab
- 4. 配置external_url
- 5. 重新加载配置文件
- 6. 查看服务状态
- 7. 配置防火墙
- 8. 浏览器验证
- 9. 寻找密码信息
- 10. 查看密码
- 11. 重新登陆
- 12. 修改密码
- 13. 重新登陆
- 14. Gitlab常用命令
声明:Centos/Red Hat7/8.x 下载、安装、配置不通的地方我会进行特殊说明,未说明的属于共有部分。
一、下载、安装、配置依赖
1. 安装配置需要的依赖
https://about.gitlab.com/install/#centos-7


# On CentOS 7 (and RedHat/Oracle/Scientific Linux 7), the commands below will also open HTTP, HTTPS and SSH access in the system firewall. This is an optional step, and you can skip it if you intend to access GitLab only from your local network.
sudo yum install -y policycoreutils-python openssh-server perl# Enable OpenSSH server daemon if not enabled: sudo systemctl status sshd
sudo systemctl enable sshd
sudo systemctl start sshd# Check if opening the firewall is needed with: sudo systemctl status firewalld
sudo firewall-cmd --permanent --add-service=http
sudo firewall-cmd --permanent --add-service=https
sudo systemctl reload firewalld# Next, install Postfix to send notification emails. If you want to use another solution to send emails please skip this step and configure an external SMTP server after GitLab has been installed.
sudo yum install postfix
sudo systemctl enable postfix
sudo systemctl start postfix
2. Gitlab下载
Centos/Red Hat7.x 下载链接:
https://mirrors.tuna.tsinghua.edu.cn/gitlab-ce/yum/el7/

Centos/Red Hat8.x 下载链接:
https://mirrors.tuna.tsinghua.edu.cn/gitlab-ce/yum/el8/

3. 安装Gitlab
# Centos/Red Hat7.x 安装方式
[root@localhost ~]# rpm -ivh gitlab-ce-14.2.3-ce.0.el7.x86_64.rpm # Centos/Red Hat8.x 安装方式
[root@localhost ~]# rpm -ivh gitlab-ce-14.2.3-ce.0.el8.x86_64.rpm
操作记录:
[root@localhost ~]# rpm -ivh gitlab-ce-14.2.3-ce.0.el7.x86_64.rpm
警告:gitlab-ce-14.2.3-ce.0.el7.x86_64.rpm: 头V4 RSA/SHA1 Signature, 密钥 ID f27eab47: NOKEY
准备中...                          ################################# [100%]
正在升级/安装...1:gitlab-ce-14.2.3-ce.0.el7        ################################# [100%]
It looks like GitLab has not been configured yet; skipping the upgrade script.*.                  *.***                 ********               *****.******             ***************            ********,,,,,,,,,***********,,,,,,,,,,,,,,,,,,,,*********,,,,,,,,,,,.,,,,,,,,,,,*******,,,,,,,,,,,,,,,,,,,,,*****,,,,,,,,,.,,,,,,,****,,,,,,.,,,***,,,,,*,._______ __  __          __/ ____(_) /_/ /   ____ _/ /_/ / __/ / __/ /   / __ `/ __ \/ /_/ / / /_/ /___/ /_/ / /_/ /\____/_/\__/_____/\__,_/_.___/Thank you for installing GitLab!
GitLab was unable to detect a valid hostname for your instance.
Please configure a URL for your GitLab instance by setting `external_url`
configuration in /etc/gitlab/gitlab.rb file.
Then, you can start your GitLab instance by running the following command:sudo gitlab-ctl reconfigureFor a comprehensive list of configuration options please see the Omnibus GitLab readme
https://gitlab.com/gitlab-org/omnibus-gitlab/blob/master/README.mdHelp us improve the installation experience, let us know how we did with a 1 minute survey:
https://gitlab.fra1.qualtrics.com/jfe/form/SV_6kVqZANThUQ1bZb?installation=omnibus&release=14-2[root@localhost ~]#
4. 配置external_url
[root@localhost ~]# vim /etc/gitlab/gitlab.rb
将 #external_url 'http://gitlab.example.com'调整为http://+ip:端口的格式
external_url 'http://192.168.159.102:8000'

5. 重新加载配置文件
[root@localhost ~]# sudo gitlab-ctl reconfigure

等着安装完毕就好了
6. 查看服务状态
sudo gitlab-ctl status

7. 配置防火墙
#开放端口(开放后需要要重启防火墙才生效)
firewall-cmd --zone=public --add-port=8000/tcp --permanent# 重新启动防火墙
firewall-cmd --reload

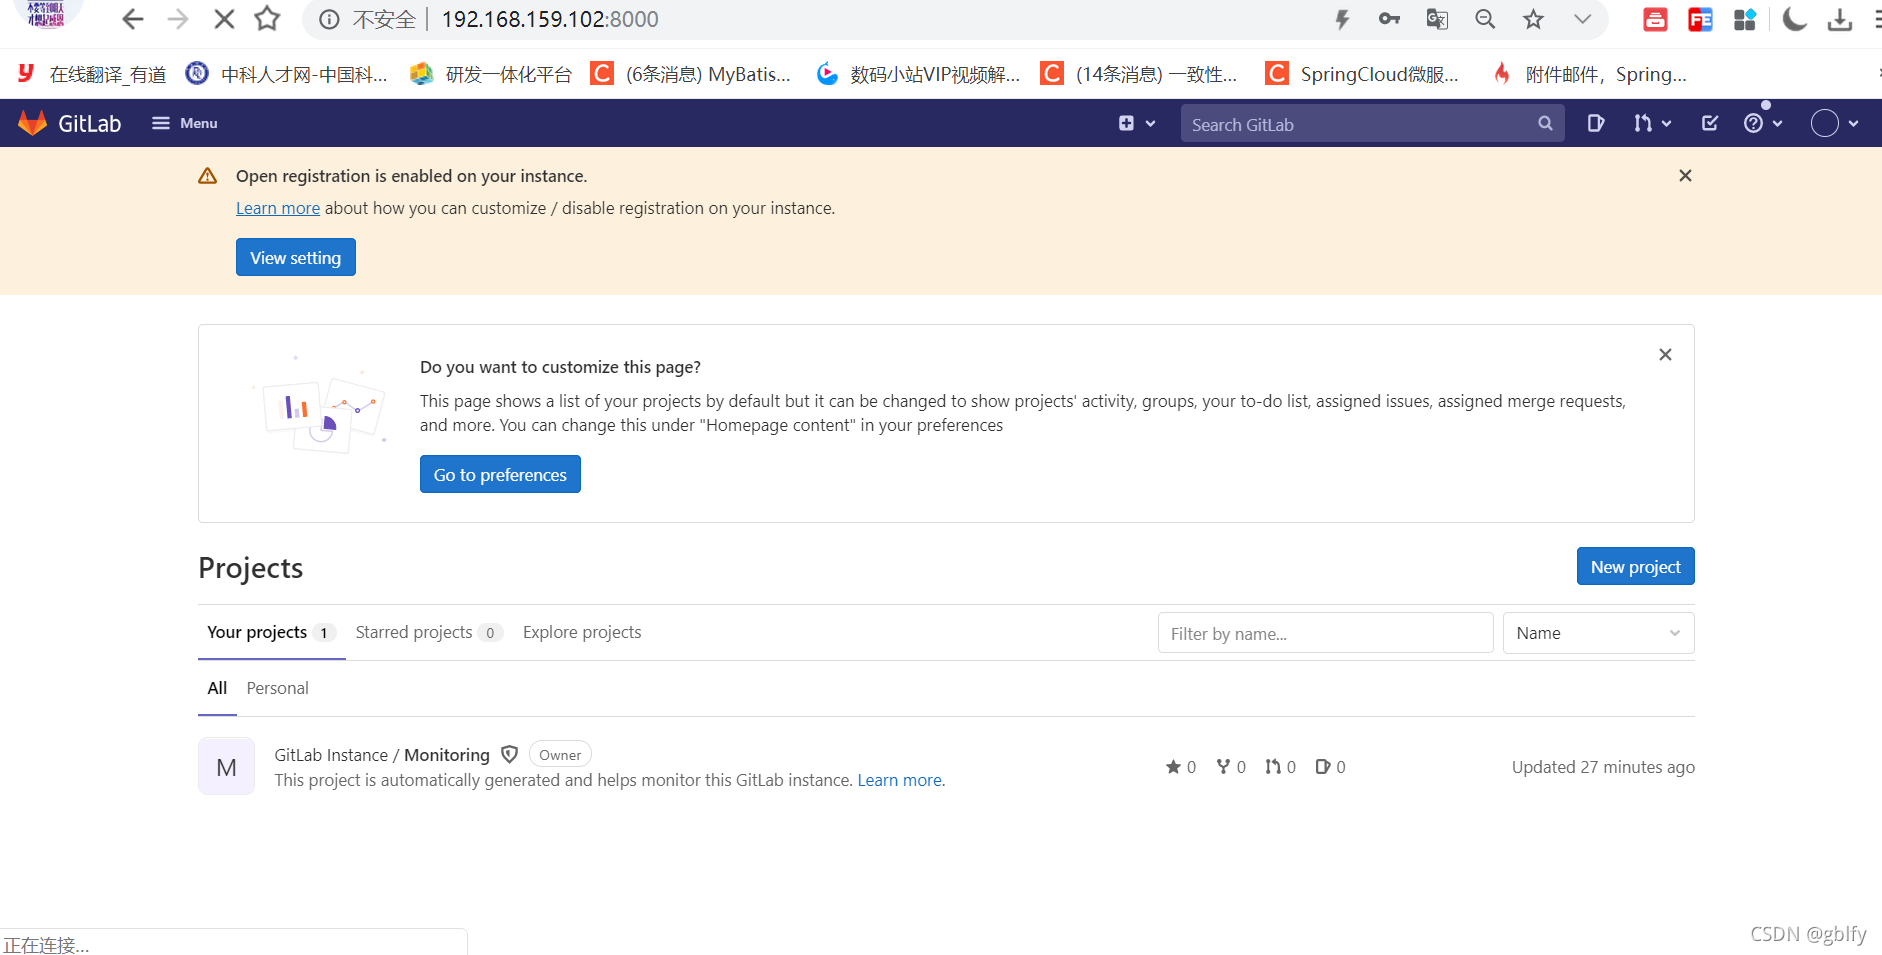
8. 浏览器验证
# 格式:IP+端口号(默认8080)
http://192.168.159.102:8000/
这个Gitlab14.x版本,和以前有些不同,以前的第一次访问会让你设置root用户的密码,但是这个版本,默认为你配置了密码

9. 寻找密码信息
安装完成后,最后会有以下信息
Notes:
Default admin account has been configured with following details:
Username: root
Password: You didn't opt-in to print initial root password to STDOUT.
Password stored to /etc/gitlab/initial_root_password. This file will be cleaned up in first reconfigure run after 24 hours.NOTE: Because these credentials might be present in your log files in plain text, it is highly recommended to reset the password following https://docs.gitlab.com/ee/security/reset_user_password.html#reset-your-root-password.gitlab Reconfigured!
关键信息说明:
默认管理员用户名是root,root用户的密码存放到/etc/gitlab/initial_root_password文件中了,请在24小时内修改密码。
Username: root
Password: You didn't opt-in to print initial root password to STDOUT.
Password stored to /etc/gitlab/initial_root_password. This file will be cleaned up in first reconfigure run after 24 hours.

10. 查看密码
[root@localhost ~]# cat /etc/gitlab/initial_root_password# WARNING: This value is valid only in the following conditions
#          1. If provided manually (either via `GITLAB_ROOT_PASSWORD` environment variable or via `gitlab_rails['initial_root_password']` setting in `gitlab.rb`, it was provided before database was seeded for the first time (usually, the first reconfigure run).
#          2. Password hasn't been changed manually, either via UI or via command line.
#
#          If the password shown here doesn't work, you must reset the admin password following https://docs.gitlab.com/ee/security/reset_user_password.html#reset-your-root-password.Password: oQIWkCNmUtrOeYebj8vVJ53CocII+ZlpWhzssaLUH5c=# NOTE: This file will be automatically deleted in the first reconfigure run after 24 hours.
[root@localhost ~]#
11. 重新登陆


12. 修改密码

13. 重新登陆


14. Gitlab常用命令
| 命令功能 | 执行命令 |
|---|---|
| 重启配置,并启动gitlab服务 | sudo gitlab-ctl reconfigure |
| 启动所有 gitlab | sudo gitlab-ctl start |
| 重新启动GitLab | sudo gitlab-ctl restart |
| 停止所有 gitlab | sudo gitlab-ctl stop |
| 查看服务状态 | sudo gitlab-ctl status |
| 查看Gitlab日志 | sudo gitlab-ctl tail |
| 修改默认的配置文件 | sudo vim /etc/gitlab/gitlab.rb |
| 检查gitlab | gitlab-rake gitlab:check SANITIZE=true --trace |
接下一篇:Centos/Red Hat7/8.x 安装、配置、启动Gitlab14.x (语言和主题配置
想学习更多前后端分离、微服务、分布式、MQ/缓存/引擎中间件、数据库、项目重构技巧等系列技术
请移步技术专栏 https://gblfy.com
让我们一起进步!!!


)


)
![gateway集成nacos、loadbalancer实现自定义负载均衡器,带源码解析(cloud版本:2021.0.3|boot版本:2.7.4)[场景1:灰度发布(金丝雀发布)]](http://pic.xiahunao.cn/gateway集成nacos、loadbalancer实现自定义负载均衡器,带源码解析(cloud版本:2021.0.3|boot版本:2.7.4)[场景1:灰度发布(金丝雀发布)])


