1. 前言
最近突然想要个BusyIndicator。做过WPF开发的程序员对BusyIndicator应该不陌生,Extended WPF Toolkit 提供了BusyIndicator的开源实现,Silverlight Toolkit也有一个,这次想要把这个控件移植到UWP中。
2. 先说点正经的
2.1 BusyIndicator的功能
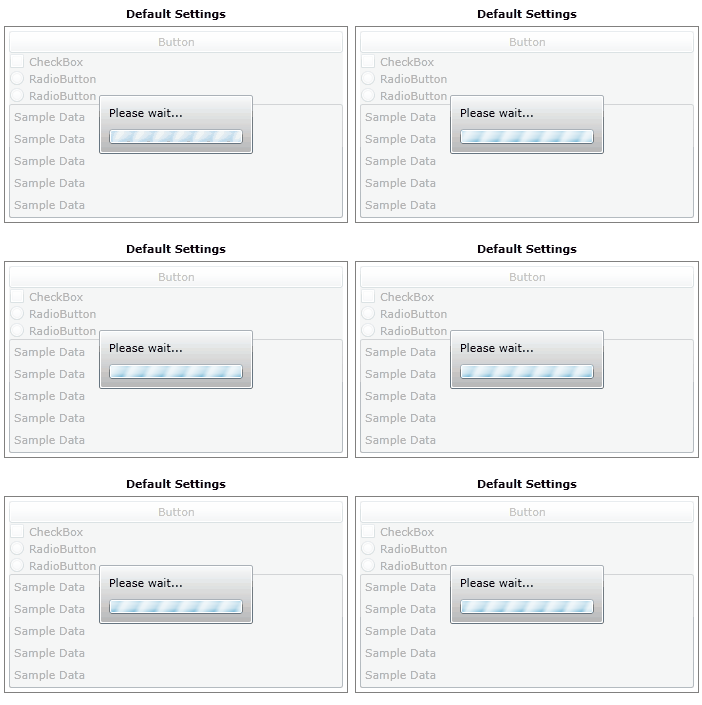
BusyIndicator的功能很简单,就是提示正在执行操作并遮挡不能被修改的内容。通常它派生自ContentControl并提供public bool IsBusy{ get; set; }属性,当设置IsBusy=True时将Content.IsEnabled设置成False,并显示Overlay、BusyContent和一个ProgressBar。在Silverlight中,它的UI如下:

2.2 移植
Extended WPF Toolkit和Silverlight Toolkit中的BusyIndicator实现基本一致,由于Silverlight和各个XAML平台的兼容性都比较好,我选择了Silverlight Toolkit中的BusyIndicator用于移植。事实证明这是个正确的选择,只改动了几行代码就完美移植成功了。
2.3 改进
既然UWP有ProgressRing,我就不想用ProgressBar来展示Busy的状态。另外,虽然BusyIndicator的ControlTemplate已经够精简了,为了方便将来修改我再进一步简化了XAML,结果如下:
<ContentControl x:Name="content"Content="{TemplateBinding Content}"ContentTemplate="{TemplateBinding ContentTemplate}"ContentTransitions="{TemplateBinding ContentTransitions}"HorizontalContentAlignment="{TemplateBinding HorizontalContentAlignment}"VerticalContentAlignment="{TemplateBinding VerticalContentAlignment}" />
<Rectangle x:Name="overlay"Style="{TemplateBinding OverlayStyle}" />
<ContentPresenter x:Name="busycontent"><Grid HorizontalAlignment="Center"VerticalAlignment="Center"><Grid.RowDefinitions><RowDefinition /><RowDefinition Height="Auto" /></Grid.RowDefinitions><ProgressRing x:Name="ProgressRing"IsActive="True"Style="{TemplateBinding ProgressRingStyle}" /><ContentPresenter Content="{TemplateBinding BusyContent}"ContentTemplate="{TemplateBinding BusyContentTemplate}"Grid.Row="1"FontSize="15"HorizontalAlignment="Center"Foreground="{ThemeResource SystemControlHighlightAccentBrush}" /></Grid>
</ContentPresenter>
和Silverlight/WPF不同的是,需要在ContentControl上绑定ContentTransitions属性。
UWP可以使用VisualState.Setters代替VisualState.Storyboard,这简化了大量XAML,为什么微软早十年没想到这个做法。
Silverlight的BusyIndicator:
<VisualStateManager.VisualStateGroups><VisualStateGroup x:Name="VisibilityStates"><VisualState x:Name="Hidden"><Storyboard><ObjectAnimationUsingKeyFrames BeginTime="00:00:00" Duration="00:00:00.001" Storyboard.TargetName="busycontent" Storyboard.TargetProperty="(UIElement.Visibility)"><DiscreteObjectKeyFrame KeyTime="00:00:00"><DiscreteObjectKeyFrame.Value><Visibility>Collapsed</Visibility></DiscreteObjectKeyFrame.Value></DiscreteObjectKeyFrame></ObjectAnimationUsingKeyFrames><ObjectAnimationUsingKeyFrames BeginTime="00:00:00" Duration="00:00:00.001" Storyboard.TargetName="overlay" Storyboard.TargetProperty="(UIElement.Visibility)"><DiscreteObjectKeyFrame KeyTime="00:00:00"><DiscreteObjectKeyFrame.Value><Visibility>Collapsed</Visibility></DiscreteObjectKeyFrame.Value></DiscreteObjectKeyFrame></ObjectAnimationUsingKeyFrames></Storyboard></VisualState><VisualState x:Name="Visible"><Storyboard><ObjectAnimationUsingKeyFrames BeginTime="00:00:00" Duration="00:00:00.001" Storyboard.TargetName="busycontent" Storyboard.TargetProperty="(UIElement.Visibility)"><DiscreteObjectKeyFrame KeyTime="00:00:00"><DiscreteObjectKeyFrame.Value><Visibility>Visible</Visibility></DiscreteObjectKeyFrame.Value></DiscreteObjectKeyFrame></ObjectAnimationUsingKeyFrames><ObjectAnimationUsingKeyFrames BeginTime="00:00:00" Duration="00:00:00.001" Storyboard.TargetName="overlay" Storyboard.TargetProperty="(UIElement.Visibility)"><DiscreteObjectKeyFrame KeyTime="00:00:00"><DiscreteObjectKeyFrame.Value><Visibility>Visible</Visibility></DiscreteObjectKeyFrame.Value></DiscreteObjectKeyFrame></ObjectAnimationUsingKeyFrames></Storyboard></VisualState></VisualStateGroup><VisualStateGroup x:Name="BusyStatusStates"><VisualState x:Name="Idle"><Storyboard><ObjectAnimationUsingKeyFrames BeginTime="00:00:00" Duration="00:00:00.001" Storyboard.TargetName="content" Storyboard.TargetProperty="(Control.IsEnabled)"><DiscreteObjectKeyFrame KeyTime="00:00:00"><DiscreteObjectKeyFrame.Value><sys:Boolean>True</sys:Boolean></DiscreteObjectKeyFrame.Value></DiscreteObjectKeyFrame></ObjectAnimationUsingKeyFrames></Storyboard></VisualState><VisualState x:Name="Busy"><Storyboard><ObjectAnimationUsingKeyFrames BeginTime="00:00:00" Duration="00:00:00.001" Storyboard.TargetName="content" Storyboard.TargetProperty="(Control.IsEnabled)"><DiscreteObjectKeyFrame KeyTime="00:00:00"><DiscreteObjectKeyFrame.Value><sys:Boolean>False</sys:Boolean></DiscreteObjectKeyFrame.Value></DiscreteObjectKeyFrame></ObjectAnimationUsingKeyFrames></Storyboard></VisualState></VisualStateGroup>
</VisualStateManager.VisualStateGroups>
UWP的BusyIndicator
<VisualStateManager.VisualStateGroups><VisualStateGroup x:Name="VisibilityStates"><VisualState x:Name="Hidden"><VisualState.Setters><Setter Target="overlay.(UIElement.Visibility)"Value="Collapsed" /><Setter Target="busycontent.(UIElement.Visibility)"Value="Collapsed" /></VisualState.Setters></VisualState><VisualState x:Name="Visible" /></VisualStateGroup><VisualStateGroup x:Name="BusyStatusStates"><VisualState x:Name="Idle" /><VisualState x:Name="Busy"><VisualState.Setters><Setter Target="content.(Control.IsEnabled)"Value="False" /></VisualState.Setters></VisualState></VisualStateGroup>
</VisualStateManager.VisualStateGroups>
2.3 其它细节
<Setter Property="BusyContent"Value="Please wait..." />
<Setter Property="IsTabStop"Value="False" />
<Setter Property="OverlayStyle"><Setter.Value><Style TargetType="Rectangle"><Setter Property="Fill"Value="{ThemeResource ApplicationForegroundThemeBrush}" /><Setter Property="Opacity"Value="0.2" /></Style></Setter.Value>
</Setter>
<Setter Property="ProgressRingStyle"><Setter.Value><Style TargetType="ProgressRing"><Setter Property="Height"Value="50" /><Setter Property="Width"Value="50" /><Setter Property="Margin"Value="8,8,8,0" /></Style></Setter.Value>
</Setter>
<Setter Property="DisplayAfter"Value="00:00:00.1" />
<Setter Property="HorizontalAlignment"Value="Stretch" />
<Setter Property="VerticalAlignment"Value="Stretch" />
<Setter Property="HorizontalContentAlignment"Value="Stretch" />
<Setter Property="VerticalContentAlignment"Value="Stretch" />
上面是BusyIndicator DefaultStyle的Setters,有一些细节是实现模板化控件需要注意的:
BusyContent
BusyContent没有在依赖属性定义中的PropertyMetadata给出默认值,而是在Setter中给出,这是模板化控件中依赖属性的最佳做法。PropertyMetadata的默认值应该尽量做到:值类型使用值类型的默认值,引用类型使用Null。
IsTabStop
已经不厌其烦地提醒过复合类型控件要将IsTabStop设置为False,以便在使用键盘导航时其内容可以直接获得焦点。
OverlayStyle和ProgressRingStyle
复合类型控件通常都会像这样为里面某个元素提供Style的属性,代替提供一大堆OverlayBackground,OverlayOpacity等属性。为了使用户清楚这两个Style属性对应的TargetType,可以在BusyIndicator的类型声明上使用StyleTypedPropertyAttribute:
[StyleTypedProperty(Property = "OverlayStyle", StyleTargetType = typeof(Rectangle))]
[StyleTypedProperty(Property = "ProgressRingStyle", StyleTargetType = typeof(ProgressRing))]
IsTabStop和StyleTypedPropertyAttribute的介绍都可见我另一篇文章:了解模板化控件(9):UI指南
HorizontalContentAlignment和VerticalContentAlignment
使用ContentControl时几乎每次都要设置HorizontalContentAlignment和VerticalContentAlignment为Stretch,SilverlightToolkit中BusyIndicator的作者就很清楚这点。
这两个属性和BusyContent不同,并不是BusyIndicator定义的,而是从父类继承而来。像这种从父类继承而来的属性通常不会在构造函数中设置默认值,而是在DefaultStyle的Setter中设置默认值。
2.4 运行效果
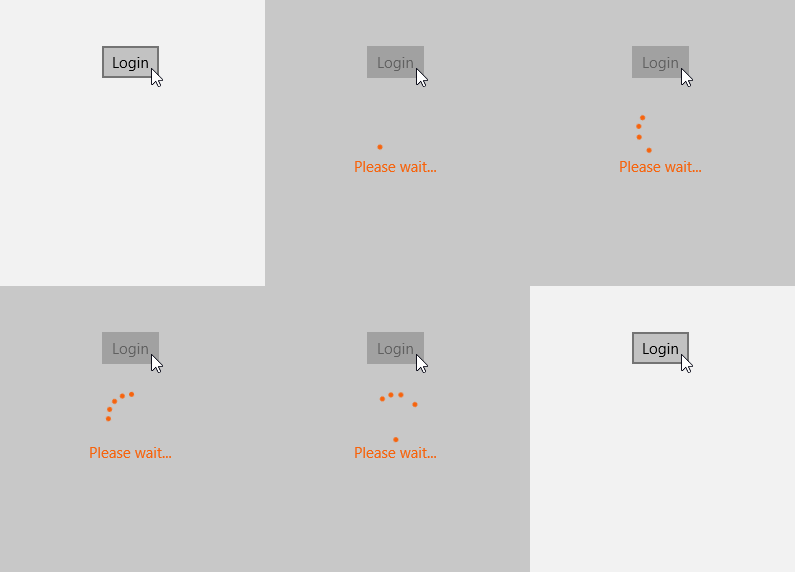
就这样一个BusyIndicator就移植成功了。由于代码部分基本没有改变(除了ProgressBarStyle改成ProgressRingStyle),应该不会出什么大问题。运行效果如下:

<busyIndicatorSample:BusyIndicator x:Name="BusyIndicator"><Button HorizontalAlignment="Center"VerticalAlignment="Center"Content="Login"Click="Button_Click"Margin="0,0,0,150" />
</busyIndicatorSample:BusyIndicator>
private async void Button_Click(object sender, RoutedEventArgs e)
{BusyIndicator.IsBusy = true;await Task.Delay(TimeSpan.FromSeconds(3));BusyIndicator.IsBusy = false;
}
3. 来点调皮的
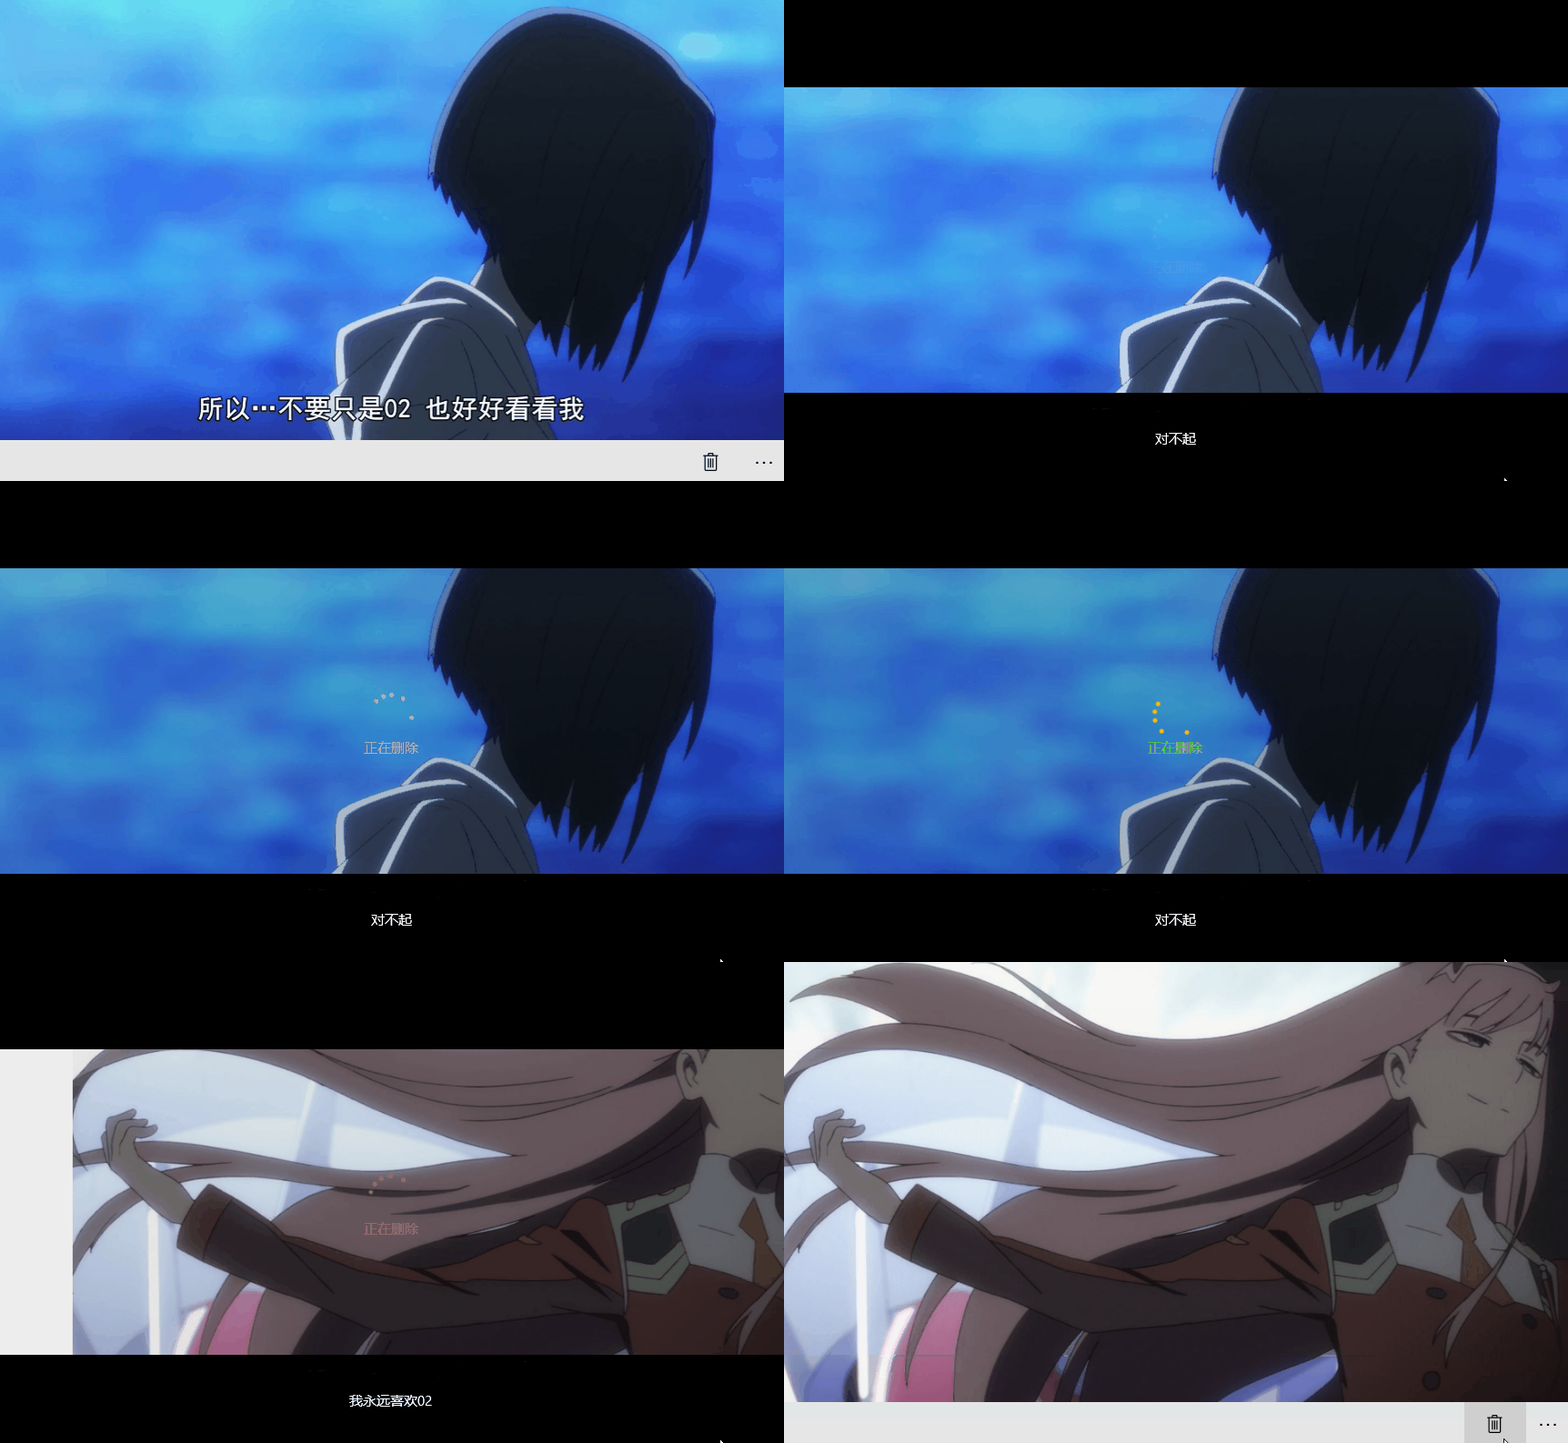
突然来了点兴致,于是就派生出新的控件ExtendBusyIndicator并新增public object BusyInformation{ get; set; }和public object IdleInformation{ get; set; }两个属性,运行效果如下:

XAML:
<busyIndicatorSample:ExtendBusyIndicator x:Name="BusyIndicator"Background="White"><busyIndicatorSample:ExtendBusyIndicator.BusyInformation><StackPanel><TextBlock Text="十年后"HorizontalAlignment="Center" /><TextBlock Text="10 years later"HorizontalAlignment="Center"Margin="0,2,0,0" /></StackPanel></busyIndicatorSample:ExtendBusyIndicator.BusyInformation><busyIndicatorSample:ExtendBusyIndicator.IdleInformation><StackPanel><TextBlock Text="这个网页终于加载完了"HorizontalAlignment="Center" /><TextBlock Text="the Web page finally finished loading."HorizontalAlignment="Center"Margin="0,2,0,0" /></StackPanel></busyIndicatorSample:ExtendBusyIndicator.IdleInformation><Button Style="{StaticResource ButtonRevealStyle}"Padding="0"HorizontalAlignment="Center"Background="Transparent"Margin="0,0,0,150"Click="Button_Click"><Image Source="logo1.png"Width="80" /></Button>
</busyIndicatorSample:ExtendBusyIndicator>
4. 莓良心的

5. 结语
BusyIndicator十分实用,毕竟已经经过多年的考验而代码基本没有更改,应该可以使用在UWP的实际项目中。
其实我个人不是很喜欢IsBusy就将Content.IsEnabled设置成False这么简单粗暴,因为这样内容会变成灰色。而且busyContent显示的过程应该是个透明度渐变的过程。这两个点使得执行很快的操作会令UI闪烁一下。而且ControlTemplate中ProgressRing和Overlay的父元素是一个叫busyContent的Grid,但BusyContent(注意大小些)是BusyIndicator的一个属性,内容是Busy状态下显示的文字内容,这样很容易让人混淆。幸运的是模板化控件最大的特色就是对修改UI是开放的,将来可以想办法修改。
ExtendBusyIndicator就算了,闹着玩的。
6. 参考
Extended WPF Toolkit
Silverlight Toolkit - CodePlex Archive
UWP BusyIndicator · telerik UI For UWP
7. 源码
BusyIndicatorSample


函数重定向方法,太实用了)


