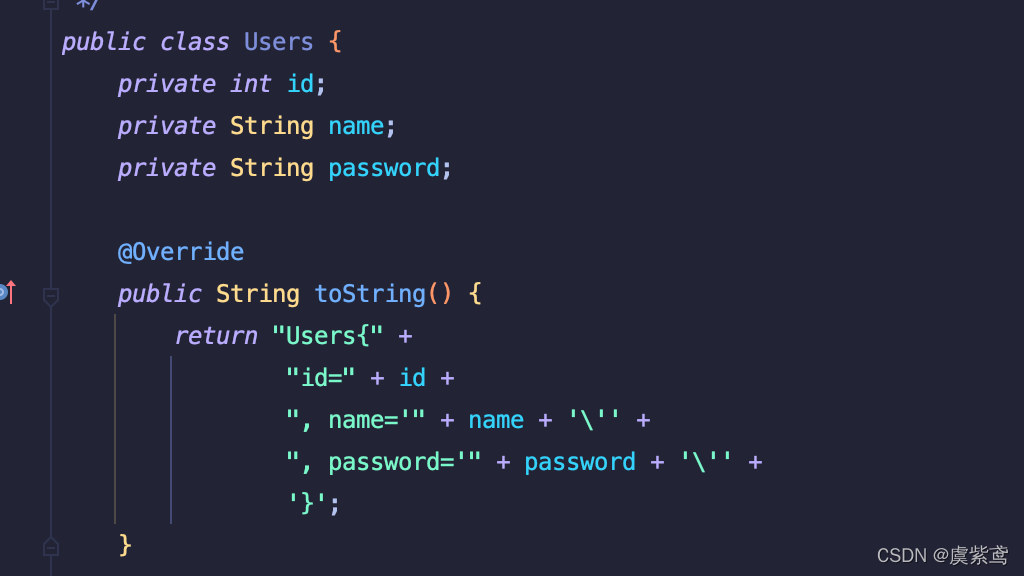
数据准备
<?xml version="1.0" encoding="UTF-8"?>
<project xmlns="http://maven.apache.org/POM/4.0.0"xmlns:xsi="http://www.w3.org/2001/XMLSchema-instance"xsi:schemaLocation="http://maven.apache.org/POM/4.0.0 https://maven.apache.org/xsd/maven-4.0.0.xsd"><modelVersion>4.0.0</modelVersion><groupId>com.example</groupId><artifactId>spring5</artifactId><version>1.0-SNAPSHOT</version><name>spring5</name><properties><maven.compiler.target>1.8</maven.compiler.target><maven.compiler.source>1.8</maven.compiler.source><junit.version>5.7.1</junit.version></properties><dependencies><dependency><groupId>org.junit.jupiter</groupId><artifactId>junit-jupiter-api</artifactId><version>${junit.version}</version><scope>test</scope></dependency><dependency><groupId>org.junit.jupiter</groupId><artifactId>junit-jupiter-engine</artifactId><version>${junit.version}</version><scope>test</scope></dependency><dependency><groupId>mysql</groupId><artifactId>mysql-connector-java</artifactId><version>8.0.19</version></dependency><dependency><groupId>com.alibaba</groupId><artifactId>druid</artifactId><version>1.2.6</version></dependency><dependency><groupId>org.springframework</groupId><artifactId>spring-web</artifactId><version>5.0.5.RELEASE</version></dependency><dependency><groupId>org.springframework</groupId><artifactId>spring-webmvc</artifactId><version>5.0.5.RELEASE</version></dependency><dependency><groupId>javax.servlet</groupId><artifactId>javax.servlet-api</artifactId><version>3.1.0</version></dependency><dependency><groupId>javax.servlet.jsp</groupId><artifactId>javax.servlet.jsp-api</artifactId><version>2.2.1</version></dependency><dependency><groupId>org.springframework</groupId><artifactId>spring-context</artifactId><version>5.0.6.RELEASE</version></dependency><dependency><groupId>org.springframework</groupId><artifactId>spring-test</artifactId><version>5.0.5.RELEASE</version></dependency><dependency><groupId>com.fasterxml.jackson.core</groupId><artifactId>jackson-core</artifactId><version>2.13.1</version></dependency><dependency><groupId>com.fasterxml.jackson.core</groupId><artifactId>jackson-annotations</artifactId><version>2.13.1</version></dependency><dependency><groupId>com.fasterxml.jackson.core</groupId><artifactId>jackson-databind</artifactId><version>2.13.1</version></dependency><dependency><groupId>commons-fileupload</groupId><artifactId>commons-fileupload</artifactId><version>1.4</version></dependency><dependency><groupId>commons-io</groupId><artifactId>commons-io</artifactId><version>2.5</version></dependency></dependencies><build><plugins></plugins></build>
</project>
1.1 JdbcTemplate概述
它是spring框架中提供的一个对象,是对原始繁琐的Jdbc API对象的简单封装。spring框架为我们提供了很多的操作 模板类。例如:操作关系型数据的JdbcTemplate和HibernateTemplate,操作nosql数据库的RedisTemplate,操 作消息队列的JmsTemplate等等。
1.2 JdbcTemplate开发步骤
1 导入spring-jdbc和spring-tx坐标
<!--导入spring的jdbc坐标-->
<dependency><groupId>org.springframework</groupId><artifactId>spring-jdbc</artifactId><version>5.0.5.RELEASE</version>
</dependency>
<!--导入spring的tx坐标-->
<dependency><groupId>org.springframework</groupId><artifactId>spring-tx</artifactId><version>5.0.5.RELEASE</version>
</dependency>
2 创建数据库表和实体
3 创建JdbcTemplate对象
4 执行数据库操作
1.3 JdbcTemplate快速入门
在数据库中准备好数据


public class test {//测试jdbc@Testpublic void test1() throws PropertyVetoException {//创建数据源对象ComboPooledDataSource dataSource = new ComboPooledDataSource();dataSource.setDriverClass("com.mysql.cj.jdbc.Driver");dataSource.setJdbcUrl("jdbc:mysql://localhost:3306/day17");dataSource.setUser("root");dataSource.setPassword("12345678");JdbcTemplate jdbcTemplate = new JdbcTemplate();//设置数据源jdbcTemplate.setDataSource(dataSource);//执行语句int row = jdbcTemplate.update("insert into day22 value ( ?,? ,? ) ", null,"lisi", "123456");System.out.println(row);}
}
1.4 Spring产生JdbcTemplate对象
我们可以将JdbcTemplate的创建权交给Spring,将数据源DataSource的创建权也交给Spring,在Spring容器内部将 数据源DataSource注入到JdbcTemplate模版对象中,配置如下:
<?xml version="1.0" encoding="UTF-8"?>
<beans xmlns="http://www.springframework.org/schema/beans"xmlns:xsi="http://www.w3.org/2001/XMLSchema-instance"xsi:schemaLocation="http://www.springframework.org/schema/beans http://www.springframework.org/schema/beans/spring-beans.xsd">
<!--    配置数据源对象--><bean id="dataSource" class="com.mchange.v2.c3p0.ComboPooledDataSource"><property name="driverClass" value="com.mysql.cj.jdbc.Driver"/><property name="jdbcUrl" value="jdbc:mysql://localhost:3306/day17"/><property name="user" value="root"/><property name="password" value="12345678"/></bean><!--    配置JDBC模板对象--><bean id="jdbcTemplate" class="org.springframework.jdbc.core.JdbcTemplate"><property name="dataSource" ref="dataSource"/></bean></beans>
@Testpublic void test2(){ApplicationContext app = new ClassPathXmlApplicationContext("applicationContext.xml");JdbcTemplate jdbcTemplate = app.getBean(JdbcTemplate.class);int row = jdbcTemplate.update("insert into day22 value ( ?,? ,? ) ", null,"mazi", "123456");System.out.println(row);}继续抽取配置applicationContext.xml文件,减少耦合性
- 创建jdbc.properties
jdbc.driver=com.mysql.cj.jdbc.Driver
jdbc.url=jdbc:mysql://localhost:3306/day17
jdbc.name=root
jdbc.password=12345678
- 在applicationContext.xml 引入外部文件
<?xml version="1.0" encoding="UTF-8"?>
<beans xmlns="http://www.springframework.org/schema/beans"xmlns:xsi="http://www.w3.org/2001/XMLSchema-instance"xmlns:context="http://www.springframework.org/schema/context"xsi:schemaLocation="http://www.springframework.org/schema/beans http://www.springframework.org/schema/beans/spring-beans.xsd
http://www.springframework.org/schema/context http://www.springframework.org/schema/context/spring-context.xsd">
<!--    引入外部文件--><context:property-placeholder location="jdbc.properties"/><!--    配置数据源对象--><bean id="dataSource" class="com.mchange.v2.c3p0.ComboPooledDataSource"><property name="driverClass" value="${jdbc.driver}"/><property name="jdbcUrl" value="${jdbc.url}"/><property name="user" value="${jdbc.name}"/><property name="password" value="${jdbc.password}"/></bean><!--    配置JDBC模板对象--><bean id="jdbcTemplate" class="org.springframework.jdbc.core.JdbcTemplate"><property name="dataSource" ref="dataSource"/></bean></beans>
package com.study.test;import com.study.doman.Users;
import org.junit.Test;
import org.junit.runner.RunWith;
import org.springframework.beans.factory.annotation.Autowired;
import org.springframework.jdbc.core.BeanPropertyRowMapper;
import org.springframework.jdbc.core.JdbcTemplate;
import org.springframework.test.context.ContextConfiguration;
import org.springframework.test.context.junit4.SpringJUnit4ClassRunner;import java.util.List;/*** @author Alina* @date 2022年03月30日 7:14 下午*/
//使用spring集成Junit进行测试
@RunWith(SpringJUnit4ClassRunner.class)
//指定配置文件
@ContextConfiguration("classpath:applicationContext.xml")
public class jdbcTemplateTest {//注入对象@Autowiredprivate JdbcTemplate jdbcTemplate;@Testpublic void test1(){int row = jdbcTemplate.update("update day22 set password = ? where username = ?", 123123, "tom");System.out.println(row);}@Testpublic void test2(){int row = jdbcTemplate.update("delete from day22 where username = ?",  "tom");System.out.println(row);}//查询全部@Testpublic void test3(){List<Users> User = jdbcTemplate.query("select * from day22", new BeanPropertyRowMapper<Users>(Users.class));System.out.println(User);}//查询一个@Testpublic void test4(){Users user = jdbcTemplate.queryForObject("select * from day22 where username = ?", new BeanPropertyRowMapper<>(Users.class), "张三");System.out.println(user);}@Test//查询行数public void test5(){Long user = jdbcTemplate.queryForObject("select count(*) from day22 where username = ?", Long.class, "张三");System.out.println(user);}}

![icp光谱仪的工作原理_icp直读光谱仪-3秒快速了解原理步骤[博越仪器]](http://pic.xiahunao.cn/icp光谱仪的工作原理_icp直读光谱仪-3秒快速了解原理步骤[博越仪器])
之拦截器)
:字符串拼接和截取)

)
:替换字符串和转换为数组)


:简单数据类型和复杂数据类型)


)
:数据类型内存分配)
版本不支持getElementsByClassName())
:简单数据类型传参)

:复杂数据类型传参)

