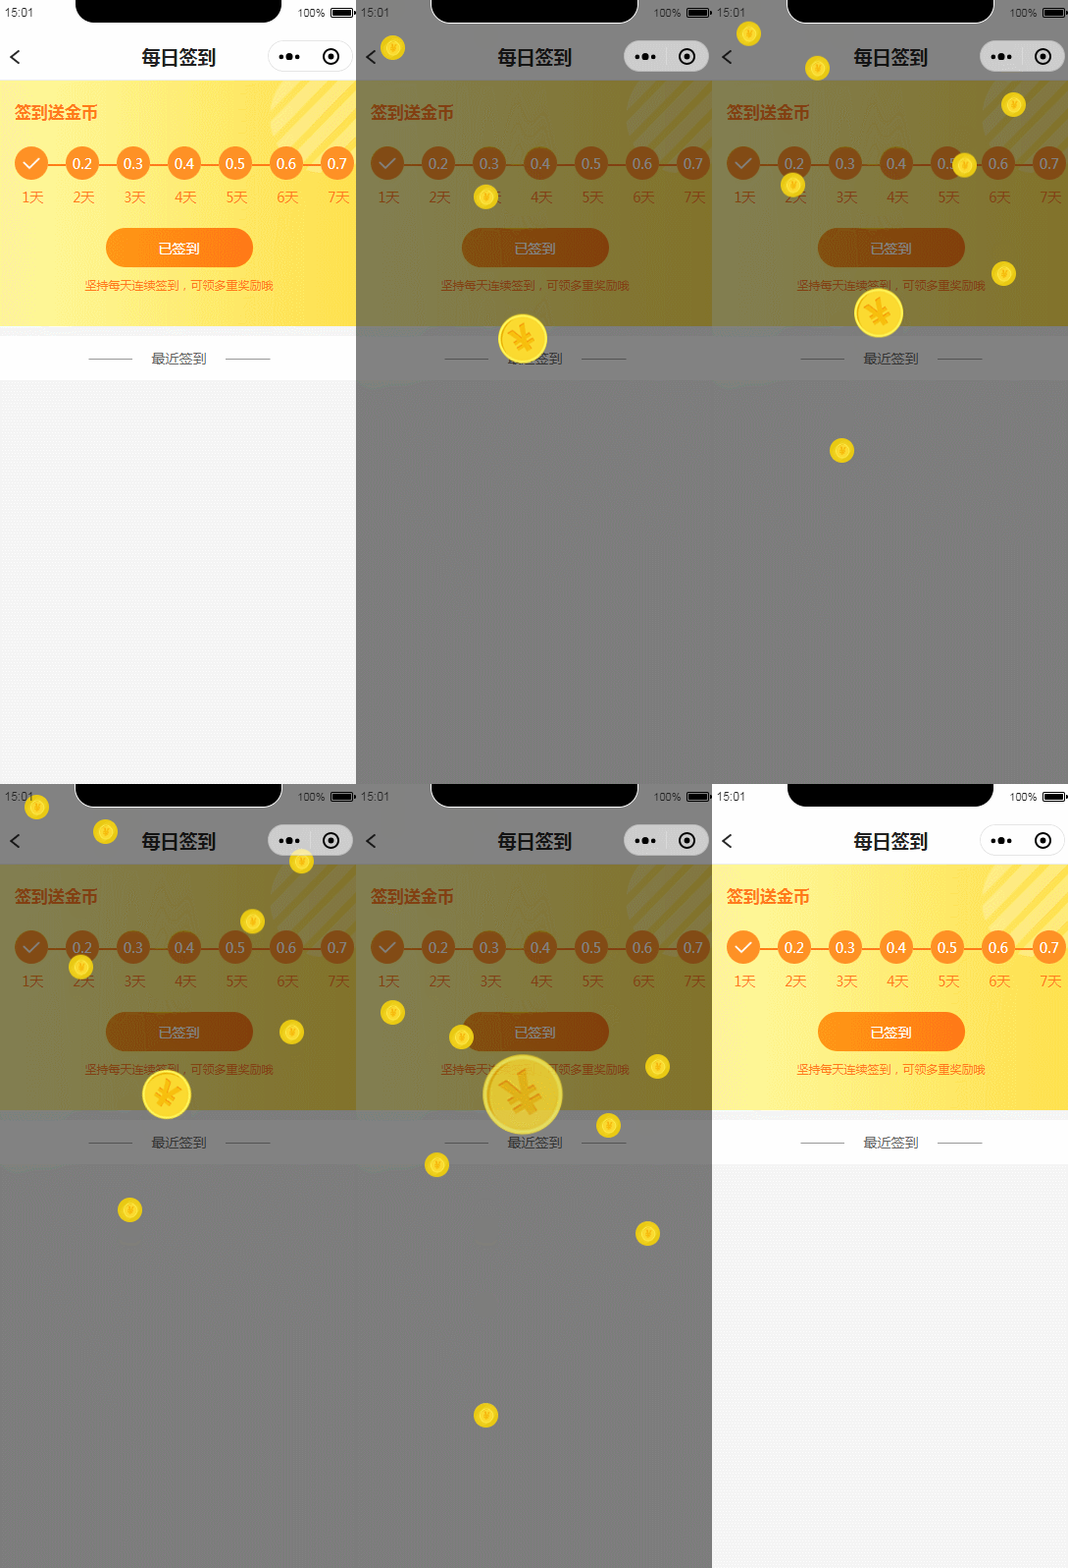
这里使用小程序自带的api来实现,用小程序来写动画的恶心点在于,没有帧,只能用setimeout 来作为帧来使用,
下面是实现代码, 下面是简单用div代替了图片,需要什么图片,可以自行替换相应的div即可
需要变成原生小程序,则需要修改一下代码的写法
效果图:

创建金币动画组件 clockAnimation.vue
export default{
data() {
return {
coinShow:false,//金币对象是否显示,用于重置动画时,隐藏对象
isShow:false, //遮罩显示
//大金币动画
bgCoinAnimation:{},
//小金币动画
coinAnimation1:{},
coinAnimation2:{},
coinAnimation3:{},
coinAnimation4:{},
coinAnimation5:{},
coinAnimation6:{},
coinAnimation7:{},
}
},
methods: {
//动画
animation(){
this.coinShow =false
this.isShow = true
this.bgAnimation()
this.smallAnimation()
},
//大金币动画
bgAnimation(){
var animation = wx.createAnimation({
duration:1000,
timingFunction: 'ease-in-out',
})
this.timer = setTimeout(()=>{
animation.translate3d(0,30,0).step().translate3d(0,0,0).step().rotate(80).step({duration:400}).rotate(0).step({duration:500})
this.bgCoinAnimation = animation.export()
},100)
setTimeout(()=>{
animation.opacity(0).scale(4).step()
this.bgCoinAnimation = animation.export()
},3000)
},
//小金币动画
smallAnimation(){
var animation = wx.createAnimation({
duration:1000,
timingFunction: 'ease-in-out',
})
animation.translate3d(0,30,0).step().translate3d(0,0,0).step()
setTimeout(()=>{
this.coinAnimation1 = animation
},300)
setTimeout(()=>{
this.coinAnimation2 = animation
},500)
setTimeout(()=>{
this.coinAnimation3 = animation
},600)
setTimeout(()=>{
this.coinAnimation4 = animation
},700)
setTimeout(()=>{
this.coinAnimation5 = animation
},800)
setTimeout(()=>{
this.coinAnimation6 = animation
},900)
setTimeout(()=>{
this.coinAnimation7 = animation.export()
},1000)
//小金币掉落动画
setTimeout(()=>{
animation.translate3d(0,1000,0).step()
this.coinAnimation1 = animation
this.coinAnimation2 = animation
this.coinAnimation3 = animation
this.coinAnimation4 = animation
this.coinAnimation5= animation
this.coinAnimation6 = animation
this.coinAnimation7 = animation
},3000)
//动画结束,重置动画初始位置
setTimeout(()=>{
this.coinShow =true
var animation = wx.createAnimation({
duration:300,
timingFunction: 'ease-in-out',
})
var animation2 = wx.createAnimation({
duration:300,
timingFunction: 'ease-in-out',
})
animation.translate3d(0,-1000,0).step()
animation2.translate3d(0,-1000,0).step().scale(1).step()
this.bgCoinAnimation = animation2.export()
this.coinAnimation1 = animation
this.coinAnimation2 = animation
this.coinAnimation3 = animation
this.coinAnimation4 = animation
this.coinAnimation5= animation
this.coinAnimation6 = animation
this.coinAnimation7 = animation
setTimeout(()=>{
this.isShow = false
},500)
},4000)
}
},
mounted () {
},
onShow(){
}
}
.container{
position:absolute;
top:0;
left: 0;
width: 100%;
height: 100vh;
// z-index: 999;
background: rgba(5, 5, 5,0.5)
}
.bgCoin{
background: rgb(233, 201, 19);
border-radius: 50%;
width: 100rpx;
height: 100rpx;
position: absolute;
left: 350rpx;
margin-left:-50rpx;
top:600rpx;
text-align: center;
line-height: 100rpx;
color: #ffffff;
transform:rotate(180deg);
transform:translate3d(0,-1000rpx,0);
}
.coinShow{
opacity: 0;
}
.coin{
background: rgb(233, 201, 19);
border-radius: 50%;
width: 50rpx;
height: 50rpx;
position: absolute;
font-size: 24rpx;
text-align: center;
line-height: 40rpx;
color: #ffffff;
transform:translate3d(0,-1000rpx,0);
}
.coin1{
top:40rpx;
left:60rpx;
}
.coin2{
top:90rpx;
left:200rpx;
}
.coin3{
top:860rpx;
left:250rpx;
}
.coin4{
top:150rpx;
left:600rpx;
}
.coin5{
top:270rpx;
left:500rpx;
}
.coin6{
top:490rpx;
left:580rpx;
}
.coin7{
top:350rpx;
left:150rpx;
}
使用 引入组件
立即签到
//引入组件
import clockAnimation from "../../components/clockAnimation.vue";
export default {
components: {
clockAnimation
},
data() {
return {
clockIsShow: false,
}
},
methods: {
clockInAnimation() {
this.clockIsShow = true;
this.$refs.clockAnimation.animation();
},
}
总结
以上所述是小编给大家介绍的mpvue实现小程序签到金币掉落动画(api实现),希望对大家有所帮助,如果大家有任何疑问请给我留言,小编会及时回复大家的。在此也非常感谢大家对脚本之家网站的支持!
如果你觉得本文对你有帮助,欢迎转载,烦请注明出处,谢谢!
:__WEBPACK_IMPORTED_MODULE_1_vuex__.a.store is not a constructor)


:vuex-state单一状态的理解)


:解析ctf中的pwn--Fast bin里的UAF)

...)
)
:mutation提交风格)


