【.NET监控】| 总结/Edison Zhou
0Why 监控?
Edison所在团队95%以上的应用都是基于.NET 4.5开发的,只能跑在Windows Server服务器上的IIS中,公司运维也没有意愿对Windows Server进行有效的管理和提供监控支持,整得我们无法及时查看有效的性能状况(老实说,之前啥都没有)。
因此,我们需要自行搭建一套适合.NET 4.5应用的监控环境,Prometheus是首选。
1准备工作
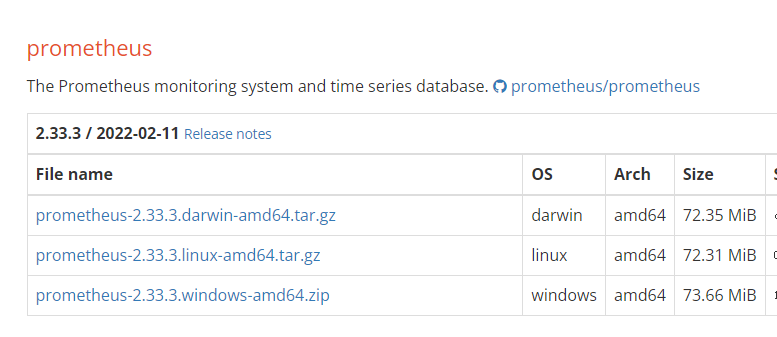
下载Prometheus:https://prometheus.io/download/,最新版本:2.33.3
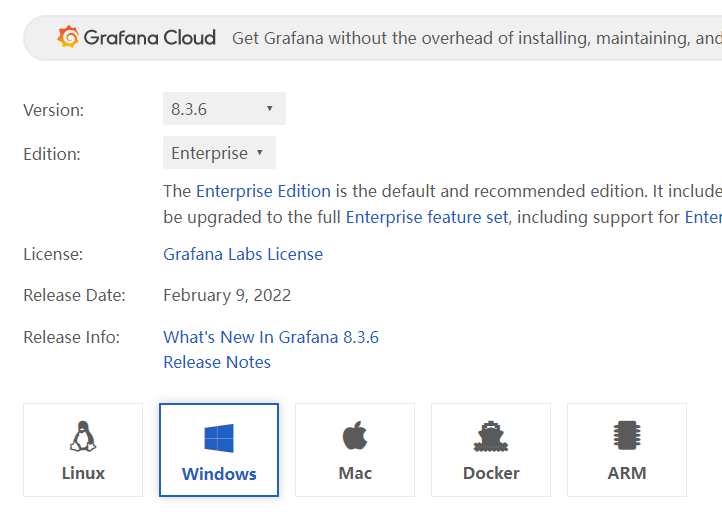
下载Grafana:https://grafana.com/grafana/download,最新版本:8.3.6
下载Windows Exporter:https://github.com/prometheus-community/windows_exporter/releases,最新版本:0.18.1,建议选择msi安装文件。
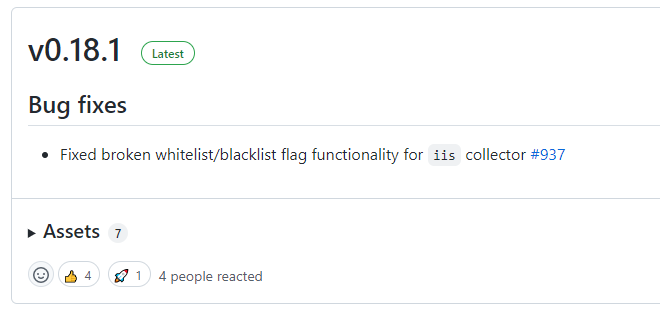
Note:针对Windows Server服务器,请选择对应的Windows版本(amd64后缀)下载安装。
2Prometheus服务搭建
第一步,安装Prometheus Windows版本,假设这里安装在192.168.80.100服务器上。
第二步,打开prometheus.yml配置文件,将需要监控的服务器添加到配置文件中,假设我们需要对192.168.80.1 ~ 10 共计10台机器进行监控。这里我加了一些label,便于后续我进行筛选。
# my global config
global:scrape_interval: 60s # Set the scrape interval to every 15 seconds. Default is every 1 minute.evaluation_interval: 60s # Evaluate rules every 15 seconds. The default is every 1 minute.# scrape_timeout is set to the global default (10s)......# A scrape configuration containing exactly one endpoint to scrape:
# Here it's Prometheus itself.
scrape_configs:# The job name is added as a label `job=<job_name>` to any timeseries scraped from this config.- job_name: "Prometheus-Service"# metrics_path defaults to '/metrics'# scheme defaults to 'http'.static_configs:- targets: ["192.168.80.100:9090"]- job_name: 'Application-Server-Host'static_configs:- targets: ['192.168.80.1:9182','192.168.80.2:9182','192.168.80.3:9182','192.168.80.4:9182']labels:type: Windows-Serverstatus: InUsegroup: BIZ-PURCHASER- targets: ['192.168.80.5:9182','192.168.80.6:9182','192.168.80.7:9182','192.168.80.8:9182']labels:type: Windows-Serverstatus: InUsegroup: BIZ-SUPPLIER- targets: ['192.168.220.9:9182','192.168.220.10:9182']labels:type: Windows-Serverstatus: InUsegroup: BIZ-JOB第三步,双击prometheus.exe启动(不推荐)。
第四步,将prometheus.exe注册为windows服务,开机自启动(推荐),可选方式:借助NSSM将exe配置为Windows服务。
第五步,在本地浏览器访问 http://localhost:9090 进行验证,能够正常访问就说明安装并启动成功。
3Windows Exporter安装配置
由于Windows Exporter默认并没有设置收集IIS和TCP连接数据,因此我们需要在安装目录下执行以下下面的命令:
msiexec /i windows_exporter-0.18.1-amd64.msi ENABLED_COLLECTORS=cpu,cpu_info,cs,logical_disk,net,os,service,system,textfile,iis,process,memory,tcpWindows Exporter的默认端口是9182,一般不建议修改,当然你如果想修改也可以,修改一下上面的命令增加监听端口的参数,假设改为监听8000端口:
msiexec /i windows_exporter-0.18.1-amd64.msi ENABLED_COLLECTORS=cpu,cpu_info,cs,logical_disk,net,os,service,system,textfile,iis,process,memory,tcp LISTEN_PORT=8000执行完上面的命令之后,Windows Exporter会开始自动安装,安装完成后会注册为一个Windows服务,我们可以在Windows服务列表中找到它:
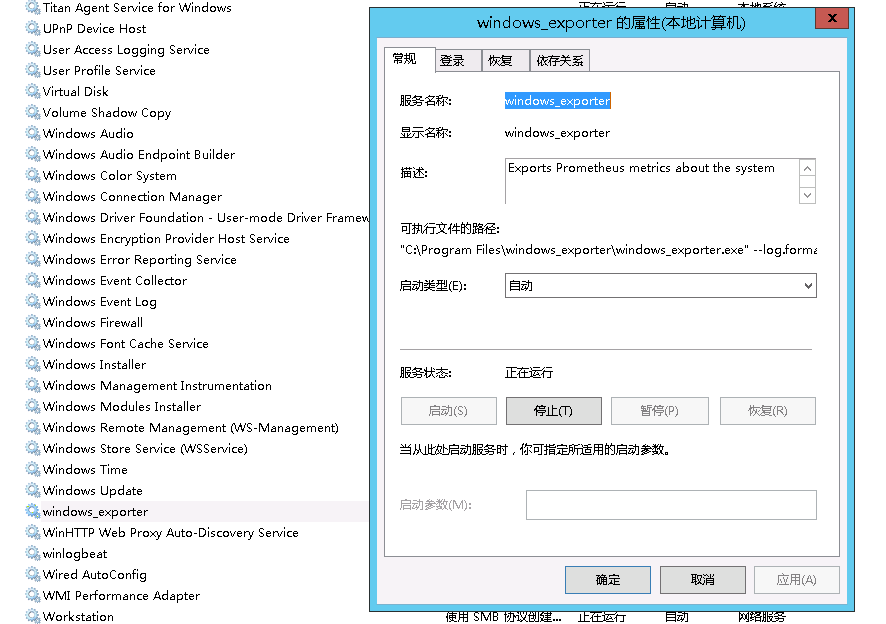
更多内容设置请参考:
https://github.com/prometheus-community/windows_exporter
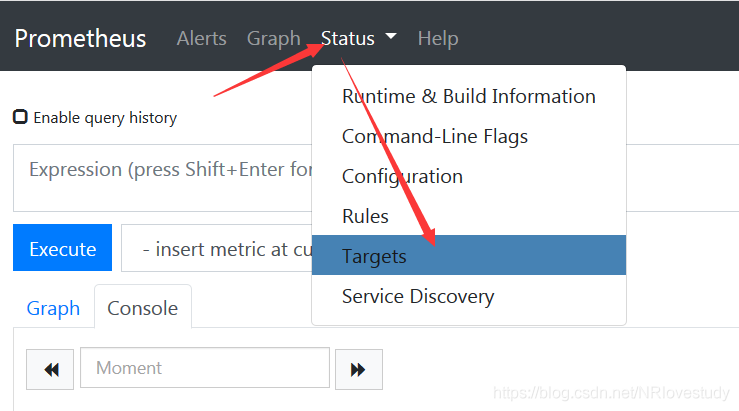
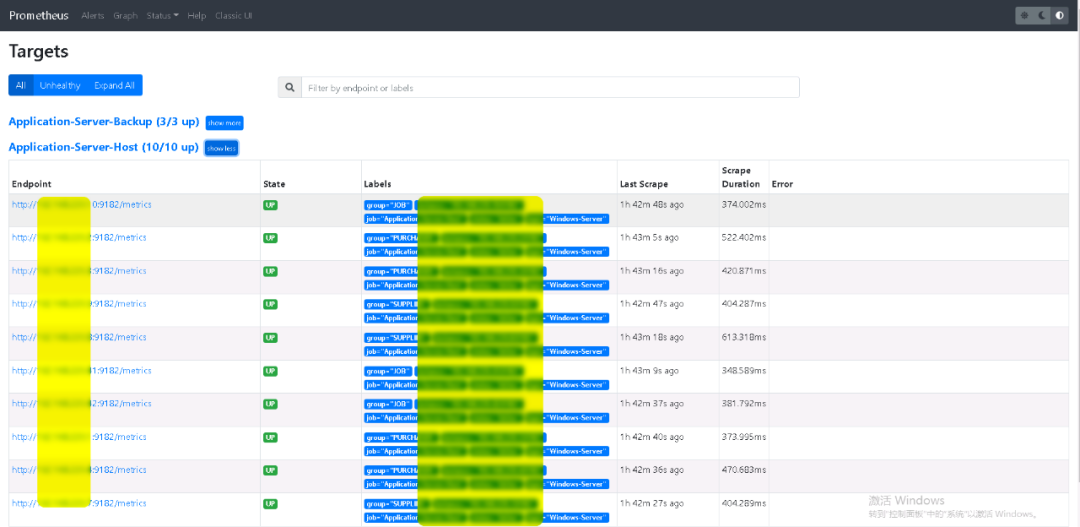
当所有需要监控的服务器上都安装了Exporter之后,就可以通过Prometheus查看状态了:
踩坑记
在安装过程中,有一台服务器启动后报错
collected metric "windows_iis_worker_request_errors_total" { label:
label:label:counter:<0>} was collected before with the same name and label values0>
collected metric "windows_iis_worker_request_errors_total" { label:
label:label:counter:<0>} was collected before with the same name and label values0>
.......
发现只要加上针对iis的监控就会报如上错误,去掉就不会报错。
这个bug已经体现在了:
https://github.com/prometheus-community/windows_exporter/issues/903
但是,我使用的最新版本还是没有解决这个问题。
因此,我看了一下issue中的comments,针对这台服务器将版本退回到了0.16.0版本解决了这个问题。
4Grafana服务搭建
第一步,将安装包拷贝到服务器并解压,这里假设部署到192.168.80.100服务器上。
第二步,同Prometheus一样,将grafana-server.exe注册为windows服务,开机自启动(推荐),可选方式:借助NSSM将exe配置为Windows服务。
第三步,启动grafana-server.exe,可以通过访问 http://localhost:3000 进行验证,默认账号:admin/admin。
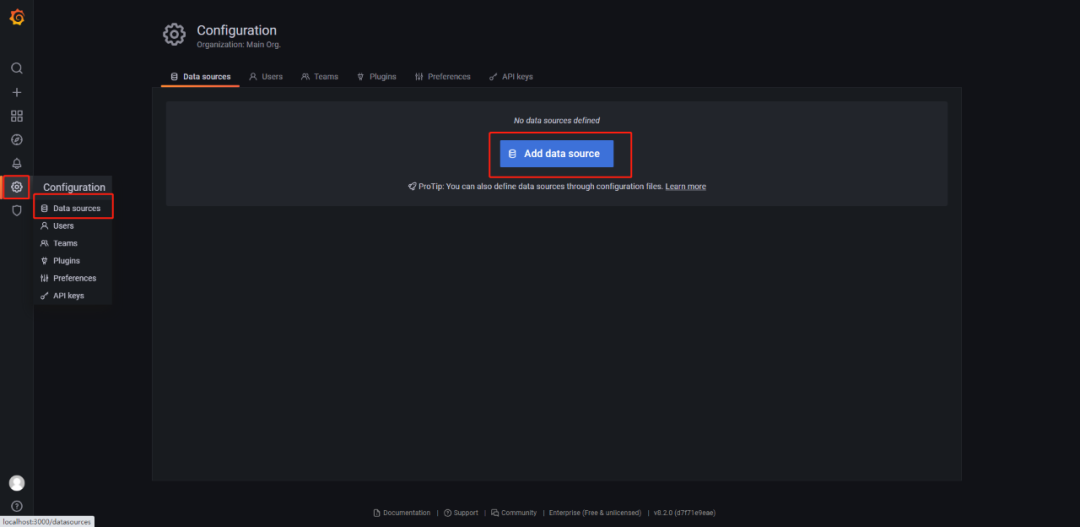
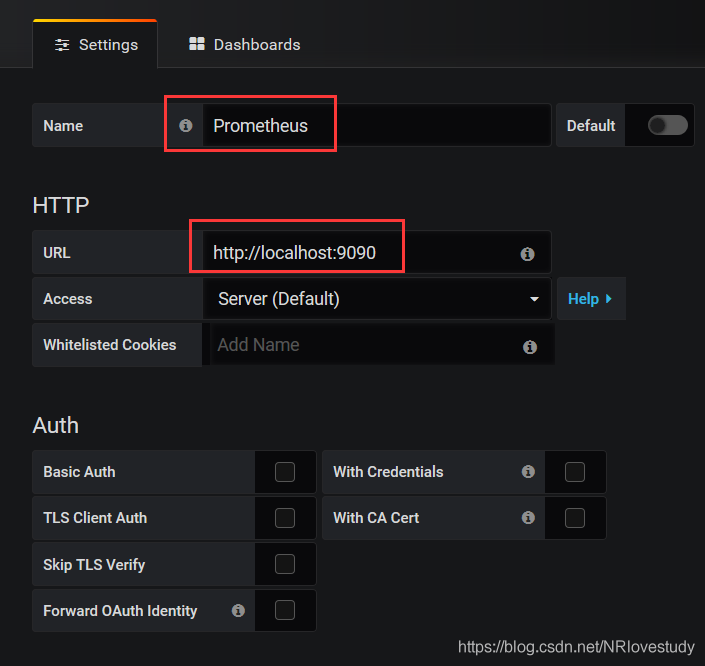
第四步,配置data source,增加Prometheus数据源。
第五步,导入dashboard模板,这里我选择了两个模板,一个是展示Windows Server主机性能指标(10467),另一个则展示IIS应用站点的性能指标(13610)。
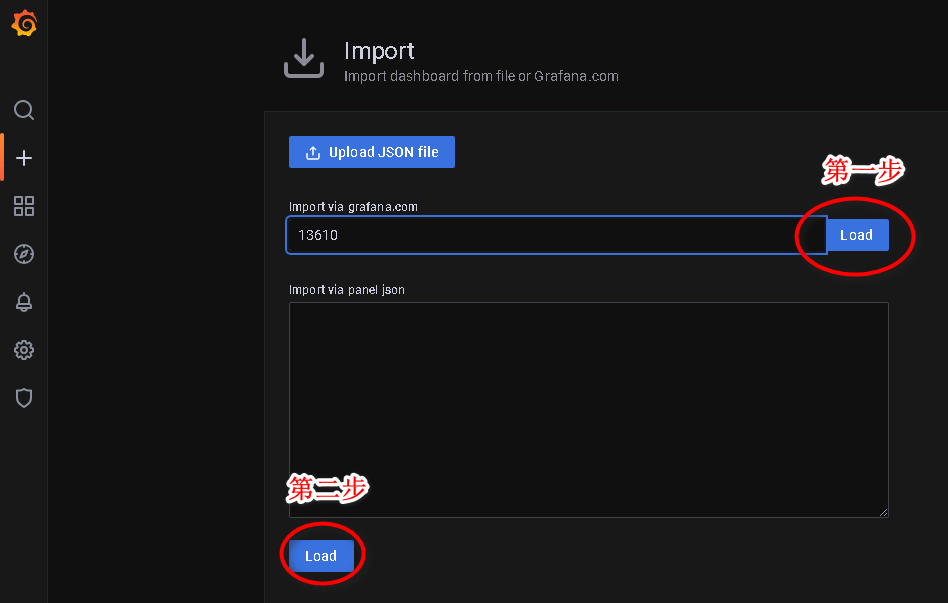
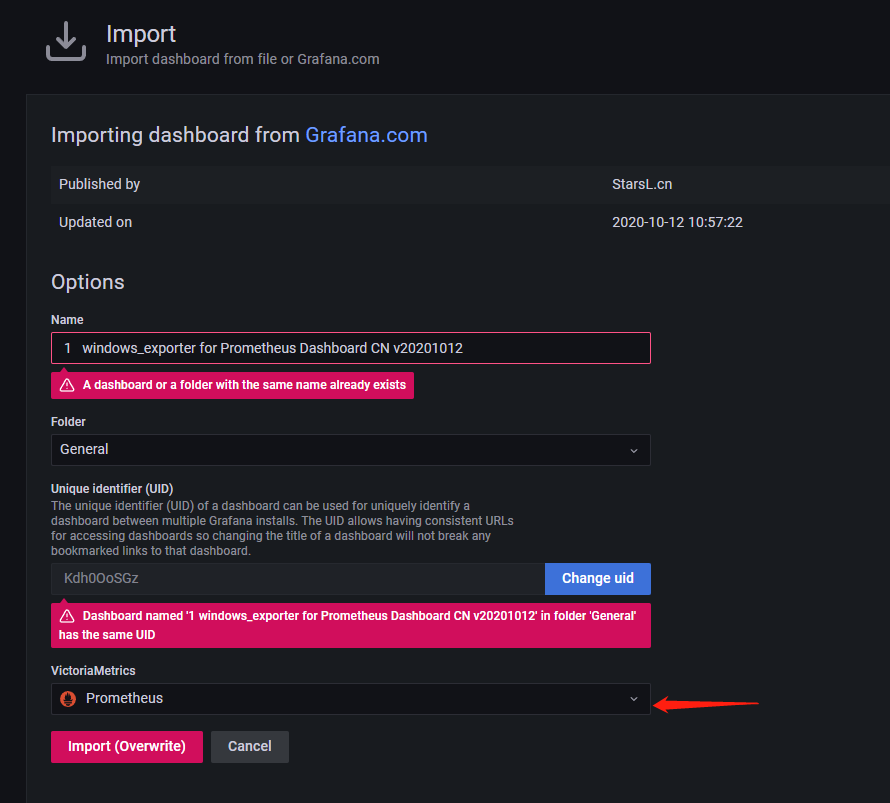
点击Import即可完成dashboard导入。
更多dashboard请参考:
https://grafana.com/grafana/dashboards
5监控面板体验
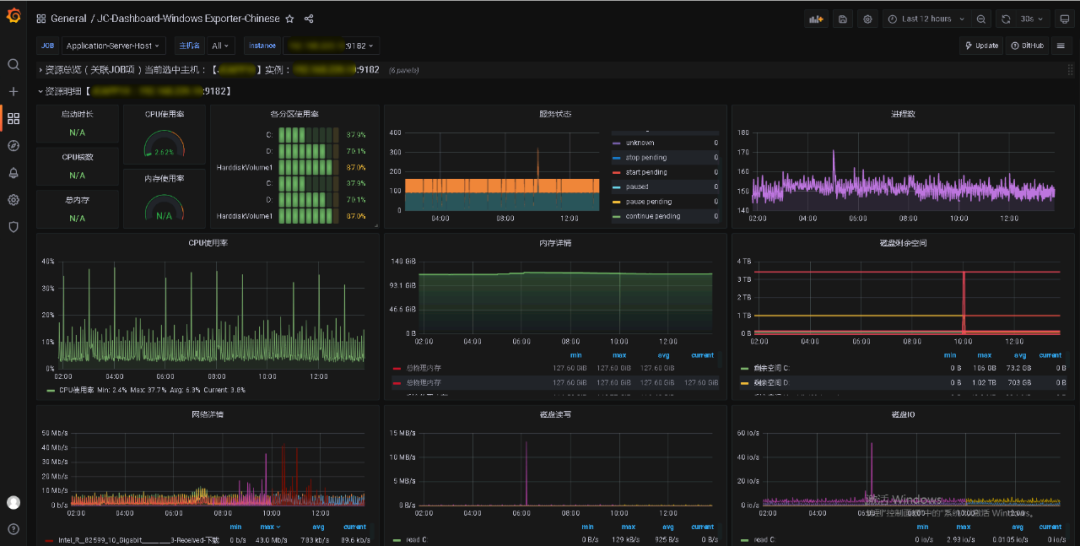
Windows Server主机监控
该面板主要针对服务器主机的各项性能指标进行监控展示,主要包括:CPU使用率、内存使用率、磁盘IO、网络读写情况等。
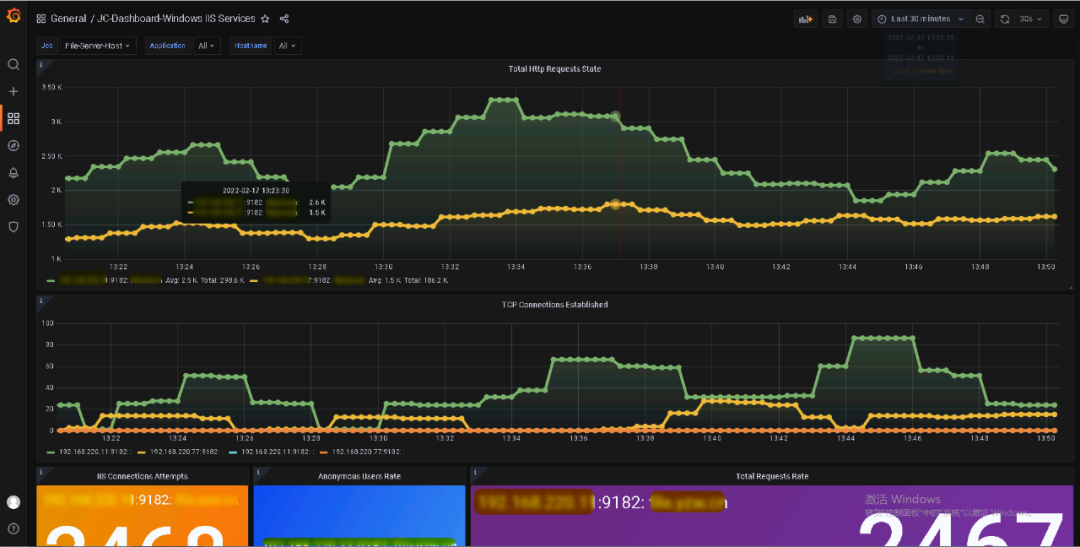
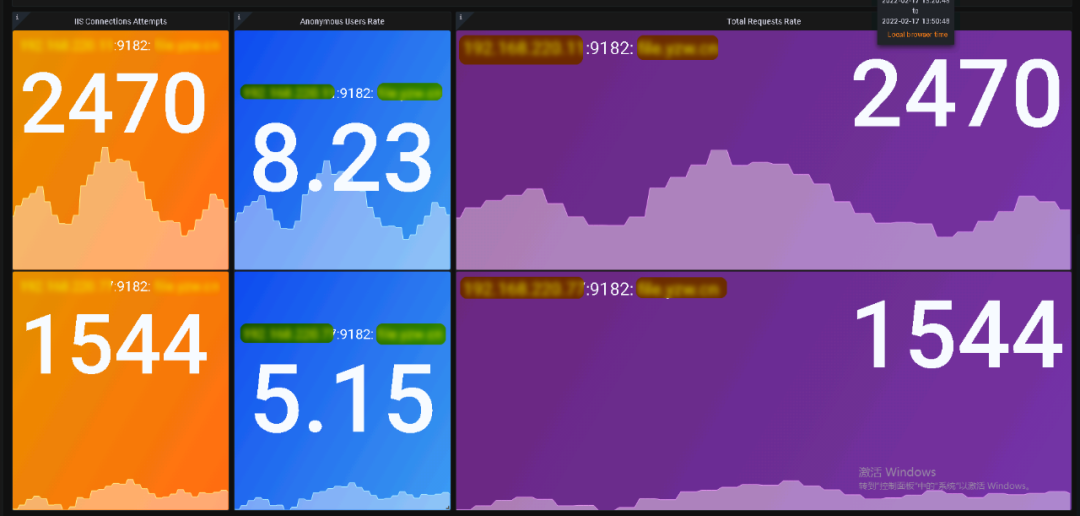
IIS .NET应用监控面板
该面板主要针对服务器主机上部署的IIS应用站点的各项性能指标进行监控展示,主要包括:TCP连接数、总体HTTP请求率、请求用户数等。
End总结
本文介绍了如何基于Prometheus+Grafana+Windows Exporter监控Windows Server服务器及IIS的.NET应用,除此之外,还可以基于altermanager构建报警机制,实现自定义报警规则及时通知(通过email或钉钉等)。这里由于我司运维已经构建了,我就没有重复搭了。

年终总结:Edison的2021年终总结
数字化转型:我在传统企业做数字化转型
C#刷题:C#刷剑指Offer算法题系列文章目录
.NET面试:.NET开发面试知识体系
.NET大会:2020年中国.NET开发者大会PDF资料


,live(),delegate(),on()事件绑定方式的区别)


)
)


