前言
2020年4月,我写了一篇用turtle绘制《小清新风格的树》,反响挺好。现在打算使用turtle修改一下绘制方式,因为线条的绘制太过考虑因素过多,如果使用方块进行堆叠,绘制出来的形状可以如马赛克一样,既符合IT,也较为建议,又方便一些低龄段的孩子学习turtle;毕竟turtle的文档上说的很清楚,turtle是为了提升青少年学习python的乐趣而开发的,那我也为这个乐趣舔一份彩吧。
虽然这个工具由于时间关系还没写好,只实现了其中一部分,也就是核心的线条部分,代码也没优化。计划是之后打算写一个图像库,直接调用即可绘制不同种类的字母、数字、人以及各类物体。
 有始有终,既然我正式连续性的写博客是从小清新树这篇文开始,那么即将到春节,也草草的做个总结吧。
计划
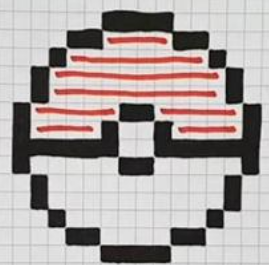
我们先看几张马赛克风格的图片:


我们的马赛克风格一般是由一些颜色的小方块组合而成,并且使用了阶梯式来呈现出弧度的效果,但基本元素是小方块。那么我们第一步就先绘制出一个基本小方块为core吧。
一、绘制小方块
我们创建一个函数为point点,以后绘制小方块都使用这个函数即可。在turtle中绘制一个正方形的小方块很简单,for循环4次left或者right,并且进行fd画线即可,新建一个文件为core,代码如下:
from turtle import *class Core:def point(self):for i in range(0,4):fd(10)right(90)
接下来我们创建一个文件为drawdemo,在其中进行测试:
from core import Corepxtool=Core()
pxtool.point()
input()
成功绘制:

在此需要注意,要统一标注,以后绘制一个点都需要从这个方法进行出发。接下来开始给这个方法增加参数,这样可以动态的绘制指定大小;增加了参数后还需要有一个填充颜色,使用turtle的填充方法begin_fill与end_fill,并且需要给予颜色值fillcolor;再添加一个笔杆颜色,设置默认与填充颜色一致。我们可以创建2个方法,分别设置填充颜色与笔杆颜色:
from turtle import *class Core:def point(self,plenght=10,fcolor="black",pcolor="1",psize=1):self.fillcolor_set(fcolor)self.pencolor_set(fcolor,pcolor)self.pensize_set(psize)begin_fill()for i in range(0,4):fd(plenght)right(90)end_fill()#填充颜色色值def fillcolor_set(self,fcolor="black"):fillcolor(fcolor)#笔杆颜色设置def pencolor_set(self,fcolor="black",pcolor="1"):if pcolor=="1":pcolor=fcolorpencolor(pcolor)else:pencolor(pcolor)#笔杆尺寸def pensize_set(self,psize=1):pensize(psize)
这个时候就可以传值,随意的设置颜色和大小了:
pxtool=Core()
pxtool.point(30,fcolor="red",pcolor="blue",psize=10)

二、绘制线
我们从已有的点上开始出发,直接绘制线段线段绘制的方法很简单,也就是平移点到下一个绘制坐标进行点的绘制即可。首先我们查看绘制完一个点后的小乌龟位置:

小乌龟回到了初始点,这个时候我们默认往右开始绘制线段,那么这个时候就应该是当前绘制向前移动一个单位,我们在这里统一不使用fd,使用goto进行跳转:
def loc_goto(self,plenght):penup()goto(pos()+(plenght,0))pendown()def line(self,lenght=1,plenght=10,fcolor="black",pcolor="1",psize=1):for i in range(0,lenght):self.point(plenght=plenght,fcolor=fcolor,pcolor=pcolor,psize=psize)if i!=(lenght-1):self.loc_goto(plenght)
以上写了2个方法,一个是line绘制线,一个是跳转到下一个单位的goto方法,但是在line方法中,我们只在有需要跳转时跳转,不需要跳转时,最后一笔时则不跳转,方便之后的扩展少改动,只做有限的事情,绝不画蛇添足。
效果如下:

编写好向右绘制线段好我们接下来需要向左绘制线段。向左绘制线段需要使用loc_goto方法减去当前的x坐标点,向左移动即可,并且在line方法中添加参数,判断方向:
def line(self,lenght=1,plenght=10,direction="right",fcolor="black",pcolor="1",psize=1):for i in range(0,lenght):self.point(plenght=plenght,fcolor=fcolor,pcolor=pcolor,psize=psize)if i!=(lenght-1):if direction=="right":self.loc_goto(plenght)elif direction=="left":self.loc_goto(-plenght)elif i==(lenght-1):if direction=="left":self.loc_goto(plenght)
以上代码为了保证一个标准型,所有的绘制方法在最后一个矩形绘制时需要进行移动,所以在方向扥估left时向右移动了一个单位的距离。同理,接下来向上绘制以及向下绘制代码如下,并且修改loc_goto方法,loc_goto方法只做移动,不复再值拼接,再设置一个方法用于控制line绘制的移动:
def loc_goto(self,movepos):penup()goto(pos()+movepos)pendown()
#line方法的绘图跳转控制
def line_func_draw_move(self,cout_i,direction,lenght,plenght):if cout_i!=(lenght-1):if direction=="right":self.loc_goto((plenght,0))elif direction=="left":self.loc_goto((-plenght,0))elif direction=="up":self.loc_goto((0,plenght))elif direction=="down":self.loc_goto((0,-plenght))elif cout_i==(lenght-1):if direction=="left":self.loc_goto((plenght,0))if direction=="up":self.loc_goto((0,-plenght))def line(self,lenght=1,plenght=10,direction="right",fcolor="black",pcolor="1",psize=1):for i in range(0,lenght):self.point(plenght=plenght,fcolor=fcolor,pcolor=pcolor,psize=psize)self.line_control_func_draw_move(i,direction,lenght,plenght)
三、阶梯绘制
阶梯在马赛克绘画中是当作弧来使用,阶梯有每个阶梯的长,以及每个阶梯的高;长我们可以使用横线绘制,高我们使用横线往上绘制即可完成。
def step(self,lenght=1,height=1,blenght=1,plenght=10,direction="right",fcolor="black",pcolor="1",psize=1):for i in range(0,lenght):self.line(lenght=blenght,plenght=plenght,direction=direction,fcolor=fcolor,pcolor=pcolor,psize=psize)self.loc_goto((plenght,plenght))self.line(lenght=blenght,plenght=plenght,direction="up",fcolor=fcolor,pcolor=pcolor,psize=psize)if i!=(lenght-1):self.loc_goto((plenght,plenght*2))
以上代码绘制方法一样,首先绘制横线,然后跳转到下一个绘制点,由于要绘制成马赛克锯齿状所以跳转的位置的高度会提高一个单位self.loc_goto((plenght,plenght*2))。其中lenght是总长度,height是每个分段位的高度,blenght是每个分段的长度。意思就说lenght表示有多少个分段,blenght每个分段位有多少长度,height为每个分段的高度。代码调用:
pxtool.step(2,2,2,10,direction="right",fcolor="red",pcolor="blue")
结果如下:

接着我们绘制起始绘制方向为左边、左下、右下的阶梯,这时只需要更改绘制时的跳转坐标以及绘制方向以及写一个控制跳转的方法即可:
#step方法的绘图跳转控制
#@lenght=总长
#@blenght=bit一个位长度
#@plenght=点长度
#@direction1=横线绘制方向
#@direction2=竖线绘制方向
#@fcolor=填充颜色
#@pcolor=笔颜色
#@psize=笔大小
#@gotopos=如何跳转pos位置
#@cout_i=循环控制变量i
def step_control_func_draw_move(self,lenght,blenght,plenght,direction1,direction2,fcolor,pcolor,psize,gotopos1,gotopos2,cout_i):self.line(lenght=blenght,plenght=plenght,direction=direction1,fcolor=fcolor,pcolor=pcolor,psize=psize)self.loc_goto(gotopos1)self.line(lenght=blenght,plenght=plenght,direction=direction2,fcolor=fcolor,pcolor=pcolor,psize=psize)if cout_i!=(lenght-1):self.loc_goto(gotopos2)def step(self,lenght=1,height=1,blenght=1,plenght=10,direction="right",fcolor="black",pcolor="1",psize=1):for i in range(0,lenght):if direction=="right":self.step_control_func_draw_move(lenght,blenght,plenght,direction,"up",fcolor,pcolor,psize,(plenght,plenght),(plenght,plenght*2),i)elif direction=="left":self.step_control_func_draw_move(lenght,blenght,plenght,"left","up",fcolor,pcolor,psize,(-plenght*2,plenght),(-plenght,plenght*2),i)elif direction=="rightdown":self.step_control_func_draw_move(lenght,blenght,plenght,"right","down",fcolor,pcolor,psize,(plenght,-plenght),(plenght,-plenght),i)elif direction=="leftdown":self.step_control_func_draw_move(lenght,blenght,plenght,"left","down",fcolor,pcolor,psize,(-plenght*2,-plenght),(-plenght,-plenght),i)
三、对称绘制
在绘制马赛克时,很多绘制内容都是左右对称,这时我们可以对我们绘制的线段进行对称控制。我们可以考虑从起始绘制点开始到左右某一点的距离对称。我们暂且定位右边与当前绘制的起始点对称,若我们设为右边10个单位与当前起始点对称则是当前起始点位置pos+(10*一个单位的值,0)为对称坐标,得到对称坐标后计算对称坐标与与起始点的差,将对称坐标加上差则等于右侧对称内容的起始绘制点,从而进行反向绘制即可对称。
这时我们可以从point方法入手,在point绘制点时就记录每次绘制的坐标,方便之后选取目标点作为起始绘制点:
def goto_(self,pos_):penup()goto(pos_)pendown()
def point(self,plenght=10,fcolor="black",pcolor="1",psize=1):poslist=[]self.fillcolor_set(fcolor)self.pencolor_set(fcolor,pcolor)self.pensize_set(psize)begin_fill()for i in range(0,4):poslist.append(pos())fd(plenght)right(90)end_fill()return poslist
def line(self,lenght=1,plenght=10,direction="right",fcolor="black",pcolor="1",psize=1,symmetrical="f",symmetrical_direction="right"):posdict={}symmetrical_point="f"if symmetrical!="f":if symmetrical_direction=="right":symmetrical_point=pos()+(int(symmetrical)*plenght,0)elif symmetrical_direction=="left":symmetrical_point=pos()+(-int(symmetrical)*plenght,0)elif symmetrical_direction=="up":symmetrical_point=pos()+(0,int(symmetrical)*plenght)elif symmetrical_direction=="down":symmetrical_point=pos()+(0,-int(symmetrical)*plenght)for i in range(0,lenght):posdict['point'+str(i)]=self.point(plenght=plenght,fcolor=fcolor,pcolor=pcolor,psize=psize)self.line_control_func_draw_move(i,direction,lenght,plenght)if symmetrical!="f":self.goto_(symmetrical_point)posdict['symmetrical_point']=self.line(lenght=lenght,plenght=plenght,direction=direction,fcolor=fcolor,pcolor=pcolor,psize=psize,symmetrical="f")self.goto_(posdict['point'+str(lenght-1)][3])return posdict
这时我们所绘制的线段就会产生对称:
pos_list=pxtool.line(4,10,direction="left",fcolor="red",pcolor="blue",symmetrical=5,symmetrical_direction="down")
symmetrical_direction为对称方向,symmetrical为对称单位。

返回的结果为每个点坐标:
 接下来再把阶梯对称的给写好:
def step(self,lenght=1,height=1,blenght=1,plenght=10,direction="right",fcolor="black",pcolor="1",psize=1,symmetrical="f",symmetrical_direction="right"):posdict={}symmetrical_point="f"symmetrical_draw_direction=''if symmetrical!="f":if symmetrical_direction=="right":symmetrical_point=pos()+(int(symmetrical)*plenght,0)if direction=="right":symmetrical_draw_direction="left"elif direction=="left":symmetrical_draw_direction="right"elif direction=="rightdown":symmetrical_draw_direction="leftdown"elif direction=="leftdown":symmetrical_draw_direction="rightdown"elif symmetrical_direction=="left":symmetrical_point=pos()+(-int(symmetrical)*plenght,0)if direction=="right":symmetrical_draw_direction="left"elif direction=="left":symmetrical_draw_direction="right"elif direction=="rightdown":symmetrical_draw_direction="leftdown"elif direction=="leftdown":symmetrical_draw_direction="rightdown"elif symmetrical_direction=="rightdown":symmetrical_point=pos()+(0,int(symmetrical)*plenght)if direction=="right":symmetrical_draw_direction="left"elif direction=="left":symmetrical_draw_direction="right"elif direction=="rightdown":symmetrical_draw_direction="leftdown"elif direction=="leftdown":symmetrical_draw_direction="rightdown"elif symmetrical_direction=="leftdown":symmetrical_point=pos()+(0,-int(symmetrical)*plenght)if direction=="right":symmetrical_draw_direction="left"elif direction=="left":symmetrical_draw_direction="right"elif direction=="rightdown":symmetrical_draw_direction="leftdown"elif direction=="leftdown":symmetrical_draw_direction="rightdown"for i in range(0,lenght):if direction=="right":posdict["step"+str(i)]=self.step_control_func_draw_move(lenght,blenght,plenght,direction,"up",fcolor,pcolor,psize,(plenght,plenght),(plenght,plenght*2),i)elif direction=="left":posdict["step"+str(i)]=self.step_control_func_draw_move(lenght,blenght,plenght,"left","up",fcolor,pcolor,psize,(-plenght*2,plenght),(-plenght,plenght*2),i)elif direction=="rightdown":posdict["step"+str(i)]=self.step_control_func_draw_move(lenght,blenght,plenght,"right","down",fcolor,pcolor,psize,(plenght,-plenght),(plenght,-plenght),i)elif direction=="leftdown":posdict["step"+str(i)]=self.step_control_func_draw_move(lenght,blenght,plenght,"left","down",fcolor,pcolor,psize,(-plenght*2,-plenght),(-plenght,-plenght),i)print(posdict)#对称if symmetrical!="f":self.goto_(symmetrical_point)posdict['symmetrical_step']=self.step(lenght=lenght,height=height,blenght=blenght,plenght=plenght,direction=symmetrical_draw_direction,fcolor=fcolor,pcolor=pcolor,psize=psize)self.goto_(posdict['step'+str(lenght-1)]['vline'+str(blenght-1)]['point'+str(height-1)][0])return posdict
使用方法:
pos_list=pxtool.step(2,2,2,10,direction="leftdown",fcolor="red",pcolor="blue",symmetrical=5,symmetrical_direction="left")
结果:

祝大家新年快乐,CSDN牛气冲天
以下代码由《小清新风格的树》组成。

完整代码如下:
core.py文件:
from turtle import *class Core:'''设置'''#填充颜色色值#@fcolor=点填充颜色def fillcolor_set(self,fcolor="black"):fillcolor(fcolor)#笔杆颜色设置#@fcolor=点填充颜色#@pcolor=线颜色def pencolor_set(self,fcolor="black",pcolor="1"):if pcolor=="1":pcolor=fcolorpencolor(pcolor)else:pencolor(pcolor)#笔杆尺寸#@psize=线尺寸def pensize_set(self,psize=1):pensize(psize)'''other func '''#跳转def loc_goto(self,movepos):penup()goto(pos()+movepos)pendown()def goto_(self,pos_):penup()goto(pos_)pendown()#line方法的绘图跳转控制def line_control_func_draw_move(self,cout_i,direction,lenght,plenght):if cout_i!=(lenght-1):if direction=="right":self.loc_goto((plenght,0))elif direction=="left":self.loc_goto((-plenght,0))elif direction=="up":self.loc_goto((0,plenght))elif direction=="down":self.loc_goto((0,-plenght))elif cout_i==(lenght-1):if direction=="left":self.loc_goto((plenght,0))if direction=="up":self.loc_goto((0,-plenght))#step方法的绘图跳转控制#@lenght=总长#@blenght=bit一个位长度#@plenght=点长度#@direction1=横线绘制方向#@direction2=竖线绘制方向#@fcolor=填充颜色#@pcolor=笔颜色#@psize=笔大小#@gotopos=如何跳转pos位置#@cout_i=循环控制变量idef step_control_func_draw_move(self,lenght,blenght,plenght,direction1,direction2,fcolor,pcolor,psize,gotopos1,gotopos2,cout_i,height):print('-----------',blenght)posdict={}posdict['line'+str(cout_i)]=self.line(lenght=blenght,plenght=plenght,direction=direction1,fcolor=fcolor,pcolor=pcolor,psize=psize)self.loc_goto(gotopos1)posdict['vline'+str(cout_i)]=self.line(lenght=height,plenght=plenght,direction=direction2,fcolor=fcolor,pcolor=pcolor,psize=psize)if cout_i!=(lenght-1):self.loc_goto(gotopos2)return posdict'''绘制'''#绘制点#@plenght=点长度#@fcolor=点填充颜色#@pcolor=线颜色#@psize=线尺寸def point(self,plenght=10,fcolor="black",pcolor="1",psize=1):poslist=[]self.fillcolor_set(fcolor)self.pencolor_set(fcolor,pcolor)self.pensize_set(psize)begin_fill()for i in range(0,4):poslist.append(pos())fd(plenght)right(90)end_fill()return poslist#绘制线段#@lenght=线长度#@plenght=点长度#@fcolor=点填充颜色#@pcolor=线颜色#@psize=线尺寸def line(self,lenght=1,plenght=10,direction="right",fcolor="black",pcolor="1",psize=1,symmetrical="f",symmetrical_direction="right"):posdict={}symmetrical_point="f"if symmetrical!="f":if symmetrical_direction=="right":symmetrical_point=pos()+(int(symmetrical)*plenght,0)elif symmetrical_direction=="left":symmetrical_point=pos()+(-int(symmetrical)*plenght,0)elif symmetrical_direction=="up":symmetrical_point=pos()+(0,int(symmetrical)*plenght)elif symmetrical_direction=="down":symmetrical_point=pos()+(0,-int(symmetrical)*plenght)for i in range(0,lenght):posdict['point'+str(i)]=self.point(plenght=plenght,fcolor=fcolor,pcolor=pcolor,psize=psize)self.line_control_func_draw_move(i,direction,lenght,plenght)if symmetrical!="f":self.goto_(symmetrical_point)posdict['symmetrical_point']=self.line(lenght=lenght,plenght=plenght,direction=direction,fcolor=fcolor,pcolor=pcolor,psize=psize,symmetrical="f")self.goto_(posdict['point'+str(lenght-1)][3])return posdict #绘制线段#@lenght=线长度#@height=线高度#@blenght=bit一个位长度#@plenght=点长度#@fcolor=点填充颜色#@pcolor=线颜色#@psize=线尺寸def step(self,lenght=1,height=1,blenght=1,plenght=10,direction="right",fcolor="black",pcolor="1",psize=1,symmetrical="f",symmetrical_direction="right"):posdict={}symmetrical_point="f"symmetrical_draw_direction=''if symmetrical!="f":if symmetrical_direction=="right":symmetrical_point=pos()+(int(symmetrical)*plenght,0)if direction=="right":symmetrical_draw_direction="left"elif direction=="left":symmetrical_draw_direction="right"elif direction=="rightdown":symmetrical_draw_direction="leftdown"elif direction=="leftdown":symmetrical_draw_direction="rightdown"elif symmetrical_direction=="left":symmetrical_point=pos()+(-int(symmetrical)*plenght,0)if direction=="right":symmetrical_draw_direction="left"elif direction=="left":symmetrical_draw_direction="right"elif direction=="rightdown":symmetrical_draw_direction="leftdown"elif direction=="leftdown":symmetrical_draw_direction="rightdown"elif symmetrical_direction=="rightdown":symmetrical_point=pos()+(0,int(symmetrical)*plenght)if direction=="right":symmetrical_draw_direction="left"elif direction=="left":symmetrical_draw_direction="right"elif direction=="rightdown":symmetrical_draw_direction="leftdown"elif direction=="leftdown":symmetrical_draw_direction="rightdown"elif symmetrical_direction=="leftdown":symmetrical_point=pos()+(0,-int(symmetrical)*plenght)if direction=="right":symmetrical_draw_direction="left"elif direction=="left":symmetrical_draw_direction="right"elif direction=="rightdown":symmetrical_draw_direction="leftdown"elif direction=="leftdown":symmetrical_draw_direction="rightdown"for i in range(0,lenght):if direction=="right":posdict["step"+str(i)]=self.step_control_func_draw_move(lenght,blenght,plenght,direction,"up",fcolor,pcolor,psize,(plenght,plenght),(plenght,plenght*2),i,height)elif direction=="left":posdict["step"+str(i)]=self.step_control_func_draw_move(lenght,blenght,plenght,"left","up",fcolor,pcolor,psize,(-plenght*2,plenght),(-plenght,plenght*2),i,height)elif direction=="rightdown":posdict["step"+str(i)]=self.step_control_func_draw_move(lenght,blenght,plenght,"right","down",fcolor,pcolor,psize,(plenght,-plenght),(plenght,-plenght),i,height)elif direction=="leftdown":posdict["step"+str(i)]=self.step_control_func_draw_move(lenght,blenght,plenght,"left","down",fcolor,pcolor,psize,(-plenght*2,-plenght),(-plenght,-plenght),i,height)#对称if symmetrical!="f":self.goto_(symmetrical_point)posdict['symmetrical_step']=self.step(lenght=lenght,height=height,blenght=blenght,plenght=plenght,direction=symmetrical_draw_direction,fcolor=fcolor,pcolor=pcolor,psize=psize)print(posdict)self.goto_(posdict['step'+str(lenght-1)]['vline'+str(lenght-1)]['point'+str(height-1)][0])return posdict
from core import Core
from turtle import *
import random
tracer(False)
setworldcoordinates(-1000,-750,1000,750)
def drawTree(length):if length>1:if length<30 and length>14:#缩小一下树干pensize(4)elif length<15 and length>5:#长度这个范围内那么就是绿叶color('#04B486')#pensize(3)elif length<5 and length>1:#红花color('#FE2E9A')pensize(2)else:color('#5E5E5E')#其他范围就是正常的树干pensize(5)#随机角度与长度randangle=2*random.random()randlen=2*random.random()#每次使用函数先绘制线段,再调整角度,这里是向右的角度转动fd(length)right(20*randangle)drawTree(length - 10*randlen)#这里是向左的角度转动left(40 * randangle)drawTree(length - 10*randlen)#为什么需要再向右转20度?那是因为我一共向左转了40度,使用backward后退,必须是相同的角度,不然退回去角度就不同了位置就不会对right(20 * randangle)up()backward(length)down()
def fallingFlowers(m):x,y=-1000,-750for i in range(30):up()goto(x,y)x+=100down()yval=50for i in range(m):a = 100*random.random()b = 2*random.random()print(a)if a>59:color('#FE2E9A')else:color('#04B486')circle(5)up()goto(x,y+(yval*b))fd(a)yval+=50down()      def treemain():               fallingFlowers(10)#绘制落叶bgcolor("#F5F6CE")color('#5E5E5E')pensize(5)up()goto(0,-700)#跳到绘制起始点down()left(80)fd(140)drawTree(120)pxtool=Core()
def degoto(posv):penup()goto(posv)pendown()weight_v=20
#牛头
def cattle():#pxtool.line(4,10,direction="right",fcolor="red",pcolor="blue")pos_list=pxtool.step(1,4,9,30,direction="left",fcolor="red",pcolor="blue",symmetrical=1,symmetrical_direction="right")penup()goto(pos_list['step0']['line0']['point5'][2])pendown()for i in range(10):pxtool.line(6,30,direction="down",fcolor="red",pcolor="blue")degoto(pos()+(30,30*5))
def cwrite():#Cpxtool.line(4,weight_v,direction="left",fcolor="red",pcolor="blue")degoto(pos()+(-weight_v,0))pxtool.step(2,1,2,weight_v,direction="leftdown",fcolor="red",pcolor="blue")pxtool.line(8,weight_v,direction="down",fcolor="red",pcolor="blue")pxtool.step(1,1,2,weight_v,direction="rightdown",fcolor="red",pcolor="blue")pxtool.line(7,weight_v,direction="right",fcolor="red",pcolor="blue")
def swrite():#spxtool.step(1,5,5,weight_v,direction="leftdown",fcolor="red",pcolor="blue")pxtool.step(1,5,5,weight_v,direction="rightdown",fcolor="red",pcolor="blue")pxtool.line(6,weight_v,direction="left",fcolor="red",pcolor="blue")
def dwrite():#dpxtool.line(11,weight_v,direction="down",fcolor="red",pcolor="blue")pxtool.line(6,weight_v,direction="right",fcolor="red",pcolor="blue")pxtool.step(1,2,2,weight_v,direction="right",fcolor="red",pcolor="blue")pxtool.line(10,weight_v,direction="up",fcolor="red",pcolor="blue")degoto(pos()+(0,weight_v))pxtool.line(8,weight_v,direction="left",fcolor="red",pcolor="blue")
def nwrite():#npxtool.line(10,weight_v,direction="up",fcolor="red",pcolor="blue")degoto(pos()+(weight_v,0))pxtool.step(4,1,1,weight_v,direction="rightdown",fcolor="red",pcolor="blue")pxtool.line(10,weight_v,direction="up",fcolor="red",pcolor="blue")
treemain()degoto((-weight_v*11,0))
cwrite()
degoto((-weight_v*11,0))
degoto(pos()+(weight_v*8,0))
swrite()
degoto((-weight_v*11,0))
degoto(pos()+(weight_v*11,-weight_v))
dwrite()
degoto(pos()+(weight_v*11,-weight_v*9))
nwrite()degoto((0,-weight_v*21))
cattle()
#pos_list=pxtool.line(4,10,direction="left",fcolor="red",pcolor="blue",symmetrical=5,symmetrical_direction="down")#goto(pos_list['point3'][0])
#goto((0,0))
#fd(30)
input()


)


)


![[python opencv 计算机视觉零基础到实战] 九、模糊](http://pic.xiahunao.cn/[python opencv 计算机视觉零基础到实战] 九、模糊)


中的应用)

![[python opencv 计算机视觉零基础到实战] 十、图片效果毛玻璃](http://pic.xiahunao.cn/[python opencv 计算机视觉零基础到实战] 十、图片效果毛玻璃)

函数_Java - split()函数和trim()函数的使用方法)
