感谢各位大佬和粉丝的厚爱和关心( 催更),我会再接再厉的,其实这也是督促自己的一种方式,非常感谢。
刚写了一篇万字长文,自己也休养生息(低调发育)了一段时间,接下来来几个小案例。
拖曳小球
WPF的拖曳效果,基本配置一下,就可以了,但是自绘的话,就得自己控制,按键点击,按键移动和按键松开的事件,与其配合达到目的。
这个效果实现了,其实也变相的实现了WPF里的拖动效果,这个效果用着还是很方便的。
但是代码,确十分的简单。
Wpf 和 SkiaSharp
新建一个WPF项目,然后,Nuget包即可 要添加Nuget包
Install-Package SkiaSharp.Views.WPF -Version 2.88.0其中核心逻辑是这部分,会以我设置的60FPS来刷新当前的画板。
skContainer.PaintSurface += SkContainer_PaintSurface;
_ = Task.Run(() =>
{while (true){try{Dispatcher.Invoke(() =>{skContainer.InvalidateVisual();});_ = SpinWait.SpinUntil(() => false, 1000 / 60);//每秒60帧}catch{break;}}
});
实现代码的 鼠标按下,移动,鼠标松开
先对SkiaSharp对象,增加相关事件
skContainer.MouseDown += SkContainer_MouseDown;skContainer.MouseUp += SkContainer_MouseUp;skContainer.MouseMove += SkContainer_MouseMove;然后增加相关事件处理代码,我这边都统一处理了.
private void SkContainer_MouseDown(object sender, MouseButtonEventArgs e)
{var cur = e.GetPosition(sender as IInputElement);drawClock.MouseDown(new SKPoint((float)cur.X, (float)cur.Y), true);
}
private void SkContainer_MouseUp(object sender, MouseEventArgs e)
{var cur = e.GetPosition(sender as IInputElement);drawClock.MouseDown(new SKPoint((float)cur.X, (float)cur.Y), false);
}
private void SkContainer_MouseMove(object sender, MouseEventArgs e)
{var cur = e.GetPosition(sender as IInputElement);drawClock.MouseMove(new SKPoint((float)cur.X, (float)cur.Y));
}
拖曳核心类
/// <summary>
/// 拖曳
/// </summary>
public class Drag
{public SKPoint centerPoint;public int Radius = 0;private bool Pressed = false;private bool CirclePressend = false;private SKPoint sKPoint = SKPoint.Empty;private SKPoint CirclePoint = SKPoint.Empty;private SKCanvas canvas;private float dx = 0;private float dy = 0;/// <summary>/// 渲染/// </summary>public void Render(SKCanvas canvas, SKTypeface Font, int Width, int Height){this.canvas = canvas;centerPoint = new SKPoint(Width / 2, Height / 2);this.Radius = 40;canvas.Clear(SKColors.White);if (CirclePoint.IsEmpty){CirclePoint = new SKPoint(centerPoint.X, centerPoint.Y);}if (CirclePressend){CirclePoint = new SKPoint(sKPoint.X - dx, sKPoint.Y - dy);DrawCircle(this.canvas, CirclePoint);}else{DrawCircle(this.canvas, CirclePoint);}using var paint = new SKPaint{Color = SKColors.Black,IsAntialias = true,Typeface = Font,TextSize = 24};var msg = $"X:{ sKPoint.X}  Y:{sKPoint.Y}  Pressed:{Pressed} CirclePressend:{CirclePressend}";canvas.DrawText(msg, 0, 30, paint);}public void MouseMove(SKPoint sKPoint){this.sKPoint = sKPoint;if (CirclePressend)//按下,就开始拖动{CirclePoint = sKPoint;}}public void MouseDown(SKPoint sKPoint, bool Pressed){this.sKPoint = sKPoint;this.Pressed = Pressed;if (this.Pressed){this.CirclePressend = CheckPoint(sKPoint, CirclePoint);if (this.CirclePressend){dx = sKPoint.X - CirclePoint.X;dy = sKPoint.Y - CirclePoint.Y;}}else{this.CirclePressend = false;}}public bool CheckPoint(SKPoint sKPoint, SKPoint CirclePoint){var d = Math.Sqrt(Math.Pow(sKPoint.X - CirclePoint.X, 2) + Math.Pow(sKPoint.Y - CirclePoint.Y, 2));return this.Radius >= d;}/// <summary>/// 画一个圆/// </summary>public void DrawCircle(SKCanvas canvas, SKPoint sKPoint){using var paint = new SKPaint{Color = SKColors.Blue,Style = SKPaintStyle.Fill,IsAntialias = true,StrokeWidth = 2};canvas.DrawCircle(sKPoint.X, sKPoint.Y, Radius, paint);}
}
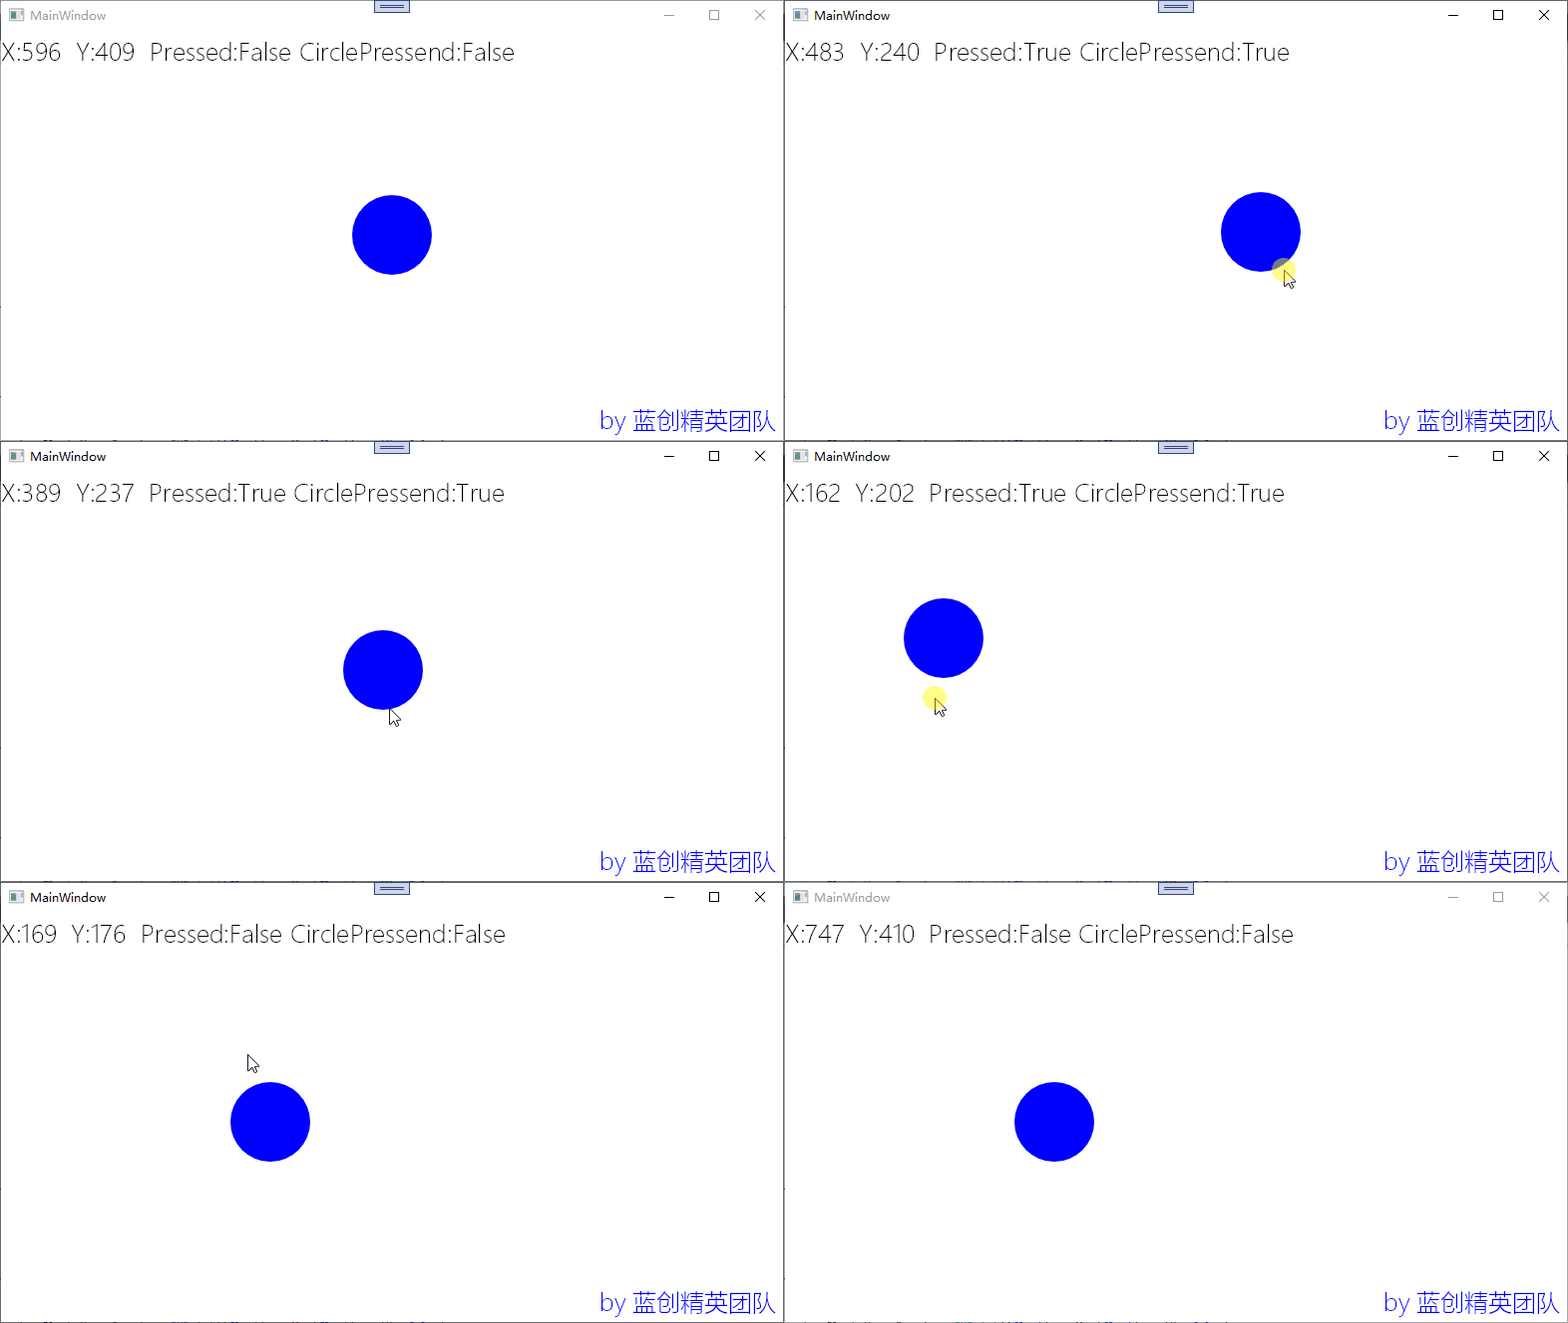
效果如下:

我可以点的球的边边哦,这也是一个小技巧,点到球哪里,停止的时候,鼠标还在那个位置,是不是有点像拖动窗体的感觉了。
总结
以前对拖曳总是很好奇,一直想是如何实现的,现在自己也自己从头到尾的实现了,那么,它就是已知的,这就是可以写出来的进步,每天都应该有一点这样的进步。
代码地址
https://github.com/kesshei/WPFSkiaDragDemo.git
https://gitee.com/kesshei/WPFSkiaDragDemo.git
阅
一键三连呦!,感谢大佬的支持,您的支持就是我的动力!
版权
蓝创精英团队(公众号同名,CSDN同名)
)
![[转]常用自动化测试工具](http://pic.xiahunao.cn/[转]常用自动化测试工具)

---自由式制图表达)


:开始一个WinForm程序)


![[转]Autofac 框架初识与应用](http://pic.xiahunao.cn/[转]Autofac 框架初识与应用)


)
