目录
一、导入依赖与配置信息
二、导入测试数据创建实体类
三、插入数据
1、Insert默认集合插入
2、Insert指定集合插入
3、Insert批量插入数据
4、save默认集合插入
5、save指定集合插入
6、insert与save的区别
四、修改数据
1、修改符合条件的第一条数据
2、全部修改
五、删除数据
1、删除满足条件的所有文档
2、删除集合里所有文档
3、删除满足条件的单个文档并返回
4、删除满足条件的所有文档并返回
六、查找数据
1、查询全部文档
2、查询指定id的文档
3、查询满足条件的一条文档
4、查询满足条件的所有文档
5、And查询
6、Or查询
7、In查询
8、比较查询
9、正则查询
10、排序查询
11、分页查询
12、统计查询
一、导入依赖与配置信息
首先我们需要在项目中导入所需要的依赖,有两种方式:在项目创建之初选择对应的依赖
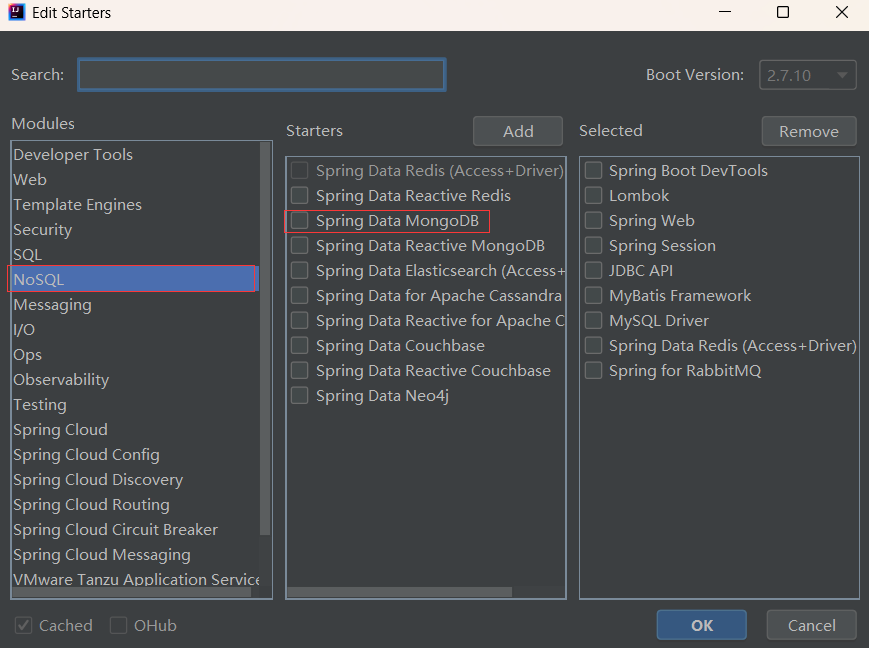
如果项目已经创建则在pom.xml文件中加入以下依赖
<dependency><groupId>org.springframework.boot</groupId><artifactId>spring-boot-starter-data-mongodb</artifactId></dependency>在依赖导入后,我们需要在项目的配置文件中配置相对应的信息
spring:data:mongodb:host: IPport: 27017database: 数据库
二、导入测试数据创建实体类
在MongoDB中导入数据
db.comment.insertMany([{_id:"1",nickname:"zs",content:"这是一本好书",userId:1,createTime:"2021-01-01T00:00:00",like:1,parentId:0},{_id:"2",nickname:"ls",content:"可是一本好书",userId:2,createTime:"2021-01-01T12:00:00",like:11,parentId:0},{_id:"3",nickname:"ls",content:"不是一本好书",userId:2,createTime:"2021-01-11T12:00:00",like:111,parentId:0}])创建对应的实体类
package com.example.demo.pojo.mongodbVo;import lombok.Data;
import org.springframework.data.annotation.Id;
import org.springframework.data.mongodb.core.index.Indexed;
import org.springframework.data.mongodb.core.mapping.Document;import java.io.Serializable;
import java.time.LocalDateTime;@Data
@Document(collection = "comment")
public class Comment implements Serializable {@Idprivate String id;private String nickname;private String content;@Indexedprivate Integer userId;private LocalDateTime createTime;private Integer like;private Integer parentId;
}
三、插入数据
1、Insert默认集合插入
命令:db.comment.insert({_id:"4",nickname:"ww",content:"这位是谁啊",userId:3,createTime:……})
这种方式插入数据会插入到实体类上Document注解对应的集合中
@SpringBootTest
class CommentServiceTest {@Autowiredprivate MongoTemplate mongoTemplate;@Testvoid testInsert() {Comment comment = new Comment("4","ww","这位是谁啊",3, LocalDateTime.now(),1,0);mongoTemplate.insert(comment);}
}
2、Insert指定集合插入
命令:db.comment.insert({})
@SpringBootTest
class CommentServiceTest {@Autowiredprivate MongoTemplate mongoTemplate;@Testvoid testInsert() {// 1. 构建数据Comment comment = new Comment("5","ww","这位是老师",3, LocalDateTime.now(),1,0);// 2. 存储数据库mongoTemplate.insert(comment,"comment");}
}
3、Insert批量插入数据
命令:db.comment.insert([{},{}])
使用insert进行批量插入时必须指定集合名
@SpringBootTest
class CommentServiceTest {@Autowiredprivate MongoTemplate mongoTemplate;@Testvoid testInsert() {// 1. 构建数据Comment comment1 = new Comment("4","ww","这位是老师啊",3, LocalDateTime.now(),1,0);Comment comment2 = new Comment("6","ww","这位是啊",3, LocalDateTime.now(),1,0);List<Comment> list = new ArrayList<>();list.add(comment1);list.add(comment2);// 2. 存储数据库mongoTemplate.insert(list,"comment");}
}
4、save默认集合插入
命令:db.comment.save({})
使用save进行插入时会根据id进行判断,如果要插入数据中的id在数据库存在,则会将旧的数据覆盖,如果不存在则插入数据
@SpringBootTest
class CommentServiceTest {@Autowiredprivate MongoTemplate mongoTemplate;@Testvoid testInsert() {// 1. 构建数据Comment comment = new Comment("4","ww","这位是老师啊12",3, LocalDateTime.now(),1,0);// 2. 存储数据库mongoTemplate.save(comment);}
}
5、save指定集合插入
命令:db.comment.save({})
@SpringBootTest
class CommentServiceTest {@Autowiredprivate MongoTemplate mongoTemplate;@Testvoid testInsert() {// 1. 构建数据Comment comment = new Comment("4","ww","这位是老师啊12",3, LocalDateTime.now(),1,0);// 2. 存储数据库mongoTemplate.save(comment,"comment");}
}
6、insert与save的区别
在MongoTemplate中,save()和insert()方法有以下区别:
- save()方法:save()方法用于插入新文档或更新现有文档。如果要保存的文档没有id字段,将插入一个新文档。如果文档具有id字段,MongoDB将尝试使用匹配的id值更新文档。如果找不到具有匹配id的文档,则插入一个新文档。
- insert()方法:insert()方法用于向集合中插入新文档。如果要插入的文档已经具有id字段,并且集合中已经存在具有相同id值的文档,则会抛出异常。这确保插入的文档具有唯一的_id值。
总结:save()方法用于插入和更新操作,而insert()方法专门用于插入新文档,并确保_id字段的唯一性。
四、修改数据
1、修改符合条件的第一条数据
命令:db.comment.update({},{})
@SpringBootTest
class CommentServiceTest {@Autowiredprivate MongoTemplate mongoTemplate;@Testvoid testInsert() {// 1. 构建更新的数据Comment comment = new Comment("4","ww","这位是老师啊12",3, LocalDateTime.now(),1,0);// 2. 构建更新的条件Query query = new Query(Criteria.where("id").is(comment.getId()));// 3. 构建更新值Update update = new Update().set("content",comment.getContent()).set("createTime",comment.getCreateTime());// 4. 更新第一条满足条件的数据UpdateResult updateResult = mongoTemplate.updateFirst(query, update, Comment.class);// 5. 判断是否更新System.out.println(update);}
}
2、全部修改
命令:db.comment.update({},{},{multi:true})
@SpringBootTest
class CommentServiceTest {@Autowiredprivate MongoTemplate mongoTemplate;@Testvoid testInsert() {// 1. 构建更新的数据Comment comment = new Comment("4","ww","修改全部数据",3, LocalDateTime.now(),1,0);// 2. 构建更新的条件Query query = new Query(Criteria.where("nickname").is(comment.getNickname()));// 3. 构建更新值Update update = new Update().set("content",comment.getContent()).set("createTime",comment.getCreateTime());// 4. 更新第一条满足条件的数据UpdateResult updateResult = mongoTemplate.updateMulti(query, update, Comment.class);// 5. 判断是否更新System.out.println(update);}
}
五、删除数据
1、删除满足条件的所有文档
命令:db.comment.remove({})
@SpringBootTest
class CommentServiceTest {@Autowiredprivate MongoTemplate mongoTemplate;@Testvoid testInsert() {// 1. 构建筛选条件Query query = new Query(Criteria.where("userId").is(2));// 2. 执行删除操作DeleteResult remove = mongoTemplate.remove(query, Comment.class);}
}
2、删除集合里所有文档
命令:db.comment.remove({})
@SpringBootTest
class CommentServiceTest {@Autowiredprivate MongoTemplate mongoTemplate;@Testvoid testInsert() {// 1. 执行删除操作DeleteResult remove = mongoTemplate.remove(new Query(), Comment.class);}
}
3、删除满足条件的单个文档并返回
命令:db.comment.remove({})
@SpringBootTest
class CommentServiceTest {@Autowiredprivate MongoTemplate mongoTemplate;@Testvoid testInsert() {// 1. 构建删除条件Query query = new Query(Criteria.where("userId").is(1));// 2. 删除数据接收返回的文档Comment andRemove = mongoTemplate.findAndRemove(query, Comment.class);// 3. 打印删除的文档System.out.println(andRemove);}
}
4、删除满足条件的所有文档并返回
命令:db.comment.remove({})
@SpringBootTest
class CommentServiceTest {@Autowiredprivate MongoTemplate mongoTemplate;@Testvoid testInsert() {// 1. 删除所有满足条件并返回List<Comment> comments = mongoTemplate.findAllAndRemove(new Query(Criteria.where("userId").is(3)), Comment.class);// 2. 打印删除System.out.println(comments);}
}
六、查找数据
1、查询全部文档
命令:db.comment.find()
@SpringBootTest
class CommentServiceTest {@Autowiredprivate MongoTemplate mongoTemplate;@Testvoid testInsert() {// 1. 查询全部文档List<Comment> comments = mongoTemplate.findAll(Comment.class);// 2. 打印结果System.out.println(comments);}
}
2、查询指定id的文档
命令:db.comment.find({_id:"id"})
@SpringBootTest
class CommentServiceTest {@Autowiredprivate MongoTemplate mongoTemplate;@Testvoid testInsert() {// 1. 查询文档Comment comment = mongoTemplate.findById("1", Comment.class);// 2. 打印结果System.out.println(comment);}
}
3、查询满足条件的一条文档
命令:db.comment.findOne({})
@SpringBootTest
class CommentServiceTest {@Autowiredprivate MongoTemplate mongoTemplate;@Testvoid testInsert() {// 1. 查询文档Comment comment = mongoTemplate.findOne(new Query(Criteria.where("nickname").is("ww")),Comment.class);// 2. 打印结果System.out.println(comment);}
}
4、查询满足条件的所有文档
命令:db.comment.find({})
@SpringBootTest
class CommentServiceTest {@Autowiredprivate MongoTemplate mongoTemplate;@Testvoid testInsert() {// 1. 查询文档List<Comment> comments = mongoTemplate.find(new Query(Criteria.where("nickname").is("ww")),Comment.class);// 2. 打印结果System.out.println(comments);}
}
5、And查询
命令:db.comment.find({$and:[{},{}]})
@SpringBootTest
public class PersonServiceTest {@Autowiredprivate MongoTemplate mongoTemplate;@Testpublic void findByAndCondition() {// 1.创建将要and的条件Criteria criteriaNickName = Criteria.where("nickame").is("ww");Criteria criteriaLike = Criteria.where("like").is(1);// 2.将上面条件进行and关联Criteria criteria = new Criteria().andOperator(criteriaNickName, criteriaLike);// 3.条件对象添加到其中Query query = new Query(criteria);List<Comment> result = mongoTemplate.find(query, Comment.class);System.out.println("查询结果:" + result.toString());}
}
6、Or查询
命令:db.comment.find({$or:[{},{}]})
下面代码简写,具体可参照上述and写法,效果一致
@SpringBootTest
class CommentServiceTest {@Autowiredprivate MongoTemplate mongoTemplate;@Testvoid testInsert() {// 1. 查询文档List<Comment> comments = mongoTemplate.find(new Query(new Criteria().orOperator(Criteria.where("nickname").is("ww"),Criteria.where("like").is(10))), Comment.class);// 2. 打印结果System.out.println(comments);}
}
7、In查询
命令:db.comment.find({count:{$in:[11,12]}})
@SpringBootTest
class CommentServiceTest {@Autowiredprivate MongoTemplate mongoTemplate;@Testvoid testInsert() {// 1. 查询文档List<Integer> ins = Arrays.asList(1,0,2);List<Comment> comments = mongoTemplate.find(new Query(Criteria.where("like").in(ins)), Comment.class);// 2. 打印结果System.out.println(comments);}
}
8、比较查询
命令:db.comment.find({ "like": { $gt: 0, $lt: 5 } })
@SpringBootTest
class CommentServiceTest {@Autowiredprivate MongoTemplate mongoTemplate;@Testvoid testInsert() {// 1. 查询文档Query query = new Query(Criteria.where("like").gt(0).lt(5));   // 查询大于0小于5List<Comment> comments = mongoTemplate.find(query, Comment.class);// 2. 打印结果System.out.println(comments);}
}
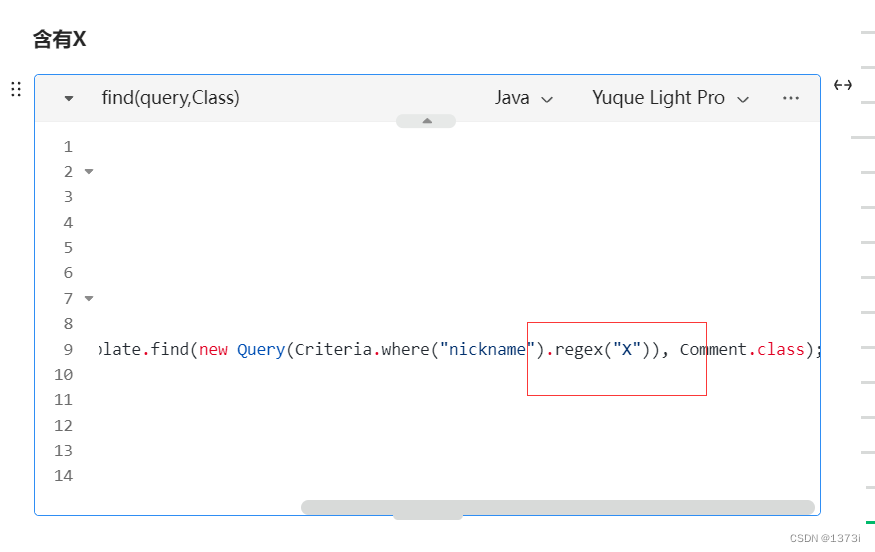
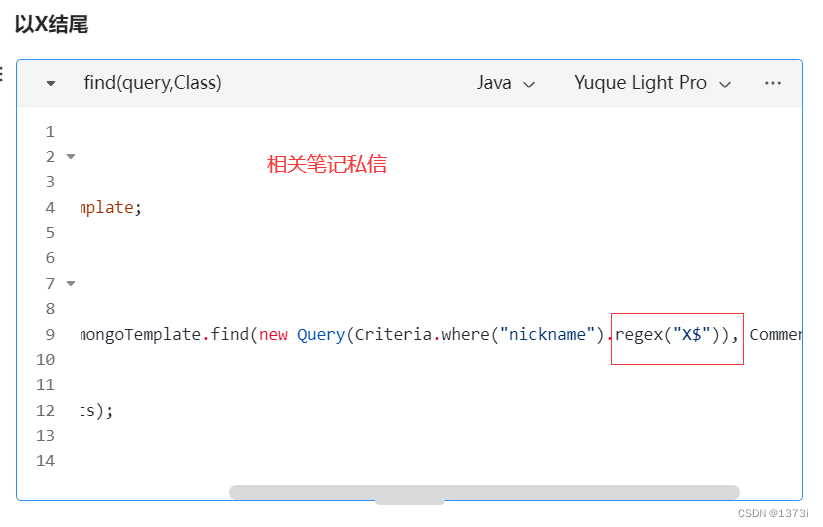
9、正则查询
命令:db.collectionName.find({ "nickname": { $regex: '^w' } })
@SpringBootTest
class CommentServiceTest {@Autowiredprivate MongoTemplate mongoTemplate;@Testvoid testInsert() {// 1. 查询文档List<Comment> comments = mongoTemplate.find(new Query(Criteria.where("nickname").regex("^w")), Comment.class);  // 查询nickname中w开头的数据// 2. 打印结果System.out.println(comments);}
}
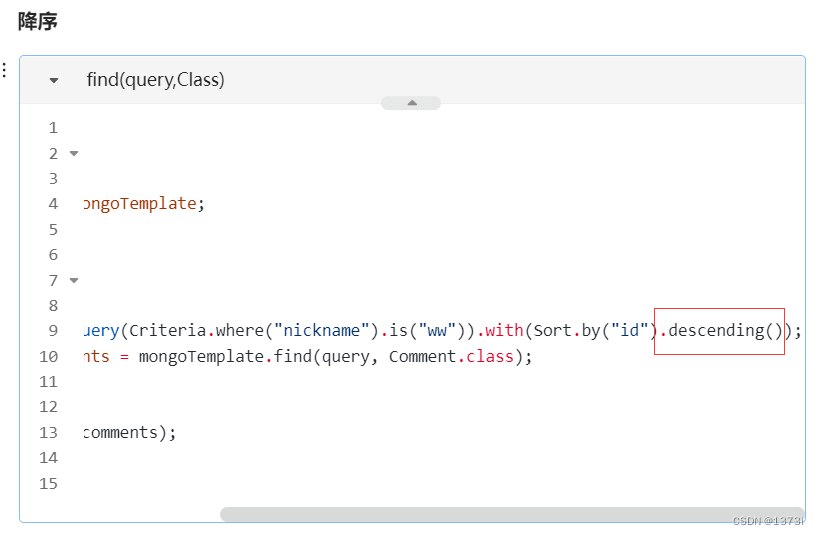
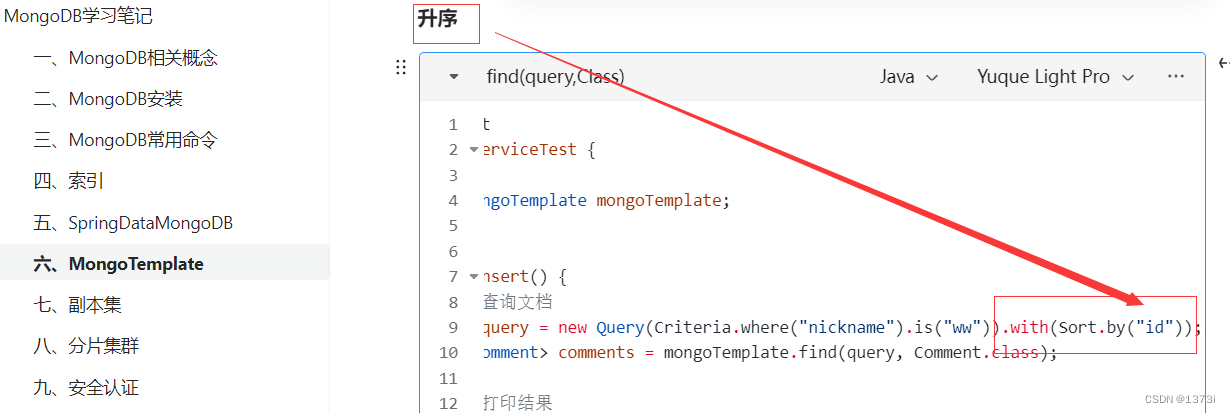
10、排序查询
命令:db.collectionName.find({ "nickname": "ww" }).sort({ "like": 1 })
@SpringBootTest
class CommentServiceTest {@Autowiredprivate MongoTemplate mongoTemplate;@Testvoid testInsert() {// 1. 查询文档Query query = new Query(Criteria.where("nickname").is("ww")).with(Sort.by("id").descending());List<Comment> comments = mongoTemplate.find(query, Comment.class);// 2. 打印结果System.out.println(comments);}
}
11、分页查询
命令:db.comment.find({}).skip(2).limit(2)
@SpringBootTest
class CommentServiceTest {@Autowiredprivate MongoTemplate mongoTemplate;@Testvoid testInsert() {// 1. 查询文档Query query = new Query(Criteria.where("nickname").is("ww")).skip(2).limit(2);List<Comment> comments = mongoTemplate.find(query, Comment.class);// 2. 打印结果System.out.println(comments);}
}
12、统计查询
命令:db.comment.count({})
@SpringBootTest
class CommentServiceTest {@Autowiredprivate MongoTemplate mongoTemplate;@Testvoid testInsert() {// 1. 查询文档Query query = new Query(Criteria.where("nickname").is("ww"));long count = mongoTemplate.count(query, Comment.class);// 2. 打印结果System.out.println(count);}
}
![[PM]敏捷开发之Scrum总结](http://pic.xiahunao.cn/[PM]敏捷开发之Scrum总结)

![[保研/考研机试] 猫狗收容所 C++实现](http://pic.xiahunao.cn/[保研/考研机试] 猫狗收容所 C++实现)


))


![[RTKLIB]模糊度固定相关问题(一)](http://pic.xiahunao.cn/[RTKLIB]模糊度固定相关问题(一))
