目录
一.Secret
1.secret介绍
2.secret的类型
3.创建secret
4.使用secret
环境变量的形式
volume数据卷挂载
二ConfigMap
1.创建ConfigMap的方式
2.使用ConfigMap
2.1作为volume挂载使用
2.2.作为环境变量
三.Downward API
1.以环境变量的方式实现
2.Volume挂载
一.Secret
1.secret介绍
- secret用来保存小片敏感数据的k8s资源,例如密码,token,或者秘钥。这类数据当然也可以存放在Pod或者镜像中,但是放在Secret中是为了更方便的控制如何使用数据,并减少暴露的风险。
- 用户可以创建自己的secret,系统也会有自己的secret。
- Pod需要先引用才能使用某个secret; pod使用secret方式主要是作为volume的一个域被一个或多个容器挂载。
2.secret的类型
內建的Secret:
由ServiceAccount创建的API证书附加的秘钥k8s自动生成的用来访问apiserver的Secret,所有Pod会默认使用这个Secret与apiserver通信。
创建自己的Secret:
方式1:使用kubectl create secret命令
方式2:yaml文件创建Secret
3.创建secret
创建pod要访问数据库需要用户名密码,现在我们分别设置这个用户名和密码 Secret 对象要求这些数据必须是经过 Base64 转码。
 echo -n "123456" | base64
MTIzNDU2echo -n "test" | base64
dGVzdA==手动base64解码方式:
[root@kube-master echo dGVzdA== | base64 --decode    #或者 -d
test[root@kube-master ~]#
创建
[root@kube-master ~]# vim secret.yaml
apiVersion: v1
kind: Secret
metadata:name: mysecret
type: Opaque
data:password: MDAxMTIydatabase: dGVzdA==## kubectl apply -f secret.yml [root@kube-master ~]# kubectl  get secret
NAME                  TYPE                                  DATA   AGE
default-token-j48pd   kubernetes.io/service-account-token   3      3d3h
mysecret              Opaque                                2      6h

4.使用secret
secret可以作为数据卷挂载或者作为环境变量暴露给Pod中的容器使用,也可以被系统中的其他资源使用。
每一个被引用的Secret都要在spec.volumes中定义
如果Pod中的多个容器都要引用这个Secret那么每一个容器定义中都要指定自己的volumeMounts,但是Pod定义中声明一次spec.volumes就好了。
-
环境变量的形式
env: 定义环境变量- name: MYSQL_ROOT_PASSWORD #创建新的环境变量名称valueFrom:secretKeyRef: #调用的key是什么name: mysecret #变量的值来自于mysecretkey: password #username里面的值- name: MYSQL_DATABASEvalueFrom: secretKeyRef:name: mysecretkey: database-
volume数据卷挂载
volumeMounts: #挂载一个卷- name: ljh #这个名字需要与定义的卷的名字一致mountPath: "/opt/aaa" #挂载到容器里哪个目录下readOnly: true volumes: #数据卷的定义- name: ljh #卷的名字这个名字自定义secret: #卷是直接使用的secret。secretName: mysecret items:- key: password #将那个key重新定义到那个目录下path: aren #相对路径,相对于/opt/aaa的路径映射secret key到指定的路径 和 以环境变量的形式使用Secret
[root@kube-master kubernetes]# vim  mysql.yaml
apiVersion: v1
kind: Secret
metadata:name: mysecret
type: Opaque
data:password: MDAxMTIydatabase: dGVzdA==---
apiVersion: v1
kind: Pod
metadata:name: mysqllabels:name: mysql
spec:containers:- name: mysqlimage: 10.36.192.206:8088/library/mysql:5.7resources:limits:memory: "512Mi"cpu: "1000m"ports:- containerPort: 3306env:        定义环境变量- name: MYSQL_ROOT_PASSWORD     #创建新的环境变量名称valueFrom:secretKeyRef:            #调用的key是什么name: mysecret        #变量的值来自于mysecretkey: password            #username里面的值- name: MYSQL_DATABASEvalueFrom:             secretKeyRef:name: mysecretkey: databasevolumeMounts:        #挂载一个卷- name: ljh        #这个名字需要与定义的卷的名字一致mountPath: "/opt/aaa"    #挂载到容器里哪个目录下readOnly: true    volumes:              #数据卷的定义- name: ljh        #卷的名字这个名字自定义secret:             #卷是直接使用的secret。secretName: mysecret items:- key: password    #将那个key重新定义到那个目录下path: aren    #相对路径,相对于/opt/aaa的路径
创建并查看
[root@kube-master kubernetes]# kubectl apply -f mysql.yaml
4.1 从volume中读取secret的值
[root@kube-master kubernetes]# kubectl  exec -it -n default   mysql   -c mysql /bin/bashbash-4.2# cat /opt/aaa/aren
001122bash-4.2#
4.2 打印一下定义的变量
bash-4.2# echo $MYSQL_DATABASE
test
4.3 被挂载的secret内容自动更新
也就是如果修改一个Secret的内容,那么挂载了该Secret的容器中也将会取到更新后的值,但是这个时间间隔是由kubelet的同步时间决定的。
将password修改为123456 容器中挂在的数据也会改变。
bash-4.2# cat /opt/aaa/aren
123456bash-4.2#
二ConfigMap
1.创建ConfigMap的方式
创建ConfigMap的方式有4种:
命令行方式
方式1:通过直接在命令行中指定configmap参数创建,即--from-literal
方式2:通过指定文件创建,即将一个配置文件创建为一个ConfigMap,--from-file=<文件>
方式3:通过指定目录创建,即将一个目录下的所有配置文件创建为一个ConfigMap,--from-file=<目录>
配置文件方式
方式4:事先写好标准的configmap的yaml文件,然后kubectl create -f 创建
1.1 通过命令行参数创建
kubectl create configmap test-configmap --from-literal=user=root #结果如下面的data内容所示
[root@kube-master kubernetes]# kubectl get configmap test-configmap -o yaml
apiVersion: v1
data:user: root
kind: ConfigMap
metadata:creationTimestamp: "2023-12-14T09:24:55Z"name: test-configmapnamespace: defaultresourceVersion: "144400"uid: f1f3cd45-1880-444c-b30a-49a3f5345a2c
1.2.通过指定文件创建
kubectl create configmap test-yaml    --from-file=/etc##结果如下面data内容所示
[root@kube-master kubernetes]# kubectl get configmap etc -o yaml
apiVersion: v1
data:passwd: |root:x:0:0:root:/root:/bin/bashbin:x:1:1:bin:/bin:/sbin/nologindaemon:x:2:2:daemon:/sbin:/sbin/nologinadm:x:3:4:adm:/var/adm:/sbin/nologinlp:x:4:7:lp:/var/spool/lpd:/sbin/nologinsync:x:5:0:sync:/sbin:/bin/syncshutdown:x:6:0:shutdown:/sbin:/sbin/shutdownhalt:x:7:0:halt:/sbin:/sbin/haltmail:x:8:12:mail:/var/spool/mail:/sbin/nologinoperator:x:11:0:operator:/root:/sbin/nologingames:x:12:100:games:/usr/games:/sbin/nologinftp:x:14:50:FTP User:/var/ftp:/sbin/nologinnobody:x:99:99:Nobody:/:/sbin/nologinsystemd-network:x:192:192:systemd Network Management:/:/sbin/nologindbus:x:81:81:System message bus:/:/sbin/nologinpolkitd:x:999:998:User for polkitd:/:/sbin/nologinsshd:x:74:74:Privilege-separated SSH:/var/empty/sshd:/sbin/nologinpostfix:x:89:89::/var/spool/postfix:/sbin/nologinchrony:x:998:996::/var/lib/chrony:/sbin/nologinaren:x:1000:1000:aren:/home/aren:/bin/bashnginx:x:997:995:Nginx web server:/var/lib/nginx:/sbin/nologinntp:x:38:38::/etc/ntp:/sbin/nologin
kind: ConfigMap
metadata:creationTimestamp: "2023-12-14T09:31:29Z"name: etcnamespace: defaultresourceVersion: "144961"uid: 0243ada4-ee7a-4ef5-a6d9-3a1fdc88b6db
1.3通过yaml文件创建
[root@kube-master kubernetes]# vim configmap.yaml
apiVersion: v1
kind: ConfigMap
metadata:name: nginx-config
data:nginx.level: 1.20.2nginx.info:nginx配置文件nginx.conf: |# For more information on configuration, see:#   * Official English Documentation: http://nginx.org/en/docs/#   * Official Russian Documentation: http://nginx.org/ru/docs/user nginx;worker_processes auto;error_log /var/log/nginx/error.log;pid /run/nginx.pid;# Load dynamic modules. See /usr/share/doc/nginx/README.dynamic.include /usr/share/nginx/modules/*.conf;events {worker_connections 1024;}http {log_format  main  '$remote_addr - $remote_user [$time_local] "$request" ''$status $body_bytes_sent "$http_referer" ''"$http_user_agent" "$http_x_forwarded_for"';access_log  /var/log/nginx/access.log  main;sendfile            on;tcp_nopush          on;tcp_nodelay         on;keepalive_timeout   65;types_hash_max_size 4096;include             /etc/nginx/mime.types;default_type        application/octet-stream;# Load modular configuration files from the /etc/nginx/conf.d directory.# See http://nginx.org/en/docs/ngx_core_module.html#include# for more information.include /etc/nginx/conf.d/*.conf;server {listen       88;server_name  _;root         /usr/share/nginx/html;# Load configuration files for the default server block.include /etc/nginx/default.d/*.conf;error_page 404 /404.html;location = /404.html {}error_page 500 502 503 504 /50x.html;location = /50x.html {}}# Settings for a TLS enabled server.##    server {#        listen       443 ssl http2;#        listen       [::]:443 ssl http2;#        server_name  _;#        root         /usr/share/nginx/html;##        ssl_certificate "/etc/pki/nginx/server.crt";#        ssl_certificate_key "/etc/pki/nginx/private/server.key";#        ssl_session_cache shared:SSL:1m;#        ssl_session_timeout  10m;#        ssl_ciphers HIGH:!aNULL:!MD5;#        ssl_prefer_server_ciphers on;##        # Load configuration files for the default server block.#        include /etc/nginx/default.d/*.conf;##        error_page 404 /404.html;#            location = /40x.html {#        }##        error_page 500 502 503 504 /50x.html;#            location = /50x.html {#        }#    }}
创建
[root@kube-master kubernetes]# kubectl  apply -f configmap.yaml #查看
[root@kube-master kubernetes]# kubectl  get configmap nginx-config  -o yaml
可视化界面查看:

2.使用ConfigMap
使用ConfigMap的方式,一种是通过环境变量的方式,直接传递pod,另一种是使用volume的方式挂载入到pod内。
2.1作为volume挂载使用
[root@kube-master kubernetes]# vim test-config.yaml
apiVersion: v1
kind: Pod
metadata:name: nginxlabels:name: nginx
spec:containers:- name: nginximage: 10.36.192.206:8088/library/nginx:1.20.2ports:- containerPort: 80volumeMounts:- name: nginx       ##挂载的名称mountPath: /etc/nginx/nginx.conf   #挂载路径subPath: nginx.conf    #这个文件不会覆盖其他文件,只代替原有的nginx.confvolumes:- name: nginx   #挂载的名称(与volumeMounts一样)configMap:name: nginx-config    #定义的configmap的名字#启动
##  kubectl  apply -f test-config.yaml
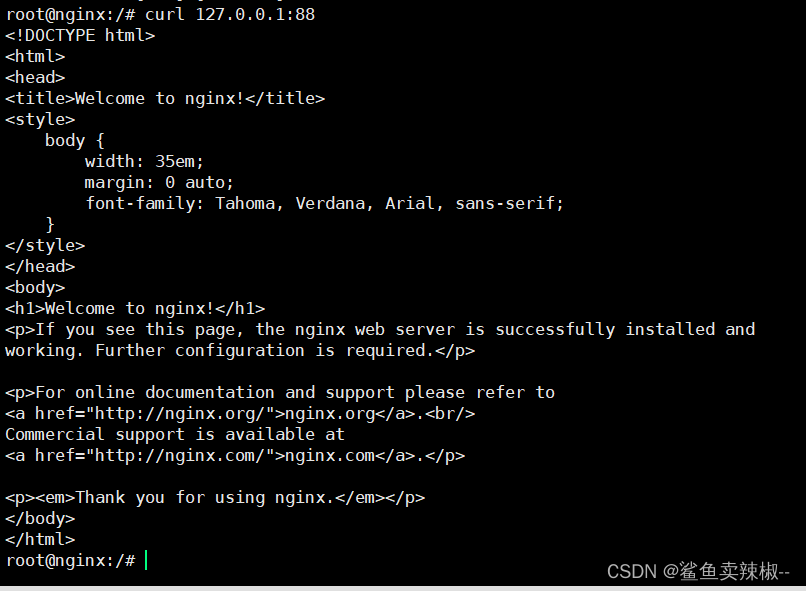
进入容器访问可以返回信息
2.2.作为环境变量
(1) 使用valueFrom、configMapKeyRef、name、key指定要用的key:
[root@kube-master kubernetes]# vim test-config.yaml
apiVersion: v1
kind: Pod
metadata:name: nginxlabels:name: nginx
spec:containers:- name: nginximage: 10.36.192.206:8088/library/nginx:1.20.2ports:- containerPort: 80env:         #专门在容器里面设置变量的关键字- name: NGINX_LEVEL        #这里的-name,是容器里设置的新变量的名字valueFrom:configMapKeyRef:name: nginx-config     #这里是来源于哪个configMapkey: nginx.level    #configMap里的key## kubectl  apply -f test-config.yaml
(2) 通过envFrom、configMapRef、name使得configmap中的所有key/value对 都自动变成环境变量:(configmap中定义的数据都会自动变成环境变量)
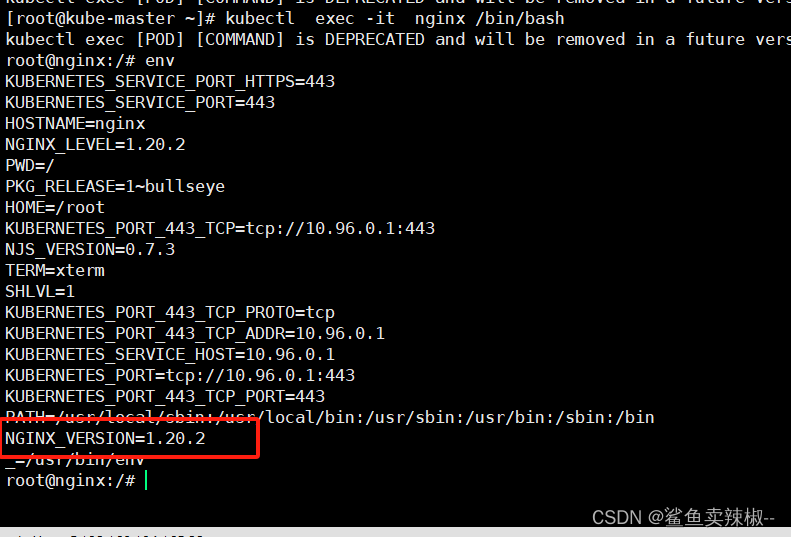
envFrom:- configMapRef:name: nginx-config进入容器查看环境变量生效

三.Downward API
Downward API
用于在容器中获取 POD 的基本信息,kubernetes原生支持。
Downward API提供了两种方式用于将 POD 的信息注入到容器内部:
1.环境变量:用于单个变量,可以将 POD 信息直接注入容器内部。
2.Volume挂载:将 POD 信息生成为文件,直接挂载到容器内部中去。
1.以环境变量的方式实现
通过Downward API来将 POD 的 IP、名称以及所对应的 namespace 注入到容器的环境变量中去,然后在容器中打印全部的环境变量。
使用fieldRef获取 POD 的基本信息
[root@kube-master kubernetes]# vim downword.yaml
apiVersion: v1
kind: Pod
metadata:name: test-downwardlabels:name: test-downward
spec:containers:- name: test-downwardimage: 10.36.192.206:8088/library/nginx:1.20.2resources:limits:memory: "128Mi"cpu: "500m"ports:- containerPort: 80env:- name: POD_NAME    #第一个环境变量的名字valueFrom:        #使用valueFrom方式设置fieldRef:            #关联一个字段metadata.name    fieldPath: metadata.name    #这个字段从当前运行的pod详细信息查看- name: POD_NAMESPACEvalueFrom:fieldRef:fieldPath: metadata.namespace- name: POD_IPvalueFrom:fieldRef:fieldPath: status.podIP
注意: POD 的 name 和 namespace 属于元数据,是在 POD 创建之前就已经定下来了的,所以使用 metadata 获取就可以了,但是对于 POD 的 IP 则不一样,因为POD IP 是不固定的,POD 重建了就变了,它属于状态数据,所以使用 status 去获取。
创建pod
#  kubectl  create  -f downword.yaml
pod/test-downward created
创建成功后进入容器查看环境变量
[root@kube-master ~]# kubectl  exec -it test-downward  /bin/bash
kubectl exec [POD] [COMMAND] is DEPRECATED and will be removed in a future version. Use kubectl exec [POD] -- [COMMAND] instead.
root@test-downward:/# env | grep POD
POD_NAME=test-downward
POD_NAMESPACE=default
POD_IP=10.244.233.2512.Volume挂载
通过Downward API将 POD 的 Label、等信息通过 Volume 以文件的形式挂载到容器的某个文件中去,然后在容器中打印出该文件的值来验证。
apiVersion: v1
kind: Pod
metadata:name: test-downwardlabels:name: test-downward
spec:containers:- name: test-downwardimage: 10.36.192.206:8088/library/nginx:1.20.2resources:limits:memory: "128Mi"cpu: "500m"ports:- containerPort: 80volumeMounts:- name: podinfomountPath: /opt/podinfovolumes:- name: podinfodownwardAPI:items:- path: labelsfieldRef:fieldPath: metadata.labels
创建pod
#  kubectl  create  -f downword.yaml
pod/test-downward created
进入容器查看数据已经挂在进来。
[root@kube-master ~]# kubectl  exec -it test-downward  /bin/bash
kubectl exec [POD] [COMMAND] is DEPRECATED and will be removed in a future version. Use kubectl exec [POD] -- [COMMAND] instead.
root@test-downward:/# cat /opt/podinfo/labels
name="test-downward"root@test-downward:/#
1. 使用 fieldRef 可以声明使用:
spec.nodeName - 宿主机名字
status.hostIP - 宿主机 IP
metadata.name - Pod 的名字
metadata.namespace - Pod 的 Namespace
status.podIP - Pod 的 IP
spec.serviceAccountName - Pod 的 Service Account 的名字
metadata.uid - Pod 的 UID
metadata.labels['<KEY>'] - 指定 <KEY> 的 Label 值
metadata.annotations['<KEY>'] - 指定 <KEY> 的 Annotation 值
metadata.labels - Pod 的所有 Label
metadata.annotations - Pod 的所有 Annotation
基本信息使用 下面方式查看需要什么数据在里面截取。
# kubectl  get pod nginx -o yaml
apiVersion: v1
kind: Pod
metadata:annotations:cni.projectcalico.org/containerID: 079e38db69022ad5436d47df8ffa99f0f624e75a17cf5eb7215ce52253c270b5cni.projectcalico.org/podIP: 10.244.9.118/32cni.projectcalico.org/podIPs: 10.244.9.118/32kubectl.kubernetes.io/last-applied-configuration: |{"apiVersion":"v1","kind":"Pod","metadata":{"annotations":{},"labels":{"name":"mysql"},"name":"mysql","namespace":"default"},"spec":{"containers":[{"env":[{"name":"MYSQL_ROOT_PASSWORD","valueFrom":{"secretKeyRef":{"key":"password","name":"mysecret"}}},{"name":"MYSQL_DATABASE","valueFrom":{"secretKeyRef":{"key":"database","name":"mysecret"}}}],"image":"10.36.192.206:8088/library/mysql:5.7","name":"mysql","ports":[{"containerPort":3306}],"resources":{"limits":{"cpu":"1000m","memory":"512Mi"}},"volumeMounts":[{"mountPath":"/opt/aaa","name":"ljh","readOnly":true}]}],"volumes":[{"name":"ljh","secret":{"items":[{"key":"password","path":"aren"}],"secretName":"mysecret"}}]}}creationTimestamp: "2023-12-15T12:24:55Z"labels:name: mysqlname: mysqlnamespace: defaultresourceVersion: "213151"uid: 34802837-648b-41f0-a77a-d59e784ee403
spec:containers:- env:- name: MYSQL_ROOT_PASSWORDvalueFrom:secretKeyRef:
.........
.........


)
)


—kubectl)


