k8s部署单机模式的minio和minio-client
- 一、k8s部署minio
- 1.1说明
- 1.2 yaml内容
- 1.3 步骤
- 1.3.1 创建资源
- 1.3.2 查看启动日志
- 1.3.3 查看svc并访问控制台
- 二、docker部署minio-client
- 2.1 查找镜像
- 2.2 运行镜像
- 2.3 绑定minio server
一、k8s部署minio
1.1说明
项目使用minio,准备在k8s环境部署一套minio试用。
1.关于minio的原理和概念参考:
https://mp.weixin.qq.com/s?__biz=MzI3MDM5NjgwNg==&mid=2247487162&idx=1&sn=39c683a43ec2678fbf6d767f6ab6dcc6&chksm=ead0f253dda77b459edaf514cf72fc03546f2c5075c7b131c34b34772ca3517cab170d94c056#rd
2. 官网k8s部署minio方法说明:
https://min.io/docs/minio/kubernetes/upstream/index.html
1.2 yaml内容
参考:
https://www.jianshu.com/p/2d45990dd652
https://raw.githubusercontent.com/minio/docs/master/source/extra/examples/minio-dev.yaml文档yaml内容:
# Deploys a new Namespace for the MinIO Pod
apiVersion: v1
kind: Namespace
metadata:name: minio-dev # Change this value if you want a different namespace namelabels:name: minio-dev # Change this value to match metadata.name
---
# Deploys a new MinIO Pod into the metadata.namespace Kubernetes namespace
#
# The `spec.containers[0].args` contains the command run on the pod
# The `/data` directory corresponds to the `spec.containers[0].volumeMounts[0].mountPath`
# That mount path corresponds to a Kubernetes HostPath which binds `/data` to a local drive or volume on the worker node where the pod runs
#
apiVersion: v1
kind: Pod
metadata:labels:app: minioname: minionamespace: minio-dev # Change this value to match the namespace metadata.name
spec:containers:- name: minioimage: quay.io/minio/minio:latestcommand:- /bin/bash- -cargs: - minio server /data --console-address :9090volumeMounts:- mountPath: /dataname: localvolume # Corresponds to the `spec.volumes` Persistent VolumenodeSelector:kubernetes.io/hostname: kubealpha.local # Specify a node label associated to the Worker Node on which you want to deploy the pod.volumes:- name: localvolumehostPath: # MinIO generally recommends using locally-attached volumespath: /mnt/disk1/data # Specify a path to a local drive or volume on the Kubernetes worker nodetype: DirectoryOrCreate # The path to the last directory must exist
实际使用到的minio.yaml配置文件:
apiVersion: v1
kind: PersistentVolume
metadata:labels:app: miniorelease: minioname: minionamespace: sscs-dev
spec:accessModes:- ReadWriteOncecapacity:storage: 10GivolumeMode: FilesystemhostPath:path: /home/cicd/sscs-dev/minio
---
apiVersion: v1
kind: PersistentVolumeClaim
metadata:# This name uniquely identifies the PVC. Will be used in deployment below.name: minio-pv-claimlabels:app: minio-storage-claimnamespace: sscs-dev
spec:# Read more about access modes here: https://kubernetes.io/docs/user-guide/persistent-volumes/#access-modesaccessModes:- ReadWriteOnceresources:# This is the request for storage. Should be available in the cluster.requests:storage: 10Gi# Uncomment and add storageClass specific to your requirements below. Read more https://kubernetes.io/docs/concepts/storage/persistent-volumes/#class-1#storageClassName:
---
apiVersion: apps/v1
kind: Deployment
metadata:# This name uniquely identifies the Deploymentname: minio-deploymentnamespace: sscs-dev
spec:strategy:type: Recreateselector:matchLabels:app: miniotemplate:metadata:labels:# Label is used as selector in the service.app: miniospec:# Refer to the PVC created earliervolumes:- name: storagepersistentVolumeClaim:# Name of the PVC created earlierclaimName: minio-pv-claimimagePullSecrets:- name: sscs-secretcontainers:- name: minio# Pulls the default MinIO image from Docker Hubimage: artifact.srdcloud.cn/khala_insight-release-docker-local/minio:latest# 注意:--console-address ":5000"用来固定控制台访问端口,否则页面会无法访问控制台command:- /bin/sh- -c- minio server /data --console-address ":5000"args:- server- /storageenv:# MinIO access key and secret key- name: MINIO_ACCESS_KEYvalue: "admin123"- name: MINIO_SECRET_KEYvalue: "admin123"ports:- name: datacontainerPort: 9000protocol: "TCP"- name: consolecontainerPort: 5000protocol: "TCP"# Mount the volume into the podvolumeMounts:- name: storage # must match the volume name, abovemountPath: "/storage"
---
apiVersion: v1
kind: Service
metadata:namespace: sscs-devname: minio-servicespec:type: NodePortports:- name: dataport: 9000targetPort: 9000protocol: TCPnodePort: 31955- name: consoleport: 5000targetPort: 5000protocol: TCPnodePort: 32108selector:app: minio
注意事项:
要添加--console-address ":5000"命令参数来固定控制台端口,否则页面会无法访问。
1.3 步骤
1.3.1 创建资源
执行命令:kubectl apply -f minio.yaml
1.3.2 查看启动日志
kubectl get pod -n sscs-dev | grep minio查看pod运行状态,正常:

kubectl logs -f minio-deployment-54648b586-kxcbn -n sscs-dev查看pod运行日志:

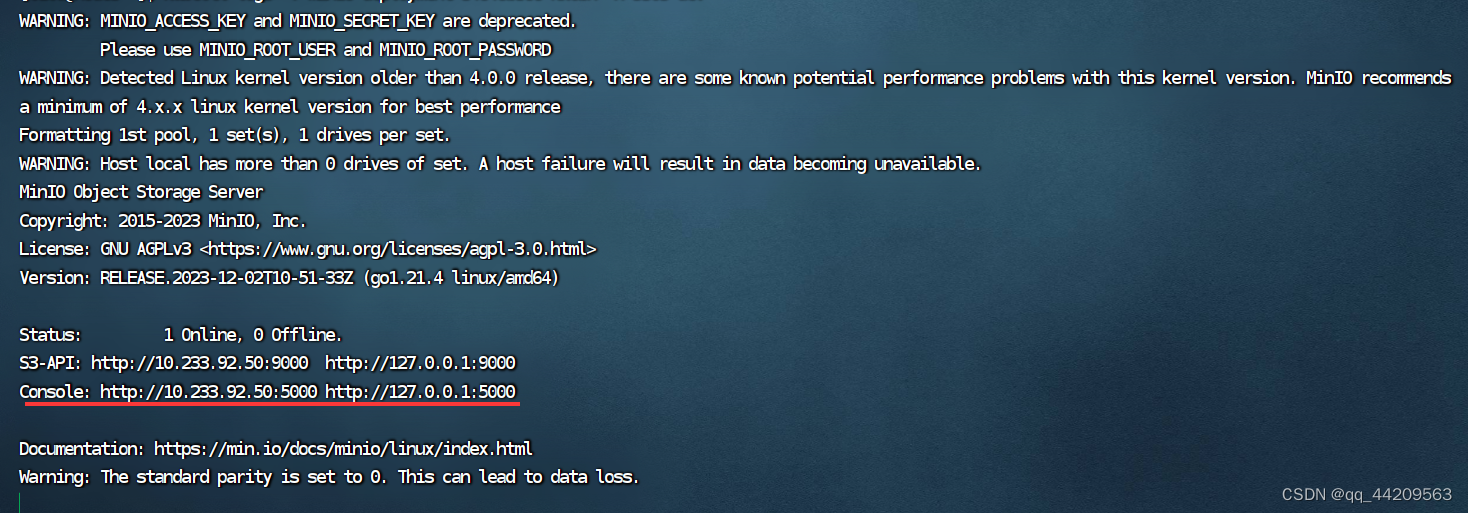
根据日志可获取以下信息:
api端口为9000,控制台端口为5000控制台端口为5000,说明命令参数--console-address ":5000"生效。
1.3.3 查看svc并访问控制台
执行命令:kubectl get svc -n sscs-dev | grep minio

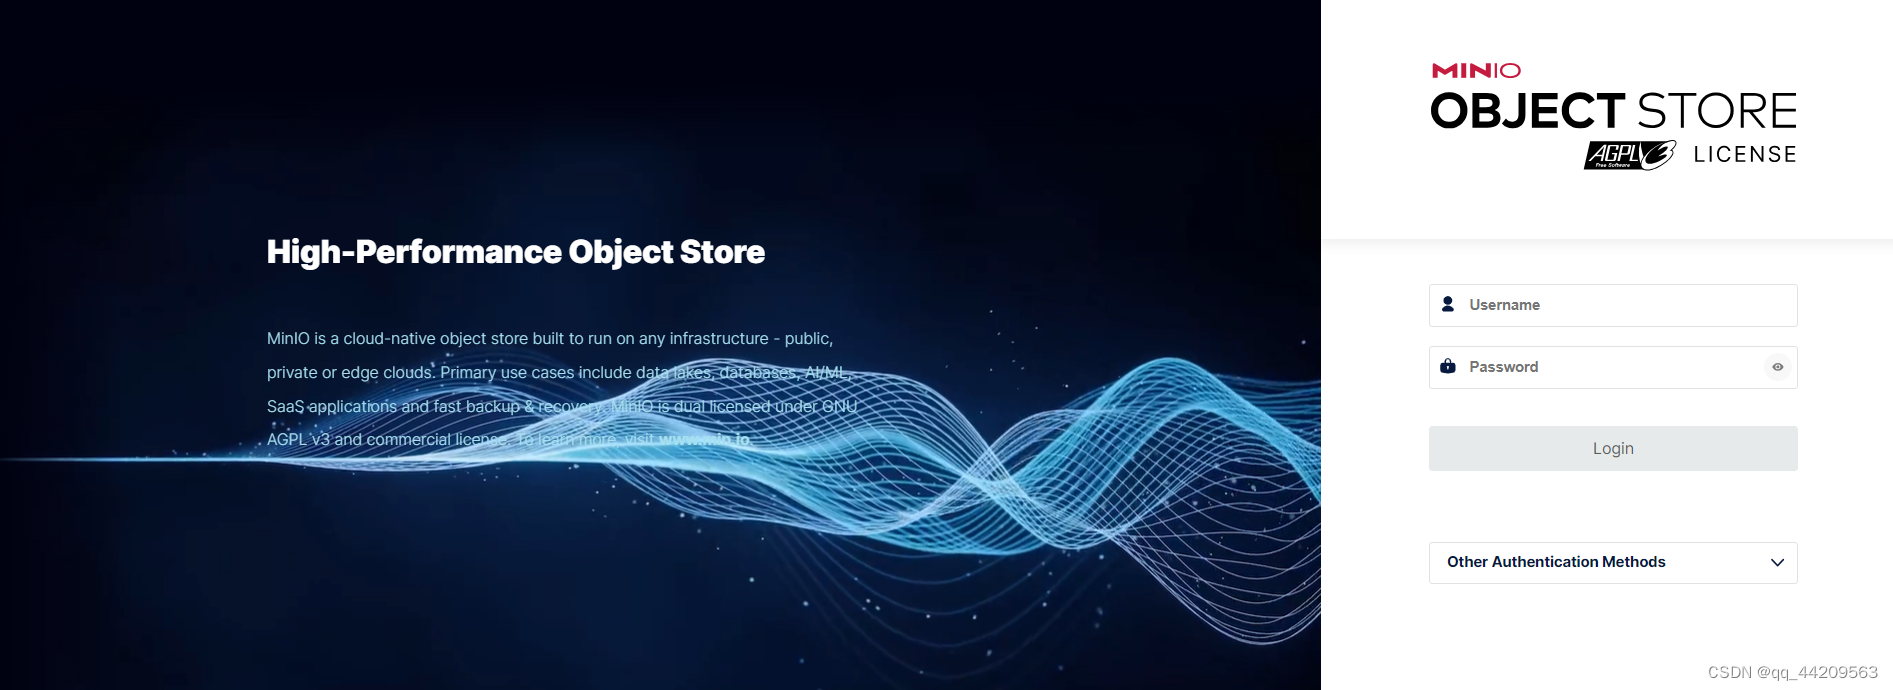
yaml中使用的svc是nodePort类型,可以看到以上控制台5000端口映射主机32108端口,则访问地址为: 服务器ip:32108:

出现以上页面表示成功
二、docker部署minio-client
参考文章:
https://blog.csdn.net/weixin_45821811/article/details/119116172
2.1 查找镜像
执行命令docker search minio/mc

2.2 运行镜像
执行命令: docker run -it --entrypoint=/bin/sh minio/mc
参数说明:
-i: 以交互模式运行容器,通常与 -t 同时使用;
-t: 为容器重新分配一个伪输入终端,通常与 -i 同时使用;
注意:
启动容器时要加上参数:-it --entrypoint=/bin/sh,启动后自动进入容器终端,否则容器一启动就会退出。
2.3 绑定minio server
- 执行完容器启动命令:
docker run -it --entrypoint=/bin/sh minio/mc之后,会自动进入容器终端。 - 此时在容器内部执行命令绑定minio server:
mc config host add minio http://132.1xx.xx.5:31955
说明:
mc config host add minio http://132.1xx.xx.5:31955
minio 为别名,可自定义
http://132.1xx.xx.5:31955 为minio服务部署的ip和api映射的主机端口,1.3.3 中可查看api端口9000映射的主机端口
- 命令行会要求输入
access key和secret key(参考minio.yaml中配置的值)

至此minio-client部署完成,可以使用相关命令来直接操作minio server
 导致的 StackOverflowError 异常)


)
———JS中的异步编程与Promise)

