1. 链表
1.1 结构组成
链表是一种物理存储结构上非连续存储结构,数据元素的逻辑顺序是通过链表中的引用链接次序实现的 。
链表的结构如下图所示,是由很多个节点相互通过引用来连接而成的;每一个节点由两部分组成,分别数据域(存放当前节点的数据)和next域(用来存放连接下一个节点的引用);
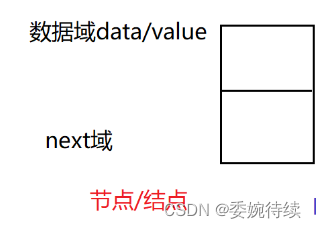
下图是链表的结构,每一个节点都有一个地址,方便前一个节点的next域来存放。多个节点通过引用连接成整个链表。

 实际在内存中每个节点的地址是随机的,只不过用这个节点的next,找到了下一个节点的地址,由此实现链接。
1.2 链表分类
主要通过链表方向,是否循环,是否带箭头主要分为以下六个特色;

下面是一些不同种类的链表图解:
1. 单向或者双向

2. 带头或者不带头

3. 循环或者非循环

将以上六种单一种类进行组合可以构成一下8种链表

虽然有这么多的链表的结构,但是我们重点掌握两种:
无头单向非循环链表:结构简单,一般不会单独用来存数据
无头双向链表:在Java的集合框架库中LinkedList底层实现就是无头双向循环链表。
2.无头单向非循环链表的实现
2.1 自定义MyArrayList类
建立一个Ilist接口,在里面构造mysinglelist链表要实现的抽象方法;
public interface IList {//头插法void addFirst(int data);//尾插法void addLast(int data);//任意位置插入,第一个数据节点为0号下标void addIndex(int index,int data);//查找是否包含关键字key是否在单链表当中boolean contains(int key);//删除第一次出现关键字为key的节点void remove(int key);//删除所有值为key的节点void removeAllKey(int key);//得到单链表的长度int size();void clear();void display();
}
无头单向非循环链表的节点是由两个属性(value域和next域构成的),同时也要在自定义MyArrayList类里面使用内部类创建链表节点类,之后再链表类里面创建一个头结点来代表当前链表的引用;同时实现我们之前创建的接口,接下来重写接口里面的方法,让其能够具体化;
public class MySingleList implements IList {//创建链表节点//节点的内部类static class ListNode{public int value;public ListNode next;//表示下一个节点的引用public ListNode(int value){this.value = value;}}public ListNode head;@Overridepublic void addFirst(int data) {}@Overridepublic void addLast(int data) {}@Overridepublic void addIndex(int index, int data) {}@Overridepublic boolean contains(int key) {return false;}@Overridepublic void remove(int key) {}@Overridepublic void removeAllKey(int key) {}@Overridepublic int size() {return 0;}@Overridepublic void clear() {}@Overridepublic void display() {}
}
}
下面代码主要是创建多个节点
public void createList() {ListNode node1 = new ListNode(12);ListNode node2 = new ListNode(23);ListNode node3 = new ListNode(34);ListNode node4 = new ListNode(45);ListNode node5 = new ListNode(56);node1.next = node2;node2.next = node3;node3.next = node4;node4.next = node5;this.head = node1;}2.2 遍历链表
思路:
1、当前节点是怎么走到下一个节点的
2、当遍历链表时,如何判断当前链表的所有节点都遍历完
首先建立一个当前节点cur,通过cur来指向next域里面的节点地址并访问和输出操作来完成整个链表的遍历;让cur的next域指向(存放)下一个节点的地址并访问,以此类推逐步完成整个链表的遍历(问题一);如果cur指向的下一个节点的next域里存放的不是地址,而是空指针,则当前的链表被遍历即将结束(问题二);
下面是重写的遍历链表具体的方法:
@Overridepublic void display() {ListNode cur = head;while (cur != null){System.out.print(cur.value+"->");cur = cur.next;}System.out.println(" ");} public static void main(String[] args) {MySingleList list = new MySingleList();list.createList();list.display();}下面代码的执行结果:

2.3 得到单链表的长度
对整个链表进行遍历,使用计数器进行记录遍历的次数,最后将计数器的值返回即可,下图代码是该方法的具体实现;
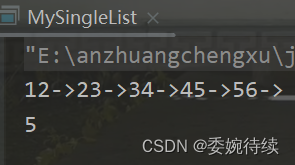
@Overridepublic int size() {int count = 0;ListNode cur = head;while (cur != null){count++;cur = cur.next;}return count;}public static void main(String[] args) {MySingleList list = new MySingleList();list.createList();list.display();System.out.println(list.size());}下面代码的执行结果:
2.4 查找是否包含关键字
对链表进行遍历,然后将关键字key和链表数值进行比较,如果存在key关键字则返回true;反之则返回false;
方法具体实现的代码如下:
@Overridepublic boolean contains(int key) {ListNode cur = this.head;while (cur != null){if ( cur.value==key){return true;}cur = cur.next;}return false;}测试代码和执行结果如下:
public static void main(String[] args) {MySingleList list = new MySingleList();list.createList();list.display();System.out.println(list.contains(45));} 
2.5头插法
思路:
1、将之前第一个节点的地址存储到我们新添加的节点的next域里面;
2、将新添加的节点赋给head,作为新链表的头节点,链表图解如下图所示:

具体实现头插法的方法如下:
@Overridepublic void addFirst(int data) {ListNode node = new ListNode(data);if (this.head == null){this.head = node;}else {node.next = this.head;this.head= node;}测试代码及结果:
public static void main(String[] args) {MySingleList list = new MySingleList();list.createList();list.display();list.addFirst(1);list.addFirst(0);list.display();} 
2.6尾插法
思路:
1、首先对该链表进行遍历,当遍历到最后一个节点时,将新添加的节点的地址给最后一个节点的next域。
2、如果该链表为空,直接将该新增节点设为头节点
链表图解:

具体实现方法带吗如下:
@Overridepublic void addLast(int data) {ListNode node = new ListNode(data);ListNode cur = this.head;if (this.head == null){this.head = node;}else {//一直找最后一个节点while (cur.next != null){cur = cur.next;}cur.next = node;}}
测试代码及结果:
public static void main(String[] args) {MySingleList list = new MySingleList();list.createList();list.display();list.addLast(9);list.addLast(10);list.display();}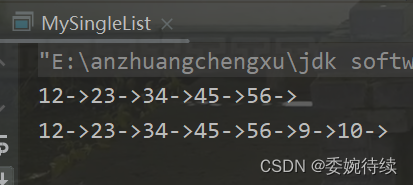
分析总结:头插法的时间复杂度为o(1);尾插法的时间复杂度为o(N);
2.7任意位置插入
思路:
1、需要插入的位置必须为合法,如果不合法,我们会抛出一个异常进行提醒,所以首先自定义一个异常;
public class ListIndexOutOfException extends RuntimeException{public ListIndexOutOfException(String msg){super(msg);}
}
2、任意位置插入,首先分几种情况,插在开头,插在结尾,插在中间
2.1 当插在链表开头和结尾时,可以使用头插法和尾差法;
2.2 当插在其他的位置时,首先让cur走到index前面一个节点的位置(此处创建一个方法)(这时候就需要考虑将下一个节点加在index的位置时如何处理建立连接的顺序);其次注意建立连接的时候,一定要先建立添加节点和后节点的连接,其次在确立添加节点和前一个节点的位置,链表图解如下:

具体实现方法代码如下:
@Overridepublic void addIndex(int index, int data) {if(index < 0 || index > size()) {//抛自定义的异常throw new ListIndexOutOfException("你当前输入的索引有问题");}if(index == 0) {addFirst(data);return;}if(index == size()) {addLast(data);return;}ListNode cur = searchPrev(index);//node之前的一个节点ListNode node = new ListNode(data);node.next = cur.next;cur.next = node;}private ListNode searchPrev(int index) {//该方法是找到添加节点node在index时//index之前的节点的索引ListNode cur = this.head;int count = 0;while (count != index-1 ) {cur = cur.next;count++;}return cur;}测试代码及结果如下:
public static void main(String[] args) {MySingleList list = new MySingleList();list.createList();list.display();list.addIndex(2,2);list.addIndex(3,3);list.display();}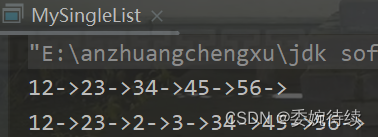
2.8删除第一次出现关键字为key的节点
思路:大体分为以下四种情况
1.链表为空链表,一个节点也没有
2.我们所需要删除数据所在的节点在第一个
3.遍历完所有的链表节点,发现没有要删除的数据
4.有要删除的数据且不是第一个节点
具体实现方法代码如下:
public void remove(int key) {if(this.head == null) {//一个节点都没有 无法删除!return;}if(this.head.value == key) {this.head = this.head.next;return;}//1. 找到前驱ListNode cur = findPrev(key);//2、判断返回值是否为空?if(cur == null) {System.out.println("没有你要删除的数字");return;}//3、删除ListNode del = cur.next;cur.next = del.next;}private ListNode findPrev(int key) {//找到要删除节点的前一个节点ListNode cur = this.head;while (cur.next != null) {if(cur.next.value == key) {return cur;}cur = cur.next;}return null;}测试代码及结果如下:
public static void main(String[] args) {MySingleList list = new MySingleList();list.createList();list.display();list.addIndex(2,2);list.addIndex(3,3);list.remove(100);list.display();}
2.9回收链表
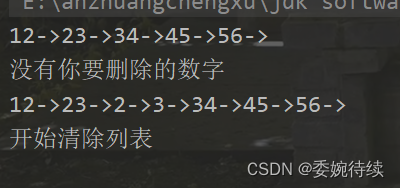
将头节点置为空即可,代码和结果如下所示;
@Overridepublic void clear() {this.head = null;} 
ps:本次的内容就到这里了,如果你喜欢的话,就请一键三连哦!!!
)


)

插值方法的计算方法与源程序)
)


-- 防火墙篇)


