文章目录
- 一、简单了解什么是 CSS
- 二、CSS 选择器
- 1.标签选择器
- 2.类选择器
- 3.ID 选择器
- 4.后代选择器
- 5.子选择器
- 6.伪类选择器
- 三、字体属性
- 1.设置字体家族
- 2.设置字体大小
- 3.设置字体粗细
- 4.文字倾斜
- 四、文本属性
- 1.文本对齐
- 2.文本装饰
- 3.文本缩进
- 4.背景设置
- 五、圆角矩形
- 六、CSS 盒子模型
- 1.介绍边框与外边框
- 2.介绍内边框
- 七、弹性布局
一、简单了解什么是 CSS
CSS 的工作就是将网页中元素的排版进行精确的控制,实现美化页面的效果。
CSS的基本语法规则如下:
选择器 + {一条 / N条声明}
对于 CSS 有下面几种写的方式:
- 内部样式
使用 style 标签,直接将 CSS 写入到 html 文件中。
<p>这是内部样式</p><!--内部样式--><style>p {color: red;font-size: 30px;}</style>

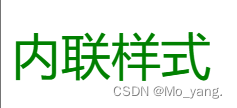
- 内联样式
同样使用 style 标签,针对指定的元素设置样式。(此时只对当前元素生效)
<p style="color: green; font-size: 40px;"> 内联样式</p>
- 外部样式
将 CSS 代码单独作为一个 .css 文件,通过 link 标签,让 html 引入该文件。
这是 .css 文件
p { color: blue;font-size: 50px;
}
这是 html 的代码
<!--这里是外部样式的引入方式--><link rel="stylesheet" href="style.css"><p>外部样式的测试</p>

二、CSS 选择器
1.标签选择器
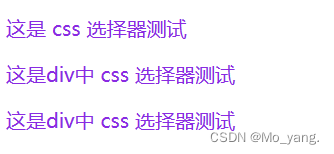
在 style 标签中使用 {},在 { 前面写上标签名称。 此时,就意味着会选中当前页面中所有指定的标签。
<style>p{color: blueviolet;}</style><p>这是 css 选择器测试</p><div><p>这是div中 css 选择器测试</p><p>这是div中 css 选择器测试</p>这是一个 div</div>
2.类选择器
可以创建 CSS 类,手动来指定哪些元素使用这个类。
<style>/* 此处定义一个 css 类,名字为 one */.one{color: aqua;}.two{color: gray;}.three{color: fuchsia;}.four{font-size: 30px;}</style><div class ="one">这是第一个div</div><div class="two">这是第二个div</div><div class="three">这是第三个div</div>

到这里,我们已知类选择器的使用方式,但是,还需要注意:
一个类,可以被一个元素引用,也可以被多个元素引用。
一个元素可以引用一个类,也可以引用多个类。
<div class ="one four">这是引用了多个类的div</div>

3.ID 选择器
html 中的每个元素,都是可以设置一个唯一的 id 作为元素的身份标识。
<style>#oneDiv{color: darkred;}#twoDiv{color: darkorange;}</style><div id="oneDiv">这是一个测试ID选择器的div</div><div>这是一个测试ID选择器的另一个div</div id="twoDiv">

总结,类选择器 和 ID选择器 两者的特点。
类选择器, 是可以让多个元素应用用一个类的。
ID 选择器,只能针对唯一元素生效,一个页面中只能有唯一的 ID。
4.后代选择器
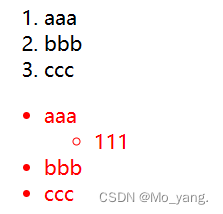
<style>ul li {color: red;}</style>
这里代码的含义是,先在页面中找到所有的 ul,然后在这些 ul 中找到所有的 li。
注:
这里的 li 只要是 ul 的后代即可,不一定非得是 “子元素”。
<ol><li>aaa</li><li>bbb</li><li>ccc</li></ol><ul><li>aaa</li><ul><li>111</li> </ul><li>bbb</li><li>ccc</li></ul>
5.子选择器
只是找到匹配的单一的子元素,不找其他孙子元素之类的。
<style>.test>ul{color: rgb(223, 92, 5);}</style>
这里的代码含义是,只在 .test 的子元素中找到 ul 标签。
<div class="test"><ul><li>aa</li><li>bb</li><li>cc</li> </ul></div>

6.伪类选择器
前面 的选择器是选中某个元素。
伪类选择器选中的是某个元素的特定状态。
:hover 鼠标悬停时的状态。
:active 鼠标按下时的状态。
<style>.one1:hover{color: green;font-size: 30px;}.one1:active{color: greenyellow;font-size: 50px;}</style><div class="one1">这是一个测试伪类选择器的div</div>


三、字体属性
1.设置字体家族
font - family 当前使用哪种字体来显示。
<style>.one{font-family: 宋体;}</style><div class="one">这是一个div</div>

注: 这个属性指定的字体,需要是系统已经安装了的。
2.设置字体大小
font - size 单位是 px(像素)
<style>.one{font-size: 40px;}</style><div class="one">这是一个div</div>

3.设置字体粗细
font - weight
实际设置是有两种设置风格。
1.使用单词
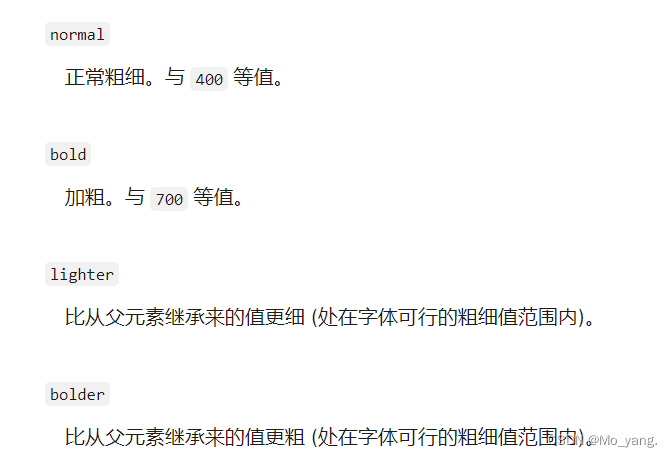
<style>.one{font-weight: bold;}</style><div class="one">这是一个div</div>

2.使用数字
<style>.one{font-weight: 100;}</style><div class="one">这是一个div</div>

4.文字倾斜
/* 设置倾斜 */
font-style: italic;
/* 取消倾斜 */
font-style: normal;

四、文本属性
1.文本对齐
text - align 属性来设置对齐方式。
对齐方式有下面三种:
center:居中对齐
left:左对齐
right:右对齐
在这里就只演示 center 居中对齐.
<style>.one{text-align: center;}</style><div class="one">这是一个div</div>

2.文本装饰
text-decoration 属性来进行文本装饰。
装饰的常用取值有下面几个:
underline 下划线
none 什么都没有,可以给 a 标签去掉下划线
overline 上划线
line - through 删除线
下划线
<style>.one{text-decoration: underline;}</style><div class="one">这是一个div</div>

none
<style>a{text-decoration: none;}</style><br><a href="#">百度</a><br>

overline 上划线
<style>.one{text-decoration: overline;}</style><div class="one">这是一个div</div>

line - through 删除线
<style>.one{text-decoration: overline;}</style><div class="one">这是一个div</div>

3.文本缩进
text - indent 每个段落首行缩进两个文字。
这里常用的单位是 em 。这个单位表示的是一个相对的量。是以问字尺寸为基础进行设置的。
<style>.one{font-size: 40px;text-indent: 2em;line-height: 60px;}</style><div class="one">文本缩进</div>

这就很明显的展示出了是相对于文字进行缩进的。
这里要说明一个新名词 —— 行高
行高 = 文字高度 + 行间距
4.背景设置
设置背景分为两种:
1.设置背景颜色: background - color 设定单一颜色。
2.设置背景图片: background - image:url(图片路径);
这里我直接演示如何设置背景图片。
<style>.one{background-image: url(touxiang.png);/* 这里设定一个较大的高度便于观察 */height: 1000px;}</style><div class="one">这是背景Lorem ipsum dolor sit amet consectetur adipisicing elit. Labore nemo, necessitatibus beatae voluptatibus rem esse, quam unde voluptatem excepturi impedit pariatur nulla nobis facilis voluptates odit delectus, incidunt qui deleniti.</div>

如图所示,会出现一个这样平铺的效果。
background - repeat: no-repeat 这段代码可以解决图片在页面平铺的问题。
<style>.one{background-image: url(touxiang.png);/* 这里设定一个较大的高度便于观察 */background-repeat: no-repeat; height: 1000px;}</style><div class="one">这是背景Lorem ipsum dolor sit amet consectetur adipisicing elit. Sit vel soluta cupiditate laborum ipsa ex voluptatibus obcaecati, esse quisquam nisi, nulla facilis saepe consectetur voluptates repellendus magnam voluptas nostrum optio.</div>
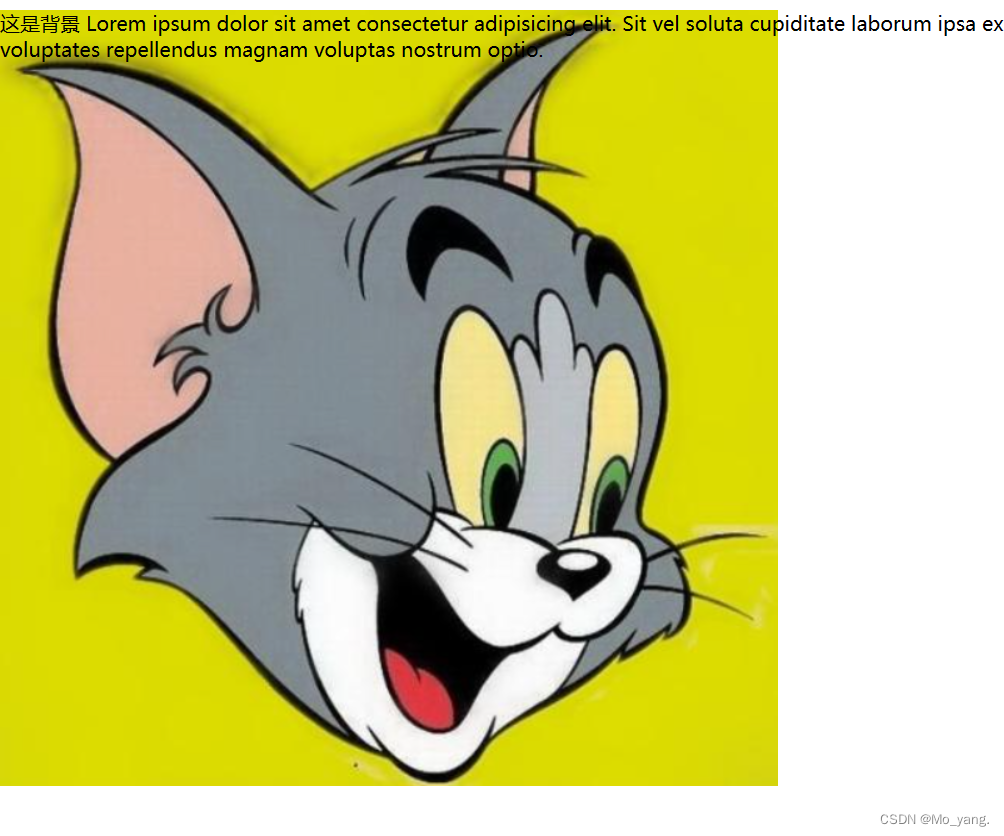
此时,我们有会发现一个问题,就是背景图片出现在了左上角。如果我们想将图片转移到中间,呢么,background-position:
center center; 这串代码可以解决问题。
这里就不在演示。
background - size 设置背景图的尺寸。
由此,来实现背景图片的页面全覆盖。
<style>.one{background-image: url(touxiang.png);/* 这里设定一个较大的高度便于观察 */background-repeat: no-repeat; height: 1000px;background-position: center center;background-size: cover;}</style><div class="one">这是背景Lorem ipsum dolor sit amet consectetur adipisicing elit. Sit vel soluta cupiditate laborum ipsa ex voluptatibus obcaecati, esse quisquam nisi, nulla facilis saepe consectetur voluptates repellendus magnam voluptas nostrum optio.</div>
注: 这里的截图不好展示,大家可以自行试验一下。
五、圆角矩形
在我们编辑页面时,可以使用 div 通过限制其高度,宽度。以此来实现一个矩形。
但是,有时需要通过圆角矩形来让页面更加美化。
对此,使用 border-radius: 可以实现需求。
<style>.one{/* 通过设置宽高来限制范围 */width: 200px;height: 100px;/* 设置矩形的背景颜色 */background-color: black;color: white;text-align: center;line-height: 100px;/* 设定矩形的角的弧度像素数 */border-radius: 10px;} </style><div class="one"><p>这是一个测试圆角矩形的div </p></div>
六、CSS 盒子模型
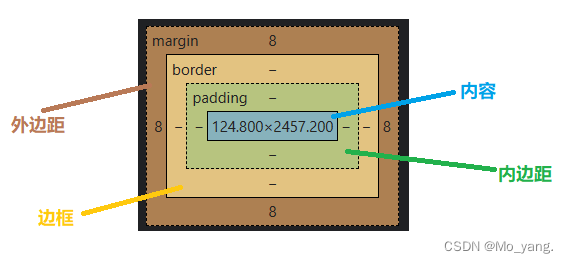
如上图所示,这就是一个 html 的元素基本布局规则。
1.介绍边框与外边框
要改变边框属性需要使用到一个关键字 border。
默认情况下,直接使用 border 是直接设置了四个方向。
要实现准确的设置还有下面的操作:
border - left: 设置左边框
border - right:设置右边框
border - top:设置顶部边框
border - bottom:设置下方边框
为了方便后面的解释,这里在引入一个关键字。
margin-bottom: 这个关键字是控制外边距,即,控制盒子与盒子之间的距离。
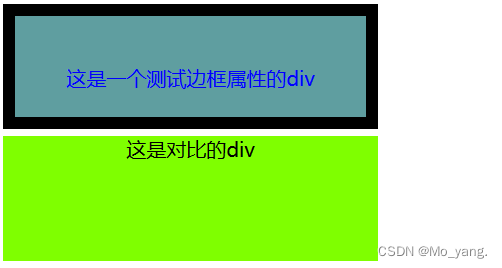
<style>.one{width: 300px;height: 100px;background-color: cadetblue;color: blue;text-align: center;line-height: 100px;border: 10px black solid;/* 控制外边距让两个元素之间有间隙 */margin-bottom: 5px;} /*这是对比元素*/.contrast{width: 300px;height: 100px;background-color: chartreuse;color: black;text-align: center;/* 控制外边距让两个元素之间有间隙 */margin-bottom: 10px;}</style><div class="eight">这是一个测试边框属性的div </div><div class="contrast">这是对比的div</div>

如上图所示,我们发现边框的添加,会导致盒子的撑大。
对此,这里再引入一个属性 box-sizing: border-box;
.one{width: 300px;height: 100px;background-color: cadetblue;color: blue;text-align: center;line-height: 100px;border: 10px black solid;box-sizing: border-box; /* 让两个元素之间有间隙 */margin-bottom: 5px;}
这里介绍几种边框样式:
- 粗细: border-width
- 样式: border-style,
- 默认没边框.
- 实线边框 solid
- 虚线边框 dashed
- 点线边框 dotted
- 颜色: border-color
2.介绍内边框
对于内边框,这里的属性关键字是 padding
padding 在这里应用有下面几种形式
- padding:10px; 表示四个方向都是 10
- padding:10px 20px; 表示上下边距是10,左右边距是 20
- padding:10px 20px 30px 40px; 上右下左(顺时针方向设定)
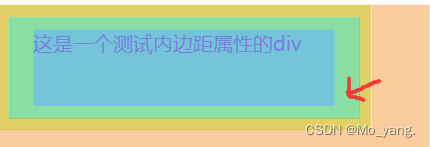
这里使用第二种形式解释:
<style>.one{width: 300px;height: 100px;background-color: aquamarine;color: blueviolet;text-align: left;/* line-height: 100px; */border: 10px rgb(168,168,0) solid;box-sizing: border-box;padding: 10px 20px;margin-bottom: 15px;}</style><div class="nine">这是一个测试内边距属性的div</div >
七、弹性布局
首先,我们先创建出一个 div,内部包含三个 span
<style>div{width: 100%;height: 150px;background-color: red;}div>span{background-color: green;width: 100px;height: 100px;}</style><div><span>1</span><span>2</span><span>3</span></div>

开启弹性布局
display:flex;
要给水平排列的父元素,设置 flex。这样水平方向上的尺寸边距就会变得比较可控。
设置元素的水平排列方式
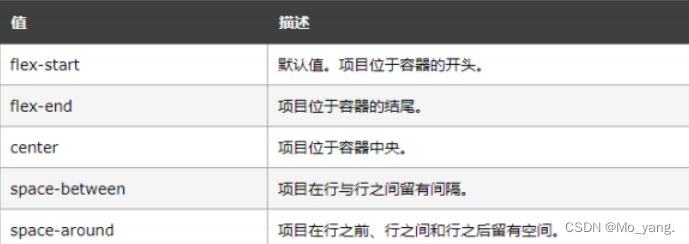
justify-content: space-around;
这里的排列方式的值,常用的有下面几条:
设置元素的垂直排列方式
align-items:
这里展现一个简单调整过的界面
<style>div{width: 100%;height: 150px;background-color: red;display: flex;justify-content: space-around;align-items: center;}div>span{background-color: green;width: 100px;height: 100px;}</style><div><span>1</span><span>2</span><span>3</span></div>
码子不易,您小小的点赞是对我最大的鼓励!!!


![Set.toArray(new String[size]) 和 Set.toArray(new String[0]) 区别](http://pic.xiahunao.cn/Set.toArray(new String[size]) 和 Set.toArray(new String[0]) 区别)

)


)


