一直对开源UI组件库比较感兴趣,摸索着开发了一套,虽然还只是开始,但是从搭建到发布这套流程基本弄明白了,现在分享给大家,希望对同样感兴趣的同学有所帮助。
目前我的这套名为hasaki-ui的组件库仅有两个组件,大致成果如下,后续有时间会继续完善。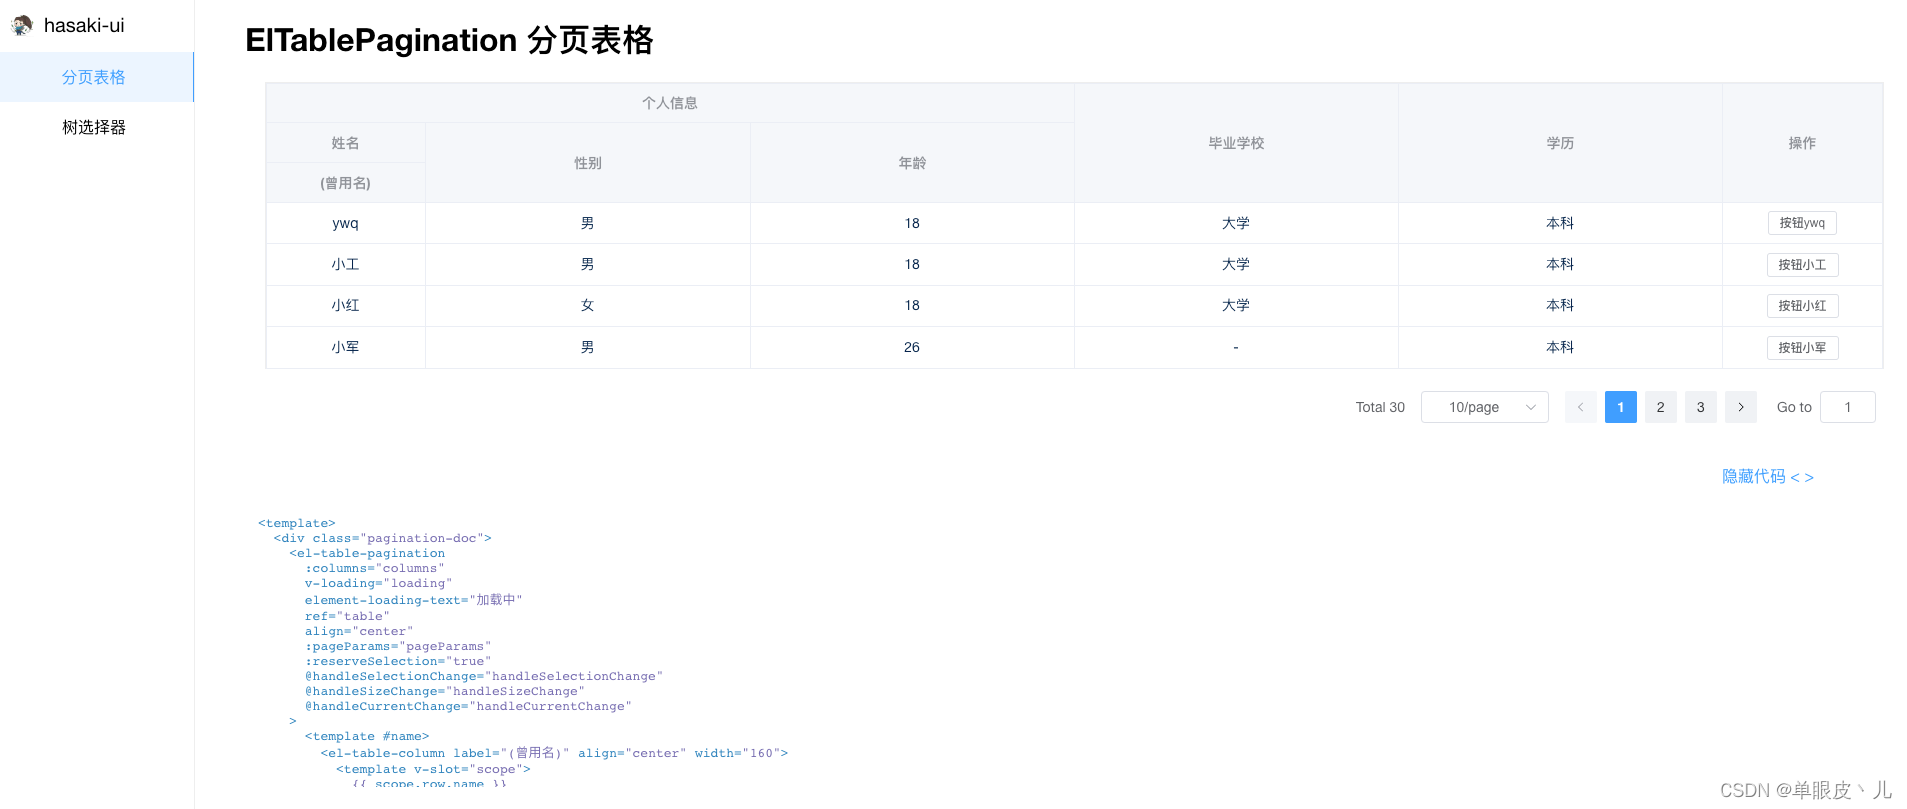
该项目采用的技术栈为Vite + Vue3,还使用了一些基本的Markdown知识,阅读本文档前,希望你至少对vue有些基础,那么我们正式开始。
一、创建一个Vite项目
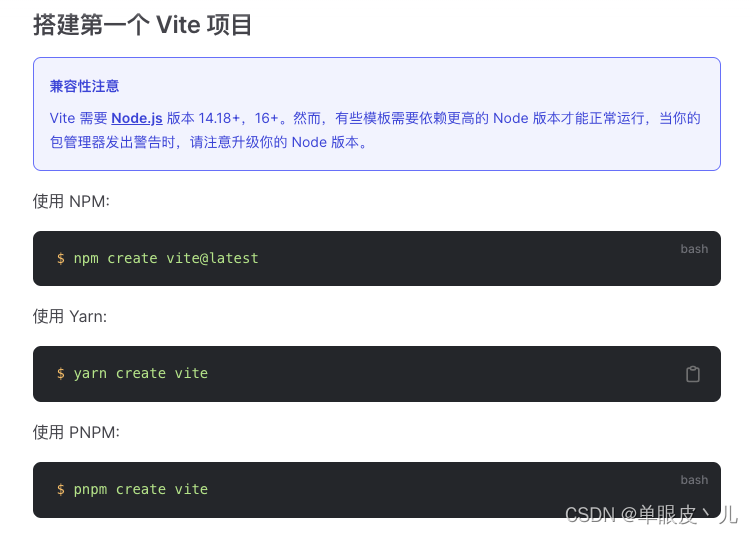 参照vite官网,打开命令行,执行上述命令之一,按提示操作即可,创建完成后,你得到了一个以你创建的项目名为名的一个文件夹,我的为hasaki-ui,直接以成品进行说明吧。
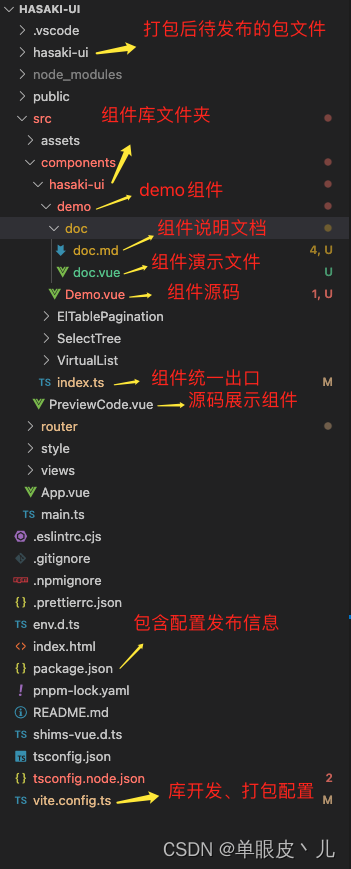
二、组件开发
本文重点不在于某个组件的开发,而是库开发的配置、发布流程,所以在此以一个很简单的demo组件作为说明。

doc.md为组件的说明文档,一般是用 Markdown 来写。这里我们需要使用 vite-plugin-vue-markdown插件来将 md 文件转换成 vue 文件。
// doc.md
<script setup>
import doc from './doc.vue';
import PreviewCode from '@/components/PreviewCode.vue'
</script># DEMO<doc/>
<PreviewCode compName="demo" />
doc.vue 为展示demo组件的vue文件
// doc.vue
<template><div class="demo-doc"><Demo /></div>
</template>
<script lang="ts">
export default {name: 'DemoDoc'
}
</script>
<script lang="ts" setup></script>
<style lang="scss" scoped>
.demo-doc {width: 100%;height: 100%;padding: 20px;
}
</style>
库组件
// Demo.vue
<template><div class="demo">Demo is here</div>
</template>
<script lang="ts">
export default {name: 'Demo'
}
</script>
<script lang="ts" setup>
import { onMounted } from 'vue'onMounted(() => {console.log('demo 出现啦')
})
// endregion
</script>
<style lang="scss" scoped>
.demo {height: 100%;width: 100%;display: flex;flex-direction: column;overflow: hidden;
}
</style>
PreviewCode.vue组件用于获取组件源码,用于在页面展示源码
// PreviewCode.vue
<template><div class="preview-code"><div class="showCode" @click="showOrhideCode"><span>{{ showCode ? '隐藏代码' : '显示代码' }} < ></span></div><el-scrollbar><transition><pre v-highlight v-if="showCode"><code>{{ sourceCode }}</code></pre></transition></el-scrollbar></div>
</template><script setup>
import { onMounted, ref } from 'vue'const props = defineProps({compName: {type: String,default: '',require: true}
})const showCode = ref(false)
const sourceCode = ref('')const showOrhideCode = () => {showCode.value = !showCode.value
}const getSourceCode = async () => {let code = await import(/* @vite-ignore */ `@/components/hasaki-ui/${props.compName}/doc/doc.vue?raw`)sourceCode.value = code.default
}onMounted(() => {getSourceCode()
})
</script>
<style lang="scss">
.preview-code {height: 300px;.showCode {cursor: pointer;color: #777;text-align: right;padding-right: 50px;&:hover {color: #409eff;}}
}.v-enter-active,
.v-leave-active {transition: all 0.5s ease;
}.v-enter-from,
.v-leave-to {opacity: 0;transform: translateY(200px);
}
</style>
组件出口
// index.ts
import ElTablePagination from './ElTablePagination/ElTablePagination.vue'
import SelectTree from './SelectTree/SelectTree.vue'
import Demo from './demo/Demo.vue'// 按需引入
export { ElTablePagination, SelectTree, Demo }const component = [ElTablePagination, SelectTree, Demo]const HasakiUI = {install(App: any) {component.forEach((item) => {App.component(item.name, item)})}
}export default HasakiUI
在src的main.ts中引入组件库
import { createApp } from 'vue'
import App from './App.vue'
import router from './router'
import HasakiUI from './components/hasaki-ui'import hljs from 'highlight.js' // 引入代码高亮文件
import 'highlight.js/styles/color-brewer.css'const app = createApp(App)app.directive('highlight', function (el) {const blocks = el.querySelectorAll('pre code')blocks.forEach((block) => {hljs.highlightBlock(block)})
})app.use(router)
app.use(HasakiUI)
app.mount('#app')
接下来我们简单写下项目外壳样式
// views/home-page.vue
<template><div class="home-page"><div class="home-page-sidebar"><div class="logo"><img src="/favicon.ico" alt="" />hasaki-ui</div><ul v-for="item in routes" :key="item"><liv-for="(ele, index) in item.children":key="ele":class="{ active: mIndex == index }"@click="goPath(ele, index)">{{ ele.name }}</li></ul></div><main class="home-page-main"><router-view></router-view></main></div>
</template><script setup>
import { computed, ref } from 'vue'
import { useRouter } from 'vue-router'const router = useRouter()
const mIndex = ref(sessionStorage.getItem('mIndex') || '0')
const routes = computed(() => router.options.routes)const goPath = (ele, index) => {mIndex.value = indexrouter.push({path: ele.path})sessionStorage.setItem('mIndex', index)
}
</script><style lang="scss" scoped>
.home-page {display: flex;justify-content: space-between;width: 100%;height: 100%;overflow: hidden;&-sidebar {width: 200px;height: 100%;border-right: 1px solid #eee;text-align: center;.logo {display: flex;align-items: center;padding: 15px;font-size: 20px;img {width: 25px;margin-right: 10px;}}ul {li {height: 50px;line-height: 50px;cursor: pointer;}.active {color: #409eff;background-color: #ecf5ff;border-right: 1px solid #409eff;}}}&-main {flex: 1;padding: 20px 50px;overflow-y: auto;}
}
</style>
配置路由
// router/index.ts
import { createRouter, createWebHistory } from 'vue-router'
const routes = [{path: '/',name: '组件页面',component: () => import('@/views/home-page.vue'),redirect: '/demo',children: [{path: '/demo',name: 'Demo',// @ts-ignorecomponent: () => import('@/components/hasaki-ui/demo/doc/doc.md')},{path: '/el-table-pagination',name: '分页表格',// @ts-ignorecomponent: () => import('@/components/hasaki-ui/ElTablePagination/doc/doc.md')},{path: '/select-tree',name: '树选择器',// @ts-ignorecomponent: () => import('@/components/hasaki-ui/SelectTree/doc/doc.md')}]}
]
const router = createRouter({history: createWebHistory(import.meta.env.BASE_URL),routes
})export default router
// App.vue
<script setup lang="ts"></script>
<template><div class="main"><RouterView /></div>
</template>
<style scoped lang="scss">
.main {width: 100vw;height: 100vh;
}
</style>
Markdown 插件需要我们在vite.config.ts中进行配置
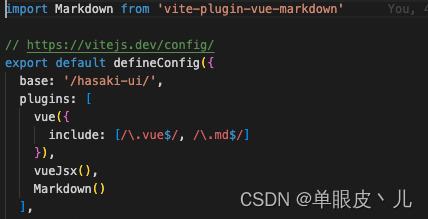
到这里我们的一个简单的组件库demo就完成了

三、库模式开发打包配置
在此我们介绍如何把我们开发的组件库进行打包,重点是配置lib字段来进行库开发
// vite.config.ts
import { fileURLToPath, URL } from 'node:url'
import { defineConfig } from 'vite'
import vue from '@vitejs/plugin-vue'
import vueJsx from '@vitejs/plugin-vue-jsx'
import Markdown from 'vite-plugin-vue-markdown'// https://vitejs.dev/config/
export default defineConfig({base: '/hasaki-ui/',plugins: [vue({include: [/\.vue$/, /\.md$/]}),vueJsx(),Markdown()],build: {outDir: 'hasaki-ui', //输出文件名称lib: {entry: fileURLToPath(new URL('./src/components/hasaki-ui/index.ts', import.meta.url)), //指定组件编译入口文件name: 'hasaki-ui', // 包名fileName: 'hasaki-ui' // 打包文件名}, //库编译模式配置rollupOptions: {// 确保外部化处理那些你不想打包进库的依赖external: ['vue', 'vue-router'],output: {// 在 UMD 构建模式下为这些外部化的依赖提供一个全局变量globals: {vue: 'Vue'}}}, // rollup打包配置terserOptions: {// 在打包代码时移除 console、debugger 和 注释compress: {/* (default: false) -- Pass true to discard calls to console.* functions.If you wish to drop a specific function call such as console.info and/orretain side effects from function arguments after dropping the functioncall then use pure_funcs instead*/drop_console: true, // 生产环境时移除consoledrop_debugger: true // 生产环境时移除debugger},format: {comments: false // 删除注释comments}}},resolve: {alias: {'@': fileURLToPath(new URL('./src', import.meta.url))}}
})
在package.json中配置发布信息
{"name": "hasaki-ui", // 发布包的名称"version": "0.0.5",  // 版本号,每次更新注意升级版本号"private": false, // 是否为私有,这里注意应为false"main": "./hasaki-ui/hasaki-ui.umd.js", // 入口文件"module": "./hasaki-ui/hasaki-ui.mjs", // 模块入口"sideEffects": false,"keywords": ["hasaki","hasaki-ui","HasakiUI"], // 搜索关键词"description": "一款基于Element-Plus开发的UI组件库,适用于vue3,大多为PC端后台管理系统常用组件", // 描述"author": "YXX", // 作者"exports": {"./hasaki-ui/style.css": "./hasaki-ui/style.css",".": {"import": "./hasaki-ui/hasaki-ui.mjs","require": "./hasaki-ui/hasaki-ui.umd.js"}}, // 引用路径映射,解决加载样式失败问题"files": ["hasaki-ui/*"], // 描述了将软件包作为依赖项安装时要包括的条目,默认值为[“*”],这意味着它将包括所有文件,我们指定我们自己组件文件夹即可// ..重要的就上面这些
}
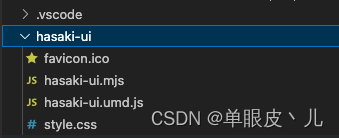
执行 npm/yarn/pnpm run build进行打包,出现如下表示打包成功了
四、发布
这一步其实很简单,一个命令搞定,npm publish,但是初次发布需要登录你的npm:
1、执行npm login 命令,输入用户名和密码,输入密码时是看不到的,之后按提示输入绑定的邮箱,成功后你的邮箱会收到一个one-time password,填入后即登录成功。
2、登录之后,就可以执行npm publish进行发布。
3、发布前要注意查看你的npm源是否为官方源https://registry.npmjs.org ,如果不是要切回官方源,否则发布失败
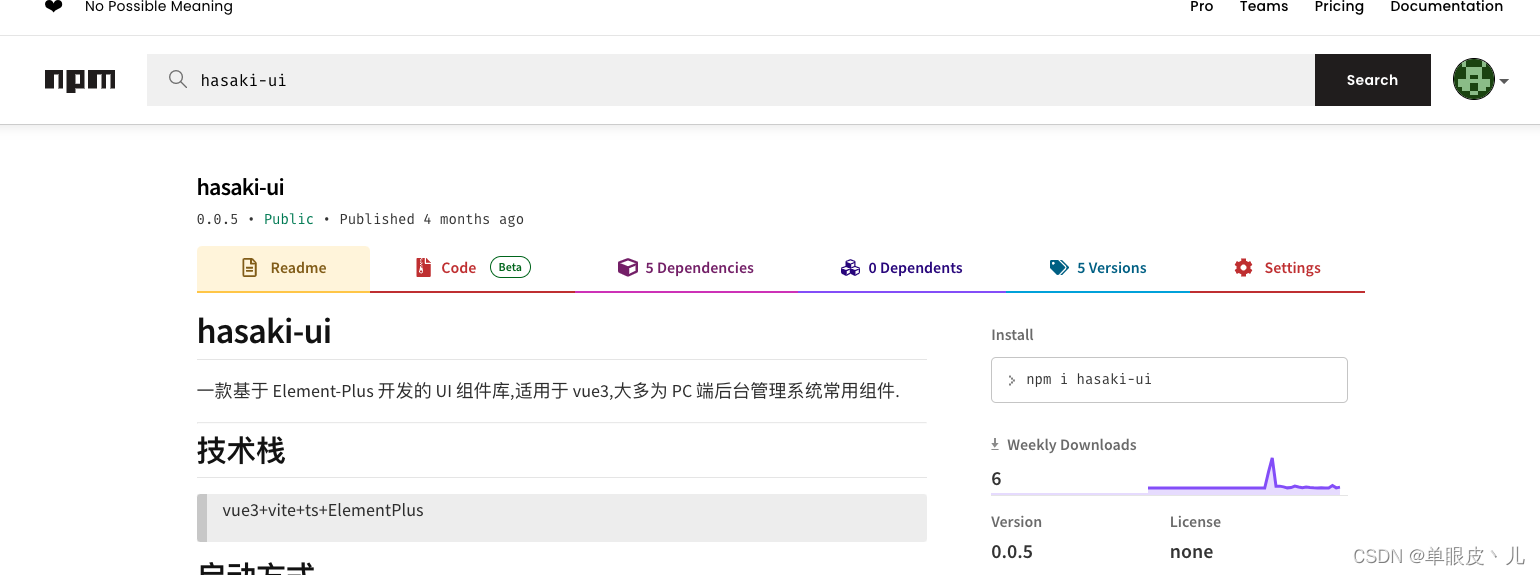
4、发布成功后,到npm上就可以看到我们的包了,至此我们就有了自己的一个开源包。


)
)


)
——spring-mvc请求流程)


