1、HugeGraph-Server与HugeGraph-Hubble下载
HugeGraph官方地址:https://hugegraph.apache.org/
环境为:linux
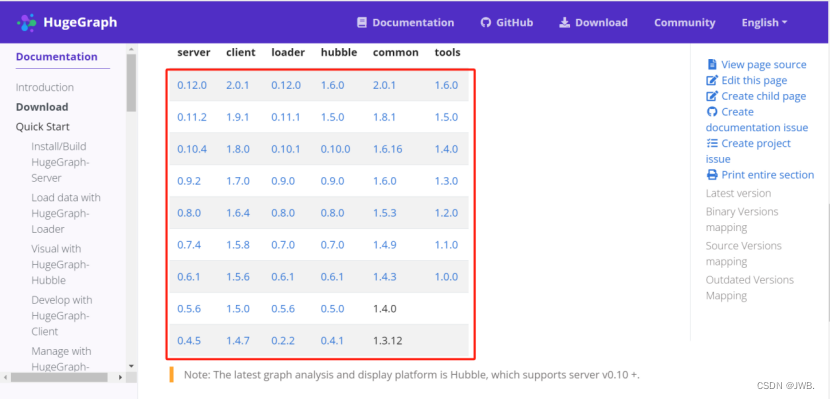
 官网是有模块版本对应关系,尽量下载较新版本,hubble1.5.0之前是studio功能比较少。官网已经下架server,其他模块下载也比较慢。可以在网上找资源下载。本文选用HugeGraph-Server(0.12.0)和HugeGraph-Hubble(1.6.0),网盘资源:https://pan.baidu.com/s/1BBT65L2S0FiW_8oPcqqOKA 5ats
2、HugeGraph模块介绍
| components | description |
|---|---|
| HugeGraph-Server | 核心,服务端,图数据到后端的存储。支持的后端包括:Memory,Cassandra,ScyllaDB, RocksDB,HBase,MySQL和PostgreSQL |
| HugeGraph-Hubble | Web可视化管理平台,一站式可视化分析平台。平台覆盖从数据建模,到数据快速导入,再到数据线上线下分析、图统一管理的全流程; |
| HugeGraph-Client | RESTful API 客户端,用于连接到 HugeGraph-Server。目前,仅实现Java版本。其他语言的用户可以自己实现; |
| HugeGraph-Loader | 数据导入工具,它将普通文本数据转换为图形顶点和边缘,并插入图形数据库; |
| HugeGraph-Spark | 对图进行并行计算,如PageRank算法等 |
| HugeGraph-Tools | 命令行工具集,部署和管理工具,包括管理图形、备份/恢复、Gremlin 执行等功能。 |
3、HugeGraph-server与HugeGraph-Hubble安装和配置
将下载好的hugegraph-0.12.0.tar.gz和hugegraph-hubble-1.6.0.tar.gz压缩包解压到安装目录下。如下图我是安装在/opt/hugegraph0.12.0下。对两个目录及包含文件进行授权(要么在上传服务器时和启动时可能出现未知问题,也可只对操作的内容进行授权)

4、HugeGraph-server主要配置文件
| components | description |
|---|---|
| gremlin-server.yaml | gremlin图数据库查询语言服务配置,无特殊需要默认即可 |
| rest-server.properties | 如果需要外部访问HugeGraphServer,请修改rest-server.properties的restserver.url配置项 (默认为http://127.0.0.1:8080),修改成机器名或IP地址, |
| hugegraph.properties | 具体图实例的配置,每个图一个配置文件,图的名称就是文件的名称。可默认也可修改后端存储 MySQL和PostgreSQL等 |
主要修改内容:
hugegraph.properties
(可默认RocksDB,以下是修改为mysql)根据实际需要修改后端存储数据库,打开对应注释配置好连接。
# auth config: com.baidu.hugegraph.auth.HugeFactoryAuthProxy
gremlin.graph=com.baidu.hugegraph.HugeFactory# cache config
#schema.cache_capacity=100000
# vertex-cache default is 1000w, 10min expired
vertex.cache_type=l2
#vertex.cache_capacity=10000000
#vertex.cache_expire=600
# edge-cache default is 100w, 10min expired
edge.cache_type=l2
#edge.cache_capacity=1000000
#edge.cache_expire=600# schema illegal name template
#schema.illegal_name_regex=\s+|~.*#vertex.default_label=vertexbackend=mysql
serializer=mysqlstore=hugegraphraft.mode=false
raft.safe_read=false
raft.use_snapshot=false
raft.endpoint=127.0.0.1:8281
raft.group_peers=127.0.0.1:8281,127.0.0.1:8282,127.0.0.1:8283
raft.path=./raft-log
raft.use_replicator_pipeline=true
raft.election_timeout=10000
raft.snapshot_interval=3600
raft.backend_threads=48
raft.read_index_threads=8
raft.read_strategy=ReadOnlyLeaseBased
raft.queue_size=16384
raft.queue_publish_timeout=60
raft.apply_batch=1
raft.rpc_threads=80
raft.rpc_connect_timeout=5000
raft.rpc_timeout=60000search.text_analyzer=jieba
search.text_analyzer_mode=INDEX# rocksdb backend config
#rocksdb.data_path=/path/to/disk
#rocksdb.wal_path=/path/to/disk# cassandra backend config
cassandra.host=localhost
cassandra.port=9042
cassandra.username=
cassandra.password=
#cassandra.connect_timeout=5
#cassandra.read_timeout=20
#cassandra.keyspace.strategy=SimpleStrategy
#cassandra.keyspace.replication=3# hbase backend config
#hbase.hosts=localhost
#hbase.port=2181
#hbase.znode_parent=/hbase
#hbase.threads_max=64# mysql backend config
jdbc.driver=com.mysql.jdbc.Driver
jdbc.url=jdbc:mysql://127.0.0.1:3306
jdbc.username=root
jdbc.password=root
jdbc.reconnect_max_times=3
jdbc.reconnect_interval=3
jdbc.sslmode=false# postgresql & cockroachdb backend config
#jdbc.driver=org.postgresql.Driver
#jdbc.url=jdbc:postgresql://localhost:5432/
#jdbc.username=postgres
#jdbc.password=
#jdbc.postgresql.connect_database=template1# palo backend config
#palo.host=127.0.0.1
#palo.poll_interval=10
#palo.temp_dir=./palo-data
#palo.file_limit_size=32
rest-server.properties(修改restserver.url即可)
# bind url
restserver.url=http://0.0.0.0:8080
# gremlin server url, need to be consistent with host and port in gremlin-server.yaml
#gremlinserver.url=http://127.0.0.1:8182#graphs=[hugegraph:conf/hugegraph.properties](网上说修改成这样,但是报错,默认即可)
graphs=./conf/graphs# The maximum thread ratio for batch writing, only take effect if the batch.max_write_threads is 0
batch.max_write_ratio=80
batch.max_write_threads=0# authentication configs
# choose 'com.baidu.hugegraph.auth.StandardAuthenticator' or 'com.baidu.hugegraph.auth.ConfigAuthenticator'
#auth.authenticator=# for StandardAuthenticator mode
#auth.graph_store=hugegraph
# auth client config
#auth.remote_url=127.0.0.1:8899,127.0.0.1:8898,127.0.0.1:8897# for ConfigAuthenticator mode
#auth.admin_token=
#auth.user_tokens=[]# rpc group configs of multi graph servers
# rpc server configs
rpc.server_host=127.0.0.1
rpc.server_port=8090
#rpc.server_timeout=30# rpc client configs (like enable to keep cache consistency)
rpc.remote_url=127.0.0.1:8090
#rpc.client_connect_timeout=20
#rpc.client_reconnect_period=10
#rpc.client_read_timeout=40
#rpc.client_retries=3
#rpc.client_load_balancer=consistentHash# lightweight load balancing (beta)
server.id=server-1
server.role=master
5、HugeGraph-Hubble主要配置文件
| components | description |
|---|---|
| hugegraph-hubble.properties | web可视化配置访问 |
hugegraph-hubble.properties(修改访问可视化界面的ip及端口号)
server.host=127.0.0.1
server.port=8088
gremlin.suffix_limit=250
gremlin.vertex_degree_limit=100
gremlin.edges_total_limit=500
gremlin.batch_query_ids=100
6、启动hugegraph-server
启动分为"首次启动"和"非首次启动",这么区分是因为在第一次启动前需要初始化后端数据库,然后启动服务。
首次启动:进入hugegraph-0.12.0目录下的bin目录启动init-store.sh。
执行命令为:
bash init-store.sh
启动server:进入hugegraph-0.12.0目录下的bin目录启动start-hugegraph.sh。
执行命令为:
bash start-hugegraph.sh
7、启动hugegraph-Hubble
进入hugegraph-hubble-1.6.0目录下的bin目录启动start-hubble.sh。
执行命令为:
bash start-hubble.sh
8、测试 hugegraph-server
访问 http://服务器ip:8080/graphs
结果:{ “graphs”: [ “hugegraph” ]}
9、测试 hugegraph-Hubble
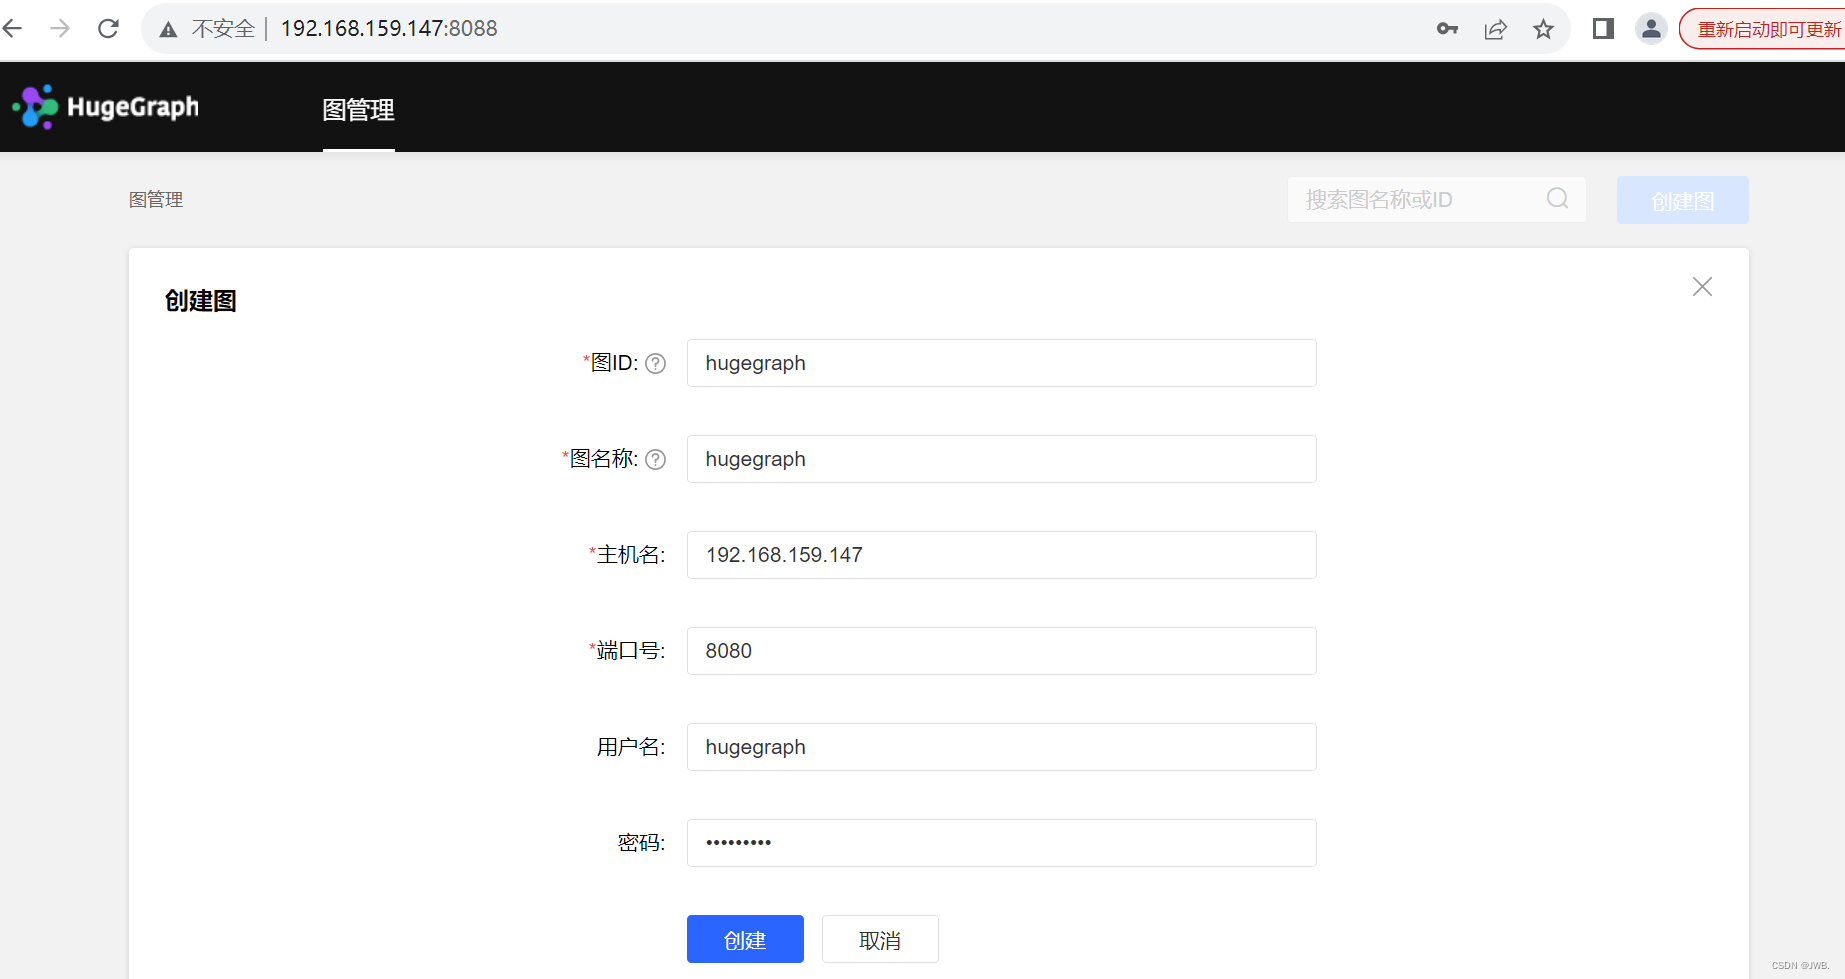
访问hugegraph-hubble.properties配置文件中配置的ip加端口号。

第一次需要创建图填写信息,图名称就是hugegraph.properties配置文件名称,也可在配置文件中配置。

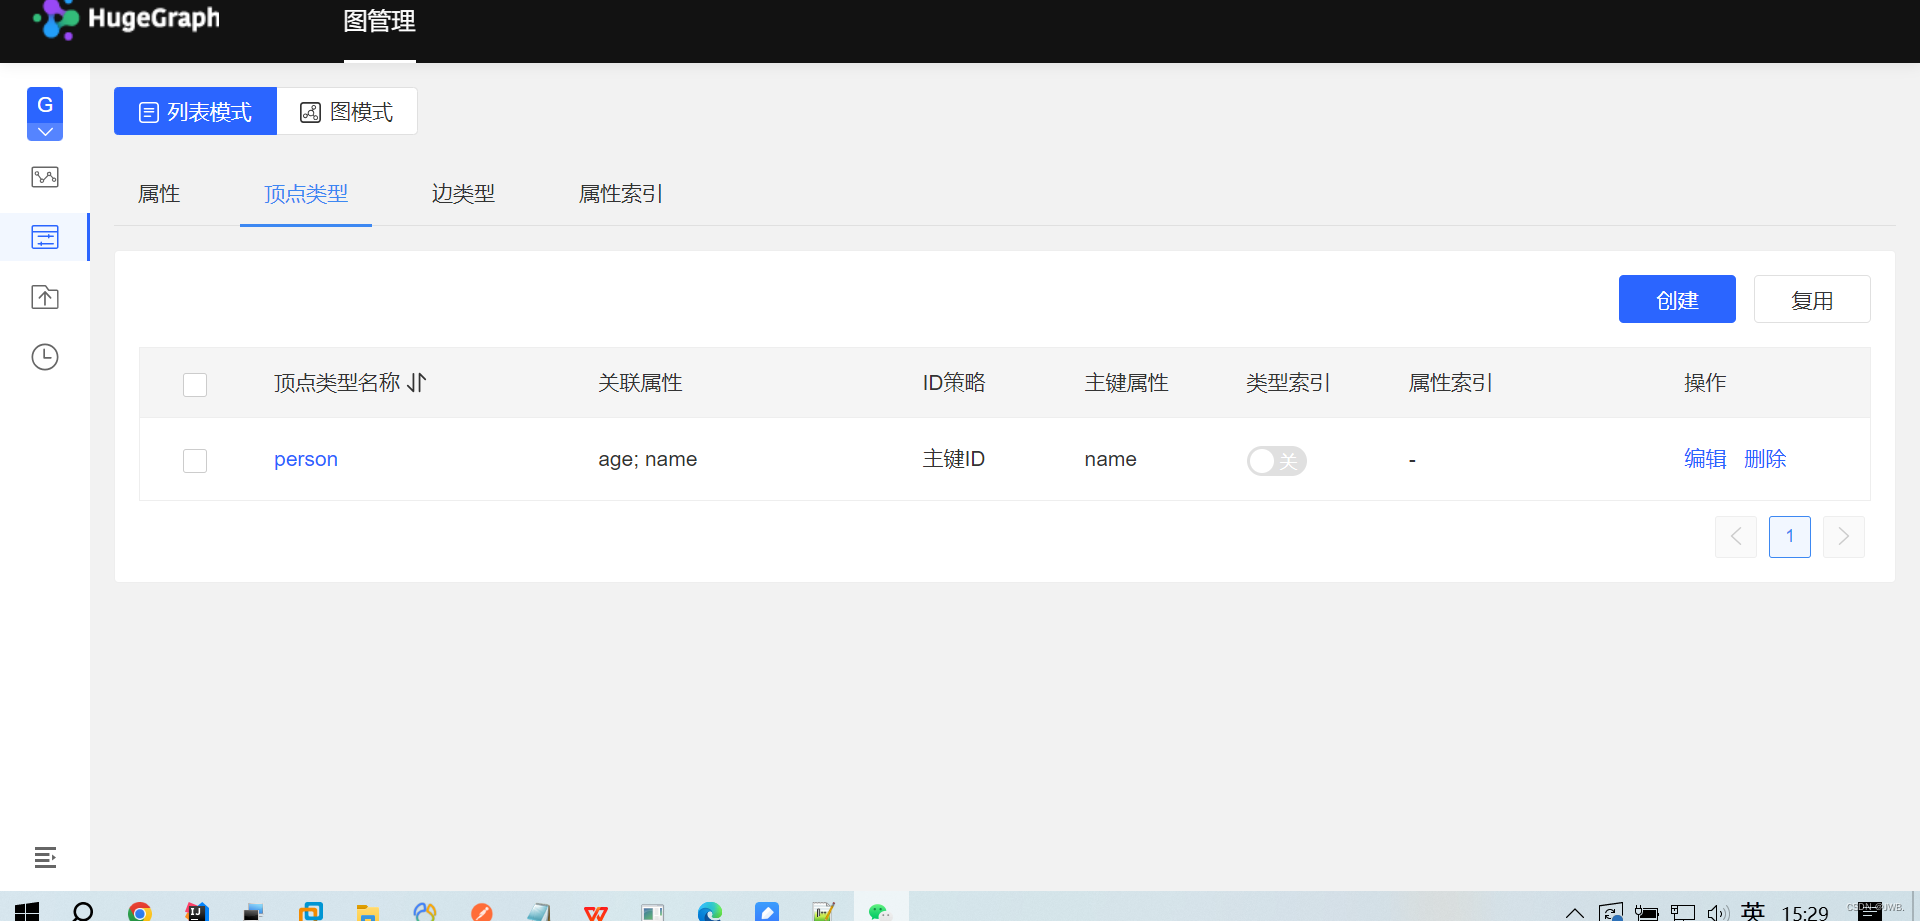
访问进去之后就可以创建属性、顶点、边类型等进行一系列操作。
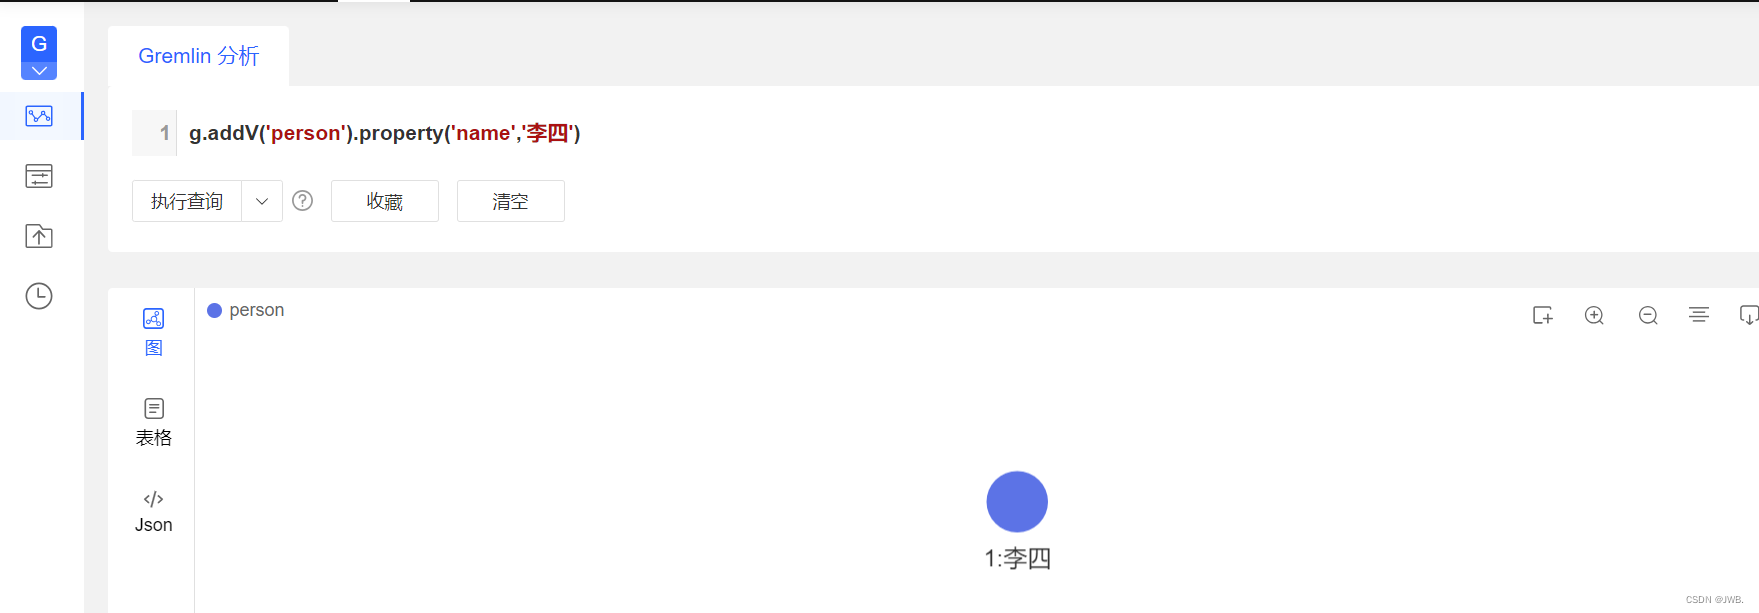
可以通过gremin语句进行查询,创建实体,创建边等。
例如:创建一个姓名为李四的人。

通过官网提供的API操作图数据库:如下图


怎么使用modelsim进行仿真?modelsim仿真教程一份请签收~)
)


)
)


