ELK大家应该很了解了,废话不多说开始部署
kafka在其中作为消息队列解耦和让logstash高可用
kafka和zk 的安装可以参考这篇文章
深入理解Kafka3.6.0的核心概念,搭建与使用-CSDN博客
第一步、官网下载安装包
需要
elasticsearch-8.10.4
logstash-8.10.4
kibana-8.10.4
kafka_2.13-3.6.0
apache-zookeeper-3.9.1-bin.tar
filebeat-8.10.4-linux-x86_64.tar
第二步: 环境配置(每一台都做)
创建es用户
useradd es配置主机名、配置IP地址、每台主机配置/etc/hosts名称解析
192.168.1.1 es1
192.168.1.2 es2
192.168.1.3 es3
将Linux系统的软硬限制最大文件数改为65536,将所有用户的最大线程数修改为65536
打开/etc/security/limits.conf文件,添加以下配置(每一台都做)
vim  /etc/security/limits.conf* soft nofile 65536
* hard nofile 65536* soft nproc 65536
* hard nproc 65536es  hard   core    unlimited  #打开生成Core文件
es  soft   core    unlimited
es  soft   memlock unlimited #允许用户锁定内存
es  hard   memlock unlimitedsoft  xxx  : 代表警告的设定,可以超过这个设定值,但是超过后会有警告。
hard  xxx  : 代表严格的设定,不允许超过这个设定的值。
nproc  : 是操作系统级别对每个用户创建的进程数的限制
nofile : 是每个进程可以打开的文件数的限制
soft nproc :单个用户可用的最大进程数量(超过会警告);
hard nproc:单个用户可用的最大进程数量(超过会报错);
soft nofile  :可打开的文件描述符的最大数(超过会警告);
hard nofile :可打开的文件描述符的最大数(超过会报错);
修改/etc/sysctl.conf文件,添加下面这行,并执行命令sysctl -p使其生效
vim /etc/sysctl.confvm.max_map_count=262144  #限制一个进程可以拥有的VMA(虚拟内存区域)的数量,es要求最低65536
net.ipv4.tcp_retries2=5 #数据重传次数超过 tcp_retries2 会直接放弃重传,关闭 TCP 流
解压安装包,进入config文件夹,修改elasticsearch.yml 配置文件
cluster.name: elk #集群名称
node.name: node1 #节点名称
node.roles: [ master,data ] #节点角色
node.attr.rack: r1  #机架位置,一般没啥意义这个配置
path.data: /data/esdata
path.logs: /data/eslog
bootstrap.memory_lock: true  #允许锁定内存
network.host: 0.0.0.0
http.max_content_length: 200mb
network.tcp.keep_alive: true
network.tcp.no_delay: true
http.port: 9200
http.cors.enabled: true #允许http跨域访问,es_head插件必须开启
http.cors.allow-origin: "*"  #允许http跨域访问,es_head插件必须开启
discovery.seed_hosts: ["ypd-dmcp-log01", "ypd-dmcp-log02"]
cluster.initial_master_nodes: ["ypd-dmcp-log01", "ypd-dmcp-log02"]
xpack.monitoring.collection.enabled: true #添加这个配置以后在kibana中才会显示联机状态,否则会显示脱机状态
xpack.security.enabled: true
#xpack.security.enrollment.enabled: true
xpack.security.http.ssl.enabled: true
xpack.security.http.ssl.keystore.path: elastic-certificates.p12  #我把文件都放在config下。所以直接写文件名,放在别处需要写路径
xpack.security.http.ssl.truststore.path: elastic-certificates.p12
xpack.security.transport.ssl.enabled: true
xpack.security.transport.ssl.verification_mode: certificate
xpack.security.transport.ssl.keystore.path: elastic-certificates.p12k
xpack.security.transport.ssl.truststore.path: elastic-certificates.p12
配置jvm内存大小
修改 jvm.options
-Xms6g #你服务器内存的一半,最高32G
-Xmx6g #你服务器内存的一半,最高32G
改好文件夹准备生成相关key
创建ca证书,什么也不用输入,两次回车即可(会在当前目录生成名为elastic-stack-ca.p12的证书文件)
bin/elasticsearch-certutil ca使用之前生成的ca证书创建节点证书,过程三次回车,会在当前目录生成一个名为elastic-certificates.p12的文件
bin/elasticsearch-certutil cert --ca elastic-stack-ca.p12生成http证书,根据提示信息进行操作,主要是下面几步
bin/elasticsearch-certutil httpGenerate a CSR? [y/N]n
Use an existing CA? [y/N]y
CA Path: /usr/local/elasticsearch-8.10.4/config/certs/elastic-stack-ca.p12
Password for elastic-stack-ca.p12:  直接回车,不使用密码
For how long should your certificate be valid? [5y] 50y#过期时间
Generate a certificate per node? [y/N]n
Enter all the hostnames that you need, one per line. #输入es的节点 两次回车确认
When you are done, press <ENTER> once more to move on to the next step.
es1
es2
es3You entered the following hostnames.- es1- es2- es3Is this correct [Y/n]yWhen you are done, press <ENTER> once more to move on to the next step. #输入es的ip 两次回车确认192.168.1.1
192.168.1.2
192.168.1.3You entered the following IP addresses.- 192.168.1.1- 192.168.1.2- 192.168.1.3Is this correct [Y/n]yDo you wish to change any of these options? [y/N]n
接下来一直回车,然后会在当前目录生成名为:elasticsearch-ssl-http.zip的压缩文件
解压缩http证书文件到config下,证书在http文件夹里。名字是http.p12,mv出来到config下
确保elasticsearch目录下所有文件的归属关系都是es用户
chown -R es:es /home/es/elasticsearch-8.10.4启动es
su - es #到es用户下
bin/elasticsearch  初次可以前台启动 没问题就放后台
bin/elasticsearch -d
复制整个es文件夹到es2,es3
只需要修改
node.name: es2 #节点名称network.host: 192.168.1.2 #节点ipnode.name: es3 #节点名称network.host: 192.168.1.3 #节点ip浏览器访问一下es的web ui
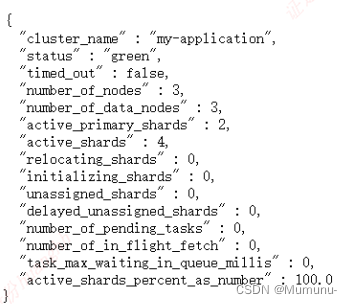
https://192.168.1.1:9200

生成账户密码
bin/elasticsearch-setup-passwords interactivewarning: ignoring JAVA_HOME=/usr/local/java/jdk1.8.0_361; using bundled JDK
******************************************************************************
Note: The 'elasticsearch-setup-passwords' tool has been deprecated. This       command will be removed in a future release.
******************************************************************************Initiating the setup of passwords for reserved users elastic,apm_system,kibana,kibana_system,logstash_system,beats_system,remote_monitoring_user.
You will be prompted to enter passwords as the process progresses.
Please confirm that you would like to continue [y/N]yEnter password for [elastic]:
Reenter password for [elastic]:
Enter password for [apm_system]:
Reenter password for [apm_system]:
Enter password for [kibana_system]:
Reenter password for [kibana_system]:
Enter password for [logstash_system]:
Reenter password for [logstash_system]:
Enter password for [beats_system]:
Reenter password for [beats_system]:
Enter password for [remote_monitoring_user]:
Reenter password for [remote_monitoring_user]:
Changed password for user [apm_system]
Changed password for user [kibana_system]
Changed password for user [kibana]
Changed password for user [logstash_system]
Changed password for user [beats_system]
Changed password for user [remote_monitoring_user]
Changed password for user [elastic]这个时候就可以使用账号密码访问了
创建一个给kibana使用的用户
bin/elasticsearch-users useradd kibanauser
kibana不能用es超级用户,此处展示一下用法
bin/elasticsearch-users roles -a superuser kibanauser
加两个角色 不然没有监控权限
bin/elasticsearch-users roles -a kibana_admin kibanauser
bin/elasticsearch-users roles -a monitoring_user kibanauser
然后配置kibana
解压然后修改kibana.yml
server.port: 5601
server.host: "0.0.0.0"server.ssl.enabled: true
server.ssl.certificate: /data/elasticsearch-8.10.4/config/client.cer
server.ssl.key: /data/elasticsearch-8.10.4/config/client.key
elasticsearch.hosts: ["https://192.168.1.1:9200"]
elasticsearch.username: "kibanauser"
elasticsearch.password: "kibanauser"
elasticsearch.ssl.certificate: /data/elasticsearch-8.10.4/config/client.cer
elasticsearch.ssl.key: /data/elasticsearch-8.10.4/config/client.key
elasticsearch.ssl.certificateAuthorities: [ "/data/elasticsearch-8.10.4/config/client-ca.cer" ]
elasticsearch.ssl.verificationMode: certificate
i18n.locale: "zh-CN"
xpack.encryptedSavedObjects.encryptionKey: encryptedSavedObjects1234567890987654321
xpack.security.encryptionKey: encryptionKeysecurity1234567890987654321
xpack.reporting.encryptionKey: encryptionKeyreporting1234567890987654321
启动
bin/kibana访问 https://ip:5601
配置logstash
解压后在conf下创建一个配置文件,我取名logstash.conf
input {kafka {bootstrap_servers => "192.168.1.1:9092"group_id => "logstash_test"client_id => 1 #设置相同topic,设置相同groupid,设置不同clientid,实现LogStash多实例并行消费kafkatopics => ["testlog"]consumer_threads => 2 #等于 topic分区数codec => json {    #添加json插件,filebeat发过来的是json格式的数据charset => "UTF-8"}decorate_events => false #此属性会将当前topic、offset、group、partition等信息也带到message中type => "testlog" #跟topics不重合。因为output读取不了topics这个变量
}}
filter {mutate {remove_field => "@version"  #去掉一些没用的参数remove_field => "event"remove_field => "fields"}
}output {elasticsearch {cacert => "/data/elasticsearch-8.10.4/config/client-ca.cer"ssl => truessl_certificate_verification => falseuser => elasticpassword => "123456"action => "index"hosts => "https://192.168.1.1:9200"index => "%{type}-%{+YYYY.MM.dd}"
}}
修改jvm.options
-Xms6g #你服务器内存的一半,最高32G
-Xmx6g #你服务器内存的一半,最高32G
启动logstash
bin/logstash -f conf/logstash.conf最后去服务器上部署filebeat
filebeat.inputs:
- type: filestream 跟以前的log类似。普通的日志选这个就行了id: testlog1  enabled: truepaths:- /var/log/testlog1.logfield_under_root: true #让kafka的topic: '%{[fields.log_topic]}'取到变量值fields:log_topic: testlog1  #跟id不冲突,id输出取不到变量值multiline.pattern: '^\d(4)'    # 设置多行合并匹配的规则,意思就是不以4个连续数字,比如2023开头的 视为同一条multiline.negate: true   # 如果匹配不上multiline.match: after  # 合并到后面- type: filestream id: testlog2enabled: truepaths:- /var/log/testlog2field_under_root: true fields:log_topic: testlog2multiline.pattern: '^\d(4)' multiline.negate: truemultiline.match: afterfilebeat.config.modules:path: ${path.config}/modules.d/*.yml reload.enabled: true  #开启运行时重载配置#reload.period: 10s
path.home: /data/filebeat-8.10.4/  #指明filebeat的文件夹。启动多个时需要
path.data: /data/filebeat-8.10.4/data/
path.logs: /data/filebeat-8.10.4/logs/processors:- drop_fields: #删除不需要显示的字段fields: ["agent","event","input","log","type","ecs"]output.kafka:enabled: truehosts: ["10.8.74.35:9092"]   #kafka地址,可配置多个用逗号隔开topic: '%{[fields.log_topic]}'   #根据上面添加字段发送不同topic
初步的部署这就完成了。后面的使用才是大头,路漫漫其修远兮

)


