Walrus 是一款基于平台工程理念的开源应用管理平台,致力于解决应用交付领域的深切痛点。借助 Walrus 将云原生的能力和最佳实践扩展到非容器化环境,并支持任意应用形态统一编排部署,降低使用基础设施的复杂度,为研发和运维团队提供易用、一致的应用管理和部署体验,进而构建无缝协作的软件交付流程。
在本篇文章中,我们将手把手带您创建 AWS GitLab 模板,并使用 Walrus 在 AWS EC2 实例上部署一个 GitLab 服务器。
使用前提
-
用于存储模板的 GitHub 或 Gitlab 仓库。
-
安装 Walrus(https://seal-io.github.io/docs/zh/deploy/standalone)。
在 GitHub 上新建仓库
-
在 GitHub 上新建一个仓库,这里我们使用的是 demo 版本库。
-
将版本库克隆到本地。
git clone git@gitlab.com:seal-eyod/gitlab-on-aws.git
创建模板文件
打开克隆的版本库目录。
cd gitlab-on-aws
在该目录下创建文件,如下所示:
- gitlab-on-aws- main.tf- outputs.tf- variables.tf- README.md
main.tf文件定义了要创建的资源。在这里,我们为模板定义了创建 AWS EC2 实例并在其上运行 Gitlab 服务器的资源。
data "aws_ami" "ubuntu" {most_recent = truefilter {name = "name"values = ["ubuntu/images/hvm-ssd/ubuntu-jammy-22.04-amd64-server-*"]}filter {name = "virtualization-type"values = ["hvm"]}owners = ["099720109477"] # Canonical}data "aws_security_group" "selected" {name = var.security_group_name}data "aws_subnets" "selected" {filter {name = "vpc-id"values = [data.aws_security_group.selected.vpc_id]}}resource "aws_instance" "gitlab" {ami = data.aws_ami.ubuntu.idinstance_type = var.instance_typesubnet_id = data.aws_subnets.selected.ids.0vpc_security_group_ids = [data.aws_security_group.selected.id]key_name = var.key_nameuser_data = <<-EOF#!/bin/bashset -ex;public_ip=$(curl http://169.254.169.254/latest/meta-data/public-ipv4)curl -fsSL https://get.docker.com | bash && sudo usermod -aG docker ubuntudocker run -d --privileged --restart=always -p 80:80 -p 443:443 \-e GITLAB_ROOT_PASSWORD="${var.gitlab_root_password}" \"${var.gitlab_image}"EOFtags = {"Name" = "${var.gitlab_metadata_application_instance_name}-gitlab"}root_block_device {volume_size = var.disk_size}}resource "null_resource" "gitlab_health_check" {depends_on = [aws_instance.gitlab,]triggers = {always_run = timestamp()}provisioner "local-exec" {command = "for i in `seq 1 100`; do curl -k -s $ENDPOINT >/dev/null && exit 0 || true; sleep 5; done; echo TIMEOUT && exit 1"interpreter = ["/bin/sh", "-c"]environment = {ENDPOINT = "http://${aws_instance.gitlab.public_ip}"}}}
variables.tf文件定义了模板中使用的变量。Walrus 将使用这些变量生成供用户填写的表单。
Walrus 使用@label和@group来定义变量的标签和组。可选的 @options用于定义变量的下拉选项,如果未定义 @options ,变量将在表单中显示为文本框。
在本示例中,我们定义了两个组: Basic组和 AWS 组。使用此模板创建服务时,表单中将显示为两个选项卡。
# @group "Basic"
variable "gitlab_image" {type        = stringdescription = "gitlab image"default     = "gitlab/gitlab-ce"
}# @group "Basic"
variable "gitlab_root_password" {type        = stringdescription = "gitlab root password"default     = "seal123456"sensitive   = true
}# @group "AWS"
# @options ["t3.medium", "c5.xlarge"]
variable "instance_type" {type        = stringdescription = "Instance type"default     = "t3.medium"
}# @group "AWS"
variable "disk_size" {type        = numberdescription = "Root disk size in GiB"default     = 50
}# @group "AWS"
variable "key_name" {type        = stringdescription = "AWS key name"default     = "xueying"
}# @group "AWS"
variable "security_group_name" {type        = stringdescription = "Security group Name"default     = "all-open"
}# @hidden
variable "gitlab_metadata_application_instance_name" {type        = stringdescription = "gitlab metadata application instance name."default     = "bar"
}
outputs.tf文件定义了服务创建后将显示给用户的模板输出。服务模板的输出也可以被其他服务引用。在本例中,我们定义了输出 gitlab_url,它是 Gitlab 实例的 URL。
output "gitlab_url" {description = "The URL of the GitLab instance"value = "http://${aws_instance.gitlab.public_ip}"}
README.md文件是对模板的描述。在使用该模板创建服务时,它将显示给用户。
在此,我们可以使用 terraform-docs 工具生成模板说明。你需要根据项目文档在笔记本电脑上安装该工具,然后运行以下命令为模板生成 README.md 文件。
terraform-docs markdown . > README.md
生成的 README.md 文件内容如下:
# Gitlab on AWSThis is a terraform module that will create a Gitlab instance on AWS.## Providers| Name | Version |
|------|---------|
| aws  | n/a     |## Inputs| Name                                      | Description                                |   Type   |       Default        | Required |
|-------------------------------------------|--------------------------------------------|:--------:|:--------------------:|:--------:|
| gitlab_image                              | Gitlab image                               | `string` | `"gitlab/gitlab-ce"` |    no    |
| gitlab_root_password                      | Gitlab root password                       | `string` |    `"seal123456"`    |    no    |
| instance\_type                            | Instance type                              | `string` |    `"t3.medium"`     |    no    |
| disk\_size                                | Root disk size in GiB                      | `number` |         `50`         |    no    |
| security\_group\_name                     | Security group Name                        | `string` |     `"all-open"`     |    no    |
| gitlab_metadata_application_instance_name | gitlab metadata application instance name. | `string` |       `"bar"`        |    no    |## Outputs| Name       | Description |
|------------|-------------|
| gitlab_url | Gitlab URL  |
提交和标记版本
git add .git commit -m "add template files"git push -u origin main
为模板版本创建一个标签。
git tag v0.0.1git push --tags
在 Walrus 上创建一个模板
-
在浏览器中打开 Walrus 并登录。
-
选择
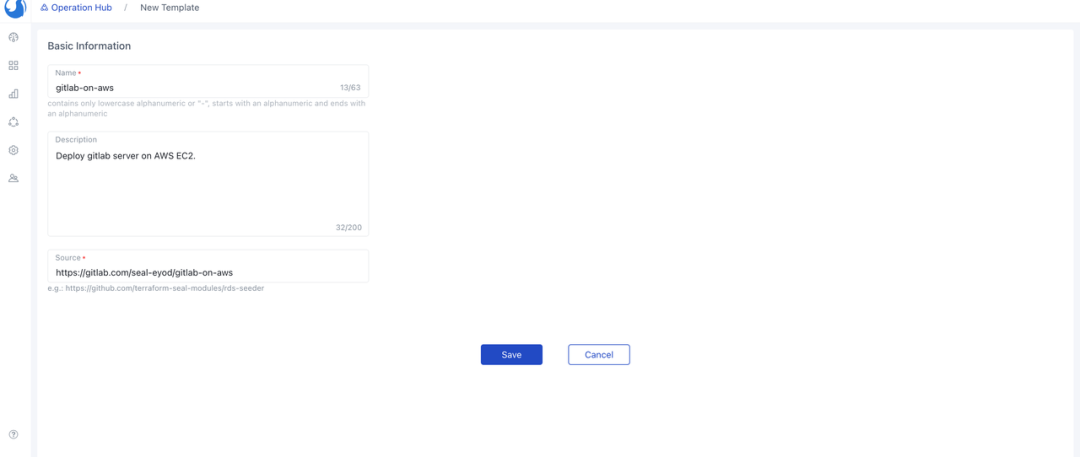
Operations Hub中的Template,然后选择我们最近创建的模板来制作一个新模板。这里我们将此模板命名为gitlab-on-aws。

Walrus 同步模板后,可以在 Operations Hub 中看到此模板。

导入任务完成后,可以发现模板显示在列表中。需要注意的是该模板有两个版本:v0.0.1 和 v0.0.2。

在 AWS 上部署 Gitlab 服务器
在 Operations Hub 的 Connectors 中添加 AWS。

在环境中添加 connector。

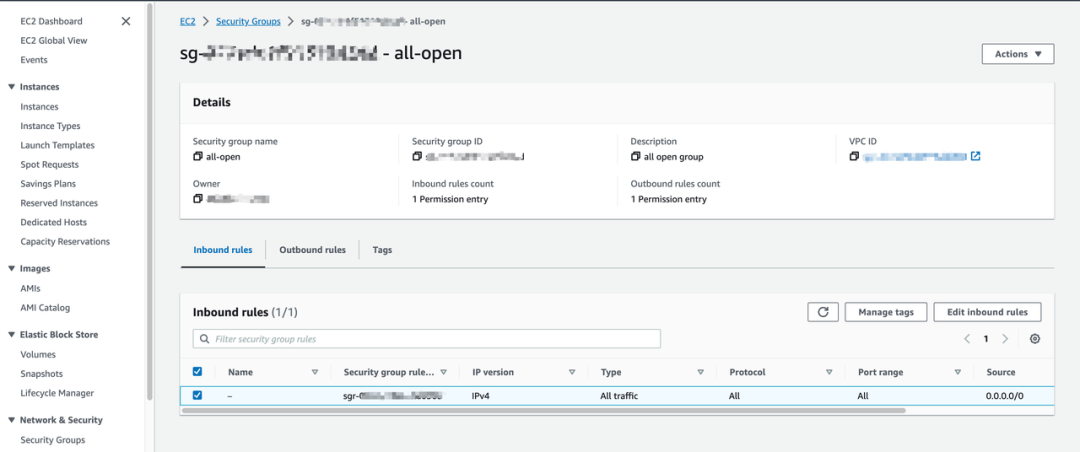
利用 gitlab-on-aws 模板创建服务。UI 表单中的分组和标签是根据我们之前定义的模板变量中对应的注释动态生成的。输入变量在模板的 variables.tf 文件中列出。为确保网络流量管理,EC2 实例需要一个安全组。我们可以创建一个名为all-open的安全组来允许所有网络流量,为了增强安全性,可以根据需要自定义规则。

在 AWS 目标区域创建安全组后,就可以保存和应用服务了。


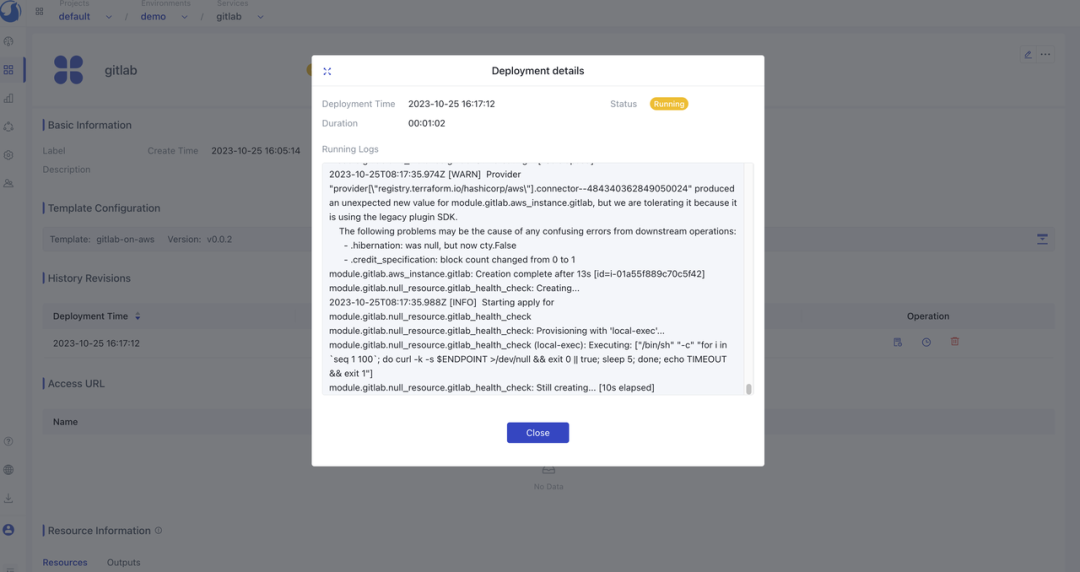
部署完成后,Gitlab 实例就能在 AWS 上成功配置了。

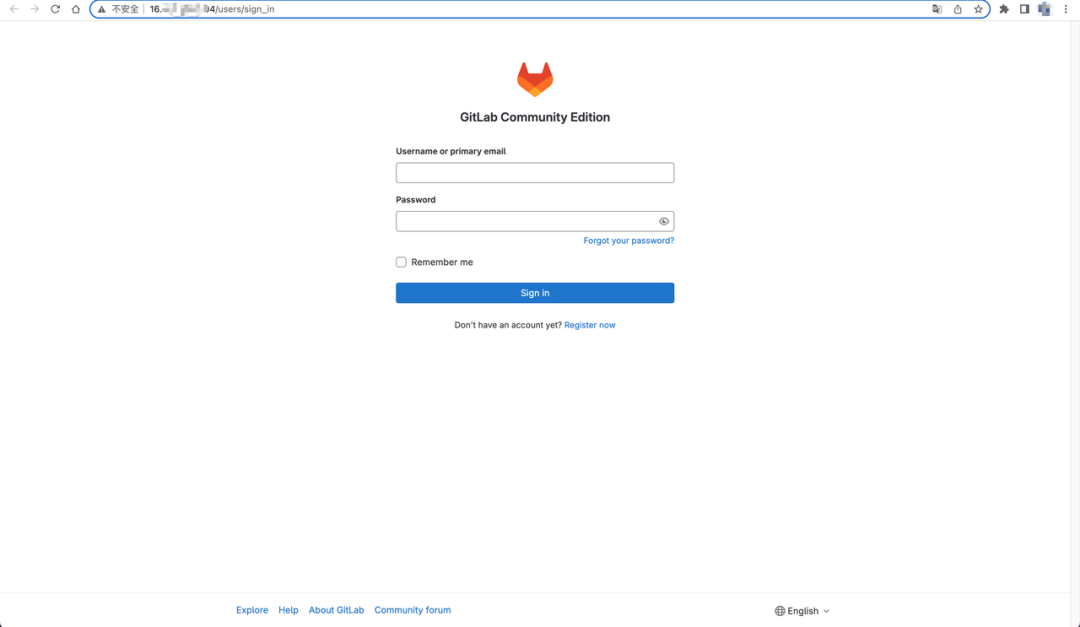
GitLab URL 将显示在输出结果中。获得 URL 后,就可以访问 GitLab 服务器了。


总 结
以上就是在 Walrus 中创建模板的全步骤,我们借助 Walrus 大大简化了部署流程。此外,Walrus 还兼容 Terraform 社区的大量成熟模板,只需轻轻一点,即可轻松采用最佳实践。
欢迎小伙伴们试用 Walrus,如果您喜欢我们的项目,可以在 GitHub 上为我们点亮星星🌟
项目地址:https://github.com/seal-io/walrus


