目录
- 项目介绍
- 开发环境
- 所用技术
- 项目宏观结构
- 编写思路
- 1. 编写compile_server
- 1.1 编译模块编写
- 1.2 运行功能
- 1.3compile_runner 编译与运行
- 1.4 编写compile_server.cpp调用compile_run模块,形成网络服务
- 2. 编写基于MVC的oj_server
- 2.1 oj_server.cpp的编写
- 2.2 oj_model_mysql .hpp的编写
- 2.3 oj_view.hpp的编写
- 2.3 control的编写
- 2.3.1 session和LoginInterceptor的编写
- 2.3.2对于用户注册时,密码加密的说明
- 2.3.3 对于负载均衡的说明
- 2.3.3 control的编写
- 2.3.4 对于用户通过题状态的说明
- 2.3.5 对于control的编写
- 前端页面的编写
- 相关工具的安装
- boost库安装
- cpp-httplib的安装
- ctemplate的安装
- 连接mysql工具包的安装
- ACE编译器的使用(直接复制粘贴即可)
- 项目源码
项目介绍
这个项目是设计一个在线均衡的在线刷题网站,具有登录,注册,判题,用户通过题的状态,录题的功能。
对功能实现的说明:
对于登录的实现:作者设计了一个session用于保存用户登录信息。当用户登录时服务器会创建一个会话并且返回一个sessionId给用户。后续的判题功能,就需要用户是已经登录的状态,所以每次判题时会先拦截判题请求,然后根据用户的sessionId找到对应的会话,验证登录状态;验证通过后之后进行相关的业务处理,否则就返回。
对于注册功能的实现:用户注册时,密码在服务器通过加盐算法进行加密后存储到数据库中
对于录题功能:只有当用户具有管理员权限时才允许录制题目
开发环境
- Centos 7云服务器
- vscode
所用技术
- C++ STL标准库
- Boost准标准库(字符串切割)
- cpp-httplib第三方开源网络库
- ctemplate第三方开源前端网页渲染库
- jsoncpp第三方开源序列化,反序列化库
- MySQL C conect
- Ace前端在线编译器
- html/css/js/jquery/ajax
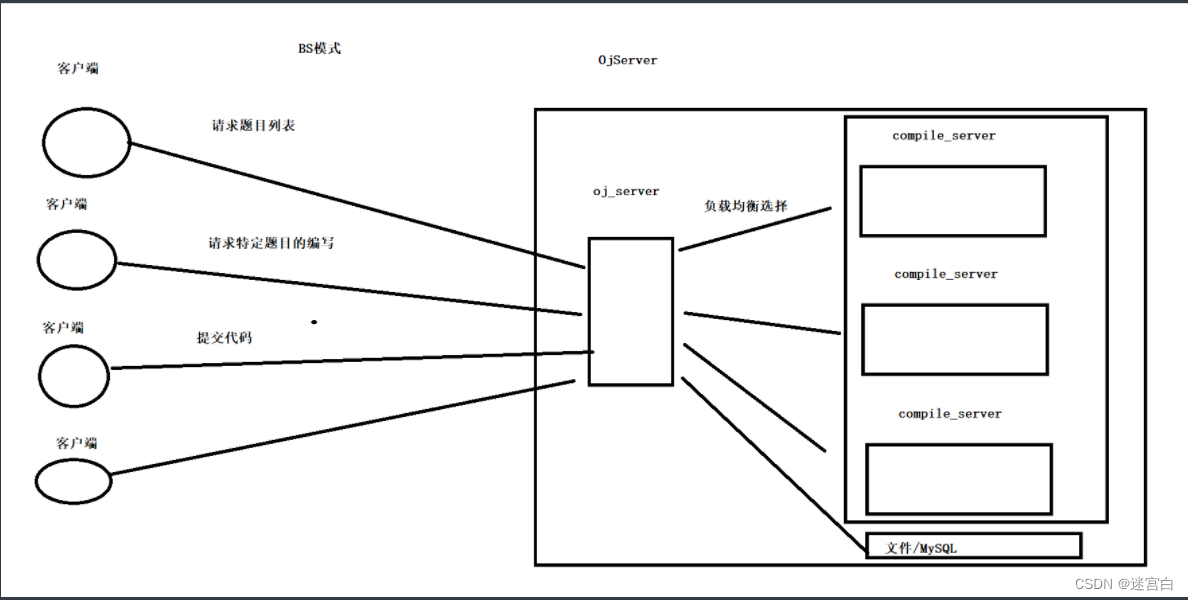
项目宏观结构
o Session模块:封装session管理,实现http客户端通信状态的维护和身份识别
o 编译运行模块:主要用于对用户提交的代码进行编译和运行;将编译和运行的结果进行返回(编译运行模块可部署到多台机器上)
o 业务处理模块:根据客户端的请求调用不同的模块提供对应的业务处理;这个模块是一个MVC模型可以细分为3个模块
- M:数据管理模块,基于mysql数据库进行数据管理以及封装数据管理模块实现对数据库的访问。
- V:页面渲染模块,基于ctemplate库,对题目详情页和题目列表页进行渲染
- C:控制器模块,主要的业务处理,调用不同模块和工具类提供对应的业务处理。
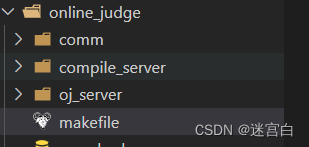
目录结构
编写思路
- 先编写compile_server:编译和运行模块
- 再编写oj_server:获取题目列表,查看题目编写题目界面,负载均衡等
- 基于mysql的在线OJ
- 登录,注册功能的编写(设计session)
- 用户通过题状态的编写
- 前端页面的设计
1. 编写compile_server
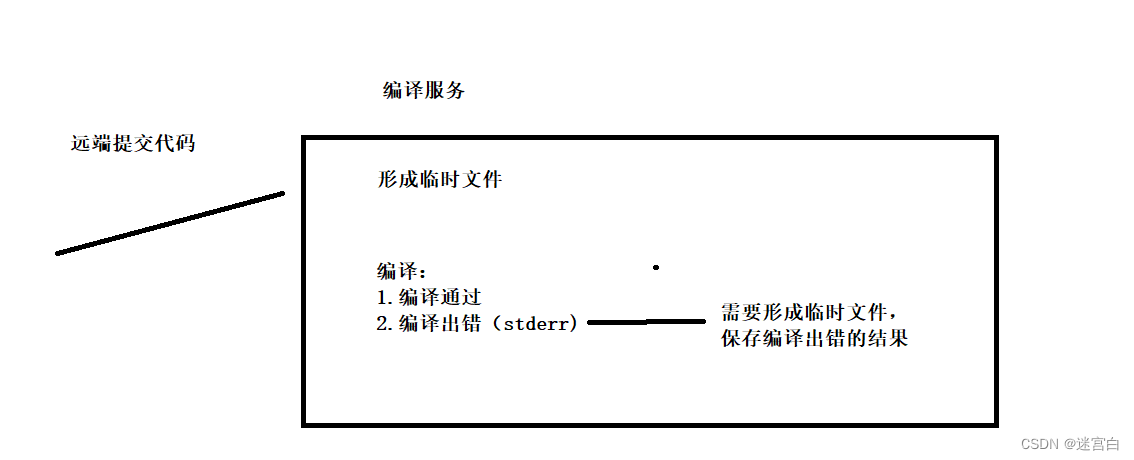
1.1 编译模块编写
编译并运行代码,得到格式化的相关结果
思路:传入需要编译的文件名;创建临时文件,保存编译错误的结果;fork子进程,完成编译工作。
#pragma once#include <iostream>
#include <unistd.h>
#include <sys/wait.h>
#include <sys/types.h>
#include <sys/stat.h>
#include <fcntl.h>#include "../comm/util.hpp"
#include "../comm/log.hpp"using std::endl;
namespace ns_oj_compile
{//引入路径拼接功能using namespace ns_oj_util;using namespace ns_oj_log;class Compiler{public:Compiler(){}~Compiler(){}//返回值:编译成功:true;否则就是false//输入参数:编译的文件名//传入文件名-》./temp/文件名.cpp 或 ./temp/文件名.exe 或 ./temp/文件名.stderrstatic bool Compile(const std::string &file_name){pid_t pid = fork();if(pid < 0){LOG(ERROR) << "内部错误,创建子进程失败" << endl;return false;}else if(pid == 0){umask(0);int stderr_ = open(PathUtil::GetCompilerError(file_name).c_str(),O_CREAT | O_WRONLY ,0644);if(stderr_ < 0){LOG(WARNING) << "没有成功形成stderr文件" << endl;exit(1);}//重定向标准错误到stderr_dup2(stderr_,2);//程序替换,并不影响进程的文件描述符表//子进程:调用编译器,完成对代码的编译工作//g++ -o target src -std=c++11execlp("g++","g++","-o",PathUtil::GetExe(file_name).c_str(),PathUtil::GetSrc(file_name).c_str(),"-std=c++11","-D","COMPILER_ONLINE",nullptr);LOG(ERROR) << "启动编译器g++失败,可能是参数错误" << endl;exit(2);}else {//父进程waitpid(pid,nullptr,0);//编译是否成功,看有没有形成对应的可执行程序if(FileUtil::IsFileExits(PathUtil::GetExe(file_name))){LOG(INFO) << PathUtil::GetSrc(file_name) << "编译成功" << endl;return true;}}LOG(ERROR) << "编译失败,没有形成可执行程序" << endl;return false;}};
}
需要用的日志
#pragma once#include <iostream>
#include <string>
#include "util.hpp"
namespace ns_oj_log
{using namespace ns_oj_util;//日志等级enum {//枚举其实就是整数INFO,DEBUG,WARNING,ERROR,FATAL};//log() << "message"inline std::ostream& Log(const std::string &level,const std::string &file_name,int line){//添加日志等级std::string message = "[";message += level;message += "]";//添加报错文件名称message += "[";message += file_name;message += "]";//添加报错行message += "[";message += std::to_string(line);message += "]";//日志时间戳message += "[";message += TimeUtil::GetTimeStamp();message += "]";//cout 本质 内部是包含缓冲区的std::cout << message;//不要endl进行刷新return std::cout;}//给宏参数加上# 可以将对应的宏名称以字符串的方式进行展示//LOG(INFO) << "message" << "\n"//开放式日志#define LOG(level) Log(#level,__FILE__,__LINE__)
}
需要用到的工具类
#pragma once#include <iostream>
#include <vector>
#include <string>
#include <atomic>
#include <fstream>
#include <sys/types.h>
#include <sys/stat.h>
#include <unistd.h>
#include <sys/time.h>
#include <boost/algorithm/string.hpp>
#include <boost/uuid/uuid.hpp>
#include <boost/uuid/uuid_generators.hpp>
#include <boost/uuid/uuid_io.hpp>
#include <boost/chrono.hpp>
#include <jsoncpp/json/json.h>#include "md5.h"
#include "../oj_server/oj_model_struct.hpp"
#include "httplib.h"namespace ns_oj_util
{using namespace oj_model_struct;class TimeUtil{public:static std::string GetTimeStamp(){// 时间戳struct timeval time_;gettimeofday(&time_, nullptr);return std::to_string(time_.tv_sec);}// 获得毫秒时间戳static std::string GetTimeMs(){struct timeval _time;gettimeofday(&_time, nullptr);return std::to_string(_time.tv_sec * 1000 + _time.tv_usec / 1000);}// 获得当前时间戳static long long CurrentTimeStamp(){// 获取当前时间点boost::chrono::system_clock::time_point now = boost::chrono::system_clock::now();// 将时间点转化为当前ms级的时间戳boost::chrono::milliseconds timestamp = boost::chrono::duration_cast<boost::chrono::milliseconds>(now.time_since_epoch());return timestamp.count();}};const std::string temp_path = "./temp/";class PathUtil{public:// 添加前缀和后缀static std::string AddPrefixSuffix(const std::string &file_name, const std::string &suffix){std::string path_name = temp_path;path_name += file_name;path_name += suffix;return path_name;}/*编译时需要的临时文件*/// 构建源文件路径 + 后缀的完整文件名static std::string GetSrc(const std::string &file_name){return AddPrefixSuffix(file_name, ".cpp");}// 构建可执行程序的完整路径 + 后缀名static std::string GetExe(const std::string &file_name){return AddPrefixSuffix(file_name, ".exe");}// 构建该程序对应的编译错误的完整路径 + 后缀名static std::string GetCompilerError(const std::string &file_name){return AddPrefixSuffix(file_name, ".compile_error");}/*运行时需要的临时文件*/// 构建对应的标准输入完整路径 + 后缀名static std::string GetStdin(const std::string &file_name){return AddPrefixSuffix(file_name, ".stdin");}// 构建对应的标准输出完整路径 + 后缀名static std::string GetStdout(const std::string &file_name){return AddPrefixSuffix(file_name, ".stdout");}// 构建该程序对应的标准错误完整的路径 + 后缀名static std::string GetStderr(const std::string &file_name){return AddPrefixSuffix(file_name, ".stderr");}//构建该程序对应测试用例时候通过的完整路径 + 后缀名static std::string GetResult(const std::string &file_name){return AddPrefixSuffix(file_name,".result");}};class FileUtil{public:static bool IsFileExits(const std::string &path_name){struct stat st;if (stat(path_name.c_str(), &st) == 0){// 获取属性成功,文件已经存在return true;}return false;}static std::string UniqueFileName(){static std::atomic_uint id(0);id++;// 毫秒级时间戳 + 原子性递增唯一值:来保证唯一性std::string ms = TimeUtil::GetTimeMs();std::string uniq_id = std::to_string(id);return ms + "_" + uniq_id;}static bool WriteFile(const std::string &target, const std::string &content){std::ofstream out(target);if (!out.is_open()){return false;}out.write(content.c_str(), content.size());out.close();return true;}static bool ReadFile(const std::string &target, std::string *content, bool keep = false /*可能还需要其他参数*/){(*content).clear();std::ifstream in(target);if (!in.is_open()){return false;}std::string line;// getline:不保存行分割符,有些时候需要保留\n// getline内部重载了强制类型转化while (std::getline(in, line)){(*content) += line;(*content) += (keep ? "\n" : "");}in.close();return true;}};class StringUtil{public:/*str:输入型参数,目标要切分的字符串target:输出型参数,保存切分完毕的结果sep:指定的分隔符*/static void SplitString(const std::string &str, std::vector<std::string> *target, std::string sep){// 这里使用boost库的一个splite方法boost::split(*target, str, boost::is_any_of(sep), boost::algorithm::token_compress_on);}static void ReplaceAll(std::string &str, const std::string &search, const std::string replace){boost::replace_all(str, search, replace);}static std::string create_sessionId(){boost::uuids::random_generator generator;boost::uuids::uuid uuid = generator();return boost::uuids::to_string(uuid);}};}
这些工具类需要用到boost库,后面会统一说明如何安装
1.2 运行功能
思路:主要是实现Run方法,Run方法有3个函数,指定需要运行代码的文件名(不需要带路径,不需要带后缀),cpu_limit(程序运行时间限制),mem_limit(程序内存限制)
这里采用setrlimit()方法来限制进程的运行时间和内存限制,具体用法可以自行查询
Run方法返回值:
返回值> 0 :程序异常,退出时收到了信号,返回值就是对应信号的编号
返回值==0:正常运行完毕,结果保存到了对应的临时文件中
返回值 < 0:内部错误
程序运行有3种结果:1. 代码跑完,结果正确2.代码跑完,结果不正确3.代码没跑完,异常了在这里,代码跑完,结果正确与否并不关心;结果正确与否由测试用例决定(由上层决定)在这里,只考虑是否能运行完毕一个程序在默认启动时:标准输入:不处理(全部由测试用例决定)标准输出:程序运行完成,输出结果是什么标准错误:运行时错误信息扩展:代码跑完,关心结果是否正确思路:在打开一个文件,执行是否通过完这个文件记录,然后父进程读
/*
负责运行功能
*/
#pragma once#include <iostream>
#include <string>
#include <unistd.h>
#include <sys/types.h>
#include <sys/stat.h>
#include <fcntl.h>
#include <sys/wait.h>
#include <sys/time.h>
#include <sys/resource.h>
#include "../comm/log.hpp"
#include "../comm/util.hpp"namespace ns_oj_runner
{using namespace ns_oj_util;using namespace ns_oj_log;class Runner{public:Runner(){}~Runner(){}public://提供设置进程占用资源大小的接口//cpu_limit 以秒为单位//mem_limit 以kb为单位static void SetProcLimit(int cpu_limit,int mem_limit){//设置占用CPU时长struct rlimit cpu_rlimit;cpu_rlimit.rlim_cur = cpu_limit;cpu_rlimit.rlim_max = RLIM_INFINITY;setrlimit(RLIMIT_CPU,&cpu_rlimit);//设置内存大小struct rlimit mem_rlimit;mem_rlimit.rlim_cur = mem_limit * 1024;//转换成字节mem_rlimit.rlim_max = RLIM_INFINITY;setrlimit(RLIMIT_AS,&mem_rlimit);}//指明文件名即可,不需要带路径,不需要带后缀/*返回值 > 0:程序异常了,退出时收到了信号,返回值就是对应的信号编号返回值 == 0:正常运行完毕的,结果保存到了对应的临时文件中返回值 < 0:内部错误cpu_limit:该程序运行时,可以使用的最大CPU资源上限(运行时长)(单位是秒)mem_limit:该程序运行时,可以使用的最大内存大小KB(申请的空间)(单位是kb)*/static int Run(const std::string file_name,int cpu_limit,int mem_limit){/*程序运行有3种结果:1. 代码跑完,结果正确2.代码跑完,结果不正确3.代码没跑完,异常了在这里,代码跑完,结果正确与否由测试用例决定,这里是打开一个.result文件看是否有对应输入在这里,只考虑是否能运行完毕一个程序在默认启动时:标准输入:不处理(全部由测试用例决定)标准输出:程序运行完成,输出结果是什么标准错误:运行时错误信息扩展:代码跑完,关心结果是否正确思路:在打开一个文件,执行是否通过完这个文件记录,然后父进程读*/std::string execute_ = PathUtil::GetExe(file_name);std::string stdin_ = PathUtil::GetStdin(file_name);std::string stdout_ = PathUtil::GetStdout(file_name);std::string stderr_ = PathUtil::GetStderr(file_name);std::string result_ = PathUtil::GetResult(file_name);umask(0);int stdin_fd = open(stdin_.c_str(),O_CREAT | O_WRONLY,0644);int stdout_fd = open(stdout_.c_str(),O_CREAT | O_WRONLY,0644);int stderr_fd = open(stderr_.c_str(),O_CREAT | O_WRONLY,0644);int result_fd = open(result_.c_str(),O_CREAT | O_WRONLY,0644);if(stdin_fd < 0 || stdout_fd < 0 || stderr_fd < 0){LOG(ERROR) << "运行时打开标准文件失败" << std::endl;return -1;//代表打开文件失败}pid_t pid = fork();if(pid < 0){LOG(ERROR) << "运行时创建子进程失败" << std::endl;close(stdin_fd);close(stdout_fd);close(stderr_fd);close(result_fd);return -2;//代表创建子进程失败}else if(pid == 0){//子进程dup2(stdin_fd,0);dup2(stdout_fd,1);dup2(stderr_fd,2);SetProcLimit(cpu_limit,mem_limit);execl(execute_.c_str()/*我要执行谁*/,execute_.c_str(),std::to_string(result_fd).c_str()/*我想在命令行上如何执行该程序*/,nullptr);exit(1);}else{//父进程close(stdin_fd);close(stdout_fd);close(stderr_fd);close(result_fd);int status = 0;waitpid(pid,&status,0);//程序运行异常,在Linux一定是因为收到了信号//status & 0x7F,看是否为信号所停止,是什么信号所杀LOG(INFO) << "运行完毕,info:" << (status & 0x7F) << std::endl;return status & 0X7F;}}};
}
1.3compile_runner 编译与运行
这个模块主要整合编译部分和运行部分,适配用户请求,定制通信协议字段
由于最后这个项目是通过网络来通信,所以这里需要用到Jsoncpp(主要用来约定传输的通信字段)
/*
整合编译和运行模块
*/#pragma once
#include "compile.hpp"
#include "runner.hpp"
#include "../comm/util.hpp"
#include "../comm/log.hpp"#include <signal.h>
#include <unistd.h>
#include <jsoncpp/json/json.h>// 适配用户请求,定制通信协议字段
// 正确的调用compile and runnamespace ns_oj_compile_run
{using namespace ns_oj_util;using namespace ns_oj_log;using namespace ns_oj_compile;using namespace ns_oj_runner;class CompileAndRun{public:// code > 0 :进程收到了信号导致异常崩溃// code < 0 :整个过程非运行报错(代码为空,编译报错等)// code = 0 :整个过程全部完成// 待完善static std::string CodeToDesc(int code, const std::string &file_name){std::string desc;switch (code){case 0:desc = "编译运行成功";break;case -1:desc = "提交的代码为空";break;case -2:desc = "未知错误";break;case -3:// desc = "代码编译时发生了错误";FileUtil::ReadFile(PathUtil::GetCompilerError(file_name), &desc, true);break;case SIGABRT:desc = "内存超过可使用范围";break;case SIGXCPU:desc = "CPU使用超时(运行超时)";break;case SIGFPE:desc = "浮点数溢出";default:desc = "未知:" + std::to_string(code);break;}return desc;}static void RemoveTempFile(const std::string &file_name){// 清理文件的个数是不确定的,但是有哪些是我们知道的std::string src_ = PathUtil::GetSrc(file_name);if (FileUtil::IsFileExits(src_))unlink(src_.c_str()); //删除文件std::string compiler_error_ = PathUtil::GetCompilerError(file_name);if(FileUtil::IsFileExits(compiler_error_))unlink(compiler_error_.c_str());std::string execute_ = PathUtil::GetExe(file_name);if(FileUtil::IsFileExits(execute_))unlink(execute_.c_str());std::string stdin_ = PathUtil::GetStdin(file_name);if(FileUtil::IsFileExits(stdin_))unlink(stdin_.c_str());std::string stdout_ = PathUtil::GetStdout(file_name);if(FileUtil::IsFileExits(stdout_))unlink(stdout_.c_str());std::string stderr_ = PathUtil::GetStderr(file_name);if(FileUtil::IsFileExits(stderr_))unlink(stderr_.c_str()); std::string result_ = PathUtil::GetResult(file_name);if(FileUtil::IsFileExits(result_))unlink(result_.c_str());}/*输入:code:用户提交的代码input:用户给自己提交的代码对应输入,不做处理cpu_limit:时间要求mem_limit:空间要求输出:必填status:装态码reason:请求结果选填:stdout:我的程序运行完的结果stderr:我的程序运行完的错误结果in_json: {"code" : "用户提交的代码","input" : "用户输入,这里不做处理","cpu_limit" : "cpu运行时间","mem_limit" : "空间要求,KB为单位"}out_json:{"status" : "0","reason" : "","stdout" : "代码执行结果","stderr" : "代码执行错误的报错信息","completed":"是否通过该题目"}*/static void Start(const std::string &in_json, std::string *out_json){//std::cout << "开始" << std::endl;Json::Value in_value;Json::Reader reader;reader.parse(in_json, in_value); // 最后处理差错问题std::string code = in_value["code"].asString();std::string input = in_value["input"].asString();int cpu_limit = in_value["cpu_limit"].asInt();int mem_limit = in_value["mem_limit"].asInt();int status_code = 0;int run_result = 0;Json::Value out_value;std::string file_name; // 需要内部形成的唯一文件名if (code.size() == 0){// 最后处理差错问题// 序列化过程status_code = -1; // 代码为空goto END;}// 形成的文件名只具有唯一性,没有目录,没有后缀// 毫秒级时间戳 + 原子性递增唯一值:来保证唯一性file_name = FileUtil::UniqueFileName();// 形成临时src文件if (!FileUtil::WriteFile(PathUtil::GetSrc(file_name), code)){// 写入失败status_code = -2; // 未知错误goto END;}if (!Compiler::Compile(file_name)){// 编译失败status_code = -3; // 代码编译时发生了错误goto END;}run_result = Runner::Run(file_name, cpu_limit, mem_limit);if (run_result < 0){// 服务器内部错误status_code = -2;goto END;}else if (run_result > 0){// 程序运行崩溃了status_code = run_result;goto END;}else{// 运行成功status_code = 0;goto END;}END:// status_codeout_value["status"] = status_code;out_value["reason"] = CodeToDesc(status_code, file_name);if (status_code == 0){// 整个过程全部成功std::string stdout_;FileUtil::ReadFile(PathUtil::GetStdout(file_name), &stdout_, true);out_value["stdout"] = stdout_;std::string stderr_;FileUtil::ReadFile(PathUtil::GetStderr(file_name), &stderr_, true);out_value["stderr"] = stderr_;std::string completed_;FileUtil::ReadFile(PathUtil::GetResult(file_name),&completed_,true);out_value["completed"] = completed_; std::cout << completed_ << endl;}Json::StyledWriter writer;*out_json = writer.write(out_value);RemoveTempFile(file_name);}};
}
1.4 编写compile_server.cpp调用compile_run模块,形成网络服务
这个模块需要用到cpp-httplib,关于其安装统一放在最后
#include "compile_run.hpp"
#include "../comm/httplib.h"
using namespace ns_oj_compile_run;using namespace httplib;void Usage(std::string proc)
{std::cerr << "Usage:"<< "\n\t" << proc << std::endl;
}// 编译服务随时可能被多个人请求,必须保证传递上来的code,形成源文件名称的时候,要具有唯一性,要不然多个用户之间会相互影响
int main(int argc, char *argv[])
{if (argc != 2){Usage(argv[0]);exit(1);}Server svr;svr.Post("/compile_run",[](const Request &req,Response &resp){//用户请求的服务正文是我们想要的json stringstd::string in_json = req.body;std::string out_json;if(!in_json.empty()){CompileAndRun::Start(in_json,&out_json);resp.set_content(out_json,"application/json;charset=utf-8");}});svr.listen("0.0.0.0",atoi(argv[1]));// 提供的编译服务,打包形成一个网络服务// 使用cpp-httplib 是一个网络库// 通过http 让client给我们上传一个json string//  std::string in_json;//  Json::Value in_value;//  in_value["code"] = R"(#include<iostream>//   int main() {//      int *p = new int[1024 * 1024 * 50];//      while(1);//       std::cout << "hello" << std::endl ;//       return 0;//       })";//  in_value["input"] = "";//  in_value["cpu_limit"] = 1;//  in_value["mem_limit"] = 10240 * 3;//  Json::FastWriter writer;//  in_json = writer.write(in_value);//  std::cout << in_json << std::endl;// //这个是将来给客户端返回的json串// std::string out_json;// CompileAndRun::Start(in_json,&out_json);// std::cout << out_json << std::endl;return 0;
}
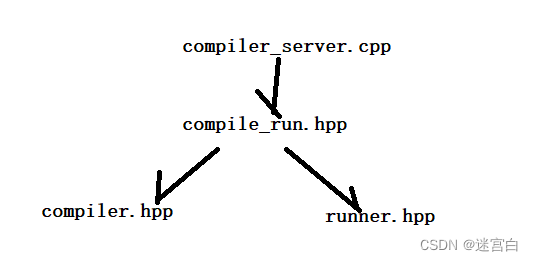
大致的调用关系就是
编译模块的makefile
compile_server:compile_server.cppg++ -o $@ $^  -L./lib -std=c++11 -ljsoncpp -lpthread -lboost_system -lboost_chrono
.PHONY:clean
clean:rm -f compile_server
2. 编写基于MVC的oj_server
主要功能:
- 获取首页
- 编辑区域页面
- 提交判题功能
- 注册功能
- 登录功能
MVC模型
M:Model,是和数据交互的模块,比如在这个项目中就是对题库表,用户表等的增删查改
V:view,通常是拿到数据之后,要进行构建网页,渲染网页内容
C:control,控制器,主要是核心的业务逻辑
2.1 oj_server.cpp的编写
主要是接收用户请求服务的路由功能
#include <iostream>
#include <signal.h>
#include "../comm/httplib.h"
#include "oj_control.hpp"
#include "../comm/util.hpp"using namespace httplib;
using namespace ns_oj_control;
using namespace ns_oj_util;static Control *ctrl_ptr = nullptr;LoginInterceptor interceptor;void Recovery(int signo)
{ctrl_ptr->RecoveryMachine();
}int main()
{// ctrl + \ 让所有主机上线signal(SIGQUIT, Recovery);// 用户请求的服务路由功能Server svr;Control ctrl;ctrl_ptr = &ctrl;// 获取所有的题目列表svr.Get("/all_questions", [&ctrl](const Request &req, Response &resp){// 解析cookie拿到session_userinfo_key对应的sessionIdstd::string sessionId;CookieUtil::explainCookie(req, &sessionId);std::cout << sessionId << endl;// 返回一张所有含有题目的html网页std::string html;ctrl.GetTotalQuestionsCreateHTML(&html, sessionId);resp.set_content(html, "text/html;charset=utf-8");// resp.set_content("这是所有题目的列表","text/plain;charset=utf-8");});// 用户要根据题目编号,获取题目的内容//  questions/100   \d+是正则表达式// R"()",原始字符串可以保持字符串内容的原貌,不用做相关的转义svr.Get(R"(/question/(\d+))", [&ctrl](const Request &req, Response &resp){std::string id = req.matches[1];std::string html;ctrl.GetQuestionByIdGreateHTML(id, &html);resp.set_content(html, "text/html;charset=utf-8");// resp.set_content("这是指定的一道题:" + number,"text/plain;charset=utf-8");});// 用户提交代码,使用我们的判题功能(1.每道题的测试用例 2. compile_and_rum)svr.Post(R"(/judge/(\d+))", [&ctrl](const Request &req, Response &resp){// 解析cookie拿到session_userinfo_key对应的sessionIdstd::string sessionId;CookieUtil::explainCookie(req, &sessionId);if (interceptor.preHandle(&sessionId)){std::string id = req.matches[1];std::string result_json;ctrl.Judge(id, req.body, sessionId, &result_json);resp.set_content(result_json, "application/json;charset=utf-8");}else{// 设置未登录的状态码,之后前端提示未登录,跳转登录页面resp.status = 401;}// resp.set_content("指定判定的题目:" + number,"text/plain;charset=utf-8");});// 用户提交登录信息,验证登录信息svr.Post("/login", [&ctrl](const Request &req, Response &resp){std::string cookieValue = req.get_header_value("Cookie");// 解析cookie拿到session_userinfo_key对应的sessionIdstd::string sessionId;CookieUtil::explainCookie(req, &sessionId);// 执行验证std::string result_json;bool flag = ctrl.Login(req.body, &sessionId, &result_json);// LOG(DEBUG) << result_json << endl;if (flag)resp.set_header("Set-Cookie", session_userinfo_key + sessionId);resp.set_content(result_json, "application/json;charset=utf-8");//LOG(DEBUG) << "发送" << endl; });// 用户提交注册信息svr.Post("/reg", [&ctrl](const Request &req, Response &resp){//注册用户std::string result_json;ctrl.Reg(req.body,&result_json);resp.set_content(result_json,"application/json;charset=utf-8"); });//检查用户权限svr.Post("/check_grade",[&ctrl](const Request &req,Response &resp){//解析cookie拿到session_userinfo_key对应的sessionIdstd::string sessionId;CookieUtil::explainCookie(req,&sessionId);std::string result_json;bool flag = ctrl.CheckGrade(sessionId,&result_json);if(!flag) resp.status = 401;resp.set_content(result_json,"application/json;charset=utf-8");});//录题svr.Post("/question_entry",[&ctrl](const Request &req,Response &resp){std::string result_json;ctrl.QuestionEntry(req.body,&result_json);resp.set_content(result_json,"application/json;charset=utf-8");});svr.set_base_dir("./rootweb");svr.listen("0.0.0.0", 8081);return 0;
}
2.2 oj_model_mysql .hpp的编写
对于model模块,我们需要3个模型:用户表,题目表,记录用户完成题目的表;
CREATE TABLE IF NOT EXISTS `oj_questions`( `id` int PRIMARY KEY AUTO_INCREMENT COMMENT '题目的ID', `title` VARCHAR(256) NOT NULL COMMENT '题目的标题', `star` VARCHAR(30) NOT NULL COMMENT '题目的难度', `desc` TEXT NOT NULL COMMENT '题目描述', `header` TEXT NOT NULL COMMENT '题目头部,给用户看的代码', `tail` TEXT NOT NULL COMMENT '题目尾部,包含我们的测试用例', `cpu_limit` int DEFAULT 1 COMMENT '题目的时间限制', `mem_limit` int DEFAULT 50000 COMMENT '题目的空间限制'
)ENGINE=INNODB DEFAULT CHARSET=utf8;
CREATE TABLE IF NOT EXISTS users (id int PRIMARY KEY AUTO_INCREMENT, username varchar(100) NOT NULL,`password` varchar(100) NOT NULL,grade int default 1                # 0 表示管理员, 0 表示用户
) ENGINE=InnoDB DEFAULT CHARSET=utf8;
CREATE TABLE IF NOT EXISTS completed (id INT PRIMARY KEY AUTO_INCREMENT,user_id INT,question_id INT,completed_time TIMESTAMP DEFAULT CURRENT_TIMESTAMP,FOREIGN KEY (user_id) REFERENCES users(id),FOREIGN KEY (question_id) REFERENCES oj_questions(id)
) ENGINE=InnoDB DEFAULT CHARSET=utf8;
c++连接数据库需要安装工具包,对于安装也放在最后统一讲
对于对应的表,我创建一个oj_model_struct,用来放对应的模型(其实就是结构体)
#pragma once#include <string>#include "include/mysql.h"
namespace oj_model_struct {struct Question{std::string id; //题目编号唯一std::string title;  //题目的标题std::string star;   //难度:简单  中等  困难std::string desc;   //题目的描述std::string header; //题目预设给用户在线编辑器的代码std::string tail;   //题目的测试用例,需要和header拼接,形成完整代码int cpu_limit;      //题目的时间要求(秒为单位)int mem_limit;      //题目的空间要求(KB为单位)void getObjectByRow(const MYSQL_ROW &row){id = row[0];title = row[1];star = row[2];desc = row[3];header = row[4];tail = row[5];cpu_limit = atoi(row[6]);mem_limit = atoi(row[7]);}};struct Users{int id;//用户编号唯一std::string username;std::string password;int grade;void getObjectByRow(const MYSQL_ROW &row){id = atoi(row[0]);username = row[1];password = row[2];grade = atoi(row[3]);}};struct Completed{int id;int user_id;int question_id;int completed_time;void getObjectByRow(const MYSQL_ROW &row){id = atoi(row[0]);user_id = atoi(row[1]);question_id = atoi(row[2]);completed_time = atoi(row[3]);}};}
#pragma once// MySQL 版本
#include "../comm/log.hpp"
#include "../comm/util.hpp"
#include "oj_model_struct.hpp"#include <iostream>
#include <string>
#include <vector>
#include <unordered_map>
#include <fstream>
#include <cstdlib>
#include <cassert>
#include "include/mysql.h"#include <boost/algorithm/string/replace.hpp>// 根据题目list文件,加载所有的题目信息到内存
// model:主要用来和数据进行交互,对外提供访问数据的接口namespace ns_oj_model
{using namespace std;using namespace ns_oj_log;using namespace ns_oj_util;using namespace oj_model_struct;const std::string question_table_name = "oj_questions";const std::string user_table_name = "users";const std::string completed_table_name = "completed";const std::string host = "127.0.0.1";const std::string user = "oj_client";const std::string passwd = "123456";const std::string db = "oj";const int port = 3306;class Model{public:Model(){LoadMySQL();}~Model(){// 关闭mysql连接mysql_close(mysql_conn);}// 获取是所有题目信息到outbool GetTotalQuestions(vector<Question> *out){std::string sql = "select * from ";sql += question_table_name;return QueryMysql(sql, out);}// 根据id获取题目bool GetQuestionById(const string &id, Question *q){bool res = false;std::string sql = "select * from ";sql += question_table_name;sql += " where id=";sql += id;vector<Question> out;if (QueryMysql(sql, &out)){if (out.size() == 1){*q = out[0];res = true;}}return res;}// 根据username和password查询用户bool GetUserByCredentials(const string &username, const string &password, Users *user){std::string sql = "select * from ";sql += user_table_name;sql += " where username='";sql += username;sql += "'";sql += " and password='";sql += password;sql += "'";vector<Users> out;if (QueryMysql(sql, &out)){if (out.size() == 1){LOG(INFO) << "查询成功" << endl;*user = out[0];return true;}}return false;}bool GetUserByUserName(const string &username, Users *user){std::string sql = "select * from ";sql += user_table_name;sql += " where username='";sql += username;sql += "'";vector<Users> out;if (QueryMysql(sql, &out)){if (out.size() == 1){LOG(INFO) << "查询成功" << endl;*user = out[0];return true;}}return false;}// 根据username和password注册用户bool RegUser(const string &username, const string &password){std::string sql = "insert ";sql += user_table_name;sql += " values (NULL,'";sql += username;sql += "','";sql += password;sql += "',";sql += "1)";if (insert_mysql_query(sql) == 1){LOG(INFO) << "插入数据成功" << endl;return true;}return false;}int insert_mysql_query(const string &sql){if (mysql_query(mysql_conn, sql.c_str()) != 0){LOG(WARNING) << sql << "sql execute error" << endl;return -1;}// 否则返回受影响的行数return mysql_affected_rows(mysql_conn);}bool GetCompletedByUid(int uid, vector<Completed> *out){std::string sql = "select * from ";sql += completed_table_name;sql += " where user_id=";sql += to_string(uid);return QueryMysql(sql, out);}bool GetCompletedByUidAndQid(const std::string &uid, const std::string &qid, vector<Completed> *out){std::string sql = "select * from ";sql += completed_table_name;sql += " where user_id=";sql += uid;sql += " and question_id=";sql += qid;return QueryMysql(sql, out);}bool InsertCompletedByUidAndQid(const std::string &uid, const std::string &qid){std::string sql = "insert into ";sql += completed_table_name;sql += "(user_id,question_id) values(";sql += uid;sql += ",";sql += qid;sql += ")";return insert_mysql_query(sql) == 1;}bool InsertQuestion(std::string &title, std::string &star, std::string &desc, std::string &header, std::string &tail, std::string &cpu_limit, std::string &mem_limit){std::string sql = "insert oj_questions (title, star, `desc`, `header`, `tail`) values(";sql += "'" + title + "', " + "' " + star + "', " + "'" + desc + "', " + "'" + header + "', " + "'" + tail + "')";return insert_mysql_query(sql) == 1;}private:void LoadMySQL(){// 创建mysql句柄mysql_conn = mysql_init(nullptr);// 连接数据库if (mysql_real_connect(mysql_conn, host.c_str(), user.c_str(), passwd.c_str(), db.c_str(), port, nullptr, 0) == nullptr){LOG(FATAL) << "连接数据库失败!" << endl;exit(-1);}// 一定要设置该连接的编码格式,要不然会出现乱码问题mysql_set_character_set(mysql_conn, "utf8");LOG(INFO) << "连接数据库成功!" << endl;}template <class T>bool QueryMysql(const std::string &sql, vector<T> *out){// 执行sql语句if (mysql_query(mysql_conn, sql.c_str()) != 0){LOG(WARNING) << sql << " sql execute error" << endl;return false;}// 提取结果MYSQL_RES *res = mysql_store_result(mysql_conn);// 分析结果int rows = mysql_num_rows(res);   // 获得行数量int cols = mysql_num_fields(res); // 获得列数量for (int i = 0; i < rows; i++){T t;MYSQL_ROW row = mysql_fetch_row(res);t.getObjectByRow(row);out->push_back(t);}// 释放结果空间free(res);return true;}private:MYSQL *mysql_conn;};
}
2.3 oj_view.hpp的编写
这个模块主要是对于,题目详情页和题目列表的渲染。
需要用到ctemplate库,安装放最后统一讲
#pragma once#include <iostream>
#include <string>
#include <vector>
#include <ctemplate/template.h>
#include <boost/algorithm/string.hpp>#include "oj_model_mysql.hpp"
#include "../comm/util.hpp"namespace ns_oj_view
{using namespace ns_oj_model;using namespace ns_oj_util;const std::string template_html_path = "./ctemplate_html/";class View{public:View(){}~View(){}public:void TotalQuestionsExpandHtml(const std::vector<struct Question> &all_questions,const std::vector<struct Completed> &user_all_completed,std::string *html){//题目的编号,题目的标题,题目的难度//推荐使用表格显示//1.形成路径std::string src_html = template_html_path + "all_questions.html";//2.形成数据字典ctemplate::TemplateDictionary root("all_questions");int size = user_all_completed.size();int i = 0;for(const auto& q : all_questions){ctemplate::TemplateDictionary *sub = root.AddSectionDictionary("question_list");if(i < size && user_all_completed[i].question_id == atoi(q.id.c_str())){sub->SetValue("completed","√");i++;}else{sub->SetValue("completed"," ");}sub->SetValue("id",q.id);sub->SetValue("title",q.title);sub->SetValue("star",q.star);}//3.获取被渲染的网页ctemplate::Template *tpl = ctemplate::Template::GetTemplate(src_html,ctemplate::DO_NOT_STRIP);//4.开始完成渲染过程tpl->Expand(html,&root);}void rendSingleQuestionExpandHtml(struct Question &q,std::string *html){//1.形成路径std::string src_html = template_html_path + "single_question.html";ctemplate::TemplateDictionary root("one_question");root.SetValue("id",q.id);root.SetValue("title",q.title);// StringUtil::ReplaceAll(q.desc,"\n","<br>");root.SetValue("desc",q.desc);root.SetValue("star",q.star);root.SetValue("pre_code",q.header);//3.获取被渲染的网页ctemplate::Template *tpl = ctemplate::Template::GetTemplate(src_html,ctemplate::DO_NOT_STRIP);//4.开始完成渲染功能tpl->Expand(html,&root);}};
}
2.3 control的编写
control就是核心业务逻辑
2.3.1 session和LoginInterceptor的编写
对于session根据我自己的理解进行设计(如有不对请大佬在评论区指正一下)
核心思路:
boost库里的一个生成UUID的接口,用这个作为sessionId
/*
在 C++ 的 Boost 库中,确实存在 UUID(通用唯一标识符)的接口。UUID 是一个标准的标识符,用于唯一地标识信息或实体。Boost 库提供了 boost::uuids 命名空间,其中包含用于生成和操作 UUID 的类和函数。下面是一个简单的示例,展示了如何使用 Boost 库生成 UUID:
*/
#include <boost/uuid/uuid.hpp>
#include <boost/uuid/uuid_generators.hpp>
#include <boost/uuid/uuid_io.hpp>int main()
{// 生成一个随机的 UUIDboost::uuids::random_generator generator;boost::uuids::uuid uuid = generator();// 将 UUID 转换为字符串表示std::string uuidStr = boost::uuids::to_string(uuid);std::cout << "UUID: " << uuidStr << std::endl;return 0;
}
创建一个httpsession类,里面4个成员:创建时间,最后一次登录时间,User对象
创建一个类叫sessionMgr,里面一个私有成员是map<string,httpsession>,并提供对这个哈希表的增删查改
在controller构造方法开启一个线程,定期对哈希表扫描,删除过期会话
对于登录拦截器的编写
核心思路:对于登录功能,每次登录都更新一下会话信息
对于判题功能,每次提交都会拦截请求,验证用户是否登录
#pragma once#include <unordered_map>
#include <string>
#include <pthread.h>#include "../oj_server/oj_model_struct.hpp"
#include "util.hpp"
#include "log.hpp"
namespace ns_oj_session
{using namespace oj_model_struct;using namespace ns_oj_util;using namespace ns_oj_log;struct HttpSession{HttpSession(){session_create_time = TimeUtil::CurrentTimeStamp();last_login_time = session_create_time;}// session创建时间long long session_create_time;// session最后一次登录时间long long last_login_time;Users user;};// 过期时间const long long expire_time = 259200000;// 一个服务器一个session,设计成单例模式class SessionMgr{public:static SessionMgr *GetInstance(){// 保护第一次,后续不需要加锁// 保证对象创建好了之后,不用再次获取锁,提高效率if (_sessionMgr == nullptr){pthread_mutex_lock(&_mutex);// 保证第一次访问时,线程安全if (_sessionMgr == nullptr){_sessionMgr = new SessionMgr;}pthread_mutex_unlock(&_mutex);}return _sessionMgr;}// 创建会话,生成sessionId赋值给*sessionIdvoid create_httpSession(Users &user, std::string *sessionId){HttpSession *httpSession = new HttpSession();httpSession->user = user;*sessionId = StringUtil::create_sessionId();pthread_mutex_lock(&_mutex);_sessionMap[*sessionId] = httpSession;pthread_mutex_unlock(&_mutex);}// 根据sessionId,查找会话bool find_httpSession(std::string &sessionId, HttpSession **httpSession){LOG(DEBUG) << "开始查找会话 "  << sessionId << std::endl;pthread_mutex_lock(&_mutex);if (_sessionMap.count(sessionId) == 0){pthread_mutex_unlock(&_mutex);LOG(DEBUG) << "没有该会话" << std::endl;*httpSession = nullptr;return false;}*httpSession = _sessionMap[sessionId];pthread_mutex_unlock(&_mutex);return true;}// 根据sessionId将最后一次登录时间,更新为当前时间void updateLastLoginTime(std::string *sessionId){pthread_mutex_lock(&_mutex);HttpSession *httpSession = _sessionMap[*sessionId];pthread_mutex_unlock(&_mutex);httpSession->last_login_time = TimeUtil::CurrentTimeStamp();}void deleteExpireSession(){pthread_mutex_lock(&_mutex);for (auto it = _sessionMap.begin(); it != _sessionMap.end();){std::string sessionId = it->first;HttpSession *httpSession = it->second;if (httpSession->last_login_time + expire_time < TimeUtil::CurrentTimeStamp()){// 过期了it = _sessionMap.erase(it);}}pthread_mutex_unlock(&_mutex);}// 实现一个内嵌垃圾回收类class CGarbo{public:~CGarbo(){if (_sessionMgr){delete _sessionMgr;}}};// 定义一个静态成员变量,程序结束时,系统会自动调用它的析构函数从而释放单例对象static CGarbo cg; // 声明private:SessionMgr(){}~SessionMgr(){}SessionMgr(const SessionMgr &mgr) = delete;private:static SessionMgr *_sessionMgr;static pthread_mutex_t _mutex;std::unordered_map<std::string, HttpSession *> _sessionMap;};SessionMgr *SessionMgr::_sessionMgr = nullptr;SessionMgr::CGarbo cg;pthread_mutex_t SessionMgr::_mutex = PTHREAD_MUTEX_INITIALIZER;}
#pragma once
#include <string>#include "session.hpp"
#include "log.hpp"
namespace ns_oj_interceptor
{using namespace ns_oj_session;using namespace ns_oj_log;class LoginInterceptor{public:LoginInterceptor(){_sessionMgr = SessionMgr::GetInstance();}/**登录成功时调用如果sessionId为空,说明是第一次登录,则创建会话,将创建好的sessionId赋值如果sessionId不为空,有两种情况1. 如果查不到会话,说明会话过期,已经被删除,那么重新创建会话2.如果查到会话,更新会话的最后一次登录时间为当前时间*/void updateLoginMgr(Users &user, std::string *sessionId){if (sessionId->size() != 0){HttpSession *httpSession;if (_sessionMgr->find_httpSession(*sessionId, &httpSession)){if (httpSession->user.id == user.id){_sessionMgr->updateLastLoginTime(sessionId);return;}}}_sessionMgr->create_httpSession(user, sessionId);}bool getUserInfo(std::string &sessionId,Users *user){HttpSession *httpSession;if(_sessionMgr->find_httpSession(sessionId,&httpSession)){LOG(DEBUG) << "user id: " << httpSession->user.id << std::endl; *user = httpSession->user;return true;}return false;}/*前端发送请求时,拦截执行preHandle,判断是否登录*/bool preHandle(std::string *sessionId){HttpSession *httpSession = nullptr;if(sessionId->size() == 0 || !_sessionMgr->find_httpSession(*sessionId,&httpSession)){return false;}return true;}private:SessionMgr *_sessionMgr;};
}
然后我自己实现了后续需要用到的CookieUtil
const std::string session_userinfo_key = "session_userinfo_key=";class CookieUtil{public:static bool explainCookie(const httplib::Request &req,std::string *sessionId){std::string cookieValue = req.get_header_value("Cookie");// 解析cookie拿到session_userinfo_key对应的sessionIdsize_t pos = cookieValue.find(session_userinfo_key);if (pos != std::string::npos){pos += session_userinfo_key.size();size_t endPos = cookieValue.find(';', pos);*sessionId = cookieValue.substr(pos, endPos - pos);return true;}*sessionId = "";return false;}};2.3.2对于用户注册时,密码加密的说明
密码加密采用加盐算法进行加密
对于加密过程:每次生成内容不同,但长度为32的盐值(UUID);然后盐值拼接密码进行MD5加密形成32位长度的字符串;最后将盐值拼接这MD5加密后的32位字符串,存到数据库中
对于解密过程:从数据库取出用户的密码,然后截取前32位,就是盐值;然后盐值拼接用户输入的密码进行MD5加密后形成的32位字符串;然后拼接盐值和数据库中存入用户的密码进行比较
class SecurityUtil{public:// 加盐static void encrypt(const std::string &password, std::string *out){// 每次生成内容不同的,但长度为32的盐值(这里使用boost库提供的接口)boost::uuids::random_generator generator;boost::uuids::uuid uuid = generator();// 将UUID转换为字符串表示,不包含连接字符std::string salt = boost::uuids::to_string(uuid);StringUtil::ReplaceAll(salt, "-", "");std::string finalPassword = MD5(salt + password).toStr();// 返回盐值 + 密码;总共64位存到数据库*out = salt + finalPassword;}static bool decrypt(std::string &password, const std::string &finalPassword){if (password.size() == 0 || finalPassword.size() == 0 || finalPassword.size() != 64){return false;}// 获取盐值std::string salt = finalPassword.substr(0, 32);// 使用盐值 + 密码生成一个32为的密码std::string securityPassword = MD5(salt + password).toStr();securityPassword = salt + securityPassword;return finalPassword == securityPassword;}};但是c++没有提供相关的MD5加密的接口,所以需要引入别人写的,其安装也最后说
2.3.3 对于负载均衡的说明
首先我们在指定路径下,创建一个.conf文件,里面记录编译运行主机的信息

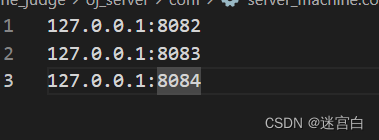
由于作者只有一台机器,所以就部署多个端口即可
这里设计一个Machine来表示编译运行的主机的信息以及其负载的情况,提供一些增加负载,减少负载的方法。
再设计一个LoadBlance类,这个是负责均衡块,主要记录全部主机,在线主机和离线主机,并提供一个方法用来智能选择主机。
这里选择主机的算法:只是通过简单的遍历,找出负载最小的主机(后续主机多了,可以对这个算法进行修改)
需要注意,对于负载和主机等属于临界资源的需要进行加锁
// 提供服务的主机class Machine{public:Machine(): _ip(""), _port(0), _load(0), _mtx(nullptr){}~Machine(){}public:// 增加主机负载void IncLoad(){if (_mtx)_mtx->lock();++_load;if (_mtx)_mtx->unlock();}// 减少主机负载void DecLoad(){if (_mtx)_mtx->lock();--_load;if (_mtx)_mtx->unlock();}void ResetLoad(){if (_mtx)_mtx->lock();_load = 0;if (_mtx)_mtx->unlock();}// 获取主机负载uint64_t Load(){uint64_t load = 0;load = _load;if (_mtx)_mtx->unlock();return load;}public:std::string _ip; // 编译服务的ipint _port; // 编译服务的portuint64_t _load; // 编译服务的负载std::mutex *_mtx; // mutex禁止拷贝,使用指针来完成};const std::string server_machine_path = "./conf/server_machine.conf";// 负载均衡块class LoadBlance{public:LoadBlance(){assert(LoadConf(server_machine_path));LOG(INFO) << "服务器配置文件加载成功... 路径为:" << server_machine_path << endl;}~LoadBlance(){}public:// 加载主机配置文件bool LoadConf(const std::string &machine_conf){std::ifstream in(machine_conf);if (!in.is_open()){LOG(FATAL) << "服务器配置文件加载失败.... 配置文件路径为:" << machine_conf << endl;return false;}std::string line;while (std::getline(in, line)){std::vector<std::string> results;StringUtil::SplitString(line, &results, ":");if (results.size() != 2){LOG(WARNING) << "切分" << line << "失败" << endl;continue;}Machine m;m._ip = results[0];m._port = atoi(results[1].c_str());m._mtx = new std::mutex();_online.push_back(_machines.size());_machines.push_back(m);}in.close();return true;}// 智能选择负载最小的主机// id:输出型参数,id是机器的下标// m:输出型参数,m是该机器的地址bool SmartSelect(int *id, Machine **m){// 1.使用选择好的主机(更新该主机的负载)// 2.我们需要可能离线该主机_mtx.lock();// 负载均衡的算法:// 1.随机数法 + hash// 2.轮询 + hashint online_num = _online.size();if (online_num == 0){_mtx.unlock();LOG(FATAL) << "所有的后端编译主机已经离线,请检查编译主机" << endl;return false;}// 这里通过遍历的方式,找到所有负载最小的机器*id = _online[0];*m = &_machines[_online[0]];uint64_t min_load = _machines[_online[0]].Load();for (int i = 0; i < online_num; i++){uint64_t cur_load = _machines[_online[i]].Load();if (min_load > cur_load){min_load = cur_load;*id = _online[i];*m = &_machines[_online[i]];}}_mtx.unlock();return true;}// 离线主机void OfflineMachine(int id){_mtx.lock();for (auto iter = _online.begin(); iter != _online.end(); iter++){if (*iter == id){_machines[id].ResetLoad();// 要离线的主机已经找到了_online.erase(iter);// 这里不能用*iter,因为迭代器可能会因为erase而失效_offline.push_back(id);// 因为break存在,所有我们暂时不考虑迭代器失效的问题break;}}_mtx.unlock();}// 在线主机void OnlineMachine(){// 当所有主机都离线的时候,我们统一上线// TODO_mtx.lock();_online.insert(_online.end(), _offline.begin(), _offline.end());_offline.erase(_offline.begin(), _offline.end());_mtx.unlock();LOG(INFO) << "所有的主机已经上线" << endl;}// for test(用来调试)void ShowMachines(){_mtx.lock();LOG(INFO) << "当前在线主机列表:";for (auto &id : _online){std::cout << id << " ";}std::cout << std::endl;LOG(INFO) << "当前离线主机列表:";for (auto &id : _offline){std::cout << id << " ";}std::cout << std::endl;_mtx.unlock();}private:// 可以给我们提供编译服务的所有主机// 每一个主机都有自己的下标,充当当前主机的idstd::vector<Machine> _machines;// 所有在线的主机std::vector<int> _online;// 所有离线主机的idstd::vector<int> _offline;// 保证LoadBlance它的数据安全std::mutex _mtx;};2.3.3 control的编写
#pragma once#include <iostream>
#include <string>
#include <fstream>
#include <vector>
#include <algorithm>
#include <mutex>
#include <cassert>
#include <jsoncpp/json/json.h>
#include <pthread.h>#include "../comm/util.hpp"
#include "../comm/log.hpp"
#include "../comm/httplib.h"
#include "oj_model_mysql.hpp"
#include "oj_view.hpp"
#include "oj_model_struct.hpp"
#include "../comm/LoginInterceptor.hpp"
#include "../comm/session.hpp"namespace ns_oj_control
{using namespace std;using namespace ns_oj_log;using namespace ns_oj_util;using namespace ns_oj_model;using namespace ns_oj_view;using namespace httplib;using namespace ns_oj_interceptor;// 提供服务的主机class Machine{public:Machine(): _ip(""), _port(0), _load(0), _mtx(nullptr){}~Machine(){}public:// 增加主机负载void IncLoad(){if (_mtx)_mtx->lock();++_load;if (_mtx)_mtx->unlock();}// 减少主机负载void DecLoad(){if (_mtx)_mtx->lock();--_load;if (_mtx)_mtx->unlock();}void ResetLoad(){if (_mtx)_mtx->lock();_load = 0;if (_mtx)_mtx->unlock();}// 获取主机负载uint64_t Load(){uint64_t load = 0;load = _load;if (_mtx)_mtx->unlock();return load;}public:std::string _ip;  // 编译服务的ipint _port;        // 编译服务的portuint64_t _load;   // 编译服务的负载std::mutex *_mtx; // mutex禁止拷贝,使用指针来完成};const std::string server_machine_path = "./conf/server_machine.conf";// 负载均衡块class LoadBlance{public:LoadBlance(){assert(LoadConf(server_machine_path));LOG(INFO) << "服务器配置文件加载成功... 路径为:" << server_machine_path << endl;}~LoadBlance(){}public:// 加载主机配置文件bool LoadConf(const std::string &machine_conf){std::ifstream in(machine_conf);if (!in.is_open()){LOG(FATAL) << "服务器配置文件加载失败.... 配置文件路径为:" << machine_conf << endl;return false;}std::string line;while (std::getline(in, line)){std::vector<std::string> results;StringUtil::SplitString(line, &results, ":");if (results.size() != 2){LOG(WARNING) << "切分" << line << "失败" << endl;continue;}Machine m;m._ip = results[0];m._port = atoi(results[1].c_str());m._mtx = new std::mutex();_online.push_back(_machines.size());_machines.push_back(m);}in.close();return true;}// 智能选择负载最小的主机// id:输出型参数,id是机器的下标// m:输出型参数,m是该机器的地址bool SmartSelect(int *id, Machine **m){// 1.使用选择好的主机(更新该主机的负载)// 2.我们需要可能离线该主机_mtx.lock();// 负载均衡的算法:// 1.随机数法 + hash// 2.轮询 + hash(这里采用第二种方案)int online_num = _online.size();if (online_num == 0){_mtx.unlock();LOG(FATAL) << "所有的后端编译主机已经离线,请检查编译主机" << endl;return false;}// 通过遍历的方式,找到所有负载最小的机器*id = _online[0];*m = &_machines[_online[0]];uint64_t min_load = _machines[_online[0]].Load();for (int i = 0; i < online_num; i++){uint64_t cur_load = _machines[_online[i]].Load();if (min_load > cur_load){min_load = cur_load;*id = _online[i];*m = &_machines[_online[i]];}}_mtx.unlock();return true;}// 离线主机void OfflineMachine(int id){_mtx.lock();for (auto iter = _online.begin(); iter != _online.end(); iter++){if (*iter == id){_machines[id].ResetLoad();// 要离线的主机已经找到了_online.erase(iter);// 这里不能用*iter,因为迭代器可能会因为erase而失效_offline.push_back(id);// 因为break存在,所有我们暂时不考虑迭代器失效的问题break;}}_mtx.unlock();}// 在线主机void OnlineMachine(){// 当所有主机都离线的时候,我们统一上线// TODO_mtx.lock();_online.insert(_online.end(), _offline.begin(), _offline.end());_offline.erase(_offline.begin(), _offline.end());_mtx.unlock();LOG(INFO) << "所有的主机已经上线" << endl;}// for test(用来调试)void ShowMachines(){_mtx.lock();LOG(INFO) << "当前在线主机列表:";for (auto &id : _online){std::cout << id << " ";}std::cout << std::endl;LOG(INFO) << "当前离线主机列表:";for (auto &id : _offline){std::cout << id << " ";}std::cout << std::endl;_mtx.unlock();}private:// 可以给我们提供编译服务的所有主机// 每一个主机都有自己的下标,充当当前主机的idstd::vector<Machine> _machines;// 所有在线的主机std::vector<int> _online;// 所有离线主机的idstd::vector<int> _offline;// 保证LoadBlance它的数据安全std::mutex _mtx;};// 核心业务逻辑控制器class Control{public:Control(){CreateThreadScanHashMap();}~Control(){}private:static void *scanHashMap(void *args){pthread_detach(pthread_self());SessionMgr *sessionMgr = static_cast<SessionMgr *>(args);while (1){LOG(INFO) << "扫描哈希表,删除过期会话" << endl;sessionMgr->deleteExpireSession();// 休眠30分钟sleep(1800);}}void CreateThreadScanHashMap(){SessionMgr *sessionMgr = SessionMgr::GetInstance();pthread_t t;pthread_create(&t, nullptr, scanHashMap, sessionMgr);}public:void RecoveryMachine(){_load_blance.OnlineMachine();}// 根据题目数据构建网页// html:输出型参数bool GetTotalQuestionsCreateHTML(string *html, string &sessionId){bool ret = true;vector<Question> all_questions;vector<Completed> user_all_completed;if (_model.GetTotalQuestions(&all_questions)){sort(all_questions.begin(), all_questions.end(), [](const struct Question &q1, const struct Question &q2){//升序排序return atoi(q1.id.c_str()) < atoi(q2.id.c_str()); });// 如果有登录的话,从completed查询该用户题目的完成情况LoginInterceptor interceptor;Users user;if (sessionId.size() != 0 && interceptor.getUserInfo(sessionId, &user)){// 有登录获取完成状态LOG(DEBUG) << "userid : " << user.id << endl;if (_model.GetCompletedByUid(user.id, &user_all_completed)){sort(user_all_completed.begin(), user_all_completed.end(), [](const struct Completed &c1, const struct Completed &c2){//按照题目编号升序排序return c1.question_id < c2.question_id; });}else{LOG(WARNING) << "获取题目完成状态失败" << endl;}}// 获取题目信息成功,将所有的题目数据构建成网页_view.TotalQuestionsExpandHtml(all_questions, user_all_completed, html);}else{*html = "获取题目失败,形成题目列表失败";ret = false;}return ret;}bool GetQuestionByIdGreateHTML(const string &id, string *html){bool ret = true;struct Question q;if (_model.GetQuestionById(id, &q)){// 获取题目信息成功,将所有题目数据构建成网页_view.rendSingleQuestionExpandHtml(q, html);}else{*html = "指定题目:" + id + "不存在!";ret = false;}return ret;}// id:100// code:#include// input:""void Judge(const std::string &id, const std::string in_json, std::string &sessionId, std::string *out_json){LOG(DEBUG) << in_json << endl<< "number" << id << endl;// 0.根据题目编号,直接拿到对应的题目细节struct Question q;_model.GetQuestionById(id, &q);// 1.in_json进行反序列化,得到题目id,得到用户提交源代码code,inputJson::Reader reader;Json::Value in_value;reader.parse(in_json, in_value);std::string code = in_value["code"].asString();std::string input = in_value["input"].asString();// 2.重新拼接用户代码 + 测试用例代码,形成新的代码Json::Value compile_value;compile_value["input"] = input;compile_value["code"] = code + "\n" + q.tail;compile_value["cpu_limit"] = q.cpu_limit;compile_value["mem_limit"] = q.mem_limit;Json::FastWriter writer;std::string compile_string = writer.write(compile_value);// 3.选择负载最低的主机,然后发起http请求,得到结果// 规则:一直选择,直到主机可用,否则,就是全部挂掉while (true){int machine_id = 0;Machine *m = nullptr;if (!_load_blance.SmartSelect(&machine_id, &m)){break;}// 4.然后发起http请求,得到结果Client cli(m->_ip, m->_port);LOG(INFO) << "选择主机成功,主机id:" << machine_id << "主机详情:" << m->_ip << ":" << m->_port << "当前主机的负载是:" << m->Load() << endl;// 4.1主机增加负载m->IncLoad();if (auto res = cli.Post("/compile_run", compile_string, "application/json;charset=utf-8")){// 5.将结果赋值给out_jsonif (res->status == 200){*out_json = res->body;// 5.1主机减少负载m->DecLoad();// 读取completed查看结果是否通过,通过则往数据库completed表中插数据// 6.1 out_json进行反序列化,得到completedJson::Reader r1;Json::Value v1;reader.parse(*out_json, v1);std::string completed = v1["completed"].asString();if (completed.size() != 0){// 1.根据sessionId拿到userinfoLoginInterceptor interceptor;Users user;std::vector<Completed> out;if (interceptor.getUserInfo(sessionId, &user)){// 2.根据uid和qid去数据库查表是否有这一条记录if (_model.GetCompletedByUidAndQid(to_string(user.id), id, &out)){//LOG(DEBUG) << "user_id:" << user.id << " qid:" << id << std::endl;if (out.size() == 0){// 2.1没有的话完completed添加记录_model.InsertCompletedByUidAndQid(to_string(user.id), id);}// 2.2有的话,什么都不做}}}LOG(INFO) << "请求编译和运行服务成功..." << endl;break;}m->DecLoad();}else{// 请求失败LOG(ERROR) << "当前请求的主机id:" << id << "主机详情:" << m->_ip << ":" << m->_port << " 可能已经离线" << endl;_load_blance.OfflineMachine(machine_id);_load_blance.ShowMachines(); // 仅仅是为了调试}}}bool CheckGrade(std::string &sessionId,std::string *out_json){LoginInterceptor interceptor;Users user;if(interceptor.getUserInfo(sessionId,&user)){if(user.grade == 0){RespUtil::RespData(200,1,"验证成功",out_json);return true;}}RespUtil::RespData(401,1,"未登录或权限不够",out_json);return false;}// 验证登录bool Login(const std::string in_json, std::string *sessionId, std::string *out_json){LOG(DEBUG) << "用户登录信息  " << in_json << endl;// 1.in_json进行反序列化,得到username,passwordJson::Reader reader;Json::Value in_value;reader.parse(in_json, in_value);std::string username = in_value["username"].asString();std::string password = in_value["password"].asString();if (username.size() == 0 || password.size() == 0){RespUtil::RespData(-1, 0, "非法参数请求", out_json);return false;}struct Users user;if (_model.GetUserByUserName(username, &user)){// 用户名正确验证密码if (SecurityUtil::decrypt(password, user.password)){LOG(DEBUG) << "用户名密码正确" << endl;LoginInterceptor interceptor;interceptor.updateLoginMgr(user, sessionId);// 登录成功,创建或更新session//  获取用户对象成功//  1表示成功int status = 200;int data = 1;string message = "登录成功";RespUtil::RespData(status, data, message, out_json);return true;}}// 获取用户对象失败//-1表示失败int status = -1;int data = -1;string message = "登录失败";RespUtil::RespData(status, data, message, out_json);return false;}// 注册用户信息void Reg(const std::string in_json, std::string *out_json){LOG(DEBUG) << "用户注册信息" << in_json << endl;// 1.in_json进行反序列化,得到username,passwordJson::Reader reader;Json::Value in_value;reader.parse(in_json, in_value);std::string username = in_value["username"].asString();std::string password = in_value["password"].asString();if (username.size() == 0 || password.size() == 0){RespUtil::RespData(-1, 0, "非法参数请求", out_json);return;}struct Users user;if (_model.GetUserByUserName(username, &user)){RespUtil::RespData(200, -2, "注册失败,用户名已存在!", out_json);return;}std::string secPassword;SecurityUtil::encrypt(password, &secPassword);if (_model.RegUser(username, secPassword)){// 注册用户对象成功// 1表示成功int status = 200;int data = 1;string message = "注册成功";RespUtil::RespData(status, data, message, out_json);}else{// 注册用户对象失败RespUtil::RespData(-1, -1, "数据注册失败", out_json);}}void QuestionEntry(std::string in_json,std::string *out_json){//1.对in_json进行反序列化,得到title等信息Json::Reader reader;Json::Value in_value;reader.parse(in_json,in_value);std::string title = in_value["title"].asString();std::string star = in_value["star"].asString();std::string desc = in_value["desc"].asString();std::string header = in_value["header"].asString();std::string tail = in_value["tail"].asString();std::string cpu_limit = in_value["cpu_limit"].asString();std::string mem_limit = in_value["mem_limit"].asString();if(title.size() == 0 || star.size() == 0 || desc.size() == 0 || header.size() == 0 || tail.size() == 0 || cpu_limit.size() == 0 || mem_limit.size() == 0){RespUtil::RespData(-1,0,"非法参数请求",out_json);return;}if(_model.InsertQuestion(title,star,desc,header,tail,cpu_limit,mem_limit)){RespUtil::RespData(200,1,"录题成功",out_json);return;}RespUtil::RespData(502,1,"未知错误",out_json);}private:Model _model;            // 提供后台数据View _view;              // 提供html渲染功能LoadBlance _load_blance; // 核心负载均衡器};
}
2.3.4 对于用户通过题状态的说明
由于前面已经只有登录的用户才能判题,所以这里对于用户通过题后,在题库界面会有一个状态标识( √)这个题已经通过了。
这个扩展需要配合测试用例,当用例不通过时,输出到一个指定文件,然后后端检查文件是否为空,为空的话,就说明题目通过;就往数据库中的completed插入一条记录,记录用户已经通过这道题。
测试用例要求:代码中不能使用单引号,代码通过后,往指定的文件输出1,表示该题通过
测试用例展示(以判断是否为回文数的测试用例进行示例)
#ifndef COMPILER_ONLINE#include "header.cpp"#endif#include <unistd.h>void WriteJudgeResult(int is_passed,int fd)
{if(is_passed == 1){std::string result = "1";write(fd,result.c_str(),result.size());}close(fd);
}int Test1()
{//通过定义临时对象,来完成方法的调用bool ret = Solution().isPalindrome(121);if(ret){std::cout << "通过用例1,测试121通过..." << std::endl;return 1;}else{std::cout << "没有通过用例1,测试121不通过" << std::endl;return 0;}
}
int Test2()
{//通过定义临时对象,来完成方法的调用bool ret = Solution().isPalindrome(-10);if(!ret){std::cout << "通过用例2,测试-10通过..." << std::endl;return 1;}else{std::cout << "没有通过用例2,测试-10不通过" << std::endl;return 0;}
}int main(int argc,char* argv[])
{int is_passed = 1;is_passed &= Test1();is_passed &= Test2();int fd = atoi(argv[1]);WriteJudgeResult(is_passed,fd);return 0;
}
2.3.5 对于control的编写
// 核心业务逻辑控制器class Control{public:Control(){CreateThreadScanHashMap();}~Control(){}private:static void *scanHashMap(void *args){pthread_detach(pthread_self());SessionMgr *sessionMgr = static_cast<SessionMgr *>(args);while (1){LOG(INFO) << "扫描哈希表,删除过期会话" << endl;sessionMgr->deleteExpireSession();// 休眠30分钟sleep(1800);}}void CreateThreadScanHashMap(){SessionMgr *sessionMgr = SessionMgr::GetInstance();pthread_t t;pthread_create(&t, nullptr, scanHashMap, sessionMgr);}public:void RecoveryMachine(){_load_blance.OnlineMachine();}// 根据题目数据构建网页// html:输出型参数bool GetTotalQuestionsCreateHTML(string *html, string &sessionId){bool ret = true;vector<Question> all_questions;vector<Completed> user_all_completed;if (_model.GetTotalQuestions(&all_questions)){sort(all_questions.begin(), all_questions.end(), [](const struct Question &q1, const struct Question &q2){//升序排序return atoi(q1.id.c_str()) < atoi(q2.id.c_str()); });// 如果有登录的话,从completed查询该用户题目的完成情况LoginInterceptor interceptor;Users user;if (sessionId.size() != 0 && interceptor.getUserInfo(sessionId, &user)){// 有登录获取完成状态LOG(DEBUG) << "userid : " << user.id << endl;if (_model.GetCompletedByUid(user.id, &user_all_completed)){sort(user_all_completed.begin(), user_all_completed.end(), [](const struct Completed &c1, const struct Completed &c2){//按照题目编号升序排序return c1.question_id < c2.question_id; });}else{LOG(WARNING) << "获取题目完成状态失败" << endl;}}// 获取题目信息成功,将所有的题目数据构建成网页_view.TotalQuestionsExpandHtml(all_questions, user_all_completed, html);}else{*html = "获取题目失败,形成题目列表失败";ret = false;}return ret;}bool GetQuestionByIdGreateHTML(const string &id, string *html){bool ret = true;struct Question q;if (_model.GetQuestionById(id, &q)){// 获取题目信息成功,将所有题目数据构建成网页_view.rendSingleQuestionExpandHtml(q, html);}else{*html = "指定题目:" + id + "不存在!";ret = false;}return ret;}// id:100// code:#include// input:""void Judge(const std::string &id, const std::string in_json, std::string &sessionId, std::string *out_json){LOG(DEBUG) << in_json << endl<< "number" << id << endl;// 0.根据题目编号,直接拿到对应的题目细节struct Question q;_model.GetQuestionById(id, &q);// 1.in_json进行反序列化,得到题目id,得到用户提交源代码code,inputJson::Reader reader;Json::Value in_value;reader.parse(in_json, in_value);std::string code = in_value["code"].asString();std::string input = in_value["input"].asString();// 2.重新拼接用户代码 + 测试用例代码,形成新的代码Json::Value compile_value;compile_value["input"] = input;compile_value["code"] = code + "\n" + q.tail;compile_value["cpu_limit"] = q.cpu_limit;compile_value["mem_limit"] = q.mem_limit;Json::FastWriter writer;std::string compile_string = writer.write(compile_value);// 3.选择负载最低的主机,然后发起http请求,得到结果// 规则:一直选择,直到主机可用,否则,就是全部挂掉while (true){int machine_id = 0;Machine *m = nullptr;if (!_load_blance.SmartSelect(&machine_id, &m)){break;}// 4.然后发起http请求,得到结果Client cli(m->_ip, m->_port);LOG(INFO) << "选择主机成功,主机id:" << machine_id << "主机详情:" << m->_ip << ":" << m->_port << "当前主机的负载是:" << m->Load() << endl;// 4.1主机增加负载m->IncLoad();if (auto res = cli.Post("/compile_run", compile_string, "application/json;charset=utf-8")){// 5.将结果赋值给out_jsonif (res->status == 200){*out_json = res->body;// 5.1主机减少负载m->DecLoad();// 读取completed查看结果是否通过,通过则往数据库completed表中插数据// 6.1 out_json进行反序列化,得到completedJson::Reader r1;Json::Value v1;reader.parse(*out_json, v1);std::string completed = v1["completed"].asString();if (completed.size() != 0){// 1.根据sessionId拿到userinfoLoginInterceptor interceptor;Users user;std::vector<Completed> out;if (interceptor.getUserInfo(sessionId, &user)){// 2.根据uid和qid去数据库查表是否有这一条记录if (_model.GetCompletedByUidAndQid(to_string(user.id), id, &out)){//LOG(DEBUG) << "user_id:" << user.id << " qid:" << id << std::endl;if (out.size() == 0){// 2.1没有的话完completed添加记录_model.InsertCompletedByUidAndQid(to_string(user.id), id);}// 2.2有的话,什么都不做}}}LOG(INFO) << "请求编译和运行服务成功..." << endl;break;}m->DecLoad();}else{// 请求失败LOG(ERROR) << "当前请求的主机id:" << id << "主机详情:" << m->_ip << ":" << m->_port << " 可能已经离线" << endl;_load_blance.OfflineMachine(machine_id);_load_blance.ShowMachines(); // 仅仅是为了调试}}}bool CheckGrade(std::string &sessionId,std::string *out_json){LoginInterceptor interceptor;Users user;if(interceptor.getUserInfo(sessionId,&user)){if(user.grade == 0){RespUtil::RespData(200,1,"验证成功",out_json);return true;}}RespUtil::RespData(401,1,"未登录或权限不够",out_json);return false;}// 验证登录bool Login(const std::string in_json, std::string *sessionId, std::string *out_json){LOG(DEBUG) << "用户登录信息 " << in_json << endl;// 1.in_json进行反序列化,得到username,passwordJson::Reader reader;Json::Value in_value;reader.parse(in_json, in_value);std::string username = in_value["username"].asString();std::string password = in_value["password"].asString();if (username.size() == 0 || password.size() == 0){RespUtil::RespData(-1, 0, "非法参数请求", out_json);return false;}struct Users user;if (_model.GetUserByUserName(username, &user)){// 用户名正确验证密码if (SecurityUtil::decrypt(password, user.password)){LOG(DEBUG) << "用户名密码正确" << endl;LoginInterceptor interceptor;interceptor.updateLoginMgr(user, sessionId);// 登录成功,创建或更新session// 获取用户对象成功// 1表示成功int status = 200;int data = 1;string message = "登录成功";RespUtil::RespData(status, data, message, out_json);return true;}}// 获取用户对象失败//-1表示失败int status = -1;int data = -1;string message = "登录失败";RespUtil::RespData(status, data, message, out_json);return false;}// 注册用户信息void Reg(const std::string in_json, std::string *out_json){LOG(DEBUG) << "用户注册信息" << in_json << endl;// 1.in_json进行反序列化,得到username,passwordJson::Reader reader;Json::Value in_value;reader.parse(in_json, in_value);std::string username = in_value["username"].asString();std::string password = in_value["password"].asString();if (username.size() == 0 || password.size() == 0){RespUtil::RespData(-1, 0, "非法参数请求", out_json);return;}struct Users user;if (_model.GetUserByUserName(username, &user)){RespUtil::RespData(200, -2, "注册失败,用户名已存在!", out_json);return;}std::string secPassword;SecurityUtil::encrypt(password, &secPassword);if (_model.RegUser(username, secPassword)){// 注册用户对象成功// 1表示成功int status = 200;int data = 1;string message = "注册成功";RespUtil::RespData(status, data, message, out_json);}else{// 注册用户对象失败RespUtil::RespData(-1, -1, "数据注册失败", out_json);}}void QuestionEntry(std::string in_json,std::string *out_json){//1.对in_json进行反序列化,得到title等信息Json::Reader reader;Json::Value in_value;reader.parse(in_json,in_value);std::string title = in_value["title"].asString();std::string star = in_value["star"].asString();std::string desc = in_value["desc"].asString();std::string header = in_value["header"].asString();std::string tail = in_value["tail"].asString();std::string cpu_limit = in_value["cpu_limit"].asString();std::string mem_limit = in_value["mem_limit"].asString();if(title.size() == 0 || star.size() == 0 || desc.size() == 0 || header.size() == 0 || tail.size() == 0 || cpu_limit.size() == 0 || mem_limit.size() == 0){RespUtil::RespData(-1,0,"非法参数请求",out_json);return;}if(_model.InsertQuestion(title,star,desc,header,tail,cpu_limit,mem_limit)){RespUtil::RespData(200,1,"录题成功",out_json);return;}RespUtil::RespData(502,1,"未知错误",out_json);}private:Model _model; // 提供后台数据View _view; // 提供html渲染功能LoadBlance _load_blance; // 核心负载均衡器};
oj_server的makefile编写
oj_server:oj_server.o md5.og++ -o oj_server oj_server.o md5.o  -L./lib  -lpthread -lctemplate -ljsoncpp -lmysqlclient -lboost_system -lboost_chronooj_server.o: oj_server.cppg++ -c oj_server.cpp -std=c++11 -I ./includemd5.o: ../comm/md5.cppg++ -c ../comm/md5.cpp -std=c++11.PHONY:clean
clean:rm -f oj_server oj_server.o md5.o
前端页面的编写
由于作者不是很懂前端,所以页面基本上是东拼西凑出来的
<!DOCTYPE html>
<html lang="en"><head><meta charset="UTF-8"><meta name="viewport" content="width=device-width, initial-scale=1.0"><title>蓝扣OJ系统</title><style>/* 保证我们的样式设置可以不受默认影响 */* {/* 消除网页的默认外边距 */margin: 0px;/* 消除网页的默认内边距 */padding: 0px;}html,body {width: 100%;height: 100%;}.container .content {/* 设置标签宽度 */width: 800px;/* 背景颜色 *//* background-color: #ccc; *//* 整体居中 */margin: 0px auto;/* 设置文字居中 */text-align: center;/* 设置上外边距 *//* margin-top: 200px; */}.container .navbar {width: 100%;height: 50px;background-color: rgba(0, 0, 0,0.5);/* 给父级标签设置overflow,取消后续float带来的影响 */overflow: hidden;}.container .navbar a {/* 设置a标签是行内块元素,允许你设置宽度 */display: inline-block;/* 设置a标签的宽度,a标签默认是行内元素,无法设置宽度 ,需要将display设置为inline-block*/width: 80px;/* 设置字体颜色 */color: white;/* 设置字体的大小 */font-size: large;/* 设置文字高度和导航栏一样的高度 */line-height: 50px;/* 去掉a标签的下划线 */text-decoration: none;/* 设置a标签中的文字居中 */text-align: center;}/* 设置鼠标悬停时的事件 */.container .navbar a:hover {background-color: green;}.container .navbar .login {float: right;}.container .navbar .register {float: right;}.container .navbar .or {color: rgb(220, 209, 209);float: right;text-align: center;line-height: 50px;}.container .content .font {/* 设置标签为块级元素,独占一行,可以设置高度宽度等属性 */display: block;/* 设置每个文字的上外边距 */margin-top: 20px;/* 去除a标签下划线 */text-decoration: none;/* 设置字体大小 */font-size: large;}* {box-sizing: border-box;}:root {/* 每个四叶草子div的长度; 宽度为长度的1/3 */--l: 300px;}body {height: 100vh;margin: 0;/* display: flex;justify-content: center;align-items: center; */background-image: linear-gradient(to right, #c9fced, #b0e7fc);/* 超出部分隐藏(四叶草位置可以自己修改, 放置过于靠边会导致旋转时出现滚动条) */overflow: hidden;}.four {position: absolute;width: var(--l);height: var(--l);/* 旋转动画: 动画单次时长10s 动画名字 速度变化曲线为线性 重复次数无数次 */animation: 10s rotating linear infinite;/* 四叶草显示位置, 可以自己修改 */bottom: -20px;right: -20px;/* 透明 */opacity: .6;/* 放置在底层 */z-index: -1;}.four:nth-child(2) {left: -20px;top: -20px;bottom: unset;right: unset;}.four div {position: absolute;display: inline-block;/* 宽度为高度的1/3 */width: calc(var(--l) / 3);height: var(--l);background-color: lightgreen;/* 圆弧: 圆弧的半径为宽度的一半 */border-radius: calc(var(--l) / 3 / 2);}.four div:nth-child(1) {/* 位移为圆弧的半径 */transform: translateX(calc(var(--l) / 3 / 2))}.four div:nth-child(2) {/* 位移为圆弧的半径 + :nth-child(1)的宽度 */transform: translateX(calc(var(--l) / 3 / 2 * 3));}.four div:nth-child(3) {transform: rotateZ(90deg) translateY(calc(var(--l) / -3)) translateX(calc(var(--l) / 3 / -2));}.four div:nth-child(4) {transform: rotateZ(90deg) translateY(calc(var(--l) / -3)) translateX(calc(var(--l) / 3 / 2));}/* 中间的白线 */.four div:nth-child(4)::before,.four div:nth-child(4)::after {content: '';position: absolute;width: 1px;/* 为两个div的宽度 */height: calc(var(--l) / 3 * 2);transform: translateY(calc(var(--l) / 3 / 2)) translateX(-.5px);border-radius: 50%;background-color: #fff;}.four div:nth-child(4)::after {transform: rotateZ(90deg) translateX(calc(var(--l) / 3 / 2 - .5px));}/* 旋转动画 */@keyframes rotating {0% {transform: rotateZ(0deg);}100% {transform: rotateZ(360deg);}}/* 当窗口宽度大于950px,高度大于550px时,修改四叶草大小 */@media (min-width: 950px) and (min-height: 550px) {:root {/* 每个四叶草子div的长度; 宽度为长度的1/3 */--l: 510px;}}</style>
</head><body><!-- 四叶草 --><div class="four"><div></div><div></div><div></div><div></div></div><div class="four"><div></div><div></div><div></div><div></div></div><div class="container"><!-- 导航栏 --><div class="navbar"><a href="#">首页</a><a href="/all_questions">题库</a><a href="/question_entry.html">录题</a><!-- <a href="#">讨论</a> --><!-- <a href="#">求职</a> --><a class="login" href="/oj_login.html">登录</a><span class="or">或</span><a class="register" href="/oj_reg.html">注册</a></div><!-- 网页内容 --><div class="content"><!-- <h1 class="font_">欢迎来到在线OJ</h1> --><h1 class="font">欢迎来到蓝扣OJ</h1><a class="font" href="/all_questions">点击此处开始编程</a></div></div>
</body></html>
<!DOCTYPE html>
<html lang="en"><head><meta charset="UTF-8"><meta http-equiv="X-UA-Compatible" content="IE=edge"><meta name="viewport" content="width=device-width, initial-scale=1.0"><title>Login</title><!-- 引入JQuery CDN --><script src="http://code.jquery.com/jquery-2.1.1.min.js"></script><style>* {box-sizing: border-box;}:root {/* 每个四叶草子div的长度; 宽度为长度的1/3 */--l: 300px;}body {height: 100vh;margin: 0;/* display: flex;justify-content: center;align-items: center; */background-image: linear-gradient(to right, #c9fced, #b0e7fc);/* 超出部分隐藏(四叶草位置可以自己修改, 放置过于靠边会导致旋转时出现滚动条) */overflow: hidden;}.four {position: absolute;width: var(--l);height: var(--l);/* 旋转动画: 动画单次时长10s 动画名字 速度变化曲线为线性 重复次数无数次 */animation: 10s rotating linear infinite;/* 四叶草显示位置, 可以自己修改 */bottom: -20px;right: -20px;/* 透明 */opacity: .6;/* 放置在底层 */z-index: -1;}.four:nth-child(2) {left: -20px;top: -20px;bottom: unset;right: unset;}.four div {position: absolute;display: inline-block;/* 宽度为高度的1/3 */width: calc(var(--l) / 3);height: var(--l);background-color: lightgreen;/* 圆弧: 圆弧的半径为宽度的一半 */border-radius: calc(var(--l) / 3 / 2);}.four div:nth-child(1) {/* 位移为圆弧的半径 */transform: translateX(calc(var(--l) / 3 / 2))}.four div:nth-child(2) {/* 位移为圆弧的半径 + :nth-child(1)的宽度 */transform: translateX(calc(var(--l) / 3 / 2 * 3));}.four div:nth-child(3) {transform: rotateZ(90deg) translateY(calc(var(--l) / -3)) translateX(calc(var(--l) / 3 / -2));}.four div:nth-child(4) {transform: rotateZ(90deg) translateY(calc(var(--l) / -3)) translateX(calc(var(--l) / 3 / 2));}/* 中间的白线 */.four div:nth-child(4)::before,.four div:nth-child(4)::after {content: '';position: absolute;width: 1px;/* 为两个div的宽度 */height: calc(var(--l) / 3 * 2);transform: translateY(calc(var(--l) / 3 / 2)) translateX(-.5px);border-radius: 50%;background-color: #fff;}.four div:nth-child(4)::after {transform: rotateZ(90deg) translateX(calc(var(--l) / 3 / 2 - .5px));}/* 旋转动画 */@keyframes rotating {0% {transform: rotateZ(0deg);}100% {transform: rotateZ(360deg);}}/* 当窗口宽度大于950px,高度大于550px时,修改四叶草大小 */@media (min-width: 950px) and (min-height: 550px) {:root {/* 每个四叶草子div的长度; 宽度为长度的1/3 */--l: 510px;}}body {margin: 0;height: 100vh;}.container {display: flex;justify-content: center;align-items: center;margin-top: 10%;}.login-container {width: 400px;padding: 40px;box-sizing: border-box;background: rgba(0, 0, 0, 0.5);box-shadow: 0 5px 25px rgba(0, 0, 0, 0.6);border-radius: 10px;}.login-container h2 {margin: 0 0 30px;color: #fff;text-align: center;}.login-form>div {position: relative;}.login-form>div>input {width: 100%;padding: 10px 0;font-size: 16px;color: #fff;margin-bottom: 30px;border: none;border-bottom: 1px solid #fff;outline: none;background-color: transparent;}.login-form>div>label {position: absolute;color: #fff;top: 0;left: 0;padding: 10px 0;font-size: 16px;transition: all .5s;/* none表示鼠标事件“穿透”该元素 */pointer-events: none;}.login-form>div>input~label {top: -20px;color: #03e9f4;font-size: 12px;}.login-form>button {background-color: rgb(94, 121, 122);border: none;position: relative;display: inline-block;padding: 6px 20px;margin-top: 40px;color: #03e9f4;font-size: 16px;text-decoration: none;transition: all 0.5s;letter-spacing: 4px;overflow: hidden;}.login-form>button span {position: absolute;display: block;}.login-form>button span:nth-child(1) {top: 0;left: -100%;width: 100%;height: 2px;background: linear-gradient(90deg, transparent, #03e9f4);animation: running1 1s linear infinite;}.login-form>button span:nth-child(2) {right: 0;top: -100%;height: 100%;width: 2px;background: linear-gradient(180deg, transparent, #03e9f4);animation: running2 1s linear .25s infinite;}.login-form>button span:nth-child(3) {bottom: 0;right: -100%;width: 100%;height: 2px;background: linear-gradient(270deg, transparent, #03e9f4);animation: running3 1s linear .5s infinite;}.login-form>button span:nth-child(4) {left: 0;bottom: -100%;height: 100%;width: 2px;background: linear-gradient(360deg, transparent, #03e9f4);animation: running4 1s linear .75s infinite;}.login-form .control {padding-left: 56%;color: #000;margin-top: 15px;font-size: 13px;}.login-form .control button {color: #000;margin: 0 5px;letter-spacing: 1px;}.login-form .control button:hover {color: limegreen;}@keyframes running1 {0% {left: -100%;}50%,100% {left: 100%;}}@keyframes running2 {0% {top: -100%;}50%,100% {top: 100%;}}@keyframes running3 {0% {right: -100%;}50%,100% {right: 100%;}}@keyframes running4 {0% {bottom: -100%;}50%,100% {bottom: 100%;}}.header .navbar {position: relative;width: 100%;height: 50px;background-color: rgba(0, 0, 0, 0.5);/* 给父级标签设置overflow,取消后续float带来的影响 */overflow: hidden;}.header .navbar a {/* 设置a标签是行内块元素,允许你设置宽度 */display: inline-block;/* 设置a标签的宽度,a标签默认是行内元素,无法设置宽度 ,需要将display设置为inline-block*/width: 80px;/* 设置字体颜色 */color: white;/* 设置字体的大小 */font-size: large;/* 设置文字高度和导航栏一样的高度 */line-height: 50px;/* 去掉a标签的下划线 */text-decoration: none;/* 设置a标签中的文字居中 */text-align: center;}/* 设置鼠标悬停时的事件 */.header .navbar a:hover {background-color: green;}.header .navbar .login {float: right;}.header .navbar .register {float: right;}.header .navbar .or {color: rgb(220, 209, 209);float: right;text-align: center;line-height: 50px;}</style></head><body><div class="header"><div class="navbar"><a href="#">首页</a><a href="/all_questions">题库</a><a href="/question_entry.html">录题</a><!-- <a href="#">竞赛</a> --><!-- <a href="#">讨论</a> --><!-- <a href="#">求职</a> --><a class="login" href="/oj_login.html">登录</a><span class="or">或</span><a class="register" href="/oj_reg.html">注册</a></div></div><!-- 四叶草 --><div class="four"><div></div><div></div><div></div><div></div></div><div class="four"><div></div><div></div><div></div><div></div></div><div class="container"><div class="login-container"><h2>LOGIN</h2><form action="" class="login-form" onsubmit="return false;"><div><input type="text" required="true" id="username"><label for="">用户名</label></div><div><input type="password" required="true" id="password"><label for="">密码</label></div><button onclick="mysub()"><span></span><span></span><span></span><span></span>登录</button><div class="control"><span>没有帐号? <a href="oj_reg.html">Register</a></span></div></form></div></div>
</body>
<script>function mysub() {console.log("提交");//1.非空效验var username = jQuery("#username");var password = jQuery("#password");if (username.val() == "") {username.focus();return false;}if (password.val() == "") {password.focus();return false;}//2.发送请求给后端jQuery.ajax({url: "/login",method: 'Post',dataType: 'json',contentType: 'application/json;charset=utf-8', data: JSON.stringify({"username": username.val(),"password": password.val()}),success: function (result) {if (result.status == 200 && result.data == 1) {location.href = "/all_questions";} else {alert("用户名或密码错误,请重新输入!");username.focus();}}});}
</script></html>
<!DOCTYPE html>
<html lang="en"><head><meta charset="UTF-8"><meta http-equiv="X-UA-Compatible" content="IE=edge"><meta name="viewport" content="width=device-width, initial-scale=1.0"><title>Register</title><!-- 引入JQuery CDN --><script src="http://code.jquery.com/jquery-2.1.1.min.js"></script><style>* {box-sizing: border-box;}:root {/* 每个四叶草子div的长度; 宽度为长度的1/3 */--l: 300px;}body {height: 100vh;margin: 0;/* display: flex;justify-content: center;align-items: center; */background-image: linear-gradient(to right, #c9fced, #b0e7fc);/* 超出部分隐藏(四叶草位置可以自己修改, 放置过于靠边会导致旋转时出现滚动条) */overflow: hidden;}.four {position: absolute;width: var(--l);height: var(--l);/* 旋转动画: 动画单次时长10s 动画名字 速度变化曲线为线性 重复次数无数次 */animation: 10s rotating linear infinite;/* 四叶草显示位置, 可以自己修改 */bottom: -20px;right: -20px;/* 透明 */opacity: .6;/* 放置在底层 */z-index: -1;}.four:nth-child(2) {left: -20px;top: -20px;bottom: unset;right: unset;}.four div {position: absolute;display: inline-block;/* 宽度为高度的1/3 */width: calc(var(--l) / 3);height: var(--l);background-color: lightgreen;/* 圆弧: 圆弧的半径为宽度的一半 */border-radius: calc(var(--l) / 3 / 2);}.four div:nth-child(1) {/* 位移为圆弧的半径 */transform: translateX(calc(var(--l) / 3 / 2))}.four div:nth-child(2) {/* 位移为圆弧的半径 + :nth-child(1)的宽度 */transform: translateX(calc(var(--l) / 3 / 2 * 3));}.four div:nth-child(3) {transform: rotateZ(90deg) translateY(calc(var(--l) / -3)) translateX(calc(var(--l) / 3 / -2));}.four div:nth-child(4) {transform: rotateZ(90deg) translateY(calc(var(--l) / -3)) translateX(calc(var(--l) / 3 / 2));}/* 中间的白线 */.four div:nth-child(4)::before,.four div:nth-child(4)::after {content: '';position: absolute;width: 1px;/* 为两个div的宽度 */height: calc(var(--l) / 3 * 2);transform: translateY(calc(var(--l) / 3 / 2)) translateX(-.5px);border-radius: 50%;background-color: #fff;}.four div:nth-child(4)::after {transform: rotateZ(90deg) translateX(calc(var(--l) / 3 / 2 - .5px));}/* 旋转动画 */@keyframes rotating {0% {transform: rotateZ(0deg);}100% {transform: rotateZ(360deg);}}/* 当窗口宽度大于950px,高度大于550px时,修改四叶草大小 */@media (min-width: 950px) and (min-height: 550px) {:root {/* 每个四叶草子div的长度; 宽度为长度的1/3 */--l: 510px;}}body {margin: 0;height: 100vh;}.container {display: flex;justify-content: center;align-items: center;margin-top: 10%;}.login-container {width: 400px;padding: 35px;box-sizing: border-box;background: rgba(0, 0, 0, 0.5);box-shadow: 0 5px 25px rgba(0, 0, 0, 0.6);border-radius: 10px;}.login-container h2 {margin: 0 0 30px;color: #fff;text-align: center;}.login-form>div {position: relative;}.login-form>div>input {width: 100%;padding: 10px 0;font-size: 16px;color: #fff;margin-bottom: 30px;border: none;border-bottom: 1px solid #fff;outline: none;background-color: transparent;}.login-form>div>label {position: absolute;color: #fff;top: 0;left: 0;padding: 10px 0;font-size: 16px;transition: all .5s;/* none表示鼠标事件“穿透”该元素 */pointer-events: none;}.login-form>div>input~label {top: -20px;color: #03e9f4;font-size: 12px;}.login-form>button {background-color: rgb(94, 121, 122);border: none;position: relative;display: inline-block;padding: 6px 20px;margin-top: 40px;color: #03e9f4;font-size: 16px;text-decoration: none;transition: all 0.5s;letter-spacing: 4px;overflow: hidden;}.login-form>button span {position: absolute;display: block;}.login-form>button span:nth-child(1) {top: 0;left: -100%;width: 100%;height: 2px;background: linear-gradient(90deg, transparent, #03e9f4);animation: running1 1s linear infinite;}.login-form>button span:nth-child(2) {right: 0;top: -100%;height: 100%;width: 2px;background: linear-gradient(180deg, transparent, #03e9f4);animation: running2 1s linear .25s infinite;}.login-form>button span:nth-child(3) {bottom: 0;right: -100%;width: 100%;height: 2px;background: linear-gradient(270deg, transparent, #03e9f4);animation: running3 1s linear .5s infinite;}.login-form>button span:nth-child(4) {left: 0;bottom: -100%;height: 100%;width: 2px;background: linear-gradient(360deg, transparent, #03e9f4);animation: running4 1s linear .75s infinite;}.login-form .control {padding-left: 56%;color: #000;margin-top: 15px;font-size: 13px;}.login-form .control button {color: #000;margin: 0 5px;letter-spacing: 1px;}.login-form .control button:hover {color: limegreen;}@keyframes running1 {0% {left: -100%;}50%,100% {left: 100%;}}@keyframes running2 {0% {top: -100%;}50%,100% {top: 100%;}}@keyframes running3 {0% {right: -100%;}50%,100% {right: 100%;}}@keyframes running4 {0% {bottom: -100%;}50%,100% {bottom: 100%;}}.header .navbar {position: relative;width: 100%;height: 50px;background-color: rgba(0, 0, 0,0.5);/* 给父级标签设置overflow,取消后续float带来的影响 */overflow: hidden;}.header .navbar a {/* 设置a标签是行内块元素,允许你设置宽度 */display: inline-block;/* 设置a标签的宽度,a标签默认是行内元素,无法设置宽度 ,需要将display设置为inline-block*/width: 80px;/* 设置字体颜色 */color: white;/* 设置字体的大小 */font-size: large;/* 设置文字高度和导航栏一样的高度 */line-height: 50px;/* 去掉a标签的下划线 */text-decoration: none;/* 设置a标签中的文字居中 */text-align: center;}/* 设置鼠标悬停时的事件 */.header .navbar a:hover {background-color: green;}.header .navbar .login {float: right;}.header .navbar .register {float: right;}.header .navbar .or {color: rgb(220, 209, 209);float: right;text-align: center;line-height: 50px;}</style></head><body><div class="header"><div class="navbar"><a href="#">首页</a><a href="/all_questions">题库</a><a href="/question_entry.html">录题</a><!-- <a href="#">竞赛</a> --><!-- <a href="#">讨论</a> --><!-- <a href="#">求职</a> --><a class="login" href="/oj_login.html">登录</a><span class="or">或</span><a class="register" href="/oj_reg.html">注册</a></div></div><!-- 四叶草 --><div class="four"><div></div><div></div><div></div><div></div></div><div class="four"><div></div><div></div><div></div><div></div></div><div class="container"><div class="login-container"><h2>REGISTER</h2><form action="" class="login-form" onsubmit="return false;"><div><input type="text" required="true" id="username"><label for="">用户名</label></div><div><input type="password" required="true" id="password"><label for="">密码</label></div><div><input type="password" required="true" id="confirmPassword"><label for="">确认密码</label></div><button onclick="mysub()"><span></span><span></span><span></span><span></span>注册</button><div class="control"><span>已有帐号? <a href="oj_login.html">Login</a></span></div></form></div></div>
</body>
<script>function mysub() {//1.非空效验var username = jQuery("#username");var password = jQuery("#password");var confirmPassword = jQuery("#confirmPassword");if(username.val() == "") {username.focus();return false;}if(password.val() == "") {password.focus();return false;}if(confirmPassword.val() == "") {confirmPassword.focus();return false;}if(password.val() != confirmPassword.val()) {alert("密码不一致!");password.focus();return false;}console.log(username.val());console.log(password.val());console.log(confirmPassword.val());//2.发送请求给后端jQuery.ajax({url: "/reg",method: 'Post',dataType: 'json',contentType: 'application/json;charset=utf-8',data: JSON.stringify({"username": username.val(),"password": password.val()}),success: function(result) {if(result.status == 200 && result.data == 1) {if(confirm("注册成功!是否去登录?")) {location.href="oj_login.html";}} else if(result.status == 200 && result.data == -2 && result.message!=null) {alert("注册失败,用户名已存在!");} else {alert("注册失败,请重试!");}}});}
</script>
</html>
<!DOCTYPE html>
<html><head><title>Question Entry Page</title><meta charset="UTF-8"><meta http-equiv="X-UA-Compatible" content="IE=edge"><meta name="viewport" content="width=device-width, initial-scale=1.0"><script src="http://code.jquery.com/jquery-2.1.1.min.js"></script><style>body {font-family: Arial, sans-serif;background-color: #f2f2f2;padding: 20px;}.container {max-width: 600px;margin: 0 auto;background-color: #fff;padding: 20px;border-radius: 5px;box-shadow: 0 2px 5px rgba(0, 0, 0, 0.1);}.input-group {margin-bottom: 20px;}.input-label {display: block;margin-bottom: 5px;font-weight: bold;}.input-field {width: 100%;padding: 10px;font-size: 16px;border-radius: 3px;border: 1px solid #ccc;}.submit-btn {display: block;width: 100%;padding: 10px;font-size: 16px;text-align: center;background-color: #4CAF50;color: #fff;border: none;border-radius: 3px;cursor: pointer;}.submit-btn:hover {background-color: #45a049;}* {/* 消除网页的默认外边距 */margin: 0px;/* 消除网页的默认内边距 */padding: 0px;}html,body {width: 100%;height: 100%;/* 如果溢出浏览器页面,自动加滚动条 */overflow: auto;}.navbar {width: 100%;height: 50px;background-color: rgba(0, 0, 0, 0.5);/* 给父级标签设置overflow,取消后续float带来的影响 */overflow: hidden;}.navbar a {/* 设置a标签是行内块元素,允许你设置宽度 */display: inline-block;/* 设置a标签的宽度,a标签默认是行内元素,无法设置宽度 ,需要将display设置为inline-block*/width: 80px;/* 设置字体颜色 */color: white;/* 设置字体的大小 */font-size: large;/* 设置文字高度和导航栏一样的高度 */line-height: 50px;/* 去掉a标签的下划线 */text-decoration: none;/* 设置a标签中的文字居中 */text-align: center;}/* 设置鼠标悬停时的事件 */.navbar a:hover {background-color: green;}.navbar .login {float: right;}.navbar .register {float: right;}.navbar .or {color: rgb(220, 209, 209);float: right;text-align: center;line-height: 50px;}</style></head><body><div class="navbar"><a href="/index.html">首页</a><a href="/all_questions">题库</a><a href="/question_entry.html">录题</a><!-- <a href="#">竞赛</a> --><!-- <a href="#">讨论</a> --><!-- <a href="#">求职</a> --><a class="login" href="/oj_login.html">登录</a><span class="or">或</span><a class="register" href="oj_reg.html">注册</a></div><div class="container"><h1>Question Entry</h1><form onsubmit="return false;"><div class="input-group"><label class="input-label" for="title">title:</label><textarea id="title" class="input-field" required="true"></textarea></div><div class="input-group"><label class="input-label" for="star">star:</label><textarea id="star" class="input-field" required="true"></textarea></div><div class="input-group"><label class="input-label" for="desc">desc:</label><textarea id="desc" class="input-field" required="true"></textarea></div><div class="input-group"><label class="input-label" for="header">header:</label><textarea id="header" class="input-field" required="true"></textarea></div><div class="input-group"><label class="input-label" for="question5">tail:</label><textarea id="tail" class="input-field" required="true"></textarea></div><div class="input-group"><label class="input-label" for="cpu_limit">cpu_limit:</label><textarea id="cpu_limit" class="input-field" required="true"></textarea></div><div class="input-group"><label class="input-label" for="question5">mem_limit(默认是:30000):</label><textarea id="mem_limit" class="input-field" required="true"></textarea></div><button type="submit" class="submit-btn" onclick="mysub()">Submit</button></form></div>
</body>
<script>function mysub() {var title = jQuery("#title");var star = jQuery("#star");var desc = jQuery("#desc");var header = jQuery("#header");var tail = jQuery("#tail");var cpu_limit = jQuery("#cpu_limit");var mem_limit = jQuery("#mem_limit");//console.log(title.val());//发送请求给后端jQuery.ajax({url: "/question_entry",method: 'Post',dataType: 'json',contentType: 'application/json;charset=utf-8',data: JSON.stringify({"title": title.val(),"star": star.val(),"desc": desc.val(),"header": header.val(),"tail": tail.val(),"cpu_limit": cpu_limit.val(),"mem_limit": mem_limit.val()}),success: function (result) {if(result.status == 200 && result.data == 1){alert("录题成功");location.href="question_entry.html"}else{alert("服务器错误,请重试");}}});}function checkGrade() {jQuery.ajax({url: "/check_grade",method: 'Post',error: function (err) {if (err.status == 401) {alert("用户未登录,或权限不够");location.href = "index.html";}}});}checkGrade();
</script></html>
<!DOCTYPE html>
<html lang="en"><head><meta charset="UTF-8"><meta name="viewport" content="width=device-width, initial-scale=1.0"><title>蓝扣OJ-题目列表</title><style>/* 保证我们的样式设置可以不受默认影响 */* {/* 消除网页的默认外边距 */margin: 0px;/* 消除网页的默认内边距 */padding: 0px;}html,body {width: 100%;height: 100%;/* 如果溢出浏览器页面,自动加滚动条 */overflow: auto;}.container .navbar {width: 100%;height: 50px;background-color: rgba(0, 0, 0,0.5);/* 给父级标签设置overflow,取消后续float带来的影响 */overflow: hidden;}.container .navbar a {/* 设置a标签是行内块元素,允许你设置宽度 */display: inline-block;/* 设置a标签的宽度,a标签默认是行内元素,无法设置宽度 ,需要将display设置为inline-block*/width: 80px;/* 设置字体颜色 */color: white;/* 设置字体的大小 */font-size: large;/* 设置文字高度和导航栏一样的高度 */line-height: 50px;/* 去掉a标签的下划线 */text-decoration: none;/* 设置a标签中的文字居中 */text-align: center;}/* 设置鼠标悬停时的事件 */.container .navbar a:hover {background-color: green;}.container .navbar .login {float: right;}.container .navbar .register {float: right;}.container .navbar .or {color: rgb(220, 209, 209);float: right;text-align: center;line-height: 50px;}.container .question_list {padding-top: 25px;width: 800px;height: 100%;margin: 0px auto;/* background-color: #ccc; */text-align: center;}.container .question_list table {width: 100%;font-family: 'Lucida Sans', 'Lucida Sans Regular', 'Lucida Grande', 'Lucida Sans Unicode', Geneva, Verdana, sans-serif;margin-top: 25px;background-color: rgba(243,248,244,0.5);}.container .question_list h1 {color:   green;}.container .question_list table .item {border-bottom: 1px solid #09b7ca;width: 100px;height:30px;padding-top: 5px;padding-bottom: 5px;font-size: large;font-family: 'Times New Roman', 'Times, serif';}.container .question_list table .item a {text-decoration: none;color:black;}.container .question_list table .item a:hover {color: blue;text-decoration: underline;}.container .footer {height: 50px;width: 100%;text-align: center;background-color: black;line-height: 50px;color: #ccc;margin-top: 15px;}* {box-sizing: border-box;}:root {/* 每个四叶草子div的长度; 宽度为长度的1/3 */--l: 300px;}body {height: 100vh;margin: 0;/* display: flex;justify-content: center;align-items: center; */background-image: linear-gradient(to right, #c9fced, #b0e7fc);/* 超出部分隐藏(四叶草位置可以自己修改, 放置过于靠边会导致旋转时出现滚动条) */overflow: hidden;}.four {position: absolute;width: var(--l);height: var(--l);/* 旋转动画: 动画单次时长10s 动画名字 速度变化曲线为线性 重复次数无数次 */animation: 10s rotating linear infinite;/* 四叶草显示位置, 可以自己修改 */bottom: -20px;right: -20px;/* 透明 */opacity: .6;/* 放置在底层 */z-index: -1;}.four:nth-child(2) {left: -20px;top: -20px;bottom: unset;right: unset;}.four div {position: absolute;display: inline-block;/* 宽度为高度的1/3 */width: calc(var(--l) / 3);height: var(--l);background-color: lightgreen;/* 圆弧: 圆弧的半径为宽度的一半 */border-radius: calc(var(--l) / 3 / 2);}.four div:nth-child(1) {/* 位移为圆弧的半径 */transform: translateX(calc(var(--l) / 3 / 2))}.four div:nth-child(2) {/* 位移为圆弧的半径 + :nth-child(1)的宽度 */transform: translateX(calc(var(--l) / 3 / 2 * 3));}.four div:nth-child(3) {transform: rotateZ(90deg) translateY(calc(var(--l) / -3)) translateX(calc(var(--l) / 3 / -2));}.four div:nth-child(4) {transform: rotateZ(90deg) translateY(calc(var(--l) / -3)) translateX(calc(var(--l) / 3 / 2));}/* 中间的白线 */.four div:nth-child(4)::before,.four div:nth-child(4)::after {content: '';position: absolute;width: 1px;/* 为两个div的宽度 */height: calc(var(--l) / 3 * 2);transform: translateY(calc(var(--l) / 3 / 2)) translateX(-.5px);border-radius: 50%;background-color: #fff;}.four div:nth-child(4)::after {transform: rotateZ(90deg) translateX(calc(var(--l) / 3 / 2 - .5px));}/* 旋转动画 */@keyframes rotating {0% {transform: rotateZ(0deg);}100% {transform: rotateZ(360deg);}}/* 当窗口宽度大于950px,高度大于550px时,修改四叶草大小 */@media (min-width: 950px) and (min-height: 550px) {:root {/* 每个四叶草子div的长度; 宽度为长度的1/3 */--l: 510px;}}</style>
</head><body><!-- 四叶草 --><div class="four"><div></div><div></div><div></div><div></div></div><div class="four"><div></div><div></div><div></div><div></div></div><div class="container"><div class="navbar"><a href="#">首页</a><a href="/all_questions">题库</a><a href="/question_entry.html">录题</a><!-- <a href="#">竞赛</a> --><!-- <a href="#">讨论</a> --><!-- <a href="#">求职</a> --><a class="login" href="oj_login.html">登录</a><span class="or">或</span><a class="register" href="oj_reg.html">注册</a></div><div class="question_list"><h1>蓝扣OJ题目列表</h1><table><tr><th class="item">状态</th><th class="item">题目编号</th><th class="item">题目标题</th><th class="item">题目难度</th></tr>{{#question_list}}<tr><td class="item">{{completed}}</td><td class="item">{{id}}</td><td class="item"><a href="/question/{{id}}">{{title}}</a></td><td class="item">{{star}}</td></tr>{{/question_list}}</table></div><!-- <div class="footer"> --><!-- <hr> --><!-- <h4>@XHBIN</h4> --><!-- </div> --></div>
</body>
<script></script>
</html>
<!DOCTYPE html>
<html lang="en"><head><meta charset="UTF-8"><meta name="viewport" content="width=device-width, initial-scale=1.0"><title>{{id}}.{{title}}</title><!-- 引入ACE插件 --><!-- 官网链接:https://ace.c9.io/ --><!-- CDN链接:https://cdnjs.com/libraries/ace --><!-- 使用介绍:https://www.iteye.com/blog/ybc77107-2296261 --><!-- https://justcode.ikeepstudying.com/2016/05/ace-editor-%E5%9C%A8%E7%BA%BF%E4%BB%A3%E7%A0%81%E7%BC%96%E8%BE%91%E6%9E%81%E5%85%B6%E9%AB%98%E4%BA%AE/ --><!-- 引入ACE CDN --><script src="https://cdnjs.cloudflare.com/ajax/libs/ace/1.2.6/ace.js" type="text/javascript"charset="utf-8"></script><script src="https://cdnjs.cloudflare.com/ajax/libs/ace/1.2.6/ext-language_tools.js" type="text/javascript"charset="utf-8"></script><!-- 引入JQuery CDN --><script src="http://code.jquery.com/jquery-2.1.1.min.js"></script><style>* {margin: 0;padding: 0;}html,body {width: 100%;height: 100%;overflow: auto;}.container .navbar {width: 100%;height: 50px;background-color: rgb(40, 40, 40);/* 给父级标签设置overflow,取消后续float带来的影响 */overflow: hidden;}.container .navbar a {/* 设置a标签是行内块元素,允许你设置宽度 */display: inline-block;/* 设置a标签的宽度,a标签默认是行内元素,无法设置宽度 ,需要将display设置为inline-block*/width: 80px;/* 设置字体颜色 */color: white;/* 设置字体的大小 */font-size: large;/* 设置文字高度和导航栏一样的高度 */line-height: 50px;/* 去掉a标签的下划线 */text-decoration: none;/* 设置a标签中的文字居中 */text-align: center;}/* 设置鼠标悬停时的事件 */.container .navbar a:hover {background-color: green;}.container .navbar .login {float: right;}.container .navbar .register {float: right;}.container .navbar .or {color: rgb(220, 209, 209);float: right;text-align: center;line-height: 50px;}.container .part1 {width: 100%;height: 600px;overflow: hidden;}.container .part1 .left_desc {width: 40%;height: 600px;float: left;overflow: scroll;}.container .part1 .right_code {width: 60%;float: right;}.container .part1 .right_code .ace_editor {width: 100%;height: 600px;}.container .part1 .left_desc h3 {padding-top: 10px;padding-left: 10px;}.container .part1 .left_desc pre {padding-top: 10px;padding-left: 10px;font-size: medium;font-family: 'Gill Sans', 'Gill Sans MT', Calibri, 'Trebuchet MS', sans-serif';}.container .part2 {width: 100%;overflow: hidden;}.container .part2 .result {width: 300px;float: left;}.container .part2 .btn-submit {width: 120px;height: 50px;font-size: large;float: right;background-color: #26bb9c;color: #FFF;/* 给按钮带上圆角 */border-radius: 0.5pc;border: 0px;margin-top: 10px;margin-right: 10px;}.container .part2 button:hover {color: green;}.container .part2 .result {margin-top: 15px;margin-left: 15px;}.container .part2 .result pre {font-size: large;}</style>
</head><body><div class="container"><div class="navbar"><a href="#">首页</a><a href="/all_questions">题库</a><a href="/question_entry.html">录题</a><!-- <a href="#">竞赛</a> --><!-- <a href="#">讨论</a> --><!-- <a href="#">求职</a> --><a class="login" href="../oj_login.html">登录</a><span class="or">或</span><a class="register" href="../oj_reg.html">注册</a></div><!-- 左右呈现,题目描述和预设代码 --><div class="part1"><div class="left_desc"><h3><span id="number">{{id}}</span>.{{title}} {{star}}</h3><pre>{{desc}}</pre></div><div class="right_code"><!-- ace需要的标签 --><pre id="code" class="ace_editor"><textarea class="ace_textinput">{{pre_code}}</textarea></pre></div></div><!-- 提交并且得到结果,并显示 --><div class="part2"><div class="result"></div><button class="btn-submit" onclick="submit()">提交代码</button></div></div><script>//初始化对象editor = ace.edit("code");//设置风格和语言(更多风格和语言,请到github上相应目录查看)// 主题大全:http://www.manongjc.com/detail/25-cfpdrwkkivkikmk.htmleditor.setTheme("ace/theme/monokai");editor.session.setMode("ace/mode/c_cpp");// 字体大小editor.setFontSize(17);// 设置默认制表符的大小:editor.getSession().setTabSize(4);// 设置只读(true时只读,用于展示代码)editor.setReadOnly(false);// 启用提示菜单ace.require("ace/ext/language_tools");editor.setOptions({enableBasicAutocompletion: true,enableSnippets: true,enableLiveAutocompletion: true});function submit() {//1. 收集当前页面有关的数据 1.题号,2.代码;这里采用JQuery来获取网页内容var code = editor.getSession().getValue();//console.log(code);var id = $(".container .part1 .left_desc h3 #number").text();//console.log(id);var judge_url = "/judge/" + id;//console.log(judge_url);//2.构建json,并通过ajax向后台发起基于http的json请求$.ajax({method: 'Post',                                //向后端发起请求的方式url: judge_url,                                //向后端指定的url发起的请求dataType: 'json',                              //告知服务器,我需要什么格式contentType: 'application/json;charset=utf-8', //告知服务器,我给你的是什么格式data: JSON.stringify({'code': code,'input': ''}),success: function (data) {//成功得到结果console.log(data);show_result(data);},error:function(err) {if(err.status == 401) {alert("用户未登录,即将跳转登录页面");location.href="../oj_login.html"}}});//3.得到结果,解析并显示到result中function show_result(data) {console.log(data.status);console.log(data.reason);//拿到result结果标签var result_div = $(".container .part2 .result");// 清空上一次的运行结果result_div.empty();//拿到结果的状态码和原因结果var _status = data.status;var _reason = data.reason;var reason_lable = $("<p>", {text: _reason});reason_lable.appendTo(result_div);if (status == 0) {//请求成功,编译运行过程没出问题,但是结果是否通过看测试用例var _stdout = data.stdout;var _stderr = data.stderr;var stdout_lable = $("<pre>", {text: _stdout});var stderr_lable = $("<pre>", {text: _stderr});stdout_lable.appendTo(result_div);stderr_lable.appendTo(result_div);} else {//编译运行出错}}}</script>
</body></html>
相关工具的安装
boost库安装
安装方法有好几种,下面给出一种最简单的安装方式,使用yum命令:
yum install boostyum install boost-develyum install boost-doc
就上面这三个命令,就能自动安装sudo yum install -y boost-devl
cpp-httplib的安装
建议:cpp-httplib 0.7.15
下载zip安装包,上传到服务器即可
cpp-httplib gitee 链接:https://gitee.com/yuanfeng1897/cpp-httplib?_from=gitee_search
v0.7.15版本链接:https://gitee.com/yuanfeng1897/cpp-httplib/tree/v0.7.15
把httplib.h拷贝到我们项目,即可直接使用
注意:httplib.h需要高版本的gcc,建议是gcc 7,8,9都可以(如果没有升级,cpp-httplib:要么就是编译报错,要么就是运行出错)
升级gcc:
百度搜索:scl gcc devesettool 升级gcc
> 安装scl
sudo yum install centos-release-scl scl-utils-build
安装新版本gcc,这里也可以把7换成8或者9;作者用的是9
sudo yum install -y devtoolset-9-gcc devtoolset-9-gcc-c++
    ls /opt/rh///启动:细节,命令行启动只能在本会话有效scl enable devtoolset-9 bashgcc -v//可选:如果想每次登录时,都是较新的gcc,需要把上面的命令添加到~/.bash_profile中cat ~/.bash_profile# .bash_profile# Get the aliases and functions
if [ -f ~/.bashrc ]; then. ~/.bashrc
fi# User specific environment and startup programsPATH=$PATH:$HOME/.local/bin:$HOME/binexport PATH
ctemplate的安装
ctemplate库:
https://gitee.com/mirrors_OlafvdSpek/ctemplate?_from=gitee_search
第一步: git clone https://gitee.com/mirrors_OlafvdSpek/ctemplate.git
第二步 ./autogen.sh
第三步 ./configure
第四步: make //编译
第5步: make install //安装到系统中
注意gcc版本
如果安装报错,注意使用sudo
安装出现问题;如果make编译错误,检查gcc版本
如果make命令出现:“make:*** No targets specified and no makefile found.Stop.”
解决方法:https://blog.csdn.net/owenzhang24/article/details/122234100
测试代码:
#include <iostream>
#include <string>
#include <ctemplate/template.h>int main()
{std::string in_html = "./test.html";std::string value = "hello ctemplate";//形成数据字典ctemplate::TemplateDictionary root("test");//unordered_map<> test;root.SetValue("key",value);                 //test.insert({});//获取被渲染网页对象ctemplate::Template *tpl = ctemplate::Template::GetTemplate(in_html,ctemplate::DO_NOT_STRIP);//第二个参数表示保持网页原貌//添加字典数据到网页中std::string out_html;tpl->Expand(&out_html,&root);//完成了渲染std::cout << out_html << std::endl;return 0;
}
<!DOCTYPE html>
<html lang="en">
<head><meta charset="UTF-8"><meta name="viewport" content="width=device-width, initial-scale=1.0"><title>Document</title>
</head>
<body><p>{{key}}</p><p>{{key}}</p><p>{{key}}</p><p>{{key}}</p><p>{{key}}</p>
</body>
</html>
编译过程可能会遇到:
解决方法:
cd 到 /template/.lib下
执行:
cp * /lib64
cp */usr/lib64
将库拷贝到lib64和/usr/lib64
最后执行ldconfig,让安装生效f
附加功能:需要有数据渲染
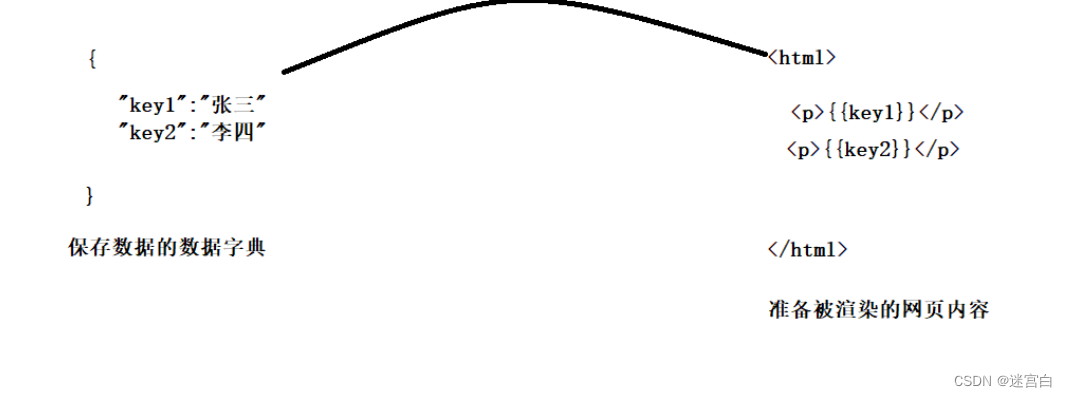
//如果后续引入了ctemplate,一旦对网页结构进行修改,尽量的每次想看到结果,将server重启一下,ctemplate有自己的优化加速策略,可能在内存中存在缓存网页资源
连接mysql工具包的安装
连接mysql需要的工具包
MySQL :: Download MySQL Connector/C (Archived Versions)
适配版本:5.5.68等

下载到自己的云服务器

然后在项目的oj_server里建立软链接
[XHBIN@VM-12-4-centos oj_server]$ ln -s ~/thirdpart/mysql-connector/lib lib
[XHBIN@VM-12-4-centos oj_server]$ ln -s ~/thirdpart/mysql-connector/include include
然后就可以用了

如果我们曾经安装的mysql可能已经默认具有了开发包,我们默认使用的就是系统自带的,
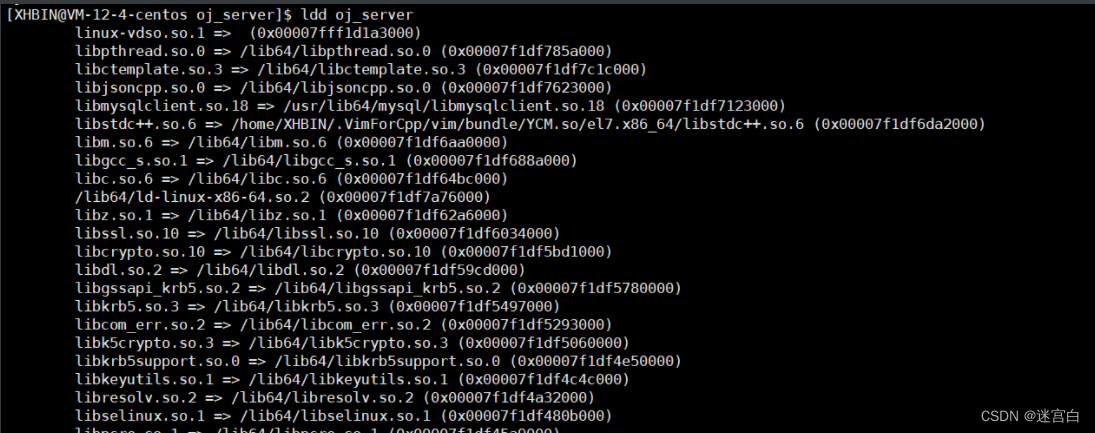

但是如果没有请按照下面的方式来
- 将库安装到系统路径下
- 配置文件
ACE编译器的使用(直接复制粘贴即可)
<!DOCTYPE html><html lang="en">
<head><meta charset="UTF-8"><meta http-equiv="X-UA-Compatible" content="IE=edge"><meta name="viewport" content="width=device-width, initial-scale=1.0"><title>Ace测试</title><!-- 引入ACE插件 --><!-- 官网链接:https://ace.c9.io/ --><!-- CDN链接:https://cdnjs.com/libraries/ace --><!-- 使用介绍:https://www.iteye.com/blog/ybc77107-2296261 --><!-- https://justcode.ikeepstudying.com/2016/05/ace-editor-
%E5%9C%A8%E7%BA%BF%E4%BB%A3%E7%A0%81%E7%BC%96%E8%BE%91%E6%9E%81%E5%85%B6%E9%AB%98%E4%BA%AE/
--><script src="https://cdnjs.cloudflare.com/ajax/libs/ace/1.2.6/ace.js" type="text/javascript"charset="utf-8"></script>
<script src="https://cdnjs.cloudflare.com/ajax/libs/ace/1.2.6/ext-language_tools.js" type="text/javascript"charset="utf-8"></script><style>* {margin: 0;比特就业课padding: 0;}html,body {width: 100%;height: 100%;}div .ace_editor {height: 600px;width: 100%;}</style>
</head>
<body><div><pre id="code" class="ace_editor"><textarea class="ace_textinput">#include<iostream>intmain()
{std::cout << "hello ace editor" << std::endl;return 0;
}</textarea></pre><button class="bt" onclick="submit()">提交代码</button><br/></div><script>//初始化对象editor = ace.edit("code");//设置风格和语言(更多风格和语言,请到github上相应目录查看)// 主题大全:http://www.manongjc.com/detail/25-cfpdrwkkivkikmk.htmleditor.setTheme("ace/theme/monokai");editor.session.setMode("ace/mode/c_cpp");// 字体大小editor.setFontSize(16);// 设置默认制表符的大小:editor.getSession().setTabSize(4);// 设置只读(true时只读,用于展示代码)editor.setReadOnly(false);// 启用提示菜单ace.require("ace/ext/language_tools");editor.setOptions({enableBasicAutocompletion: true,enableSnippets: true,enableLiveAutocompletion: true});</script>
</body>
</html>
项目源码
源码链接
项目展示


】硬件空间挂载)
)


:日期和时间(time、datetime、calendar 模块))


