1、搭建环境
pip install pyinstaller
2、准备测试代码
exe_test.py
import timeprint("hello")
print("hello")
print("hello")
print("hello")time.sleep(5)
注:添加sleep以便在执行exe文件的时候能看到结果
3、生成exe文件
(1)命令行进入exe_test.py所在的目录

(2)生成exe文件
pyinstaller -F exe_test.py
4、获取exe文件
在dist目录中会生成exe_test.exe文件


5、自定义exe文件的版本信息参数
以上是不带版本信息参数生成exe文件

如果要带版本信息参数,则需要先编辑版本信息文本文件exe_verinfo.txt
VSVersionInfo(
ffi=FixedFileInfo(
filevers=(1, 0, 0, 1),
prodvers=(1, 0, 0, 1),
mask=0x3f,
flags=0x0,
OS=0x4,
fileType=0x1,
subtype=0x0,
date=(0, 0)
),
kids=[
StringFileInfo(
[
StringTable(
'080403a8',
[StringStruct('CompanyName', 'L.T Co'),
StringStruct('FileDescription', '生成可执行文件'),
StringStruct('FileVersion', '1.001'),
StringStruct('InternalName', 'exe_test.exe'),
StringStruct('LegalCopyright', 'L.T Copyright'),
StringStruct('OriginalFilename', 'exe_test.py'),
StringStruct('ProductName', 'Python生成exe文件'),
StringStruct('ProductVersion', '1.001')])
]),
VarFileInfo([VarStruct('Translation', [2052, 936])])
]
)
生成带版本信息的exe文件:
pyinstaller -F --version-file=exe_verinfo.txt exe_test.py

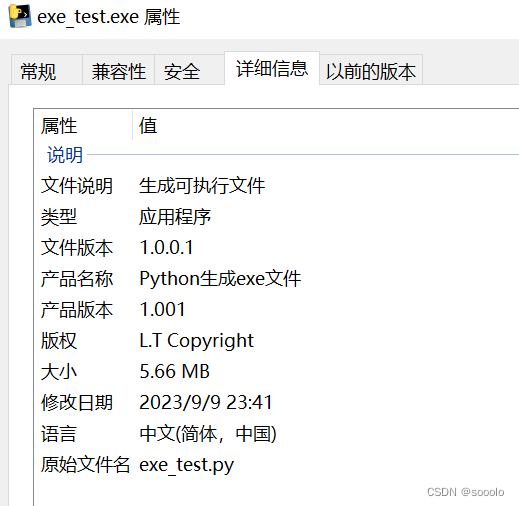
带版本信息的exe文件:


![[Linux]进程间通信--管道](http://pic.xiahunao.cn/[Linux]进程间通信--管道)

坐标与依赖:坐标概念,依赖配置、范围、传递性和最佳实践 ~)


 基础)


)
