open-mmlab的系列深度学习开源框架还是备受关注的,但是相关框架的安装也容易出现问题,导致在环境这一步就让人却步,我也在使用过程中碰到了很多问题。特别是随着框架的升级,硬件的升级等,使环境安装可以获取的选择变得更多,同时带来的问题也更多了。
这里暂记一下安装mmdet和mmcv的方法,便于需要时参考。
1、mmdet安装
mmdet主要是服务于mmdetection以及相关的延伸工作,所以相关任务绕不开mmdet的安装
附上官网地址:https://github.com/open-mmlab/mmdetection/blob/master/docs/zh_cn/get_started.md
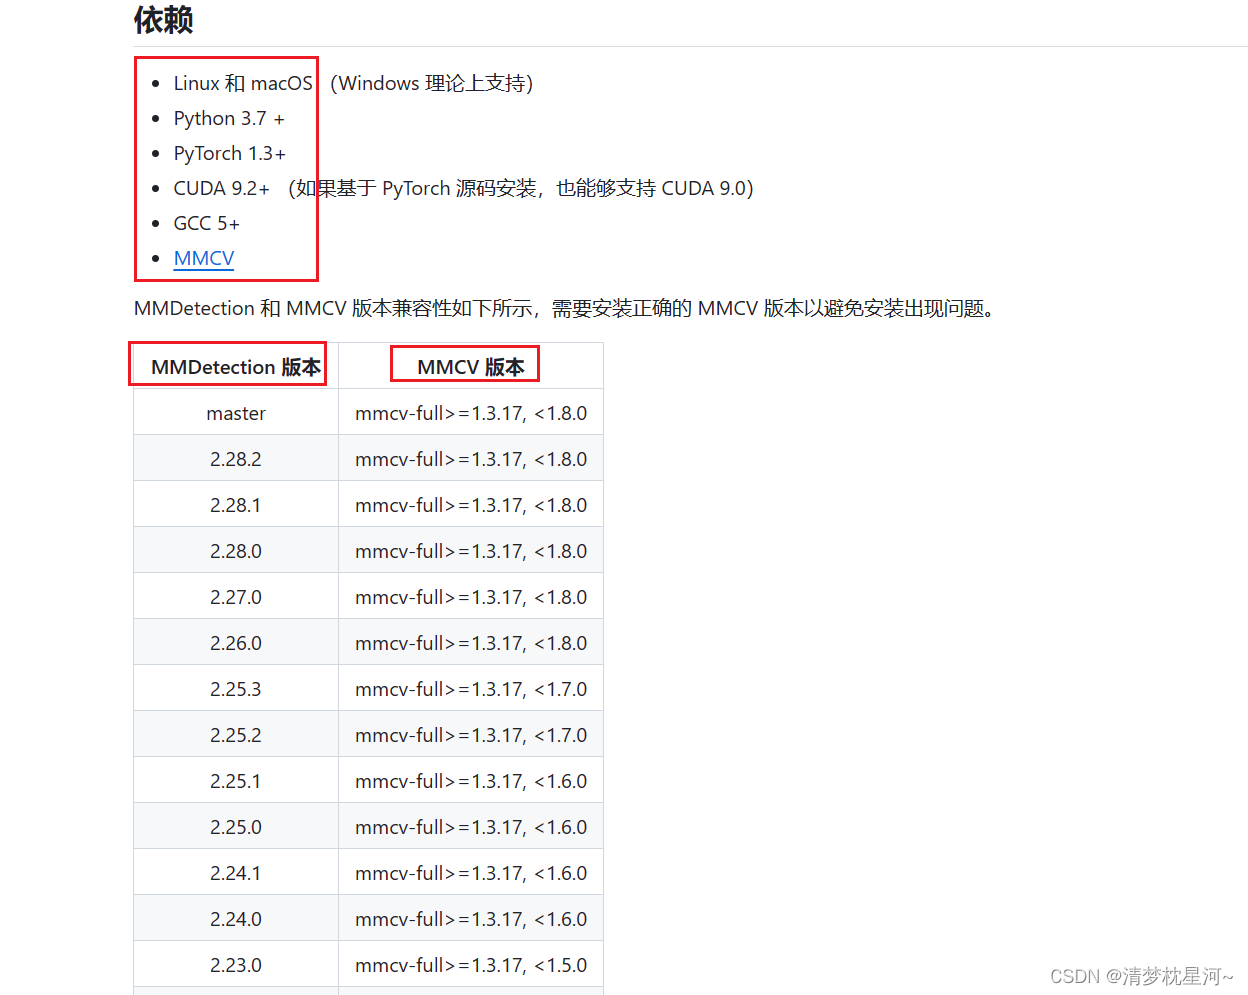
mmdet的安装主要需要匹配以下依赖,重点是mmcv的版本。
其实mmdet的安装还是简单的,主要是基于使用的CUDA版本(大于9.2)选择pytorch,然后安装自己想要安装的mmdetection版本,进入mmdetection后进行编译就会生成mmdet,或者直接选择想要安装的mmdet版本

三种安装方法:
1、使用mim安装,MIM 能够自动地安装 OpenMMLab 的项目以及对应的依赖包,官方建议采用mim安装
pip install openmim
mim install mmdet
2、pip安装
pip install mmdet
3、从git仓库编译源码
git clone https://github.com/open-mmlab/mmdetection.git
cd mmdetection
pip install -r requirements/build.txt
pip install -v -e .  # or "python setup.py develop"
2、mmcv安装
mmcv的安装要复杂一些,顺利很快就装好了,不顺利非常折腾,这也是为什么记一下的原因之一。
mmcv的安装需要编译,时间也长,报错也不好解决。
常见报错:
ModuleNotFoundError: No module named 'mmcv._ext'
很有可能是你在开始安装mmcv-full的时候,没有指定版本,选择直接安装,如下:
pip install mmcv-full或者比如
pip install mmcv==1.2.7
采用这样默认安装mmcv-full的方式,如果与你环境里的cuda和torch版本不匹配,就容易出现上面报错
解决方法首先要卸载掉安装的mmcv:
pip uninstall mmcv-full/mmcv
官方提供的安装办法:https://mmcv.readthedocs.io/en/latest/get_started/installation.html#install-with-pip
1、官方也是建议mim安装

安装命令:
pip install -U openmim
mim install mmcv
这里没限定版本,应该是mim会根据已有版本定向选择需要的版本进行安装,当然明确装的版本也可以直接限定进行安装
mim install mmcv==2.0.0
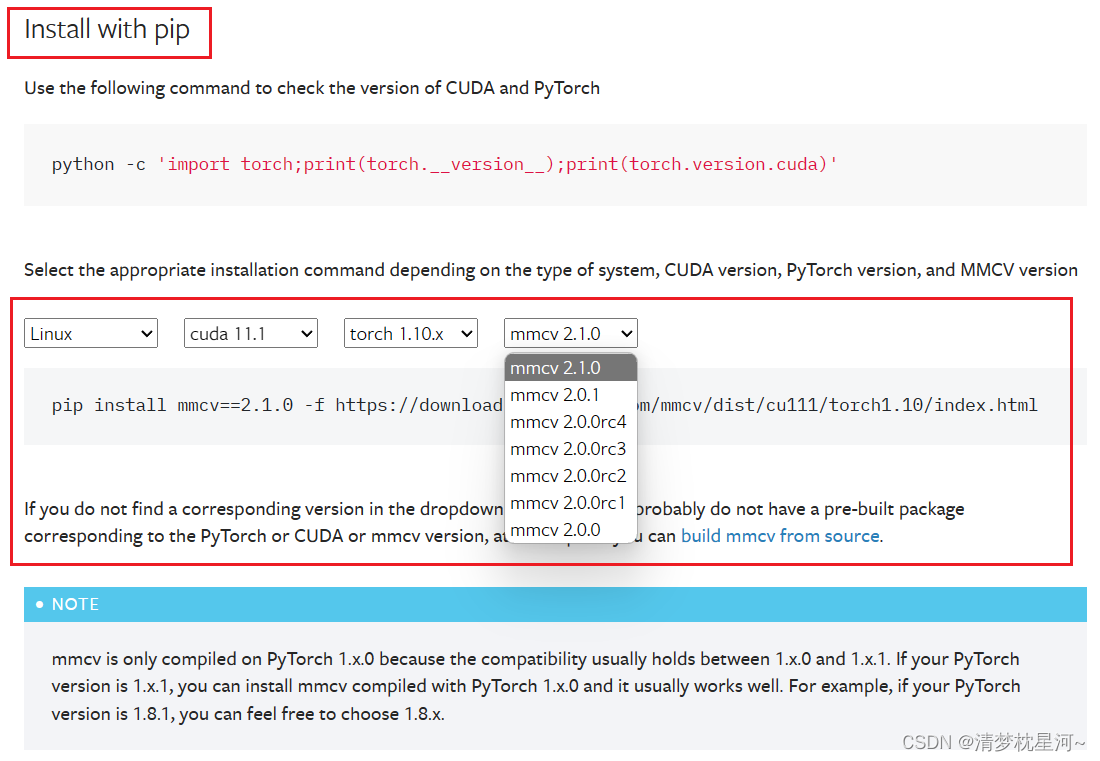
2、使用pip安装,可以根据如下页面选择合适的mmcv版本进行安装

安装命令如下:
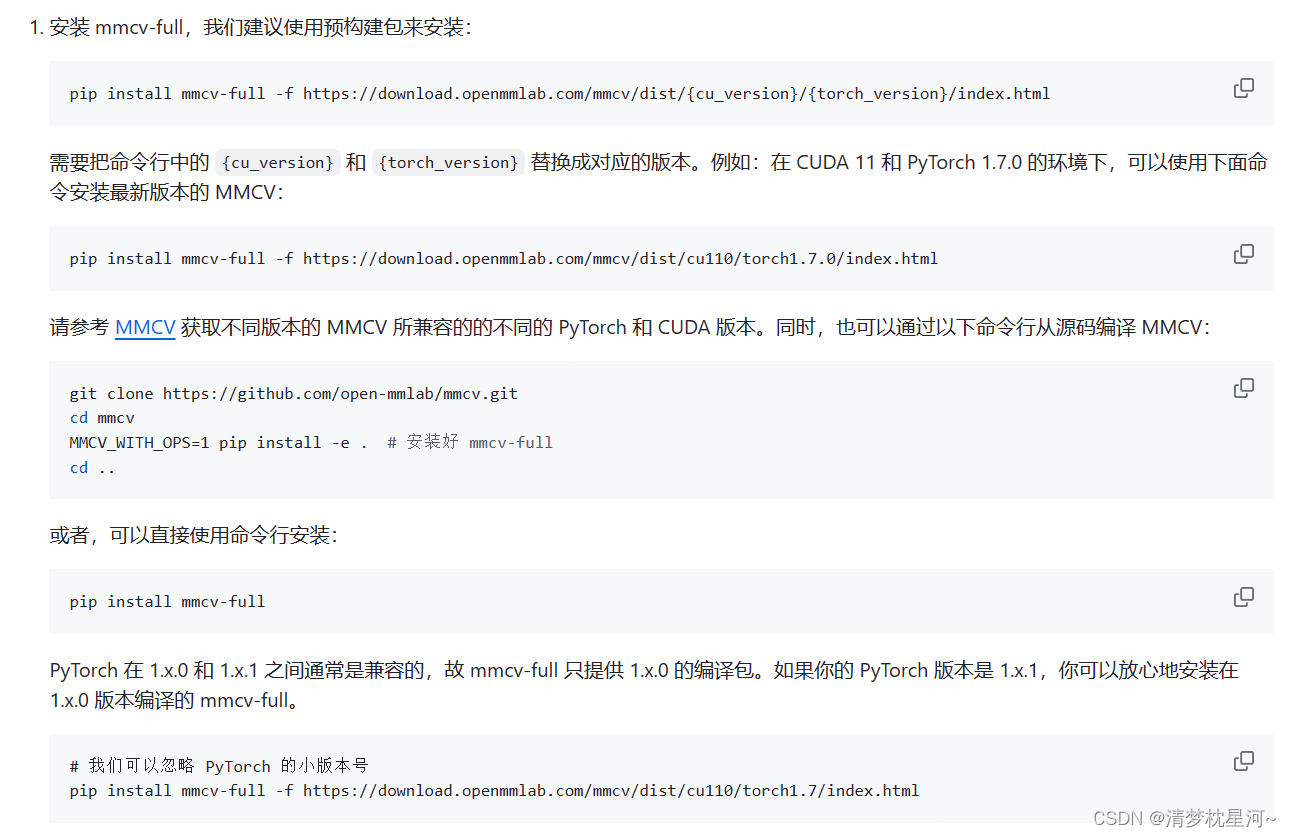
pip install mmcv-full -f https://download.openmmlab.com/mmcv/dist/{cu_version}/{torch_version}/index.html
其中需要把命令行中的 {cu_version} 和 {torch_version} 替换成对应的版本。
注意:建议是可以参考mmdetection中mmcv-full的安装方法,网址和mmdetection安装网址一致:https://github.com/open-mmlab/mmdetection/blob/master/docs/zh_cn/get_started.md

3、源码自行编译安装,熟悉的人可以尝试,不推荐,也繁琐。
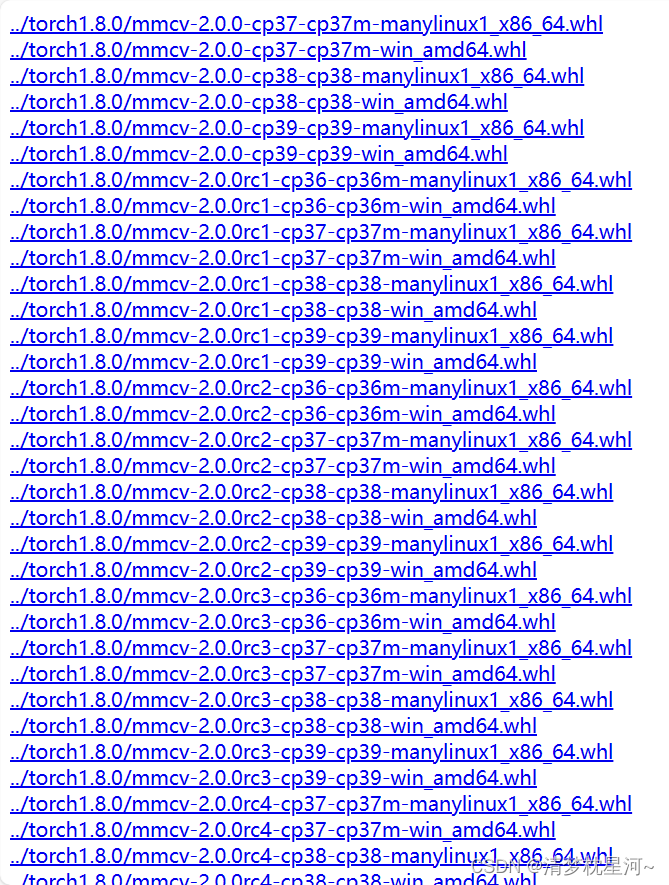
4、根据编译好的whl文件来安装
网址:https://download.openmmlab.com/mmcv/dist/cu110/torch1.7/index.html
网址给的是cuda11.0 、pytorch1.7版本的mmcv的whl文件
可以自己根据cuda和pytorch版本修改网址进行查找,比如cuda11.1,pytorch1.8
https://download.openmmlab.com/mmcv/dist/cu111/torch1.8/index.html

下载后的安装命令:
pip install xxx.whl
总结:最好的办法还是根据cuda版本和pytorch版本来选择mmcv的版本进行安装
3、其他

注意:
(1) 按照上述说明,MMDetection 安装在 dev 模式下,因此在本地对代码做的任何修改都会生效,无需重新安装;
(2) 如果希望使用 opencv-python-headless 而不是 opencv-python, 可以在安装 MMCV 之前安装;
(3) 一些安装依赖是可以选择的。例如只需要安装最低运行要求的版本,则可以使用 pip install -v -e . 命令。如果希望使用可选择的像 albumentations 和 imagecorruptions 这种依赖项,可以使用 pip install -r requirements/optional.txt 进行手动安装,或者在使用 pip 时指定所需的附加功能(例如 pip install -v -e .[optional]),支持附加功能的有效键值包括 all、tests、build 以及 optional 。
(4) 如果希望使用 albumentations,我们建议使用 pip install -r requirements/albu.txt 或者 pip install -U albumentations --no-binary qudida,albumentations 进行安装。 如果简单地使用 pip install albumentations>=0.3.2 进行安装,则会同时安装 opencv-python-headless(即便已经安装了 opencv-python 也会再次安装)。我们建议在安装 albumentations 后检查环境,以确保没有同时安装 opencv-python 和 opencv-python-headless,因为同时安装可能会导致一些问题。更多细节请参考官方文档。


【strtok,strerror,perror】)


