文章目录
- 一、整合版本说明
- 1. 毕业版本依赖关系(推荐使用)
- 2. 组件版本关系
- 3. 演示版本
- 二、部署单机 TC Server
- 2.1. 下载Seata
- 2.2. 解压缩
- 2.3. 启动
- 2.4. 监听日志
- 2.5. 启动命令讲解
一、整合版本说明
1. 毕业版本依赖关系(推荐使用)
| Spring Cloud Version | Spring Cloud Alibaba Version | Spring Boot Version |
|---|---|---|
| Spring Cloud 2020.0.0 | 2021.1 | 2.4.2 |
| Spring Cloud Hoxton.SR9 | 2.2.6.RELEASE | 2.3.2.RELEASE |
| Spring Cloud Greenwich.SR6 | 2.1.4.RELEASE | 2.1.13.RELEASE |
| Spring Cloud Hoxton.SR3 | 2.2.1.RELEASE | 2.2.5.RELEASE |
| Spring Cloud Hoxton.RELEASE | 2.2.0.RELEASE | 2.2.X.RELEASE |
| Spring Cloud Greenwich | 2.1.2.RELEASE | 2.1.X.RELEASE |
2. 组件版本关系
| Spring Cloud Alibaba Version | Sentinel Version | Nacos Version | RocketMQ Version | Dubbo Version | Seata Version |
|---|---|---|---|---|---|
| 2.2.6.RELEASE | 1.8.1 | 1.4.2 | 4.4.0 | 2.7.8 | 1.3.0 |
| 2021.1 or 2.2.5.RELEASE or 2.1.4.RELEASE or 2.0.4.RELEASE | 1.8.0 | 1.4.1 | 4.4.0 | 2.7.8 | 1.3.0 |
| 2.2.3.RELEASE or 2.1.3.RELEASE or 2.0.3.RELEASE | 1.8.0 | 1.3.3 | 4.4.0 | 2.7.8 | 1.3.0 |
| 2.2.1.RELEASE or 2.1.2.RELEASE or 2.0.2.RELEASE | 1.7.1 | 1.2.1 | 4.4.0 | 2.7.6 | 1.2.0 |
| 2.2.0.RELEASE | 1.7.1 | 1.1.4 | 4.4.0 | 2.7.4.1 | 1.0.0 |
3. 演示版本
| Spring Cloud Version | Spring Cloud Alibaba Version | Spring Boot Version | Nacos Version | jdk |
|---|---|---|---|---|
| Spring Cloud Hoxton.SR9 | 2.2.6.RELEASE | 2.3.2.RELEASE | 1.4.2 | 1.8.202 |
按我们使用的SpringCloudAlibaba的版本是2.2.6, 此次我们应该使用1.3.0版本的Seata进行安装。
版本说明:
https://github.com/alibaba/spring-cloud-alibaba/wiki/%E7%89%88%E6%9C%AC%E8%AF%B4%E6%98%8E
二、部署单机 TC Server
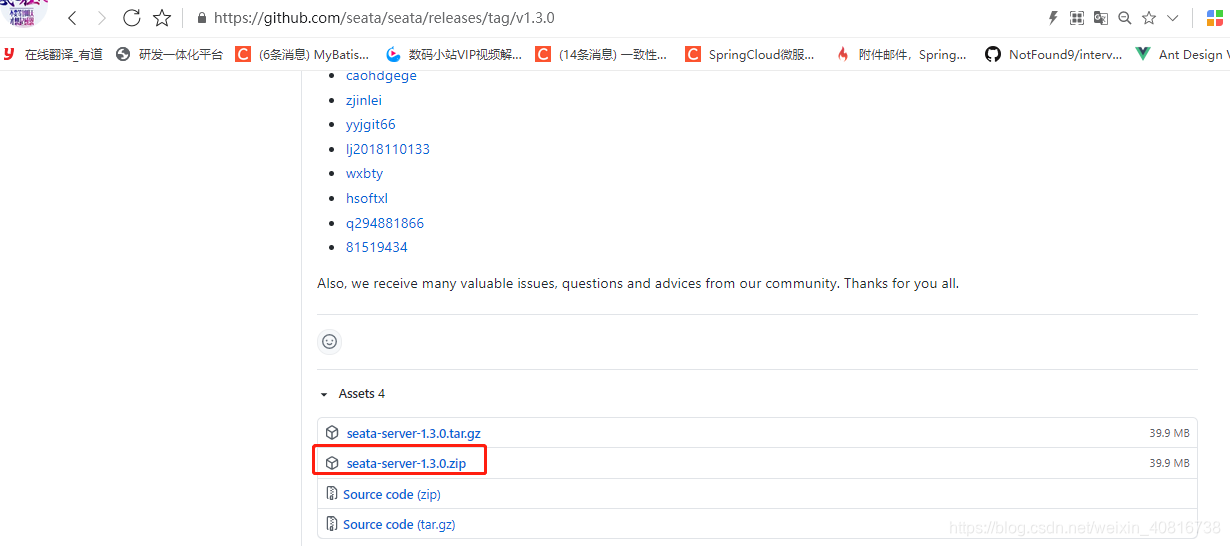
2.1. 下载Seata
在https://github.com/seata/seata/releases 这里找到对应的版本软件包进行下载
下载地址:https://github.com/seata/seata/releases/download/v1.3.0/seata-server-1.3.0.zip

注:单机模式只适用于学习或者本地测试阶段,生产环境推荐使用集群模式。
2.2. 解压缩

cd /app
unzip seata-server-1.3.0.zip
2.3. 启动
[root@node2 app]# cd seata/bin/
[root@node2 bin]# nohup ./seata-server.sh &
2.4. 监听日志
[root@node2 bin]#
[root@node2 bin]# tail -f nohup.out

可以看到日志中已经默认启动了 8091端口
因为 TC 需要进行全局事务和分支事务的记录,所以需要对应的存储。目前,TC 有两种存储模式( store.mode ):
file 模式:适合单机模式,全局事务会话信息在内存中读写,并持久化本地文件 root.data,性能较高。
db 模式:适合集群模式,全局事务会话信息通过 db 共享,相对性能差点。
显然,我们将采用 file 模式,最终我们部署单机 TC Server 如下图所示:

因为我们使用 file 模式,所以可以看到用于持久化的本地文件 root.data。操作命令如下:
ls -l sessionStore/

可以看到,已经默认生成了root.data文件
2.5. 启动命令讲解
sh seata-server.sh -p $LISTEN_PORT -m $MODE(file or db) -h $HOST -e $ENV
-p seata-server 监听服务端口号
-m 存储模式,可选值:file、db。file 用于单点模式,db用于ha模式,当使用db存储模式,需要修改配置中store配置节点的数据库配置,同时在数据库中初始化的sql
-h 用于解决seata-server和业务侧跨网络问题,其配置的host值直接显示到注册中心的服务可用地址host,当跨网络时这里需要配置为公网IP或NATIP,若都在同一局域网则无需配置
-e 用于解决多环境配置中心隔离问题
接下一篇:Seata 与 Nacos注册中心整合实现集群环境搭建_02


)和显示对话框(setVisible(true))的编写顺序)

)

)


)


