目录
项目背景
项目功能
测试详情
一、设计测试用例
二、功能测试步骤结果
1. 登录页面
2. 个人博客页面
3. 博客详情页
4. 博客编辑页
三、自动化测试及测试结果
1. 测试环境
2. 登录测试用例:
3. 个人详情页测试用例:
4. 写博客并发布测试用例:
5. 校验已发布博客标题 和 时间
6. 更多测试用例详情:
发现的bug / 如何修复 / 修复时间
一、注册失败:
二、登录获取不到验证码图片
三、博客发布时间为 null
四、点赞数量不增加:
项目背景
无论是对于开发人员还是学生而言,在掌握了新的技术或者遇到了 bug,长期坚持写博客都是对于自己技术提升的关键 ,目前的记录博客的网站例如:CSDN,掘金,月光,祖冬SEO等等。所以我在学习过程中也会在一些博客网站中记录自己对新技术的理解,最近学习了Java生态中的一些主流的框架,所以构思了一个轻量的博客网站:爱搜Blog,做了一个简易版的博客记录平台。
项目功能
爱搜平台提供 用户管理、文章管理、以及关键字搜索功能。
- 用户模块:用户注册账号之后会将用户登录状态以 session 方式将数据持久化 到 redis中,所以用户不需要在同一时间内重复登录,并且采用加盐算法技术来存储用户设置的密码,所以可以保证系统的安全性。
- 文章管理模块:支持文章的增删改查,文章发布时间,作者信息,用户点赞,文章热度等,并引入第三方库实现 markdown 格式的转换,采用分页算法支持前端的主页界面的分页浏览功能。
- 搜索模块:采用关键字模糊查询的方式可以让用户在平台中搜索自己想要浏览的文章,以便给用户更好的体验。
测试详情
项目测试模块
- 设计测试用例
- 功能测试步骤结果
- 自动化测试及测试结果
- 定位到的 bug
- 如何解决的 bug 及 bug 修复时间
一、设计测试用例

测试用例设计详情:https://xafb501sh16.feishu.cn/mindnotes/Z0aebWzGymWbLsnMeKScLtL2n7M?from=from_copylink
编写自动化测试用例首先要进行测试用例的设计,之后针对设计的测试用例详细展开代码的编写。
二、功能测试步骤结果
1. 登录页面
1.1 账号或密码为空

1.2 账号或密码填写错误

1.3 填写验证码为空 / 错误

1.4 正确登录操作跳转到个人列表页面(可对已发布博客 增删改查)

2. 个人博客页面
2.1 正常登录状态下 (点击主页)

2.2 未登录状态下只导航栏只显示登录按钮

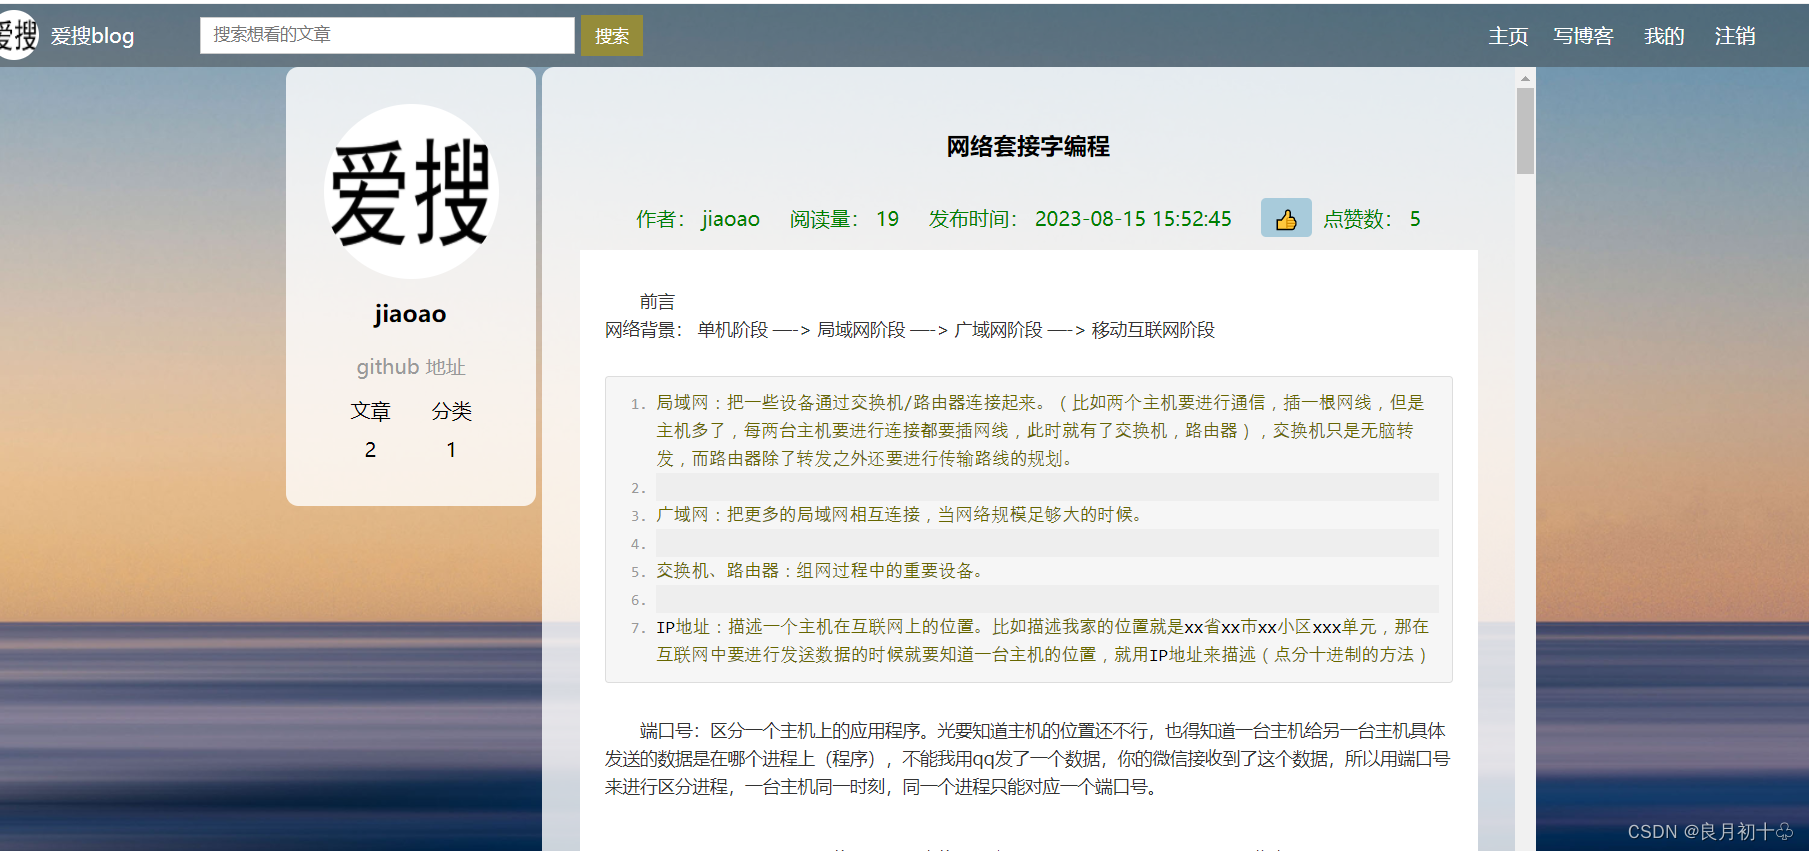
3. 博客详情页
3.1 未登录状态下(不能为文章点赞,支持搜索功能 ,不能修改其他用户博客)

3.2 登录状态下(导航栏显示主页 / 写博客 / 我的 / 注销, 并且可以为当前文章进行点赞 并支持搜索功能)

4. 博客编辑页
4.1 未登录状态导航栏不显示 / 不支持 写博客

4.2 登录状态点击写博客可进入 博客编辑页

4.3 博客标题 / 正文 为空 (不能发布当前创作博客)

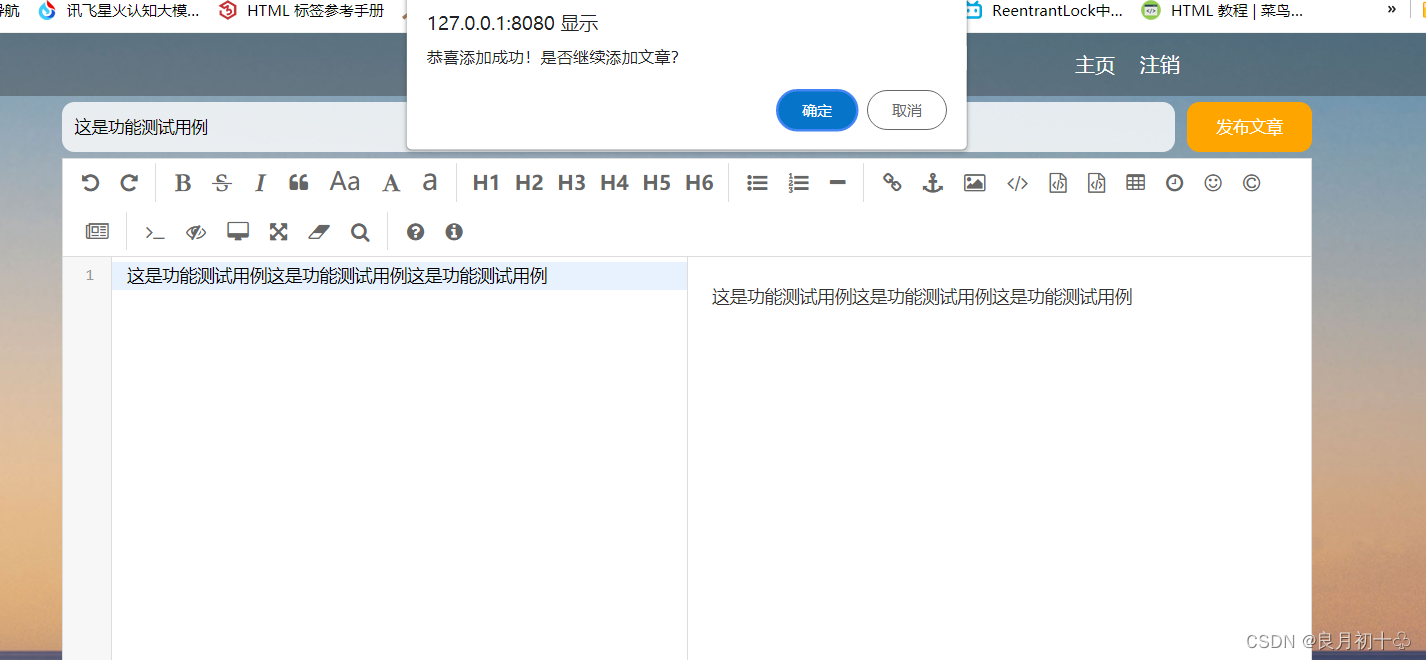
4.3 标题 / 正文 不为空 (点击发布文章后提示是否继续添加文章)

4.4 点击 否 跳转到 个人博客列表页面 (点击 是 则继续添加博客文章)

三、自动化测试及测试结果
1. 测试环境
编写自动化测试用例是根据实际的业务场景决定的,所以自动化测试用例可以测试爱搜平台的核心功能:注册、登录、查看文章详情、删除博客、写博客并 发布、分页浏览、用户点赞等。
- 相关技术及环境:
- 编译器:IDEA 2021
- 浏览器:Google Chrom 104.0.5112.81
- 驱动程序:ChromSetup.exe
- 自动化测试工具:selenium4、Junit5
- 测试项目的依赖:
<!-- https://mvnrepository.com/artifact/org.junit.jupiter/junit-jupiter-params --><dependency><groupId>org.junit.jupiter</groupId><artifactId>junit-jupiter-params</artifactId><version>5.8.1</version><!-- <scope>test</scope>--></dependency><!-- https://mvnrepository.com/artifact/org.junit.jupiter/junit-jupiter-api --><dependency><groupId>org.junit.jupiter</groupId><artifactId>junit-jupiter-api</artifactId><version>5.8.2</version><!-- <scope>test</scope>--></dependency><!-- https://mvnrepository.com/artifact/org.junit.platform/junit-platform-suite --><dependency><groupId>org.junit.platform</groupId><artifactId>junit-platform-suite</artifactId><version>1.9.1</version></dependency><!-- https://mvnrepository.com/artifact/org.junit.jupiter/junit-jupiter-engine --><dependency><groupId>org.junit.jupiter</groupId><artifactId>junit-jupiter-engine</artifactId><version>5.8.1</version><!-- <scope>test</scope>--></dependency><!-- https://mvnrepository.com/artifact/commons-io/commons-io --><dependency><groupId>commons-io</groupId><artifactId>commons-io</artifactId><version>2.11.0</version></dependency><dependency><groupId>org.seleniumhq.selenium</groupId><artifactId>selenium-java</artifactId><version>3.141.59</version></dependency>自动化测试前置工作:
(由于自动化测试需要频繁得到 web驱动程序对象,并且执行完测试用例后需要关闭 Chrom浏览器,所以可以将创建驱动对象、关闭浏览器设置成前置和后置方法)
package ISearchblogtest;import org.junit.jupiter.api.AfterAll;
import org.junit.jupiter.api.BeforeAll;
import org.openqa.selenium.WebDriver;
import org.openqa.selenium.chrome.ChromeDriver;public class InitAndEnd {static WebDriver webDriver;@BeforeAllstatic void setUp() {webDriver = new ChromeDriver();}@AfterAllstatic void tearDown() {webDriver.quit();}
}
注:以下测试用例用到了@order注解,不用 care(是因为先把 爱搜平台的核心功能先按照顺序整体进行了测试,然后又把所有的测试用例补充了细节)
2. 登录测试用例:
(由于测试验证码需要引入一些 OCR引擎,此处采用手工测试)
2.1 登录成功:
对于正常登录而言,编写自动化测试用例需要进行传递多组测试用例参数,所以单独在 resource配置文件下新建 loginSuccess.csv 文件:(然后将多组参数写成多行的格式即可 idea 会自动识别csv文件中的参数,但是前提是加上@ParameterizedTest 和 @CsvFileSource(resources = "LoginSuccess.csv") 注解)
jiaoao,123,http://62.234.216.147:8080/myblog_list.html/** 输入正确的账号,密码, 验证码 登录成功* */@Order(1)@ParameterizedTest@CsvFileSource(resources = "LoginSuccess.csv")void LoginSuccess(String username, String password, String blog_list_url) throws InterruptedException {//打开博客登录页面webDriver.get("http://62.234.216.147:8080/login.html");webDriver.manage().timeouts().implicitlyWait(3, TimeUnit.SECONDS);//输入账号jiaoaowebDriver.findElement(By.cssSelector("#username")).sendKeys(username);//输入密码 123webDriver.findElement(By.cssSelector("#password")).sendKeys(password);//webDriver.manage().timeouts().implicitlyWait(3, TimeUnit.SECONDS);// 输入验证码 (注:此处采用手工测试)
// File imageFile = new File("D:/home/image/");
// File[] files = imageFile.listFiles();
// if (files != null && files.length > 0) {
// Arrays.sort(files, Comparator.comparing(File::lastModified));
// File lastImage = files[files.length - 1];
// if (lastImage.getName().endsWith(".png")) {
//
// } else {
// System.out.println("没有找到当前要找的图片!");
// }
// } else {
// System.out.println("当前文件夹为空!");
// }
// webDriver.findElement(By.cssSelector("#code_input")).sendKeys();sleep(9000);//点击提交按钮webDriver.findElement(By.cssSelector("#submit")).click();webDriver.manage().timeouts().implicitlyWait(3, TimeUnit.SECONDS);// 跳转到列表页//获取到当前页面的 url 如果url 是正确的则测试通过sleep(1000);String cur_url = webDriver.getCurrentUrl();Assertions.assertEquals(blog_list_url, cur_url);//列表页展示用户信息是jiaoao//用户名是 jiaoao 则测试通过webDriver.manage().timeouts().implicitlyWait(3, TimeUnit.SECONDS);webDriver.findElement(By.cssSelector("#artlist > div:nth-child(1) > a:nth-child(4)")).click();String cur_admin = webDriver.findElement(By.cssSelector("#author2")).getText();Assertions.assertEquals(username, cur_admin);System.out.println("登录页面通过自动化测试");}测试用例执行结果:

2.2 登录异常:
jiaoao,11111,http://62.234.216.147:8080/login.html// 测试异常登录情况@Test@ParameterizedTest@CsvFileSource(resources = "LoginFile.csv")void loginFile(String username, String password, String blog_list_url) throws InterruptedException {webDriver.get("http://62.234.216.147:8080/login.html");webDriver.manage().timeouts().implicitlyWait(3, TimeUnit.SECONDS);//输入账号jiaoaowebDriver.findElement(By.cssSelector("#username")).sendKeys(username);//输入密码 123webDriver.findElement(By.cssSelector("#password")).sendKeys(password);sleep(9000);//点击提交按钮webDriver.findElement(By.cssSelector("#submit")).click();webDriver.manage().timeouts().implicitlyWait(3, TimeUnit.SECONDS);// 跳转到列表页//获取到当前页面的 url 如果url 是正确的则测试通过sleep(1000);Alert alert = webDriver.switchTo().alert();alert.accept();String cur_url = webDriver.getCurrentUrl();Assertions.assertEquals(blog_list_url, cur_url);System.out.println("登录页面失败通过自动化测试! [用户名或密码错误]");}测试用例执行结果:

3. 个人详情页测试用例:
@Order(2)@Testvoid BlogList() throws InterruptedException {//打开博客登录页面webDriver.get("http://62.234.216.147:8080/login.html");webDriver.manage().timeouts().implicitlyWait(3, TimeUnit.SECONDS);//输入账号jiaoaowebDriver.findElement(By.cssSelector("#username")).sendKeys("jiaoao");//输入密码 123webDriver.findElement(By.cssSelector("#password")).sendKeys("123");sleep(9000);//点击提交按钮webDriver.findElement(By.cssSelector("#submit")).click();//跳转到博客列表页//获取页面上所有的博客标题对应的元素webDriver.manage().timeouts().implicitlyWait(3, TimeUnit.SECONDS);webDriver.findElement(By.cssSelector("#artlist > div > a:nth-child(4)")).click();//用户登录信息和 博客详情信息可以对应上String author = webDriver.findElement(By.cssSelector("#author2")).getText();Assertions.assertEquals("jiaoao", author);System.out.println("个人列表页测试用例通过");}测试用例执行结果:

4. 写博客并发布测试用例:
此处用到了 Generator()方法来获取参数测试用例中用到的参数
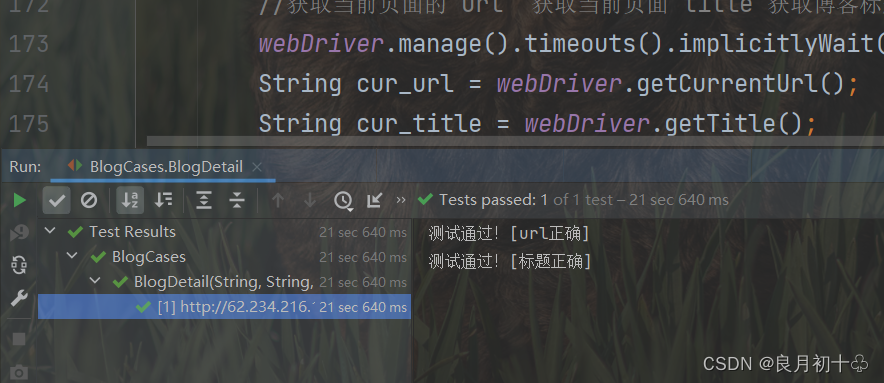
public static Stream<Arguments> Generator() {return Stream.of(Arguments.arguments("http://62.234.216.147:8080/blog_content.html?id=","这是自动化测试第二篇博客!","一般是指软件测试的自动化,软件测试就是在预设条件下运行系统或应用程序,评估运行结果,预先条件应包括正常条件和异常条件。"));}//测试写博客@Order(4)@ParameterizedTest@MethodSource("Generator")void BlogDetail(String expected_url, String expected_title, String expected_blog) throws InterruptedException {//打开博客登录页面webDriver.get("http://62.234.216.147:8080/login.html");webDriver.manage().timeouts().implicitlyWait(3, TimeUnit.SECONDS);//输入账号jiaoaowebDriver.findElement(By.cssSelector("#username")).sendKeys("jiaoao");//输入密码 123webDriver.findElement(By.cssSelector("#password")).sendKeys("123");sleep(8000);//点击提交按钮webDriver.findElement(By.cssSelector("#submit")).click();sleep(1000);// 点击写博客webDriver.findElement(By.cssSelector("body > div.nav > a:nth-child(5)")).click();webDriver.manage().timeouts().implicitlyWait(3, TimeUnit.SECONDS);// 输入文章标题webDriver.findElement(By.cssSelector("#title")).sendKeys(expected_title);sleep(4000);// 点击发布文章webDriver.findElement(By.cssSelector("body > div.blog-edit-container > div.title > button")).click();sleep(2000);Alert alert = webDriver.switchTo().alert();alert.dismiss();webDriver.manage().timeouts().implicitlyWait(3, TimeUnit.SECONDS);//找到第一篇博客对应的查看全文按钮webDriver.manage().timeouts().implicitlyWait(3, TimeUnit.SECONDS);webDriver.findElement(By.cssSelector("#artlist > div:nth-child(1) > a:nth-child(4)")).click();//获取当前页面的 url 获取当前页面 title 获取博客标题webDriver.manage().timeouts().implicitlyWait(3, TimeUnit.SECONDS);String cur_url = webDriver.getCurrentUrl();String cur_title = webDriver.getTitle();String cur_blog_title = webDriver.findElement(By.cssSelector("#title")).getText();if (cur_url.contains(expected_url)) {System.out.println("测试通过![url正确]");} else {System.out.println("测试不通过![url错误]");}sleep(3000);if (cur_title.contains("博客正文")) {System.out.println("测试通过![标题正确]");} else {System.out.println("测试不通过![标题错误]");}}测试用例执行结果:

5. 校验已发布博客标题 和 时间
@Order(5)@Testvoid BlogInfoCheck() throws InterruptedException {//打开博客登录页面webDriver.get("http://62.234.216.147:8080/login.html");webDriver.manage().timeouts().implicitlyWait(3, TimeUnit.SECONDS);//输入账号jiaoaowebDriver.findElement(By.cssSelector("#username")).sendKeys("jiaoao");//输入密码 123webDriver.findElement(By.cssSelector("#password")).sendKeys("123");sleep(8000);//点击提交按钮webDriver.findElement(By.cssSelector("#submit")).click();sleep(1000);//获取第一篇博客标题String first_blog_title = webDriver.findElement(By.cssSelector("#artlist > div:nth-child(1) > div.title")).getText();//获取第一篇博客发布时间String first_blog_time = webDriver.findElement(By.cssSelector("#artlist > div:nth-child(1) > div.date")).getText();//校验博客标题是否是 ”这是自动化测试第二篇博客!“Assertions.assertEquals("这是自动化测试第二篇博客!", first_blog_title);//如果时间是 2023-08 发布的,测试通过if (first_blog_time.contains("2023-08")) {System.out.println("当前时间匹配");System.out.println("测试通过");}else {System.out.println("当前时间不匹配");System.out.println("测试不通过!");}}测试用例执行结果:

6. 更多测试用例详情:
上述自动化测试用例是一部分,包括测试通过是否执行通过,(所有测试用例已通过)爱搜平台自动化测试用例更多详情:Java进阶学习: 自动化测试 - Gitee.com
发现的bug / 如何修复 / 修复时间
bug修复时间:2023-8-16 ~ 2023-8-18
当项目部署到云服务器后,更新了测试用例(自动化测试版本1只是测试单机项目,更新后的是测试的服务器中的项目),然后执行测试用例就出现了不少的 bug:
一、注册失败:
如下图所示:

定位bug:
1. 观察报错信息,发现密码长度过长,导致 Mariadb 中的数据表无法存储这个密码数据(仔细回想;虽然输入的密码只有三个数字,但是数据库中存储的是用加盐算法处理过的密码)
2. 对比MySQL中的password字段长度,以前在 MySQL 更改过用户的信息表结构,发现在Mariadb 中没有注意这个问题
解决方案:
修改 Mariadb 数据库用户表中 password 长度即可。
二、登录获取不到验证码图片
如下图所示:

定位bug:
1. 抓包工具看前端 Ajax 请求数据和参数是否正确发送,后观察后端接口参数是否一个并且绑定
2. 发现响应的数据为 null,看后端存储验证码的路径对应的文件是否有生成的验证码图片,发现后端 properties 配置文件错误,项目部署到云服务器中需要新创建文件夹存储生成的验证码图片
解决方案:
停止当前项目运行并杀死8080端口对应进程,之后修改项目配置文件中的验证码存储路径,重新打包项目,上传至云服务器,创建对应的文件夹存储验证码图片,重启项目,发现bug已解决
三、博客发布时间为 null
新发布的博客不显示博客发布时间,如下图所示:

定位bug:
使用 fiddler 抓包工具 观察返回的响应信息,发现参数有误;
(1)观察前端 Ajax 请求,确定不是前端的参数传递问题
(2)检查后端参数是否接收和绑定,是否使用 @Param 注解
(3)检查数据库表 结构以及初始设置参数是否有误,发现当前服务器中的 Mariadb5.5版本及以下 数据库不支持 timestamp 类型,而且不允许设置默认值
解决方案:
1. 更改服务器中 Mariadb 版本为 10.0 以上版本(配置阿里云镜像文件)详情可以参考这位大佬博客:网站运维:Centos7使用yum安装最新MariaDB 10.4.6 -CSDN博客 和 MariaDB 5.5 create table default value 注意的事项_mariadb不能插入月份-CSDN博客
中间遇到关于 Mariadb 不能免密登录的问题可参考:Mariadb和mysql 忘记root密码,初始化密码 - 知乎mariadb和mysql都是数据库 1,重置密码2,修改密码3,忘记密码怎么修改1.mariadb 第一安装进去是不需要密码的 直接敲 mysql 就可以直接进去 这时候是没有密码的给root设置密码 如果你已经设置过密码,想要修改密码…![]() https://zhuanlan.zhihu.com/p/112774485#:~:text=1%2C%20%E6%89%BE%E5%88%B0mariadb%E7%9A%84%E9%85%8D%E7%BD%AE%E6%96%87%E4%BB%B6%20%E4%B8%80%E8%88%AC%E5%9C%A8%20%2Fetc%2Fmy.cnf%20%E6%8A%8A%20skip-grant-tables%20%E6%B7%BB%E5%8A%A0%E5%88%B0%E9%85%8D%E7%BD%AE%E6%96%87%E4%BB%B6%E9%87%8C%E9%9D%A2%20%E6%94%BE%E5%9C%A8%5Bmysqld%5D%E4%B8%8B%E9%9D%A2%E5%B0%B1%E5%8F%AF%E4%BB%A5%E4%BA%86,systemctl%20restart%20mariadb%206%20%E7%99%BB%E5%BD%95%E5%B0%B1%E5%8F%AF%E4%BB%A5%E4%BA%86%20mysql%20-uroot%20-p%27%E8%AE%BE%E7%BD%AE%E7%9A%84%E6%96%B0%E5%AF%86%E7%A0%81%27 2. 更改表结构,设置 发布博客时间 参数类型,并设置默认值为当前时间
https://zhuanlan.zhihu.com/p/112774485#:~:text=1%2C%20%E6%89%BE%E5%88%B0mariadb%E7%9A%84%E9%85%8D%E7%BD%AE%E6%96%87%E4%BB%B6%20%E4%B8%80%E8%88%AC%E5%9C%A8%20%2Fetc%2Fmy.cnf%20%E6%8A%8A%20skip-grant-tables%20%E6%B7%BB%E5%8A%A0%E5%88%B0%E9%85%8D%E7%BD%AE%E6%96%87%E4%BB%B6%E9%87%8C%E9%9D%A2%20%E6%94%BE%E5%9C%A8%5Bmysqld%5D%E4%B8%8B%E9%9D%A2%E5%B0%B1%E5%8F%AF%E4%BB%A5%E4%BA%86,systemctl%20restart%20mariadb%206%20%E7%99%BB%E5%BD%95%E5%B0%B1%E5%8F%AF%E4%BB%A5%E4%BA%86%20mysql%20-uroot%20-p%27%E8%AE%BE%E7%BD%AE%E7%9A%84%E6%96%B0%E5%AF%86%E7%A0%81%27 2. 更改表结构,设置 发布博客时间 参数类型,并设置默认值为当前时间
3. 重启 Mariadb 数据库,将项目重新打包部署到云服务器
四、点赞数量不增加:
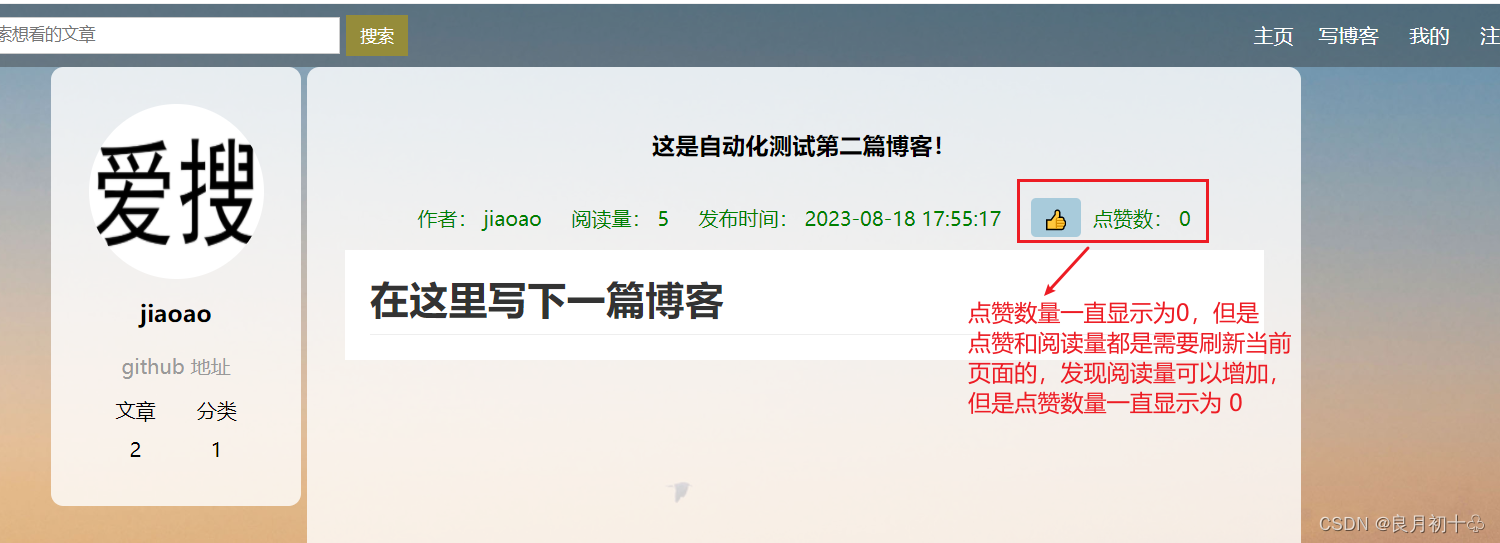
当跳转到文章详情页时,如果时已经登录的用户,是可以对文章点赞的,但是登陆后发现点击点赞按钮后,点赞数量并不会增加,如下图所示:


定位bug:
1. 使用 fiddler 抓包工具查看请求数据和参数是否和数据库字段值对应(这里前端的参数,包括后端的参数和数据库的参数防止容易出错,直接使用的都是同一的参数)
2. 点击点赞按钮,抓包看点赞操作的接口是否能够发送请求,发现没有 upvote(点赞) 接口
3. 查看后端响应的数据是否正确,使用浏览器抓包后,显示当前返回的响应 data 中 value 值为 null
4. 查看数据库表字段及设置的默认值是否正确,发现表结构中的 upvote字段没有设置默认值 0,所以默认是 null
解决方案:
修改文章数据表中的 isupvote(存储点赞状态)和 upvote_count(存储点赞数量)字段默认值,修改为 int(0)即可,之后重启 Mariadb 服务,发现bug已解决。


)


)


)


